cabela's ultimate alaknak tents ultimate alaknak tent set number 519278 sku 02843564 ... set-up...
TRANSCRIPT
Cabela's Ultimate Alaknak Tent
Set Number 519278
SKU 02843564 02843565
ASSEMBLY
INSTRUCTIONS
Fig. 1
Fig. 4
Fig. 3
Fig. 2
45°
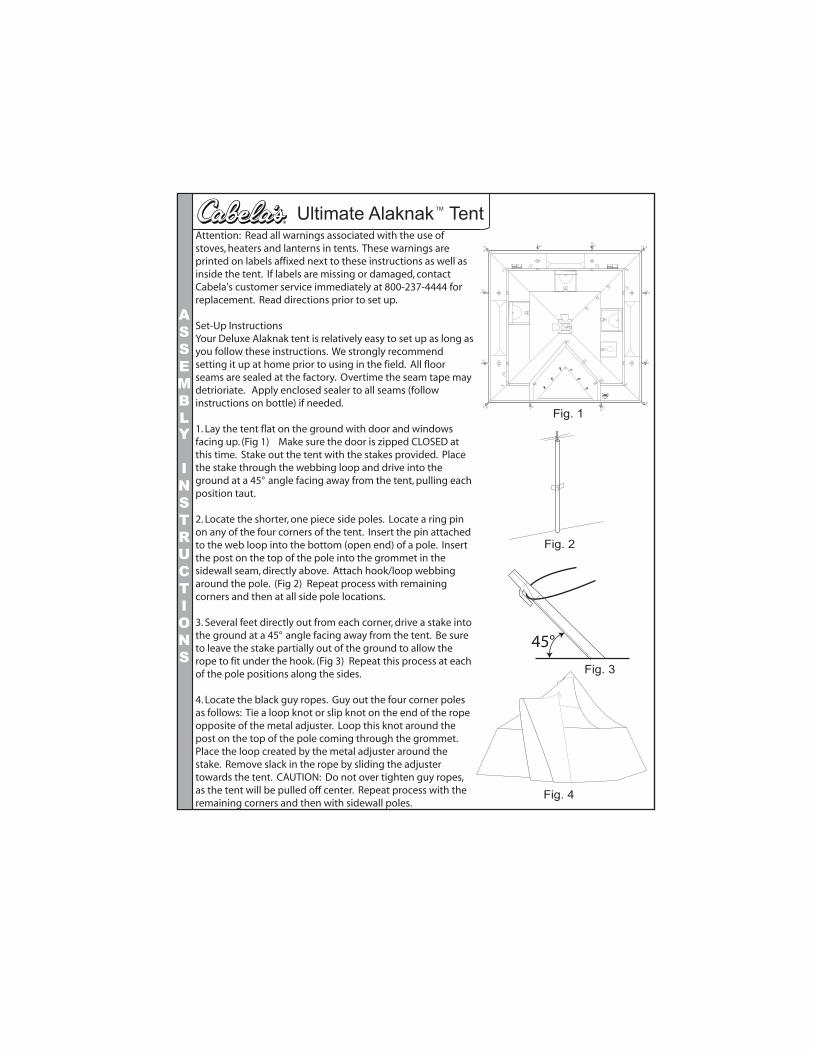
Attention: Read all warnings associated with the use of stoves, heaters and lanterns in tents. These warnings are printed on labels affixed next to these instructions as well as inside the tent. If labels are missing or damaged, contact Cabela's customer service immediately at 800-237-4444 for replacement. Read directions prior to set up.
Set-Up InstructionsYour Deluxe Alaknak tent is relatively easy to set up as long as you follow these instructions. We strongly recommend setting it up at home prior to using in the field. All floor seams are sealed at the factory. Overtime the seam tape may detrioriate. Apply enclosed sealer to all seams (follow instructions on bottle) if needed.
1. Lay the tent flat on the ground with door and windows facing up. (Fig 1) Make sure the door is zipped CLOSED at this time. Stake out the tent with the stakes provided. Place the stake through the webbing loop and drive into the ground at a 45° angle facing away from the tent, pulling each position taut.
2. Locate the shorter, one piece side poles. Locate a ring pin on any of the four corners of the tent. Insert the pin attached to the web loop into the bottom (open end) of a pole. Insert the post on the top of the pole into the grommet in the sidewall seam, directly above. Attach hook/loop webbing around the pole. (Fig 2) Repeat process with remaining corners and then at all side pole locations.
3. Several feet directly out from each corner, drive a stake into the ground at a 45° angle facing away from the tent. Be sure to leave the stake partially out of the ground to allow the rope to fit under the hook. (Fig 3) Repeat this process at each of the pole positions along the sides.
4. Locate the black guy ropes. Guy out the four corner poles as follows: Tie a loop knot or slip knot on the end of the rope opposite of the metal adjuster. Loop this knot around the post on the top of the pole coming through the grommet. Place the loop created by the metal adjuster around the stake. Remove slack in the rope by sliding the adjuster towards the tent. CAUTION: Do not over tighten guy ropes, as the tent will be pulled off center. Repeat process with the remaining corners and then with sidewall poles.
R
R
R
R
R
LoopH
ookLoop
Hook
LoopHook LoopHook
Loop
Hoo
kLo
opH
ook
R
R
R
R
R
R
R
Ultimate Alaknak Tent TM
ASSEMBLY
INSTRUCTIONS
Fig. 5
Fig. 6
Fig. 7(12'x20')
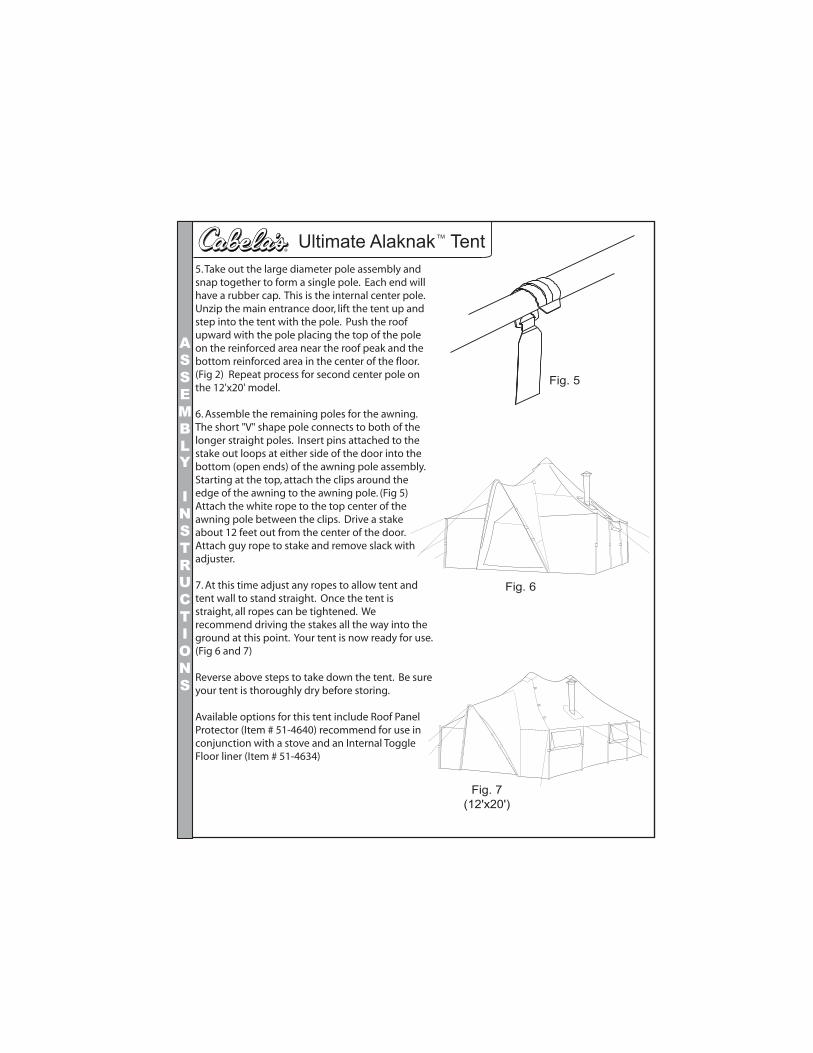
5. Take out the large diameter pole assembly and snap together to form a single pole. Each end will have a rubber cap. This is the internal center pole. Unzip the main entrance door, lift the tent up and step into the tent with the pole. Push the roof upward with the pole placing the top of the pole on the reinforced area near the roof peak and the bottom reinforced area in the center of the floor. (Fig 2) Repeat process for second center pole on the 12'x20' model.
6. Assemble the remaining poles for the awning. The short "V" shape pole connects to both of the longer straight poles. Insert pins attached to the stake out loops at either side of the door into the bottom (open ends) of the awning pole assembly. Starting at the top, attach the clips around the edge of the awning to the awning pole. (Fig 5) Attach the white rope to the top center of the awning pole between the clips. Drive a stake about 12 feet out from the center of the door. Attach guy rope to stake and remove slack with adjuster.
7. At this time adjust any ropes to allow tent and tent wall to stand straight. Once the tent is straight, all ropes can be tightened. We recommend driving the stakes all the way into the ground at this point. Your tent is now ready for use. (Fig 6 and 7)
Reverse above steps to take down the tent. Be sure your tent is thoroughly dry before storing.
Available options for this tent include Roof Panel Protector (Item # 51-4640) recommend for use in conjunction with a stove and an Internal Toggle Floor liner (Item # 51-4634)
Ultimate Alaknak Tent TM
TENT
CARE
INSTRUCTIONS
1. Cabela's tents are produced to strict specifications, using only the finest coated fabrics. To prevent stitching leakage, all floor and fly seams are factory seam taped. Enclosed seam sealer can be used to repair seams that may deterioriate over time..
2. Do not erect the tent over rocks, sticks or other sharp objects which could damage the tent floor. Placing a ground cloth under the tent is highly recommended.
3. Cabela's tent fabrics are flame retardant treated per CPAI-84 specifications. Open flames should not be used in or near the tent since a flame-resistant tent can still burn or melt.
4. When possible, open doors and ventilation panels to increase ventilation and reduce condensation which can form on the inner tent surface.
5. The durable steel poles are specifically designed to allow for maximum tautness. Care should be taken to avoid unnecessary stress to these poles. The poles should only be used as intended and not bent more than the curvature of the tent. Make sure joints are fully engaged before bending the poles. Should you break or lose a pole, a replacement can be obtained from Cabela's.
6. When the warm, moist air inside your tent meets the colder air, moisture may accumulate on the tent walls. This is condensation, and its occurence is natural. There is nothing wrong with your tent. Condensation can be limited or avoided through ventilation: Keep as many vents, windows and doors open as possible. Using a wood burning stove can also help to dry out the air outside your tent.
7. Always store the tent dry and clean. To clean soiled areas, gently apply non-detergent soap and water.
Tent
WATER BASED
SEAM SEAL
Waterproofs seams innylon and other synthetic
outdoor fabrics
2 fl. oz.59.16 cc Seam Sealer x2
Repair Nylon
x 2
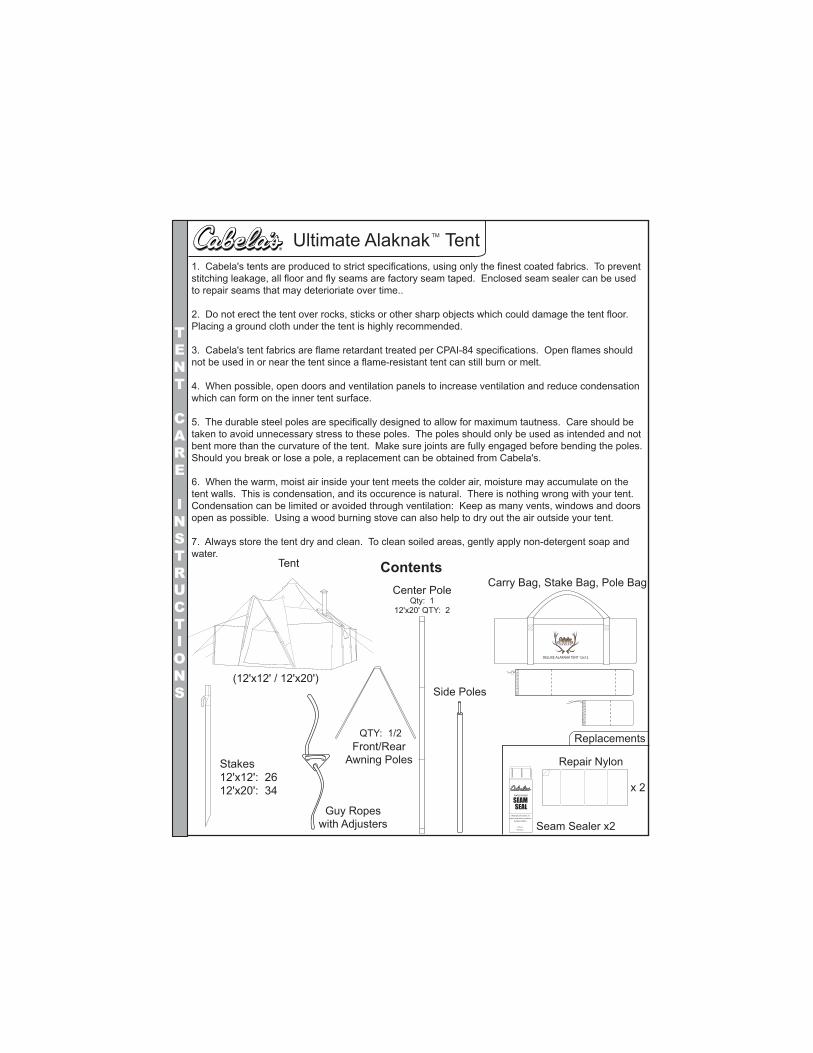
ContentsCarry Bag, Stake Bag, Pole Bag
Replacements
Stakes12'x12': 2612'x20': 34
Center PoleQty: 1
12'x20' QTY: 2
Side Poles
DELUXE ALAKNAK TENT 12x12
(12'x12' / 12'x20')
Guy Ropeswith Adjusters
Ultimate Alaknak Tent TM
Front/RearAwning Poles
QTY: 1/2