candy making - sea of stories -home get a hobby! 55 what you’ll need • candy thermometer •...
TRANSCRIPT

get a hobby!54 55
what you’ll need
• Candythermometer
• Medium-sizedsaucepanwithaheavybottomandstraightsidestopreventboil-overs
• Bowllargeenoughtoholdthesaucepanforcoolingcandy
• Long-handledwoodenspoon
• Pastrybrush(forcertainrecipes)
candy makingFor most oF us, biting into a piece oF candy—whether taffy, licorice, or a jelly bean—fulfills an almost primordial craving. bring that childlike rush of excitement home by making your own sugary treats. and don’t spoil it with any residual guilt: enjoy every last morsel!
overviewThere is a great variety of sweet stuff available for your tasting pleasure. There’s hard candy like lollipops, jawbreakers, lemon drops, and candy canes; chewy candy like fudge, taffy, and licorice; and, of course, the mother of them all—chocolate. Most are made by dissolving sugar in water or milk to form a syrup, then boiling the mixture until it starts to caramelize. By varying the temperature, cooking time, and ingredients, the texture of the candy can be made hard or soft, chewy or brittle. A “soft-ball” candy should not be cooked higher than 240°F (116°C), while “hard-crack” varieties top out at 310°F (154°C). The boiling of the syrup causes the sugar concentration to increase as the water evaporates, which consequently raises the boiling point. Because the boiling temperature at each of these stages is fixed, you can know exactly how hot to make the syrup to achieve the kind of candy you want. The general rule: The higher the temperature, the harder the candy.
history Sugar was first made by evaporating cane juice around 500 b.c.e. in India. The ingredient gradually spread with increases in trade and reached Persia by 600 c.e. Before long, it was being produced throughout the Old World. Christopher Columbus himself brought it to the New World in 1493. Not, of course, that life was sugar-free before sugarcane—honey (arguably sweeter than sugar) has been available for as long as people have been keeping bees (see Beekeeping). Honey-sweetened confections were abundant at elaborate Greek banquets and at Roman feasts. Savvy physicians during the Middle Ages learned how to disguise the nasty taste of medicines by dipping them in something sweet. In the New World, sugar was a precious commodity kept under lock and key. Colonists enjoyed candied fruits, brittles, and toffee, as well as liquorices and ice cream in the mid-1700s. In the latter half of the 19th century, as part of the Industrial Revolution, commercial candy exploded onto the scene, with marketers like Stephen F. Whitman, founder of Whitman’s chocolates, cashing in on the candy craze. Soon thereafter came candy corn (1880s), Tootsie Rolls (1896), and, in 1906, Hershey’s Chocolate Kisses. In 1930, M&M Mars rolled out the Snickers Bar, which has been America’s best-selling candy ever since.
getting startedSince one or two degrees can drastically change the outcome of your recipe, test your thermometer for accuracy. Insert it in a pan of water and bring the water to a boil. (Be sure not to thrust the thermometer into already boiling water, which can break it.) When the water is boiling, the temperature should read 212°F (100°C). If it’s off by a few degrees, you’ll need to adjust accordingly. Measure all ingredients before you get started. This will help you act quickly once the water has boiled.
For most candies, you’ll dissolve sugar in liquid ingredients over low heat, then bring the mixture to a boil. Either attach the thermometer to the side of the pan, or regularly check the temperature. Either way, the bulb of the thermometer should not touch the sides or bottom of the pan, which can give an inaccurate reading. Clean the thermometer after every reading and keep it in a glass of warm water nearby. Cook the syrup until you reach the speci-fied temperature—for example, saltwater taffy needs to be cooked to 258°F (126°C)—and stir as instructed.
For those who like to take the names “soft-ball stage,” “hard-crack stage,” and so on literally and who want to wing it without a thermometer, you can test the candy by dropping a small amount of the mixture into a glass of cold water. Look for more instructions about this online and in cookbooks. Be sure to remove the pan from the heat while you test so that the candy doesn’t overcook.
A final bit of advice: Try not to make candy on a humid or rainy day, as the candy might not set as well.
project: easy maple candy
Serves6
Bring 2 cups (480 ml) maple syrup to a boil in a 4-quart (3.5 L) pot, stirring constantly so the syrup doesn’t boil over, and when it reaches 235°F (122°C) (measure the temperature with a candy ther-mometer) remove the pot from the heat. Stop stirring and let the syrup cool to 175°F (91°C), which should take about 10 minutes.
With a wooden spoon, briskly blend the syrup for a few minutes until you see the color turn lighter, the consistency thicken, and the syrup become creamier. Now it’s ready to be poured into either a buttered baking pan (quickly sliced into squares for easy removal later) or into rubber molds. Let the candy cool for 10 to 30 minutes, depend-ing on the humidity. When it’s cooled and hardened, just turn over the pan or molds and pop out the candy. Enjoy!
candy making
hobby personality: adventurous • animal-loving • artistic • crafty • dexterous • epicurean • extroverted • history-loving • independent • meditative • meticulous • musical • nature-loving • nurturing • outdoorsy • patient • social • sporty • technical
if you like this hobby, you might enjoy:
• Beer brewing (see page 38)
• Cake decorating
• Coffee roasting (see page 60)
• Cookie baking
• Deep-frying (see page 74)
• Ice sculpture (see page 120)
• Making preserves (see page 136)
resourcesTruffles, Candies, and Confections: Techniques and Recipes for Candymaking, by Carole Bloom (Ten Speed Press, 2005).
Candymaking, by Ruth Kendrick (HP Trade, 1987).
www.candymaking.net: Facts about candy making and recipes galore.
www.candyusa.org: The National Confectioners’ Association presents recipes, games, quizzes, and references about everything candy-related.
www.sugarcraft.com: Candy-making and cake-decorating products.

get a hobby!56 57
what you’ll need
• Car
• Customizationkit
• Cartools
car moddingWhat does your car say about you? do you have tricked-out fenders, tinted windows, spinning rims, or racing stripes? no? then maybe it’s time to propel your set of wheels to the nex t level. With a little bit of imagination and some cues from the experts, you’ll be the belle of the boulevard.
overviewCar modding (or modifying you car) can be as elaborate or as simple as you envision. You can customize the exterior or the interior of the car, or both. Exterior changes can include adding fiberglass fender flares, spinner rims (the kind that continue to revolve even when the car is stopped), wings, spoilers, decorative lighting, grills, racing stripes, and other designs—just about anything to make the car stand apart from the others gridlocked on the asphalt. Beyond making your car into a public spectacle, you can also trick out the interior for your own private pleasure. Racing seats can be added, windows can be tinted, and a booming audio system can be installed, with subwoofers and bass speakers that will blow away the next nearest unwitting driver. Modders can increase their car’s horsepower with a sporty exhaust system, improve steering and handling by installing antiroll bars, springs, and shocks, and improve anything on the car that was not included in the standard-issue model. You can buy customization kits from auto body shops and do the installation yourself, or add the parts bit by bit. Each model and type of car comes with its own kit and adaptable gear.
history The MTV show Pimp My Ride debuted in 2004 with a fairly straightforward premise: Take a rattletrap and restore it (in ways that are anything but straight-forward). But people had been engaged in this hobby long before the show hit the small screen. Ever since the first gasoline-powered automobile, produced by Ransom E. Olds, rolled out in the U.S. in 1902, cars have been bought and customized to their owners’ specifications. Hot rods in the 1930s were modified by removing and replacing existing running boards and fenders, which made the cars lighter and faster. Car customization became increasingly popular in the 1950s, when car owners started experimenting with bright colors, painting on flames, and applying acrylic for a glossy effect. In more recent pop culture history, we saw cousins Bo and Luke Duke of Hazzard County evading the rascally county commissioner Boss Hogg in their
getting started
• THEFirSTTHingtoconsiderwiththishobbyishowmuchmoneyyoucaninvest.ifyou’vegotunlimitedfunds,thenthehardestpartwillbedecidingwheretostart.Fortherestofus,it’samatterofprioritizing.Decidewhetheryou’remoreinterestedinyourcar’sperformanceoritsimage.ifit’smorezoomyou’relookingfor,gotoyourlocalcarcustomizationdealerandtalktotheclerkaboutyouroptions.Lookintothingslikehackingtheenginecontrolunitandmakingengineandexhaustsystemmodifications,whichaddhorsepowerandgivethecaramoreaggressivefeel;upgradingtheairintakesystem,whichaddsmorehorsepowerbyimprovingthefiltrationsystem;andmodifyingthesuspensionforasmootherride.
• iFyourgoaListoturnheads,focusonyourcar’simage.inside,youcanaddracingseats,tintedwindows,racingpedalsandgearshift,aluminumorcarbondashboardgaugecovers,multicoloredfireextinguishers,racingfloormats,evenapairoffuzzydice.Fortheexterior,makeaninstantupgradewithdecals—smallflames,racingstripes,5-footdragons,oranyimagethatstrikesyou.applythemtothehood,thedriver’sdoor,thebackwindow,orthetrunk.Thenkeepaddingfeatures:biggerwheels,asetofstrobelightstothehoodforapoliceeffectorunderneathtohelplighttheway,wings,asunroof,orevenBatmobile-stylelambodoorsthatopenupwardinsteadofouttotheside.you’llfeeleverybitlikethesuperheroyouare.
project: tint your windows
Shield yourself from the sun and the paparazzi by tinting your windows. First, check out the laws in your state regulating visible light transmission: see www.autowindowtintings.com/lawsexplained.ihtml.
1) Collect the following tools: win-dow washing solution, sponges, X-Acto knife, tinting film, squee-gee, blow dryer, and bone tool. Measure your windows and cut the film to their precise mea-surements and shape. You can draw the shape of the window on tracing paper and use that as a guide.
2) Clean your windows thoroughly with a glass cleaner and scrape off every last trace of gunk, then wipe down the remaining residue from the glass cleaner with a squeegee.
3) Starting with one of the side windows, carefully apply the tinting film, leaving about 1/4 inch (64 mm) at the top of the window clear. With your bone tool, press the film down underneath the window seals. Blast your blow dryer onto the tint while smoothing out the bubbles with your squeegee.Repeat these steps with the other windows.
resourcesHow to Build the Cars of the Fast and the Furious, by Eddie Paul (Motorbooks, 2004).
Car Hacks and Mods for Dummies, by David Vespremi(Dummies, 2004).
www.autosportz.com: Articles, photos, and simplified explanations of all different kinds of car mods.
www.importmodifications.com: Page after page of images of car mods.
car modding
souped-up hot rod “The General Lee” in the TV show The Dukes of Hazzard. Superhero Batman’s wheels, the legendary Batmobile, represents the fantasy of customized cars with the ability to fly, tread water, deflect bullets from bad guys, and other amazing feats. Before embarking upon each of his missions, British spy James Bond is handed the keys to an automobile that features, among other handy devices, retractable tire slashers, a passenger ejector seat, a retractable roof panel for jettisoning the enemy, rear smoke screen releases, and oil-slick ejectors. Nice ride!
hobby personality: adventurous • animal-loving • artistic • crafty • dexterous • epicurean • extroverted • history-loving • independent • meditative • meticulous • musical • nature-loving • nurturing • outdoorsy • patient • social • sporty • technical
get a hobby!58 59
what you’ll need
• Helmetwithmountedlightsource,suchasahalogenlamporLED
• Backuplightsource,incasesome-thinghappenstoyourhelmetlight
• Backupbatteriesforthelights
• appropriateclothing,suchasawetsuitoreasy-to-layerclothingmadeoffabricthatstayswarmwhendamp
• Hikingbootsandwater-absorbentsocks
• gloves
• Climbingropesandrelatedaccessories(suchasbolts,slings,carabiners)
• Foodandwater
• Firstaidkit
cavingperhaps the image oF indiana Jones being chased by a mammoth stone barreling behind him is how you envision a caving expedition. although most cavers aren’t routinely pursued by a rogue rock, there is a certain amount of risk associated with the sport. still, for those who don’t mind—and who even relish the thought of getting dirty, crawling on hands and knees, and discovering previously uncharted paths and species—this sport is for you!
overviewCaving is the recreational sport of exploring caves, a hobby that requires quite a bit of physical exertion. It involves climbing, crawling, and using ropes to gain access to deep recesses, all the while negotiating pitches, squeezes, and waterways. Most cavers consider the sport a challenging form of exercise as well as a way to commune with nature and learn about history and science. For the adventurers of the world, the potential of unearthing undiscovered caves and exploring the unknown, which requires digging and even diving, is reason enough to get dirty. But there are other rewards, like coming across spectacular rock formations, gravity-defying stalactites, and underground waterfalls and lakes.
history Caves have served as dwellings since prehistoric times, but they have also been explored for water, sources of medicine, and, more recently, valuable treasures and historic artifacts. Caving gained national prominence in the U.S. with the pub-lication of Mark Twain’s The Adventures of Tom Sawyer, in which Tom and Becky Thatcher get lost in a cave. Speleology, the word for the scientific exploration of caves, gave rise to the slang terms spelunking and spelunker for amateur cave exploration and cavers. Accessibility to modern tools like helmets, headlights, high-tech ropes, and ladders have since rendered the sport safer and more sophisticated than it was in its early days.
JoELDESPainhasseeneverythingfromelephantstoorang-utans incaveswhileonspelunkingexpeditions.Butthedis-coveries that intrigue him the most are on a much smallerscale. He’s fascinated by the unusual minerals that turn upincaves—like6-inch-longpiecesofgreencrystal,azurecave
formations, and marble. as with most experienced cavers, Despain knows toadmirethesenaturalwondersfromarespectfuldistance.“youdon’ttouchthesethingsbecausethey’resodelicate,theywouldbreak,”hesays.
Despain works as a cave management specialist for Sequoia and KingsCanyon national Parks, but he’s traveled the world exploring caves. “you neverknowwhereacave isgoingtogo,”hesays.“it’sthequestionoftheunknown.it’sintriguingtonotknowwhat’saroundthecorner,toseesomethingthatyoumayhaveneverseenbefore.”Becauseoftheiroddhabitats,caves are home to unfamiliarliving things, which Despainlovestolearnabout.infact,Despainandhiscolleaguesrecentlydiscovered27newspeciesintheCaliforniacaveswheretheywork:invertebrateslikesilverfish,isopods,millipedes,crickets,andspiders.
profile: delving into the depths
caving
project: make a bat house
You can’t always be in a cave, but maybe you can bring a little bit of cave wildlife to you—with a bat house. You can purchase bat house kits, which are easily assembled and can be mounted on a tree, building, or pole. They look vaguely like wooden mailboxes, and, depending on their size, can house 300 bats or more. Some have multiple chambers, but all have ventilation gaps for circulating air and maintaining the right tempera-ture. At the right time in the eve-ning, you can watch these mystical creatures come home. A bonus for those who live in humid climates: Bats eat lots of mosquitoes!
“If you’re a beginner, join a local caving club, let them show you the ropes, and keep going back.”
getting startedCaving can be a dangerous pursuit, so the first thing to do is get yourself the appropriate gear. Sturdy clothing and footwear and a helmet are compulsory. Choose layers of synthetic fibers and woolens, which don’t absorb water like cotton does. If you know you’re going into a wet cave, wear a wetsuit to reduce the chance of hypothermia. Carry easily metabolized food, like fruit or sweets, and warm foods like vegetable soup in a thermos. Don’t forget to take at least two sources of long-lasting light with backup batteries.
When you’re ready to start your expedition, first try joining a guided group (seeresources for nearby organiza-tions). After a few organized treks, ask a few of the more experienced cavers if they’d be interested in going out in a smaller group.
When going out on your own with your caving group, it’s important to take a few precautions: Be sure someone aboveground knows where you are and when you’ll return. Rainwater can flood a cave quickly, so look at the weather forecast for the day, and find out if it has rained in that spot on previous days. Try to memorize landmarks as you traverse passages. In some caves, you can leave behind small stacks of rocks or flagging tape to mark your path. If you find yourself going down a steeper slope than you think you’ll be able to climb in the other direction, turn back.
Caves have a fragile ecosystem and must be carefully preserved during exploration. Be cautious of damaging or removing any cave formations and pick up all your trash before you go. Never build fires inside a cave or paint graf-fiti on cave walls.
resourcesCaving (Essential Guides), by Peter K. Swart (Stackpole Books, 2002).
Caves: Exploring Hidden Realms, by Michael Ray Taylor and Roman C. Kerbo (National Geographic, 2001).
www.caves.org: The National Speleological Society, an American group with local chapters that explores and conserves caves.
www.cave-research.org: The Cave Research Foundation is a nonprofit group that studies and protects caves.
www.caving.uk.com: A British-based resource with a link to Descent, a magazine for cavers, as well as a listing of great caving spots in the U.K.
hobby personality: adventurous • animal-loving • artistic • crafty • dexterous • epicurean • extroverted • history-loving • independent • meditative • meticulous • musical • nature-loving • nurturing • outdoorsy • patient • social • sporty • technical
get a hobby!60 61
what you’ll need
• roaster—youcanuseyouroven,anairpopcornpopper,oroneoftheseveralcommerciallyavailablehomecoffeeroasters
• greencoffeebeans
• airtightstoragejar
• Kitchenthermometer
• notebookorjournaltorecordyourwork
• Digitalscaleandtimer(optional)
coffee roastingFor most americans, enjoying a cup of coffee has become an essential morning ritual. although for some, the primary appeal is the immediate boost that comes with the first cup of joe, many people relish the rich taste. For those who are curious about concocting their own ideal blend—and for those who resent paying more than a dollar for a simple cup of coffee—home roasting is a compelling idea. it’s simple, clean, and requires few accoutrements.
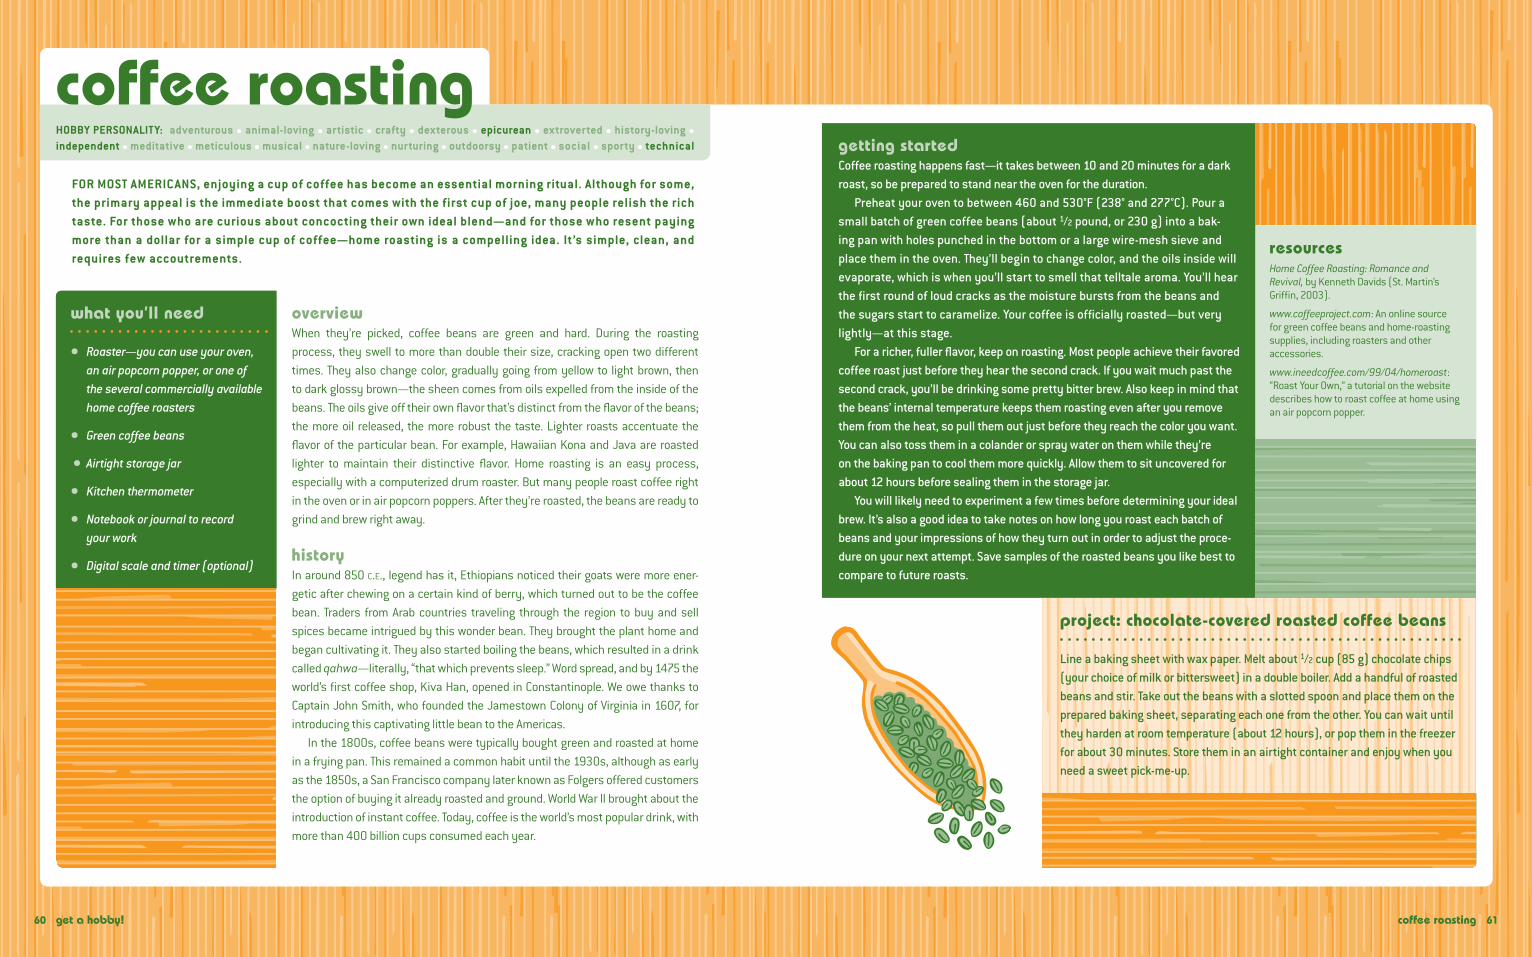
overviewWhen they’re picked, coffee beans are green and hard. During the roasting process, they swell to more than double their size, cracking open two different times. They also change color, gradually going from yellow to light brown, then to dark glossy brown—the sheen comes from oils expelled from the inside of the beans. The oils give off their own flavor that’s distinct from the flavor of the beans; the more oil released, the more robust the taste. Lighter roasts accentuate the flavor of the particular bean. For example, Hawaiian Kona and Java are roasted lighter to maintain their distinctive flavor. Home roasting is an easy process, especially with a computerized drum roaster. But many people roast coffee right in the oven or in air popcorn poppers. After they’re roasted, the beans are ready to grind and brew right away.
history In around 850 c.e., legend has it, Ethiopians noticed their goats were more ener-getic after chewing on a certain kind of berry, which turned out to be the coffee bean. Traders from Arab countries traveling through the region to buy and sell spices became intrigued by this wonder bean. They brought the plant home and began cultivating it. They also started boiling the beans, which resulted in a drink called qahwa—literally, “that which prevents sleep.” Word spread, and by 1475 the world’s first coffee shop, Kiva Han, opened in Constantinople. We owe thanks to Captain John Smith, who founded the Jamestown Colony of Virginia in 1607, for introducing this captivating little bean to the Americas.
In the 1800s, coffee beans were typically bought green and roasted at home in a frying pan. This remained a common habit until the 1930s, although as early as the 1850s, a San Francisco company later known as Folgers offered customers the option of buying it already roasted and ground. World War II brought about the introduction of instant coffee. Today, coffee is the world’s most popular drink, with more than 400 billion cups consumed each year.
getting startedCoffee roasting happens fast—it takes between 10 and 20 minutes for a dark roast, so be prepared to stand near the oven for the duration.
Preheat your oven to between 460 and 530°F (238° and 277°C). Pour a small batch of green coffee beans (about 1/2 pound, or 230 g) into a bak-ing pan with holes punched in the bottom or a large wire-mesh sieve and place them in the oven. They’ll begin to change color, and the oils inside will evaporate, which is when you’ll start to smell that telltale aroma. You’ll hear the first round of loud cracks as the moisture bursts from the beans and the sugars start to caramelize. Your coffee is officially roasted—but very lightly—at this stage.
For a richer, fuller flavor, keep on roasting. Most people achieve their favored coffee roast just before they hear the second crack. If you wait much past the second crack, you’ll be drinking some pretty bitter brew. Also keep in mind that the beans’ internal temperature keeps them roasting even after you remove them from the heat, so pull them out just before they reach the color you want. You can also toss them in a colander or spray water on them while they’re on the baking pan to cool them more quickly. Allow them to sit uncovered for about 12 hours before sealing them in the storage jar.
You will likely need to experiment a few times before determining your ideal brew. It’s also a good idea to take notes on how long you roast each batch of beans and your impressions of how they turn out in order to adjust the proce-dure on your next attempt. Save samples of the roasted beans you like best to compare to future roasts.
resourcesHome Coffee Roasting: Romance and Revival, by Kenneth Davids (St. Martin’s Griffin, 2003).
www.coffeeproject.com: An online source for green coffee beans and home-roasting supplies, including roasters and other accessories.
www.ineedcoffee.com/99/04/homeroast: “Roast Your Own,” a tutorial on the website describes how to roast coffee at home using an air popcorn popper.
project: chocolate-covered roasted coffee beans
Line a baking sheet with wax paper. Melt about 1/2 cup (85 g) chocolate chips (your choice of milk or bittersweet) in a double boiler. Add a handful of roasted beans and stir. Take out the beans with a slotted spoon and place them on the prepared baking sheet, separating each one from the other. You can wait until they harden at room temperature (about 12 hours), or pop them in the freezer for about 30 minutes. Store them in an airtight container and enjoy when you need a sweet pick-me-up.
coffee roasting
hobby personality: adventurous • animal-loving • artistic • crafty • dexterous • epicurean • extroverted • history-loving • independent • meditative • meticulous • musical • nature-loving • nurturing • outdoorsy • patient • social • sporty • technical
get a hobby!62 63
collecting
what you’ll need
• anitemyou’reinfatuatedwithtocollect
• researchtoolssuchasaccesstotheinternetandatelephone
everyone’s got one t ype oF obsession or another. For those predisposed to fixating on material things, collecting is a hobby that can quickly turn into an obsession. though it can be easy to sit back and throw money at dealers who are more than happy to do the foraging for you, it’s far more rewarding to embark on the hunt yourself. the thrill of outbidding another collector on ebay, of searching out a priceless coin at a flea market, or snagging a valuable painting at a garage sale can’t be matched by having items hand-delivered to your door. Whatever your personal passion is, get out there and collect it.
overviewCollecting encompasses an extremely broad range of other hobbies and preoccupations. Starting a collection simply entails amassing multiple objects of the same kind. These can range from postage stamps to wine bottle labels to thimbles to figurines (see things to collect, pages 63–65). Collectors can search for specific items within a category, such as dolls from the Civil War era, or much broader categories, such as dolls of all types. They might choose to collect every album by a certain band or singer, or every book by an author. Collectors can search for their items of choice on their own time or buy them through a professional dealer connected to a vast network of people and institutions searching for rare items. Working with a dealer, however, typically costs much more than scoring a find yourself. Auction sites such as eBay can cut out the middleman (though dealers also advertise their wares on the sites), but it’s a riskier proposition—the item might not be authentic, and occasionally the unscrupulous seller defaults on the promise to send an item. Original items of value typically come with either a certificate of authenticity or are signed or marked in a way that verifies their authenticity. Collectors also trawl flea markets, conventions, and other publicly held sales and events where they might stumble upon prize finds.
history Coins were one of the first items to be collected—at least since the Roman era.According to a book called Lives of the Caesars, written in 75 c.e. by Suetonius, Emperor Augustus collected old foreign coins and gifted them to friends and acquaintances. Famous collectors throughout history include Sir Thomas Phil-lips of England, who during the 19th century attempted to own a copy of every single book published in the world (he came close: 77,000 titles at the time of his death), and Franz Gall, an Austrian who got a kick out of decorating his walls with rows of human skulls he collected from gallows and asylums.
getting startedGetting started can be the most challenging part of this hobby simply because the choices are infinite. So your first priority is to choose something you’re fas-cinated by, or obsessed with, or simply something you want to own in multiples because of its aesthetic value. A good way to start is by checking around your own house. You might discover you already have a small collection of tea tins, for example, which you’ve been keeping because you like the way they look. That counts as a collection.
Then start researching. Visit auction and dealer websites to familiarize yourself with your collectible of choice and its market value, and subscribe to magazines and newsletters that contain information about sales and classi-fied ads. Take copious notes during your research and keep important phone numbers and websites on file. Tell everyone you know about the item you’re collecting and see how quickly your home fills up with your chosen collectibles.
SPoTS To RuMMAGE FoR CoLLECTIBLES:
• FLEaMarKETS.Dependingonwhereyouliveandhowenergeticallyyousearch,fleamarketscanyieldbigscores.Don’tbeafraidtohaggleforabet-terprice—thesellerdoesn’thavetoknowhowimportantthepieceistoyou.
• yarD,Tag,ESTaTE,orruMMagESaLES.Whenhomesareclearedoutinprepa-rationforbeingsold,allkindsofpricelessitems—antiqueclocks,furniture,jewelry,china,andthehomeowners’owncollections—comeupforgrabs.Beatthedealerstothepunchbyshowingupearlyandscavengingforthebestgoods.
• CoLLECTorS’ConvEnTionS.Thesearetypicallypopulatedbyprofessionalantiquedealers,sotheymightnotsaveyoumoney,butforthatcoveteditemyoucan’tfindanywhereelse,thismightbetheplacetogo.
If you’re interested in collecting rare or extremely valuable items, be sure to check them carefully for authenticity before buying. Is it a limited edition? If so, what is its number in the series? Is there any obvious damage or wear and tear that would diminish the value of the piece? To validate the authenticity of china, pottery, glassware, or furniture, refer to manuals and books about what signs to look for. Research how furniture of that particular time period was made, what types of wood were used, how the pieces were assembled, and the period’s distinctive flourishes. Artists, designers, and manufacturing companies usually sign or stamp their logos or signatures on the back or bottom of their work.
resourcesTo Have and to Hold: An Intimate History of Collectors and Collecting, by Philipp Blom (Overlook Press, 2003).
Collectibles Price Guide 2005, by Judith Miller (DK Adult, 2004).
www.avdm.com/Collectibles.html: Display cases for every type of collection, including modular pieces for DIY displays.
eBay.com: Online auction site for every type of collectible imaginable.
collecting
hobby personality: adventurous • animal-loving • artistic • crafty • dexterous • epicurean • extroverted • history-loving • independent • meditative • meticulous • musical • nature-loving • nurturing • outdoorsy • patient • social • sporty • technical things to collect
Aluminum foil ballsAmericana (Canadiana, etc.)Animal-themed collectiblesApronsArrowheadsArtBakeliteBasketsBooksBottlesBrewerianaButtonsCamerasCansCardsChia petsChinaChristmas stuffClocksCoins (and currency)Comic booksCookie jarsCostumesCrystalsDiceDollsEphemeraFansFirearms and weaponryFishing luresFood/candy packagingFound photos/postcardsFurnitureGlasswareHatsJewelry(continuedonpage64)
get a hobby!64 65
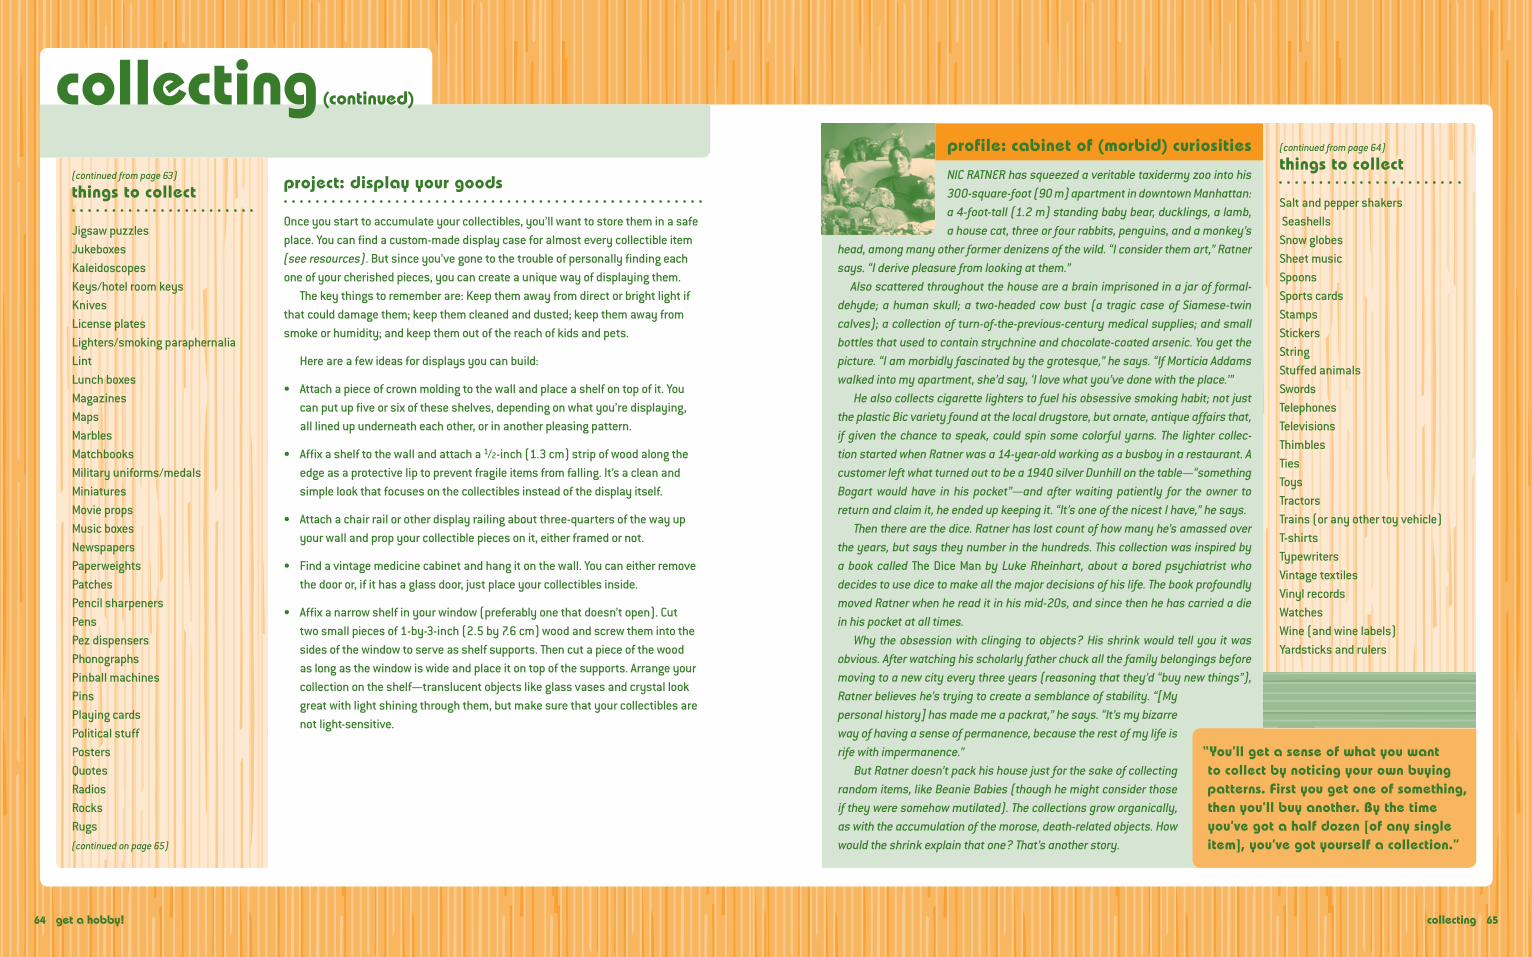
niCraTnErhassqueezedaveritabletaxidermyzoointohis300-square-foot(90m)apartmentindowntownManhattan:a4-foot-tall(1.2m)standingbabybear,ducklings,alamb,ahousecat,threeorfourrabbits,penguins,andamonkey’s
head,amongmanyotherformerdenizensofthewild.“iconsiderthemart,”ratnersays.“iderivepleasurefromlookingatthem.”alsoscatteredthroughoutthehouseareabrainimprisonedinajarofformal-dehyde; a human skull; a two-headed cow bust (a tragic case of Siamese-twincalves);acollectionofturn-of-the-previous-centurymedicalsupplies;andsmallbottlesthatusedtocontainstrychnineandchocolate-coatedarsenic.yougetthepicture.“iammorbidlyfascinatedbythegrotesque,”hesays.“ifMorticiaaddamswalkedintomyapartment,she’dsay,‘ilovewhatyou’vedonewiththeplace.’”
Healsocollectscigarettelighterstofuelhisobsessivesmokinghabit;notjusttheplasticBicvarietyfoundatthelocaldrugstore,butornate,antiqueaffairsthat,if given the chance to speak, could spin some colorful yarns. The lighter collec-tionstartedwhenratnerwasa14-year-oldworkingasabusboyinarestaurant.acustomerleftwhatturnedouttobea1940silverDunhillonthetable—“somethingBogart would have in his pocket”—and after waiting patiently for the owner toreturnandclaimit,heendedupkeepingit.“it’soneofthenicestihave,”hesays.
Thentherearethedice.ratnerhaslostcountofhowmanyhe’samassedovertheyears,butsaystheynumberinthehundreds.Thiscollectionwasinspiredbya book called The Dice Man by Luke rheinhart, about a bored psychiatrist whodecidestousedicetomakeallthemajordecisionsofhislife.Thebookprofoundlymovedratnerwhenhereaditinhismid-20s,andsincethenhehascarriedadieinhispocketatalltimes.
Why the obsession with clinging to objects? His shrink would tell you it wasobvious.afterwatchinghisscholarlyfatherchuckallthefamilybelongingsbeforemovingtoanewcityeverythreeyears(reasoningthatthey’d“buynewthings”),ratnerbelieveshe’stryingtocreateasemblanceofstability.“[Mypersonalhistory]hasmademeapackrat,”hesays.“it’smybizarrewayofhavingasenseofpermanence,becausetherestofmylifeisrifewithimpermanence.”
Butratnerdoesn’tpackhishousejustforthesakeofcollectingrandomitems,likeBeanieBabies(thoughhemightconsiderthoseiftheyweresomehowmutilated).Thecollectionsgroworganically,aswiththeaccumulationofthemorose,death-relatedobjects.Howwouldtheshrinkexplainthatone?That’sanotherstory.
profile: cabinet of (morbid) curiosities
project: display your goods
once you start to accumulate your collectibles, you’ll want to store them in a safe place. You can find a custom-made display case for almost every collectible item (seeresources). But since you’ve gone to the trouble of personally finding each one of your cherished pieces, you can create a unique way of displaying them.
The key things to remember are: Keep them away from direct or bright light if that could damage them; keep them cleaned and dusted; keep them away from smoke or humidity; and keep them out of the reach of kids and pets.
Here are a few ideas for displays you can build:
• Attach a piece of crown molding to the wall and place a shelf on top of it. You can put up five or six of these shelves, depending on what you’re displaying, all lined up underneath each other, or in another pleasing pattern.
• Affix a shelf to the wall and attach a 1/2-inch (1.3 cm) strip of wood along the edge as a protective lip to prevent fragile items from falling. It’s a clean and simple look that focuses on the collectibles instead of the display itself.
• Attach a chair rail or other display railing about three-quarters of the way up your wall and prop your collectible pieces on it, either framed or not.
• Find a vintage medicine cabinet and hang it on the wall. You can either remove the door or, if it has a glass door, just place your collectibles inside.
• Affix a narrow shelf in your window (preferably one that doesn’t open). Cut two small pieces of 1-by-3-inch (2.5 by 7.6 cm) wood and screw them into the sides of the window to serve as shelf supports. Then cut a piece of the wood as long as the window is wide and place it on top of the supports. Arrange your collection on the shelf—translucent objects like glass vases and crystal look great with light shining through them, but make sure that your collectibles are not light-sensitive.
collecting(continued)
(continuedfrompage63)
things to collect
Jigsaw puzzlesJukeboxesKaleidoscopesKeys/hotel room keysKnivesLicense platesLighters/smoking paraphernaliaLintLunch boxesMagazinesMapsMarblesMatchbooksMilitary uniforms/medalsMiniaturesMovie propsMusic boxesNewspapersPaperweightsPatchesPencil sharpeners PensPez dispensersPhonographs Pinball machinesPinsPlaying cardsPolitical stuffPosters Quotes RadiosRocks Rugs(continuedonpage65)
(continuedfrompage64)
things to collect
Salt and pepper shakers SeashellsSnow globesSheet musicSpoons Sports cardsStampsStickersStringStuffed animalsSwordsTelephonesTelevisionsThimblesTiesToysTractorsTrains (or any other toy vehicle)T-shirtsTypewritersVintage textilesVinyl recordsWatchesWine (and wine labels)Yardsticks and rulers
collecting
“You’ll get a sense of what you want to collect by noticing your own buying patterns. First you get one of something, then you’ll buy another. By the time you’ve got a half dozen [of any single item], you’ve got yourself a collection.”

get a hobby!66 67
what you’ll need
• Kitchenwastesuchascoffeegrounds,eggshells,fruit,andvegetablescraps
• gardenandyardwastesuchassmalltwigs,leaves,grassclippings,strawandhay,pineneedlesandcones,coworhorsemanure
• Miscellaneousitemsthatcanbecompostedincludecottonorfeltwastes,shreddednewspapers,sawdust,andwoodchips
• acompostbinordesignatedarea
• rake,shovel,orspadingforkforturningthecompost
composting“ashes to ashes, dust to dust” applies not just to the human life process, but to gardens, too. nutritious soil and, in turn, thriving plants and vegetables, need rich, organic fertilizer, and the best way of providing this shot of vitamins is to give your garden soil exactly what you took from it: your food!
overviewCompost is the accumulation of decomposed scraps of food and plant matter used in gardening and agriculture. Mixing compost into soil improves its quality, adding organic materials that provide nutrients to the plants you grow. Home composting is done by collecting “brown” and “green” waste in a pile and, in some cases, adding microbes or other creatures like earthworms, ants, and nematodes. Composting requires a controlled environment, with the proper amount of carbon, nitrogen, oxygen, and water, in order to encourage the growth of active microbes. You can start a compost in your backyard in a contained bin like an old garbage can or in an open pile—but the latter might be a bit smelly if not turned on a regular basis to aerate the mixture.
history The first evidence we have of composting, or at least the idea of returning organic scraps to the soil, is in clay tablets from about 2350 b.c.e., in the Akkadian empire in Mesopotamia. The Romans, Greeks, and early Hebrews are also said to have added rotted manure to soil. By the Middle Ages, composting was the rule rather than the exception in agricultural practice. American president James Madison touted the benefits of it in an 1818 speech to an agricultural society in Virginia. Many of the composting methods most familiar to us now were developed in the first half of the 20th century by Sir Albert Howard, a British botanist and organic farming pioneer who worked in Indore, India. Composting today—in a world where landfills are taxed to their limits—is an important method of waste reduction, as well as a good way to maintain healthy, organic gardens.
getting startedYou can choose from a variety of composting methods: container composting, indoor composting, composting with worms, and mound composting, among others. Container composting is quite common and relatively easy. First, find a place for your container—ideally, a spot in your back-yard that’s out of plain sight but close to the kitchen. You can either buy a composting bin or build one with wood or recycled pallets, leaving the bin open on one side for easy access. Not only will you be adding compost, but you’ll also need to turn it regularly and be able to scoop out finished compost from the bottom of the pile.
Before you begin adding kitchen scraps, let the process get a head start using yard waste only. Try mixing together one part grass clippings and old annuals (“green” waste)
with two parts dry leaves and soil (“brown” waste) until the mixture is damp but not wet. Start with a 4-inch (10 cm) layer of leaves (brown waste) at the bottom of the pile, then 1 inch (2.5 cm) of good garden soil. Layer on 2 inches (5 cm) of grass clippings or old plants, and keep alternating brown and green waste. After a week, turn the pile with a spading fork, then start adding your food scraps, and turn the compost weekly. When you can no longer recognize the individual items you threw in and all the material looks uni-formly like soil (dark color, small particles, and an earthy odor), the compost is ready. (This should happen within two months.) Dig it out with a shovel and use it to add the best kind of nutrients to your garden soil. Remember to mix the pile to ventilate it—oxygen keeps foul odors away.
project: build a wire mesh container
If you don’t want to pay for a composting bin, make one out of wire mesh. You can easily turn the composting materials in this convenient container.
What you’ll need:10feet(3m)of36-inch-wide(.9m),1-inch(2.5cm)galvanizedchickenwireThreeorfour4-foot-tall(1.2m)woodenormetalpostsHeavywiretotiethechickenwiretothepostsandtogetherToolssuchasheavy-dutywireortinsnips,pliers,hammerWorkgloves
Wearing work gloves for protection, fold back about 4 inches (10 cm) of wire at each cut end of the chicken wire. Join the two folded ends of the wire together to make a cylinder shape with open ends by inserting and twisting together several short pieces of heavy wire with pliers. Place the cylinder of wire, with one open end facing up, where you want your compost pile. Evenly space the posts around the cylinder, pounding them into the ground, then bind the posts to the chicken wire with more pieces of heavy wire. After piling in your yard waste and kitchen scraps, the best way to turn the contents is to lift the wire bin off and away from the com-posting material, set it on a new spot next to the old, and shovel the compost back into the wire bin. Be sure to harvest compost from the bottom of the pile.
resourcesWorms Eat My Garbage: How to Set Up and Maintain a Worm Composting System, by Mary Appelhof (Flower Press, 1997).
Let It Rot! The Gardener’s Guide to Com-posting, 3rd ed., by Stu Campbell (Storey Publishing, 1998).
www.compost-bin.org: An educational and news site about composting, featuring articles, news, and events.
www.compostinfo.com: Florida’s online composting resource provides a wealth of information for beginners from any state.
www.4backyards.com: Supplier of tools and equipment for backyard composting.
www.mastercomposter.com: A subscriber site offering detailed instructions, dia-grams, and tele-classes.
composting
hobby personality: adventurous • animal-loving • artistic • crafty • dexterous • epicurean • extroverted • history-loving • independent • meditative • meticulous • musical • nature-loving • nurturing • outdoorsy • patient • social • sporty • technical

get a hobby!68 69
what you’ll need
• Worsted-weightyarn
• Sizegcrochethook
• yarnneedlewithabigeye
• Smallscissors
crochetto the untrained eye, crochet is a miracle oF engineering: thousands of links of thread looped together to create a whole piece. to crocheters, it’s a rewarding hobby that results in beautiful clothing, table covers, and any number of decorative home accessories. Whichever way you look at it, crocheting can be a source of delight for just about anyone.
overviewCrochet comes from the French word crocher, which means “to hook.” The process involves creating fabric from cord, yarn, or thread with a specialized hook. First you place a slipknot loop on the hook, then you pull another loop through the first one, then another through that, and so on, to create a chain. After a row is completed, the chain is either turned and remade into another row, or is joined end-to-end and worked in rounds. Rounds can also be created by working many stitches into a single loop.
history The technique of crocheting seems to have originated around the 1800s. As a less-expensive alternative to lace, crochet soon began to play a role in class dif-ferentiations around the world. Those who could afford it chose delicate and intri-cate lace and disparaged crocheted items. But with the endorsement of Queen Victoria, who wore Irish-made crochet (also called “Irish lace”) and learned the technique herself, crocheting was given the royal nod. In Europe, handmade hooks of ivory, brass, or wood—some ornately carved or inlaid with mother-of-pearl—were used to work natural-fiber thread. By 1845, published patterns and instructions for reproducing bobbin lace and needle lace with crochet were being circulated courtesy of a Frenchwoman named Riego del Branchardiere. Until 1950, crochet was done only with thread, but by the mid-1950s, crochet-ers started using heavier yarns for heartier clothes and home accessories. And during the next decade, what was once relegated mostly to homemakers began making the rounds among the younger generation. Looking back at the fashions of the 1960s—particularly all the granny-square ponchos and afghans—shows us just how popular this technique became.
getting startedThe best way of learning how to crochet is by taking a class. That way, you’ll have close instructional help from an expert who can guide those first crucial steps. Many yarn and craft stores offer classes. They’re also available at recreation centers, through adult-education programs, and at design centers.
To make the foundation row for crocheting, hold the hook in your right hand (if you’re right handed—
otherwise, hold it in the left) and make a slipknot on the hook. Bring the yarn over the hook from back to front and grab it with the hook. Draw the hooked yarn through the slipknot and onto the hook. You’ve got one chain stitch! Bring the yarn over the hook again and draw it through the loop to make the second stitch; repeat the sequence as many times as you like to create a longer chain.
project: stiffen a crocheted piece
To straighten out those lovely doilies or inherited tablecloths that have begun to curl at the edges, lightly spray each piece with spray starch, then shape it the way you want it to “freeze.” You can do this by covering the piece with a handkerchief and pressing it with an iron set on cool. Alternatively, you can stretch it out on a piece of cardboard or bulletin board and fix it in place using rust-proof pins. If extreme flatness isn’t critical, you can just stretch it out on a terry-cloth towel and let it dry.
crochet
hobby personality: adventurous • animal-loving • artistic • crafty • dexterous • epicurean • extroverted • history-loving • independent • meditative • meticulous • musical • nature-loving • nurturing • outdoorsy • patient • social • sporty • technical
EriCa MuLHErin has creative energy to spare, both inand out of the workplace. “i’m an illustrator [based inolympia,Washington]andihaveway,waytoomanyhobbies.iliketotryabitofeverything,butmyfavoritesaresewing,felting, embroidery, papier-mâché, woodworking, and, of
course,crocheting.”She’s a third-generation crocheter—her mother and both grandmothers
crocheted—andshehasfondsummertimememoriesofcrochetingBarbiedollclotheswithhergrandma.Shecontinuestoenjoythesimplicityofthiscraft.“it’seasy,portable,soothing,andfairlyunstructured.youonlyneedahookandsomeyarn,”shesays.Hermostambitiousprojecttodate?“ioncemadeacrochetedquilt.itendedupbeinggiganticandreally,reallyheavy.itendtosticktosmallerthingsthesedays.”Herlittlecrochetedcritters,especiallytheseamonkey,aretrulyirresistible.
Mulherindoesn’tbelieve that youhavetofollowacrochetpattern,orevensetouttomakeaspecificitem.“Justcrochet.itdoesn’thaveto“be”anythingyet.SitinfrontoftheTvandpracticesinglecrochet,thendoublecrochet;thentryadifferentstitchforawhile.Thiswill help you get used to handling the yarn and making nice, neat stitches,”sheadvises.
profile: off the hook
“Remember that it is OKAY to rip stitches out and start over. Practice makes perfect.”
resourcesThe Crochet Answer Book: Solutions to Every Problem You’ll Ever Face; Answers to Every Question You’ll Ever Ask, by Edie Eckman(Storey Publishing, 2005).
www.craftyarncouncil.com: The Craft Yarn Council of America offers free instruction and an outline of basics for beginners. It’s also a good source for free projects, patterns, and discussion groups.
www.crochet.org: The Crochet Guild of America’s website features events, informa-tion on local chapters, and lessons.
www.crochetpartners.org: Crochet Partners is a membership-based resource that connects crocheters around the country.

get a hobby!70 71
what you’ll need
• Clear-dryingwhiteglue(diluted—3partsglueto1partwater),ModPodge,orvarnish
• Papercutouts,tissuepaper,bitsofgildingormetalfoil,andthelike
• Paintbrushorotherimplementforspreadingtheglueorvarnish
• Popsiclestickorbrayer(aminiatureroller)tosmoothoutwrinklesandremoveexcessglue
• Dampragtowipeupexcessglueandothercleanup
• Finesteelwoolorsandingsponge(optional)
• Paint(optional)
decoupagea blank, Flat surFace is a terrible thing to Waste. Find your favorite photos and images and fill in that blank! the process is absurdly easy and instantly gratifying.
overviewDecoupage is the art of decorating an object by gluing bits of paper onto it, embellishing it with different painting techniques, and covering it with multiple coats of varnishes or products like Mod Podge, which work as both adhesive and polished finish. The end result looks as if the cutouts—which usually come from magazines or photos—have been inlaid or painted onto the surface. It is typically done to small boxes, furniture, and dishware, among other household items.
history The roots of decoupage can be traced to 12th-century Chinese peasant art that made use of paper cutouts for decoration. The idea of adding layers of varnish over the paper cutouts was introduced by Venetian craftsmen in the 17th century; they were trying to make a more affordable substitute for the elaborate lacquered furniture being imported from Asia. For that reason, decoupage became known as “poor man’s art,” but it quickly caught on with the not-so-poor. Decoupage cap-tivated aristocrats like Marie Antoinette and Madame de Pompadour and, in the 20th century, artists like Pablo Picasso and Henri Matisse. The word derives from the French term découper, which means “to cut out.”
getting started
• FirST,FinDaFLaTSurFaCEyouwanttocoverwithart.anythingworks:asidetable,photoalbum,shelves,pictureframes,boxes,evenmirrors.Wipeoffdustanddirt,andifyouwantabackgroundcolor,paintit.Thenit’stimetofindimagesyouwanttoseeonthesurface.Considerusingwrap-pingpaper,wallpaper,magazineclippings,fabric,orphotos(photocopiesmaybeeasiertoworkwith).Cutoutthetheimagesyouwanttouse,thenarrangethemonthesurfacetoseewhatshapesandcolorslookbesttogether.Don’tbeafraidtooverlapimages—that’sacommontechniqueindecoupage.
• WHEnyou’vEPLannEDTHEDESign,coatthebackofeachimagewithglueorwhateverdecoupagemediumyouhave.alsospreadathinlayerofglueonthebackgroundsurface.gentlypositionthecutout,takingcarenottoletitwrinkleorbubble.useyourfinger,aPopsiclestick,orabrayertopresstheimagedownonthesurface,andtowipeoffanyexcessglue.repeatwiththeotherimagesandletthegluedry.
• onCETHEgLuEiScompletelydry,coattheentiresurfacewithyourdecoupagemedium.Waituntilthatdries,thencontinueaddingcoatsofthemedium,takingcareeachtimethatthepreviouscoathasthoroughlydriedbeforeyouspreadonanewone.youcanstoplayeringwhentheedgesoftheimageshavebeencompletelysmootheddown.youmightfindthatusingfinesteelwoolorasandingspongeonthelatercoatshelpstocreateasmoothersurface.
resourcesAbsolute Beginner’s Decoupage: The Simple Step-by-Step Guide to Creating Beautiful Decoupage, by Alison Jenkins (Watson-Guptill Publications, 1999).
New Decoupage, by Durwin Rice (Potter Craft, 1998).
www.decoupage.org: The National Guild of Decoupagers.
www.decoupage-online.com: All about decoupage.
decoupage
hobby personality: adventurous • animal-loving • artistic • crafty • dexterous • epicurean • extroverted • history-loving • independent • meditative • meticulous • musical • nature-loving • nurturing • outdoorsy • patient • social • sporty • technical
project: decoupage a coffee table
Add a bit of personality to a bland old coffee table using decoupage. First, decide on a theme, such as travel. Then start collecting pieces that could work as part of a col-lage: magazine clippings, postage stamps, vintage postcards, travel ads, old plane or train tickets, admission stubs, even photocop-ies of your own photos will work. Lay out the pieces on the top of the coffee table, moving them around until you find a pleasing arrangement. Now apply some Mod Podge or another decoupage medium to the surface of the table where you want each piece to go. Add the same type of adhesive to the back of the cutout pieces and place them on the glued areas on the table. Carefully smooth out any bubbles or creases with your fingers. After each of the pieces has dried, apply three coats of the decoupage medium over the entire table, waiting for each application to dry before applying the next.
get a hobby!72 73
what you’ll need
• asolidsoundsystem,includinggoodspeakersandamplifiers
• abroadrangeofmusicinanymedium—vinylrecords,CDs,orMP3s
• atleasttwomusic-playingdevices
• Microphone
• Headphones,tocueupthenextsongwithoutplayingittotheaudience
• amixertocombinesongsfromtwoplayers(optional)
• Soundeffectssuchasdrummachines,samplers,andthelike(optional)
deejayingthere’s nothing like the thrill oF motivating a group of people to groove to one rocking song after another. it's a little-known fact that deejaying is one of the healing professions: bringing music (and therefore dance) to a crowd is the best medicine of all.
overviewDeejaying encompasses a broad range of activities, from choosing a lineup of songs and playing them in order, to adding beats and other special effects to the music. The deejays we hear at parties play a big role in getting dancers onto the floor by choosing the right rhythms; mixing songs; and cutting, scratching, phrasing, and beat-matching to keep the rhythm going. Some people like deejaying for friends at home and do it for the pure pleasure, while others are hired for events and arrive with a full set of equipment, including hundreds of records or CDs and a sound system.
history The first record player that used grooved, flat discs was invented in 1887 by Emil Berliner, but spinning records for a public audience didn’t hit happen until the mid-1940s, on the radio. Facts are fuzzy in the field of deejaying at live events. David Mancuso, founder of New York City’s first underground party, was one of the first deejays (or “disc jockeys”) in the modern sense of the term. But as early as 1920, at a Dada gathering, the German composer Stefan Wolpe lined up eight phonographs and used them to play snippets of Beethoven’s Fifth Symphony at different speeds. Many popular techniques, such as beat-matching (synchronizing the beats of two different pieces in order to fade from one to the other), were devised by deejay greats like Francis Grasso and remixer Larry Levan. DJ Kool Herc, known to many as the “father of hip-hop,” is credited with inventing the backbeat technique (playing a continuous background beat on a second record player while changing the foreground sounds on a primary record player). Grandmaster Flash added scratching and cutting (moving the record back and forth under the needle with one hand while operating the fader with the other to bring in or mute the resulting sounds) to the bag of tricks in the late 1970s. By the 1980s, people were squaring off at deejay battles, vying to show who was faster and more creative while keeping a rhythm.
getting started
• DEFiniTELyTryTHiSaTHoMEbeforegoingpublic.aswithanyperformanceart,deejayingtakesplentyofpractice.Startbycollectingonecategoryofmusic—let’ssayit’stechnodance.Listentoavarietyofsongsandchooseonesthatflowtogetherorganically.onesimplewayoffulfillingyourfirstdeejaydutiesistoprerecordaCDandplayitstraight.observehowpeoplerespondtoyourpicks,thenthinkaboutthenextoccasion.
• ToPLanyourLinEuP,loadyourfirstCDorrecordintotheplayerandplaythesongwiththecrossfaderallthewayup.Thenloadthenextsongintothesecondplayerwiththecrossfaderdown,andlistentothesongonyourheadphones.youcanweartheheadphonesononeearandleavetheotherearuncoveredsoyoucanhearbothpieces—this’llhelptokeepyourrhythmstraight.Trytomatchtherhythmofthesecondsongwiththesongthat’splayingonthefirstdeck.ifitdoesn’twork,findanother,keepinginmindthelengthoftimethefirstsonghasleft.Whenyoufindatunethat’saperfectfollow-uptothefirstsong,cueittothebeginning,thenjustastheotherendsorfades,playthesecondsongandmovethecrossfadertothemiddleposition.graduallymovethecrossfaderovercompletelytotheseconddeckanddownonthefirstone.Thenbegintheprocessagain.
resourcesHow to DJ Right: The Art and Science of Playing Records, by Frank Broughton and Bill Brewster (Grove, 2003).
Last Night a DJ Saved My Life: The History of the Disc Jockey, by Frank Broughton and Bill Brewster (Grove, 2000).
www.djforums.com: Forums, tutorials, and downloads.
www.djtimes.com: Online magazine for deejays with features about the pros, music charts, and forums.
www.panasonic-europe.com/technics: Supplier of the industry-standard turn-tables for deejays.
www.rockandsoul.com: Online supplier of deejay gear.
project: make a mix cd
For the one you love, or the one you want to woo, music can maneuver the way to the heart. Consider the kind of songs your beloved likes. Then think about the message you want to convey and find songs that carry the general theme of that message. For those with eclectic tastes, do some research to find the newest music by bands they like. Check out the websites of college radio sta-tions or those that focus on independent labels and look at their playlists. After you compile a set of songs, arrange them in an order that works in its entirety, rather than throwing them together randomly. Start with a bold, catchy tune that will immediately set the tone. You can slow down the pace later on, then build up momentum again. Burn the tracks onto a CD. If you want to make a customized cover, you can download software from any number of websites, then come up with graphics, liner notes, and even a name for the CD.
deejaying
hobby personality: adventurous • animal-loving • artistic • crafty • dexterous • epicurean • extroverted • history-loving • independent • meditative • meticulous • musical • nature-loving • nurturing • outdoorsy • patient • social • sporty • technical

get a hobby!74 75
what you’ll need
• Cookingoil(aneutral-flavoredoilwithahighsmokingpoint,likecanolaorpeanut)
• Deep-fryerorothervesseltoheattheoilin
• Cookingthermometer
• Tongs,longslottedspoon,orspatula
deep-fryingthere’s good reason for that deeply satisfied feeling you get after eating French fries or fried chicken. the taste sates an innate craving—that’s why it’s called “comfort food.” but not all fried foods are created equal, and they’re not all necessarily unhealthful. Frying at the proper temperature makes foods not just delectable, but also guilt-free.
overviewDoughnuts, french fries, fried chicken, fish and chips, fried calamari, and tempura all fall under the broad and sinfully delicious category of deep-fried foods. The technique calls for immersing food in hot oil, a quick process that swiftly fries the foods. Contrary to what we associate with deep-fried foods, slippery fingers shouldn’t necessarily result from eating them. Because the moisture in the food actually repels the oil, only a small amount of it should remain, confined to the exterior layer of the food. Often, though, as at most fast-food restaurants, the frying temperature is not high enough and the food stays in the oil too long, resulting in the dreaded post-grease gloom. For authentic deep-frying without the oily residue, foods should be fried between 345 and 375°F (174 and 190°C) or higher, depending on the type of the food. Nearly any deep-fried food develops a crisp, golden exterior. But breading it, or dipping it in batter—milk, flour, eggs, and crumbs—creates another kind of crispiness, which makes for a flaky coating around a soft, warm interior.
history As a cooking technique, deep-frying has a long history in a multitude of cultures. Recipes from Apicius, an epicure during the Roman Empire, mentions various frit-ters, deep-fried cakes made with fruit, vegetables, or fish. Although there’s good reason to assume that many people thought of the idea of deep-frying blobs of bread dough, the Dutch are generally given credit for gifting civilization with the first doughnuts, called olykoeks, which, incidentally, did not yet have holes. Images of dropping food into boiling oil have been found in early Chinese art. In Japan, the tempura method was introduced by missionaries from Spain and Portugal, who taught the locals the wonders of deep-frying battered foods in the late 1500s. The Japanese perfected the tempura we now know in the 18th cen-tury. Deep-fried chicken, typical fare of the American South, actually came from Scotland. Fish and chips has been typical British takeout food since the first chip shop opened in London in 1860. The idea of deep-frying fish was apparently car-ried to the U.K. by Portuguese Jews, who immigrated to England in the 1500s.
getting startedIf you have a deep-fryer, follow the manufacturer’s instructions for using it. To deep-fry on the stovetop, pour in as much oil as it takes to cover your ingredients completely. Turn up the heat on your stove and use a cooking thermometer to gauge when your oil gets to about 365°F (185°C). If it gets past 400°F (204°C), the oil will burn. Place ingredients carefully into the oil using tongs, a long slotted spoon, or a spatula (you don’t want to get splashed). Battered foods will turn a golden brown. Take out one of your cooked pieces carefully and slice it open to see if it’s cooked inside. If it’s still crunchy or raw, lower the temperature to about 325°F (163°C), and start again. As each piece finishes frying, take it out and place it on paper towels, paper bags, or cooling racks to drain. Extremely high temperatures are employed in deep-frying, so make sure you have a fire extinguisher designed for grease fires. Never throw water on this type of fire (known as a class B fire); instead cut off the air supply by covering the pot or throwing baking soda on the flames.
“Fattastesgood,”saysriCKBroWnE,cookbookauthorandhostofthePBStelevisionshowBarbecue America,toexplainwhyhumansofallcreeds,cultures,andclassesaredrawntodeep-friedfoods.“Fataddsanice,sweetflavorandmois-ture to food.” Hence our insatiable craving for doughnuts,
friedchicken,andfrenchfries.Theword “deep”addedtofriediswhatgivesitabad rap, he says. “But if you think about it, everything cooked on the stove isfried:eggs,pancakes,vegetables.Everycultureintheworldfriesfood,fromtheEskimostothepeopleintheSahara.”
Browne,wholivesinvancouver,Washington,notesthatifdeep-fryingisdoneright—oilisheatedtotherighttemperatureandthefoodistakenoutintimeanddrained—the fat content is comparable to foods roasted in the oven. “The fatsearsthemeat,itdoesn’tgointothemeat,”Brownesaysofthetechnique.“Theextremelyhottemperaturesealsinallthejuices of the meat or fish you’re frying.”Deep-fryingbegsforexperimentation.Trydeep-fryingsteak,oreos,cornonthecob,evenfruit liketheEasternEuropeansdo,Brownesuggests.
profile: deeply satisfying
deep-frying
hobby personality: adventurous • animal-loving • artistic • crafty • dexterous • epicurean • extroverted • history-loving • independent • meditative • meticulous • musical • nature-loving • nurturing • outdoorsy • patient • social • sporty • technical
resourcesThe Frequent Fryers Cookbook: How to Deep-Fry Just about Anything That Walks, Crawls, Flies, or Vegetates, by Rick Browne (Regan Books, 2003).
www.allrecipes.com: Offers recipes—including deep-frying ones—from the general public.
www.crisco.com: The website for the best-known shortening brand has a number of deep-fried recipes.
www.epicurious.com: From deep-fried baby artichokes to zucchini, you’ll find recipes in their searchable database.
“Stay away from safflower oil and palm oil, which are high in triglyceride; use the right temperature; and drain the oil from the food.”
project: scottish deep-fried mars bar
First, don’t spend any time searching for Mars bars in Ameri-can stores—here they’re called Milky Way bars. (Incidentally, you can try deep-frying pretty much any type of nougat-filled, choco-late-covered bar.) Chill the candy bar by leaving it in the refrigerator for a while (not the freezer). Mix together 1 cup (125 g) all-purpose flour, ½ cup (65 g) cornstarch, and a pinch of baking soda in a bowl. Pour in a splash of milk and stir until you get a creamy texture, then set aside. Now start heating your frying oil in a pan. When the oil reaches the right temperature, remove the Mars bar from the refrigerator and dip it in the batter. Lower the chocolate bar into the oil using tongs and fry until the exterior turns golden brown. Bring it out, drain it briefly, and enjoy this scrumptious treat while it’s hot. For an over-the-top splurge, serve it à la mode, with vanilla ice cream.

get a hobby!76 77
what you’ll need
For this hobby, you need a lot of free time, an interest in a particular cultural institution or subject, and a natural inclination to absorb and communicate information. You’ll also need some “people skills.”
docentingiF you Find yourselF spending hour aFter leisurely hour at museums reading every last placard, wondering how you can get more information, and love explaining points of fact to friends, you should consider docenting. sure it doesn’t pay much (if at all), and you have to go through some rigorous training, but for docents, their job is more a calling than a hobby, a true point of pride.
overviewDocents provide instructional guided tours of museums, zoos, historic sites, parks, landmarks, and other public attractions. They are considered educators and are trained extensively in their specific field to answer questions and provide basic information about the institutions they represent. They undergo a training process following experienced docents and eventually work up to offering their own tours. They must attend seminars to keep up with the changes at the institution they represent. Some docents receive a small fee for their work, while others work on a volunteer basis.
history It’s hard to pinpoint exactly when docenting began. It is said in docenting circles that the first museum to institute such a program was the Museum of Fine Arts in Boston. It is also believed that the Rhode Island School of Design has had docents for about a century.
getting startedFind a local institution, like an art museum, historical site, library, or other institution in your area that is looking for volunteer docents. Get in touch with the person in charge and ask about docenting opportunities. Chances are, they are looking for volunteers.
docenting
BETSyTHoMaShasapenchantforlearning,atraitthathasledhertosomefascinatingexperiences.asahistorybuff,shelearned
about long-goneerasthatprovidecontext for thepresent.Whenobtaininghermaster’sdegreeinamericanhistoryattheuniversityofSouthernillinois,shewroteherthesisonthehistoryofthe19th-centuryhouseshelivedinandthemanygenerationswhohadlivedtherebefore.ShefirstbecameadocentatthehistoricDeaconJohngraveHouseinMadison,Connecticut,andeventuallyservedonitsboardofdirectors.Builtinthelate1600s,thisbeautifullypreservedstructurehousedsevengenerationsofthesamefamily—dressmak-ers, innkeepers, soldiers, and farmers—up until the early20th century. Meticulously kept records and accountingbooksdetailedthelongandtexturedlifelineofthefamilieswho lived in the house. Documents like receipts for goodsfromLondon,lettersfromsoldierswhostayedatthehomeduringtherevolutionaryWar,andevenwrittenchargesofkickingand“othertumultuousandoffensivebehavior”pro-vided colorful accounts of life in the coastal new England
townoverthepast400years.“ilovedteachingpeopleaboutthe house, and learned most of what i knew by followingotherdocentsontheirtours,”Thomassays.
once she got a taste of the docenting life, Thomas fol-lowed her interest in art and architecture to the ColoradoSprings Fine arts Center, where she now gives tours. Hertrainingtookfivemonthsandgaveheranextensiveknowl-
edgeaboutthemuseum’scollection.“Thebestpartisthatigettolearn,”shesays.“andeverytimewehostanewtravel-ingexhibiticontinuetolearnmore.”Thomasgivestoursonceaweekandsometimesservesasamentortonewdocents.itturnsoutthatmanyofthedocentsshe’smetsofarhaveworkedasteachersinthepast.aftersixyearsofdocenting,Thomassayssheplanstocontinueaslongassheenjoysit.
profile: porter to the past
resourcesThe Professional Guide: Dynamics of Tour Guiding, by Kathleen Lingle Pond (Wiley, 1992).
www.docents.net: The National Docent Symposium Council’s website offers information about sponsored activities and recruitment opportunities, plus a handbook on docenting.
www.idealist.org: Find docenting and other volunteer opportunities.
www.volunteermatch.org: Volunteer Match: listings of hundreds of volunteer opportunities.
hobby personality: adventurous • animal-loving • artistic • crafty • dexterous • epicurean • extroverted • history-loving • independent • meditative • meticulous • musical • nature-loving • nurturing • outdoorsy • patient • social • sporty • technical project: offer a tour of your own neighborhood
To get a feel for this kind of work, start by offering a tour of your own neighborhood. Research all the pertinent facts about the history of the region: when your house and the houses around you were built, who the architects were, the demographics of the people who first moved to the area, how it evolved over the years both in cultural and in geographical ways, and soon. Find out if any fires, floods, or other natural occurrences changed the way the streets looked. Also look into what types of businesses were first established in that region, how long they lasted, and what accounted for their closure. Go to the library and look for old photos of the neigh-borhood or business plans. Many cities keep these records on file and might allow you to photocopy them.
Talk to old-timers in the area to add colorful anecdotes to your tour. They’ve probably witnessed many of the changes you’re reading about and can give you firsthand accounts of how they were affected. When you’ve accumulated all the information, put together a comprehensive time line of the neighborhood. Plan a walking tour with stops at the signifi-cant sites you’ve learned about. Try to make the time line correspond to the stops in the tour, to give context to the information. Keep the tour to between 30 and 45 minutes. Practice on your family and see if it holds their interest. When you’ve got the green light, put together a flyer and pass it around to your neighbors. Schedule a time and date for your premiere tour and watch them line up!
“Talk to someone at a history museum, an art museum, or even a zoo and inquire about their docent training and when it starts.”

get a hobby!78 79
dog breedingimagine holding a neWborn puppy, playing with it, and letting it slumber away contentedly in your arms. helping to bring that adorable creature into the world is the heart-warming part of dog breeding. but this hobby also involves several weeks of sleepless nights (puppies cry just like human babies), veterinarian bills, and the responsibility of finding good homes for the little tykes. Why go through all the trouble? have you held a newborn pup lately?
overviewDog breeding is the propagation of a specific breed of dog by mating a bitch and a stud of the same breed. After the mating is complete, gestation takes between 61 and 63 days (about nine weeks, as compared to 38 weeks for humans). Most purebred (not mixed with other breeds) puppies are recorded on a breed registry that’s kept by a kennel or breeder. Like children, newborn puppies require a tremendous amount of attention and care, and helping bitches through the birthing process can be an intense experience. Don’t underestimate the effort and expertise involved: Breeding dogs is an ambitious undertaking.
history There’s evidence that ancient dog breeds originated all over the world, from Sibe-ria to Africa. Of the 14 ancient breeds that have been officially identified, one of the oldest is the basenji, images of which have been found on stone slabs in the tombs of ancient Egyptian pharaohs. People have been reproducing breeds of dog throughout the ages for different purposes. In the scorching heat, desert dwellers needed their dogs to withstand days of travel without food and water, while snowbound owners in northern countries needed heavy-coated working dogs that could run through snow and swim in icy waters. Dogs have been instru-mental for hunting, guiding, and, of course, keeping their owners company. As a pastime, dog breeding became popular in the mid-1800s, when wealthy Europe-ans busied themselves by organizing dog shows, the first of which was held in England in 1859.
getting startedA breeder must have thorough knowledge of the breed of choice. Compare your purebred to the standard and see if it’s got any major “faults,” such as skeletal problems, or any other health issues that would impede breeding. If you find none, then it’s time to find a mate—either a bitch of breeding age or a stud.
When it’s time for the birth, you’ll need to find a warm and quiet spot— preferably a box you’ve constructed for this purpose, known as the whelping box, where the bitch can deliver her puppies. When they’re born, the puppies will need to stay in the whelping box, and you’ll probably need to stay nearby day and night for the first two weeks to ensure that the mother doesn’t crush the pups and that the puppies are thriving. You’ll measure their weight on the food scale twice a day, and take their temperatures once in the morning and once at night. You’ll cut their toenails and clean their ears, supply the mom with something to eat three times a day, and basically make sure they have everything they need. As with newborn babies, puppies need to be fed every couple of hours. Don’t count on getting much sleep, as you may need to help them find the mother’s teats. If the puppies don’t appear to be gaining weight, you’ll have to supplement with formula. once the pup-pies are weaned (in about eight weeks), decide whether you’ll be selling or keep-ing them. If some will stay, it’s time to start doing your research on dog training.
resourcesBreeding Better Dogs, by Carmelo L. Battaglia (Battaglia Enterprises, 1990).
The Complete Book of Dog Breeding, by Dan Rice (Barron’s Educational, 1996).
www.akc.org: American Kennel Club’s official site with links to breeders, differ-ent kinds of breeds, and clubs.
www.denmothers.net: The website for a documentary by the same name about Rhodesian Ridgebacks “and the humans who love them,” directed by filmmaker Keegan Walden.
www.learntobreed.com: Breeder Jane Anderson’s site for the beginning breeder, including a checklist of criteria, books to read, and advice on screening your dog for hip dysplasia.
project: instant whelping box
Building a whelping box from scratch takes time, energy, and power tools. If you’d prefer to skip that step altogether, do what some breeders do and opt for using an inflatable pool. It can be cleaned much more easily than wood, and if lined with a soft blanket, mom and puppies will be kept warm and snug in the confines of their new circular home. An inflatable pool is roomy enough for the lot, but cozy enough to make them feel safe and comfortable.
dog breeding
hobby personality: adventurous • animal-loving • artistic • crafty • dexterous • epicurean • extroverted • history-loving • independent • meditative • meticulous • musical • nature-loving • nurturing • outdoorsy • patient • social • sporty • technical
CynTHiaKELLy,whobreedsrhodesianridgebacks,spendshoursaday watching the puppies she’s helped breed and birth. “They arewonderful,”shesays.“i lovetowatchthemasthey learntowalk,toplay,astheyeatandsleep,andastheybegintolearnabouttheworldandtheirplaceinit.”
That’sthefunpart.ButKellyisalsopragmaticenoughtocautionpotentialbreedersaboutthechallengingaspectsofthishobby.“ifapuppybecomesveryill,i’mfightingwiththemothertokeepthatpuppyalive,”shesays.“ifapupdoesn’tmakeitforsomeotherrea-
son,youfeelthelossyourselfandsharetheintensegriefthemotherfeels.”Breed-ersmustalsocontendwiththeexpensesincurred,thedoctors’visits,theshots,andfindingtherighthomesforthenewpups.“itishard,hard,hardwork!”
Butforher,it’sobviouslyalaboroflove.“Theyaresocute,”shesaysaboutthepuppies.“youhavetocuddleeachpuppyseveraltimesaday,handleandtalktothelittletykes.Mygoalisthatnopuppyleavesmyhomewithoutathousandkissestoremembermeby.”
profile: puppy love
“There are many puppies that families think they want until they grow out of the cute stage and are
abandoned. These dogs need rescuing and that can be every bit as gratifying as breeding dogs.”
what you’ll need
• Femaledog,orbitch
• Maledog,orstud
• Quietspotforthefemaletowhelp(orgivebirthto)thepuppieswheretheycanbeswaddledinwarmth;alsoknownasa“whelpingbox”
• Towelsfordeliveringanddryingthepuppies
• Stringordentalflosstocuttheumbilicalcordsandiodinetocleanthem
• Syringetoabsorbexcessfluidsfromthepuppies’mouthsandnoses
• Cleancardboardboxestohousethepuppies
• Thermometer
• Foodscale
• alladditionalsupplies(food,water,groomingtools)necessaryforthehealthandwell-beingofyourdogs