care and maintenance of a peripheral inserted central
TRANSCRIPT

Issue Date: 17th February 2020 Page 1 of 31 Filename: GNUAPIPL1 Issue No: 2.5
Author: Carol McCormick Authorised by: Integrated Care Directorate Meeting Copy No:
PATIENT CARE PLAN FOR CARE OF PERIPHERALLY INSERTED CENTRAL CATHETER (PICC)
These guidelines are part of the Clatterbridge Care and Maintenance of CVADs in hospital and at home for adults
The Clinical Interventions Team at The Clatterbridge Cancer Centre 0151 556-5737. Mon –Fri 8-6 or alternatively the CCC Hotline on 0800 169 5555 which is available 24 hours a day 7 days a week.
These general guidelines have been provided to assist all health care professionals or other users when handling Clatterbridge PICC lines in any setting.
When relatives have been trained and supervised please confirm they are ready to continue ongoing care:
Date:…………………… Trained by:……………………………………………………………………………………..

Issue Date: 17th February 2020 Page 2 of 31 Filename: GNUAPIPL1 Issue No: 2.5
Author: Carol McCormick Authorised by: Integrated Care Directorate Meeting Copy No:
TROUBLE-SHOOTING GUIDE Type of device Risks Actions Variations / Comments SIGN
Peripherally Inserted Central Catheter (PICC)
Infection due to loss of skin integrity
Contact dermatitis
Line infection potentially resulting in systemic bacteraemia
Site clean and protect with sterile dressing as per CCC guidelines.
Minimum of 8 hourly inspection of exit site for signs of inflammation or infection. Do not remove dressing unless
Take swab for culture and sensitivity if indicated
Check weekly or at each visit if in community setting
Use Biopatch if necessary at exit site
For contact dermatitis see dressing sequencing guide
Chlorhexidine can be the allergen, replace with Povidone and AG patches in place of Biopatch
Visual Infusion Phlebitis scored (VIIAD) See chart
Observe patient for signs of line infection (pyrexia/raised WCC)
If clinically unstable and patient has had rigors, first take blood cultures peripherally and then from line (each lumen). Administer antibiotic therapy as prescribed using the line in an attempt to conserve. Assess medical condition prior to removal of line for continued need for reliable venous access
Send line tip for culture and sensitivity following removal if line cannot be salvaged
Ensure administration lines are used according to local policy.
Label infusion lines with date for renewal.
Change add-on devices at same time as administration sets or as soon as integrity is compromised. Use needle free systems avoiding 3 way taps
Air embolus Use Needle-free systems
Ensure air dispelled from medication/ flushes/infusates prior to administration.
Close the clamp when accessing the line or

Issue Date: 17th February 2020 Page 3 of 31 Filename: GNUAPIPL1 Issue No: 2.5
Author: Carol McCormick Authorised by: Integrated Care Directorate Meeting Copy No:
removing or change infusion bags Thrombus For suspected or confirmed thrombus commence
treatment dose LMWH as soon as possible
Arrange a Doppler to confirm or exclude thrombus
PICC line should be used as required to conserve line and to provide reliable access particularly for those patients with restricted access
When a line is no longer required or has failed when a thrombus is diagnosed, treatment dose LMWH should be administered for between 3-5 days before removing the line to limit the risks of embolisation
Occlusion of lumen. Maintain patency via 0.9% Sodium Chloride for injection flushes using positive pressure as per CCC guidelines, Pre & post drug/ infusion administration.
Check compatibility of drugs/infusates to eliminate precipitation.
Try to flush line using a to-fro method to re- establish patency
Attach a half filled 10ml syringe to the line then pull back on syringe and let go several times (Pop technique) to help re-establish patency
Bleeding from site / line itself.
Observe for signs of new bleeding from site.
Apply pressure above dressing
Ensure add-on devices/taps securely fastened.
Ensure clotting studies are in acceptable range prior to removal of line.
Palpitations
For patients who experience palpitations soon after the insertion of a line, particularly when they lay on their left side. Pull PICC back by 1-2cm only to resolve but to maintain the correct positon
Line migration / displacement
Check notes to ensure insertion staff have documented line is in correct place and safe to use
Check the Securacath device is closed when

Issue Date: 17th February 2020 Page 4 of 31 Filename: GNUAPIPL1 Issue No: 2.5
Author: Carol McCormick Authorised by: Integrated Care Directorate Meeting Copy No:
redressing line
Check each time line accessed for signs of line migration
Anchor lines during dressing changes to avoid accidental displacement or stretching using fixation devices as in CCC guidelines.
If in doubt do not use line until instructed to do so by CIT staff and ensure patient is aware of problems
Order chest x-ray to check tip position.
Line in situ when no longer required.
Ensure prompt removal when line no longer required.

Issue Date: 17th February 2020 Page 5 of 31 Filename: GNUAPIPL1 Issue No: 2.5
Author: Carol McCormick Authorised by: Integrated Care Directorate Meeting Copy No:
Visual Infusion Phlebitis (VIP) Scoring Tool for Intravenous Access Device (VIIAD)
0
1
2
3
4
5
Exit site appears healthy
One of the following is evident: Slight pain near exit site Slight redness near exit site
Two of the following are evident: Pain at exit site Swelling Erythema
All of the following are evident: Pain along the IV catheter Erythema
Swelling All of the following are evident and extensive:
Pain along the path of the IV catheter Erythema Swelling Palpable venous cord
All of the following are evident and extensive:
Pain along the path of the IV catheter Erythema Swelling Palpable venous cord Pyrexia
No sign of phlebitis
Observe PICC exit site
Possible first signs of phlebitis Continue to observe IV catheter
IMPORTANT Seek advice VIP score 3-5
Mon-Fri between 8am and 6pm ring the Clinical Interventions Team on 0151 556-5737 CCC Hotline on 0800 169 5555

Issue Date: 17th February 2020 Page 6 of 31 Filename: GNUAPIPL1 Issue No: 2.5
Author: Carol McCormick Authorised by: Integrated Care Directorate Meeting Copy No:
Level
5
Mepitel film +antihistamines + Sorbaderm cream/film + Biopatch/Zonis until settled then red
film alone. If unavailable may need to try alternatives from list above
Note:
Level 1
Level 2 Level 3
• Clear Film I.V - For all lines with or without Securacath
• If skin becomes red and itchy add in oral antihistamines, move to Level 2:
• Tegaderm I.V. Advanced + antihistamines – try IV Clear Pro (port dressing) • If itch/redness continue add in Sorbaderm barrier film, move to Level 3:
• IV 3000 + antihistamines + Sorbaderm barrier film
• If no improvement add in Sorbaderm cream, Biopatch/Zonis to prevent line infection, move to Level 4:
Level 4
• Opsite visible +antihistamines + Sorbaderm film & cream + Biopatch/Zonis
• If still no improvement move to Level 5
Follow this dressings guide for patients who develop contact dermatitis from Level 1-5 and record actions within the documents. The distal portion of the line may be secured with simple Tegaderm dressing if using the Clear Film I.V. to allow for easy removal when conserving the base dressing.
Other suitable alternatives include Allyvn, Sorbaview, Mepore and Duoderm
Substitute Chlorhexidine for Povidone if sensitive and replace Biopatch with AG patch

Issue Date: 17th February 2020 Page 7 of 31 Filename: GNUAPIPL1 Issue No: 2.5
Author: Carol McCormick Authorised by: Integrated Care Directorate Meeting Copy No:
The Principles of Asepsis
Asepsis is defined as the absence of pathogenic (harmful) organisms.
The principles of asepsis/aseptic technique are:
Reducing activity in the immediate vicinity of the area in which the procedure is to be performed Using an aseptic non touch technique (ANTT) to protect key parts and key sites
Keeping the exposure of a susceptible site to a minimum
Checking all sterile packs to be used for evidence of damage or moisture
penetration
Ensuring all fluids and materials to be used are in date
Not re-using single use items
Ensuring contaminated/non-sterile items are not placed in the aseptic field
Ensuring appropriate hand decontamination prior to the procedure and at other necessary time throughout the procedure
Protecting uniform/clothing with a disposable apron
Using sterile gloves when required
Knowing the difference and when to use standard ANTT or surgical ANTT
Risk assess each procedure prior to commencement for either standard or surgical ANTT.

Issue Date: 17th February 2020 Page 8 of 31 Filename: GNUAPIPL1 Issue No: 2.5
Author: Carol McCormick Authorised by: Integrated Care Directorate Meeting Copy No:
Steps to performing an aseptic dressing change – Surgical ANTT
Indicated for complex procedures with many key parts and key sites
Staff should be “bare below the elbow”
Maintain an aseptic field throughout the procedure
Decontaminate hands by washing with liquid soap and warm water or by applying alcohol hand rub,
using the recommended technique.
Don disposable apron and wearing gloves
Decontaminate the trolley (or working surface to be used if trolley not available, e.g., in the patients
home) with detergent and warm water or detergent wipes and dry.
Assemble sterile procedure packs, e.g., dressing packs and equipment, check all items are in date and
packaging is intact.
Explain and discuss the procedure with the patient.
Ensure patient is positioned both comfortably and so the area to be exposed is accessible without
undue exposure.
Open sterile procedure pack outer packaging, sliding the contents onto the top shelf of the trolley (or
working surface).
Add any extra items without compromising the prepared aseptic field, clean items if needed to be placed
close by but not compromising the aseptic field.
Lift the plastic waste disposal bag from the aseptic field carefully by its open end and holding one edge of
the opening end, place the other hand into bag, hence covering the hand with an aseptic 'glove'. Using
the aseptic 'glove', arrange items on the aseptic field.
Attach the bag to the trolley, below the top shelf or on a nearby surface if in a patients home.
Decontaminate hands with alcohol hand rub,

Issue Date: 17th February 2020 Page 9 of 31 Filename: GNUAPIPL1 Issue No: 2.5
Author: Carol McCormick Authorised by: Integrated Care Directorate Meeting Copy No:
Don non sterile gloves, remove old dressing and dispose of in disposal plastic bag. Decontaminate hands
with alcohol hand rub
Put on sterile gloves ensuring hands do not contaminate outer surface of the glove.
Perform the procedure as directed, using the correct dressings to suit the patients individual needs
Ensure equipment is discarded if it becomes contaminated.
Dispose of all used items, including soiled dressings, into the plastic waste disposal bag and seal.
Discard disposal waste bag into clinical waste bag.
Remove gloves and apron and dispose of in clinical waste
Decontaminate hands with alcohol hand rub; document all actions taken within the patients hand held
records or electronically as required.
Standard ANTT Staff should be “bare below the elbow”
Maintain a clean field throughout the procedure - protect key parts and key sites
Decontaminate hands by washing with liquid soap and warm water or by applying alcohol handrub,
using the recommended technique throughout the procedure.
Don disposable apron and wear non sterile gloves, single use items should not be reused
Mirrored precautions using non sterile gloves , a prepared clean field used to handle equipment by
protecting key parts and key sites by holding non critical areas
Simple procedures with few key sites and key parts
Care and Maintenance of a Peripheral Inserted Central Catheter (PICC).

Issue Date: 17th February 2020 Page 10 of 31 Filename: GNUAPIPL1 Issue No: 2.5
Author: Carol McCormick Authorised by: Integrated Care Directorate Meeting Copy No:
EXIT DRESSING CHANGE (Weekly) Band 2 and above support workers to use pre filled saline syringes only – Surgical ANTT Weekly dressing change will incorporate weekly flush and possibly blood sampling
Action Rationale
Equipment required Dressing Pack containing sterile towel, gauze and Gloves Chlorhexidine Gluconate 2% in 70% Isopropyl alcohol impregnated applicator Chlorhexidine Gluconate 2% in 70% Isopropyl alcohol impregnated wipes x2 Semi-Permeable transparent IV dressing Alcohol hand rub or gel Skin fixation device (e.g. grip-lok) if a Securacath device has not be used Small Melolite or non adhesive dressing Plastic apron Needleless connector Biopatch if indicated
Care of Exit site Dressing changes should be performed on a weekly basis or when dressing is dirty, wet
or loose Maintain ANTT at all times. Inspect the catheter exit site for signs of skin discolouration or signs of infection. Please
contact the hospital team who placed the catheter or the hotline service for advice if necessary. Refer to trouble-shooting guide.
To prevent infection Epic 3: 2017, To maintain the integrity of the exit site Exit site dressings are important in preventing trauma and the extrinsic contamination of the site of entry (Jones 2004).
Explain the procedure to the patient. Ensure that valid consent is gained.
Ensure working area is as clean as possible.
Ensure all equipment is available before commencing the procedure.
To prevent/reduce patient anxiety Maintain safety To minimise the risk of infection and catheter contamination.
Open pack, and prepare suitable aseptic field
Open all required equipment including suitable dressings to suit the patients individual needs – don non sterile gloves
Loosen the dressings taking care not to cause migration of the line by working
To allow for a sterile environment for accessing intravenous device.

Issue Date: 17th February 2020 Page 11 of 31 Filename: GNUAPIPL1 Issue No: 2.5
Author: Carol McCormick Authorised by: Integrated Care Directorate Meeting Copy No:
from the distal section of the line “ the dangly end” SCISSORS SHOULD NEVER BE USED. Appeal dressing remover may be useful if the
patient is sensitive
Be aware that the fixation device/strip may also come off with the dressing
When redressing a PICC without a Securacath keep the Grip-lok in place while the exit site has been cleaned and a clean securing tape has been applied close to the exit site to
Maintain the positon of the line and reduce migration, ALWAYS DOCUMENT THE EXIT LENGTH IN THE HAND HELD RECORDS.
Chlorhexidine based solutions are recommended (in alcohol) dependent on the availability and catheter manufacturers. Recommendations (DOH 2001). To prevent accidental removal of the catheter and friction or trauma to the skin surface

Issue Date: 17th February 2020 Page 12 of 31 Filename: GNUAPIPL1 Issue No: 2.5
Author: Carol McCormick Authorised by: Integrated Care Directorate Meeting Copy No:
Remove the dressing using a non touch technique. Removed gloves Decontaminate hands Put on sterile gloves
Place sterile towel as near as possible to the PICC catheter. Clean the catheter exit site with Chlorhexidine impregnated applicator, for lines with a
Securacath lift the PICC up to allow for cleaning all around the exit site. The solution should be applied with gentle friction in a criss cross shape around the exit
site. Clean the remainder of the line to the connector with a chlorhexidine wipes. Allow to dry. Fold the non-adhesive dressing into1/ 2 so that it sits neatly beneath the Securacath
device for comfort; place one of the securing tapes from the IV dressing across the wings of the line on the top of the non-adhesive dressing to prevent pressure, position line on the outer aspect of the arm towards the shoulder, check that the Securacath is not twisted or pulled to an angle which will cause discomfort, check with the patient that it is comfortable.
Apply new PICC dressing over the exit site ensuring the exit site is covered but visible and the distal portion of the line is positioned through the ported section.
Remove the needleless connector then scrub the hub of the line with a chlorhexidine wipe using some friction several times for at least15 seconds, allowing to dry. Attach a new need free connector being careful not to over tighten
Remove the dressing towel Remove gloves. Clear away equipment. Dispose of waste as per organisational policy. Wash Hands Documents care in patient’s hand held records.
Alcoholic Chlorhexidine combines the benefits of rapid action and excellent residual activity (DOH 2001)
To prevent the Securacath device from granulating into the tissues beneath the PICC
Semi-permeable transparent IV dressings are well tolerated by patients (Campbell et al 1999, Treston-Aurand et al 1997, Wille 1993) and are easy to apply and remove (Wille 1997).
To reduce friction from the body or movement at the Ante-cubital fossa
Needless connectors need to be changed every 7 days according to the license of the product

Issue Date: 17th February 2020 Page 13 of 31 Filename: GNUAPIPL1 Issue No: 2.5
Author: Carol McCormick Authorised by: Integrated Care Directorate Meeting Copy No:
Peripherally Inserted Central Catheter – 0.9% Sodium Chloride for injection for weekly maintenance Flush. Note: Non registered nurses can only flush IV devices using a pre filled saline syringe. Surgical ANTT if part of weekly redressing routine
Action Rationale
Equipment Required Dressing Pack containing sterile towel, gauze and gloves Chlorhexidine Gluconate 2% in 70% Isopropyl alcohol impregnated applicator/wipe 10ml pre-filled saline syringe Suitable transparent semi-permeable IV dressing Alcohol hand rub Plastic apron Needle free I/V access connector change weekly
May require disinfectant cap if an inpatient
10ml syringes should always be used, smaller syringe sizes may damage the catheter (Hadaway 1998)
Before the procedure begins make sure that your hands are washed and dried thoroughly and that they continue to be decontaminated during the procedure. A plastic apron should be worn.
Explain the procedure to the patient. Ensure that valid consent is gained.
Maintain ANTT at all times.
Inspect the catheter exit site for signs of skin discolouration or signs of infection. Please contact the hospital team who placed the catheter or the hotline service for advice if necessary. Refer to trouble-shooting guide.
Ensure working area is as clean as possible.
Ensure all equipment is gathered before commencing the procedure
Open pack allowing inner pack to fall onto clean working area.
Create an aseptic field.
Ensure easy access to the needle free system. Remove if necessary
Maintain asepsis. Reduce risk of infection. To avoid contamination and to reduce risk of infection
Reduce anxiety and improve patient compliance

Issue Date: 17th February 2020 Page 14 of 31 Filename: GNUAPIPL1 Issue No: 2.5
Author: Carol McCormick Authorised by: Integrated Care Directorate Meeting Copy No:
Decontaminate hands.
Put on sterile gloves.
Place sterile towel as near as possible to the catheter.
Scrub the hub of the needle free system with 2%Chlorhexidine impregnated wipe, rubbing from the top of the needle free connector to the sides. Do this three times using different parts of the wipe, over a period of at least 15 seconds. Allow to dry. If needle free connector is due to be changed, remove the old connector wipe the end of the line using a 2%Chlorhexidine impregnated wipe several times and allow to dry, then re- apply a sterile needle free connector
Attach pre filled saline syringe, pull back to blush the saline with blood then inject the flush using a push/ pause action, clamping as the last ml of solution is instilled into the catheter. Remove the syringe and discard.
Ensure that the catheter is secured with the distal portion of the line being covered with one piece of gauze for comfort over the lamp and secure with a transparent IV dressing.
Remove dressing towel and discard. Remove gloves.
Wash hands
Clear away equipment disposing of waste as per organisational policy.
Document care in patient’s records.
Chlorhexidine based solutions are recommended (in alcohol) as per policy (DOH 2001).
There is no requirement to routinely withdraw blood and discard it prior to flushing (except prior to blood sampling although the first sample can be used for blood cultures (RCN 2010).
There is an increased risk of infection and occlusion when withdrawing blood via a central venous catheter (RCN 2010), therefore for routine flushing of a line withdrawal and waste of blood is not required, to confirm placement of line pullback only to colour the saline
The pulsated flush creates turbulence within the catheter lumen, removing debris from the internal catheter wall (Goodwin & Carlson 1993, Todd 1998).
Positive pressure within the lumen of the catheter should be maintained to prevent reflux of blood (INS 2000).

Issue Date: 17th February 2020 Page 15 of 31 Filename: GNUAPIPL1 Issue No: 2.5
Author: Carol McCormick Authorised by: Integrated Care Directorate Meeting Copy No:
Peripherally Inserted Central Catheter – Blood Sampling may be part of the weekly maintenance as Surgical ANTT
Action Rationale
Equipment Required Dressing Pack containing sterile towel, gauze and gloves 10ml syringes x 2 Chlorhexidine Gluconate 2% in 70% Isopropyl alcohol impregnated applicator/wipe 10ml 0.9% Sodium Chloride for injection Alcohol hand rub Needle free I/V access connector Disinfectant cap may be required
Before the procedure begins make sure that your hands are washed and dried thoroughly and that they continue to be decontaminated during the procedure. A plastic apron should be worn.
Maintain ANTT at all times.
Explain the procedure to the patient. Ensure that valid consent is gained.
Inspect the catheter exit site for signs of skin discolouration or signs of infection, please contact the hospital team who placed the catheter for advice or ring the hotline for advice. Refer to trouble-shooting guide.
Ensure working area is as clean as possible.
Ensure all equipment is gathered before commencing the procedure.
Open equipment allowing inner pack to fall onto clean working area.
Create an aseptic field.
Ensure easy access to the needle free system.
Decontaminate hands.
Put on sterile gloves.
Place sterile towel as near as possible to the catheter.
Scrub the hub of the needle free system with 2%Chlorhexidine impregnated wipe,
Maintain asepsis. Reduce risk of infection. To avoid contamination and to reduce risk of infection
Reduce anxiety and improve patient compliance
Chlorhexidine based solutions are recommended (in alcohol) as per policy (DOH 2001)

Issue Date: 17th February 2020 Page 16 of 31 Filename: GNUAPIPL1 Issue No: 2.5
Author: Carol McCormick Authorised by: Integrated Care Directorate Meeting Copy No:
rubbing from the top of the needle free connector to the sides. Do this three times using different parts of the wipe, over a period of at least15 seconds. Allow to dry
Attach empty 10ml syringe into needle free system and aspirate at least 5-8mls of blood from the catheter. If unable to do so attach the syringe containing the saline solution to the needle free system gently flush with 1-2mls then aspirate blood from catheter. Discard blood aspirated as per policy - Note if taking blood samples when PN has been administered, following an IV infusion or for an INR sample at least 20mls of blood should be taken and dis-guarded before taking the sample.
If taking blood for cultures DO NOT WASTE the first drawn blood.
Attach an empty 10ml syringe and withdraw amount of blood required for analysis and immediately transfer into the relevant blood tubes using a transfer unit, while maintaining ANTT.
Attach pre filled saline syringe then flush using a push/ pause action, clamping as the last ml of solution is instilled into the catheter.
Remove the syringe and discard.
Ensure that the catheter is secure and comfortable.
Remove dressing towel and discard. Remove gloves.
Wash hands
Clear away equipment disposing of waste as per organisational policy.
Document care in patient’s records.
Label sample bottles then transfer to the lab
The pulsated flush creates turbulence within the catheter lumen, removing debris from the internal catheter wall (Goodwin & Carlson 1993, Todd 1998).
Positive pressure within the lumen of the catheter should be maintained to prevent reflux of blood (INS 2000).
To prevent the sample result being inaccurate due to saline or other solutions from the line

Issue Date: 17th February 2020 Page 17 of 31 Filename: GNUAPIPL1 Issue No: 2.5
Author: Carol McCormick Authorised by: Integrated Care Directorate Meeting Copy No:
Peripherally Inserted Central Catheter – Administration of antibiotics/additives/infusion – standard ANTT Administer drugs or IV therapy as prescribed using correct diluent and rate of infusion. Always use at least a 10ml syringe, never use force to flush the catheter.
Action
Rationale
Equipment Required Gauze and gloves Chlorhexidine Gluconate 2% in 70% Isopropyl alcohol or Chlorhexidine impregnated wipe 10ml syringes x 3 2 x 10ml pre filled saline syringes Alcohol hand rub Plastic apron Antibiotics/additives/infusion as prescribed
Before the procedure begins make sure that your hands are washed and dried thoroughly and that they continue to be decontaminated during the procedure. A plastic apron should be worn.
Maintain ANTT at all times.
Explain the procedure to the patient. Ensure that valid consent is gained.
Inspect the catheter exit site for signs of skin discolouration or signs of infection, please contact the hospital team or the Hotline service for advice. Refer to trouble-shooting guide.
Ensure working area is as clean as possible.
Ensure all equipment is gathered before commencing the procedure
Open equipment allowing inner pack to fall onto clean working area.
Create a sterile field.
Ensure easy access to the needle free system.
Decontaminate hands.
Put on sterile gloves if necessary.
To minimise risks of infection and contamination.
Ensures patient compliance and reduces anxiety
Maintain asepsis.

Issue Date: 17th February 2020 Page 18 of 31 Filename: GNUAPIPL1 Issue No: 2.5
Author: Carol McCormick Authorised by: Integrated Care Directorate Meeting Copy No:
Place the filled syringe within clean field protecting key parts. Scrub the hub of the needle free system with Chlorhexidine impregnated wipe, rubbing
from the top of the needle free connector to the sides. Do this three times using different parts of the wipe, over at least a 15 second period. Allow to dry.
Attach pre filled saline syringe, aspirate enough blood to blush the saline solution then inject using a push pause action camping as the last ml of the solution is instilled into the catheter. Remove the syringe and discard.
If unable to aspirate blood from the line refer to the algorithm for persistent withdrawal occlusion and if pain free or blood return is yielded continue to use the line.
Administer IV antibiotics/additives/infusion as prescribed.
Flush catheter again with pre filled saline syringe as previously. Ensure the catheter is secure and comfortable and the distal portion of the line including the clamp is wrapped in sterile gauze if an inpatient. Remove dressing towel and discard. Remove gloves. Wash hands
Clear away equipment used. Dispose of contaminated waste as per policy.
Document care in patient’s records.
Chlorhexidine based solutions are recommended (in alcohol) dependent on the availability and catheter manufacturers recommendations (DOH 2001).
To check catheter patency and to remove residual solution from catheter. The RCN Standards for infusion Therapy state, “the nurse should aspirate the catheter and check for blood return to confirm patency prior to the administration of medications and/or solutions (INS 2000). On no account should a vesicant drug or vesicant infusion be administered through a vascular access device where difficulty is experienced in withdrawing blood or flushing the line (Masoorli 2003).
The pulsated flush creates turbulence within the catheter lumen, removing debris from the internal catheter wall (Goodwin & Carlson 1993, Todd 1998). Positive pressure within the lumen of the catheter should be maintained to prevent reflux of blood (INS 2000).

Issue Date: 17th February 2020 Page 19 of 31 Filename: GNUAPIPL1 Issue No: 2.5
Author: Carol McCormick Authorised by: Integrated Care Directorate Meeting Copy No:
Disconnection of Ambulatory Chemotherapy (Infusor/ Infuser) from Central Venous Access Device – standard ANTT risk assess first by use Surgical ANTT
Action
Rationale
Equipment Required Dressing Pack containing sterile towel, gauze and gloves if required Chlorhexidine Gluconate 2% in 70% Isopropyl alcohol impregnated wipe
10ml pre filled saline syringe Alcohol hand rub, Needle-free system Plastic apron Plastic bag for empty cytotoxic chemotherapy infuser Luer lock stopper for Infuser
Explain procedure to the patient. Ensure that valid consent is gained.
Before the procedure begins make sure that your hands are washed and dried thoroughly and that they continue to be decontaminated during the procedure. A plastic apron should be worn.
Maintain ANTT at all times Ensure that the working area is as clean as possible. Ensure that all equipment is gathered before commencing the procedure Open equipment allowing the inner pack to fall onto the clean working area. Create an aseptic field Decontaminate hands Put on sterile gloves. If necessary protect key parts Place sterile towel as near as possible to the catheter Close catheter clamp. Using a 2% Chlorhexidine wipe to clean the catheter end, allow to
dry. Hold the catheter with gauze; disconnect Infuser from the access device, while
holding a sterile piece of gauze attach the luer lock stopper to the end of the Infuser
Ensures patient compliance and reduces anxiety
Reduce the risk of infection, to avoid contamination
To maintain asepsis
Luer lock stopper will prevent leakage of chemotherapy from infusor this is now a sealed unit.

Issue Date: 17th February 2020 Page 20 of 31 Filename: GNUAPIPL1 Issue No: 2.5
Author: Carol McCormick Authorised by: Integrated Care Directorate Meeting Copy No:
tubing while maintaining sterility of the gloves Scrub the hub of the needle free system with a Chlorhexidine impregnated wipe,
rubbing from the top of the needle free connector to the sides. Do this three times using different parts of the wipe, over a period of at least 15 seconds. Allow to dry.
Attach a pre filled saline syringe and flush with push pause action, clamping as the last ml is instilled. Ensure that the catheter is secure and comfortable so that the distal portion of the line is covered with sterile gauze over the clamp and a transparent dressing to fully secure.
Remove dressing towel and discard. Place infuser in the plastic bag clearly labelled cytotoxic waste.
Remove gloves. Wash hands
Clear away equipment used. Dispose of contaminated waste as per organisational policy.
Document care in patient’s records.
Patient should be asked to return the empty chemotherapy infuser to the hospital on their next visit
Issue Date: 17th February 2020 Page 21 of 31 Filename: GNUAPIPL1 Issue No: 2.5
Author: Carol McCormick Authorised by: Integrated Care Directorate Meeting Copy No:
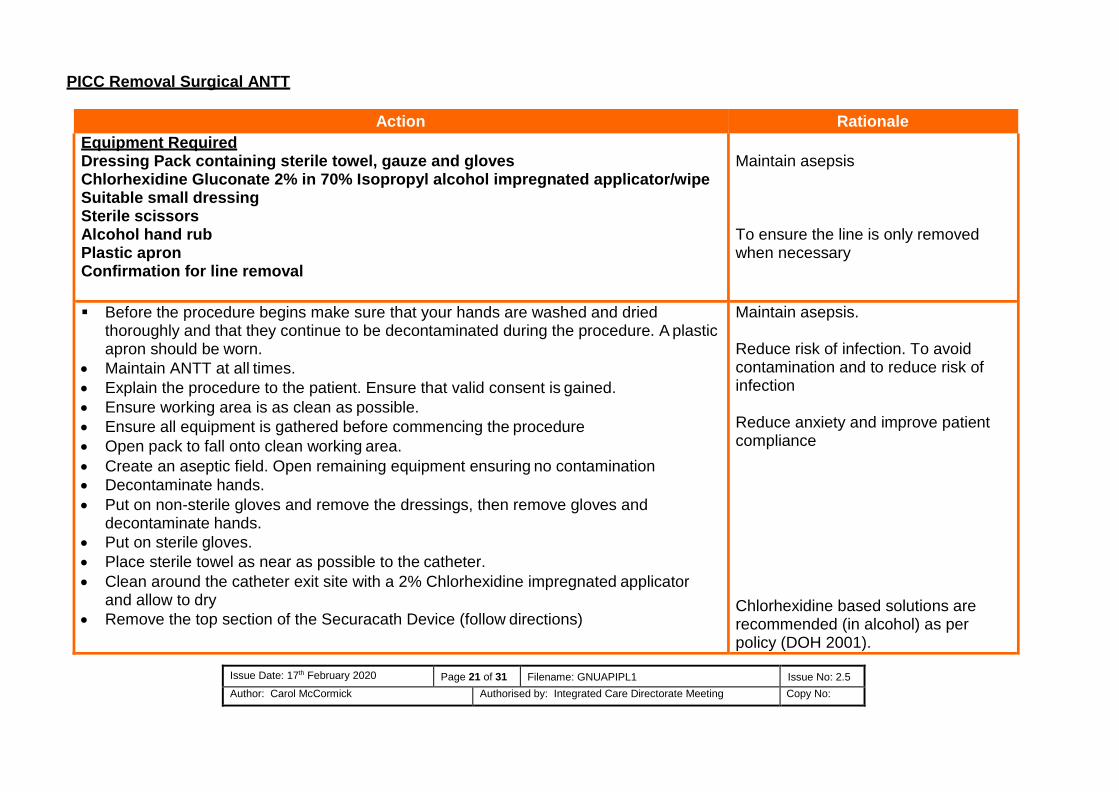
PICC Removal Surgical ANTT
Action Rationale
Equipment Required Dressing Pack containing sterile towel, gauze and gloves Chlorhexidine Gluconate 2% in 70% Isopropyl alcohol impregnated applicator/wipe Suitable small dressing Sterile scissors Alcohol hand rub Plastic apron Confirmation for line removal
Maintain asepsis
To ensure the line is only removed when necessary
Before the procedure begins make sure that your hands are washed and dried thoroughly and that they continue to be decontaminated during the procedure. A plastic apron should be worn.
Maintain ANTT at all times.
Explain the procedure to the patient. Ensure that valid consent is gained.
Ensure working area is as clean as possible.
Ensure all equipment is gathered before commencing the procedure
Open pack to fall onto clean working area.
Create an aseptic field. Open remaining equipment ensuring no contamination
Decontaminate hands.
Put on non-sterile gloves and remove the dressings, then remove gloves and decontaminate hands.
Put on sterile gloves.
Place sterile towel as near as possible to the catheter.
Clean around the catheter exit site with a 2% Chlorhexidine impregnated applicator and allow to dry
Remove the top section of the Securacath Device (follow directions)
Maintain asepsis. Reduce risk of infection. To avoid contamination and to reduce risk of infection
Reduce anxiety and improve patient compliance
Chlorhexidine based solutions are recommended (in alcohol) as per policy (DOH 2001).

Issue Date: 17th February 2020 Page 22 of 31 Filename: GNUAPIPL1 Issue No: 2.5
Author: Carol McCormick Authorised by: Integrated Care Directorate Meeting Copy No:
Step 1 for removing a Securacath
Remove cover by placing finger under the device to stabilise Grasp tab on cover with other hand
Step 2
Lift tab to completely detach cover from anchor base
There is no requirement to routinely withdraw blood and discard it prior to flushing (except prior to blood sampling although the first sample can be used for blood cultures (RCN 2010).
There is an increased risk of infection and occlusion when withdrawing blood via a central venous catheter (RCN 2010), therefore for routine flushing of a line withdrawal and waste of blood is not required, to confirm placement of line pullback only to colour the saline
The pulsated flush creates turbulence within the catheter lumen, removing debris from the internal catheter wall (Goodwin & Carlson 1993, Todd 1998).
Positive pressure within the lumen of the catheter should be maintained to prevent reflux of blood (INS 2000).

Issue Date: 17th February 2020 Page 23 of 31 Filename: GNUAPIPL1 Issue No: 2.5
Author: Carol McCormick Authorised by: Integrated Care Directorate Meeting Copy No:
Step 3
Gently and steadily remove the catheter while covering the site with gauze to prevent splashes to the face of the practitioner with blood products
Option 1 - Fold Base
Fold edges of anchor base downward

Issue Date: 17th February 2020 Page 24 of 31 Filename: GNUAPIPL1 Issue No: 2.5
Author: Carol McCormick Authorised by: Integrated Care Directorate Meeting Copy No:
Place third finger under back edge of device to help begin folding motion
Place a piece of gauze near the insertion site to stabilise the tissue Hold folded anchor base horizontal to the skin, then simultaneously lift the anchor
vertically up out of the insertion site using a swift, deliberate upward tug to remove the anchor as downward pressure is put on the piece of gauze at the exit site to remove the anchor
Option 2 - Cut Base
Use blunt sterile scissors to cut the anchor base in half lengthwise along the groove

Issue Date: 17th February 2020 Page 25 of 31 Filename: GNUAPIPL1 Issue No: 2.5
Author: Carol McCormick Authorised by: Integrated Care Directorate Meeting Copy No:
Place one hand near the insertion site to stabilise the tissue Then either gently remove each separate half from the skin maintaining the natural
angle of each side out of the skin or use a swift, deliberate tug to remove each half of the anchor base separately
The flexible anchor will straighten as it is pulled out and will not cause tearing of trauma to the tissue
Place a clean small occlusive dressing i.e. Opsite to cover the exit site
Remove dressing towel and discard. Remove gloves.
Wash hands
Clear away equipment disposing of waste as per organisational policy.
Document care in patient’s records.

Issue Date: 17th February 2020 Page 26 of 31 Filename: GNUAPIPL1 Issue No: 2.5
Author: Carol McCormick Authorised by: Integrated Care Directorate Meeting Copy No:
No Yes
Blood return is still absent
The following steps should initially be done on admission or prior to drug administration and documented in nursing care-plan so that all staff are aware that patency has been verified Step 1 Administer a 250ml normal saline “challenge” via an infusion pump over 15 minutes to test for patency – the infusion may not resolve the lack of blood return but will confirm that the line is safe to use in the absence of pain along the catheter route
If there have been no problems, therapy can be administered as normal. If the patient experiences ANY discomfort or there is any unexplained problems then stop and seek medical advice. It may be necessary to verify tip location by chest X -Ray. OR Step 2 Instill Urokinase 10,000iu in 3.5mls using the Push-Lock method and leave for 30 minutes. After this time withdraw the Urokinase and assess the catheter again. Repeat as necessary.
If blood return is still absent, it may be necessary to verify tip location by chest X Ray .in the absence of Urokinase instill Actilyse, 2mg in 2ml left for 2 hours then aspirate. May repeat, often line will bleed on the next occasion. For long term lines it may be necessary to schedule this procedure regularly
No
Proceed if happy to do as long as there are complications or pain
Consider
Dormant line
If unable to aspirate. Do not continue. Refer to Medic close line
Patient to receive highly irritant/vesicant
drugs or chemotherapy
Algorithm persistent withdrawal occlusion i.e. fluids can be infused freely by gravity but blood cannot be
withdrawn
Adapted from Standards for Infusion Therapy RCN (2016)
Flush central venous catheter with 0.9% Sodium chloride in 10ml syringe using a brisk “push pause” technique. Check for flashback of blood
Ask patient to cough, deep breathe, change position, stand up or lie with foot of
the bed tipped up. Ascertain possible cause
of PWO
Blood return
is absent
Check equipment, Position, clamps, kinking. etc
Blood return is still absent
Blood return obtained - use central venous
catheter as usual

Issue Date: 17th February 2020 Page 27 of 31 Filename: GNUAPIPL1 Issue No: 2.5
Author: Carol McCormick Authorised by: Integrated Care Directorate Meeting Copy No:
The Push–Lock Method: Reconstitute a 10,000IU vial of Urokinase using 3.5ml of 0.9% sodium chloride for each lumen.
Following this Urokinase procedure it may be necessary to repeat the fluid challenge using, 250mls 0.9% Sodium Chloride over 15minutes, then try to yield blood.
This procedure may be repeated once more on the same day; if PWO persists. In the absence of Urokinase use Actilyse 2mg in 2ml instill for 2 hours then aspirate, this may be repeated. This may need to be scheduled on a regular basis for long term lines to maintain blood yield and patency.
Algorithm for the management of Upper Extremity Deep Vein Thrombosis (UEDVT)
Lock each lumen with priming volume of 2ml + 0.5ml overfill, i.e., 2.5ml
Push 0.5ml solution/lumen
Push 0.5ml solution/lumen
Aspirate lumen
0min
min
min
min

Issue Date: 17th February 2020 Page 28 of 31 Filename: GNUAPIPL1 Issue No: 2.5
Author: Carol McCormick Authorised by: Integrated Care Directorate Meeting Copy No:
PICC/CVC
Line still required
functioning
as expected
PICC/CVC
Line no longer needed
or
not functioning as required
Continue therapeutic dose LMWH for as long as line remains in-situ and for 3-
6months or as directed by medical team following line removal
Continue therapeutic dose LMWH for 3-5 days before removing line to reduce risks of
embolisation then continue LMWH 3-6months or as directed by medical team
THROMBUS suspected or confirmed
Commence LMWH immediately

Issue Date: 17th February 2020 Page 29 of 31 Filename: GNUAPIPL1 Issue No: 2.5
Author: Carol McCormick Authorised by: Integrated Care Directorate Meeting Copy No:
REFERENCES:
1. Department of Health (DOH) (2001) Guidelines for preventing infection associated with the insertion and maintenance of central venous catheters, Journal of Hospital Infection, 47 Supplement S47 – S67
2. Department of Health (DOH 2003). Winning Ways: Working together to reduce health care associated infection in England
3. Department of Health (DOH 2005). Saving Lives: A delivery programme to reduce health care associated infection including MRSA
4. Epic 3: (2014) National Evidence- Based Guidelines for Preventing Healthcare Associated Infections in NHS Hospitals in
England. Loveday, H. P, et al.
5. Goodwin M, Carlson I (1993) The peripherally inserted catheter: a retrospective look at 3 years of insertions, Journal of Intravenous Nursing, 16 (2) 92-103
6. Hadaway L (1998) Catheter connection, Journal of Vascular access devices 3 (3), 40.
7. Infection Control Nurses Association (2001) Guidelines for Preventing Intravascular Catheter-related Infection. 8. INS (2000) Infusion Nursing Standards of Practice, Journal of Intravenous Nursing 23 (6S) supplement
9. Todd J (1998) Peripherally inserted central catheters. Professional Nurse 13(5) 297-302
10. Jones A (2004) Dressings for the Management of Catheter Sites – A review. JAVA, Vol. 9 No 1, 1-8.
11. Campbell H, Carrington M (1999) Peripheral IV cannula dressings: advantages and disadvantages. British Journal of Nursing, 8(21):1420-1422, 1424-1427
12. Treston-Aurand J et al (1997) Impact of dressing materials on central venous catheter infection rates. Journal of Intravenous
Nursing 20(4):201-206.

Issue Date: 17th February 2020 Page 30 of 31 Filename: GNUAPIPL1 Issue No: 2.5
Author: Carol McCormick Authorised by: Integrated Care Directorate Meeting Copy No:
13. Wall, C. et al. (2016) Catheter –related thrombosis: A practical approach
14. Wille JC (1993) A comparison of two transparent film-type dressings in central venous therapy. Journal of Hospital Infection 23(2):113-121.
15. INS (2000) Standards for infusion therapy. Cambridge, MA: INS and Becton Dickinson (III) In RCN Standards for Infusion (2005).
16. Masoorli S (2003) Extravasation injuries associated with the use of central venous access devices. Journal of vascular access devices. 21-23 Spring

Issue Date: 17th February 2020 Page 31 of 31 Filename: GNUAPIPL1 Issue No: 2.5
Author: Carol McCormick Authorised by: Integrated Care Directorate Meeting Copy No:
Guideline recommendations
The guidelines within this document should support the intravenous care and management of adults, for guidance on the care of children please refer to the CINs paediatric guidelines. For guidance on the care of infants consult with your local paediatric specialists.
When using Alcohol Chlorhexidine where available use 2% in 70% Isopropyl alcohol. Recommend Chloroprep one step (Chlorhexidine Gluconate 2% in Isopropyl alcohol 70%) for cleaning the skin prior to line insertion and for routine line maintenance.
When Catheters are not in use they should be flushed with 10ml sodium chloride 0.9%. . This should be performed on a weekly basis following the maintenance guidelines.
For needle-free connectors, manufacturers' guidance should be followed re length of time to remain in situ. Recommend needle- free systems that are changed minimum of every seven days.
Reminder that hands must be washed and dried thoroughly before putting on disposable gloves and after removing sterile gloves.
If there is sensitivity to Chlorhexidine solution, Providone Iodine may be used as an alternative.
Ensure all interventions are recorded in the patient’s records as per organisational policy
Biopatch antimicrobial dressing with Chlorhexidine Gluconate (Johnson & Johnson) is recommend for use in patients with increased risk of line infection.
The securement Securacath device is used to prevent migration and to improve the cleansing at the exit site. It is necessary to lift the line up and down each dressing change to prevent granulation of tissue into the clip so that removal will be trouble free.