ce en 112 engineering drawing with cad application chapter 3: section and auxiliary views (lecture...
TRANSCRIPT

CE En 112 Engineering Drawing with CAD ApplicationChapter 3: Section and Auxiliary Views (Lecture B)
Auxiliary Views
2 of 21
Lecture Outline
• Auxiliary view projection theory (3.5)
• Fold-line method (3.5.1)
• Constructing an auxiliary view (3.5.2)
• Partial and half auxiliary views (3.5.3–3.5.4)
• Secondary auxiliary views
• Curves in auxiliary views
• Auxiliary view applications
• Next class
3 of 21
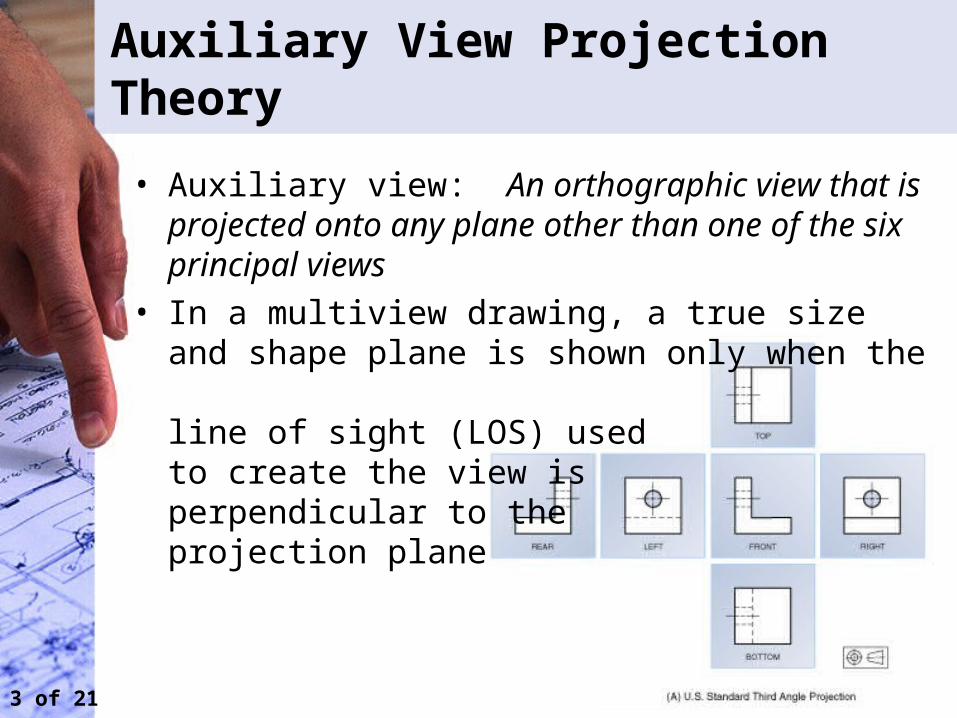
Auxiliary View Projection Theory
• Auxiliary view: An orthographic view that is projected onto any plane other than one of the six principal views
• In a multiview drawing, a true size and shape plane is shown only when the line of sight (LOS) used to create the view is perpendicular to the projection plane

4 of 21
Auxiliary View Theory (con’t)
• Oblique lines, inclined planes, and oblique planes are never shown in their true size and shape as one of the six principal views

5 of 21
Auxiliary View Theory (con’t)
• A 3-D view of this same object shows best how the auxiliary view projection theory works
The inclined plane is never shown in its true size and shape
in the six principal views

6 of 21
Auxiliary View Theory (con’t)
Notice that in this alternative, the auxiliary view is shown
perpendicular to the included plane

7 of 21
Fold-Line Method (3.5.1)
• Fold-line method: An auxiliary plane is generated that is perpendicular to and hinged to the frontal plane, creating a fold line between the front and auxiliary views
Note that the fold lines are parallel to the edge lines of the planes. This means that the
fold line is perpendicular to the projection lines (lines of sight)

8 of 21
Fold-Line Method (con’t)
• An alternative to the traditional fold-line method is the Reference Plane Method
The two methods are essentially the same. In the reference plane method, the folding line moves to the edge or inside of the object to a
location that makes it more convenient to draw an auxiliary line

9 of 21
Constructing an Auxiliary View (3.5.2)
• Step 1: Draw fold line F-1 using a phantom line parallel to the edge view of the inclined surface
• Step 2: Draw fold lines between the front and top, and front and right side views – perpendicular to the projectors between the two views and at distance X from the rear edge of the views
• Step 3: Project the length of the inclined surface from the front view to the auxiliary view perpendicular to the edge view

10 of 21
Constructing an Auxiliary View (con’t)
• Step 4: Transfer the depth of the inclined surface from the top view to the auxiliary view (distance X from the fold line)
• Step 5: From point C in the auxiliary view, draw a line perpendicular to the projectors. Depth dimension Y is transferred from the top view by measuring the perpendicular distance from the fold line to point A. This can then be transferred to the auxiliary view
• Step 6: Darken the lines in the auxiliary view
Note that only the inclined plane is shown in the auxiliary view. This is referred to as a partial auxiliary view.

11 of 21
Partial and Half Auxiliary Views (3.5.3–3.5.4)
• Partial auxiliary view: When only the details for the inclined surface are projected and drawn in the auxiliary view – saves time and produces a drawing that is much more readable
Note: Hidden lines are not shown in an auxiliary view unless absolutely necessary

12 of 21
Partial and Half Auxiliary Views (con’t)
• Half auxiliary view: Used for symmetrical objects in which only half of the object is shown

13 of 21
Secondary Auxiliary Views
• To find the true size of an oblique line or plane a secondary auxiliary view is required

14 of 21
Curves in Auxiliary Views
• Curves in auxiliary views are handled similar to the offset coordinate method used with pictorial views
These lines are parallel

15 of 21
Auxiliary View Applications
• Reverse construction: Used when an auxiliary view must be created to draw a principal view
It is very difficult to draw this right-side
view without having an auxiliary view (this
uses the offset coordinate method to transfer the circle to the right-side view)

16 of 21
Auxiliary View Applications (con’t)
• Dihedral angles: A dihedral angle is the angle between two planes
• To draw and measure the angle between two planes, create a point view of the line of intersection between the two planes (meaning that the fold line is perpendicular to the line of intersection between the two planes)

17 of 21
Auxiliary View Applications (con’t)
Sample 1 (inclined plane)

18 of 21
Auxiliary View Applications (con’t)
Sample 1 (con’t)

19 of 21
Auxiliary View Applications (con’t)
Sample 2: Inclined place with a curve

20 of 21
Auxiliary View Applications (con’t)
Sample 2: (con’t)

21 of 21
Next Class