chamberland sop taking an nmr · web viewthe following is a basic operational procedure for typical...
TRANSCRIPT
NMRSCI 213Bruker How to use the Bruker Avance 400 MHz NMR
The following is a basic operational procedure for typical NMR spectra.
NOTE – Sign in the Log Book! This book is to be used to see who is on the instrument at what times, and to track any problems with the
instrument. If you have a problem, please log it. Write down the error message.
SIGN-INLogin to the NMR computer using your login name and password. Open the Topspin program from the desktop.
WARNING – If you are a new user, the Topspin program will need modifications in order to follow this SOP. Contact the instrument
technicians @ 2897 to perform the modifications required.
NOTE – The Proton Standard should be in the NMR sample chamber upon first arriving.
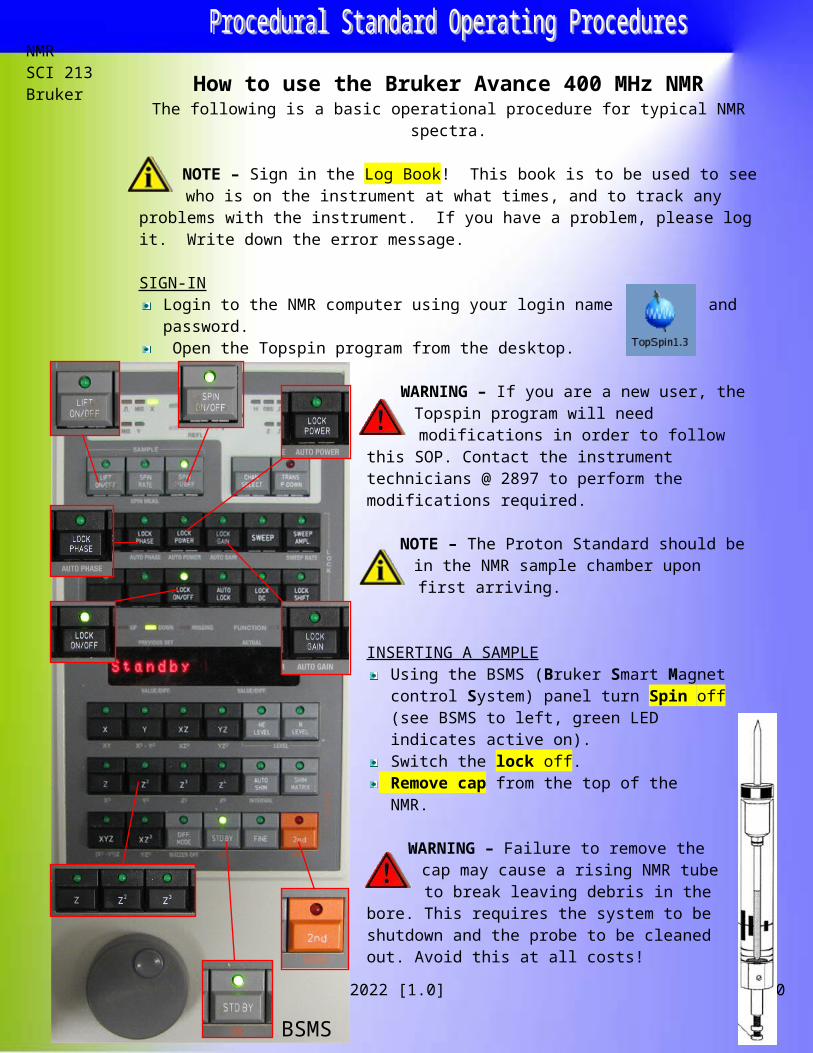
INSERTING A SAMPLEUsing the BSMS (Bruker Smart Magnet control System) panel turn Spin off (see BSMS to left, green LED indicates active on).Switch the lock off. Remove cap from the top of the NMR.
WARNING – Failure to remove the cap may cause a rising NMR tube to break leaving debris in the bore. This
requires the system to be shutdown and the probe to be cleaned out. Avoid this at all costs!
Switch the lift on. You have about 5-7s before the sample comes up. If you’re quick, you can take the cap off as the sample is coming up. Remove the standard and insert sample with spinner in place. Hold the sample+spinner in place briefly before letting go of it to ensure that the air stream levitates the spinner.
Effective Date: May 2023 [1.0] 1/8
BSMS

NMRSCI 213Bruker NOTE – Spinner alignment tool (shown to the right) is taped off to our
instrument’s specifications. Tube should just touch the bottom black line and sample should extend past upper mark (penned in). If
sample is less than this, split the volume over the middle line. There should be no layer separation or particulates within the sample. To remove particulates, filter the NMR sample through a cotton plug. Make sure the tube is free of any tags or other unbalancing issues. DO NOT PUT SPINNER ALIGNMENT TOOL INTO THE NMR!
Switch the lift off, the sample will descend into the NMR and you should hear a “click” after 5-7s. Replace cap. Cap replacement isn’t necessary if running a few proton NMR spectra.Switch the spin on.Switch the lock on.
OPENING OR CREATING A NEW FILENOTE – It is best to open an older file as a template for your run. This will
automatically fill in the fields required when creating a new experiment. Make sure however that you immediately close the template file. Failure
to do so can corrupt the template or even the experimental processes if one is not careful.
Create ( ) or open ( or ) a data file. When opening a file follow the tree down to the desired file and double click (requires a fast double click). Fill in Fields accordingly:
Name Name of experiment (Format as follows: Initials-Book Number-Page Number+Descriptor, e.g., SC-I-143c = Steve Chamberland-Book I-page 143, crude; c=crude, p=pure, or some other descriptor, like SC-I-143Aliquot2h, or SC-I-143columnfraction42)ExpNo Experiment number (used to separate acquisition parameters). Usually, proton=1, carbon=2, DEPT=3, COSY=4, etc.ProcNo Procedure number (used on a single acquisition but allows for
varying process parameters to be used)Dir Where your Home account exists (opt/home/Username from login) Do not deviate from this or your file will be harder to find.User Different than login username. This can add an additional level to the tree file structure. It can denote a class, student or project ID.
Using these parameters the file will be saved as:Acquisition files:
DIR/data/USER/nmr/NAME/EXPNO/Procedural files:DIR/data/USER/nmr/NAME/EXPNO/pdata/PROCNO/
Solvent Deuterated solvent used for sampleExperiment If you already have an experiment open and you want to use the same parameters you can choose Use current
Effective Date: May 2023 [1.0] 2/8

NMRSCI 213Bruker
Params. Otherwise select from the generic settings for various NMR applications. This automatically set up your acquisition and process parameters. Title This is text that can be displayed on your plot. The title feature can be implemented at any time and can be left blank. Be
descriptive.SHIMMING AND SAMPLE PREPERATION
Go to the lock display window ( ) in the Topspin program and press the lock gain button on the BSMS panel (see BSMS panel graphic above). Using the dial on the BSMS adjust the gain until the signal is visible at around 3/4 the height of the display (If at any point during hand shimming the signal goes off the top of the screen, adjust this parameter). If you want the line to go faster or slower, press “2nd” (orange button), then “SWEEP AMPL” – accessing the second command of SWEEP RATE – and adjust using the dial.HAND SHIMMING: Hand shimming of Z and Z2 can be performed by
pressing Z on the BSMS; adjusting, and then repeating for Z2 to achieve a maximum signal. If Z2 is changed revisit Z before finishing. Usually 2 cycles of Z/Z2 adjustment are sufficient.
NOTE – When hand shimming be careful not to walk the signal to far off. It is always a good idea to write down parameters before extensive shimming. You can also return to the original setting by reselecting
the function being actively adjusted, any other selection will lock the change in.
AUTO SHIMMING (NOT RECOMMENDED BY SC): This can be performed automatically by typing simplex zz in the command line of Topspin (approx. 5-6 min. – far longer than hand shimming) and hitting enter. A more extensive shim can be used by typing simplex z but it will take longer to finish (approx. 10 min.). During auto shimming the BSMS panel will change as the system runs. When it is done the command line display will return Simplex: finished.
The following four steps are not recommended by SC. Skip down half a page.
Auto Power the system by pressing 2ND and then lock power on the BSMS panel. During adjustment the lock power LED will blink. After the adjustment is finished the BSMS display will retain a Standby message. Allow the unit to finish the auto lock and continue. Auto Phase the system by pressing 2ND and then lock phase on the BSMS panel. Allow the unit to finish the auto phase and continue.Auto Gain the system by pressing 2ND and then lock gain on the BSMS panel. Allow the unit to finish the auto gain and continue.
Effective Date: May 2023 [1.0] 3/8

NMRSCI 213Bruker
At this point it may be time to double-check the shimming. This system requires dynamic adjustment and may demand a number of iterations of the previous steps in order to come to a proper signal. This repetition is dependent on your research and the level of accuracy desired. Return to the experiment viewer by closing out the lock display or toggling through the windows by selecting the proper button in the upper
right hand of the screen. Continue here.
Type: loopadj into the command line of Topspin and select enter; allow topspin to perform loop adjustments. Select OK within the popup when the adjustment completes.Type: rga into the command line of Topspin and select enter to set the receiver gain adjustment.Check you experimental parameter:
Select the acquisition parameters tab to adjust some common values:
NS (number of scans) – Normally 16 (~90 s) for Proton and 1024 (~1h) for Carbon. (Signal/Noise rule of thumb 2n= [number of scans]).DS (dummy scans) – scans prior to data collection (normally 2) Spectral Width - Generally 20ppm for Proton and >600 for Carbon.
Select the process parameters tab to adjust some common values:
These values are adjusted by many of the following functions within POST RUN. They can be adjusted prior to the run, afterword by hand or through the use of toolbar icons described later.
You can check the run time before starting by selecting the clock icon ().Click the green arrow ( ) button on the Topspin toolbar to start collecting data. Replace the black cap on the probe if running a sample for longer than 15 min.
POST RUNNOTE – Throughout the post run you can make use of the spectra graphic
controls shown below.
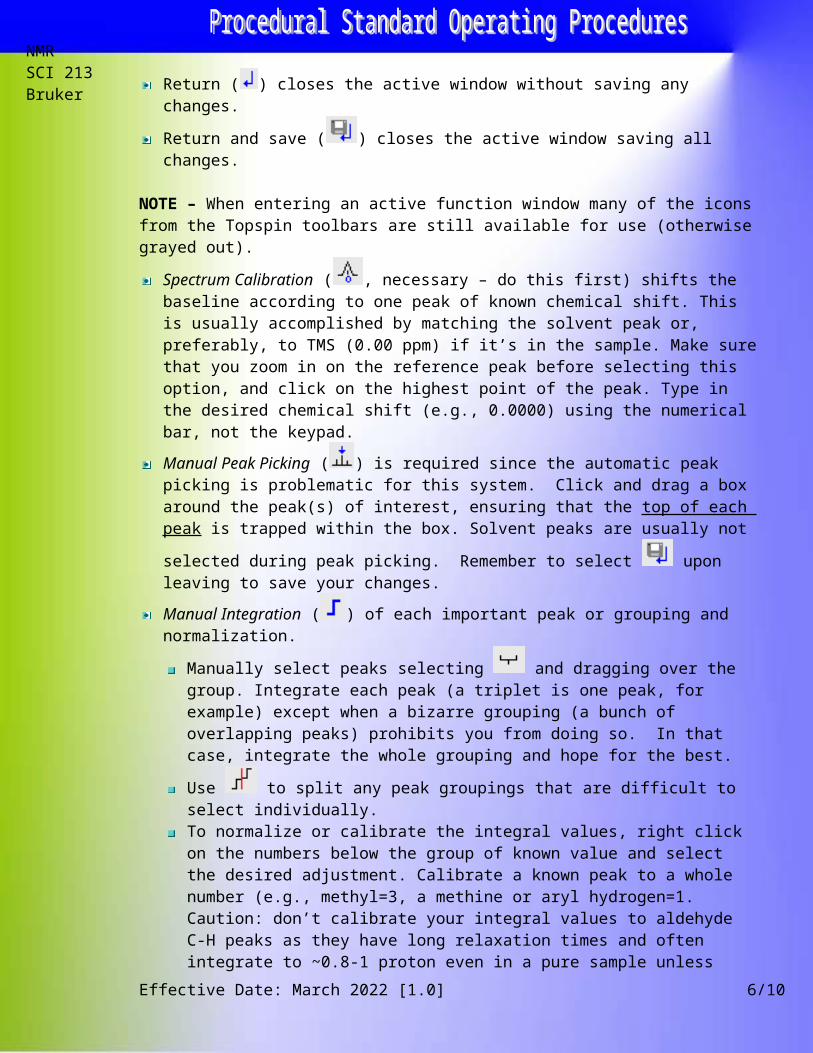
Return ( ) closes the active window without saving any changes.Return and save ( ) closes the active window saving all changes.
Effective Date: May 2023 [1.0] 4/8

NMRSCI 213Bruker
NOTE – When entering an active function window many of the icons from the Topspin toolbars are still available for use (otherwise grayed out).
Spectrum Calibration ( , necessary – do this first) shifts the baseline according to one peak of known chemical shift. This is usually accomplished by matching the solvent peak or, preferably, to TMS (0.00 ppm) if it’s in the sample. Make sure that you zoom in on the reference peak before selecting this option, and click on the highest point of the peak. Type in the desired chemical shift (e.g., 0.0000) using the numerical bar, not the keypad.Manual Peak Picking ( ) is required since the automatic peak picking is problematic for this system. Click and drag a box around the peak(s) of interest, ensuring that the top of each peak is trapped within the box. Solvent peaks are usually not selected during peak picking. Remember to select upon leaving to save your changes.Manual Integration ( ) of each important peak or grouping and normalization.
Manually select peaks selecting and dragging over the group. Integrate each peak (a triplet is one peak, for example) except when a bizarre grouping (a bunch of overlapping peaks) prohibits you from doing so. In that case, integrate the whole grouping and hope for the best. Use to split any peak groupings that are difficult to select individually.To normalize or calibrate the integral values, right click on the numbers below the group of known value and select the desired adjustment. Calibrate a known peak to a whole number (e.g., methyl=3, a methine or aryl hydrogen=1. Caution: don’t calibrate your integral values to aldehyde C-H peaks as they have long relaxation times and often integrate to ~0.8-1 proton even in a pure sample unless either the T1 time is increased. To use integral values to accurately quantify sample constituents to an internal standard, change DS=0, NS=1 before running a sample to ensure the most accurate integral values; however, this is not required for most samples).Remember to select upon leaving to save your changes.Interactive Phase Correction ( , usually not necessary) can be adjusted although it is automatically performed upon run completion. If automatic correction is not satisfactory this function can be use to select an alternative phase correction or a manual correction can be implemented. For more options type ph in the command line.Interactive Baseline Correction ( , usually not necessary) is available to flatten baseline as needed. (usually not done)
Effective Date: May 2023 [1.0] 5/8
NMRSCI 213Bruker hz/ppm Toggle ( ) alternates the x axis between chemical shift and
frequency (helpful when figuring out coupling constants (J values), but these can easily be calculated by hand later). Important: Our lab’s standard spectral width for printing a full spectrum is from -0.5 to 8.5 ppm (9 ppm total). If peaks are visible outside this range (e.g., phenols, aldehydes, carboxylic acids, print the full spectrum so all peaks are visible. The -0.5 to 8.5 ppm window will enclose >95% of the peaks you’ll see. Print expansions, if desired for clarity, so that peak multiplicities are evident.
PRINTINGSimple Printing
Print using the Topspin software icon ( ). This will print a simple plot of whatever you have displayed in the Spectrum tab graphics field.
Advanced PrintingPlot Editor ( ) yields more advanced printing options, allowing for expanded views, multiple spectra, and additional graphics.
NOTE – Once the Plot Editor is entered, analytical components (integral values, spectral calibration) can no longer be adjusted, added, or removed. The plot can only be manipulated graphically but does allow
for predefined graphics and informational boxes to be added.
Effective Date: May 2023 [1.0] 6/8

NMRSCI 213Bruker
Do not rely on quick keys or even keyboard commands to work correctly while using this portion of the software. If you want consistent results, click the icon provided using the mouse and pointer.
To move items select and click on the item. The selected item will not move using the traditional windows method of drag and drop. Instead, select a green square and enlarge the image, placing the square in approximately the area you would want it to ultimately want it to exist disregarding the distorted image. Then select a different green square and repeat the process. Once in the correct positions you will have noticed that the movements of the green boxes have returned the image back to normal. I usually delete the “Bruker” picture on the upper right corner of the page. For peak expansions select and mouse down within the plot area, dragging the image size until the mouse up solidifies the borders. Use the expand icon ( ) to drag a red box within the desired plot, resulting in a more exploded view. Repeat the process until the exact image is achieved. Use the movement process described above to finalize the position of the image.To associate the new spectral image to a particular group of peaks within the larger spectral range, select the basic option. Click on the line icon ( ) and draw a line between the grouping and expanded image.More items can be adjusted and added to the plot other than what is described above but this will be left to the user’s discretion. To Print Select:
File Print
SHUTDOWNRemove your sample from the NMR and replace it with the proton standard following the instructions outlined in the section above labeled INSERTING A SAMPLE.Leave the standard locked and spinning.Remember to replace the cap on top of the NMR before leaving.Shim the standard before you leave so the NMR is ready for the next person. Close Topspin.
Logout of the system by clicking the Red hat icon ( ) and selecting Logout.
If an error occurs during your visit, please log it.
Effective Date: May 2023 [1.0] 7/8

NMRSCI 213Bruker
If an unfixable problem arises during your run, call your labmates (x1127), a trusted research colleague in another group, Dr. Chamberland (x1126 (office) or 970-310-1190 (cell)), or Jeff Wilcox (x2897 or 899-0619)
Approved By (PI) : Stephen Chamberland, Ph.D. Date: 9/17/12
PI Signature: ___________________________________________________ Date: ______________
EH&S Signature: ________________________________________________ Date: ______________
Effective Date: May 2023 [1.0] 8/8