chapter 1: introduction to the blood · web viewto check for discrepancies of parameter...
TRANSCRIPT

MEDITECH
Validation Guidefor
MAGIC Blood BankRelease 5.6
version 1.2
Created October 20, 2006Revised December 2007Revised August 8, 2008Revised May 17, 2010
Medical Information Technology, IncMeditech Circle, Westwood, Massachusetts 02090
This information is proprietary and should be treated accordingly

TABLE OF CONTENTSMAGIC Blood Bank Validation Guide
Release 5.6
1 INTRODUCTION TO THE BLOOD BANK VALIDATION GUIDE1.1 Introduction ………………………………………………………………………. …………….. 1.2 Hardware ………………………………………………………………………………………….1.3 Parameters and Dictionaries ………………………………………………………………………1.4 How to Print Screens ……………………………………………………………... ……………... 2 DONOR PROCESSING2.1 Entering Donors ………………………………………………………………………………….2.1.1 Algorithm: Duplicate Donor Record Check ……………………………………………………..2.2 Editing Donors ……………………………………………………………………………………2.3 Deleting Donors …………………………………………………………………………………2.4 Entering Donations/Deferrals ……………………………………………………………………2.4.1 Algorithm: Donor Eligibility Check (Interval) ………………………………………………….2.4.2 Algorithm: Donor Eligibility Check (Deferral) …………………………………………………2.4.3 Algorithm: Donor Eligibility Check (Age) ………………………………………………………2.5 Deleting Donations/Deferrals ……………………………………………………………………2.6 Merging and Unmerging Donors …………………………………………………………………2.7 Editing Donor Numbers ……………………………………………………………………………2.8 Editing Donor Recruitment Data ………………………………………………………………… 2.9 Editing Donor Appointments ………………………………………………………………………2.10 Donor Questionnaires ……………………………………………………………………………… 3 UNIT INVENTORY3.1 Entering an Inventory Unit ………………………………………………………………………..3.2 Entering Inventory Units by Batch ……………………………………………………………….3.3 Entering Inventory Units in Lots …………………………………………………………………3.4 Entering Results on Inventory Units ………………………………………………………………3.5 Editing Inventory Units ……………………………………………………………………… ……3.6 Inventory Component Production …………………………………………………………………3.7 Inventory Aliquot Production ………………………………………………………………………3.8 Pooling Inventory Units ……………………………………………………………………………3.9 Transferring Inventory Units ………………………………………………………………………3.10 Changing Unit to Inactive Status …………………………………………………………………3.11 Returning Unit to Prior Status ……………………………………………………………………3.12 Changing Unit Numbers …………………………………………………………………………3.13 Deleting Inventory Units …………………………………………………………………………3.14 Entering Physical Inventory ………………………………………………………………………3.15 Editing Physical Inventory …………………………………………………………………………
1234
510121417263134394250525465
78889498
103109113117121122128131134138140
i

3.16 Comparing Physical Inventory ……………………………………………………………………3.17 Printing Labels with ISBT 128 coding conventions ………………………………………………3.18 Printing Labels with Codabar symbology …………………………………………………………
4 PATIENT PROCESSING4.1 Patient Worksheet …………………………………………………………………………………4.2 Receiving Patient Specimens ……………………………………………………………………..4.3 Entering Patient Results ……………………………………………………………………………4.3.1 Algorithm: Unit Suitability for Crossmatch Check ………………………………………………4.3.2 Algorithm: Unit Suitability for Transfusion Check ………………………………………………4.4 Patient Blood Type Calculations …………………………………………………………………4.4.1 Algorithm: Donor Blood Type and Calculation Check ……………………………………………4.5 Antibody Screen, Antibody ID, and Crossmatch Calculations ……………………………………4.6 Patient Emergency Issue ………………………………………………………………………….4.7 Patient Wristbands ………………………………………………………………………………..4.8 Canceling Patient's Product Order …………………………………………………………………4.9 Uncanceling Patient’s Product Orders ……………………………………………………………4.10 Releasing Patient's Crossmatches …………………………………………………………………4.11 Entering Patient Transfusion Reactions …………………………………………………………..4.12 Deleting Patient Transfusion Reactions ……………………………………………………………
5 AUTOLOGOUS AND DONOR-DIRECTED UNIT PROCESSING5.1 Processing Autologous Units ……………………………………………………………………5.1.1 Algorithm: Unit Linked to Donor Check …………………………………………………………5.2 Processing Donor-Directed Units …………………………………………………………………5.3 Entering Patient Results for Reserved Units ………………………………………………………
6 ENTERING/EDITING BLOOD BANK HISTORICAL DATA6.1 Entering/Editing Blood Bank Historical Transfusion Data ………………………………………6.2 Editing Blood Bank Historical Data ………………………………………………………………6.3 Changing a Historical Blood Type …………………………………………………………………6.4 Merge Patients in Medical Records ………………………………………………………………6.5 Unmerge Patients in Medical Records ……………………………………………………………6.6 Switch Blood Bank Medical Records ……………………………………………………………
7 BLOOD BANK ANALYZERS7.1 Introduction ………………………………………………………………………………………7.2 Basic Operation …………………………………………………………………………………7.3 Process Unidirectional Instruments ………………………………………………………………7.4 Process Bidirectional Instruments ……………………………………………………………….
142144162
167178200266272275280286289344356363368377379
381386388394
398401403407433437
441442443446
i

Chapter 1: INTRODUCTIONBLOOD BANK VALIDATION GUIDE
October 2006
1.1: Introduction INTRODUCTION:
The purpose of this document is to provide the user with a tool to assist in the validation of the MAGIC Blood Bank Software. This Guide contains general scenarios designed to test basic setup of system dictionaries and commonly performed Blood Bank/Transfusion Service procedures. This manual can also be used as a guide for re-validation after an update or software fix has been installed. The documentation provided with any updates or program changes should be reviewed and any affected routines re-validated and documented.
The Validation Guide has been structured as follows: Donors, Inventory, Patients, Reserved Units, History, and Error Messages. It has attempted to follow (as closely as possible) typical workflow through a Blood Bank. Each facility should develop their own scenarios for validation of site-specific procedures and workflow.
This Guide should be kept with the MEDITECH Blood Bank Module User Manuals, Application Training Notes, and BBK Report Manual to form a set of complete user documentation. Where possible, we have attempted to include the most recent changes to the system. However, due to updates to the software, not all scenarios are contained within this manual.
SCOPE:
System validation is intended to establish documented evidence that provides a high degree of confidence that the system will perform consistently. The intent of this manual is to guide the user through various scenarios in the Blood Bank/Transfusion Service. This will also demonstrate that the system performs as designed. Where possible we have made every effort to include normal, abnormal, and stress inputs.
MEDITECH recommends that you print out a copy of your LIS System Parameters before your validation begins to help you determine how your system should function according to the documentation.
This guide should be used in conjunction with your own validation plan to validate your MEDITECH MAGIC Blood Bank system. Again, we must stress that each facility design their own test plans and test scenarios to be used in validation of the system. The person testing must also challenge each function, prompt, or routine throughout the testing to confirm that the system performs no unexpected process. MEDITECH will not be held responsible for any facility not performing system validation.
In addition to the routines and functions outlined in this guide, MEDITECH strongly urges you to also validate all user-defined calculations, rules, reports, and label formats that affect Blood Bank data.
There is a signoff at the end of each test to assist in tracking the results. The signoff allows the person testing to record whether the test results were acceptable or not acceptable. The person testing should also print screens where appropriate to show the data entered or calculated. We suggest that each screenprint be labeled with the chapter, exercise number, step number, and tester’s initials for reference. We suggest that you print output from the system such as Result Inquiries, Unit Inquiries, History Inquiries, and Reports where it would substantiate the test results.
- 1-

1.2 Hardware and Equipment
The computer hardware, accessories, and peripherals you are using is an important element in your validation. We recommend that you utilize the same hardware as you normally use in your daily operations. Please record your hardware in the worksheet below.
Hardware Worksheet
Computer HardwareServer Identification / Name(where LAB/Blood Bank database resides)ManufacturerModelProcessor TypeOperating System Version
Personal ComputersManufacturerModelProcessor TypeOperating System Version
Label Printer(s)ManufacturerModel
Scanner(s)
ManufacturerModel
Blood Bank Instrument(s)ManufacturerModelSoftware version
Hospital: __________________________________
Name: ____________________________________ Title: _____________________________________
Signature: _________________________________ Date: _____________________________________
- 2-
1.3 Parameters and Dictionaries
The parameter settings in your Blood Bank system control how the software will function during your validation. We recommend that you print out a copy of the LIS parameters and User-Defined Parameters in your test database and confirm that they are the same as your live database before starting your validation.
Dictionaries also play a role in how the software will function. We recommend that you check the key dictionaries in your test database and confirm that they are the same as your live database before starting your validation.
Please record your observations in the worksheet below. If there are discrepancies between test and live, please note the reason for the difference.
Note: Some exercises will refer to specific parameter settings or dictionary entries as prerequisites for a test. If they don’t apply to your Blood Bank’s operations, you may simply mark the test as “not applicable” and record the reason in the signoff at the end of the exercise.
Worksheet for Parameters and Dictionaries
Parameter/Dictionary Test = Live(Y/N)
Reason
LIS ParametersCustomer Defined ParametersAccess DictionaryProduct DictionaryBlood Type DictionaryRules Dictionary
Hospital: __________________________________
Name: ____________________________________ Title: _____________________________________
Signature: _________________________________ Date: _____________________________________
- 3-

1.4: How to Print Screens
In order to show evidence of inputs and outputs from the system, we recommend that you print the screen. How you perform this action depends on the type of hardware you’re using: DG terminal or PC.
A. Using a terminal
Terminal model: DG model 5220
Printer required: HP LaserJet III or IV
Setup and operation:
1. Connect a printer directly to Port B of the terminal.
2. On the terminal, go to the screen that is desired to be printed.
3. Press the (ALT> key, and at the same time, press the <F18> key until PORT B says "PRINT".
4. This will print exactly what is on the screen.
5. Since there is no form feed, the paper must be manually fed through by pressing the <FORMFEED> button on the printer. (Multiple screens can fit on one page)
B. Using a PC
Setup and Operation:
1. Manage a printer to your PC using the steps outlined by the operating system on your PC, or by or your organization.
2. Press the <Print Scrn> key whenever you want to print a screen to the printer to which your PC is managed.
- 4-

Chapter 2: DONOR PROCESSING2.1: Entering Donors
FUNCTION TO BE VALIDATED: Enter/Edit Donor - Entering a new Donor
Introduction:
The Enter/Edit Donor Routine is used to enter information about an individual who donates blood at your hospital for the fist time.
Dictionaries:
Blood Type Product Donor Group Antigen Antibody Marker Access Donor Edits: Confidential Donor Donor Number Donor Status Discontinue Status Donor Antigen Donor Antibody Donor Volume Allow other access to confidential donors
Toolbox Parameters Involved:
Donor Statuses BBK Medical Record Entry
This routine can also be accessed in:
Process Donor Reports to print:
Donor List New Donor List Inquiry Marker List Recruitment List
NOTE: Users may have the ability to define CUSTOM REPORT FORMATS when printing the standard reports mentioned above. Customization to the reports may not supply all information contained in the standard version.
- 5-

2.1 Validation Exercise A:
The following fields in this routine may only be entered/edited by someone who has access to them as defined in the LIS Access Dictionary: Donor Number, Donor Status, Total volume donated, Antigens, and Antibodies.
Enter at least 3 donors with a variety of information. Record the donor information for use in later exercises.
Donor NameSocial Security NumMedical Record Num
SexD.O.B.Age
Address or Alternate Address
Blood TypeAntibodiesAntigens Markers
Product and Volume
Defer UntilDate
1. At the Donor prompt, enter the full or partial name of the donor. A prompt appears asking if this is a new donor. Enter Y.
The name will default into the name field. Enter the name here as is. The error Message “<LAST,FIRST REST> will appear.”
Did the message as stated above appear? _________________
2. Enter the Social Security Number in the format of NNN-NN-NNNN, NNNNNNNNN, and NNN-NN-NNNNA. If it is entered incorrectly, verify that the following error message appears "Format must be NNN-NN-NNNN or NNN-NN-NNNNA".
Did the error message as stated above appear? _________________
3. Enter the Date of Birth in the format of either MM/DD/YY, MMDDYYYY, DD/MM/YY, or DDMMYYYY. If an incorrect format is entered such as 67/10/06, verify that the following error message appears "<MM/DD/YY or MMDDYYYY in US, else DD/MM/YY or DDMMYYYY - No future dates>."
Did the error message as stated above appear? _________________
4. The Age is a calculated field based on the Date of Birth. Verify that the age being displayed is correct.
Is the calculated age correct? ______________________
If the age of the donor is less than that defined at the BBK Donor Warning Age prompt in the System Parameters, the following warning message appears: “Warning: Donor Age is NN.”
- 6-

5. Enter the sex of the donor. You are only allowed to choose from M, F or U. If you enter a character that is not allowed, the following message will appear. “M, F or U”.
Did the message appear as stated above? _________________
6. If you choose a sex of M, Mr. will default in at the Mr/Ms field. If you choose a sex of F, Ms. will default in at the Mr/Ms field. If you choose a sex of U, nothing will default at the Mr/Ms field. This a free text field and will allow the user to make any edits to it. Are you able to change what defaults in at this prompt? _____________
Note: If the user enters a sex and then goes back and makes a change, it does not change Mr/Ms.
7. Medical Record: This prompt may be set up three different ways as defined in the LIS System Parameters. Please check with your Applications Specialist as to how it is defined and then proceed with the appropriate exercise. If the donor does not have a record in the Master Patient Index, this prompt MAY allow you to create one.
a. BBK DONOR MEDICAL RECORD ENTRY - defined as N (Do not set up a medical record number or MPI on this patient if one does not already exist.)
Do not find a corresponding entry from the MPI for this patient.
b. BBK DONOR MEDICAL RECORD ENTRY - defined as U (Create a medical record number for this donor)
Do not find a corresponding entry from the MPI search for this patient. After Filing the donor into the system, verify that a medical record number was created by accessing the View Patient Routine in Medical Records.
c. BBK DONOR MEDICAL RECORD ENTRY - defined as I (Create just an MPI for this donor)
Do not find a corresponding entry from the MPI search for this patient. After filing the donor into the system, check with the Medical Records department to verify that an MPI was created.
8. Enter the mnemonic of a defined Donor Status. You may only choose one that is defined in your LIS Parameters. If you enter an undefined mnemonic, the following error message will appear "The entry is not defined".
Did the error message as stated above appear? _________________
9. Enter the blood type of the donor. You may only choose from those defined in the Blood Type dictionary. If you enter a mnemonic that is not defined in this dictionary, the following error message will appear "The entry is not defined".
Did the error message as stated above appear? _________________
After entering the blood type, the screen label for it as defined in the Blood Type Dictionary will appear.
Did the screen label appear on the screen? ________________
Does it match what is defined in the Blood Type Dictionary?____________
10. Enter the Usual Product that this donor donates. The lookup will only display those products defined with Usual Donation Time (Min) in the Product Dictionary. If you enter a product that is not a donatable one
- 7-
but exists in the Product Dictionary, i.e. Rhogam, the following error message will appear: "The entry is unavailable.”
Did the error message as stated above appear? _________________
11. Enter the number of Recruit Interval Days that should pass before this donor may donate again. This will default to what is defined for the product at the prompt Usual Interval (Days) in the Product Dictionary.
12. Enter the Defer Until date that the donor must wait until before donating. The date format is MM/DD/YY, MM/DD/YYYY, DD/MM/YY, or DD/MM/YYYY. If you enter a date that does not follow this format, the following error message will appear "<MM/DD/YY or MMDDYYYY in US else DD/MM/YY or DDMMYYYY."
13. To enter any Donor Comments, enter "Y". A pop-up window appears to enter any free text or canned text comments. Use the <ESC> key to save them. If you entered any comments, a checkmark will appear next to the Donor Comments.
Does a checkmark appear next to the prompt Donor Comments? _______________
14. Identify the Donor Groups that this donor belongs to. You may only enter a mnemonic of a previously defined donor group from the dictionary. If you enter a mnemonic that is not defined, the following message will appear "The entry is not defined"
15. Enter the Home Address of the donor.
16. Enter an Alternate Address to store alternate contact information for the donor. If you respond Y at the ‘Alternate Address?’ prompt, you will be brought into an editor.
Verify that you are brought into this editor to enter an Alternate Address.
17. Enter Y at the ‘Use Alternate Address’ prompt and proceed with entering alternate address information for the donor. After filing the donor (step 26), you will need to verify that only the Alternate Address information appears on reports and in routines that you use as part of your standard operating procedures, with the exception of the Donor List. Enter/Edit Donor, Delete Donor, and Donor Merge/Unmerge.
18. Enter the Work Address of the donor.
19. The prompts Appt type. Schedule. Date. From. Thru display information about future appointments.
Verify that you cannot edit these fields _____________________________________
20. If Customer Defined Screens and Queries are attached and they are required, these must be answered.
21. Enter antigens and antibodies for the donor. You may only choose from those defined in the Antibody Dictionary. If you have defined some antibodies as clinically significant antibodies, enter a clinically significant antibody for one of the donors.
Expected Result: If you enter a value that is not defined in the dictionary, the following error message will appear "The entry is not defined".
22. Enter any Marker(s) for the donor. You may only choose from those defined in the Marker Dictionary. If you enter a mnemonic that is not defined in this dictionary, the following error message will appear "The entry is not defined".
23. Enter the Total Volume that the donor has donated. If the user enters 0 or alpha character this message appears: <N___N.N___N must be greater than zero>
- 8-

24. Enter Y or N if the donor should be flagged as Confidential. If the user enters anything other than Y or N the following message appears: “<Y/y or N/n>.”
25. File the Donor.
26. For the donor with an Alternate Address, verify that only the Alternate Address appears for the donor in all reports and routines that you use as part of your standard operating procedures, other than the Donor List. Enter/Edit Donor, Delete Donor, and Donor Merge/Unmerge ______________________________________________.
27. Print the following reports to verify that the donor information entered prints correctly.
Donor List New Donor List Inquiry Marker List Recruitment List
_____________________________________________________________________
THIS ROUTINE VALIDATED BY:________________________ DATE:__ /__ /__
ACCEPTABLE:__________________ NOT ACCEPTABLE: ___________________
HOSPITAL NAME: _____________________________________________________
- 9-

2.1.1 Algorithm: Duplicate Donor Record Check
Donor Lock AlgorithmWhen a donor is entered, the system will check to ensure that the donor record is not currently in use by another user. In addition, the system will check to ensure that the entered social security number is unique, to prevent the creation duplicate records. Algorithm DescriptionThe first prompt in the Enter/Edit Donor routine is for the donor. At this prompt, the user will identify the record that they wish to enter. If the record entered at the Donor prompt is not a new entry, the system will then check the lock table to determine if a lock currently exists for that donor. A lock is created when a user access a donor so that multiple users cannot access the same donor record at the same time and override the changes made by the other user. If a lock currently exists on the donor record, an error message is displayed to the user, and the user is not allowed to proceed. The error message appears as follows: "Record locked On <date> at <time> by <user> on <device>. Wait?" The second user then has the option to wait until the first user has completed edits and released the lock. If a lock does not exist, an additional check is performed to ensure the uniqueness of the Donor record. The social security number of the new record is entered and checked against the social security number index file. This index file contains all the social security numbers that are currently on file for existing donors. If the number entered by the user does not exist in this file, it is deemed unique and the user is allowed to proceed. If the number entered by the user exists in this file, and this social security number matches the current record being edited, (i.e. the social security number is correct for the current donor), the user is allowed to proceed. If the number entered by the user exists in this file, but is linked to a donor other than the donor currently being entered, an error message is displayed and the user is not allowed to proceed. The error message appears as follows: "In use by <number> <donor name> <social security number>"
- 10-

UNIT LEVEL TEST PLAN
Prerequisites:For the following scenarios, use the donors from the previous exercise or assume that the following donors currently exist in the database: Donor Name Donor Number Donor Social Security Number BBK Donor1 BBK Donor2BBK Donor3
Test # Type Description of scenario2.1.1.1 Stress If a user (identified as USER1) is currently editing BBK,DONOR 1 and a
second user attempts to access BBK,DONOR 1 to make edits, the following error message will appear: “Edit of donor number nnnnnnn in progress. By <user> on device <device> at <time> on <date>.” The second user then has the option to wait until the first user has completed edits and released the lock.
2.1.1.2 Stress If a user is attempting to enter a new donor (donor name TEST,DONOR 3), and the social security number of either BBK,DONOR 1 or BBK,DONOR 2 is entered, the following error message appears, and the user is not allowed to proceed:
"In use by <donor number> <patient name> <social security number>"2.1.1.3 Normal If a user is attempting to enter a new donor (donor name BBK,DONOR 3)
with a new social security number, the user is allowed to proceed.2.1.1.4 Normal If a user enters the existing donor of BBK,DONOR 2, their social security
number defaults in and the user is allowed to proceed.
_________________________________________________ ________________Executor of test plan Date
- 11-

2.2: Editing Donors
FUNCTION TO BE VALIDATED: Enter/Edit Donor - Editing an Existing Donor
Introduction:
The Enter/Edit Donor Routine is used to edit the information about individuals who donate blood.
Dictionaries:
Blood Type Product Donor Group Antigen Antibody Marker Access - Donor Edits: Confidential Donor, Donor Number, Donor Status, Discontinue Status, Donor
Antigen, Donor Antibody, Donor Volume, Allow other access to confidential donors
Toolbox Parameters involved:
Donor Statuses BBK Medical Record Entry
This function can also be accessed:
Process Donor
Reports to print:
Inquiry Restricted Edit List Donor List Confidential Activity Log
NOTE: Users may have the ability to define CUSTOM REPORT FORMATS when printing the standard reports mentioned above. Customization to the reports may not supply all information contained in the standard version.
- 12-

2.2 Validation Exercise A:
The following fields in this routine may only be edited by someone who has access to them as defined in the LIS Access Dictionary: Donor Number, Donor Status, Total volume donated, Antigens, Antibodies.
1. At the Donor prompt, identify the donor previously entered using each of the methods listed in the NPR BBK USER MANUAL VOLUME 2: DONOR FEATURES.
Method of identification What you entered to identify the donor Works as Expected ?(Y/N)
2. Change the Date of Birth. Verify that the age re-calculates.
3. Change the status of the donor to Evaluate.
4. Verify that the blood type of the donor cannot be changed via this routine.
5. Change the usual Product, if more than one can be chosen.
6. Enter a Defer Until date.
7. Change the home address.
8. Delete or add an Antigen.
9. File the changes.
10. Verify that the fields edited above were changed by performing a Donor Inquiry and viewing the category of Donor.
11. Did the edits update the donor file? ______________________
12. Under the Status History, did the system change the donor's status to Evaluate and log the date, time and user who made the change? ____________
13. Under the category Restricted Edits, did the system log the old donor status, the new donor status, the old antigens and new antigens? __________
14. Perform the above steps in both Enter/Edit and Process Donor Routines.
________________________________________________________________________
THIS ROUTINE VALIDATED BY:___________________________ DATE:__ /__ /__
ACCEPTABLE:___________________NOT ACCEPTABLE: ____________________ HOSPITAL NAME: ______________________________________________________
- 13-

2.3: Deleting Donors
FUNCTION TO BE VALIDATED: Delete Donor
Introduction:
The Delete Donor Routine allows users to delete a donor. Use this routine only when erroneous data has been entered. If specimens, donations, questionnaires and/or units are on file, the system does not allow you to delete a donor.
Dictionaries: None
Toolbox Parameters involved: None
This function can also be accessed:
Process Donor Delete Donor
Reports to print:
Deleted Donor List
NOTE: Users may have the ability to define CUSTOM REPORT FORMATS when printing the standard reports mentioned above. Customization to the reports may not supply all information contained in the standard version.
- 14-

2.3 Validation Exercise A:
You will need three donors that meet the following criteria:
Donor #1 - A donor with no specimens, units, questionnaires or donations entered on him/her.
Donor #: ____________________ Name: _____________________________
Donor #2 - A donor that only has a appointment scheduled.
Donor #: ____________________ Name: _____________________________
Appointment scheduled for: _______________________________________
Donor #3 - A donor that has specimens created on him/her, donations and units on file and questionnaires on file.
Donor #: _____________________ Name: _____________________________
1. For Donor #1: At the Donor prompt, identify the donor using each of the methods listed on page 1-8 of the NPR BBK USER MANUAL VOLUME 2: DONOR FEATURES.
2. After identifying the donor, the following information, if defined, will appear on the screen: Donor Number, social security number, date of birth, age, sex, status, blood type, usual product donated, total volume donated, dates of last donation, appearance, recruitment and home address. Verify that the information being displayed is correct.
3. Try to return past the Reason field. You will be prompted with "This is a required field!".
4. Enter a reason for deleting the donor and file.
5. For Donor #2: Prior to deleting the donor, generate the Appointment List for the date the donor was scheduled.
6. Follow the same steps, 1-4, that you used to delete Donor #1 and delete Donor #2. Generate the Appointment List for the date and verify that the appointment was cancelled.
7. For Donor #3: Try deleting the donor.
Expected Results: You will be prompted with the following error messages:
"Donations/deferrals on file." "Units on file.""Questionnaires on file." “Specimens on file.”
8. Delete the donation, if it is linked to a unit, then the system will warn the user with "Donation is linked to unit # NNNN." The system will not allow the user to Delete Donation/Deferral. In order to delete the donor, the following steps must be taken:
a. For the unit on file, edit the unit to remove the reference to the donor using the Edit Unit Routine or delete the unit using the Delete Unit Routine.
b. Delete the donations/deferrals on file using the Delete Donations/Deferral Routine.
- 15-

c. For the specimens on file, cancel all the specimens created on the donor.
d. For the questionnaires on file, delete the questionnaire by using the Questionnaire routine and choosing the action called Delete. If there is more than one questionnaire you get the following message: “This is the most current questionnaire date for this donor - continue?”
9. After the above steps have been taken, you will be able to delete the donor from the system by using steps 1-4 that were used to delete Donor #1.
10. Print the Deleted Donor List to verify that all of the donors have been deleted from the system.
________________________________________________________________________
THIS ROUTINE VALIDATED BY:___________________________ DATE:__ /__ /__
ACCEPTABLE: ___________________NOT ACCEPTABLE:____________________ HOSPITAL NAME: ______________________________________________________
- 16-

2.4: Entering Donations/Deferrals
FUNCTION TO BE VALIDATED: Enter/Edit Donations/Deferrals
Introduction:
This routine allows you to enter a donation, edit a donation already on file, and record or edit a deferral of a donor. In this routine, you will have the ability of entering/editing the donation volume, minutes, collected user mnemonics, record or edit the date/time of the deferral, comments for the donation and donor, and to print the donor card, file card and unit card.
Dictionaries:
Product MIS User Workload Function Customer Defined Parameters - BBK Donor Card BBK Donor File Card BBK Donor Unit Card Access - E/E Donation for Donor Status of Inactive, Evaluate, Discontinue
Toolbox Parameters involved: None
This function can also be accessed:
Process Donor
Reports to Print:
Inquiry Donation/Deferral List Donor List Override Warning Report
NOTE: Users may have the ability to define CUSTOM REPORT FORMATS when printing the standard reports mentioned above. Customization to the reports may not supply all information contained in the standard version.
- 17-

2.4 Validation Exercise A:
Prerequisite:
Define the Access Dictionary so the user does not have access to Enter Donations for the statuses of INACTIVE, EVALUATE, or DISCONTINUE. Once you complete step 1b, change the Access Dictionary to allow the user to enter donations and continue.
Define the ‘Enter Unit From Enter Donation Routines?’ prompt as YES or ASK in the Access Dictionary.
Enter a new donor into the system with a deferred date defined and a status of INACTIVE, EVALUATE, or DISCONTINUED.
Donor NameSocial Security NumMedical Record Num
SexD.O.B.Age
Address or Alternate Address
Blood TypeAntibodiesAntigens Markers
Product and Volume
Defer UntilDate
1. At the Donor prompt in the Enter/Edit Donation/Deferral Routine, identify the donor just entered using each of the methods listed in the NPR BBK USER MANUAL VOLUME 2: DONOR FEATURES.
Method of identification What you entered to identify the donor Works as Expected ?(Y/N)
a. If the donor has a Defer Until Date defined, the following warning message will appear: "Donor is deferred until MM/DD/YY - continue?"
b. If the user does not have the access to enter a donation, the following error message will appear "Donor status is <STATUS>- not allowed."
Was this message received? _____
c. Change the Access Dictionary to allow the user to enter donations for the status used above.
d. Go back into the Enter/Edit Donations/Deferrals routine. If the donor's status is INACTIVE, DISCONTINUED or EVALUATE, the following warning message will appear: "Donor Status is <STATUS> - continue?"
Was this message received? _____
2. Enter the Date of the donation.
- 18-

Enter the collection Time.
Enter N at the Defer prompt
3. The Product will default to the Usual Product as entered in the Enter/Edit Donor Routine.
4. The Volume will default to what is defined in the Product Dictionary at the Usual Volume but may be edited as needed.
5. The Minutes will default to what is defined in the Product Dictionary at the prompt Usual Donation Time (Min).
6. Enter the mnemonic of the user who collected the product.
7. Enter a workload function.
8. Enter Comments about this donation. After hitting <ESC> to get out of the Entering screen editor, a checkmark will appear next to the word Comments.
9. Enter Donor Comments about the donor. After hitting <ESC> to get out of the screen editor, a checkmark will appear next to the word Donor Comments.
10. Enter the printer for the Donor Card, File Card and Unit Card.
11. File the donation. If you have access to Enter Unit From Enter Donation Routines? you can now enter a unit to be associated with this donation.
12. You will be branched to the Enter Inventory Units Routine. Enter the unit and File. Record the Unit Number.
13. If using the standard NPR report fragments for the above cards, verify that the following information is appearing:
DONOR CARD
Donor name Donor number Donor status Blood type Social security number Number of donations Total volume donated by the donor Last Donation date/time/product Antibodies Donor since if donor entered in for the first time
DONOR FILE CARD
Donor name Donor number Donor status Social security number Age Sex Blood type Donor comment
- 19-

Donation date/time/product Volume of the donation Collection time in minutes Collected by Workload function Donation comments Total volume donated by the donor Total number of donations for the donor Total number of appearances for the donor
DONOR UNIT CARD
Donor name Donor number Donor status Social security number Blood type Donor comment Donation date/time/product Volume of the donation Collection time in minutes Collected by Donation comments
16. Print the following reports to verify that a donation has been entered on a donor:
Donor Inquiry Donation/Deferral List Donor List
17. Print the following report to verify when a user has overridden a warning message:
Override Warning Report
________________________________________________________________________
THIS ROUTINE VALIDATED BY:___________________________ DATE: __ /__ /__
ACCEPTABLE: ___________________NOT ACCEPTABLE:____________________
HOSPITAL NAME: ______________________________________________________
- 20-

2.4 Validation Exercise B:
Prerequisite:
Define the Access Dictionary so the user has access to Enter Donations.
Define the ‘Enter Unit From Enter Donation Routines?” prompt as NO.
1. At the Donor prompt, identify the donor entered in Exercise A.
a) If the donor has a Defer Until Date defined, the following warning message will appear: "Donor is deferred until MM/DD/YY - continue?"
b) If the donor’s status is INACTIVE, DISCONTINUED or EVALUATE, the following warning message will appear: “Donor Status is < STATUS> - continue?”
2. Was this message received? _____
3. Enter the date of a previously entered donation.
4. Expected Result:
a) A lookup of any existing donations will appear. Do not choose an existing Donation, but enter the same date as one already on file. The following warning message will appear: “New donation/deferral for NN/NN/NN - OK?”. Respond Y.
5. Enter the Collection Time.
6. Enter N at the Defer prompt
7. The Product will default to the Usual Product as entered in the Enter/Edit Donor Routine.
a) If the product you are entering has already been donated by the donor within the Usual Interval (Days) as defined in the Product Dictionary, you will see the following warning message: “WB (Whole Blood) Interval = NN days Maximum = NN year Product last donated on MM/DD/YY. Continue?”
b) If the donation you are entering will exceed the Maximum Donations (Year) as defined in the Product Dictionary, you will see the following warning: “WB (Whole Blood) Interval = NN days Maximum = NN year Product last donated on MM/DD/YY. Another donation for product will exceed the maximum per year. Continue?”
8. The Volume will default to what is defined in the Product Dictionary at the Usual Volume but may be edited as needed.
11. The Minutes will default to what is defined in the Product Dictionary at the prompt Usual Donation Time (Min).
12. Enter the mnemonic of the user who collected the product.
13. Enter a workload function.
14. Enter Comments about this donation. After hitting <ESC> to get out of the Entering screen editor, a checkmark will appear next to the word Comments.
- 21-

15. Enter Donor Comments about the donor. After hitting <ESC> to get out of the screen editor, a checkmark will appear next to the word Donor Comments.
16. Enter the printer for the Donor Card, File Card and Unit Card.
17. File the donation. If you do not have access to Enter Unit From Enter Donation Routine? you will not be prompted to enter a unit. (If a unit is not entered at this time, you are never allowed to associate the unit with the donation.)
18. If using the standard NPR report fragments for the above cards, verify that the following information is appearing:
DONOR CARD
Donor name Donor number Donor status Blood type Social security number Number of donations Total volume donated by the donor Last Donation date/time/product Antibodies Donor since if donor entered in for the first time
DONOR FILE CARD
Donor name Donor number Donor status Social security number Age Sex Blood type Donor comment Donation date/time/product Volume of the donation Collection time in minutes Collected by Workload function Donation comments Total volume donated by the donor Total number of donations for the donor Total number of appearances for the donor
DONOR UNIT CARD
Donor name Donor number Donor status Social security number Blood type Donor comment Donation date/time/product Volume of the donation Collection time in minutes
- 22-

Collected by Donation comments
19. Print the following reports to verify that a donation has been entered on a donor:
Donor Inquiry Donation/Deferral List Donor List
20. Print the following report to verify when a user has overridden a warning message:
Override Warning Report ________________________________________________________________________
THIS ROUTINE VALIDATED BY:___________________________DATE: __ /__ /__
ACCEPTABLE: ___________________NOT ACCEPTABLE:____________________
HOSPITAL NAME: ______________________________________________________
- 23-

2.4 Validation Exercise C:
For this exercise, we will be editing the donation from Exercise A.
1. At the Donor prompt, identify the donor from Exercise A.
2. At the date prompt do a <Lookup> and choose the Donation entered from Exercise A. The date, time, defer, product, volume, minutes, collected by, defer until workload function will default in on the screen if they have been entered previously.
3. Try to change the product donated. If a unit has already been entered into inventory for this donation, you will be prompted with "Product for unit number XXXXX is <mnemonic>" and you will not be able to change it (XXXXXX=unit number).
4. Increase or decrease the volume. You will be prompted with "Warning: volume for unit number XXXXXX is NNN. Continue?". Enter Y to continue.
(XXXXXX=unit number, NNN=volume)
Old volume: _______________________ New volume: ______________________
5. Increase or decrease the minutes.
Old minutes: ______________________ New minutes: _____________________
6. Change the mnemonic of the user who collected the product.
Old user: _________________________ New user: _______________________
7. Edit the donation comments and file.
Old comments: ___________________________________________________________
New comments: ___________________________________________________________
8. Reprint the following reports and cards and verify that the edits made in this routine are reflected on the reports and cards:
Donor Inquiry Donor List Donation/Deferral List Donor Card Donor File Card Donor Unit Card
________________________________________________________________________
THIS ROUTINE VALIDATED BY: __________________________DATE: __ / __ / __
ACCEPTABLE: _____________________NOT ACCEPTABLE:__________________
HOSPITAL NAME: ______________________________________________________
- 24-
2.3 Validation Exercise D:
1. At the Donor prompt, identify the donor from the previous exercises or enter a new donor.
2. Enter the Date of the deferral. If the date is the same as a donation/deferral on file, a lookup will display donations/deferrals for that date. Hit ESC to exit the lookup and a message appears:
"New donation/deferral for __(date)__. OK?"
3. Enter the Time of the deferral.
4. Defer? Enter "Y".
5. Enter the Defer Until date.
6. Enter a Comment as to why the donor was deferred.
7. Print the following reports to verify that a deferral has been made for the donor:
Donor Inquiry Donor List Donation/Deferral List
8. Print the following report to verify when a user has overridden a warning message.
Override Warning Report
________________________________________________________________________
THIS ROUTINE VALIDATED BY:__________________________DATE: __ / __ / __
ACCEPTABLE: ___________________NOT ACCEPTABLE:__________________ HOSPITAL NAME: ______________________________________________________
- 25-

2.4.1 Algorithm: Donor Eligibility Check (Interval)
Donate too soon Algorithm:When a donation appointment is scheduled or a donation is entered, the system will take the appointment/donation date and the product and utilize this information in the algorithm which determines if it is too soon for the donor to be donating that product.
Algorithm Description:Once the user enters the appointment/donation date and product to be donated, the algorithm will check the Product Dictionary to see if there is a USUAL INTERVAL (number of days) defined for that product. If there is no USUAL INTERVAL defined in the Product Dictionary, the algorithm performs the maximum donations check described further below. If there is a USUAL INTERVAL defined in the Product Dictionary, the algorithm takes the appointment/donation date and adds the number of days defined at the USUAL INTERVAL field in order to calculate the cut-off date for any previous donations. The algorithm then searches the donor's history file and obtains the date of the most recent donation for that product. The date for the most recent donation is compared to the cut-off date. If the date of the most recent donation is prior to the cut-off date, the algorithm performs the maximum donations check described further below. If the date of the most recent donation is after the cut-off date, the warning message "Product last donated on MM/DD/YY." is stored in a temporary file which will be displayed to the user once the algorithm has completed all checks. The algorithm will then check the Product Dictionary to see if there is a MAXIMUM DONATIONS (in years) defined for that product. If there is no MAXIMUM DONATIONS defined in the Product Dictionary, the algorithm performs the future appointment check described further below. If there is a MAXIMUM DONATIONS defined in the Product Dictionary, the algorithm will use the appointment/donation date entered by the user to calculate a date range which represents the one year period prior to the appointment/donation date. For example if the date entered by the user is 3/1/99 then the system will calculate a date range of 02/28/98 through 02/28/99. The algorithm will then count the number of donations for that product within the calculated date range. If the number of donations found is equal to the number entered at the MAXIMUM DONATIONS field in the Product Dictionary, the warning message "Another donation for product will exceed the maximum per year." is stored in a temporary file which will be displayed to the user once the algorithm has completed all checks. If the number of donations found is greater than the number entered at the MAXIMUM DONATIONS field in the Product Dictionary, the warning message "Donations for product already exceed the maximum per year." is stored in a temporary file which will be displayed to the user once the algorithm has completed all checks. If there is a USUAL INTERVAL defined in the Product Dictionary, the algorithm will then perform the last check, which is to check the appointment/donation date entered by the user against any appointments which have been scheduled for a future date. The algorithm will add the number of days entered at the USUAL INTERVAL field in the Product Dictionary to the date entered by the user and save this as the end of date range.
- 26-

The algorithm will also subtract the number of days entered at the USUAL INTERVAL field in the Product Dictionary from the date entered by the user and save this as the beginning of the date range. If, however, the date calculated as the ending of the date range is before the current date, then the current date is saved as the begin of date range (since appointments cannot be in the past). The algorithm will then check to see if there are any donation appointments for that product within the calculated date range. If there is another appointment within the date range, then the warning message "Appointment for product scheduled on MM/DD/YY at HHMM." is stored in a temporary file which will be displayed to the user once the algorithm has completed all checks. The algorithm then checks to see if there are any warning messages stored in the temporary file. If there are no warning messages stored in the temporary file, then the user is allowed to enter the appointment or donation. If there are warning messages stored in the temporary file, the algorithm will display all of the warning messages to the user. If the user wishes to continue with the donation or appointment, the user must choose "YES" to the prompt "Continue?". This override of the warning message(s) is stored on the Override Warning Report along with the donor, history number, product and warning messages. The Override Warning Report can be set up to automatically print on a daily basis or it is printed daily by the Blood Bank Supervisor. If the user chooses "NO" to the "Continue?" prompt, he/she is returned to the donation or appointment screen.
- 27-

2.3.1 UNIT LEVEL TEST PLAN Prerequisites: For the following scenarios, assume that the following is true at the time of each example:
The product Whole Blood (WB) has a usual interval of 56 days and maximum donations per year of 6. Donor #1 ____________________________________Whole Blood (WB) has a usual interval of 56 days.Whole Blood (WB) has maximum donations per year of 6.Donor’s previous donation: T-40Donor’s next donation: T (today)
Donor #2 ____________________________________Whole Blood (WB) has a usual interval of 56 days.Whole Blood (WB) has maximum donations per year of 6.Donor’s previous donation: T-120Donor’s previous donation: T-60Donor’s donation: T (today)Donor’s next donation: T+60
Use Donor #2 from above ____________________________________Whole Blood (WB) has a usual interval of 56 days.Whole Blood (WB) has maximum donations per year of 6.Donor’s previous donation: T-350Donor’s previous donation: T-275Donor’s previous donation: T-175Donor’s previous donation: T-45Donor’s next donation: T+90
Test # Type Description2.4.1.1 Invalid Donation within interval days (56)
If the user enters a donation/appointment for the product WB, the algorithm will subtract the interval days and obtain a cut-off date of (appointment date minus 56 days). The algorithm then checks to see if there are any previous donations for the product WB which are after the calculated cut-off date. Since the patient's last donation was not prior to the calculated cutoff date, the following warning message is displayed to the user: WB (WHOLE BLOOD) Interval = 56 days Maximum = 6 year Product last donated on MM/DD/YY Continue? If the user continues with the donation/appointment, the override is logged on the Override Warning Report. The Override Warning Report can be set up to automatically print on a daily basis or it is printed daily by the Blood Bank Supervisor.
2.4.1.2 Normal Donation not within interval days and maximum donations per year not exceeded.
- 28-
If the user enters an appointment date of T+60 for the product WB, the algorithm will subtract the interval days and obtain a cut-off date. The algorithm then checks to see if there are any previous donations for the product WB which are after the calculated cut-off date. Since the patient's last donation was prior to the cutoff date, and therefore fine, the algorithm then checks to see if there is a maximum donations set for the product WB in the Product Dictionary. Since there is a maximum donations of 6 defined for the WB product, the algorithm calculates the date range and counts the number of donations within that date range. Since the donor only has three donation within the calculated date range the check passes.
2.4.1.3 Invalid Donation within interval days (56) and maximum donations per year exceeded.
If the user enters an appointment date for T+90 for the product WB, the algorithm will subtract the interval days and obtain a cutoff date. The algorithm then checks to see if there are any donations for the product after the calculated cutoff. Since the donor has a scheduled donations appointment after the cutoff, a warning message will be displayed.
This is saved to the temporary error file and the algorithm continues and checks the maximum donations per year. Since there are already 6 donations on file and another appointment, all within a 12 month period, the warning message “ Donations for product already exceed the maximum per year” is added to the temporary error file. Since all the other checks pass, the errors stored in the temporary error file are displayed as follows:
“WB (whole Blood) interval = 56 days Maximum = 6 yearProduct last donated on MM/DD/YY.Another donation will exceed the maximum per year.Appointment for product scheduled on MM/DD/YY at nnnn>Continue?
If the user continues, the override is logged on the Override Warning Report.
Prerequisites: For the following examples, assume that the following is true at the time of each example: The product Whole Blood (WB) has a usual interval of 56 days and maximum donations per year of 6. The Donor has the following previous donations on file for the product WB: Date Product 1 03/20/01 WB 2 05/03/01 WB 3 08/20/01 WB 4 11/05/01 WB 5 01/03/02 WB 6 03/10/02 WB The Donor has the following appointments on file for the product WB: Date Product
- 29-

1 06/10/02 WB
Test # Type Description2.4.1.3 Invalid If the user enters an appointment date of 05/24/02 for the product WB, the
algorithm will subtract the interval days and obtain a cut-off date of 04/01/02. The algorithm then checks to see if there are any donations for the product WB after the calculated cut-off date of 04/01/02. Since the patient has a scheduled donation appointment on 06/10/02, a warning message will be received.
This is saved in the temporary error file and the algorithm continues and checks the maximum donations per year. Since there are already six donations on file and another appointment, all within a 12 month period, the warning message "Donations for product already exceed the maximum per year." is added to the temporary error file. Since all the other checks in the algorithm pass, the mentioned errors which are stored in the temporary error file are displayed to the user as follows:
The following message is what will be received: "WB (WHOLE BLOOD) Interval = 56 days Maximum = 6 year Product last donated on 03/10/02 . Another donation for product will exceed the maximum per year.Appointment for product scheduled on 06/10/02 at 0900."
Continue?" If the user continues with the donation/appointment, the override is logged on the Override Warning Report. The Override Warning Report can be set up to automatically print on a daily basis or it is printed daily by the Blood Bank Supervisor.
________________________________________________ ____________ Executor of test plan Date
- 30-

2.4.2 Algorithm: Donor Eligibility Check (Deferral)
Algorithm to check status of donor:When a donation or an appointment is entered into the system, the system will check the eligibility of the donor based upon the status of that donor. Algorithm Description:Once a donor is first identified in the Enter/Edit Donations or Enter/Edit Appointments routine, the system checks to see if the donor is deferred. First, the system will check to see if a defer date exists on the donor's record. If a date is defined, the system will check to see if this date is greater than today's date. If the date is greater than today's date, the error message "Donor is deferred until <date> - Continue?" is displayed to the user. If the user wishes to continue with the donation or appointment, the user must respond "Y" to the prompt "Continue?". The warning override is logged on the Override Warning Report. The Override Warning Report can be set up to automatically print on a daily basis or it is printed daily by the Blood Bank Supervisor. If no defer date is identified on the record, the system will check to determine if the donor is active. If so, the user is allowed to proceed. If the donor does not have a status of ACTIVE, additional status checks are performed as follows. If the status is either "Inactive", "Evaluate", or "Discontinue", the system will check the Access Dictionary to determine the access level of the user. If the user does not have access, the error message "Donor status is <status> - not allowed." is displayed, and the user is not allowed to proceed. If the user does have access, the error message "Donor status is <status> - Continue?" is displayed. If the user wishes to continue with the donation or appointment, the user must respond "Y" to the prompt "Continue?". The warning override is logged on the Override Warning Report. The Override Warning Report can be set up to automatically print on a daily basis or it is printed daily by the Blood Bank Supervisor.
- 31-

UNIT LEVEL TEST PLAN Prerequisites: For the following scenarios, assume that the following donors currently exist in the database:
2.4 Donor Name Donor Defer Date Donor Status BBK,DONOR 5 T+90 ActiveBBK,DONOR 6 None InactiveBBK,DONOR 7 None DiscontinuedBBK,DONOR 8 None Evaluate In addition, assume that the current date is May 6, 2002.
Test # Type Description of scenario2.4.2.1 Invalid A user attempts to schedule an appointment for donor BBK,DONOR 5.
Upon accessing this donor, the following message will appear: "Donor is deferred until MM/DD/YY - Continue?" If the user selects "Y", then they are allowed to proceed with scheduling the appointment, and the warning override is logged on the Override Warning Report. The Override Warning Report can be set up to automatically print on a daily basis or it is printed daily by the Blood Bank Supervisor. If the user selects "N", they are returned to the donor prompt.
2.4.2.2 Invalid A user (identified as USER1) attempts to schedule an appointment for donor BBK,DONOR 6. Upon accessing this donor, the algorithm determines that the status of the donor is Inactive. The algorithm then determines the access level of USER1. If the user does not have access to proceed, the following error message appears: "Donor status is INACTIVE – not allowed."
2.4.2.3 Invalid A user (identified as USER1) attempts to schedule an appointment for donor, BBK,DONOR 7. Upon accessing this donor, the algorithm determines that the status of the donor is Discontinued. The algorithm then determines the access level of USER1. If the user does not have access to proceed, the following error message appears: "Donor status is DISCONTINUED - not allowed."
2.4.2.4 Invalid A user (identified as USER1) attempts to schedule an appointment for donor BBK,DONOR 8. Upon accessing this donor, the algorithm determines that the status of the donor is Evaluate. The algorithm then determines the access level of USER1. If the user does not have access to proceed, the following error message appears: "Donor status is EVALUATE – not allowed."
2.4.2.5 Normal If it is determined that USER1 does have sufficient access and the donor status is Inactive, the following message appears: "Donor status is INACTIVE – Continue?" If USER1 responds "Y" to this message, they are allowed to schedule the
- 32-

appointment, and the warning override is logged on the Override Warning Report. The Override Warning Report can be set up to automatically print on a daily basis or it is printed daily by the Blood Bank Supervisor. If USER1 selects "N", they are returned to the donor prompt.
2.4.2.6 Normal If it is determined that USER1 does have sufficient access and the donor status is Discontinued, the following message appears: "Donor status is DISCONTINUED - Continue?" If USER1 responds "Y" to this message, they are allowed to schedule the appointment, and the warning override is logged on the Override Warning Report. The Override Warning Report can be set up to automatically print on a daily basis or it is printed daily by the Blood Bank Supervisor. If USER1 selects "N", they are returned to the donor prompt.
Test # Type Description of scenario2.4.2.7 Normal If it is determined that USER1 does have sufficient access and the donor
status is Evaluate, the following message appears: "Donor status is EVALUATE – Continue?" If USER1 responds "Y" to this message, they are allowed to schedule the appointment, and the warning override is logged on the Override Warning Report. The Override Warning Report can be set up to automatically print on a daily basis or it is printed daily by the Blood Bank Supervisor. If USER1 selects "N", they are returned to the donor prompt.
_____________________________________________ ________________ Executor of test plan Date
- 33-

2.4.3 Algorithm: Donor Eligibility Check (Age)
Algorithm to check age of donor
When a donation or an appointment is entered into the system, the system will check the eligibility of the donor based upon the age of that donor. Algorithm Description
When either a date of birth or a donation date is being entered/edited in the following cases, a donor age check is made.
1) Enter/Edit Donor - Date of Birth field2) Enter Units into Inventory - Donor field3) Schedule Donor Appointment4) Enter/Edit Donor Appointment5) Enter/Edit Donation
There is a system parameter (BBK Donor Warning Age) to determine at which age a donor warning should be given. If the date of birth of a donor is entered which would make the donor less than the age defined in the system parameter, the following message appears:
“Warning: Donor Age is ZZ.”
After a donor is identified and the date of the donation is entered, if his/her age at the time of donation is less than the age in the system parameter, one of two messages will appear:
There is an Access Dictionary parameter (Enter Donation on Underage Donor) that governs whether the user may enter donations on underage donors. If this field is set to Y for the user's Access Group, the following message will display:
“Donor age (at this date) is ZZ – continue?”
The user is able to continue entering the donation. This message is indexed to the BBK Override Warning Report.
If the Enter Donation on Underage Donor field is set to N in the Access Dictionary, the following message will display:
“Donor age (at this date) is ZZ – not allowed?”
The user will not be able to continue with the donation.
- 34-

2.4.3 UNIT LEVEL TEST PLAN
Prerequisites:There are no prerequisites for these exercises.
Test # Type Description of Scenario2.4.3.1 Normal Make note of the BBK Donor Warning Age parameter in the System
Parameters. Enter a new donor in Enter/Edit Donor with a birth date that would make this donor at least as old as the age defined for this parameter.
The user should be allowed to proceed without any warning messages.2.4.3.2 Normal With the Access Dictionary set to ‘Enter Donation on Underage Donor?’
Y, enter a unit into inventory. At the Donor field, enter the Donor created in step 2.4.3.1 above.
The user should be allowed to proceed without any warning messages.2.4.3.3 Invalid Enter a new donor in Enter/Edit Donor with a birth date that would make
this donor younger than the age defined for this parameter.
The following warning message will display:
“Warning: Donor Age is ZZ.”
You will be allowed to proceed with entering the donor. Complete the rest of the required information and file the new donor.
2.4.3.4 Invalid With the Access Dictionary set to ‘Enter Donation on Underage Donor?’ Y, enter a unit into inventory. At the Donor field, enter the Donor created in step 2.4.3.3 above. The following error message will display:
“Donor age (at this date) is ZZ –continue?”
Enter Y and you will be allowed to proceed. File the unit and print the Override Warning Report to verify that the override of this warning message appears on the report.
2.4.3.5 Normal With the Access Dictionary set to ‘Enter Donation on Underage Donor?’ N, enter a unit into inventory. At the Donor field, enter the Donor created in step 2.4.3.1 above.
The user should be allowed to proceed without any warning messages.2.4.3.6 Invalid With the Access Dictionary set to ‘Enter Donation on Underage Donor?’
N, enter a unit into inventory. At the Donor field, enter the Donor created in step 2.4.3.3 above. The following error message will display:
“Donor age (at this date) is ZZ – not allowed.”You will not be allowed to proceed.
2.4.3.7 Normal With the Access Dictionary set to ‘Enter Donation on Underage Donor?’ N, attempt to schedule an appointment, via the Schedule Appointments routine, on the donor created in step 2.4.3.1 above. Enter T (Today) for the date.
The user should be allowed to proceed without any warning messages.
- 35-

2.4.3.8 Invalid With the Access Dictionary set to ‘Enter Donation on Underage Donor?’ N, attempt to schedule an appointment, via the Schedule Appointments routine, on the donor created in step 2.4.3.3 above. Enter T (Today) for the date. The following error message will display:
“Donor age (at this date) is ZZ – not allowed.”
You will not be allowed to proceed.
2.4.3.9 Normal With the Access Dictionary set to ‘Enter Donation on Underage Donor?’ Y, attempt to schedule an appointment, via the Schedule Appointments routine, on the donor created in step 2.4.3.1 above. Enter T (Today) for the date.
The user should be allowed to proceed without any warning messages.2.4.3.10 Invalid With the Access Dictionary set to ‘Enter Donation on Underage Donor?’
Y, attempt to schedule an appointment, via the Schedule Appointments routine, on the donor created in step 2.4.3.3 above. Enter T (Today) for the date. The following warning message will display:
“Donor age (at this date) is ZZ – continue?”
You will be allowed to proceed. File the appointment and print the Override Warning Report to verify that the override of this warning message appears on the report.
2.4.3.11 Normal With the Access Dictionary set to ‘Enter Donation on Underage Donor?’ N, schedule an appointment, via the Enter/Edit Appointments routine, on the donor created in step 2.4.3.1 above. Enter T (Today) for the date.
The user should be allowed to proceed . You may receive warning messages if previous appointments have been entered or there are previous donations made within the usual interval days in the Product Dictionary.
2.4.3.12 Invalid With the Access Dictionary set to ‘Enter Donation on Underage Donor?’ N, schedule an appointment, via the Enter/Edit Appointments routine, on the donor created in step 2.4.3.3 above. Enter T (Today) for the date. The following error message will display:
“Donor age (at this date) is ZZ – not allowed.”
You will not be allowed to proceed.
2.4.3.13 Normal With the Access Dictionary set to ‘Enter Donation on Underage Donor?’ Y, schedule an appointment for T (Today), via the Enter/Edit Appointments routine, for the donor created in step 2.4.3.1.
The user should be allowed to proceed. You may receive warning messages if previous appointments have been entered or there are previous donations made within the usual interval days in the Product Dictionary
2.4.3.14 Invalid With the Access Dictionary set to ‘Enter Donation on Underage Donor?’ Y, schedule an appointment for T (Today), via the Enter/Edit Appointments routine, for the donor created in step 2.4.3.3. The following error message will display:
- 36-

“Donor age (at this date) is ZZ – continue?”
You will be allowed to proceed. File the appointment and print the Override Warning Report to verify that the override of this warning message appears on the report.
2.4.3.15 Normal With the Access Dictionary set to ‘Enter Donation on Underage Donor?’ N, enter a donation, via the Enter/Edit Donations/Deferrals routine, on the donor created in step 2.4.3.1. Enter T (Today) for the date.
The user should be allowed to proceed. You may receive warning messages if previous appointments have been entered or there are previous donations made within the usual interval days in the Product Dictionary.
2.4.3.16 Invalid With the Access Dictionary set to ‘Enter Donation on Underage Donor?’ N, enter a donation, via the Enter/Edit Donations/Deferrals routine, on the donor created in step 2.4.3.3. Enter T (Today) for the date. The following error message will display:
“Donor age (at this date) is ZZ – not allowed.”
You will not be allowed to proceed.
2.4.3.17 Normal With the Access Dictionary set to ‘Enter Donation on Underage Donor?’ Y, enter a donation for T (Today), via the Enter/Edit Donations/Deferrals routine, for the donor entered in step 2.4.3.1.
2.4.3.18 Invalid With the Access Dictionary set to ‘Enter Donation on Underage Donor?’ Y, enter a donation for T (Today), via the Enter/Edit Donations/Deferrals routine, for the donor entered in step 2.4.3.3. Any previous appointments will display. You will receive a message:
“New donation/deferral for <date> - ok?” Respond “Y”.
The following error message will display:
“Donor age (at this date) is ZZ – continue?”
You will be allowed to proceed. File the donation and print the Override Warning Report to verify that the override of this warning message appears on the report.
______________________________________ ___________________________Executor of Test Plan Date
2.5: Deleting Donations/Deferrals
FUNCTIONS TO BE VALIDATED: Delete Donation/Deferral
- 37-

Introduction:
This routine is used to delete any donations or deferrals entered on a donor.
Dictionaries: None
Toolbox Parameters involved: None
This routine can also be accessed:
Process Donor
Reports to print:
Deleted Donation/Deferral List Donor Inquiry Donor List Donor's Units List
NOTE: Users may have the ability to define CUSTOM REPORT FORMATS when printing the standard reports mentioned above. Customization to the reports may not supply all information contained in the standard version.
- 38-

2.5 Validation Exercise A:
You will need three donors that meet the following criteria:
(a) Donor #1 (steps 1-4) A donation who’s unit was entered into inventory.
Donor #: ____________________ Name: _____________________________
Unit # donated: __________________________________________________
(b) Donor #2 (steps 1-3) A donation who’s unit was NOT entered into inventory.
Donor #: ____________________ Name: ____________________________
(c) Donor #3 (steps 1-6) A donor that has a deferral entered.
Donor #: ____________________ Name: _____________________________
For Donor #1:
1. At the Donor prompt, in the Delete Donation/Deferral routine, identify donor #1.
2. Enter the Date of the donation. A lookup will appear displaying the donations/deferrals from that date. Since this donation is linked to a unit number, you will be prompted with "Donation is linked to unit number XXXXXX." (where XXXXXX=unit number of product).
3. Before the system will allow you to delete the donation, you must first remove the donor's reference on the unit via the Edit Unit Routine.
4. After step 3 has been done, you will be allowed to delete the donation. A Reason for the deletion must be entered.
For Donor #2:
1. At the Donor prompt, in the Delete Donation/Deferral routine, identify donor #2.
2. Enter the date of the donation. A lookup will appear displaying the donations from that date.
3. Enter a Reason for the deletion.
Donor #3:
1. At the Donor prompt, in the Delete Donation/Deferral routine, identify donor #3. A message will appear stating: "Donor is deferred until XX/XX/XX - continue?"
Did the message appear as above? ____________________
2. Enter the date the deferral was entered. A lookup will appear displaying the donations/deferrals from that date.
3. Enter a Reason for the deletion and respond “y” to <delete?>.
4. Confirm the message “Delete Defer until date” is received.
- 39-

5. Print the following reports to verify that any of the deletions of donations and deferrals for Donors #1, #2 and #3 are correct:
Deleted Donation/Deferral List Donor Inquiry Donor List
6. Print the following report to verify when a user has overridden a warning message:
Override Warning Report
________________________________________________________________________
THIS ROUTINE VALIDATE BY:______________________________DATE:__/__/__
ACCEPTABLE:___________________ NOT ACCEPTABLE:____________________ HOSPITAL NAME: ______________________________________________________
- 40-

2.6: Merging and Unmerging Donors
PART I
FUNCTION TO BE VALIDATED: Merge/Unmerge Donor - Merging two donors
Introduction:
The Merge/Unmerge Donor Routine is used to combine two donors records into one entry in the donor database or to undo a merge after two donors have been combined to restore each donor to its original form. This may only be used in the event that the hospital is not assigning a unit number or an internal Master Patient Index number to its donors.
Dictionaries:
Enter/Edit LIS Access DictionaryRelease Frozen History?
Toolbox Parameters involved:
BBK Donor Med Record Entry BBK Merge Chk Ab/Ag/Mk
This function can also be accessed:
Process Donor
Reports to print:
Donor Inquiry Blood Bank History Inquiry Blood Bank History Merge/Unmerge/Switch Log Frozen BBK History List Blood Bank History Merge/Unmerge/Switch Inquiry
NOTE: Users may have the ability to define CUSTOM REPORT FORMATS when printing the standard reports mentioned above. Customization to the reports may not supply all information contained in the standard version.
- 41-

2.6 Validation Exercise A:
Prerequisites:
This section may only be validated if the System Parameters are as follows:
BBK DONOR MED RECORD ENTRY is set to N. BBK Merge Chk Ab/Ag/Mk is left blank.
Please confirm these parameters with your Applications Consultant.
You will need two donors that have NOT been linked to an existing MPI:
Donor #1: _________________________________
Donor #2: _________________________________
And two donors that have been linked to existing MPI numbers:
Donor #3: _________________________________
Donor #4: _________________________________
1. At the Action prompt enter the letter "M" for Merge or do an F17 lookup and choose Merge.
2. The cursor will automatically move to the Donor prompt under the heading Merge Donor. At the Donor prompt, identify donor #1 from above.
3. The cursor will now move to the Donor prompt under the heading Into Donor. At the Donor prompt, identify donor #2.
You will be prompted with "Are you sure?"
Were you prompted for confirmation? ___________________
Enter Y and perform the merge.
4. Now follow the above steps to merge donor 2, into donor 3.
Again, you will be prompted with "Are you sure?"
Did the confirmation message appear? __________________
Enter Y and perform the merge.
5. You now have two donors, each linked to separate MPI numbers (Donor 3 and Donor 4). Repeat the above steps to merge these donors.
The error message "Donors are linked to different medical records - cannot merge here." Appears and you will not be allowed to proceed.
Did the error message appear as stated? ________________
Where you allowed to proceed? ______________________
- 42-

Please refer to Section 6.4 Merge Patients In Medical Records for further information on merging donors with medical records.
6. Print the following reports to verify that the first two donor records have been merged:
Donor Inquiry Blood Bank History Inquiry Blood Bank History Merge/Unmerge/Switch Log Frozen BBK History List
7. The Donor’s History will need to be released prior to processing any donor specimens. Access the Release Frozen History Routine and identify Donor #2.
8. Answer Y to “View Merge/Unmerge/Switch Inquiry?” and confirm that the merged record appears correctly.
9. Answer Y to “View Current BBK History record?”. Confirm that the Audit Detail contains the merge data.
10. Answer Y to Release Frozen History record?. The system will prompt:
“History Record NNN released.”
11. Print the Frozen BBK History List and confirm that Donor #2 no longer appears.
________________________________________________________________________
THIS ROUTINE VALIDATED BY: __________________________ DATE: __ /__/ __
ACCEPTABLE: __________________NOT ACCEPTABLE: _____________________ HOSPITAL NAME: ______________________________________________________
- 43-

2.6 Validation Exercise B:
Prerequisites:
The following exercise was written for those Blood Bank Systems that have the Toolbox Parameter as follows:
BBK Merge Chk Ab/Ag/Mk defined as “AbAgMk”.
Before a merge is allowed in the Donor Merge routine, the system will check for discrepancies in Antibodies, Antigens and Markers.
Note: You can enter one type or any combination of checks. For example, if your health care organization enters AgMk, the system checks for discrepancies of antigens and markers before allowing a merge. You can choose from any of the following:
To check for discrepancies of Parameter Setting--------------------------------------- -----------------------Antibodies only Ab
Antigens only Ag
Markers only Mk
Antibodies and Antigens only AbAg
Antibodies, Antigens, and Markers AbAgMk
Antibodies and Markers only AbMk Antigens and Markers only AgMk If one of the histories involved in the merge has antibodies, antigens, or markers and the other history has none then no discrepancy exists.
Based on you’re your health care organization’s parameter settings the error messages in this section may differ. Please test accordingly.
You will need two donors and the donors should have two different blood types.
Donor #1: _______________ Blood type: ___________
Donor #2: ________________Blood type: ___________
1. At the Action prompt enter the letter "M" for Merge or do an F17 lookup and choose Merge.
Expected Result:
The cursor will automatically move to the Donor prompt under the heading Merge Donor.
2. At the Donor prompt, identify donor #1 from above.
Expected Result:
- 44-

The cursor will now move to the Donor prompt under the heading Into Donor.
3. At the Donor prompt, identify donor #2.
Expected Result:
After identifying the Into Donor you will be prompted with the following error message:
These records cannot be merged due to a discrepancy in the Blood Bank Histories. The discrepancy exists in the BLOOD TYPE.
The Blood Bank Histories must be corrected in the Blood Bank before this merge will be allowed.
Did this error message appear? ___________________
Were you allowed to proceed? ___________________
4. Resolve the discrepancies in the Blood Bank Module.
5. At the Action prompt enter the letter "M" for Merge or do an F17 lookup and choose Merge.
Expected Result:
The cursor will automatically move to the Donor prompt under the heading Merge Donor.
6. At the Donor prompt, identify donor #1 from above.
Expected Result:
The cursor will now move to the Donor prompt under the heading Into Donor.
7. At the Donor prompt, identify donor #2.
Expected Result:
You will be prompted with "Are you sure?"
Were you prompted for confirmation? ___________________
8. Enter Y and perform the merge.
9. Print the following reports to verify that the donor records have been merged:
Donor Inquiry Blood Bank History Inquiry Blood Bank History Merge/Unmerge/Switch Log Frozen BBK History List Blood Bank History Merge/Unmerge/Switch Inquiry
Expected Result:
The Donor’s History will need to be released prior to processing any donor specimens.
10. Access the Release Frozen History Routine and identify Donor #2.
- 45-

11. Answer Y to “View Merge/Unmerge/Switch Inquiry?” and confirm that the merged record appears correctly.
12. Answer Y to “View Current BBK History record?”. Confirm that the Audit Detail contains the merge data.
13. Answer Y to Release Frozen History record?.
Expected Result:
The system will prompt:
“History Record NNN released.”
14. Print the Frozen BBK History List and confirm that Donor #2 no longer appears.
________________________________________________________________________
THIS ROUTINE VALIDATED BY: __________________________ DATE: __ /__/ __
ACCEPTABLE: __________________NOT ACCEPTABLE: _____________________ HOSPITAL NAME: ______________________________________________________
- 46-

2.6: Merging and Unmerging Donors
PART II
FUNCTION TO BE VALIDATED: Merge/Unmerge Donor - unmerging two donors that have been merged.
Introduction:
This routine allows a user to undo a merge after two donors records have been combined to restore each donor to its original form.
Dictionaries:
Enter/Edit LIS Access DictionaryRelease Frozen History?
Toolbox Parameters involved:
BBK Donor Med Record Entry BBK Merge Chk Ab/Ag/Mk
This function can also be accessed:
Process Donor
Reports to print:
Donor Inquiry Blood Bank History Inquiry Blood Bank History Merge/Unmerge/Switch Log Frozen BBK History List Blood Bank History Merge/Unmerge/Switch Inquiry
NOTE: Users may have the ability to define CUSTOM REPORT FORMATS when printing the standard reports mentioned above. Customization to the reports may not supply all information contained in the standard version.
- 47-

2.5 Validation Exercise C:
1. At the Action prompt, type in the letter "U" or do an F17 lookup and choose Unmerge.
Expected Result:
The cursor will move to the Donor prompt under the heading Unmerge From Donor.
2. At the Donor prompt, identify donor #2 from the previous exercise.
Note: If the merged donor has had activity since the merge, the following warning will display:
The Blood Bank history currently associated with these twodonors/patients has had activity since they were merged.
Donor/Patient: XXXX,XXXDonor/Patient: XXXX,XXX
As a result, after they are unmerged both Blood Bankhistories need to be reviewed to ensure they are accurate.Do you want to continue?
3. Once the donor has been identified, the Restore Donor information will automatically display.
Did the correct information display under the Restore Donor Heading?_________________
4. Answer Y to “Are you sure?” and Complete the unmerge.
5. Print the following reports to verify that the two donors have been unmerged:
Donor Inquiry Blood Bank History Inquiry Blood Bank History Merge/Unmerge/Switch Log Frozen BBK History List Blood Bank History Merge/Unmerge/Switch Inquiry
Expected Result:
The Donor’s History will need to be released prior to processing any donor specimens.
6. Access the Release Frozen History Routine and identify Donor #2.
7. Answer Y to “View Merge/Unmerge/Switch Inquiry?” and confirm that the merged record appears correctly.
8. Answer Y to “View Current BBK History record?”. Confirm that the Audit Detail contains the merge data.
9. Answer Y to Release Frozen History record?.
Expected Result:
The system will prompt:
“History Record NNN released.”
- 48-

10. Print the Frozen BBK History List and confirm that Donor #2 no longer appears.
________________________________________________________________________
THIS ROUTINE VALIDATED BY:____________________________ DATE:__ /__/__
ACCEPTABLE: _____________________NOT ACCEPTABLE: __________________ HOSPITAL NAME: ______________________________________________________
- 49-
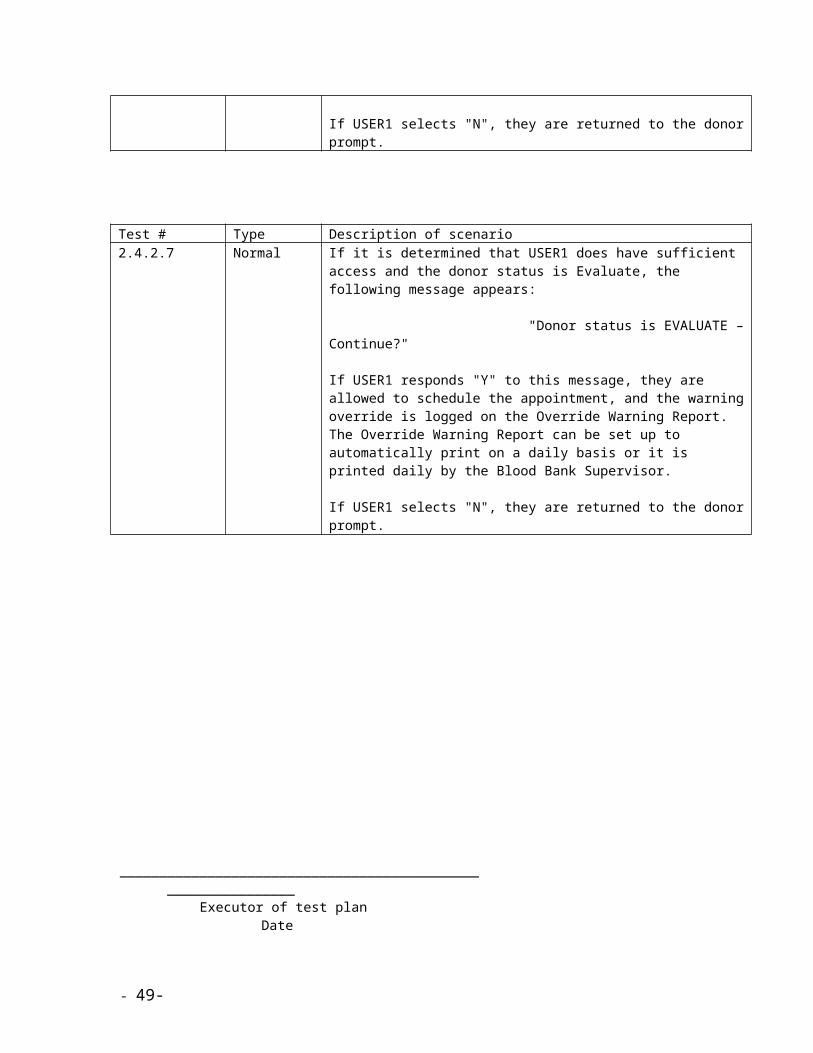
2.7: Editing Donor Numbers
FUNCTION TO BE VALIDATED: Edit Donor Number
Introduction:
The Edit Donor Number Routine is used to change existing donors numbers.
Dictionaries:
Access Donor Edits Confidential Donor Donor Number
Toolbox Parameters involved: None
Reports to print:
Inquiry Donor List Confidential Activity Log Restricted Edit List
NOTE: Users may have the ability to define CUSTOM REPORT FORMATS when printing the standard reports mentioned above. Customization to the reports may not supply all information contained in the standard version.
- 50-

2.6 Validation Exercise A:
Note: Only those individuals with access to editing donor numbers can use this routine.
1. At the Donor prompt, identify a donor by using each of the methods listed in the NPR BBK USER MANUAL VOLUME 2: DONOR FEATURES.
a. If the donor does not exist in the database or one of the above methods is not used, enter the donor name, ie, Lastname,Firstname. The following message will appear "Donor not found."
Did the error message as stated above appear? ____________________
b. If user does not have access to change the number the following message will appear "Edit of donor numbers not authorized."
c. If this is a confidential donor and the user does not have access defined at the Allow Other Access to Confidential Donors prompt, the following message will appear: "Donor not found."
2. The following information will default in for the donor identified; Number, Date of Birth, Ssn, Age and Sex. Verify that this information is correct by performing an inquiry.
3. At the New Number prompt, enter a new donor number. The number must be a positive integer with no more than eight digits and cannot currently be assigned to another donor.
a. If a donor number that belongs to another donor is entered, verify that the following message appears " In use by NNNNNNNN DONOR, NAME".
Did the error message as stated above appear? ____________________
b. If a number that is a negative value and or that has an alpha character attached to it is entered, verify that the following message appears "Must be a positive integer".
Did the error message as stated above appear? _____________________
4. Print the following reports to verify that the donor number has been changed for an existing donor:
Donor Inquiry Donor List Restricted Edit List
5. Print the following report to verify that activity was logged for editing the number of the existing confidential donor:
Confidential Activity Log
________________________________________________________________________
THIS ROUTINE VALIDATED BY:_____________________________DATE:__/__/__
ACCEPTABLE:_______________________ NOT ACCEPTABLE: ________________
HOSPITAL NAME: ______________________________________________________
- 51-

2.8: Editing Donor Recruitment Data
FUNCTION TO BE VALIDATED: Edit Recruitment Data
Introduction:
The Edit Recruitment Data Routine is used to change recruitment dates and or recruiters.
Dictionaries:
MIS User Access Confidential Donor
Toolbox Parameters involved: None
This function can also be accessed:
Process Donor
Reports to print:
Inquiry Donor List Confidential Activity Log
NOTE: Users may have the ability to define CUSTOM REPORT FORMATS when printing the standard reports mentioned above. Customization to the reports may not supply all information contained in the standard version.
- 52-

2.7 Validation Exercise A:
1. At the Donor prompt, identify a donor using each of the methods listed in the NPR BBK USER MANUAL VOLUME 2: DONOR FEATURES.
a. If a donor is entered that does not currently exist in the database or is identified incorrectly, the follow message appears "Donor not found".
Did the error message as stated above appear? __________________
b. If a user does not have access to confidential donors and one was chosen, the following message appears: "Donor not found."
Did the error message as stated above appear?____________________
2. The following information will default in for the donor identified: Number, Date of Birth, Ssn, Age, Sex, Donor Status, Blood Type, Usual Product and Total Volume. This information cannot be edited here. Verify that this information is correct by performing an inquiry.
3. Recruitment data, Date, User and User Name will also default in if entered previously. This data can be edited.
4. Enter a new date under the Date heading using the format MM/DD/YY, MMDDYYYY, DD/MM/YY, or DDMMYYYY. If the incorrect format is entered such as 67/10/06, verify that the following error message appears "<MM/DD/YY or MMDDYYYY in US, else DD/MM/YY or DDMMYYYY”.
Did the error message as stated above appear? ____________________
Enter a date in the future and the following message will appear: "Future dates not allowed here."
Did the error message as stated above appear? _____________________
5. Under the user heading enter a new user by typing in the mnemonic of the user or do an F17 lookup and choose the correct user. Once the user has been identified, the user name will default in. Verify that this name is correct.
a. If a user is entered by typing in the name of the user instead of the mnemonic, or a user is entered that is not in the MIS User Dictionary, verify that the following error message appears: "The entry is not defined".
Did the error message as stated above appear? ____________________.
6. Print the following reports to verify that the recruitment data edited is appearing with the donor:
Donor Inquiry Donor List
________________________________________________________________________
THIS ROUTINE VALIDATED BY:____________________________ DATE:__ /__/__
ACCEPTABLE:____________________ NOT ACCEPTABLE: ___________________
HOSPITAL NAME: ______________________________________________________
- 53-

2.9: Editing Donor Appointments
PART I
ROUTINE TO BE VALIDATED: Enter/Edit Appointments - Adding a new appointment
Introduction:
This routine allows you to schedule an appointment(s) for one or more donors at one or more sites.
Dictionaries:
BBK Donor Schedule Access
E/E Schedule for Donor Status of INACTIVE, EVALUATE and DISCONTINUE
Toolbox Parameters involved: BBK Donor Statuses
This function can also be accessed:
Process Donor Schedule Appointments Routine
Reports to Print:
Donor Appointment List Print Schedule Override Warning Report
NOTE: Users may have the ability to define CUSTOM REPORT FORMATS when printing the standard reports mentioned above. Customization to the reports may not supply all information contained in the standard version.
- 54-

2.9 Validation Exercise A:
Prerequisites:
A user assigned to an Access Group without access to edit donations or appointments for non-active donors (Inactive, Evaluate, Discontinued). This is defined on page 3 of the Access Dictionary.
Another user assigned to an Access Group with access to edit donations or appointments for non-active donors (Inactive, Evaluate, Discontinued).
Donors at each donor status.
1. Sign on with access defined as "Y" for E/E Donation/Appointment for donor statuses I, D and E. At the Donor prompt in the Enter/Edit Donor Appointment Routine, identify a donor.
a. If the donor's status is INACTIVE, DISCONTINUED or EVALUATE, the following warning message will appear: "Donor Status is (INACTIVE, DISCONTINUED or EVALUATE) - continue?" Enter "Y." This will index to the Override Warning Report. Exit routine.
b. If the donor has a Defer Until Date defined, the following warning message will appear: "Donor is deferred until MM/DD/YY - continue?" Enter "Y." This will index to the Override Warning Report. Exit routine.
c. Sign on with access defined as "N" for E/E Donations/Appt for donor statuses I, D and E. If the user does not have the access to schedule an appointment if the donor's status is either INACTIVE, EVALUATE, or DISCONTINUED, the following error message will appear "Donor status is (INACTIVE, DISCONTINUE or EVALUATE) - not allowed."
2. After identifying the donor, the following information, if defined, will appear on the screen: Donor's name, number, social security number, date of birth, age/sex, last appointment and next appointment. Verify that the information being displayed is correct.
3. At the Action prompt, choose Add.
4. At the Type prompt, choose the type of appointment to be entered. These are defined in the BBK Donor Schedule Dictionary.
5. Depending on how the dictionary entries have been set up, the schedule may default in at the Schedule prompt. If not choose a schedule to enter an appointment on.
6. Regardless of the Type or Schedule, today's date will default in at the Date prompt, you can accept this default or line feed this out and type in the date of the appointment. Linefeed out today's date and enter a past date. The message "Past dates not allowed here" should appear.
Message appeared? _________
7. The user can use one of the following methods to add an appointment to a schedule.
a. ADDING APPOINTMENTS DIRECTLY - At the From prompt type in the time the appointment is to begin in the format <HHMM>. The Thru time will then default in based on the time entered at the From prompt and the appointment duration as defined in the Donor Schedule Dictionary for that schedule.
b. ADDING APPOINTMENTS WITH THE SCHEDULE GRID - Press the right arrow key to display the Schedule Grid for the schedule you have chosen. Using the conventions as listed on pgs. 3-11 and 3-12 of the NPR BBK MODULE USER MANUAL VOLUME 2: DONOR FEATURES, schedule your appointment for the donor and file.
- 55-

8. Warnings and or rejections for a new appointment may appear if there is a scheduling conflict. Depending on the conflict and how the Donor Schedule Dictionary is set up, one of the following types of messages will appear:
WARNING: Appointment is outside of the schedule. Continue?
REJECTION: Appointment is outside of the schedule.
Refer to Warnings and Rejections table on pg. 3-4 of the NPR BBK MODULE USER MANUAL VOLUME 2: DONOR FEATURES.
9. Print the following reports to verify that the system has added the appointment for this donor to the specified schedule:
Donor Appointment List (will only print Next Appt for Donor) Print Schedule Donor Inquiry
10. Print the following report to verify when a user has overridden a warning message.
Override Warning Report
____________________________________________________________________
THIS ROUTINE VALIDATED BY:________________________ DATE:__ /__ /__
ACCEPTABLE: _________________NOT ACCEPTABLE:____________________
HOSPITAL NAME: ____________________________________________________
- 56-

2.9: Editing Donor Appointments
PART II
ROUTINE TO BE VALIDATED: Enter/Edit Appointments - Editing an existing appointment
Introduction:
This routine allows you to edit an appointment already on file.
Dictionaries:
Donor Schedule Access E/E Schedule for Donor Status of INACTIVE, EVALUATE and DISCONTINUE
Toolbox Parameters involved:
BBK Donor Statuses
This function can also be accessed:
Process Donor Schedule Appointments Routine
Reports to Print:
Donor Appointment List Print Schedule Override Warning Report
NOTE: Users may have the ability to define CUSTOM REPORT FORMATS when printing the standard reports mentioned above. Customization to the reports may not supply all information contained in the standard version.
- 57-

2.9 Validation Exercise B:
For this exercise, we will be editing the appointment from Part I.
1. At the Donor prompt, identify the donor just entered.
a. If the donor's status is INACTIVE, DISCONTINUED or EVALUATE, the following warning message will appear: "Donor Status is (INACTIVE, DISCONTINUED or EVALUATE) - continue?"
b. If the donor has a Defer Until Date defined, the following warning message will appear: "Donor is deferred until MM/DD/YY - continue?"
c. If the user does not have the access to schedule an appointment if the donor's status is either INACTIVE, EVALUATE, or DISCONTINUED, the following error message will appear "Donor status is (INACTIVE, DISCONTINUE or EVALUATE) - not allowed."
2. After identifying the donor, the following information, if defined, will appear on the screen: Donor name, number, social security number, date of birth, age/sex, last appointment and next appointment. Verify that this information being displayed is correct.
3. At the Action prompt, choose Edit. If there are no appointments to edit, the following message will appear "No appointments on file."
4. A pop-up screen will appear with all of the appointments for the donor listed with type, schedule, date and from time and thru time listed. Choose the appointment you entered in Part I.
5. The user can use one of the following methods to edit an appointment for a specified donor.
a. EDITING APPOINTMENTS DIRECTLY
1. Change the type used.
Old type: ____________________ New type:______________________
2. Change the schedule used.
Old schedule: ________________ New schedule: __________________
3. Edit the date.
Old date: _____________________ New date: __________________
4. Edit the From Time.
Old From Time: _____________ New From Time: ______________
Verify that the Thru Time changes based on the From Time entered and on how the periods have been set up for the schedule chosen in the Schedule Dictionary.
- 58-

EDITING APPOINTMENTS VIA THE SCHEDULE GRID .
1. Use the right arrow key to pull up the schedule grid on the screen.
2. Use the appropriate conventions, edit the date and time of the original appointment.
6. Warnings and or rejections for a new appointment may appear if there is a scheduling conflict. Depending on the conflict and how the Donor Schedule Dictionary is set up for the schedule selected, one of the following types of messages will appear:
WARNING: "Appointment is outside of the schedule. Continue?"REJECTION: "Appointment is outside of the schedule."
Upon changing the appointment date/time via the schedule grid, you should receive the following message: “Change <Donor> to <Date> at <Time> Ok? Respond Y.
7. Print the following reports to verify that the system has added the appointment for this donor to the specified schedule.
Donor Appointment List Schedule Donor Inquiry
8. Print the following report to verify that a user has overridden a warning message.
Override Warning Report
________________________________________________________________________
THIS ROUTINE VALIDATED BY:________________________DATE:__ /__ /__
ACCEPTABLE:____________________NOT ACCEPTABLE:____________________ HOSPITAL NAME: ______________________________________________________
- 59-
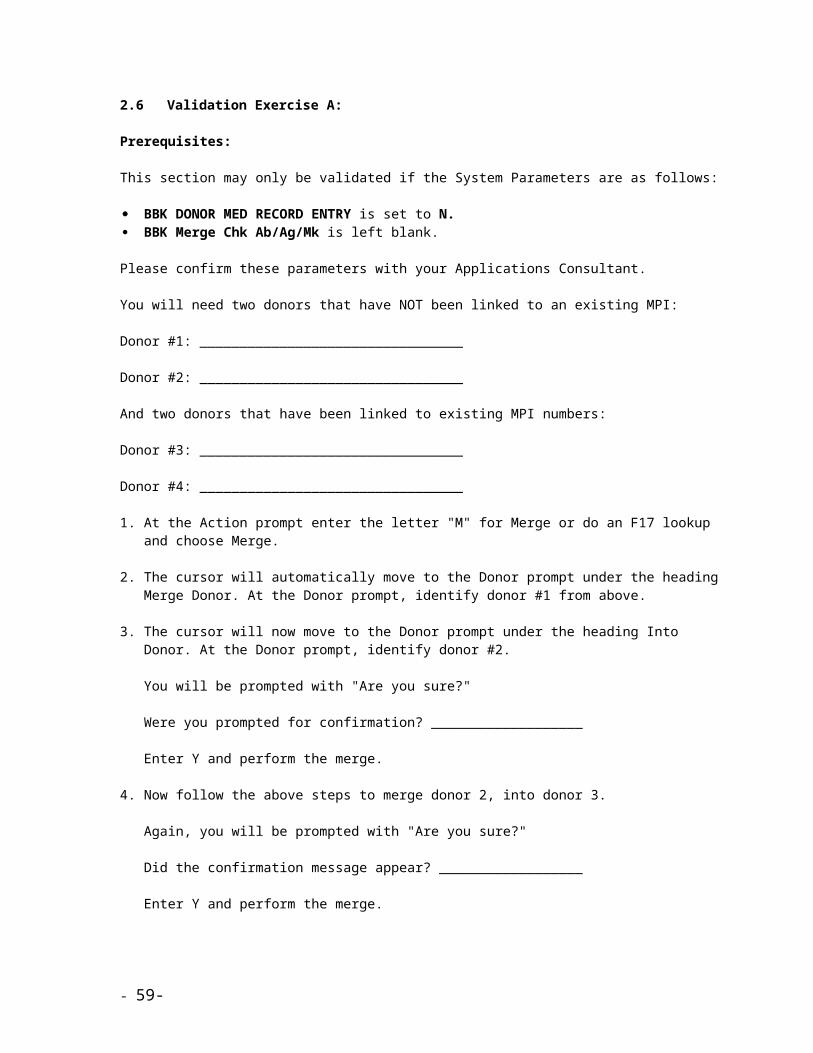
2.9: Editing Donor Appointments
PART III
ROUTINE TO BE VALIDATED: Enter/Edit Appointments - Viewing appointments
Introduction:
This routine allows you to view all existing appointments for a specific donor.
Dictionaries:
Donor Schedule Access Confidential Donor
Toolbox Parameters involved:
BBK Donor Statuses
This function can also be accessed:
Process Donor Schedule Appointments Routine
Reports to Print:
Donor Appointment List Print Schedule Override Warning Report
NOTE: Users may have the ability to define CUSTOM REPORT FORMATS when printing the standard reports mentioned above. Customization to the reports may not supply all information contained in the standard version.
- 60-

2.9 Validation Exercise C:
Prerequisite:
Enter a confidential donor into the system. You will also be viewing an appointment from Part II.
1. At the Donor prompt, identify the previous donor entered in Part II.
a. If the donor's status is INACTIVE, DISCONTINUED or EVALUATE, the following warning message will appear: "Donor Status is (INACTIVE, DISCONTINUED or EVALUATE) - continue?"
b. If the donor has a Defer Until Date defined, the following warning message will appear: "Donor is deferred until MM/DD/YY - continue?"
c. If the user does not have the access to schedule an appointment if the donor's status is either INACTIVE, EVALUATE, or DISCONTINUED, the following error message will appear: "Donor status in (INACTIVE, DISCONTINUED or EVALUATE) - not allowed."
d. If the user does not have access to confidential donors, attempt to identify the donor entered at the beginning of this exercise by the name, social security number, and donor number. The message "Donor not found" will display.
Message Received? ____________
e. Sign on as a user with access to confidential donors, and confirm that a confidential donor and their information can be accessed.
2. After identifying the donor, the following information, if defined will appear on the screen: Donor name, number, social security number, date of birth, age/sex, last appointment, and next appointment. Verify that this information being displayed is correct.
3. At the Action prompt, choose VIEW. If there are no appointments to view, an empty pop-up screen will appear.
4. If appointments are on file for the specified donor, a pop-up screen will appear displaying all appointments scheduled. The following information will appear as information: Type, schedule, date, from and thru time.
5. To scroll through this list, press the up arrow and down arrow keys. To exit, press the left arrow key.
6. Verify that you are not able to edit the appointments at this time.
7. Print the following reports to verify that the system is displaying the correct information.
Donor Appointment List Schedule Donor Inquiry
8. Print the following report to verify that a user has overridden a warning message.
- 61-

Override Warning Report____________________________________________________________________
THIS ROUTINE VALIDATED BY:________________________ DATE:__ /__ /__
ACCEPTABLE: _________________NOT ACCEPTABLE:___________________ HOSPITAL NAME: ___________________________________________________
- 62-

2.9: Editing Donor Appointments
PART IV
ROUTINE TO BE VALIDATED: Enter/Edit Appointments - Deleting an existing appointment
Introduction:
This routine allows you to delete existing appointments for a donor.
Dictionaries:
Donor Schedule Access
E/E Schedule for Donor Status of INACTIVE, EVALUATE and DISCONTINUE
Toolbox Parameters involved:
BBK Donor Statuses
This function can also be accessed:
Process Donor Schedule Appointments Routine
Reports to Print:
Donor Appointment List Print Schedule Override Warning Report
NOTE: Users may have the ability to define CUSTOM REPORT FORMATS when printing the standard reports mentioned above. Customization to the reports may not supply all information contained in the standard version.
- 63-

2.9 Validation Exercise D:
For this exercise, we will be deleting the appointment from Part II.
1. At the Donor prompt, in the Enter/Edit Donor Appointments Routine, identify the donor entered in Part II.
a. If the donor's status is INACTIVE, DISCONTINUED, or EVALUATE, the following warning message will appear: "Donor Status is (INACTIVE, DISCONTINUED or EVALUATE) - continue?"
b. If the donor has a Defer Until Date defined, the following warning message will appear: "Donor is deferred until MM/DD/YY - continue?"
c. If the user does not have the access to schedule an appointment if the donor's status is either INACTIVE, EVALUATE, or DISCONTINUED, the following error message will appear "Donor status is (INACTIVE, DISCONTINUED or EVALUATE) - not allowed."
2. After identifying the donor, the following information, if defined, will appear on the screen: Donor name, Number, Social Security Number, Date Of Birth, Age/Sex, Last Appointment and Next Appointment. Verify that this information being displayed is correct.
3. At the Action prompt, choose DELETE. A pop-up screen will appear with all of that donor's future appointments. The following information will be listed on the screen: Type Of Donation, Schedule, Date and From and Thru Times. Verify that this information cannot be edited at this time.
4. Choose the appointment that you made in Part 2 to delete. The Type, Schedule, Date and From and Thru Times default onto the screen. Verify that this information is correct. Enter yes at the FILE prompt.
5. Print the following reports to verify that the system has deleted the appointment for this donor from the specified schedule.
Donor Appointment List Schedule Donor Inquiry
6. Print the following report to verify that a user has overridden a warning message.
Override Warning Report
_____________________________________________________________________ THIS ROUTINE VALIDATED BY:________________________ DATE:__ /__ /__
ACCEPTABLE:____________________ NOT ACCEPTABLE:_________________ HOSPITAL NAME: ____________________________________________________
- 64-

2.10: Donor Questionnaires
PART 1
ROUTINE TO BE VALIDATED: Questionnaires - Adding a questionnaire
Introduction:
This routine is used to enter a new questionnaire for a donor.
Dictionaries:
Donor Prompt Donor Questionnaire Access Process Donors Donor Function
Toolbox Parameters involved:
BBK Donor Statuses
This function can also be accessed:
Process Donors Enter/Edit Donor
Reports to print:
Questionnaire List Donor Inquiry Donor List Marker List Restricted Edit List Override Warning Report
NOTE: Users may have the ability to define CUSTOM REPORT FORMATS when printing the standard reports mentioned above. Customization to the reports may not supply all information contained in the standard version.
- 65-

2.10 Validation Exercise A:
1. At the Donor prompt, identify the donor just entered using each of the acceptable methods.
a. If the donor is deferred, the following warning message will appear: "Donor is deferred until MM/DD/YY. continue?".
b. If the donor's status is INACTIVE, EVALUATE or DISCONTINUED, the following warning message will appear: "Donor status is not ACTIVE, Continue?".
2. After identifying the donor, the following information, if defined, will appear on the screen: Donor name, number, social security number, date of birth, age, sex, date of last questionnaire entered, was the questionnaire resulted and were there any exceptional results. Verify that the information being displayed is correct.
3. At the Action prompt, choose ADD.
4. Enter the Date the questionnaire was done. Today's date will default.
5. Choose the Questionnaire to be resulted. This is a required field.
6. The questionnaire will appear to be resulted. The prompts may have answers defaulting in.
This could be due to two reasons:
a. The prompt is defined in the Donor Prompt Dictionary to have a Default Answer appear. If you have any prompts defined this way, verify that the correct default answer is appearing.
b. The prompt is defined in the Donor Prompt Dictionary as Recall = Y. If the donor has previously answered this questionnaire, the result from that questionnaire is appearing here. If the prompt is defined this way, verify that the response is correct.
7. Result the questionnaire. Try to return past those prompts that are defined as being required in the Donor Prompt Dictionary. The following message should appear: “This is a required field!”.
8. Upon answering a prompt, the following may occur:
a. Upon resulting, you may be branched to another questionnaire. This may occur as soon as you answer the prompt or when the questionnaire is completely resulted. If your questionnaire is defined this way, verify that the questionnaire you are branching to is correct.
b. A defined response may cause a marker to appear on the Donor's history. Verify that the response entered placed the marker on the Donor's history.
c. A defined response may cause the donor's status to be changed to ACTIVE, INACTIVE, EVALUATE or DISCONTINUED. Verify that the response entered caused the donor's status to change.
d. If the prompt is defined as Delta Check, a delta check may be performed. If this a delta check is done, the following message will appear "Response on MM/DD/YY: response Continue?".
9. File the questionnaire.
- 66-

10. Print the following reports to verify that the system added markers or changed the donor's status if applicable:
Donor Inquiry Donor List Marker List Questionnaire List Restricted Edit List
11. Print the Override Warning Report to ensure that the override for the Deferred Donor is indexed to this report.
___________________________________________________________________
THIS ROUTINE VALIDATED BY: ______________________ DATE: __ / __ / __
ACCEPTABLE: __________________NOT ACCEPTABLE:__________________ HOSPITAL NAME: ___________________________________________________
- 67-

2.10: Donor Questionnaires
PART II
ROUTINE TO BE VALIDATED: Questionnaires - editing a questionnaire
Introduction:
This routine is used to edit any questionnaires for a donor.
Dictionaries:
Donor Prompt Donor Questionnaire Access Process Donors Donor Function
Toolbox Parameters involved:
BBK Donor Statuses
This function can also be accessed:
Process Donor
Reports to print:
Questionnaire List Donor Inquiry Donor List Marker List Restricted Edit List Override Warning Report
NOTE: Users may have the ability to define CUSTOM REPORT FORMATS when printing the standard reports mentioned above. Customization to the reports may not supply all information contained in the standard version.
- 68-

2.10validation Exercise B:
1. At the Donor prompt, identify the donor used in the previous exercise.
a. If the donor is deferred, the following warning message will appear: "Donor is deferred until MM/DD/YY. continue?".
b. If the donor's status is INACTIVE, EVALUATE or DISCONTINUED, the following warning message will appear: "Donor status is not ACTIVE. Continue?".
2. At the Action prompt, choose EDIT.
3. Enter the Date. A lookup of the dates of the donor's questionnaire is available.
4. Identify the Questionnaire that you wish to edit. A lookup of the donor's questionnaires for the date entered in step 3 is available.
5. Edit any of the responses to the prompts.
6. Print a Donor Inquiry and Donor List to make sure it displays the changed results.
7. Print the Override Warning Report to ensure that the override for the Deferred Donor is indexed to this report..
____________________________________________________________________
THIS ROUTINE VALIDATED BY: ______________________ DATE: __ / __ / __
ACCEPTABLE: _________________NOT ACCEPTABLE:___________________ HOSPITAL NAME: ___________________________________________________
- 69-

2.10: Donor Questionnaires
PART III
ROUTINE TO BE VALIDATED: Questionnaires - Viewing a questionnaire
Introduction:
This routine is used to view questionnaires for a donor on the screen.
Dictionaries:
Donor Prompt Donor Questionnaire Access Process Donors Donor Function
Toolbox Parameters involved:
BBK Donor Statuses
This function can also be accessed:
Process Donor
Reports to Print:
Donor Inquiry Donor List Override Warning Report
NOTE: Users may have the ability to define CUSTOM REPORT FORMATS when printing the standard reports mentioned above. Customization to the reports may not supply all information contained in the standard version.
- 70-
2.8 Validation Exercise C:
1. At the Donor prompt in the Questionnaire, identify the donor used in the previous exercise
a. If the donor is deferred, the following warning message will appear: "Donor is deferred until MM/DD/YY - continue?".
b. If the donor's status is INACTIVE, EVALUATE or DISCONTINUED, the following warning message will appear: "Donor status is not ACTIVE. Continue?".
2. At the Action prompt, choose VIEW.
3. Enter the Date. A lookup of the dates of the donor's questionnaire is available.
4. Identify the Questionnaire that you wish to view. A lookup of the donor's questionnaires for the date entered in step 3 is available.
5. Verify that you are not able to edit the questionnaire.
6. Print the following reports to verify that the same information on the questionnaire is being viewed:
Donor Inquiry Donor List
7. Print the Override Warning Report to ensure that the override for the Deferred Donor is indexed to this report.
____________________________________________________________________
THIS ROUTINE VALIDATED BY: ______________________ DATE: __ / __ / __
ACCEPTABLE: _________________NOT ACCEPTABLE:___________________ HOSPITAL NAME: ___________________________________________________
- 71-

2.10: Donor Questionnaires
PART IV
ROUTINE TO BE VALIDATED: Questionnaires - Printing a questionnaire
Introduction:
This routine is used to print a hard copy of a questionnaire
Dictionaries:
Donor Prompt Donor Questionnaire Access Process Donors Donor Function
Toolbox Parameters involved: None
This function can also be accessed:
Process Donors
Reports to Print:
Override Warning Report
NOTE: Users may have the ability to define CUSTOM REPORT FORMATS when printing standard reports. Customization to the reports may not supply all information contained in the standard version.
- 72-

2.10 Validation Exercise D:
1. At the Donor prompt, identify the donor used in the previous routine.
a. If the donor is deferred, the following warning message will appear: "Donor is deferred until MM/DD/YY. continue?".
b. If the donor's status is INACTIVE, EVALUATE or DISCONTINUED, the following warning message will appear: "Donor status is not ACTIVE. Continue?".
2. At the Action prompt, choose PRINT.
3. Enter the Date. A lookup of the dates of the donor's questionnaire is available. If only one questionnaire exists for this donor, the information will default.
4. Identify the Questionnaire that you wish to print. A lookup of the donor's questionnaires for the date entered in step 3 is available.
5. At the Print On prompt, enter the mnemonic of a printer.
6. Print the Override Warning Report to ensure that the override for the Deferred Donor is indexed to this report.
____________________________________________________________________
THIS ROUTINE VALIDATED BY: ______________________ DATE: __ / __ / __
ACCEPTABLE: __________________NOT ACCEPTABLE:__________________ HOSPITAL NAME: ___________________________________________________
- 73-

2.10: Donor Questionnaires
PART V
ROUTINE TO BE VALIDATED: Questionnaires - Printing a blank questionnaire
Introduction:
This routine is used to print a blank questionnaire. This copy will contain the questionnaire's prompts and blank areas where the responses can be written in by the donor. After the donor has completed the questionnaire, the responses can be entered into the system using the ACTION of ADD.
Dictionaries:
Donor Prompt Donor Questionnaire Access Process Donors Donor Function
Toolbox Parameters involved:
BBK Donor Statuses
This function can also be accessed:
Process Donors
Reports to Print:
Override Warning Report
NOTE: Users may have the ability to define CUSTOM REPORT FORMATS when printing standard reports. Customization to the reports may not supply all information contained in the standard version.
- 74-

2.10 Validation Exercise E:
1. At the Donor prompt in the Questionnaire routine, identify the donor used in the previous exercise.
a. If the donor is deferred, the following warning message will appear: "Donor is deferred until MM/DD/YY. continue?".
b. If the donor's status is INACTIVE, EVALUATE or DISCONTINUED, the following warning message will appear: "Donor status is not ACTIVE. Continue?".
2. Enter BLANK at the Action prompt.
3. Enter the Date for which you are printing the questionnaire. Future dates will display the message "Future dates not allowed here." Past dates are allowed.
Message Received? _________
4. Identify the Questionnaire that you wish to print.
5. At the Print on: prompt, enter the mnemonic of the printer.
6. Print the Override Warning Report to ensure that the override for the Deferred Donor is indexed to this report.
____________________________________________________________________
THIS ROUTINE VALIDATED BY: ______________________ DATE: __ / __ / __
ACCEPTABLE: _________________NOT ACCEPTABLE:___________________ HOSPITAL NAME: ______________________
- 75-

2.10: Donor QuestionnairesPART VI
ROUTINE TO BE VALIDATED: Questionnaires - Deleting a questionnaire
Introduction:
This routine is used to delete questionnaires for a donor.
Dictionaries:
Donor Prompt Donor Questionnaire Access Process Donors Donor Function Allow deletion of donor questionnaires
Toolbox Parameters involved:
BBK Donor Statuses
This function can also be accessed:
Process Donors
Reports to Print:
Donor Inquiry Donor List Donor Questionnaire Override Warning Report
NOTE: Users may have the ability to define CUSTOM REPORT FORMATS when printing standard reports. Customization to the reports may not supply all information contained in the standard version.
- 76-

2.10 Validation Exercise F:
1. At the Donor prompt in the Questionnaire routine, identify the donor used in the previous exercise.
a. If the donor is deferred, the following warning message will appear: "Donor is deferred until MM/DD/YY. continue?".
b. If the donor's status is INACTIVE, EVALUATE or DISCONTINUED, the following warning message will appear: "Donor status is not ACTIVE. Continue?".
2. At the Action prompt, choose DELETE.
3. Enter the Date. A lookup of the dates of the donor's questionnaire is available. If you attempt to delete the most current questionnaire, you will be prompted with the following warning message "This is the most current questionnaire date for this donor - continue?".
4. Identify the Questionnaire that you wish to delete. A lookup of the donor's questionnaires for the date entered in step 3 is available. If there is only one questionnaire for that date, it will default.
5. At the "Delete?" prompt, enter Y.
6. Check the following reports to make sure the questionnaire was deleted:
Donor Inquiry Donor List
7. Print the Override Warning Report to ensure that the override for the Deferred Donor is indexed to this report. Also, confirm on the Override Warning Report that the override warning message “This is the most current questionnaire date for this donor – continue?” is indexed to this report.
_____________________________________________________________________
THIS ROUTINE VALIDATED BY:_________________________DATE:__ /__ /__
ACCEPTABLE: ________________NOT ACCEPTABLE:_____________________ HOSPITAL NAME: ____________________________________________________
- 77-

Chapter 3: UNIT INVENTORY
3.1: Entering an Inventory Unit
FUNCTION TO BE VALIDATED: Enter Inventory Unit
Introduction:
Introduction:
The following exercise will focus on entering individual units into the inventory and printing unit labels. The Enter Unit Routine is heavily dependent on the correct definition of the Product Dictionary. Please check the Product Dictionary for accuracy before starting.
In order to validate the Enter Inventory Units Routine, MEDITECH strongly recommends that you enter at least one product example of the following:
A product requiring a lot number A product not requiring a lot number A product requiring a blood type A product not requiring a blood type A non-crossmatchable product A crossmatchable product
In order to adequately validate the printing of labels, MEDITECH recommends that you enter units of every ABO/Rh blood type.
Dictionaries:
Source/Destination Product Blood Type Unit Location Antibody Antigen Marker Site
Toolbox Parameters involved:
Ask BBK Alternate Number Allowed BBK Prefixes BBK Unit Statuses BBK Reserve Unit By
Reports to Print:
Unit Status Activity Report Unit Status List Unit Inventory List Unit Inventory Summary Reserved Donation List
- 78-

Unit Location List Marker Report Override Warning Report
NOTE: Users may have the ability to define CUSTOM REPORT FORMATS when printing standard reports. Customization to the reports may not supply all information contained in the standard version.
Prerequisites:
All aforementioned dictionaries must be correctly entered into the Blood Bank module. A unit which is currently at a status of TRANSFERRED must also be available.
3.1 Validation Exercise A: Entering an Autologous Unit
1. Enter a date greater than today at the Receive Date prompt.
Expected Result:
System will beep and display the following message: "Date or time cannot be in the future". Linefeed out the future date and enter today's date and the current time at the Time prompt.
2. Enter the appropriate Source of the blood product at the Unit Source prompt.
Expected Result:
System will only accept a valid entry from the Source/Destination Dictionary. If an invalid entry is made, the system will display the following message: "The entry is not defined".
3. Enter an appropriate product from the Product Dictionary at the Product prompt.
Expected Result:
System will only accept a valid entry from the Product Dictionary. If an invalid entry is made, the system will display the following message: "The entry is not defined".
4. The Volume prompt should display the usual volume of the Product entered. This is defined in the Product Dictionary as the Usual Volume prompt on Page 1.
Did the system default the correct usual volume of the Product entered? ____Check the Product Dictionary.
5. The Workload Function prompt should display the Workload Function defined in the Product Dictionary at the Default Unit Workload prompt on Page 3.
Did the system default the correct Workload Function? _____Check the Product Dictionary.
This is not a required field and may be left blank.
6. Enter the Source Blood Type at the Source Blood Type prompt.
Expected Result:
- 79-

System will only accept a valid entry from the Blood Type Dictionary. If an invalid entry is made, the system will display the following message: "The entry is not defined".
The screen will prominently display the AB0/Rh clearly in the upper right corner.
7. The Blood Type prompt will default either the Source Blood Type or UNK for Unknown. This is accessing the Default Blood Type prompt on Page 3 of the Product Dictionary.
Did the system default the correct Blood Type? _____
Check the Product Dictionary.
8. Enter the Unit number at the BBK Unit Number prompt.
Expected Result:
The system will only accept a valid Unit number that passes the Syntax Check rule defined in the Source Destination Dictionary. A Syntax rule is not required. If a rule is not defined the system should accept any alphanumeric 5 to 14 characters.
9. Enter a unit number which already exists for this source and product.
Expected Result
The System displays the following message: "Number already exists for this source and product."
10. Enter a unit alternate number. The system may not ask for an Alternate number. This is defined in the LIS Parameter: Ask Alternate number?. Check your LIS Parameter printout. Did the system default in a prefix? If so, does the defaulted prefix match what is defined at the Default Alt Num Prefix prompt in the Source/Destination Dictionary.
11. You will be asked to enter a Lot Number based on the Lot Number Required? Prompt on Page 1 of the BBK Product Dictionary. If your product is defined as Y, enter a valid lot number.
12. Enter a Collection Date greater than today.
Expected Result:
System will beep and display the following message: "Date or time cannot be in the future".
Was the message received? _____
13. Enter today's date at the Collection Date.
Note: You can leave this field blank and based off of the BBK Product Dictionary prompt Calc Collected Date/Time on Page 3, the system will calculate the Collection Date form the Expiration date by subtracting the Maximum Shelf Life from the Expiration Date.
14. Enter a Collection Time that is greater than the Receive Time.
Expected Result
The system will display the error message "Collection time is greater than the received time".
Was the message received? _____
- 80-

15. Edit the Collection Time to a time that is earlier than the Received Time.
Note: You can leave this field blank.
Expected Result
At the Expiration Date prompt the system will display a date which is the sum of the Collection Date plus the Maximum Shelf Life of the product as defined in the Product Dictionary.
16. Linefeed out the defaulted date and enter a date which would exceed the Maximum Shelf Life of the Product.
Expected Result:
System will beep and display the following message: "Max shelf life ends on mmddyyyy at hhmm."
17. Enter a valid expiration date and time.
18. Enter in a Segment number. This is free text and is not required.
19. Enter in a unit location. The system default may be present. The default is defined in the Site Dictionary. Check the Lab Site Dictionary.
Expected Result:
System will only accept a valid entry from the Unit Location Dictionary. If an invalid entry is made, the system will display the following message: "The entry is not defined".
20. Enter a valid printer at the Card Printer prompt to print a BBK Inventory Card. When you file your unit confirm the correct BBK Inventory Card prints as defined at the Inventory Card Program prompt on Page 3 of the BBK Product Dictionary.
21. Enter down to the Reserved prompt. Enter in the Reserved status of Autologous.
22. Enter in the recipient of the Reserved unit. Units are either reserved by Social Security number or Medical Record number, or either. Check your LIS Parameter printout for your institution's definition of the BBK Reserve Units By parameter.
Expected Result:
The system will do a Soundex search for the correct patient if the parameter is set to MRI. If it is set to Social Security number the system will force the user to enter the Social Security number of the recipient. If the system cannot find the patient, it will allow entry of patient information for the purpose of reserving the unit.
23. Enter a Date of Use for the Reserved Unit. This information can then be used to search for reserved units using the "Reserved Donation List" Report.
24. Enter a Date of Use past the expiration date of the unit you are entering.
Expected Result
The message "Date of use cannot be after expire date" will appear.
- 81-

25. If searching by MRI, choose a patient with a different blood type than the source blood type as the recipient.
Expected Result
Depending on whether the Source and/or Confirmed blood types are known, one of the following messages will appear: "Recipient's blood type does not match blood type" or "Recipient's blood type does not match source blood type".
26. The next three prompts will allow the entry of valid Antigens, Antibodies or Markers. Enter one of each.
Expected Result:
System will only except a valid entries from the Antigen, Antibody and Marker Dictionaries If an invalid entry is made, the system will display the following message: "The entry is not defined".
27. Enter Y at the prompt E/E Comments. You will be branched to a screen editor. Enter comments on this unit.
28. Enter responses to all queries on the BBK Unit Customer Defined Screen. It is not required to define a unit screen for all products. Answer the questions appropriately.
Expected Result:
System will not allow the user to return past a query that is required.
29. File the new unit.
Expected Result
Depending on the definition of the Product Dictionary, the system will either create a specimen in the Background (for retyping if necessary), ask the user if a requisition should be created or enter the Enter/Edit Requisition screen and the user may enter the requisition on the unit, or the unit is just filed but no requisition is created. Please refer to the Enter Req On Unit? And Assoc Unit Ord Grp Affiliated Source and Non-Affiliated Source prompts on Page 3 of the BBK Product Dictionary.
NOTE: Unit Specimens will be used extensively in the Enter Results Validation Section.
30. Perform a Unit Inquiry on the unit checking the status.
Expected Result:
The unit should be at a status of "ENTERED". This status will alert the user that unit has not been adequately processed and is not available for patient use.
31. In order to continue you must have access to a TRANSFERRED Unit. In the Enter Unit Routine enter the Receive Date/Time, Unit Source, and Product of the Transferred Unit. Make sure the Blood Type is different from that of the Transferred unit.
NOTE: Make sure that the information is exactly that of the Transferred Unit except the Blood Type.
32. At the Unit number prompt enter the unit number of the TRANSFERRED Unit.
Expected Result:
- 82-
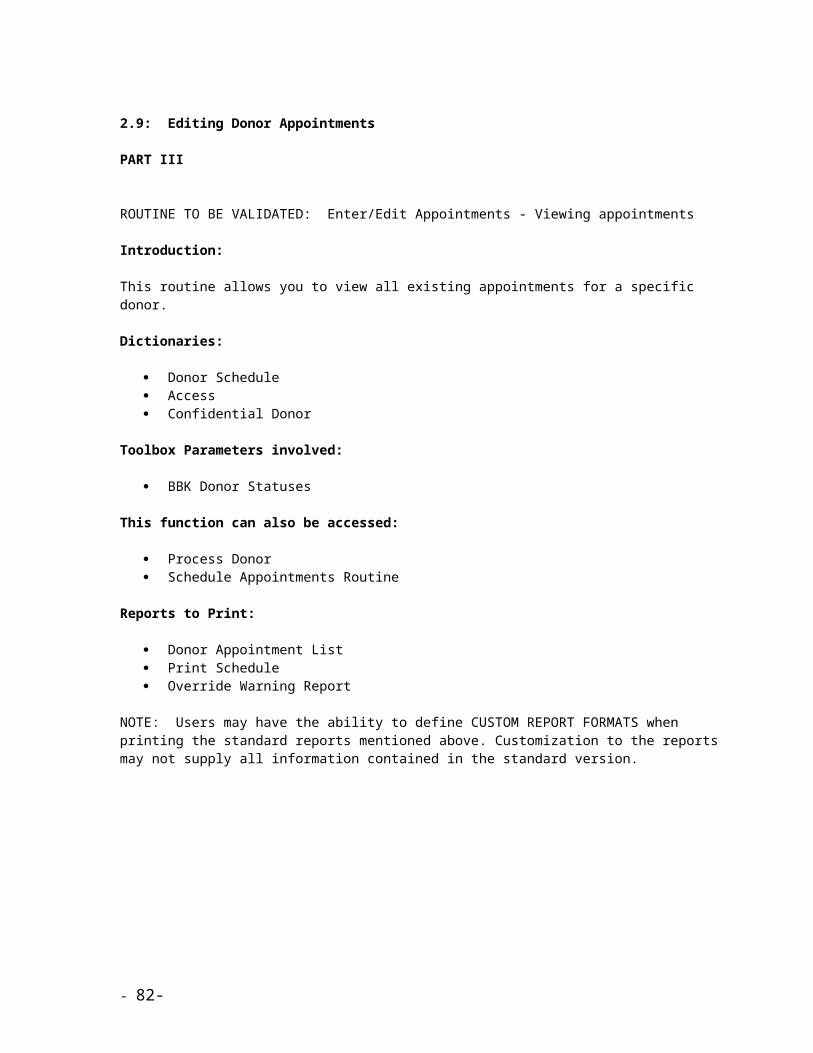
System will display the following message "Unit exists with a TRANSFERRED status, re-enter?"
33. Answer "N"o to this prompt.
Expected Result:
System will display the following message "Number already exists for this source and product."
34. The cursor will return back to the Unit number prompt to allow the user to change the unit number. Leave the Transferred Unit number at the Unit number prompt and hit return again.
Expected Result:
System will display the following message "Unit exists with a TRANSFERRED status, re-enter?"
35. Answer "Y"es to this prompt.
Expected Result:
System will display the following message "Source blood type is incorrect for this unit"
36. The cursor will rest at the Unit number prompt again. Linefeed out the unit number and Previous Key back to the Blood Type. Enter in the correct Source and Confirmed Blood Type for the Transferred Unit.
37. Go back to the Unit number prompt and enter in the Transferred Unit number. Answer "Y"es to the "Unit exists with a TRANSFERRED status, re-enter?" prompt.
Expected Result:
A green box will display in the middle of the screen with the Alternate Number (If the LIS Parameter 'Ask Alternate number?' is set) and the volume.
38. Hit return to enter the existing Alternate number and volume.
39. File the unit.
Expected Result:
The system will prompt the user with "Edit Unit?"
40. Answer "Y"es to this prompt and the system will branch into the Edit Unit Routine. Edit at least one of the unit prompts.
41. Check the Unit Inquiry for an accurate change of the unit's status and the unit information that was edited.
Expected Result:
The unit status should be ENTERED if there is an outstanding retype specimen. All unit demographics should reflect any changes that were made in the Edit Unit Routine.
NOTE: Units that do not require additional testing after they are entered into the system will automatically proceed from ENTERED to AVAILABLE.
42. Print the Unit Label.
Expected Result
- 83-

The unit label will print using the format defined. The information on the label will accurately reflect the following information when included in the label format used.
collection dateunit numberexpiration dateproduct namevolumeblood typesourcealternate number if enteredthe blood bank's name and registration number
_____________________________________________________________________
THIS ROUTINE VALIDATED BY:_________________________DATE:__ /__ /__
ACCEPTABLE:__________________ NOT ACCEPTABLE:___________________ HOSPITAL NAME: ____________________________________________________
- 84-

3.1 Validation Exercise B: Entering a non-reserved unit
1. Enter today's date at the Receive Date prompt and the current time at the Time prompt.
2. Enter the appropriate Source of the blood product at the Unit Source prompt.
Expected Result:
System will only accept a valid entry from the Source/Destination Dictionary. If an invalid entry is made, the system will display the following message: "The entry is not defined".
3. Enter an appropriate product from the Product Dictionary at the Product prompt.
Expected Result:
System will only accept a valid entry from the Product Dictionary. If an invalid entry is made, the system will display the following message: "The entry is not defined".
The Volume will display the usual volume of the Product as defined on page one in the Product Dictionary.
The Workload Function prompt should display the Workload Function as defined on page three in the Product Dictionary.
4. Enter the Source Blood Type at the Source Blood Type prompt.
Expected Result:
System will only accept a valid entry from the Blood Type Dictionary. If an invalid entry is made, the system will display the following message: "The entry is not defined".
The screen will prominently display the AB0/Rh clearly in the upper right corner.
5. Enter the Unit number at the BBK Unit Number prompt.
Expected Result:
The system will only accept a valid Unit number that passes the Syntax Check rule defined in the Source Destination Dictionary. A Syntax rule is not required. If a rule is not defined the system should accept any alphanumeric 5 to 14 characters.
6. Enter a Lot Number if required. This is based on the Lot Number Required? Prompt on Page 1 of the BBK Product Dictionary. If your product is defined as Y, enter a valid lot number.
7. Enter today's date at the Collection Date.
Note: You can leave this field blank and based off of the BBK Product Dictionary prompt Calc Collection Date/Time on Page 3, the system will calculate the Collection Date form the Expiration date by subtracting the Maximum Shelf Life from the Expiration Date.
8. Enter a Collection Time earlier than the Received Time.
9. Enter in a Segment number. This is free text and is not required.
- 85-

10. Enter in a unit location. The system default may be present. The default is defined in the Site Dictionary. Check the Lab Site Dictionary.
Expected Result:
System will only accept a valid entry from the Unit Location Dictionary. If an invalid entry is made, the system will display the following message: "The entry is not defined".
11. Enter a valid printer at the Card Printer prompt to print a BBK Inventory Card. When you file your unit confirm the correct BBK Inventory Card prints as defined at the Inventory Card Program prompt on Page 3 of the BBK Product Dictionary.
12. Enter Antigens, Antibodies or Markers. If repeating this exercise in order to enter products with different blood types, vary your entries.
Expected Result:
System will only accept a valid entries from the Antigen, Antibody and Marker Dictionaries If an invalid entry is made, the system will display the following message: "The entry is not defined".
13. Enter Y at the prompt E/E Comments. You will be branched to a screen editor. Enter comments on this unit.
14. Enter responses to all queries on the BBK Unit Customer Defined Screen. It is not required to define a unit screen for all products. Answer the questions appropriately.
Expected Result:
System will not allow the user to return past a query that is required.
15. File the new unit.
Expected Result
The system will do one of the following, depending on the product and how it has been defined on page three of the BBK Product Dictionary. The pertinent entries in the Product Dictionary are Enter Req On Unit? And Assoc Unit Ord Grp Affiliated Source and Non-Affiliated Source prompts.
(1) the unit is filed and the unit number are displayed(2) the unit is filed and a specimen is created in the Background (for retyping if necessary), (3) the unit is filed and the user is prompted whether a requisition should be created or (3) the unit is filed and the Enter/Edit Requisition screen appears for the user to enter a requisition
16. Print the Unit Label.
Expected Result
The unit label will print using the format defined. The information on the label will accurately reflect the following information when included in the label format used:
collection dateunit numberexpiration dateproduct namevolume
- 86-
blood typesourcealternate number if enteredthe blood bank's name and registration number
17. Perform a Unit Inquiry.
Expected Result
The unit information will display correctly.
18. Repeat the scenario for a variety of products and blood types.
19. When you are finished, print the following reports:
Unit Status Activity ReportUnit Status ListUnit Inventory ListUnit Inventory SummaryReserved Donation ListMarker ReportOverride Warning Report
Expected Results
The reports will accurately reflect your activity during the testing sequence.
20. Once the unit labels are printed, scan the unit labels with a scanner to confirm the data can be read.
21. List the products and blood types you entered in the form below:
Product Unit Number Blood Type Collection Date Expiration Date
__________ ___________________ _____________ _____________ _____________
__________ ___________________ _____________ _____________ _____________
__________ ___________________ _____________ _____________ _____________
__________ ___________________ _____________ _____________ _____________
__________ ___________________ _____________ _____________ _____________
__________ ___________________ _____________ _____________ _____________
__________ ___________________ _____________ _____________ _____________
__________ ___________________ _____________ _____________ _____________
__________ ___________________ _____________ _____________ _____________
- 87-

_____________________________________________________________________
THIS ROUTINE VALIDATED BY:_________________________DATE:__ /__ /__
ACCEPTABLE:__________________ NOT ACCEPTABLE:___________________ HOSPITAL NAME: ____________________________________________________
- 88-

3.2: Entering Inventory Units by Batch
FUNCTION TO BE VALIDATED: Enter Inventory Units by Batch
Introduction:
This validation exercise will cover entering units in a batch type mode. This routine is used for entering large volumes of units into the system at the same time. The Bar Code reader is usually used for quick and accurate entry of the unit information. Certain unit fields may default to the next unit entered depending on the Customer Defined Parameters. Any additional information that must be entered on the unit that is not available on the primary Enter Units by Batch screen can be entered by pressing the right arrow key. This will take the user into the Enter Inventory Units Routine.
Dictionaries:
Source/Destination Unit Location Product Blood Type Bar Code Field Bar Code Symbology Bar Code Term
System Parameters:
Ask BBK Alternate Number BBK Unit Statuses Unit Enter Batch Defaults
Function may be accessed in:
Enter Units by Batch Reports to Print: Unit Status Activity Report Unit Status List Unit Inventory List Unit Inventory Summary Reserved Donation List Unit Location List Marker Report
NOTE: Users may have the ability to define CUSTOM REPORT FORMATS when printing standard reports. Customization to the reports may not supply all information contained in the standard version.
- 89-

Prerequisites:
The only prerequisite to entering units by batch is the correct definition of the aforementioned dictionaries.
Validation Exercise:
If your hospital enters units with the Bar Code Reader, use the Bar Code reader when performing this exercise.
1. Enter a date greater than today at the Receive Date prompt. Expected Result: The system will beep and display the following message: "Date or time cannot be in the future"
Linefeed out the future date and enter today's date and the current time at the Time prompt.
2. Scan the Source bar code on the unit of blood.
Expected Result:
The system will insert the appropriate mnemonic for the Source that appears on the unit of blood. If the System Parameters have been set to Ask BBK Alternate
Number and an Alternate Number Prefix has been designed for the Bar Coded Source, the defined prefix will appear in the Default Alt Num Prefix prompt.
If you are using the bar code scanner, the bar code number of the Source should be defined in the Source/Destination Dictionary. A source may have several bar code numbers as they are defined based on symbology. If a bar code number is not defined the system will generate the message: "The entry is not defined."
A Lookup of all available Sources will also be available for manual entry.
3. At the Inv Card Device prompt, enter the printer that will be used for Inventory Cards.
Expected Result:
The system will give a Lookup of all Devices. If an invalid entry is made, the system will display the following message: "The entry is not defined."
NOTE: For the inventory card to print, a report fragment must be defined in the Product Dictionary at the Inventory Card Program prompt.
4. At the Unit Location prompt, enter the location where the units of blood being entered into inventory will be stored.
Expected Result:
The system will give a Lookup of all appropriate Locations defined in the Unit Location Dictionary. If an invalid entry is made, the system will display the following message: "The entry is not defined."
NOTE: A default Unit Location can be defined by Lab Site in the LIS Lab Site Dictionary.
- 90-

5. Scan the Product bar code from the unit of blood at the Product prompt.
Expected Result:
The system will insert the appropriate product mnemonic of the Product bar code on the unit. The Product bar code number must be defined in the appropriate Product Dictionary. If the bar code number is not defined in the Product Dictionary, the system will not accept the input and delete it from the screen. The system will also insert the Volume of the unit at the Volume prompt. The amount of the volume is being derived from the Usual Volume in the Product Dictionary.
A Lookup of all active Products will also be available for manual entry.
NOTE: If the prompt All Units Alike? is set to yes in the Product Dictionary, the system will display the following error message: "This entry is unavailable."
6. Scan the Unit Blood Type bar code from the unit of blood at the Blood Type prompt.
Expected Result:
The system will insert the appropriate Blood Type mnemonic of the Blood Type on the unit. The Blood Type bar code number must be defined in the appropriate Blood Type Dictionary. If the bar code number is not defined in the Blood Type Dictionary, the system will beep and delete the entry.
A Lookup of all Blood Types defined in the Blood Type Dictionary will be available for manual entry.
NOTE: If the prompt Affiliated? is set to Yes in the Source/Destination Dictionary, the system will skip over the Blood Type field.
7. If the unit you are scanning has a bar coded Expiration Date, scan the Expiration Date at the Exp Date prompt.
Expected Result:
If scanned, the system will insert the appropriate Expiration Date from the unit of blood.
If the unit you are scanning does not have a bar coded Expiration Date, manually enter the expiration date of the unit.
a. Enter an Expiration Date that is greater than the maximum shelf life of the unit.
Expected Result:
If an expiration date is entered that would exceed the maximum shelf life for that product, the system will display the following message: "The maximum shelf life ends on <Date>"
b. Enter an Expiration Date that is prior to today.
Expected Result:
The following error message displays: “Expire date cannot be before today.”
- 91-

c. Enter an Expiration Date using the appropriate MEDITECH Date Format.
Expected Result:
The system will accept the expiration date entered as long as the date does not exceed the maximum shelf life for that product.
NOTE: The system will recognize standard date formats. You may need to define the format used by your source for successful scanning. To do this, make sure that the appropriate entry or entries are made in the Bar Code Term Dictionary
8. If you are entering a product that is defined as Lot Number Required? Y on Page 1 of the BBK Product Dictionary, you will be asked to enter a Lot Number.
9. Scan the Unit Number from the unit of Blood at the Unit Number prompt.
Expected Result:
The system will insert the appropriate unit number for the unit of blood.
10. After the first unit of blood has been entered, defaults of Product, Blood Type, Expiration Date, Volume and/or Unit of Measure can default for the next unit. The defaults for Product, Blood Type and Expiration Date are determined by the BBK Unit Enter Batch Defaults Parameter in the Customer Defined Parameters. The defaults for Volume and Units of Measure are determined by the Product Dictionary.
What Defaults are defined in your Customer Defined Parameters? ____________
What fields have defaulted in the Enter Units By Batch Routine?_________
11. If edits need to be made to the default responses, the user will be able to go back and edit these fields by utilizing the Function Keys, as well as the Up and Down Arrow Keys.
a. If defined as a default response, go back and change the Exp Date for the second unit.
Expected Result:
System will allow the user to change the default Expiration Date.
b. If defined as a default response, go back and change the Blood Type.
Expected Result:
System will allow the user to change the default Blood Type.
c. If defined as a default response, go back and change the Product.
Expected Result:
System will allow the user to change the default Product.
- 92-

12. For units that require more specific unit information, the system will allow the user to branch into the Enter Units Routine.
a. Choose a unit that requires more specific unit information to be entered (ie. Antigens, Antibodies, Markers, Reserved Statuses and Recipients.) Enter the unit's Source, Product, Blood Type, Expiration Date, and Unit Number, then press the Right Arrow to branch into the Enter Inventory Units Routine to add the additional unit information.
Expected Result:
The system will allow the user to branch to the Enter Inventory Units Routine from the Enter Units By Batch Routine when the cursor is in the Unit Number field. The system will then branch into the Enter Units Routine where more specific unit information can be recorded.
NOTE: Validation Testing for the Enter Units Routine is covered in a different section of this manual.
b. Add the necessary additional information on the unit and file the unit.
Expected Result:
The system will file the individual unit and branch back to the Enter Units By Batch Routine. An "F" will now appear in the far right column of Enter Units By Batch to signify that information for this unit has been filed.
13. The Process of Entering Units by Batch should be repeated for all Sources, Products, and Blood Types. Additional unit information should be added for a random number of units by using the Right Arrow key to branch into the Enter Inventory Units Routine. At the Unit Number prompt, enter a unit number that already exists in the system. You should receive the following error message: “Unit number already exists for this source and product”. Each unit should be recorded in detail. The following worksheet may be useful in recording unit information.
UNIT WORKSHEET
SOURCE PRODUCT BLD TYPE EXP DATE VOLUME UNIT # OTHER ________ _________ _________ __________ ________ ________ _______________ _________ _________ __________ ________ ________ _______________ _________ _________ __________ ________ ________ _______ ________ _________ _________ __________ ________ ________ _______
14. After all units have been entered. Unit comments may be entered for those units entered in the batch.
Enter Unit Comments for a batch of units. Record Comment here: _______________________________________________________________________________.
- 93-

15. File the Batch of Units.
Expected Results:
The system will begin to file all units entered by batch in the background. The system will display the following message: "Unit filer started as background job ###."
Reports to Print:
Status Activity Report - Print this report for selected units to confirm that they are at the appropriate status after having been entered by batch.
Unit Status List - Print this report to confirm all units entered by batch have progressed through the appropriate statuses.
Unit Inventory List - Print this report for the Received Date and Time Range for the above exercises. Compare all unit information recorded with the information recorded on your unit worksheet. This report provides a detailed list.
Unit Inventory Summary - Print this report for the Received Date and Time range for the above exercises. Compare all unit information recorded with the information recorded on your unit worksheet. This report provides a detailed list.
_____________________________________________________________________
THIS ROUTINE VALIDATED BY:_________________________ DATE:__ /__ /__
ACCEPTABLE:____________________NOT ACCEPTABLE:__________________ HOSPITAL NAME: _____________________________________________________
- 94-

3.3 Entering Inventory Units in Lots
FUNCTION TO BE VALIDATED: Enter Inventory Unit In Lots
Introduction:
This exercise will be used to validate the function of entering units into the system by Lots. This routine will take all units with the same Lot number and number them consecutively depending on the Start At Number. Users also have the ability to create unit labels to attach to the units for quick identification.
Dictionaries:
Source/Destination Product Unit Location Marker LIS Workload Function
Function may be accessed:
Enter Lots Process Units
System Parameters:
Ask BBK Alternate Number Allowed BBK Prefixes BBK Unit Statuses
Reports to Print:
Unit Status Activity Report Unit Status List Unit Inventory List Unit Inventory Summary Unit Location List Marker Report
NOTE: Users may have the ability to define CUSTOM REPORT FORMATS when printing standard reports. Customization to the reports may not supply all information contained in the standard version.
Prerequisites:
The only prerequisite to entering units by lots is the correct definition of the aforementioned dictionaries.
- 95-

Validation Exercise A:
1. Enter the appropriate Source of the blood product at the Unit Source prompt.
Expected Result:
System will only accept a valid entry from the Source/Destination Dictionary. If an invalid entry is made, the system will display the following message: "The entry is not defined."
2. At the Product prompt enter in a product that is not entered in lots. Example: Packed Red Blood Cells.
Expected Results:
This prompt accesses a restricted lookup into the Product Dictionary. Only products that are defined as ‘All Units Alike? Y’ will be accepted as valid responses. Packed Red Blood Cell Products are not alike and thus will not be accepted at this prompt. The system will beep and display the following message: "This entry is unavailable."
3. Enter in a valid product at the Product prompt.
4. Enter a number higher than zero at the How Many prompt.
5. The Volume prompt should display the usual volume of the Product entered. This is accessing the Usual Volume prompt from the Product Dictionary.
The system should default in the correct volume from the Product dictionary? Check the Product Dictionary.
6. Enter in a Unit Number at the Start At Number prompt. The user has the option of either entering their own number or using the system generated prefix numbers. The system will allow the user to choose any valid prefix defined in the LIS parameters. If a prefix is chosen, the system will use the next available set of numbers on that prefix's numbering wheel for the units being entered Enter an invalid prefix without any numbers.
Expected Result:
a. The system will not allow alpha characters as suffixes.
b. If an invalid format is entered, the system will display the following message: "Invalid starting number - use form {PX}NNN...N". If the invalid format entered does not contain numbers, the system will display the message: "Invalid prefix".
7. Enter in a unit alternate prefix.
The system should default in a prefix if one is defined for this Source in the Source/Destination Dictionary. If so, is it the correct prefix as defined in the Source/Destination Dictionary?
The system may not ask for the alternate prefix. This is defined in the LIS Parameter: Ask Alternate Number?. Check your LIS Parameter printout.
8. Enter in a date greater than today at the Receive Date prompt.
Expected Result:
System will beep and display the following message: "Date or time cannot be in the future."
- 96-

9. Enter in a Collection Date greater than the receive date.
a. Expected Result:
System will beep and display the following message: "Date or time cannot be in the future."
Enter in a Collection Date the same as Received Date. Enter in a Collection Time later than the Received Time.
b. Expected Result:
The system will generate the following message: “Date or time cannot be in the future.”
NOTE: If the prompt Affiliated? is set to yes in the Source/Destination Dictionary, the system will stop at the BY field. This not a required field and can be left blank.
10. Enter the Expiration Date of your units at the Expiration Date prompt. Expiration date cannot exceed the maximum shelf life as defined in the Product dictionary. Enter a date that exceeds the maximum shelf life.
a. Expected Result:
The system will flag the user with the following message: "Max shelf life ends on mm/dd/yy at nnnn."
NOTE: The Expiration Date and Time will default in based on the Collection Date entered or the Maximum Shelf Life if the Collection Date is blank. Try to delete the Expiration Date and Time Fields.
b. Expected Result:
The system will flag the user with the following message: "This is a required field!"
11. Try to leave the Lot Number field blank.
Expected Result:
The system will flag the user with the following message: "This is a required field!"
12. Enter in the Lot Number of the units being entered. This is a 16 character field which is free text.
13. The Workload Function prompt should display the usual Workload Function captured at the time of Unit entry. This is accessing the Product Dictionary. If the Workload Function is not defined in the Product Dictionary (it is not required), this field will be blank.
The system should default the correct Workload Function? Check the Product Dictionary. This is not a required field and may be left blank. If there was no system default, enter in a Workload Function from the Workload Function Dictionary Lookup.
14. Enter in a number at the Ct prompt. This is the number of times the Workload Function codes will be captured. This is generally the same as the number of units being entered.
15. Unit Location is the next prompt. This defaults in if associated with the Lab Site Dictionary.
16. Enter in a printer at the Inventory Card Printer prompt. After printing the Inventory Cards for the units, check all fields on the card for the correct unit demographics.
- 97-

NOTE: For the inventory card to print, a report fragment must be defined in the Product Dictionary at the Inventory Card Program prompt.
17. Unit Labels are available by entering a printer at the Unit Label printer prompt. These labels can be attached to the units for future bar code identification. Print out the labels and check all of the unit demographic information.
NOTE: For the unit labels to print, a label format must be defined in the Customer Defined Parameters.
18. Enter a Marker at the Markers prompt.
Expected Result:
System will only accept a valid entry from the LIS Markers Dictionary. If an invalid entry is made, the system will display the following message: "The entry is not defined."
19. Enter Comments if desired.
20. File the units and check for the unit number assignment at the bottom of the screen.
Expected Result:
Units should be numbered consecutively from the Start At Unit Number field. Example: "Units ######...###### filed."
Reports to Print:
Unit Inventory List - Print this report for the Received Date and Time Range for the above exercises. Compare all unit information recorded with the information recorded on your unit worksheet. This report provides a detailed list.
_____________________________________________________________________
THIS ROUTINE VALIDATED BY:_________________________ DATE:__ /__ /__
ACCEPTABLE:________________NOT ACCEPTABLE:______________________ HOSPITAL NAME: _____________________________________________________
- 98-

3.4: Entering Results on Inventory Units
FUNCTION TO BE VALIDATED: Unit Result Entry
Introduction:
The entry of results for unit specimens will be covered in this exercise. We will pay special attention to the Blood Type Calculations that govern the correct Retyping of Blood Units.
Dictionaries:
Calculation Blood Bank Test Method Access Customer Defined Parameters Result Entry Screen Worksheet
Function may be accessed in:
Process Units Process/Build Worksheet Enter/Edit Results Enter Unit and Result
Reports to Print:
BBK Outstanding Specimen Report BBK Unverified Specimen Report BBK Unit Status List BBK Override Warning Report
NOTE: Users may have the ability to define CUSTOM REPORT FORMATS when printing standard reports. Customization to the reports may not supply all information contained in the standard version.
Prerequisites:
Select multiple units, each with an outstanding specimen (Example: Packed Cells with an outstanding Retype profile). Make sure that each unit represents a different Source blood type or "Labeled as" blood type. If Calculations are being used to calculate correct Blood Types, print off the Blood Bank Calculation Dictionary entry for the Unit Blood Type Target Test. Refer to the printout for resulting scenarios for each Blood Type. Each scenario must be tested to validate that the Calculations are working properly. Important Notice: The system will calculate the Blood Type of the unit depending on your hospital's dictionary set-up. If Blood Types are not calculating correctly it may be due to an incorrect Dictionary definition of the Blood Type Calculation being validated. Make sure the order of tests are the same in the Blood Type Calculation Dictionary as they are in Result Entry, or the system may not automatically calculate the correct Blood Type. Also, place any Calculations in the Blood Type Dictionary that have any multiple "OMITS" towards the end of the scenarios. For instance, a calculation that contains one OMIT may appear towards the beginning. A calculation that contains two OMITS may be in the middle. If a calculation contains three OMITS, it would have to be placed after the one with two. Otherwise, this may interfere with the correct
- 99-

calculation of different scenarios. The more the "OMITS", the further down it would have to be placed in the dictionary.
How to use the Unit Blood Type Worksheets:
Check your BBK Calculation Dictionary for each Blood Typing scenario. Use multiple unit retype specimens and enter different results for each reaction test. Example: Specimen BB6 is on an OPOS unit - enter results that indicate an OPOS Blood Type. Check to see that the system correctly calculates the Blood Type. Make sure that the Blood Type is being calculated in the foreground for this exercise. It may be changed back to calculating in the background after validation is completed. In order to check this, make sure the Move Blood Type To Target Test routine is set to "Y" in the Calculation Dictionary.
A worksheet is provided with blanks for the Blood Type and Reaction Tests. This may be used for any additional Blood Types. (Example: An unconfirmed RH, B POS/NEG etc...)
UNIT BLOOD TYPE WORKSHEET
REACTION OP ON AP AN BP BN ABP ABN
ANTI-A
ANTI-B
ANTI-AB
ANTI-D
ANTI-DU
- 100-

Validation Exercise A:
1. Enter the Enter Results Routine. Choose a unit specimen whose Source Blood Type is OPOS. Using the Blood Bank Calculation Dictionary List, enter the results that match the OPOS scenario set up in the dictionary.
Expected Result:
The system will calculate the Blood Type as OPOS and the result will default into the Blood Type Target Test.
2. File the results.
3. A. Choose another unit specimen whose Source Blood Type is OPOS and whose Labeled Blood Type is OPOS. Enter the Blood Type scenario for ABP from the Blood Bank Calculation Dictionary List.
Expected Result:
The system will prompt “Blood type ABP does not match unit’s Blood Type. Ok?”.
Answer Y and upon filing, the system will prompt the user with “Can’t verify UNIT BT. It does not match history file”.
The test will not be verified and the specimen will not go to complete. The History Blood Type will remain OPOS.
B. Choose another unit specimen whose Source Blood type is OPOS and whose Labeled Blood Type is UNK. Enter the Blood Type scenario for ABP from the Blood Bank Calculation Dictionary List.
Expected Result:
The system will prompt "Blood Type ABP does not match unit's labeled Blood Type. OK?".
4. Change the results to the correct blood type and verify the results.
5. Choose another unit specimen whose Source Blood Type is OPOS. Enter in a Blood Typing scenario that does not match any of the Calculated Blood Types from the Blood Bank Calculation Dictionary.
Expected Result:
System will prompt the user with "Invalid blood type calculation." If the user continues past this message and enters a blood type, the message "Could not calculate Blood Type. OK?" will display. Note that if the "Invalid blood type calculation" message does not appear, a message rule will have to be placed in the dictionary. Here is an example:
[bbk truth table]^X,IF {'X [bbk err msg]("Invalid blood type calculation.")}, X;
- 101-

6. Change the results to a valid scenario and verify the correct blood type.
Expected Result:
The System will only accept a valid entry from the Blood Type Dictionary. If an invalid entry is made, the system will display the following message: "The blood type is not defined."
7. Using your Blood Type calculation as a guide, enter results for a unit of each blood type. Note that some blood types may have multiple sets of results. For example, APOS can be resulted with a Positive Anti-D or a Positive DU. Documentation of all information should be done on the Unit worksheet.
8. After ALL the Unit specimens' retype profiles are filed and verified, perform a Unit Inquiry and check the status of the units.
Expected Result:
The units should now be at a status of AVAILABLE except for the units from step 3A which should be at a status of ENTERED. If your units are remaining at a status of ENTERED, check to see if there are any outstanding specimens on your units.
9. Print the following reports:
BBK Outstanding Specimen Report- Verify that the unit’s specimen from Step 3a appears on the report.
BBK Unverified Specimen Report- Verify that the BT Test from the unit specimen in Step 3a appears on the report.
BBK Unit Status List- Verify the BBK Units entered are at the correct status.
BBK Override Warning Report- Verify that the RES Override Warning Messages for the Blood Type Mismatch from Step 3
appear on the report.
____________________________________________________________________
THIS ROUTINE VALIDATED BY:_________________________DATE:__ /__ /__
ACCEPTABLE:_____________ NOT ACCEPTABLE:_______________________ HOSPITAL NAME: ____________________________________________________
- 102-

3.5: Editing Inventory Units
FUNCTION TO BE VALIDATED: Edit Units
Introduction:
The Edit Units Routine is used to edit the demographic information on units entered into the system. All of the current information on file for the unit chosen will be displayed on the screen. The user will then have the chance to edit each field. Please note that depending on the unit's current status there may be some restrictions on what fields can be edited.
Dictionaries:
Source/Destination Product Blood Type Antigen/Antibody/Markers Unit Location
System Parameters Involved:
Ask BBK Alternate Number BBK Unit Statuses
Function may be accessed in:
Edit Inventory Unit Process Units
Reports to Print:
Unit Edit Log Override Warning Report Unit Inventory Card
NOTE: Users may have the ability to define CUSTOM REPORT FORMATS when printing standard reports. Customization to the reports may not supply all information contained in the standard version.
Prerequisites:
In order to edit unit information, there must be a unit previously entered into the system. Make sure that your unit has markers and antigens as part of its demographic information. To test editing of the Donor, Reserved and Recipient prompts, you can enter a unit through the Enter/Edit Donation/Deferrals Routine and it should be made Autologous for the donor.
- 103-

Validation Exercise A:
Choose a unit that is currently at an ENTERED status.
System will default all available information about the unit that has been chosen. This information can be confirmed by printing a Unit Inquiry for this unit.
1. a. Attempt to change the Source Blood Type to another Blood Type when the confirmed Blood Type is different than the Source Blood Type.
Expected Result:
The following message will appear: “Cannot be different than Blood Type”
This can be done by deleting the confirmed Blood Type, then going back to the Source Blood Type and deleting it and entering a different type. However, if the confirmed Blood Type is unknown, the Source Blood Type can be deleted out without having to linefeed out the confirmed Blood Type first.
b. If the Product Dictionary is set to "S" for the default Blood Type prompt, and the Ask Blood Type prompt is set to "N", then the system will display the following message: "This does not match the history file." The user will not be allowed any further.
2. Attempt to change the Blood Type of the unit.
Expected Result:
System will provide a Lookup of all available Blood Types built in the Blood Type dictionary. If the user chooses any blood type other than the Source Blood Type, the system will display the following message: "Cannot be different than Source Blood Type."
3. Edit the Receive Date and Time to be a date prior to the Collection Date.
Expected Result:
System will display the following message: "Collection date is greater than received date."
4. Edit the Receive Date and Time to be greater than today's date and time.
Expected Result:
System will display the following message: "Date or time cannot be in the future."
5. Edit the Receive Date and Time to be a date after the Collection Date, but prior to today.
Expected Result:
System will allow this, as long as the Receive Date and Time remain after the Collection Date and Time.
6. Edit the Collection Date and Time to be a date older than the maximum shelf life of the unit. (ie. T-90)
Expected Result:
System will display the following message: "Max shelf life ends on <Date> at <Time>"
- 104-

7. Edit the Collection Date and Time to be greater than the Received Date and Time, but after today.
Expected Result:
System will display the following message: "Date or time cannot be in the future."
8. Edit the Collection Date and Time to be a date prior to the Received date and older than the maximum shelf life of the unit.
Expected Result:
System will display the following message: "Max shelf life ends on <Date> at <Time>"
User will have to delete the entry, change the Expiration Date to one prompted by the system, then enter in the Collection Date desired.
9. Edit the Expiration Date and Time to be prior to the Collection Date and Time.
Expected Result:
System will display the following message: "Expiration date cannot be before collection date"
10. Edit the Expiration Date and Time to be far enough into the future to exceed the maximum shelf life of the product.
Expected Result:
System will display the following message: "Max shelf life ends on <Date> at <Time>"
11. Edit the Expiration Date and Time to be greater than the Collection Date and Time, but not to exceed the max shelf life of the unit.
Expected Result:
System will allow this as long as the date entered and Time to be greater than today's date and time.
12. Edit the Antigens, P/N, Antibodies, and Markers prompts. Enter a new antigen, antibody, and marker for this unit.
Expected Result:
System will only accept a valid entry from the Antigen, Antibody, and Marker Dictionaries. If an invalid entry is made, the system will display the following message: "The entry is not defined."
13. Edit the Donor Name with the name of a different donor who has a different Blood Type.
Expected Result:
System will display the following message: "Donor's blood type does not match Blood Type." The user should not be able to progress any further.
You can also receive this message at the Blood Type prompt if you are editing the Blood Type field.
- 105-

Note: The System will display the message “Donor’s Blood Type does not match Source Blood Type” if you identify a Donor with a Blood Type different than the Source Blood Type and the Blood Type field is UNK.
You can also receive this message at the Source Blood Type prompt if you are editing the Source Blood Type field.
14. Edit the Donor Name with the name of a different donor who has the same Blood Type.
Please note that if you choose a donor who does not have a medical record, you receive a warning instead stating "Donor and recipient Medical Records do not match. OK"?. Therefore, a donor with a medical record should be chosen.
Expected Result:
System will display the following message: "Donor and recipient Medical Records do not match."
15. The user must remove the Donor Name.
16. Edit the Recipient to be a Recipient with a blood type that is different than the unit’s Source Blood Type.
Please note the error message, "Recipient's blood type does not match Source Blood Type.", will appear if the unit's Source Blood Type is known and the Blood Type is Unknown. If the Blood Type is known the error message "Recipient's blood type does not match Blood Type."
Expected Result:
System will display the following message: “Recipient’s blood type does not match Source Blood Type”.
You can also receive this message at the Source Blood Type prompt if you are editing the Source Blood Type.
17. Edit the Recipient to be a Recipient with a blood type that is different than the unit’s Blood Type.
Expected Result:
System will display the following message: “Recipient’s blood type does not match Blood Type.”
You can also receive this message at the Blood Type prompt if you are editing the Blood Type.
18. Edit the Reserved Status to "Donor-Directed."
Expected Result:
System will remove the recipient and require the user to re-enter an appropriate recipient.
19. Remove the Reserved status.
Expected Result:
System will remove the recipient from the unit.
20. Enter a Recipient with an incompatible Blood Type.
- 106-

Expected Result:
System will display the following message: Recipient’s Blood Type incompatible with Blood Type.”
Note: The System will display the message “Recipient’s Blood Type incompatible with the Source Blood Type if you identify a Recipient who has a blood type that is incompatible with the Source Blood Type and the Blood Type is UNK.
You can receive the above messages at both the Source Blood Type and Blood Type fields.
21. Edit the recipient of the Reserved Unit.
If the unit is Autologous and the Donor name is entered,
Expected Result:
System will not allow the user to edit the Recipient. The cursor will skip over the recipient field.
22. If the unit is Donor-Directed or Autologous but the Donor name is not Entered.
Expected Result:
System will allow the user to edit the Recipient.
23. Enter a Date of Use for the reserved unit. This information can then be used to search for reserved units using the “Reserved Donation List” Report.
24. Edit the Segment Number.
Expected Result:
System will allow the user to edit the Segment Number to any Free Text answer.
25. Edit the Volume by changing it to "0".
Expected Result:
System will display the following message: "Zero volume- are you sure? (Y/N)".
26. Answer "Y" to accept a zero volume or "N" to enter another volume.
27. Edit the Workload Function.
Expected Result:
System will only accept a valid entry from the Workload Function Dictionary. If an invalid entry is made, the system will display the following message: "The entry is not defined."
28. Edit the Unit Location.
Expected Result:
- 107-

System will only accept a valid entry from the Unit Location Dictionary. If an invalid entry is made, the system will display the following message: "The entry is not defined."
If unit location defaults in, it is coming from the Lab Site Dictionary.
29. Enter "Y" for Yes at the Edit Comments prompt. Enter a comment into the screen editor.
Expected Result:
The system will either allow the user to file at this point or it will prompt for any queries on the Unit Customer Defined Screen. Unit Customer Defined Screens are optional. If a screen is present, answer all related queries.
30. File the unit.
31. Enter a valid printer at the Print Inventory Card On: Prompt.
Expected Result:
The system will print the inventory card.
____________________________________________________________________
THIS ROUTINE VALIDATED BY:________________________ DATE:__ /__ /__
ACCEPTABLE:________________ NOT ACCEPTABLE:____________________ HOSPITAL NAME: ___________________________________________________
- 108-

3.6: Inventory Make Components Production
FUNCTION TO BE VALIDATED: Make Components
Introduction:
The Make Components Routine is used to make different products from an Original unit. The Components that can be made from a certain product are defined in the Product Dictionary. The user may also choose to default the usual Component Products into the Make Components screen.
Dictionaries:
Product Blood Type Markers Workload Source
System Parameters:
Autonumber Components BBK Unit Statuses
Function may be accessed in:
Process Units Make Components
Reports to Print:
Associated Units List Display Unit Tree Components/Aliquots Log Unit Inquiry Final Disposition Report
NOTE: Users may have the ability to define CUSTOM REPORT FORMATS when printing standard reports. Customization to the reports may not supply all information contained in the standard version.
Prerequisites:
In order to use the function of making components, a product must be entered that can be broken down into components. Example: Whole Blood. The types of component products that can be made from the product must be listed in the Product Dictionary.
COMPONENT WORKSHEET ORIGINAL UNIT NUMBER:
COMPONENT UNIT NUMBER:
COMPONENT UNIT NUMBER:
COMPONENT UNIT NUMBER: Validation Exercise A:
- 109-

1. Enter in your unit number at the Unit Number prompt.
Expected Result:
The following information will default on to the display screen: Product, Donor, Source Blood Type, Confirmed Blood Type, Source, Reserved Status, Volume, Status, Creation date and time, and Component Source. Check the display information for accuracy.
2. Delete the defaulted Creation date and time. Enter in T+5 or any date greater than today.
Expected Result:
System will display the following message: "Date or time cannot be in the future"
3. Enter in today's date and current time at the Creation date and time prompts.
4. Enter in a printer at the Inventory Card Printer prompt.
5. Enter in a Workload Function.
Expected Result:
The system will only accept a valid entry from the Workload Function Dictionary. If an invalid entry is made, the system will display the following message: "The entry is not defined".
6. At the Copy Comments and Copy Queries and Markers prompts enter "Y"es.
7. Two different scenarios are possible at the product prompt:
If the Original product is set to default in the components in the Product Dictionary, all possible components of the Original product will default into the product prompt.
If the Original product is not set to default in the components in the Product Dictionary, the user may choose which components to create. Please note that you may only choose components which are listed as possible component products of the Original unit. This information is entered in the Product Dictionary.
Enter a product that is not defined as a component. The error message: “This entry is unavailable” will be received.
8. Two different scenarios are possible at the unit number prompt:
If the LIS System parameter Autonumber Components is set to "Y"es, the new component units will receive the same unit number as the Original unit. The units will default in at the unit number prompt. The components are able to receive the same unit number because the product types are different. Unit numbers must only be unique by product. Example: Unit number 12345 PC and Unit number 12345 FFP is legitimate because the products are different.
If the LIS System parameter Autonumber Components is set to No, the system will allow the user to chose a valid unit prefix to number the unit. Valid unit prefixes can be seen by doing a lookup at the Unit number prompt. If chosen the unit will receive the next number on that
- 110-

prefix's numbering wheel. The user may also choose to enter their own unit number at this prompt.
Expected Result:
The volume of the component units will default on the screen. This is pulling the usual volume of the component products from the Product Dictionary.
The Volume Left display will be decremented by the volume of the components. Example: Original unit Volume: 350 cc. Component is 100 cc. Original Volume Left: 250 cc.
9. Two different scenarios are possible at the Expiration Date and Time prompts.
If the Original Product is defined as Calc Comp Ext Date/Time By CRE, the Expiration Date will be defaulted by the System. The Expiration date will be calculated from the sum of the create date of the Component product plus the product’s maximum shelf life.
If the Original Product is defined as Calc Comp Exp Date/Time By COL, the Expiration date will be defaulted by the System. The Expiration date will be calculated from the sum of the Collection date of the original product plus the product’s maximum shelf life.
10. Enter an Expiration date for one of the component products that exceeds the maximum shelf life of that product as defined in the Product Dictionary.
Expected Result:
The System will display the following message: “Max shelf life ends on mm/dd/yy at nn:nn”.
11. Enter in "Y"es for the edit of Comments/Markers/Queries. Edit each field.
Expected Result:
The cursor will now prompt for the next component of the Original unit.
12. Accept the number that the system has defaulted for this component or create your own number.
13. At the volume prompt, enter in a volume that exceeds the volume left for the Original unit.
Expected Result:
System will prompt the user with "This exceeds the volume of the original unit. Ok?
14. Answer "N"o.
15. You will again be prompted with volume for the next component. Enter a volume which is equivalent to the volume left on the Original unit or accept the usual volume of the product.
Expected Result:
The Original unit's volume will become 0 (zero).
16. Do not edit the Comments/Markers/Queries for this component.
17. Enter in any remaining information for any additional components.
- 111-

18. File the component units.
19. The system will ask you if you want to proceed to the Assign/Unassign Routine. Respond No. This function will be validated in another section.
20. Perform a Unit Inquiry on the Original unit.
Expected Result:
The Original Unit should have a status of COMPONENTS. The unit has reached a final status because the volume is 0 (zero).
21. Now proceed to the Unit Inquiry category of Aliq/Comp Units. Both of your components should be listed. Print off the Inquiry on your Original unit.
22. Perform a Unit Inquiry on both component units. The Comment/Markers/Queries should have been copied from the Original unit to the components. Make sure the statuses of the units are correct. Print both Unit Inquiries.
________________________________________________________________________
THIS ROUTINE VALIDATED BY:___________________________ DATE:__ /__ /__
ACCEPTABLE: __________________NOT ACCEPTABLE:_____________________
HOSPITAL NAME: ______________________________________________________
- 112-

3.7: Inventory Aliquot Production
FUNCTION TO BE VALIDATED: Make Aliquots
Introduction:
The Make Aliquots Routine is used to make smaller volumes of a blood product. The ability to make aliquots from a product type is defined in the Product Dictionary. The system will deplete the Original unit’s volume as the smaller units are aliquoted. The aliquots may be automatically numbered depending on your LIS parameters.
Dictionaries:
Product Blood Type Source Markers Workload
System Parameters:
Autonumber Components
Function may be accessed in:
Process Units Make Aliquots
Reports to Print:
Associated Units List Display Unit Tree Components/Aliquots Log
NOTE: Users may have the ability to define CUSTOM REPORT FORMATS when printing standard reports. Customization to the reports may not supply all information contained in the standard version.
Prerequisites:
Enter in units of a Product that is defined as Make Aliquots? Y in the Product Dictionary. Make sure to enter unit comments, markers and any associated unit queries on your unit. ALIQUOT WORKSHEET
ORIGINIAL UNIT NUMBER: VOLUME:
ALIQUOT UNIT NUMBER: VOLUME:
ALIQUOT UNIT NUMBER: VOLUME
- 113-

3.7 Validation Exercise A:
1. Enter in your unit number at the Unit Number prompt.
Expected Result:
The following information will default on to the display screen: Product Type, Reserved Status, Source Blood Type, Confirmed Blood Type, Volume, Expiration Date and Time, Status, Aliquot Source and Creation date and time. Check the display information for accuracy.
2. Delete the defaulted Creation date and time. Enter in T+5 or any date greater than today.
Expected Result:
System will display the following message: "Date or time cannot be in the future"
3. Enter in today's date and current time at the Creation date and time prompts.
4. Enter in a printer at the Inventory card printer prompt.
5. Enter in a Workload Function.
Expected Result:
The system will only accept a valid entry from the Workload Function Dictionary. If an invalid entry is made, the system will display the following message: "The entry is not defined".
6. At the Copy Comments and Copy Queries and Copy Non-HX Markers prompts enter "Y"es.
7. Two different scenarios are possible at the unit number prompt:
If the LIS System parameter Autonumber Components is set to Yes, the system will default in the number of the Original unit suffixed with a letter. The numbers will default as NNNB, NNNB, etc...
If the LIS System parameter Autonumber Components is set to No, the system will allow the user to chose a valid unit prefix to number the unit. Valid unit prefixes can be seen by doing a lookup at the Unit Number prompt. If chosen the unit will receive the next number on that prefix's numbering wheel. The user may also choose to enter their own unit number at this prompt.
8. Enter in the volume of the aliquot unit.
Expected Result:
The Volume Left display will be decremented by the volume of the aliquot. Example: Original unit Volume: 350 cc. Aliquot is 100 cc. Original Volume Left: 250 cc.
The Expiration date will be defaulted by the system. The Expiration date of the original unit will be used. Linefeed out the default and enter in a date that exceeds the maximum shelf life of the product being aliquoted.
Expected Result:
- 114-

The system will display the following message: "After expiration date/time of Original unit". The shelf life of the aliquot will not exceed that of the Original unit.
9. Enter in "Y"es for the edit Comments/Markers/Queries.
10. The cursor will now prompt for the next aliquot of the Original unit. Accept the system default of the Original unit number suffixed with a B or enter your own number.
11. At the volume prompt, enter in a volume that exceeds the volume left for the Original unit.
Expected Result:
System will prompt the user with "This exceeds the volume of the Original unit. Ok?
12. Answer "N"o. The user will again be prompted with volume for the new aliquot. Enter a volume which is equivalent to the volume left on the Original unit.
Expected Result:
The Original unit's volume will become 0 (zero).
13. Do not edit the Comments/Markers/Queries for this aliquot.
14. Do not enter anymore aliquot unit numbers. If the system defaults in another unit number, use the linefeed key.
15. File the Aliquoted units.
16. If the original unit was crossmatched to more than one specimen, the system will prompt you to choose which specimen the system updates.
If you enter Y, the system updates the product order and crossmatch information for the crossmatched specimen to include the new aliquots.
If you enter N, the system will not update this information. Also, if two or more different units in the unit tree have been crossmatched to the same specimen, the
system prompts you to select for which unit you want the system to copy the crossmatch data. If more than one eligible units exist, a lookup containing all units (determined eligible by the system) is available. This lookup contains only the unit numbers, their products (using the product abbreviation), and their sources.
Note: Units whose crossmatch is set to N/A are not considered eligible for propagation.
17. After you select a unit, the system copies the crossmatch test used for the selected unit. The system also checks the Order Crossmatch If Not Compatible/Crossmatch Test prompt (in the Product Dictionary) for a replacement test and if one is defined, the system copies that replacement test. If a replacement test is not defined, the system copies the selected unit's crossmatch test. This is true even if the aliquot and the unit being copied are different products. The system does NOT consider the associated tests (for the aliquot's product) defined in the Product Dictionary.
18. The system will ask you if you want to proceed to the Assign/Unassign Routine. Respond No. This function will be validated in another section.
19. Perform a Unit Inquiry on the Original unit.
Expected Result:
- 115-

The Original Unit should have a status of COMPONENTS. The unit has reached a final status because is volume is 0 (zero).
20. Now proceed to the Unit Inquiry category of Aliq/Comp Units. Both of your aliquots should be listed. Print off the Inquiry on your Original unit.
21. Perform a Unit Inquiry on both Aliquot units. The Comment/Markers/Queries should have been copied from the Original unit for the first Aliquot. Print both Unit Inquiries.
22. Print the new Inventory Cards for the new units. Make sure the information displayed on the Inventory cards is accurate.
________________________________________________________________________
THIS ROUTINE VALIDATED BY:___________________________ DATE:__ /__ /__
ACCEPTABLE:__________________ NOT ACCEPTABLE:_____________________ HOSPITAL NAME: ______________________________________________________
- 116-

3.8: Pooling Inventory Units
FUNCTION TO BE VALIDATED: Pool Units
Introduction:
The Pool Unit function is used to pool multiple units of blood together to make one unit of larger volume. The system will check the Pool to Make prompt in the Product Dictionary to establish what product type can be created when multiple units are pooled together .
Dictionaries:
Product Source Blood Type Marker Workload Function
System Parameters:
BBK Unit Statuses Ask Alternate Number Valid BBK Prefixes
Function may be accessed in:
Process Units Pool Units
Reports to Print:
Final Disposition Report Pooled Units Log
NOTE: Users may have the ability to define CUSTOM REPORT FORMATS when printing standard reports. Customization to the reports may not supply all information contained in the standard version.
- 117-

Prerequisites
Prerequisites
Product Dictionary:A pooled product such as Pooled Platelets. A product you can pool such as Platelets. Make sure that the product has an entry in the Product Dictionary at the Pool to Make prompt. Be sure that the Pool to Make Product is different than the product you are pooling.
You will need at least 10 units of a product that can be pooled. The units should be at a status of AVAILABLE and be of the same blood type. POOLING WORKSHEET
UNIT NUMBER: PRODUCT:
UNIT NUMBER: PRODUCT:
UNIT NUMBER: PRODUCT:
UNIT NUMBER: PRODUCT:
UNIT NUMBER: PRODUCT:
UNIT NUMBER: PRODUCT:
UNIT NUMBER: PRODUCT:
UNIT NUMBER: PRODUCT:
UNIT NUMBER: PRODUCT:
UNIT NUMBER: PRODUCT:
- 118-
3.8 Validation Exercise A:
1. At the unit prompt, in the Pool Units Routine, enter in each of your units to be pooled. There should be approximately 10 units.
Expected Result:
The system will default in the following fields for each of the units entered: Product, status, volume, blood type and expiration date.
2. At the product prompt, enter in a product type that is not listed as the Pool To Make product in the Product Dictionary. Example: 10 units of Platelets are being pooled together. Enter in Albumin for the product to be created.
Expected Result:
The system will prompt "This product cannot be made from the above products".
3. Enter in the correct Pool To Make product.
4. Enter in an appropriate Source for the new product.
Expected Result:
The system will only accept a valid entry from the Source/Destination Dictionary. If an invalid entry is made, the system will display the following message: "The entry is not defined".
5. The unit number prompt will be blank. Enter in your own unit number or use a valid BBK prefix by pressing the Lookup key and selecting a valid entry.
6. The volume of the Pooled product will be the sum of all of the products being pooled together. Example: 10 units of platelets each with a volume of 50cc will create a pooled product of 500cc. Check to be sure that the volume is indeed the correct sum of the pooled products.
7. The How Many Units prompt will default in the number of units that are being pooled together. Verify that the number is correct, and accept the default.
8. The Expiration date and time will be generated by the system and should be the Creation date of the pooled product plus the maximum shelf life of the pooled product. Is the system generated date correct?
9. At the Blood Type prompt, enter in a blood type that is not compatible with the blood type of the pooled components.
Expected Result:
The system will warn the user with the following message: "Blood type does not match any of the units in the pool; Ok?" enter Yes, if you want to have a different blood type and continue on. If not, respond No and return to the Blood Type field.
10. Enter in a compatible blood type.
11. Enter in a card printer for the Unit Inventory Cards.
12. Enter in a Workload Function.
- 119-

13. The system may ask for an Alternate number at the next prompt. This will depend on the definition in the LIS System parameter of Ask Alternate Number. If it is set to "Y"es, you must enter a number or a valid prefix at this prompt. If it is set to "N", Alternate number will not appear on the screen. If it is set to "O"ptional, you may either enter a number or a valid prefix or leave it blank.
14. Enter “Y” in the Copy Markers, Copy Comments and Copy Queries fields.
15. Enter in a marker from the LIS Marker Dictionary.
Expected Result:
The system will only accept a valid entry from the LIS Marker Dictionary. If an invalid entry is made, the system will display the following message: "The entry is not defined".
16. Enter comments on the unit of blood.
17. File the new unit.
18. The system will ask you if you want to proceed to the Assign/Unassign Routine. Respond No. This function will be validated in another section.
19. Perform a Unit Inquiry on each of the units that were pooled to make the new unit of blood.
Expected Result:
The units should be at a status of POOLED. This is a final disposition.
20. Perform a Unit Inquiry on the unit just created. Check the Unit Inquiry category of Pooled Units. All of the pooled units should be listed.
________________________________________________________________________
THIS ROUTINE VALIDATED BY:___________________________ DATE:__ /__ /__
ACCEPTABLE: ___________________NOT ACCEPTABLE:____________________
HOSPITAL NAME: _____________________________________________________
- 120-

3.9: Transferring Inventory Units
FUNCTION/ROUTINE TO BE VALIDATED: Transfer Units
Introduction:
The Transfer Units Routine is used to transfer units of blood from your facility to an outside institution. In the Source/Destination Dictionary an institution can be defined as a Destination, Source or both a Destination and a Source. In this routine, only entries which are possible Destinations for your units will appear in a lookup. A Packing List can be generated to accompany your units to their Destination. Transfer comments may also be entered.
Dictionaries:
Product Source/Destination
System Parameters involved:
BBK Unit Statuses
Function may be accessed in:
Transfer Units Process Units
Reports to Print:
Transfer List Status Activity Report Status List Final Disposition Report Transfer Log
NOTE: Users may have the ability to define CUSTOM REPORT FORMATS when printing standard reports. Customization to the reports may not supply all information contained in the standard version.
- 121-
Prerequisites:
Enter a unit of blood into the Blood Bank inventory. If a specimen is created in the background, result the specimen.
3.9 Validation Exercise A:
1. In the Transfer Units Routine, enter a Destination to send the units to be transferred.
Expected Result:
System will only accept a valid entry from the Source/Destination Dictionary. A Lookup will display only Source/Destinations defined as possible destinations in the Source/Destination Dictionary. If an invalid entry is made, the system will display the following message: "The entry is not defined".
2. Enter a unit to be transferred. Make sure the unit is at one of the following statuses ENTERED, AVAILABLE, HOLD, ASSIGNED, EXPIRED, XM COMPATIBLE or READY. The Product type and status will default on the screen.
Expected Result:
The system will either accept the unit number or display a message if the unit is at a final status. For example: "Unit is at status TRSFS" will display if the unit has a status of Transfused.
3. Enter Workload Function.
4. Enter Transfer comments on the units to be transferred.
5. Transfer the unit.
Expected result:
The system will display "# Unit(s) transferred, # Units not transferred."
6. Enter a valid printer at the Print Transfer Log On: Prompt. Verify that all the information listed is correct.
7. Print the Transfer List. Verify that all information on the List, including the comments is correct.
8. Print the Status Activity Report for the unit.
Expected Result:
Unit should be at a final disposition of TRANSFERRED.
_______________________________________________________________________
THIS ROUTINE VALIDATED BY:___________________________ DATE:__ /__/ __
ACCEPTABLE: _________________NOT ACCEPTABLE:______________________
HOSPITAL NAME: ______________________________________________________
- 122-

3.10: Changing Unit to Inactive Status
FUNCTION TO BE VALIDATED: Change To Inactive Status
Introduction:
The Change to Inactive Status Routine is used to change the status of selected units to one of the inactive statuses defined in your system. There are several inactive statuses (e.g., Transfused, Transferred or Expired); however the only inactive statuses to which you may change a unit to are: Contaminated, Destroyed, Quarantined, Salvaged or one of the three customized final statuses. The initial status of the unit to change must be at one of the following statuses: Assigned, Hold, Available, Ready, Entered, XM Compatible, Contaminated, Expired or Quarantined. Once a unit's status has changed to any of the inactive statuses defined, that unit is not available to be crossmatched, issued or transfused to a patient.
NOTE: In addition to changing an individual unit to an inactive status, you can use combinations of the "Include All Associated Units?", Include Components/ Aliquots?" and "Include Pooled Units?" prompts to inactivate related units.
Dictionaries:
Source/Destination Blood Type
System Parameters Involved:
Ask BBK Alternate Number BBK Unit Statuses
Function may be accessed in:
Change To Inactive Status Process Units
Reports to Print:
Unit Status Activity Report Unit Status List
NOTE: Users may have the ability to define CUSTOM REPORT FORMATS when printing standard reports. Customization to the reports may not supply all information contained in the standard version.
- 123-

Prerequisite:
In order to change a unit status to an inactive status, there must be a unit previously entered into inventory at one of the appropriate statuses listed above.
3.10 Validation Exercise A:
Changing a unit's status to an inactive status from appropriate and inappropriate statuses. Make sure to do this exercise several times with different types of units, different statuses and with units that have been Pooled, Aliquoted or made Components from.
1. Choose and enter units at the appropriate statuses for this routine. The system will default all available information about the unit that has been chosen. (This information can be confirmed by printing a Unit Inquiry for the unit.)
Expected result:
If you select an expired unit the system will warn the user with the following message: "Unit has expired. Choose anyway?". Either a "Y" or "N" response will allow the user to either enter a new unit or an additional unit.
2. When you have finished entering the unit(s) that you wish to change to an inactive status press the <enter> key and you will be brought to the next prompt. A lookup will display the available inactive statuses. Select the inactive status you desire.
3. The next three prompts allow you to specify which related units should also change to the inactive status.
Include All Associated Units?Include Components/Aliquots?Include Pooled Units?
You may answer these prompts by entering either Yes or No.
4. Enter a comment that will attach to the units, stating the reason for changing the unit(s) status and then File.
Expected Result:
The system will respond with the following message: "Change to unit status <inactive status selected>?" Respond with a "Y". The system will then respond with a message stating that the following units have had their statuses changed to the following inactive status.
5. Print the Crossmatch Release Notices, if applicable.
6. Print the screen display and attach the printout to this exercise.
7. Print the Unit Status List to ensure that the unit statuses changed accordingly and attach the list to this exercise. Make sure the associated units were also changed if the above three prompts (step #3) were answered.
- 124-

8. Now choose a unit at a status that is not applicable for this routine, for example, Transfused.
Expected Result:
The system will flag the user with the message: "Unit at status TRS" if the selected unit is at a status of transfused. This status is unacceptable for this routine and the system will not allow the user to change the unit's status to an inactive status.
Note: It is possible to receive the message “No units eligible” at the Unit prompt. You will receive this message when there are multiple units that are ineligible that share the same unit number. For example, you have two TRANSFERRED units that have the same unit number.
9. Print the screen and attach the printout to this exercise.
_______________________________________________________________________
THIS ROUTINE VALIDATED BY:_____________________________DATE:__/__/__
ACCEPTABLE:___________________ NOT ACCEPTABLE:____________________ HOSPITAL NAME: ______________________________________________________
- 125-

3.10 Validation Exercise B:
Trying to crossmatch, issue and transfuse a unit that is at an inactive status.
1. Order two units of a crossmatchable product on a patient. Result the associated tests, and try to crossmatch a unit at an inactive status to the patient.
Inactive Unit: ____
2. Verify that the message "Unit is at status XXX" displays, where XXX is the inactive status of the unit. Do a print screen of this message, and attach it this exercise. Also verify that the only way to continue with crossmatching ANY unit to this patient is by linefeeding the inactive unit, and choosing a valid unit. Result only one of the crossmatches on this specimen, and file it. Be sure the crossmatch is resulted as "Compatible: Y."
Crossmatched Unit: __________
3. In the Issue Units routine, note that the system does not allow you to access the field to change the crossmatched unit. Try to issue an inactive unit to this patient by entering the inactive unit at the Unit prompt for the second, unresulted crossmatch. Verify that the warning message "Unit cannot be issued at status XXX" appears, where XXX is the mnemonic of the inactive status of the unit, and that you cannot proceed with issuing an inactive unit to the patient. Do a print screen of this message, and attach it this exercise. Proceed with issuing the crossmatched unit only.
Inactive Unit: __________
4. In the Enter/Edit Transfusion Data routine, try to use the <Prev Field> key to edit the unit that you are transfusing. Verify that the system does not allow you to access that field to change the unit you are transfusing to the patient.
_______________________________________________________________________
THIS ROUTINE VALIDATED BY:_____________________________DATE:__/__/__
ACCEPTABLE: ___________________NOT ACCEPTABLE:____________________ HOSPITAL NAME: ______________________________________________________
- 126-

3.10 Validation Exercise C:
Trying to assign, issue and transfuse a unit that is at inactive status.
1. Order two units of a non-crossmatchable product on a patient, and try to assign an inactive unit of the same product to the patient. Verify that the warning "Unit at status XXX" displays, where XXX is the inactive status of the unit, and that you cannot assign this unit to the patient. Do a print screen of this message, and attach it this exercise. Proceed with assigning a unit at an acceptable status.
Inactive Unit: __________
2. In the Issue Units Routine, note that the system does not allow you to access the field to change the assigned unit. Try to issue an inactive unit to this patient by entering the inactive unit at the Unit prompt for the second product order. Verify that the warning message "Unit cannot be issued at status XXX" appears, where XXX is the mnemonic of the inactive status of the unit, and that you cannot proceed with issuing an inactive unit to the patient. Do a print screen of this message, and attach it this exercise.
Proceed with issuing the assigned unit only.
Inactive Unit: __________
3. In the Enter/Edit Transfusion Data routine, try to use the <Prev Field> key to edit the unit that you are transfusing. Verify that the system does not allow you to access that field to change the unit you are transfusing to the patient.
4. In the Emergency Issue routine, enter the patient from the previous steps. At the Unit prompt, enter ANY inactive unit. Verify that the warning "Unit cannot be issued at status XXX" displays, where XXX is the mnemonic of the inactive status of the unit, and that you cannot proceed with emergency issuing any inactive unit to this patient. Do a print screen of the message, and attach it to this exercise.
Inactive Unit: __________
Inactive Unit: __________
_______________________________________________________________________
THIS ROUTINE VALIDATED BY:_____________________________DATE:__/__/__
ACCEPTABLE: ___________________NOT ACCEPTABLE:____________________ HOSPITAL NAME: ______________________________________________________
- 127-

3.10 Validation Exercise D:
Changing a unit that has been crossmatched, issued or transfused to an inactive status.
1. Order two crossmatchable products on a patient. Result the associated tests and crossmatch two available units to the patient. Make sure both crossmatches are resulted as "Compatible: Y."
Unit #1 Crossmatched: ____________
Unit #2 Crossmatched: ____________
2. Change one of the crossmatched units to an inactive status, as outlined in the previous exercise. Verify that the system alerts you that the unit is crossmatched, and asks you if you want to order another crossmatch. Do a print screen of the message and attach it to this exercise. Respond "Y" to the additional crossmatch prompt, and file the change to the unit.
3. Once the unit has been changed to an inactive status, perform a unit inquiry to verify the updated status. Also, verify that the previous crossmatch is set to "NA" and that another crossmatch has been added to the patient's specimen.
4. Issue the second unit to the patient.
5. Try to change the second unit to an inactive status. Verify that the warning message "Unit is at status ISS" displays, and that you cannot change this unit to an inactive status. Do a print screen of this warning message and attach it to this exercise.
6. Transfuse the second unit to the patient.
7. Try to change the second unit to an inactive status. Verify that the warning message "Unit is at status TRS" displays, and that you cannot change this unit to an inactive status. Do a print screen of this warning message, and attach it to this exercise.
_______________________________________________________________________
THIS ROUTINE VALIDATED BY:_____________________________DATE:__/__/__
ACCEPTABLE: ___________________NOT ACCEPTABLE:____________________
HOSPITAL NAME: ______________________________________________________
- 128-
3.11: Returning Unit to Prior Status
FUNCTION TO BE VALIDATED: Return To Prior Status
Introduction
The Return to Prior Status Routine is used to return the status of a selected unit to a prior status. Depending on the current status there are options for prior statuses. These options appear via a lookup. Once a prior status is selected additional prompts may appear. For a listing of the prior status options, additional prompts and their meaning refer to the NPR BLOOD BANK MODULE USER MANUAL, VOLUME 1: PATIENT AND UNIT ROUTINES. In addition to optional status changes and additional prompts appearing there are effects associated with the units that are changed. These effects are status dependent and are also listed in the User Manual listed above.
NOTE: In order for a unit to be utilized in this routine it must be at one of the following statuses: Available, Issued, Transfused, Components, Contaminated, Quarantined, Destroyed, Salvaged, Presumed Transfused, or one of the three customized final statuses.
Dictionaries:
Product Source/Destination Blood Type
System Parameters Involved:
Ask BBK Alternate Number BBK Unit Statuses
Function may be accessed in:
Return to Prior status Process Units
Reports to Print:
Unit Status Activity Report Unit Status List Unit Inquiry
NOTE: Users may have the ability to define CUSTOM REPORT FORMATS when printing standard reports. Customization to the reports may not supply all information contained in the standard version.
- 129-

Prerequisite:
In order to return a unit status to a prior status, there must be a unit previously entered into inventory at one of the appropriate statuses listed above.
3.11 Validation Exercise A:
I. Returning a unit's status to a prior status from an appropriate status. Be sure to perform this exercise on several units at different statuses, with and without associated units.
1. Choose and enter a unit at one of the statuses listed previously in the Introduction. The system will default all available information about the unit that has been chosen.
Expected Results:
The following information will default on to the display screen: Product Type, Source Name, Blood Type, ALT Number and Current Status. (This information can be confirmed by printing a Unit Inquiry for the unit.)
2. When you have finished entering the unit that you wish to return to a prior status, press the <enter> key and you will be brought to the next prompt. A lookup will display the available prior statuses and the effect on the unit. Select the prior status you desire and file.
3. Print the Crossmatch release notice, if applicable.
4. Depending upon the prior status that you select additional prompts may appear (refer to introduction section above).
Expected Result:
The system will respond with the following message: "Change status?" Respond with a "Y". The system will respond with a message stating "Unit (Unit number Entered) now has status (PRIOR STATUS SELECTED)." The system will also allow comments to be edited on the Unit.
5. Print the screen and attach the printout to this exercise.
6. Print the Unit Status List to ensure that the unit statuses changed accordingly and attach the list to this exercise. Make sure associated units were also changed to the new status.
________________________________________________________________________
THIS ROUTINE VALIDATED BY:_____________________________DATE:__/__/__
ACCEPTABLE:__________________ NOT ACCEPTABLE:_____________________
HOSPITAL NAME:_______________________________________________________
- 130-

3.11 Validation Exercise B:
II. Returning a unit's status to a prior status from an inappropriate status.
1. Choose a unit at a status that is not applicable for this routine, such as Entered.
Expected Result:
The system should flag the user with the message: "Cannot return this unit to a prior status." The unit listed is an unacceptable unit for this routine and the system will not allow the user to return the unit to a prior status.
2. Print the screen and attach the printout to this exercise.
________________________________________________________________________
THIS ROUTINE VALIDATED BY:_____________________________DATE:__/__/__
ACCEPTABLE:__________________ NOT ACCEPTABLE:_____________________
HOSPITAL NAME: ______________________________________________________
- 131-

3.12: Changing Unit Numbers
FUNCTION TO BE VALIDATED: Change Unit Numbers
Introduction:
The Change Unit Number routine is used to either change a unit's number and/or alternate number or to correct a unit number that has been entered incorrectly. This routine is only available for units at one of the following statuses: Available, Components, Entered, Hold, and Ready (for non-crossmatchable products).
NOTE: If users change unit numbers with a status of COMPONENTS the component numbers will not reflect this change.
Dictionaries:
Product Source/Destination Blood Type
System Parameters Involved:
Ask BBK Alternate Number BBK Unit Statuses
Function may be accessed in:
Change Unit Numbers
Reports to Print:
Unit Edit Log Unit Inquiry
NOTE: Users may have the ability to define CUSTOM REPORT FORMATS when printing standard reports. Customization to the reports may not supply all information contained in the standard version.
- 132-

Prerequisite:
In order to change a unit number there must be a unit previously entered into inventory.
3.12 Validation Exercise A:
I. Changing the unit number of a unit that is at an appropriate unit status.
1. Choose a unit at one of the statuses listed previously in the Introduction . The system will default all available information about the unit that has been chosen. (This information can be confirmed by printing a Unit Inquiry for this unit.)
2. Enter either a new unit number or alternate unit number for the selected unit.
Expected Result:
The system will ask the user "Are you SURE you want to change this?" Respond "Y." The system will then file the new unit number.
3. Edit the unit comments for this unit.
4. Print a new Inventory Card to ensure that all appropriate comments and information has been captured. Attach a copy of the inventory card to this exercise.
5. Print the "Unit Edit Log Report" to ensure that the system has captured the unit number change for this transaction. Attach a copy of this report to this exercise.
________________________________________________________________________
THIS ROUTINE VALIDATED BY:_____________________________DATE:__/__/__
ACCEPTABLE:_________________ NOT ACCEPTABLE:______________________ HOSPITAL NAME: ______________________________________________________
- 133-
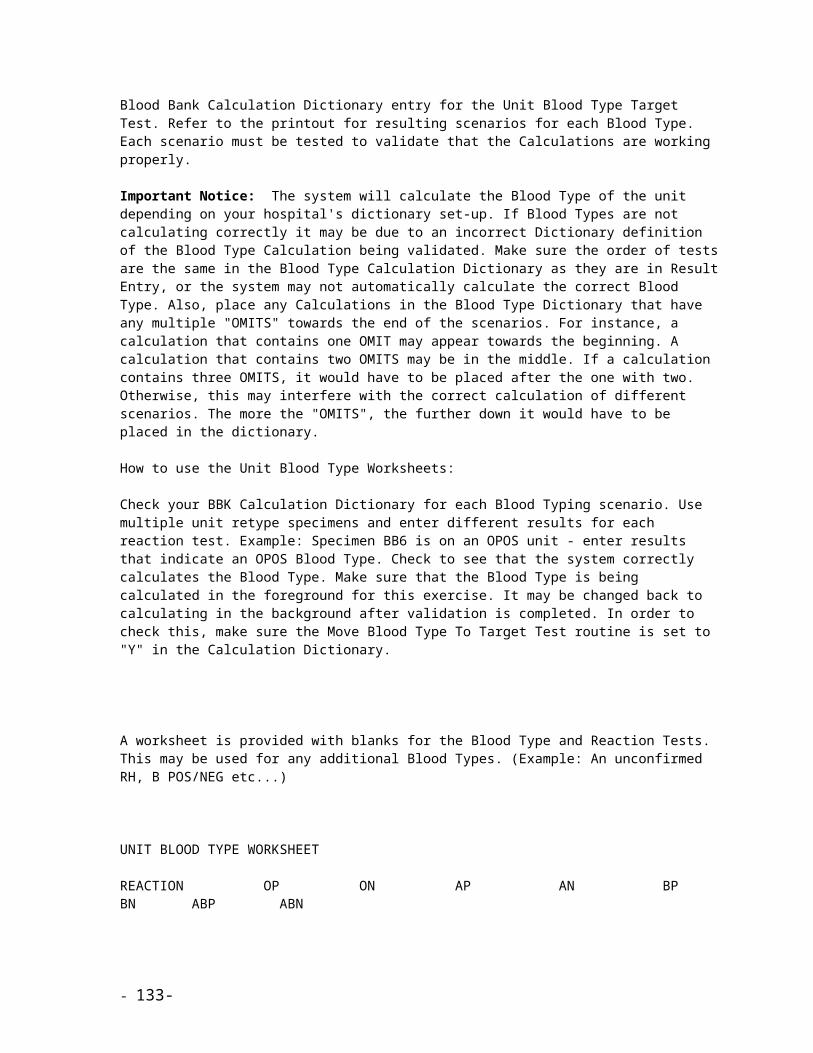
3.12 Validation Exercise B:
II. Attempt to change the unit number of a unit that is at an inappropriate unit status.
1. Choose a unit at a status not listed above.
Expected Result:
The system should flag the user with the message "Unit is at status XXXX" in which XXXX is the status of the selected unit. This status is unacceptable for this routine and the system will not allow the user to change either the unit or alternate unit number.
2. Print the displayed screen and attach the printout to this exercise.
________________________________________________________________________
THIS ROUTINE VALIDATED BY:_____________________________DATE:__/__/__
ACCEPTABLE:_________________ NOT ACCEPTABLE:______________________ HOSPITAL NAME: ______________________________________________________
- 134-

3.13: Deleting Inventory Units
FUNCTION TO BE VALIDATED: Delete Unit
Introduction:
The Delete Unit Routine is used to delete a unit from the system inventory. This routine would be utilized if a unit has been entered into inventory in error. This routine is only available for units at one of the following statuses: Available, Entered, Hold, and Ready (for non-crossmatchable products).
Dictionaries:
Product Source/Destination Blood Type.
System Parameters Involved:
Ask BBK Alternate Number BBK Unit Statuses
Function may be accessed in:
Delete Unit Process Units
Reports to Print:
Deleted Units Log
NOTE: Users may have the ability to define CUSTOM REPORT FORMATS when printing standard reports. Customization to the reports may not supply all information contained in the standard version.
- 135-

Prerequisite:
In order to delete a unit there must be a unit previously entered into inventory.
3.13 Validation Exercise A:
I. Deleting a unit that is at an appropriate unit status.
1. Choose and enter a unit at one of the statuses listed previously in the Introduction.
Expected Result:
The system will do a search to see if there are any specimens associated with the unit. If there are you will receive the following message: "BBK specimen DATE:PREFIX## must be cancelled." If you truly wish to delete the unit you will first need to cancel the specimen noted in the message. If there are no specimens, the system will default all available information about the unit that has been chosen. (This information can be confirmed by printing a Unit Inquiry for this Unit.)
2. The system will prompt for a deletion reason. In order to delete a unit a deletion comment is required. Attempt to file out of this routine without a deletion comment.
Expected result:
The system will flag the user with the following message: "A reason is required." Print the displayed screen to an attached printer and attach the copy to this exercise.
3. Enter a deletion comment and file from this routine.
Expected result:
The system will prompt the user with the following message: "Are you *SURE* you want to delete this unit?". Respond with a "Y" and the system will tell you that the unit has been deleted.
4. Print the "Deleted Units Log Report" to confirm the deletion of the unit and attach it to this exercise.
________________________________________________________________________
THIS ROUTINE VALIDATED BY:_____________________________DATE:__/__/__
ACCEPTABLE:_________________ NOT ACCEPTABLE:______________________ HOSPITAL NAME: ______________________________________________________
- 136-

3.13 Validation Exercise B:
II. Attempt to delete a unit that is at an inappropriate unit status.
1. Choose and enter a unit that is at a status not listed previously.
Expected Result:
The system should flag the user with the message: "No Units Eligible" if the selected unit has a status of transferred. This status is unacceptable for this routine and the system will not allow the user to delete the unit.
2. Print the displayed screen and attach the printout to this exercise.
_______________________________________________________________________
THIS ROUTINE VALIDATED BY:_____________________________DATE:__/__/__
ACCEPTABLE:___________________ NOT ACCEPTABLE:____________________ HOSPITAL NAME: ______________________________________________________
- 137-

3.14: Entering Physical Inventory
FUNCTION TO BE VALIDATED: Enter/Edit Physical Inventory - entering a new batch
Introduction:
The Enter/Edit Physical Inventory Routine is used to take an in-house inventory of units. The comparison of this information with the system calculated inventory will be covered in another validation exercise.
Dictionaries:
Product Blood Type Source/Destination
Function may be accessed in:
Enter/Edit Physical Inventory
Reports to Print:
List Physical Inventory
NOTE: Users may have the ability to define CUSTOM REPORT FORMATS when printing standard reports. Customization to the reports may not supply all information contained in the standard version.
Prerequisites:
Units entered into the physical inventory must already be in the system. If no units exist in the system or more units are needed for this exercise, enter them via the Enter Units Routine or Enter Units by Batch Routine.
- 138-

3.14 Validation Exercise A:
1. At the Batch prompt, type in the word "NEW". If the batch is not entered in the above format, i.e. "N", verify that the following error message appears "The entry is not defined."
Expected Result:
The following information will default on the screen: Date, Time and entry User. Verify that this information is correct.
2. Enter the name of your batch at the Name prompt. This is a free text field and all entries up to 30 characters in length will be accepted.
3. At the Unit Number prompt, either manually type in the unit numbers of units in the system or barcode in the numbers. If there is more than one product with the same unit number the user must choose which product they are entering. If a unit is entered that is not in the system, the following error message will be displayed "Unit not found.".
Expected Result:
The following information will default on the screen: Product and Source. Verify that this information is correct.
4. After entering 5 units, file the batch by pressing the "OK" key and answering the File prompt with "Y". The user will then be asked to sort units by one of the following methods: Product, Unit# or Neither. Choose one of these selections and press your enter key. Write down your batch number for future reference.
5. Enter the Physical Inventory List Routine. Enter your batch number. The name, date, time and user will default. At the ‘:List Physical, calculated or both?’ prompt, enter Physical.
________________________________________________________________________
THIS ROUTINE VALIDATED BY:_____________________________DATE:__/__/__
ACCEPTABLE:_________________ NOT ACCEPTABLE:______________________ HOSPITAL NAME: ______________________________________________________
- 139-
3.15: Editing Physical Inventory
FUNCTION TO BE VALIDATED: Enter/Edit Physical Inventory - editing a physical inventory batch
Introduction:
The Enter/Edit Physical Inventory Routine is used to edit the information entered on an existing physical inventory batch. Users can add or delete units as needed.
Dictionaries:
Product Blood Type Source/Destination
Function may be accessed in:
Enter/Edit Physical Inventory
Reports to Print:
List Physical Inventory
NOTE: Users may have the ability to define CUSTOM REPORT FORMATS when printing standard reports. Customization to the reports may not supply all information contained in the standard version.
- 140-

Prerequisites:
A physical inventory batch of units must already have been entered by a user and exist in the system.
3.15 Validation Exercise A:
1. At the Batch prompt, type in the number of the batch entered in the previous validation exercise or perform a lookup and choose the batch from the listing of batches.
Expected Result:
The following information will default on the screen: Name, Date, Time, Entry User and the Unit Number, Product and Source of the units previously entered. Verify that this information is correct.
2. Line feed the first unit listed in the batch.
3. Enter a new unit, either by manually typing in the numbers or barcoding the unit number. If a unit is entered that is not in the system, the following error message will be displayed "Unit not found.".
Expected Result:
The following information will default on the screen: Product and Source. Verify that this information is correct.
4. After entering 4 new units, file the batch by pressing the "OK" key and answering the File prompt with "Y". The user will then be asked to sort units by one of the following methods: Product, Unit# or Neither. Choose one of these selections and press your enter key.
5. Print a Physical Inventory List for the batch of units entered by choosing Physical at the prompt List Physical, Calculated, Or Both? and verify that the information edited in the above exercise is correct.
________________________________________________________________________
THIS ROUTINE VALIDATED BY:_____________________________DATE:__/__/__
ACCEPTABLE:__________________NOT ACCEPTABLE:______________________ HOSPITAL NAME: ______________________________________________________
- 141-

3.16: Comparing Physical Inventory
FUNCTION TO BE VALIDATED: Physical Inventory Compare
Introduction:
The Physical Inventory Compare Routine is used to take an existing physical inventory batch of units and compare this information with the system calculated inventory. Users can opt to view just exceptions or all units and to mark the exceptions so they are easily identified by the viewer.
Dictionaries:
Product Blood Type Source/Destination.
Function may be accessed in:
Physical Inventory Compare
Reports to Print:
List Physical Inventory
NOTE: Users may have the ability to define CUSTOM REPORT FORMATS when printing standard reports. Customization to the reports may not supply all information contained in the standard version.
- 142-

Prerequisites:
A Physical Inventory batch of units must have previously been entered by a user to use in the comparison.
3.16 Validation Exercise A:
1. At the Batch prompt, enter the number of the batch of units entered into the physical inventory during the previous validation exercise.
Expected Result:
The Batch Name, Date, Time and Entry User default on the screen. Verify that this information is correct.
NOTE: If a comparison has already been done on this batch of units, the user will receive the message: “Warning – previous comparison will be overwritten if you file.”
The Last Compare date and time along with the statuses of the units that were compared and any exceptions will default on the screen.
2. Enter the statuses of the units that you want to base your comparison on for the calculated inventory. If a user enters a status that has not been set up in the System Parameters, the error message "Invalid status" is displayed.
3. File the comparison by saying "Y" to the question "Compare?".
If the compare has found exceptions, the system will give the message: “Done – exceptions on file. <Return>
4. Print the Physical Inventory List of Exceptions at this time by answering the prompt Print List? with "Y".
a. A pop-up screen will appear that will allow the user to choose to List Physical Inventory, Calculated or Both inventories. Choose to print Both.
b. Enter Unit# at the Sort By prompt.
c. Enter "Y" at the Exceptions Only prompt. An exception is any unit that is not present in both the Physical and Calculated inventory.
d. Enter "Y" at the Mark Exceptions prompt. If this is answered with "Y", exceptions print with "-->" next to the unit number and are highlighted in a gray shaded box when using a laser printer.
e. Print the comparison and verify that the information printed is correct.
________________________________________________________________________
THIS ROUTINE VALIDATED BY:_____________________________DATE:__/__/__
ACCEPTABLE:___________________ NOT ACCEPTABLE:____________________ HOSPITAL NAME: ______________________________________________________
- 143-

3.17: Printing Unit Labels using ISBT 128 Coding Convention
3.17 Validation Exercise 1
FUNCTION TO BE VALIDATED: Printing Unit Labels - ISBT 128 Coding Convention
Introduction:
The following exercises can only be validated if you are using a HemaTrax unit label printer. This is the only Meditech-supported printer for printing unit labels using the ISBT 128 coding convention.
Dictionaries:
BBK Blood Type Dictionary: Symbology and Bar Code
BBK Source/Destination Dictionary: Registration Num, License Num, Affiliated: Default ISBT Unit#s
Toolbox Parameters Involved:
Autonumber Components
Customer Defined Parameters Involved:
HemaTrax Printer and HemaTrax COM Port
This function can be accessed in the following routines:
BBK Enter/Edit Donation/Deferral Routine BBK Change Unit Number Routine Print BBK Unit Labels Routine Print BBK Unit Labels in Quantity Routine
Setup for Products:
The following product codes are used for the testing scenarios. They can be added to existing products, or new products can be entered.
RBC E0150 E0166E0156E0159E0161E0165GRAN E3673PLT E2790
AFFP E1127 apheresis FFPPLASMA E2516E2534PLTP E3995E2908WB E0009
Steps:
1. Go to the Product dictionary and create or select a product.
- 144-

2. Move the cursor to the symbology field and confirm .ISBT128 is present. It will need to be added if it is not present.
3. Use the shift/right arrow keys and the cursor moves to the Bar Codes field. Enter the product code. (This is a multiple field and will accept more than one entry.)
4. Press <Page Up> and <Enter> and move the cursor to the Print Bar Code field. Enter the same product code (from Step 3) in this field and file.
Setup for Blood types:
Go to the Blood Type dictionary and select a blood type.Move the cursor to the symbology field and confirm .ISBT128 is present and has bar codes defined. (They will need to be added if they are not present.)Enter .HEMATRAX in the symbology field. Use <Shift><right arrow> and from the Bar Codes field do a lookup. Select the correct HemaTrax Blood Type Code for this blood type. File.Repeat the above steps for each blood type.
Setup for Source:
1. Go to the Source dictionary and create/select an affiliated source. Verify the city, state, and zip code fields have entries.
2. Move the cursor to the Registration Num field and enter a number. Enter a number in the License Num field.
3. Verify the symbology field contains an .IBST128 entry and a bar code is defined with the format "W" followed by 4 numbers.
4. Move the cursor to the "AFFILIATED: DFT ISBT UNIT #'S?" field and enter Y. File.5. Repeat Steps 1-3 and enter a non- affiliated source. Move the cursor to the "AFFILIATED: DFT ISBT
UNIT #'S?" field and enter N. File.
THIS ROUTINE VALIDATED BY: _____________________________ DATE:___________________
ACCEPTABLE:___________________________ NOT ACCEPTABLE:_______________________
HOSPITAL NAME:_____________________________________________________________________
- 145-

3.17 Validation Exercise A: Enter Inventory Units routine/Print Unit Labels1. In the Product dictionary select or enter a new product.2. Go to the symbology field and enter .ISBT128. Use <Shift><right arrow>and move to the Bar Codes
field. Enter 3 different bar codes.3. Move the cursor to the Print Bar Code field and enter one of the bar codes from Step 2. File.4. In the Enter Inventory Units routine use a non affiliated source and enter a unit of the product in Step
1. Enter ISBT in the Unit Number field. Enter required data and file.5. Go to the Print Unit Labels routine.6. In the Unit field enter the unit entered in Step 4. Press <Enter> and verify the "Print Unit Labels On
HEMATRAX" prompt appears. Press <Enter>. Verify the " BBK ISBT128 UNIT LABELS" screen displays.
7. The screen will appear as follows and the Label Type FF (Full Face) will default:
Label Type ______Unit# _________________ Donation ID Flags __Source __________Product ____________________________________________________Product Code _____Blood Type _______ HemaTrax Blood Type Code __
Product Donation Code _ Division Codes __
Expiration Date ________ Time ____ Print Exp or Col Date? _Collection Date ________ Time ____--Antigens--Kell _ E _ Test Code _____ ____________________________C _ e _ Processing Message _____________________________c _ Mi _
---Attribute Codes and Values---#1 _ ________ #3 _ ________#2 _ ________ #4 _ ________
Quantity __
8. Remove the FF label type and perform a lookup. Verify that the following label types appear:
BD Blood Type/Date FP Facility/ProductBT Blood Type PD Product/DateDT Date/Time PR ProductFF Full Face
9. Exit from the lookup and accept the default FF label.
10. Press <Enter> and verify the cursor moves to the DONATION ID FLAGS field. Press <Enter> and verify the cursor moves to the PRODUCT CODE field. Do a lookup and verify all the ICCBBA product codes from Step 2 display. Select the product code from Step 3.
*Note: the entry selected here will overwrite the entry in the Print Bar Code field in the Product Dictionary.
- 146-

11. Press <Enter> and move the cursor to the TEST CODE field. This code should be 5 characters in length and conform to the test codes that have been settled on by the national standards organization.
Note: Currently only one acceptable code has been established: N0008 for CMV Negative blood.
In the next field enter free text that describes the Test Code.
At the PROCESSING MESSAGE field enter a free text message. Press the <Enter> key until the printing message displays.
12. Verify the unit data on the label is correct. Verify the source, license number, registration number, test code message and processing message display correctly.
THIS ROUTINE VALIDATED BY: _____________________________ DATE:___________________
ACCEPTABLE:___________________________ NOT ACCEPTABLE:_______________________
HOSPITAL NAME:_____________________________________________________________________
- 147-

3.17 Validation Exercise B: Enter Units by Batch
1. Go to the Enter Units by Batch routine. In the Source field enter an affiliated source. In the Product field and enter an apheresis product.
For example: E1127 AFFP
2. In the Unit Number field <Shift><right arrow> into the Enter Inventory Units routine. Enter past the blood type field and verify ISBT defaults in the unit number field. Enter all required data and file.
3. On Line 2 enter a second unit that is not an apheresis product. In the Unit Number field <Shift><right arrow> into the Enter Inventory Units routine. Enter past the blood type field and verify ISBT defaults in the unit number field. Enter all required data and file.
For example: E0156 Red Blood Cells
4. Return to the Enter Units by Batch screen and exit.
5. Go to the Print Unit Labels routine and enter the unit numbers from Steps 2-3. The BBK ISBT128 UNIT LABELS screen will display the first unit. Move to the Attribute Codes and Values section. At the #1 field do a lookup and select "1 Original draw volume in mLs" and enter anamount.
6. Enter past the Quantity field and print the label. Repeat Step 5 and print the label for the second unit, using the same attribute.
7. Verify the attribute entered in Step 5 displays on the apheresis unit label. Verify the attribute does not display on the non-apheresis unit.
THIS ROUTINE VALIDATED BY: _____________________________ DATE:___________________
ACCEPTABLE:___________________________ NOT ACCEPTABLE:_______________________
HOSPITAL NAME:_____________________________________________________________________
- 148-

3.17 Validation Exercise C: Change Unit Number/Print Unit Label
1. Go to the change Unit Number routine and select a unit in inventory.
2. Edit the unit number to a number that is not ISBT format (make the number <13 characters or do not use the prefix "W
Expected Results: The following message displays: Are you SURE you want to change this?
3. Enter Y and file.
4. In the Print Unit Label routine enter the new unit number. In the BBK ISBT128 Unit Label screen enter past all the prompts and attempt to print a label. Verify the following message displays:
The unit number does not match ISBT128 format.
5. Exit.
6. Go to the Change Unit Number routine and select a unit in inventory. The unit must have an affiliated source.
7. In the New Unit Number field enter "ISBT" to generate a new number. Press <F12>. The following message displays:
Are you SURE you want to change this?
8. Enter Y. Verify the following message displays:
Unit Number Wnnnnnnnnnnnn filed.
9. Press <Enter>. The message appears: Edit Unit comments?
10. Enter Y and add a comment to the unit. Press <F12> and enter past the prompt "Print Inventory Card On:". Verify the following message.
11. Print unit label on HEMATRAX
12. Press <Enter>. The BBK ISBT128 UNIT LABELS screen will appear. Press <F12> and verify the label prints and the data is correct.
THIS ROUTINE VALIDATED BY: _____________________________ DATE:___________________
ACCEPTABLE:___________________________ NOT ACCEPTABLE:_______________________
HOSPITAL NAME:_____________________________________________________________________
- 149-

- 150-

3.17 Validation Exercise D: Enter/Edit Donations/Deferrals and Print Label
1. Go to the BBK Enter/Edit Donation/Deferral routine and enter a donation for a donor. Respond to required fields and press <F12>. The system will branch to the Enter Inventory Units routine.
2. Enter "ISBT" in the unit number field. Enter required data and file. Verify that the Hematrax printer appears in the print-on prompt and the BBK IBST128 UNIT LABELS screen appears.
3. Press <F12> to print the label. Verify the "Printing..." message displays. Verify the label prints and the data is correct.
THIS ROUTINE VALIDATED BY: _____________________________ DATE:___________________
ACCEPTABLE:___________________________ NOT ACCEPTABLE:_______________________
HOSPITAL NAME:_____________________________________________________________________
- 151-

3.17 Validation Exercise E: Print BBK Unit Labels in Quantity
1. Go to the Print BBK Unit Labels in Quantity routine.
2. Enter a quantity of 3, do not enter a prefix, enter a valid unit number (8 numbers). Do not enter a product, no volume, no blood type, no source, no collect date, and no expire date. Press <enter> until the message displays:
Print Unit Labels On HEMATRAX
3. Press <Enter> and enter past the Label type box. Verify the following message displays:
Label# 1: Unit# 100000 not in ISBT128 format (13 chars);1-5 Prefix, 6-13 Number.
4. Press <Enter> to remove the message. Enter a valid prefix (WNNNN) and press <F12>. Verify the following message displays:
Label# 1: Unit source is missing.
5. Press <Enter>. Enter a source, press <F12> and attempt to print the label. Verify the following message displays:
Label# 1: Product is missing.
6. Press <Enter>. Enter a product, press <F12> and attempt to print the label. Verify the following message displays:
Label# 1: Blood Type is missing.
7. Press <Enter>. Enter a blood type and print the labels. Verify the 3 labels print and the unit numbers increment correctly.
THIS ROUTINE VALIDATED BY: _____________________________ DATE:___________________
ACCEPTABLE:___________________________ NOT ACCEPTABLE:_______________________
HOSPITAL NAME:_____________________________________________________________________
- 152-

3.17 Validation Exercise F: Make Aliquots/Autonumber/Print Labels
Tool box Parameter: Autonumber Components set to Y
1. Use a bar code scanner and enter a unit into inventory. Use the ISBT number format and a product that can be aliquotted. File.
For example:Product: Whole BloodProduct Code: E0009
2. Go to the Make Aliquots routine. In the Unit field enter the unit from Step 1.
3. Enter thru all fields and enter required data. Bring the cursor to the Unit Number field and confirm the unit number defaults and contains an "A" suffix. Enter volume and expiration date.
4. Create a second aliquot and confirm the number defaults with a "B" suffix. Enter a volume and expiration date/time. File.
5. Go to the Print Label routine. Enter all 3 unit numbers in the Unit field and press <F12>.
6. The BBK ISBT128 UNIT LABELS screen will display for each unit. Verify the division codes display correctly for the aliquotted units. (The division code will display the A or B as part of the product bar code.)
For Example: E0009VA0
7. Verify the 3 labels print and the data and division codes display correctly in the product code for the aliquot units.
*Note: The full-face label for an aliquot will not print the aliquot letter. In compliance with ISBT128 only the bar code for the first 13 characters of the unit number will print. It is recommended the aliquot letter is written on the bag.
THIS ROUTINE VALIDATED BY: _____________________________ DATE:___________________
ACCEPTABLE:___________________________ NOT ACCEPTABLE:_______________________
HOSPITAL NAME:_____________________________________________________________________
- 153-

3.17 Validation Exercise G: Pool Units/Print labels 1. Go to Enter Units by Batch and enter 2 units of PLT by scanning or simulation using the ISBT formats.
File.
2. Go to the Pool Units routine. In the Unit Number field enter the 2 units from Step 1.
3. Enter a product, PLTP.
4. Enter a source and enter ISBT in the unit number field. Enter all required data and file.
5. Go to the Print Labels routine and enter the 2 unit numbers from Step 1 and the unit number from Step 3. In the BBK ISBT128 Unit Labels screen, for each of the 2 PLT units from Step 1. Select attribute 1 from the lookup and enter a volume. Print the PLT labels.
6. For the pooled unit, select attributes 2 and 5 and enter values for each. Print this label.
7. Verify the labels print and the data is correct.
THIS ROUTINE VALIDATED BY: _____________________________ DATE:___________________
ACCEPTABLE:___________________________ NOT ACCEPTABLE:_______________________
HOSPITAL NAME:_____________________________________________________________________
- 154-

3.17 Validation Exercise H: Printing ISBT 128 Labels
FUNCTION TO BE VALIDATED: Print BBK Unit Labels
Introduction: The Print BBK Unit Labels routine is used to print blood unit labels for blood products received into inventory
Dictionaries:
Blood Type Dictionary
Product Dictionary
Source Dictionary
Reports to Print:
Unit Inquiry Blood Bank History Inquiry
Prerequisite:
Define the Blood Type Dictionary for each blood type to have the correct corresponding ISBT 128 Symbology Blood Type Code. Do this for each blood type; OP, ON, AP, AN, BN, BP, AN, ABP and ABN.
O Rh Negative: 95O Rh Positive: 51A Rh Negative: 06A Rh Positive: 62B Rh Negative: 17B Rh Positive: 73AB Rh Negative: 28AB Rh Positive: 84
Define the Source/Destination Dictionary with a valid source with the corresponding ISBT 128 Donation Identification Number.
American Red Cross Dedham – W2004
Define the Product Dictionary with valid ISBT 128 Product Codes and Descriptions.
Whole Blood for each approved Anticoagulant:E0001 WHOLE BLOOD|ACD-A/450mL/refgE0005 WHOLE BLOOD|ACD-B/450mL/refgE0053 WHOLE BLOOD|CPDA-1/450mL/refgE0009 WHOLE BLOOD|CPD/450mL/refgE0131 WHOLE BLOOD|CP2DA/450mL/refgE0098 WHOLE BLOOD|CP2D/450mL/refgE0135 WHOLE BLOOD|Heparin/450mL/refg
Red Blood Cells with Anticoagulants, different volumes:E0142 RED BLOOD CELLS|ACD-A/450mL/refgE0195 RED BLOOD CELLS|CPDA-1/450mL/refgE0146 RED BLOOD CELLS|ACD-B/450mL/refg
- 155-

E0150 RED BLOOD CELLS|CPD/450mL/refgE0284 RED BLOOD CELLS|CP2DA/450mL/refg
Red Blood Cells, with Additive:E0291 RED BLOOD CELLS|CPD>AS1/450mL/refg
Red Blood Cells, Leukocytes Reduced with Anticoagulant:E0158 RED BLOOD CELLS|CPD/450mL/refg|Open|ResLeu
Fresh Frozen Plasma with Anticoagulant:E0701 FRESH FROZEN PLASMA|CPD
Apheresis Fresh Frozen Plasma:E0829 Apheresis FRESH FROZEN PLASMA|ACD-B
Cryoprecipitated AHF:E3571 CRYOPRECIPITATED AHF
Frozen Red Blood cells for different Source Volumes:E0502 Frozen RED BLOOD CELLS|None/450mLE0505 Frozen RED BLOOD CELLS|None/500MlE0508 Frozen RED BLOOD CELLS|None/250Ml
Deglycerolized RED BLOOD CELLS different Source Volumes”E0528 Deglycerolized RED BLOOD CELLS|None/450MlE0537 Deglycerolized RED BLOOD CELLS|None/500MlE0544 Deglycerolized RED BLOOD CELLS|None/250Ml
Red Blood Cells Leukocytes Reduced:E0158 RED BLOOD CELLS|CPD/450mL/refg|Open|ResLeu
Apheresis Red Blood Cells. With Anticoagulant:E4306 Apheresis RED BLOOD CELLS|ACD-A
Leukocytes:E3697 LEUKOCYTES|CPD
Platelets with Anticoagulant:E2790 PLATELETS|CPD/450mL/refg
Platelets, Leukocytes Reduced with Anticoagulant:E2817 PLATELETS|CPD/450mL/20-24C|ResLeu
Apheresis Platelets with Anticoagulant:E2922 Apheresis PLATELETS|ACD-B
Apheresis Platelets, Leukocytes Reduced with Anticoagulant:E3014 PLATELETS|ACD-A/XX/20-24C|Open|ResLeu
Hardware:
Barcode Printer: Zebra Z4MBarcode Scanner: JJ Wild Cipher 1021
- 156-
3.17 Barcode Label Worksheet for ISBT 128
Product Blood Type Source/ Unit Number Volume Expiration ScannedWhole BloodACD-A/450mL/refg
O NegativeO PositiveA NegativeA PositiveB NegativeB PositiveAB NegativeAB Positive
Product Blood Type Source/ Unit Number Volume Expiration ScannedWhole Blood
Anticoagulant/Additive:
Product Code:
O NegativeO PositiveA NegativeA PositiveB NegativeB PositiveAB NegativeAB Positive
Product Blood Type Source/ Unit Number Volume Expiration ScannedRed Blood Cells
Anticoagulant/Additive:
Product Code:
O NegativeO PositiveA NegativeA PositiveB NegativeB PositiveAB NegativeAB Positive
Product Blood Type Source/ Unit Number Volume Expiration ScannedFresh Frozen Plasma O Negative
O PositiveA NegativeA PositiveB NegativeB PositiveAB NegativeAB Positive
Product Blood Type Source/ Unit Number Volume Expiration ScannedO NegativeO PositiveA NegativeA PositiveB NegativeB PositiveAB NegativeAB Positive
- 157-

1. In the Enter Inventory Units Routine enter units and specify the source, product codes, and blood types which would normally be kept in inventory. Use the worksheet to keep track of the units entered.
2. At the BBK Unit Number field enter ISBT to generate a unit number with the correct ISBT 128 Format.
3. File the units and note the ISBT 128 generated unit numbers.
4. Access the Print BBK Unit Labels routine and print the labels. Confirm that the Source/Unit Number, Blood Type, Product and Expiration Date Barcodes appear correctly.
5. Access the Enter Inventory Units Routine and Scan the Blood Type, Product and Expiration date bar coded fields. Confirm that all fields can be scanned.
6. Access the BBK Unit Inquiry Routine and scan the Unit Number Barcodes printed in step 4. Confirm that the label can be scanned and the correct unit number identified.
7. Access the BBK History Inquiry Routine. At the History Record Prompt enter BU# (Blood Unit) and scan the Unit Number Barcode. Confirm that the correct unit number’s history appears.
THIS ROUTINE VALIDATED BY:___________________________ DATE: __ /__ /__
ACCEPTABLE: ___________________NOT ACCEPTABLE:____________________
- 158-

3.17 : Printing ISBT 128 Labels for Components and Aliquots
FUNCTION TO BE VALIDATED: Print BBK Unit Labels
The Make Components Routine is used to enter Blood Bank component units for a Blood Bank Product. The component units must be of a different product type than the original unit.
The ability to make components from a product type, and the different products that can be made into components, is defined in the Product Dictionary. The different product types that can be made into components can be defined to automatically default into the Make Components routine when the Product to be made into components is entered. Or, these component product types can be entered manually by the user. The system will deplete the Original unit’s volume as the component units are created.
Introduction: The Print BBK Unit Labels routine is used to print blood unit labels for blood products that were collected or processed. This process includes making components of a Whole Blood Product and aliquots of a Red Blood Cell Product.
Dictionaries:
Product
Reports to Print:
Display Unit Tree Unit Inquiry
Prerequisite:
In order to use the function of making components, a product must be entered that can be broken down into components. Example: Whole Blood. The types of component products that can be made from the product must be listed in the Product Dictionary at the Component Product field.
- 159-

3.17 Validation Exercise A: Make Components
1. In the Make Component Routine at the Unit prompt scan in one of the Whole Blood Units entered above in Section 1.2, Validation Exercise A.
2. At the Product field the component products from the Product Dictionary will default in, if defined to do so, with ISBT formatted unit numbers. Additional component products can be added as needed, as long as these are defined in the Product Dictionary for the Whole Blood product.
3. Enter the required volumes for each component product and file.
4. Access the Print BBK Unit Labels routine and print the unit labels for the Whole Blood Unit and each component product. Confirm that the Source/Unit Number, Blood Type, Product and Expiration Date Barcodes appear correctly.
5. Access the Blood Bank Unit Inquiry Routine and scan the Unit Number Barcode for the Whole Blood Unit.
Print the Inquiry and confirm that the component products are associated with the Whole Blood Unit.
6. Access the Display Unit Tree Routine and print the Unit Tree for the Original Whole Blood Unit.
Confirm that the component products print correctly.
THIS ROUTINE VALIDATED BY:___________________________ DATE: __ /__ /__
ACCEPTABLE: ___________________NOT ACCEPTABLE:____________________
HOSPITAL NAME: _______________________________________
- 160-

3.17 Validation Exercise B: Make Aliquots
The Make Aliquots Routine is used to make smaller volumes of a blood product. The ability to make aliquots from a product type is defined in the Product Dictionary. The system will deplete the Original unit’s volume, as the smaller units are aliquoted
1. In the Make Aliquots Routine at the Unit prompt scan in one of the Red Blood Cell Units entered above in Section 1.2, Validation Exercise B.
2. If the Blood Bank Autonumber Components? System parameter is set to “Y”, the Aliquot Unit numbers will automatically default in. If this is set to “N”, then the user will need to manually enter the three Aliqout Unit Numbers. Enter the required volume for each aliquot unit and file.
3. Access the Print BBK Unit Labels routine and print the unit labels for the Red Blood Cell Unit and each Aliquoted Unit. Confirm that the Source/Unit Number, Blood Type, Product and Expiration Date Barcodes appear correctly. Confirm that the division notation indicating the unit was divided appears on the aliquot labels.
4. Access the Blood Bank Unit Inquiry Routine and scan the Unit Number Barcode for the Red Blood Cell Unit.
Print the Inquiry and confirm that the aliquot products are associated with the Red Blood Cell Unit.
5. Access the Display Unit Tree Routine and print the Unit Tree for the Original Red Cell Unit.
Confirm that the aliquot products print correctly.
THIS ROUTINE VALIDATED BY:___________________________ DATE: __ /__ /__
ACCEPTABLE: ___________________NOT ACCEPTABLE:____________________
HOSPITAL NAME: _______________________________________
- 161-

3.18 : Printing Codabar Unit Labels
FUNCTION TO BE VALIDATED: Print BBK Unit Labels
Introduction: The Print BBK Unit Labels routine is used to print blood unit labels for blood products that were collected or processed.
Dictionaries:
Blood Type
Product
Source
Reports to Print:
Unit Inquiry Blood Bank History Inquiry
Prerequisite:
Define the Blood Type Dictionary for each blood type to have the correct corresponding Codabar Symbology Blood Type Code as provided by your Blood Distributor. Do this for each blood type; OP, ON, AP, AN, BP, BN, AN, ABP and ABN.
Define the Source/Destination Dictionary with a valid source with the corresponding Codabar Symbology code.
Define the Product Dictionary with valid Codabar Product Codes and Descriptions.
Hardware:
Barcode Printer: Datamax Allegro IIBarcode Scanner: JJ Wild Cipher 1021
Products and Blood Types to Validate:
You should enter a variety of products and blood types that you would hold in inventory and use in daily operations in your Blood Bank. At a minimum:
Whole Blood, Various Blood Types Red Blood Cells, Various Blood Types Red Blood Cells, Leukocyte Reduced, Various Blood Types Fresh Frozen Plasma, Various Blood Types Platelets, Various Blood Types Platelets, Apheresis, Various Blood Types Cryoprecipitate
- 162-

Worksheet for Codabar Unit Labels
Product Blood Type Source/ Unit Number Volume Expiration ScannedProduct Name
Anticoagulant/Additive
O NegativeO PositiveA NegativeA PositiveB NegativeB PositiveAB NegativeAB Positive
Product Blood Type Source/ Unit Number Volume Expiration ScannedO NegativeO PositiveA NegativeA PositiveB NegativeB PositiveAB NegativeAB Positive
Product Blood Type Source/ Unit Number Volume Expiration ScannedProduct Name
Anticoagulant/Additive
O NegativeO PositiveA NegativeA PositiveB NegativeB PositiveAB NegativeAB Positive
Product Blood Type Source/ Unit Number Volume Expiration ScannedProduct Name
Anticoagulant/Additive
O NegativeO PositiveA NegativeA PositiveB NegativeB PositiveAB NegativeAB Positive
Product Blood Type Source/ Unit Number Volume Expiration ScannedProduct Name
Anticoagulant/Additive
O NegativeO PositiveA NegativeA PositiveB NegativeB PositiveAB NegativeAB Positive
- 163-

3.18 Validation Exercise A:
1. In the Enter Inventory Units Routine enter a unit of the product for each blood type defined in the Blood Type Dictionary as listed in the prerequisite above.
2. At the BBK Unit Number field enter a valid Codabar format unit number.
3. File the units and note the unit numbers entered.
4. Access the Print BBK Unit Labels routine and print the labels using the Standard Codabar label format. Confirm that the Source/Unit Number, Blood Type, Product and Expiration Date Barcodes appear correctly.
5. Again, access the Enter Inventory Units Routine and Scan the Blood Type, Product and Expiration date bar coded fields. Confirm that all fields can be scanned correctly and reflect the Codabar bar code symbology
6. Access the BBK Unit Inquiry Routine and scan the Unit Number Barcodes printed in step 4.
Confirm that the label can be scanned and the correct unit number identified for each unit.
7. Access the BBK History Inquiry Routine. At the History Record Prompt enter BU# (Blood Unit) and scan the Unit Number Barcodes.
Confirm that the correct unit number’s history appears for each unit.
8. Repeat these steps for all products and blood types you would expect to hold in inventory and use in day-to-day operations in your Blood Bank.
THIS ROUTINE VALIDATED BY:___________________________ DATE: __ /__ /__
ACCEPTABLE: ___________________NOT ACCEPTABLE:____________________
HOSPITAL NAME: _______________________________________
- 164-

3.18 Validation Exercise B: Printing Codabar Labels for Components and Aliquots
FUNCTION TO BE VALIDATED: Print Unit Labels
The Make Components Routine is used to enter Blood Bank component units for a Blood Bank Product. The component units must be of a different product type than the original unit.
The ability to make components from a product type, and the different products that can be made into components, is defined in the Product Dictionary. The different product types that can be made into components can be defined to automatically default into the Make Components routine when the Product to be made into components is entered. Or, these component product types can be entered manually by the user. The system will deplete the Original unit’s volume as the component units are created.
1. In the Make Component Routine at the Unit prompt scan in one of the Whole Blood Units entered above in Section 2.1, Validation Exercise A.
2. At the Product field the component products from the Product Dictionary will default in, if defined to do so, with the unit numbers. Additional component products can be added as needed, as long as these are defined in the Product Dictionary for the Whole Blood product.
3. Enter the required volume for each component product and file.
4. Access the Print BBK Unit Labels routine and print the unit labels for the Whole Blood Unit and each component product. Confirm that the Source/Unit Number, Blood Type, Product and Expiration Date Barcodes appear correctly.
5. Access the BBK Unit Inquiry Routine and scan the Unit Number Barcode for the Whole Blood Unit.
6. Print the Blood Bank Unit Inquiry and confirm that the component products are associated with the Whole Blood Unit.
7. Access the Display Unit Tree Routine and print the Unit Tree for the Original Whole Blood Unit.
Confirm that the component products print correctly.
THIS ROUTINE VALIDATED BY:___________________________ DATE: __ /__ /__
ACCEPTABLE: ___________________NOT ACCEPTABLE:____________________
HOSPITAL NAME: _______________________________________
- 165-

3.18 Validation Exercise C: Make Aliquots
The Make Aliquots Routine is used to make smaller volumes of a blood product. The ability to make aliquots from a product type is defined in the Product Dictionary. The system will deplete the Original unit’s volume, as the smaller units are aliquoted
1. In the Make Aliquots Routine at the Unit prompt scan in one of the Red Blood Cell Units entered above in Section 2.1, Validation Exercise B.
2. If the “Blood Bank Autonumber Components?” System parameter is set to “Y”, the Aliquot Unit numbers will automatically default in. If this is set to “N”, then the user will need to manually Enter the three Aliqout Unit Numbers. Enter the required volume for each aliquot unit and file.
3. Access the Print BBK Unit Labels routine and print the unit labels for the Red Blood Cell Unit and each Aliquoted Unit. Confirm that the Source/Unit Number, Blood Type, Product and Expiration Date Barcodes appear correctly. Confirm that the division notation indicating that the unit was divided appears on the aliquot labels.
4. Access the BBK Unit Inquiry Routine and scan the Unit Number Barcode for the Red Blood Cell Unit.
5. Print the Blood Bank Unit Inquiry and confirm that the aliquot products are associated with the Red Blood Cell Unit.
6. Access the Display Unit Tree Routine and print the Unit Tree for the Original Red Cell Unit.
Confirm that the aliquot products print correctly.
THIS ROUTINE VALIDATED BY:___________________________ DATE: __ /__ /__
ACCEPTABLE: ___________________NOT ACCEPTABLE:____________________
HOSPITAL NAME: _______________________________________
- 166-

Chapter 4: PATIENT PROCESSING
4.1: Patient Worksheet
FUNCTION TO BE VALIDATED: Requisition Entry
Introduction:
This routine is used to create new requisitions for ordering tests, and products, and to edit existing requisitions.
Dictionaries:
Blood Bank Test Dictionary Product Dictionary
LAB System Parameters Involved:
Outreach Laboratory Option
ADM System Parameters Involved:
Master Patient Index (MRI) Search
Function may be accessed in:
LIS Enter/Edit Requisition LIS Enter/Edit Outreach Requisition LIS Enter/Edit Requisition and Result Process Requisitions Process Patient's Specimen Process Specimen Batch Process Workbatch Process Analyzer Process Donors Process Units.
Reports to Print:
Requisition Print
NOTE: Users may have the ability to define CUSTOM REPORT FORMATS when printing standard reports. Customization to the reports may not supply all information contained in the standard version.
- 167-

Prerequisite:
In order to enter new requisitions, there must be patients previously entered into the Admissions module. The patients should have different patient statuses. At least one patient status should be defined in the ADM parameters for your facility to require an internal and unit number, one to require only an internal number, and one to have no requirements.
4.1 Validation Exercise A:
1. Enter a requisition on a patient with an Internal and Unit Number (MPI). Use Patient Worksheet I below to record your information.
2. In the LIS Enter/Edit Requisition Routine, identify a patient with an external unit number.
3. At the order prompt for this patient, enter a BBK Product that does not require a crossmatch.
Expected Result:
This should be allowed.
4. File the requisition and note the Patient Name, Account Number, Unit Number, Wristband Number (if applicable), Ordered Product, and Specimen Number in Row A on the patient worksheet. Also print the requisition.
5. In the LIS Enter/Edit Requisition Routine, identify another patient with an external unit number.
6. At the order prompt for this patient, enter a BBK Product that does require a crossmatch.
Expected Result:
This should be allowed.
7. File the requisition and note the Patient Name, Account Number, Unit Number, Wristband Number (if applicable), Ordered Product, and Specimen Number in Row B on the patient worksheet. Also print the requisition.
8. In the LIS Enter/Edit Requisition Routine, identify another patient whose patient type has a unit number.
9. At the order prompt for this patient, enter a Pooled BBK Product.
Expected Result:
This should be allowed.
10. File the requisition and note the Patient Name, Account Number, Unit Number, Wristband Number (if applicable), Ordered Product, and Specimen Number in Row C on the patient worksheet. Also print the requisition.
11. In the LIS Enter/Edit Requisition Routine, identify other patients whose patient type has a unit number.
12. At the order prompt for each patient, enter at least one of each type of BBK Test (Charge, T-Type, Profile, Group, Antibody Screen, Antibody Identification, Antigen Identification, Blood Type and Crossmatch)
Expected Result:
- 168-

This should be allowed.
13. File the requisition and note the Patient Name, Account Number, Unit Number, Wristband Number (if applicable), Ordered Product, and Specimen Number in Rows D through L on the patient worksheet. Also print the requisition.
PATIENT WORKSHEET I. Patient Account Unit Wristband Product Specimen Name Number Number Number Ordered Number
A. ___________ ____________ ____________ _____________ __________ _________
B. ___________ ____________ ____________ _____________ __________ _________ C. ___________ ____________ ____________ _____________ __________ _________
D. ___________ ____________ ____________ _____________ __________ _________
E. ___________ ____________ ____________ _____________ __________ _________
F. ___________ ____________ ____________ _____________ __________ _________
G. ___________ ____________ ____________ _____________ __________ _________
H. ___________ ____________ ____________ _____________ __________ _________
I. ___________ ____________ ____________ _____________ _________ _________
J. ___________ ____________ ____________ ____________ __________ _________
K.___________ ____________ ____________ _____________ __________ _________
L.___________ ____________ ____________ _____________ __________ _________
________________________________________________________________________
THIS ROUTINE VALIDATED BY:_____________________________DATE:__/__/__
ACCEPTABLE:___________________NOT ACCEPTABLE:_____________________
HOSPITAL NAME: ______________________________________________________
- 169-

4.1 Validation Exercise B:
Repeat steps 1 through 12 from validation exercise A, but this time choose a patient with just an internal number. The results of this exercise should be identical to Exercise A. Use Patient Worksheet II below to record your results. Please note that the following portion can only be validated if page 5 of the ADM TOOLBOX Parameters has a patient type defined as 2.
PATIENT WORKSHEET II.
Patient Account Unit Wristband Product Specimen Name Number Number Number Ordered Number
A. ___________ ____________ ____________ ____________ __________ ________
B. ___________ ____________ ____________ ____________ __________ _________
C. ___________ ____________ ____________ _____________ _________ __________
D. ___________ ____________ ____________ _____________ _________ __________
E. ___________ ____________ ____________ _____________ _________ __________
F. ___________ ____________ ____________ _____________ _________ __________
G. ___________ ____________ ____________ _____________ _________ __________
H. ___________ ____________ ____________ _____________ _________ __________
I. ___________ ____________ ____________ ____________ __________ __________
J. ___________ ____________ ____________ ____________ __________ __________
K.___________ ____________ ____________ _____________ _________ __________
L.___________ ____________ ____________ _____________ __________ _________
________________________________________________________________________
THIS ROUTINE VALIDATED BY:_____________________________DATE:__/__/__
ACCEPTABLE:___________________ NOT ACCEPTABLE:____________________
HOSPITAL NAME: ______________________________________________________
- 170-

4.1 Validation Exercise C:
1. Enter a requisition on a patient with no MPI requirements.
2. The following portion can only be validated if page 5 of the ADM TOOLBOX Parameters has a patient type defined as 1, which determines that the patient type will not be assigned an Internal MPI.
3. In the LIS Enter/Edit Requisition Routine, identify a patient whose patient type has no unit number requirements (as defined in ADM).
4. At the order prompt for this patient, enter a BBK Product.
Expected Result:
You should receive the error message: "BBK Products not allowed for patients w/out an internal unit number (mpi)."
5. Do a print screen of this message.
6. Delete the entry from step 2 and repeat using different tests from the Blood Bank Test Dictionary.
Expected Result:
You should receive the error message: "BBK Tests not allowed for patients w/out an internal unit number (mpi)."
7. Do a print screen of each of these messages.
________________________________________________________________________
THIS ROUTINE VALIDATED BY:_____________________________DATE:__/__/__
ACCEPTABLE:___________________ _ NOT ACCEPTABLE:___________________
HOSPITAL NAME: ______________________________________________________
- 171-

4.1 Validation Exercise D:
Prerequisites
The following portion can only be validated if page 1 of the LIS Toolbox Parameters is defined as Outreach? Y. If your Facility is utilizing the Outreach option, the Outreach Facility is defined at the ‘Default Outreach Pat Fac’ prompt also on page 1 of the LIS Toolbox Parameters.
All Outreach Requisition patients are filed as REF REF patients. The patient type REG REF for the Outreach Facility must be defined on page 5 of the ADM Toolbox Parameters as 2 for Internal MPI.
There are several factors which determine whether or not the patient on the Outreach Requisition will be filed in MRI with an mpi number thus determining if BBK Tests can be ordered on the patient.
If the ADM Toolbox Parameter for the REG REF Patient Status is set to 1 (no requirements), then no mpi will be assigned to this patient; hence no BBK orders will be allowed. If the ADM Toolbox Parameter for the REG REF Patient Status is set to 2 or 3, the next determining factor is the ‘Pt Recall’ prompt in the Client Dictionary. If the ‘Pt Recall’ value is set to “Y” and a PT ID is entered on the Outreach Requisition, then the patient will be filed in MRI with an mpi number and Blood Bank orders will be allowed. If the ‘Pt Recall’ value is set to “N” (or left blank), OR if the patient is entered on the requisition without a PT ID, then no medical record number will be assigned; hence no BBK orders will be allowed.
In the LIS Client Dictionary, enter Y at the Pt Recall? prompt. At the Pt ID Req? prompt, enter Y. At the MRI Entry? Prompt, enter N.
In the LIS Enter/Edit Outreach Requisition Routine, enter a patient with the Client from step #1. (You should be required to enter a PT ID.)
1. Enter an Outreach Requisition on a patient with an Internal Unit Number (MPI).
2. At the Order prompt, enter a BBK test.
Expected Result:
This should be allowed.
3. File the requisition and print it.
4. In the LIS Client Dictionary, enter N at the Pt Recall?.
5. In the LIS Enter/Edit Outreach Requisition Routine, enter a patient with the Client from step #5.
6. At the Order prompt, enter a BBK test.
Expected Result:
You will receive the following message: “Override Client Dictionary settings and assign an mpi number to this patient?”
7. Do a print screen of this message.
8. Respond Y and file the requisition.
9. In the LIS Enter/Edit Outreach Requisition Routine, enter a patient with the Client from step #5.
- 172-

10. At the Order prompt, enter a BBK test.
Expected Result:
You will receive the following message: “Override Client Dictionary settings and assign an mpi number to this patient?”
11. Do a print screen of this message.
12. Respond N.
Expected Result:
You will receive the following message “BBK Tests not allowed for patients w/out an internal unit number (mpi).”
13. Do a print screen of this message.
14. In the LIS Client Dictionary, enter Y at the Pt Recall? prompt and at the PT ID REQ? prompt enter N.
15. In the LIS Enter/Edit Outreach Requisition Routine, enter a patient for the client from step #15 and do not enter an ID number on the patient.
16. At the Order prompt, enter a BBK test.
Expected Result:
You should receive the error message: "BBK Tests not allowed for patients w/out an internal unit number (mpi)."
17. Do a print screen of this message.
18. In the LIS Enter/Edit Outreach Requisition Routine, enter another patient with the client from step #15 and this time enter an ID number on the patient.
19. At the Order prompt, enter a BBK test.
Expected Result:
This should be allowed.
20. File the requisition and print it.
______________________________________________________________________
THIS ROUTINE VALIDATED BY:_____________________________DATE:__/__/__
ACCEPTABLE:__________________ NOT ACCEPTABLE:_____________________
HOSPITAL NAME: ______________________________________________________
- 173-

4.1 Validation Exercise E:
Repeat steps 1 through 21 for validation exercise D but this time choose a patient with an Internal and External number.
The following portion can only be validated if the LIS Toolbox Parameters is defined as ‘Outreach? Y’. If your Facility is utilizing the Outreach option, the Outreach Facility is defined at the ‘Default Outreach Pat Fac’ prompt in the LIS Toolbox Parameters.
All Outreach Requisition patients are filed as REG REF patients. The patient type REG REF for the Outreach Facility must be defined in the ADM Toolbox Parameters as 3 for Internal and External MPI.
The results of this exercise should be identical to exercise D.
________________________________________________________________________
THIS ROUTINE VALIDATED BY:_____________________________DATE:__/__/__
ACCEPTABLE:_________________ __NOT ACCEPTABLE:____________________
HOSPITAL NAME: ______________________________________________________
- 174-

4.1 Validation Exercise F:
1. Enter an Outreach Requisition on a patient without an Internal Unit Number (MPI).
The following portion can only be validated if the ‘Outreach?’ LIS Toolbox Parameter is defined as Y. If your Facility is utilizing the Outreach option, the Outreach Facility is defined at the ‘Default Outreach Pat Fac’ prompt in the LIS Toolbox Parameters.
All Outreach Requisition patients are filed as REG REF patients. The patient type REG REF for the Outreach Facility must be defined in the ADM Toolbox Parameters as 1 for no ADM Requirements.
2. In the Enter/Edit Outreach Requisition Routine, enter a patient. At the Order prompt, enter a BBK test.
Expected Result:
You should receive the error message: "BBK Tests not allowed for patients w/out an internal unit number (mpi)."
3. Repeat step 1 for different types of Blood Bank Tests.
4. Do a print screen of each of these messages.
_______________________________________________________________________
THIS ROUTINE VALIDATED BY:____________________________DATE:__/__/__
ACCEPTABLE:________________ __NOT ACCEPTABLE:_____________________
HOSPITAL NAME: ______________________________________________________
- 175-

4.1 Validation Exercise G:
1. Enter a Requisition on a patient with a temporary account.
2. Turn on the Backup Admissions Database by answering the prompt Use Only Backup ADM? Y in LIS System Status.
3. Enter a temporary account on a patient. The system will prompt the user: “Enter a new Temporary Account?”. Notice that the account number will be prefixed with "+".
4. In the LIS Enter/Edit Requisition Routine, enter the patient from step #2 and at the Order prompt enter a BBK Test.
Expected Result:
This should be allowed.
5. File the requisition and print it.
NOTE: Because ADM is unavailable you will receive the message "ADM is unavailable - Medical Necessity check will not be performed", but you will still be able to file the requisitions if all other ADM requirements are met.
6. In the LIS Enter/Edit Requisition Routine, enter the patient from step #2 and at the Order prompt enter a BBK Product.
Expected Result:
This should be allowed.
7. File the requisition and print it.
8. Turn off the Backup Admissions Database by answering the prompt Use Only Backup ADM? N in LIS System Status.
9. In the Match To Real Accounts Routine (located on the Backup ADM menu) attempt to match the temporary account to a real account that does not have an MPI number.
Expected Result:
If any fields do not match between the two accounts, the following message will appear:
There are fields that do not match. Are you sure?
If you respond Y, the following error message will be generated:
Can not match Temp acct with BBK data into Real acct with no MPI#.”
10. Attempt to match the account to a real account that does have an MPI number.
Expected Result:
If any fields do not match between the two accounts, the following message will appear:
There are fields that do not match. Are you sure?
- 176-

11. Respond Y if this message appears. This should be allowed.
________________________________________________________________________
THIS ROUTINE VALIDATED BY:_____________________________DATE:__/__/__
ACCEPTABLE:___________________ NOT ACCEPTABLE:____________________ HOSPITAL NAME: ______________________________________________________
- 177-

4.2: Receiving Patient Specimens
FUNCTION/ROUTINE TO BE VALIDATED: Receiving Patient Specimens
Introduction:
The primary purpose of these routines are to receive specimens in the LIS modules. They also allow users to receive specimens at secondary sites for testing and at the testing department
Function may be accessed in:
Receive by Batch/Location Receive by Specimen Receive by Patient Receive by HandHeld Computer Enter/Edit Requisition & Result Enter/Edit Results Enter/Edit Requisition Process Patients Specimens (via the Enter Result Function) Process Specimen Batch (via the Enter Result Function)
Dictionaries:
LIS System Parameters Test Dictionary Product Dictionary Access Dictionary Lab Site Dictionary Customer Defined Parameters
Reports to print:
Internal Inquiry (Long and Short) External Inquiry Outstanding Specimen Report
NOTE: Users may have the ability to define CUSTOM REPORT FORMATS when printing standard reports. Customization to the reports may not supply all information contained in the standard version.
Receive Specimens
Note: a worksheet is provided at the end of this section for recording of specimen information and validation results.
- 178-
4.2 Validation Exercise A: Receive by Batch/Location Routine
1. Enter orders that are not yet received in the BBK module.
2. Create the appropriate Collection Batch for the specimen created in step 1.
BATCH ________DATE _________NUMBER________
3. In the Receive By Batch/Location Routine, access the Collection Batch created in step 2.
4. Enter the collection time and received date and time.
5. Enter Y at the "Receive?" prompt.
6. Record the results on the provided worksheet at the end of this section.
7. Print the listed reports._______________________________________________________________________
THIS ROUTINE VALIDATED BY:________________________ DATE:__ /__ /__
ACCEPTABLE: _________________NOT ACCEPTABLE_______________________ HOSPITAL NAME: ______________________________________________________
- 179-

4.2 Validation Exercise B: Receive by Specimen Routine
1. Enter orders that are not yet received in the BBK module.
2. In the Receive By Specimen Routine, access the specimen created in step 1 using one of the standard conventions. (specimen number, barcode scan, patient name lookup, unit number, account number, social security number, requisition number)
3. Enter the collection time and received date and time.
4. Enter Y at the "Receive?" prompt.
5. Record the results on the provided worksheet at the end of this section.
6. Print the listed reports._____________________________________________________________________
THIS ROUTINE VALIDATED BY:________________________ DATE:__ /__ /__
ACCEPTABLE: _________________NOT ACCEPTABLE:______________________ HOSPITAL NAME: ______________________________________________________
- 180-

4.2 Validation Exercise C: Receive by Patient Routine
1. Enter orders that are not yet received in the BBK module.
2. In the Receive By Patient Routine, access the patient used in step 1 using one of the standard conventions. (specimen number, barcode scan, patient name lookup, unit number, account number, social security number, requisition number)
3. Enter the collection time and received date and time.
4. Enter Y at the "Receive?" prompt.
5. Record the results on the provided worksheet at the end of this section.
6. Print the listed reports.
________________________________________________________________________
THIS ROUTINE VALIDATED BY:________________________ DATE:__ /__ /__
ACCEPTABLE: _________________NOT ACCEPTABLE:______________________ HOSPITAL NAME: ______________________________________________________
- 181-
4.2 Validation Exercise D: Receive by HandHeld Computer Routine
Note: If Handheld Computers are not used for specimen collection, this section may not be applicable.
Please refer to the documentation for the HandHeld model that is currently in use in your system.
System Parameters Involved:
HandHeld Computer Bar Code Verify Bar Code Verify Spec Patient Bar Code # Is
Dictionaries Involved:
Customer-Defined Parameters LIS Collection Category Dictionary LIS Label Format Dictionary LIS Defaults Dictionary
Routines Involved:
Download Dictionary to Handheld Computers Download Collection Batch to Handheld Computer Receive by Handheld Computer
1. Enter orders that are not yet received in the BBK module.
2. Create the appropriate Collection Batch for the specimen created in step 1.
BATCH ________DATE _________NUMBER________
3. Download the Collection Batch created in step 2 using the Download to HandHeld Computers Routine.
4. Enter the collection information required by the Handheld Computer.
5. Upload the Collection Batch from the Handheld Computer to the LIS.
6. In the Receive By HandHeld Computer Routine, identify the uploaded Collection Batch from step 5.
7. Enter Y at the "Receive?" prompt.
8. Record the results on the provided worksheet at the end of this section.
9. Print the listed reports.
THIS ROUTINE VALIDATED BY:________________________ DATE:__ /__ /__
ACCEPTABLE: ___________________NOT ACCEPTABLE:____________________
HOSPITAL NAME: ______________________________________________________
- 182-

4.2 Validation Exercise E: Enter/Edit Requisition Routine
1. In the Enter/Edit Requisition Routine, access a patient.
2. Enter the collection date and time.
3. At the "Received?" prompt, enter Y.
4. The Recv Date and Recv Time will default in as today and now but may be changed.
5. In the Order section, place an order for a Blood Bank test.
6. File the requisition.
7. Record the results on the provided worksheet at the end of this section.
8. Print the listed reports.________________________________________________________________________
THIS ROUTINE VALIDATED BY:________________________ DATE:__ /__ /__
ACCEPTABLE: ______________________NOT ACCEPTABLE:_________________
HOSPITAL NAME: ______________________________________________________
- 183-

4.2 Validation Exercise F: Enter/Edit Requisition & Result Routine
1. In the Enter/Edit Requisition & Result Routine, access a patient.
2. Enter the collection date and time.
3. At the "Received?" prompt, enter Y.
4. The Recv Date and Recv Time will default in as today and now but may be changed.
5. In the Order section, place an order for a Blood Bank test.
6. File the requisition.
7. The prompt "Enter BBK results for (specimen number)?" will appear. Respond N.
8. Record the results on the provided worksheet at the end of this section.
9. Print the listed reports.
________________________________________________________________________
THIS ROUTINE VALIDATED BY:________________________ DATE:__ /__ /__
ACCEPTABLE:______________________ NOT ACCEPTABLE:_________________
HOSPITAL NAME: ______________________________________________________
- 184-

3.184.2 Validation Exercise G: Enter Results Routine
A. Restricted Access Group
Prerequisites:
An access group may be restricted from receiving specimens in the Enter Results Routine. Create or utilize an existing Access group defined as EE Res Rcv Spec? N”
Access group:_________
1. Sign on to the LIS modules utilizing the restricted Access group.
2. Enter orders that are not yet received in the BBK module.
3. In the Enter Results Routine, access the specimen created in step 2 using one of the standard conventions. (specimen number, barcode scan, patient name lookup, unit number, account number, social security number, requisition number)
4. The message "Specimen must be received before entering results." will appear.
Message received?_____
5. Record the results on the provided worksheet at the end of this section.
6. Print the listed reports.
B. Unrestricted Access Group
Prerequisites:
An access group may be restricted from receiving specimens in the Enter Results Routine. Create or utilize an existing Access group defined as "EE Res Rcv Spec? Y"
Access group:_________
1. Sign on to the LIS modules utilizing the unrestricted Access group.
2. Enter orders that are not yet received in the BBK module.
3. In the Enter Results Routine, access the specimen created in step 2 using one of the standard conventions. (specimen number, barcode scan, patient name lookup, unit number, account number, social security number, requisition number)
4. The Prompt "Receive Specimen from Collection?." will appear. Respond Y.
5. The Recv Date, Recv Time, and Recv By user will default in but may be edited.
6. At the Receive? prompt, enter Y.
- 185-

7. The specimen created in step 2 is now at a RECD status and the Received date and time will display with the specimen information.
8. Record the results on the provided worksheet at the end of this section.
9. Print the listed reports.
________________________________________________________________________
THIS ROUTINE VALIDATED BY:________________________ DATE:__ /__ /__
ACCEPTABLE: _____________________NOT ACCEPTABLE:__________________ HOSPITAL NAME: ______________________________________________________
- 186-

4.2 Validation Exercise H: Process Patient’s' Specimen Routine
Various Process Functions can be assigned to an Access group enabling functions to be performed on batches of specimens.
I. Function: Enter Req
Prerequisites:
A patient with specimens entered in the Blood Bank module. An Access group with the Enter Req function assigned.
1. In the Process Patient's Specimen Routine, enter a date that will compile specimens for the patient at the Start At Collection Date prompt.
2. Include only BBK to limit the list of specimens.
3. Include unreceived specimens.
4. Identify the patient using one of the standard conventions (specimen number, barcode scan, patient name lookup, unit number, account number, social security number, requisition number)
5. A list of the patient's specimens will appear.
6. At the Function prompt enter or choose from the lookup the Enter Req function.
7. The Enter/Edit Requisition screen will appear with the patient's information. Enter a new requisition.
8. Enter the collection date and time.
9. At the "Received?" prompt, enter Y.
10. The Recv Date and Recv Time will default in as the current date and time but may be changed.
11. In the Order section, place an order for a blood bank test.
12. File the requisition.
13. The Process Patient's Specimen screen will reappear and recompile. The specimen created in step 12 will now appear on the specimen list with a status of RECD.
14. Record the results on the provided worksheet at the end of this section.
15. Print the listed reports.
THIS ROUTINE VALIDATED BY:________________________ DATE:__ /__ /__
ACCEPTABLE: ___________________NOT ACCEPTABLE:____________________ HOSPITAL NAME: ______________________________________________________
- 187-

4.2 Validation Exercise H, Part II. Function: Edit Req - Change Received Date, Time, User
Prerequisites:
A patient with specimens entered in the Blood Bank module. An Access group with the Edit Req function assigned.
1. In the Process Patient's Specimen Routine, enter a date that will compile specimens for the patient at the Start At Collection Date prompt.
2. Include only BBK to limit the list of specimens.
3. Include unreceived specimens.
4. Identify the patient using one of the standard conventions (specimen number, barcode scan, patient name lookup, unit number, account number, social security number, requisition number)
5. A list of the patient's specimens will appear.
6. Choose a specimen that has already been received in the Blood Bank module.
7. At the Function prompt, enter or choose from the lookup the Edit Req function.
8. At the Edit Px prompt, enter the prefix for the Blood Bank test.
9. The Enter/Edit BBK Specimen for Prefix screen will appear.
10. Enter a different Recv Date, Recv Time, and Recv By user.
11. File the requisition.
12. The Process Patient's Specimen screen will reappear and the specimens will recompile. The specimen will remain on the list but will have the Recv Date and Recv Time entered in step 10.
13. Record the results on the provided worksheet at the end of this section.
14. Print the listed reports.________________________________________________________________________
THIS ROUTINE VALIDATED BY:________________________ DATE:__ /__ /__
ACCEPTABLE: _____________________NOT ACCEPTABLE:__________________
HOSPITAL NAME: ______________________________________________________
- 188-

4.2 Validation Exercise H, Part III. Function: Edit Req - Unreceive Specimen
Prerequisites:
A patient with specimens entered in the Blood Bank module. An Access group with the Edit Req function assigned.
1. In the Process Patient’s Specimen Routine, enter a date that will compile specimens for the patient at the Start At Collection Date prompt.
2. Include only BBK to limit the list of specimens.
3. Include unreceived specimens.
4. Identify the patient using one of the standard conventions (specimen number, barcode scan, patient name lookup, unit number, account number, social security number, requisition number)
5. A list of the patient's specimens will appear.
6. Choose a specimen that has already been received in the Blood Bank module.
7. At the Function prompt, enter or choose from the lookup the Edit Req function.
8. At the Edit Px prompt, enter the prefix for the Blood Bank test.
9. The Enter/Edit BBK Specimen for Prefix screen will appear.
10. Edit the Received? prompt from Y to N.
11. File the requisition.
12. The Process Patient’s Specimen screen will reappear and the specimens will recompile.
13. The specimen edited in step 10 will now have the status of ORD.
14. Record the results on the provided worksheet at the end of this section.
15. Print the listed reports.________________________________________________________________________
THIS ROUTINE VALIDATED BY:________________________ DATE:__ /__ /__
ACCEPTABLE: _____________________NOT ACCEPTABLE:__________________ HOSPITAL NAME: ______________________________________________________
- 189-

4.2 Validation Exercise H, Part IV. Function: Enter Res (with Restricted Access)
Prerequisites:
An access group may be restricted from receiving specimens in the Enter Results Routine. Create or utilize an existing Access group defined as “EE Res Rcv Spec? N”
An Access group with the Enter Res function assigned.
Access group:_________
1. Sign on to the LIS modules utilizing the restricted Access group.
2. Enter orders that are not yet received in the Blood Bank module.
3. In the Process Patient's Specimen Routine, enter a date that will compile the specimen created in step 2 at the Start At Collection Date prompt.
4. Include only BBK to limit the list of specimens.
5. Include unreceived specimens.
6. Identify the patient using one of the standard conventions (specimen number, barcode scan, patient name lookup, unit number, account number, social security number, requisition number)
7. A list of the patient's specimens will appear.
8. Select the specimen created in step 2.
9. At the function prompt, do a lookup or enter RES for the Enter Results function.
10. The Enter/Edit BBK Results screen will appear.
11. The message "Specimen must be received before entering results." will appear.
Message received?_______
12. Exit the Enter/Edit BBK Results screen.
13. The Process Patient's Specimen screen will reappear and the specimens will recompile.
14. The specimen created in step 2 will remain at an ORD status.
15. Record the results on the provided worksheet at the end of this section.
16. Print the listed reports.
________________________________________________________________________
THIS ROUTINE VALIDATED BY:________________________ DATE:__ /__ /__
ACCEPTABLE: _____________________NOT ACCEPTABLE:__________________ HOSPITAL NAME: ______________________________________________________
- 190-

4.2 Validation Exercise H, Part V. Function: Enter Res (with Unrestricted Access)
Prerequisites:
An access group may be restricted from receiving specimens in the Enter Results Routine. Create or utilize an existing Access group defined as "EE Res Rcv Spec? Y"
Access group:_________
An Access group with the Enter Req function assigned.
1. Sign on to the LIS modules utilizing the unrestricted Access group.
2. Enter orders that are not yet received in the Blood Bank module.
3. In the Process Patient’s Specimen Routine, enter a date that will compile the specimen created in step 2 at the Start At Collection Date prompt.
4. Include only BBK to limit the list of specimens.
5. Include unreceived specimens.
6. Identify the patient using one of the standard conventions (specimen number, barcode scan, patient name lookup, unit number, account number, social security number, requisition number)
7. A list of the patient's specimens will appear.
8. Select the specimen created in step 2.
9. At the function prompt, select Enter Results from the lookup, or enter RES for the Enter Results function.
10. The Enter/Edit BBK Results screen will appear.
11. The prompt "Receive Specimen from Collection?" will appear. Respond Y.
12. The Receive Specimen screen will appear with the current date, time and user as the Recv Date, Recv Time Recv By user.
13. At the Receive? prompt, enter Y.
14. The Enter/Edit BBK Results screen will reappear with the Received date and time entered in step 10.
15. Exit the Enter/Edit BBK Results screen.
16. The Process Patient’s Specimen screen will reappear and the specimens will recompile.
17. The specimen created in step 2 is now at a RECD status.
18. Record the results on the provided worksheet at the end of this section.
- 191-

19. Print the listed reports._____________________________________________________________________ THIS ROUTINE VALIDATED BY:________________________ DATE:__ /__ /__
ACCEPTABLE: ____________________NOT ACCEPTABLE:__________________
HOSPITAL NAME: _____________________________________________________
- 192-

4.2 Validation Exercise I: Process Specimen Batch Routine
Various Process Functions can be assigned to an Access group enabling functions to be performed on batches of specimens.
I. Function: Enter Req
Prerequisites:
A patient with Blood Bank specimens. An Access group with the function Enter Req assigned.
1. In the Process Specimen Batch routine, at the Select prompt, choose from the lookup a routine that will provide a list of specimens.
2. Depending on the choice made in step 1, answer the required prompts on the selected screen.
3. A list of specimens will appear on the Process Specimen Batch screen.
4. Select one of the specimens.
5. At the Function prompt, enter or choose from the look up the Enter Req function.
6. The Enter/Edit Requisition screen will appear with the patient's information. Enter a new requisition.
7. Enter the Coll Date and Coll Time.
8. At the Received? prompt, enter Y.
9. The Recv Date, Recv Time, and Recv By will default as they are entered through.
10. Enter an ORDER for a Blood Bank test.
11. File the requisition.
12. The Process Specimen Batch screen will reappear. The specimen created in step 11 will not appear. There is no automatic recompile in this function.
13. Record the results on the provided worksheet at the end of this section.
14. Print the listed reports._____________________________________________________________________ THIS ROUTINE VALIDATED BY:________________________ DATE:__ /__ /__
ACCEPTABLE: ____________________NOT ACCEPTABLE:__________________
HOSPITAL NAME: __________________________________________________
- 193-

4.2 Validation Exercise I, Part II. Function: Edit Req - Change Received Date, Time, User
Prerequisites:
A patient with Blood Bank specimens. An Access group with the function Edit Req assigned.
1. In the Process Specimen Batch Routine, at the Select prompt, choose from the lookup a routine that will provide a list of specimens.
2. Depending on the choice made in step 1, answer the required prompts on the selected screen.
3. A list of specimens will appear on the Process Specimen Batch screen.
4. Select one of the specimens.
5. At the Function prompt, enter or choose from the look up the Edit Req function.
6. The Enter/Edit Requisition screen will appear with the patient's information.
7. At the Edit Px prompt, enter the prefix for the Blood Bank test.
8. The Enter/Edit BBK Specimen for Prefix screen will appear.
9. Enter a different Recv Date, Recv Time, and Recv By user.
10. File the requisition.
11. The Process Specimen Batch screen will reappear and the specimens will recompile. The specimen will remain on the list but will have the Recv Date and Recv Time entered in step 9.
12. Record the results on the provided worksheet at the end of this section.
13. Print the listed reports.
_____________________________________________________________________ THIS ROUTINE VALIDATED BY:________________________ DATE:__ /__ /__
ACCEPTABLE: ____________________NOT ACCEPTABLE:_________________
HOSPITAL NAME: ____________________________________________________
- 194-

4.2 Validation Exercise I, part III. Function: Edit Req - Unreceive Specimen
Prerequisites:
A patient with Blood Bank specimens. An Access group with the function Edit Req assigned.
1. In the Process Specimen Batch Routine, at the Select prompt, choose from the lookup a routine that will provide a list of specimens.
2. Depending on the choice made in step 1, answer the required prompts on the selected screen.
3. A list of specimens will appear on the Process Specimen Batch screen.
4. Select one of the specimens that is currently at a RECD status.
5. At the Function prompt, enter or choose from the look up the Edit Req function.
6. At the Edit Px prompt, enter the prefix for the ordered test.
7. The Enter/Edit BBK Specimen for Prefix screen will appear.
8. Edit the Received? prompt from Y to N.
9. File the requisition.
10. The Process Specimen Batch screen will reappear and the specimens will recompile.
11. The specimen edited in step 8 will now have the status of ORD.
12. Record the results on the provided worksheet at the end of this section.
13. Print the listed reports.
_____________________________________________________________________ THIS ROUTINE VALIDATED BY:________________________ DATE:__ /__ /__
ACCEPTABLE: ____________________NOT ACCEPTABLE:__________________
HOSPITAL NAME: __________________________________________________
- 195-

4.2 Validation Exercise I, part IV. Function: Enter Res (with Restricted Access)
Prerequisites:
An Access group may be restricted from receiving specimens in the Enter Results Routine. Create or Utilize an existing Access group defined as "EE Res Receive Spec? N"
An Access group with the function Enter Res assigned.
Access group__________
1. Sign on to the LIS modules utilizing the restricted Access group.
2. Enter orders that are not yet received in the Blood Bank module.
3. In the Process Specimen Batch Routine, at the Select prompt, choose from the lookup a routine that will provide a list of specimens that includes the specimen created in step 2.
4. Depending on the choice made in step 3, answer the required prompts on the selected screen.
5. A list of specimens will appear on the Process Specimen Batch screen.
6. Select the unreceived specimen created in step 2.
7. At the Function prompt, enter or choose from the look up the Enter Res function.
8. The Enter/Edit BBK Results screen will appear.
9. The message "Specimen must be received before entering results." will appear.
Message received?_______
10. Exit the Enter/Edit BBK Results screen.
11. The Process Specimen Batch screen will reappear and the specimens will recompile.
12. The specimen created in step 2 will remain at an ORD status.
13. Record the results on the provided worksheet at the end of this section.
14. Print the listed reports.
_____________________________________________________________________ THIS ROUTINE VALIDATED BY:________________________ DATE:__ /__ /__
ACCEPTABLE: ____________________NOT ACCEPTABLE:_________________
HOSPITAL NAME: ____________________________________________________
- 196-

4.2 Exercise I, part V. Function: Enter Res (with Unrestricted Access)
Prerequisites:
An Access group may be restricted from receiving specimens in the Enter Results Routine. Create or Utilize an existing Access group defined as "EE Res Receive Spec? Y"
An Access group with the function Enter Res assigned.
Access group__________
A patient with Blood Bank specimens.
1. Sign on to the LIS modules utilizing the unrestricted Access group.
2. Enter orders that are not yet received in the Blood Bank module.
3. In the Process Specimen Batch Routine, at the Select prompt, choose from the lookup a routine that will provide a list of specimens that includes the specimen created in step 2.
4. Depending on the choice made in step 3, answer the required prompts on the selected screen.
5. A list of specimens will appear on the Process Specimen Batch screen.
6. Select the unreceived specimen created in step 2.
7. At the Function prompt, enter or choose from the look up the Enter Res function.
8. The Enter/Edit BBK Results screen will appear.
9. The Prompt "Receive Specimen from Collection?" will appear. Respond "Y."
10. The Receive Specimen screen will appear.
11. The Recv Date, Recv Time, and Recv By user will default in but may be edited.
12. At the Receive? prompt, enter Y.
13. The Enter/Edit BBK Results screen will reappear with the RECV date and time.
14. Exit the Enter/Edit BBK Results screen.
15. The Process Specimen Batch screen will reappear and the specimens will recompile.
16. The specimen created in step 2 is now at a RECD status.
17. Record the results on the provided worksheet at the end of this section.
18. Print the listed reports.
____________________________________________________________________
THIS ROUTINE VALIDATED BY:________________________ DATE:__ /__ /__
ACCEPTABLE: __________________NOT ACCEPTABLE:___________________ HOSPITAL NAME: ____________________________________________________
- 197-

VALIDATION WORKSHEET
Ex.# Routine used Specimen# Received? Reports Acceptable?
A. By Batch/Location
B. By Specimen
C. By Patient
D. By HandHeld Computer
E. E/E Req
F. E/E Req and Result
G. E/E Result
a. Restricted Access
b. Unrestricted Access
H. Process Patient's Spec
A. Function Enter Req
B. Function: Edit Req Change received
C. Function: Edit Req Unreceive
D. Function: Enter Res Restricted Access
E. Function: Enter Res Unrestricted Access
- 198-

I. Process Specimen Batch
A. Function: Enter Req
B. Function: Edit Req Change received
C. Function: Edit Req Unreceive
D. Function: Enter Res Restricted Access
E. Function: Enter Res Unrestricted Access
- 199-

4.3: Entering Patient Results
FUNCTION/ROUTINE TO BE VALIDATED: Enter Patient Results
Introduction:
Use this routine primarily to enter and verify results. It also allows the following:
mark results for broadcast and exception add specimen markers add specimen comments edit blood bank history and blood types receive specimens view reserved units for patient view product test view groups for ordered products
Function may be accessed in:
Process/Build Workbatch (via Enter Results Function) Enter/Edit Requisitions and Results Process Patient's Specimens (via the Enter Result Function) Process Specimen Batch (via the Enter Result Function)
Dictionaries and Parameters:
Test Dictionary Product Dictionary Access Dictionary Customer Defined Parameters LIS System Parameters
Reports to print:
Internal Specimen Inquiry (Long and Short) Assignment Card BBK History Inquiry Crossmatch Card Units Inquiry Issue/Transfuse Card Transfused Inquiry Override Warning Report Available Products by Patient Blood Bank Product Inquiry
NOTE: Users may have the ability to define CUSTOM REPORT FORMATS when printing standard reports. Customization to the reports may not supply all information contained in the standard version.
- 200-

4.3 Section I. Entering Results on a Product Not Requiring Crossmatch
Prerequisites:
Select a patient to be used in processing a specimen. The patient must have a blood type on record.
The product should not require a crossmatch (Example: Rhogam, Factor VIII) but must require typing. The order for the product must have a count of 2 (based on the Product Dictionary <Ask order count? > "Y").
The specimen must be received into the performing lab site. If applicable, enter the unique wristband number for the patient. (Based on LIS System Parameters, the wristband number is unique by medical record number, account number specimen number or none.)
4.3 Validation Exercise A: Enter/Edit BBK Results
Note: Some exercises may not be applicable for all products.
1. Identify a specimen with ordered tests using one of the standard conventions. Before the user can enter results one or more of the following pop-up windows may display:
Received Specimens Expired Specimens HX Comments/Specimen Comments/Queries Reserved Units (donor directed and autologous) Product Test View Group
Expected Result:
Certain Blood Bank specific results (ie. identified antibodies and antigens) will display in the HX field in the Enter/Edit Result Screen if applicable for this patient. Use the left arrow key to proceed.
If the product ordered has associated tests, these tests will be ordered automatically and will be placed on the same requisition with the ordered product. These product associated tests are defined in the Product Dictionary. (Example: ABO/RH)
2. The cursor will move to the Result prompt for the first test. The user can now begin to enter results.
3. If an ABO/RH is ordered to confirm the patient's blood type the user may now result the profile. The T-Type tests necessary to determine the patient's ABO/RH may consist of: Anti-A, Anti-B, Anti-AB, Anti-D, Anti-Du, D Control, Reverse A and Reverse B. The patient's blood type may now be entered in the blood type test. Depending on how your hospital system is set-up, the blood type can be:
automatically calculated and entered as type user calculated and entered manually. (The system will calculate the type in the
background and check it against the entry.)
4. Enter a blood type which is not consistent with the T-Type expected results.
The following warning message appears: "Does not match calculated blood type __. Ok?" Users may still enter the type, but they may not verify it if the Blood Type does not agree with the Historical Blood Type. 5. The system also compares the blood type entered with the history file for this patient.
- 201-

6. Enter a blood type which is different from the type on the patient's history file.
The following warning message appears: "Blood type ___does not match patient's blood type. Ok?" or "Blood type does not match patient's blood type."
If the user is allowed to override the system's calculated blood type the prompt "Ok?" will appear. Users must have access to "Override BBK History Blood Type" in the Access Dictionary.
7. Users can enter "Y" at the "Ok?" prompt but they may not verify the new blood type. The following message appears: "Specimen number: Can't verify BLD TYPE. It does not match history file."
8. To verify the new blood type and make the result part of the blood bank history, users must have access to "Edit BBK History Blood Type" in the Access Dictionary. This can be accomplished through the special function key, "Edit BBK History Blood Type" or the "Change Blood Type" routines.
9. Reports to print for validation:
Override Warning Report Interpreted Blood Type Audit BBK History Audit Log BBK History Inquiry Print Specimens (Internal) Medical Record Card
____________________________________________________________________
THIS ROUTINE VALIDATED BY:________________________ DATE:__ /__ /__
ACCEPTABLE:__________________ NOT ACCEPTABLE:___________________ HOSPITAL NAME: ____________________________________________________
- 202-

4.3 Validation Exercise B: Assign/Unassign Units Routine
If a crossmatch is not necessary before issuing a product type, the unit may be manually assigned to a specific patient. An assignment card can be generated to tag the unit of blood. The assignment of non-crossmatched product type is optional. The unit may be issued with or without the assignment of the unit.
1. Identify a specimen and product that requires a crossmatch.
The message "You cannot manually assign a crossmatchable product" will appear. Message received?________
2. Identify a specimen for a patient without a blood type on file containing an order for the product not requiring a crossmatch, but requiring a blood type. (Possible example: FFP).
3. The cursor moves to the Product prompt. Identify a product other than the ordered product.
The message appears: "Only Products ordered on this specimen are valid here" Message received?________
4. At the Product prompt identify the product you want to assign for the specimen.
5. At the Unit Number prompt, assign a unit of the ordered product that requires a blood type.
The message "Incompatible blood type." will appear. Message received?________
6. Identify a specimen with a blood type on file and an order for a product that requires a blood type but not a crossmatch. Enter the appropriate product at the Product prompt and an available unit with the same blood type as the patient at the Unit prompt. Respond “Y” to the Assign/Unassign Unit(s) to Specimen prompt.
7. Reports to print for validation:
Issue/Transfuse Cards Print Specimens Internal BBK Product Inquiry Unit Inquiry Print Assignment Cards
8. Enter the Assign/Unassign Unit Routine. Call back the last specimen using one of the system conventions.
9. Unassign one of the units by deleting the unit number. After completing this the following prompt appears: "Assign/Unassign unit(s) to specimen?." File the assignment/Unassignment by entering "Y".
10. Reports to print for validation: Unit Inquiry Print One Medical Record Card BBK Product Inquiry Print Specimens (Internal) Issue/Transfuse Cards
____________________________________________________________________
THIS ROUTINE VALIDATED BY:________________________ DATE:__ /__ /__
ACCEPTABLE: _________________ NOT ACCEPTABLE:___________________ HOSPITAL NAME: ____________________________________________________
- 203-

4.3 Validation Exercise C: Issue and Transfuse Units
Units may be issued using the Issue Unit or Issue Unit By Patient Routine. Units may be transfused using the E/E Transfusion Data or Transfuse Units By Patient Routine.
Note: Non-crossmatchable units must be at an assigned status in order to issue via the Issue Units by Patient Routine.
Requirements:
1. If the Ready Status is used (defined in the Product Dictionary) the units may be issued only if they are at a Ready Status.
2. Units must have one of the following statuses:
available crossmatched assigned expired (within cutoff hours) ready
3. Units must be the same product type or an acceptable substitute as defined in the Product Dictionary.
4. Unit assignment rule must be followed if one is defined in the Product Dictionary.
5. Antigens and Antibodies on the unit and on the patient's specimen must not conflict. If they do, the following warning message will be displayed: "Unit has Incompatible Antigens:_______ OK?
6. Reserved units must be crossmatched. If not, the following warning message will be displayed: "Crossmatch Data incomplete for this unit"
7. If the REQUIRE CURRENT BTYPE prompt on page 4 of the BBK PRODUCT dictionary is set, a check will be performed at the time a unit of the product is selected for crossmatch and/or issue. This check is performed within the timeframe specified by the HOURS prompt. Any specimens collected within this timeframe will be checked for a verified blood type test. If one is not found the user will receive one of the following messages:
The HOURS value is not zero, for the issue routines:
"Patient has no verified Blood Type within <HOURS> hours of <DATE> <TIME>."
The HOURS value is nonzero, for unit assignment/crossmatch:
"Patient has no verified Blood Type within <HOURS> hours."
The HOURS value is 0, for any routine but Issue by Patient:
"Patient has no verified Blood type on the current specimen."
The HOURS value is 0, for the routine Issue by Patient:
"Patient has no verified Blood Type on the current specimen(s)."
If the BBK OVERRIDE REQ. CURRENT TESTS prompt in the ACCESS Dictionary is set to "N":
- 204-

"Patient has no blood type within __ hours of <issue date> <issue time>." The user will not be allowed to continue until a blood type test is performed.
If the BBK OVERRIDE REQ. CURRENT TESTS prompt in the ACCESS Dictionary is set to "T" or "B":
Patient has no blood type within __ hours of <issue date> <issue time>. Continue?" A "Y" response will allow the user to continue and a comment box will appear. The warning and the comment will appear on the BBK OVERRIDE WARNING REPORT.
8. If the REQUIRE CURRENT ABSC prompt on page 4 of the BBK PRODUCT dictionary is set, a check will be performed at the time a unit of the product is crossmatched and/or issued. This check is performed within the timeframe specified by the HOURS prompt. Any specimens collected within this timeframe will be checked for a verified antibody screen. If one is not found the user will receive the following message:
The HOURS value is not zero, for the issue routines:
"Patient has no verified Antibody Screen within <HOURS> hours of <DATE><TIME>."
The HOURS value is nonzero, for unit assignment/crossmatch:
"Patient has no verified Antibody Screen within <HOURS> hours."
The HOURS value is 0, for any routine but Issue by Patient:
"Patient has no verified Blood type on the current specimen."
The HOURS value is 0, for the routine Issue by Patient:
"Patient has no verified Antibody Screen on the current specimen(s)."
If the BBK OVERRIDE REQ. CURRENT TESTS prompt in the ACCESS Dictionary is set to "N":
"Patient has no antibody screen within __ hours of <issue date> <issue time>." The user will not be allowed to continue until a blood type test is performed.
If the BBK OVERRIDE REQ. CURRENT TESTS prompt in the ACCESS Dictionary is set to "T" or "B":
Patient has no antibody screen within __ hours of <issue date> <issue time>. Continue?" A "Y" response will allow the user to continue and a comment box will appear. The warning and the comment will appear on the BBK OVERRIDE WARNING REPORT.
- 205-

4.3 Exercise C-A: Issue Unit Routine:
Prerequisite:
Units that do not require a Crossmatch may be assigned to a patient before the unit is issued through the Assign/Unassign Routine. This is not a required routine prior to issuing.
1. Identify the specimen using one of the standard conventions.
2. If the unit was assigned to the patient it will be displayed on the screen.
3. If the Assign Routine was not used, identify a unit at the unit prompt using one of the standard methods.
4. Enter a messenger.
5. Enter a card printer and a card form which will be used to print the Issue/Transfuse card.
6. Enter Unit Issue Comments and file.
ISSUE UNIT WITH WRISTBAND:Use this step if your Customer Defined Parameters are set to: BBK Ask Wristband at Issue? =Y.
7. Upon issuing the unit, if your specimen has a wristband number, you will be prompted to enter a wristband number.
If you do not enter the wristband number you will receive the following warning:WARNING: There is a wristband number entered for this specimen.
The warning will be logged to the Override Warning Report and you will be allowed to Issue.
If you enter a wristband number that does not match the specimen, you will see the following warning:WARNING: This does not match previously entered wristband number.
The warning will be logged to the Override Warning Report and you will be allowed to Issue.
8. Reports to print for validation:
Override Warning Report Print Specimens (Internal) BBK Product Inquiry Print Assignment Cards Unit Inquiry
____________________________________________________________________
THIS ROUTINE VALIDATED BY:________________________ DATE:__ /__ /__
ACCEPTABLE: _________________ NOT ACCEPTABLE:___________________ HOSPITAL NAME: ____________________________________________________
- 206-

4.3 Exercise C-B: Issue Unit By Patient Routine:
PREREQUISITE: Assign a unit to the patient.
1. Identify the patient with a unit at an assigned status using one of the standard conventions.
2. A list of available units for issue are displayed on the screen.The sort order for the display is as follows:
AUTOLOGOUS Units Product type
Expiration Date
DONOR DIRECTED Units Product type
Unit blood type Expiration date
HOMOLOGOUS Units Product type
Unit blood type Expiration date
3. Indicate which units are to be issued by entering a "Y" in the Iss? column.
4. Enter a messenger.
5. Enter a card printer and a card form which will be used to print the Issue/Transfuse card.
6. Enter Unit Issue Comments and file.
7. Reports to print for validation
Override Warning Report Print Specimens (Internal) BBK Product Inquiry Print Assignment Cards Unit Inquiry
____________________________________________________________________
THIS ROUTINE VALIDATED BY:________________________ DATE:__ /__ /__
ACCEPTABLE: _________________ NOT ACCEPTABLE:___________________ HOSPITAL NAME: ____________________________________________________
- 207-

4.3 Exercise C-C: Transfuse Units By Patient Routine:
Prerequisite:
A patient with an multiple units of the same issued product that has not yet been transfused.
The Access Parameter <allow defaults for transfusion?> must be set to “Y”
1. Identify the patient using one of the standard conventions.
Expected Result:
A pop-up window will display asking for transfusion default information.
A list of available units for transfusion are displayed on the screen. Units on this screen are sorted by unit number order.
2. Enter the transfusion date, volume, time, when the transfusion began and ended, the person who transfused the unit, and the workload function for the transfusing units. As transfusion data is entered a check mark will appear on the left column indicating that the unit has been selected for transfusion.
If a transfusion date/time is entered that is before the issue date/time, the warning message "Transfused before issued date/time - Ok?" If you put in a transfusion date/time before the collection date/time of the specimen, the error message "Transfusion cannot be before collection date/time."
3. If a transfusion Customer Defined Screen is defined in the Customer Defined Parameters Dictionary, enter responses to the queries.
4. Enter transfusion comments.
5. Transfuse the unit.
6. In the Enter/Edit Transfusion Data routine select the specimen.
7. Select the unit transfused in Step 6 and enter a second time.
8. If a transfusion Customer Defined Screen is defined in the Customer Defined Parameters Dictionary, enter a second set of responses to the queries.
9. Enter a second transfusion comment. File.
10. Reports to print for validation:
Issue/Transfuse Cards Transfusion Report Trans Product to Patient Report Print Specimens (Internal) BBK Product Inquiry BBK Transfusion Inquiry by MRI BBK History Inquiry BBK History Audit Log BBK History Transfusion Inquiry Print One Medical Record Card Unit Inquiry
- 208-

Unit Edit Log_____________________________________________________________________
THIS ROUTINE VALIDATED BY:_________________________ DATE:__ /__ /__
ACCEPTABLE: __________________ NOT ACCEPTABLE:___________________ HOSPITAL NAME: _____________________________________________________
- 209-

4.3 Exercise C-D. NUR Process Transfusions Routine:
Prerequisites:The following exercise can only be validated if the LIS System Parameter has the BBK/NUR prompt set to Y.
In the LIS System Parameters the Patient Wristband for Issue is set to ACCT# or UNIT#. The settings for the scan parameters determine which fields will need to be scanned before transfusion: Scan BBK Wristband? Unit Identifiers? Blood Type? Expiration Dt/Tm? Verify User?
A patient with an issued unit of a non-crossmatchable product.
The transfusion data is recorded in the Nursing application and the reports are accessed from the Lab application.
1. Identify a patient and enter your password and/or PIN if required.
2. The patient name and BBK History data, if any, is displayed.
3. A list of units display on the screen sorted by status then product. Only units at the following statuses will display:
Ready - The unit is ready for transfusion to the patient. In BBK, the following unit statuses will be considered: XM Compatible and Ready for crossmatchable products and Assigned for non-crossmatchable products.
Issued - The unit has been issued to the patient. Transfused - The unit has been transfused to the patient. Transfusing - NUR/PCS has sent back at least one set of vitals or the begin date/time to indicate the
transfusion has begun.
4. Select the unit to transfuse.
a. An asterisk is displayed in the "Cosign" field if the product has the 'Co-Signature for NUR Admin?' prompt in the BBK Product dictionary set to Y.
b. An asterisk is displayed in the "Instr" field if the unit has any issue comments.
c. An asterisk is displayed in the "Assoc Data" field if the product has a Test View Group defined and the field "Display At NUR Tx?" is set to Y in the BBK Product Dictionary.
5. Verify the Pre-Transfusion checklist.
If the specimen was collected before the number of hours defined in the BBK Spec Expire Hours parameter in the Custom-Defined Parameters, the error message is displayed: "Warning: Specimen was collected N hours ago. Continue?". Enter "Y" and confirm this message can be overridden.
6. Enter the Co-Signer and PIN # if required. This is determined by the parameter Co-Signature for NUR Admin? in the BBK Product dictionary.
7. Scan the patient wristband.
- 210-

a. If the wrong wristband number is entered the error message is displayed: Scanned patient wristband does not match selected patient. ***DO NOT TRANSFUSE *** Please return blood product.
b. If the correct wristband numbered is entered, the Pre-Transfusion Checklist is displayed.
8. Select one or more items on the checklist and press OK.
9. Document the transfusion and enter BBK Vital Signs. Start the transfusion by entering a Begin Date/Time. The status of the unit updates to “Transfused”.
10. Enter the End Date/Time to end the transfusion. The unit status changes to "Transfused".
11. LAB Reports to print for validation:
Issue/Transfuse Cards Transfusion Report Trans Product to Patient Report Print Specimens (Internal) BBK Product Inquiry BBK Transfusion Inquiry by MRI Print BBK History BBK History Audit Log BBK History Transfusion Inquiry Print One Medical Record Card Unit Inquiry NUR Transfusion Report
___________________________________________________________________
THIS ROUTINE VALIDATED BY: _______________________ DATE: ____________
ACCEPTABLE: ______________________ NOT ACCEPTABLE: _________________
HOSPITAL NAME: ____________________________________________________
- 211-

4.3 Exercise C-E. NUR Process Transfusions Routine with Bar Code Scanning
Prerequisites
The following exercise can only be validated if page 1 of the LIS System Parameter has BBK/NUR set to Y.
A Bar Code Reader is required for this exercise. In the LIS System Parameters Dictionary the parameter 'Patient Wristband' is set to ACCNT# or UNIT#, and one or more of the following fields is set to Y: Scan BBK Wristband? Unit Identifiers? Blood Type? Expiration Dt/Tm? Verify User?
A unit of a non-crossmatchable product is entered into inventory with a Bar Code Scanner. The unit is issued to a patient.
E. NUR Process Transfusions Routine:
1. Identify the patient and enter your password and/or PIN if required.
2. The patient name and BBK History data, if any, is displayed.
3. A list of available units for transfusion display on the screen. Units on this screen are sorted by status and product.
4. Select the unit to transfuse.
a. An asterisk will display in the 'Cosign' field if the product has the Co-Signature for NUR Admin?
Prompt in the BBK Product dictionary set to Y.
b. An asterisk is displayed in the 'Instr' field if the unit has any issue comments.
c. An asterisk is displayed in the 'Assoc Data' field if the product has a Test View Group defined and the field 'Display at NUR Tx?' is set to Y in the BBK Product Dictionary.
5. Enter the Co-Signer and PIN # if required. This is determined by the parameter Co-Signature for NUR Admin? in the BBK Product dictionary.
6. Scan the patient's wristband.
a. If you scan another patient's wristband number the error message is displayed: Scanned patient wristband does not match selected patient. ***DO NOT TRANSFUSE*** Please return blood product.
OK
b. If you scan the correct patient's wristband number, it is accepted and you are prompted for the next scan.
7. Scan the patient's BBK wristband.
a. If you scan another patient's BBK wristband number the error message is displayed:
- 212-

Scanned blood bank wristband does not match selected patient. ***DO NOT TRANSFUSE*** Please return blood product.
OK
b. If you scan the correct patient's BBK wristband number, it is accepted and you are prompted for the next scan.
c. If you scan a BBK wristband number and the patient does not have one on file, the error message is displayed:
Cannot verify scan: No blood bank wristband number on file. Continue anyway? Yes/No
8. Scan the product unit number.
a. If you scan the wrong product unit number the error message is displayed: Scanned product unit # does not match selected unit. ***DO NOT TRANSFUSE*** Please return blood product.
OK
b. If you scan the correct product unit number, it is accepted and you are prompted for the next scan.
9. Scan the product issued.
a. If you scan the wrong product the error message is displayed:Scanned product does not match selected unit. ***DO NOT TRANSFUSE*** Please return blood product.
OK
b. If you scan the correct product, it is accepted and you are prompted for the next scan.
10. Scan the source registration number. If using ISBT symbology, this prompt will not appear.
a. If you scan the wrong source registration number the error message is displayed: Scanned product source does not match selected unit. ***DO NOT TRANSFUSE*** Please return blood product.
OK
b. If you scan the correct source registration number, it is accepted and you are prompted for the next scan.
11. Scan the product blood type.
a. If you scan the wrong product blood type the error message is displayed: Scanned product blood type does not match selected unit. ***DO NOT TRANSFUSE*** Please return blood product.
OK
b. If you scan the correct product blood type, it is accepted and you are prompted for the next scan.
12. Scan the product expiration date/time.
a. If you scan an incorrect product expiration date/time the error message is displayed:
- 213-

Scanned product expiration date does not match selected unit. ***DO NOT TRANSFUSE*** Please return blood product.
OK
b. If you scan the correct product expiration date/time, it is accepted.
13. Scan the user's bar code.
a. If you do not scan the signed-on user's bar code the error message is displayed: Scanned user does not match signed-on user. ***DO NOT TRANSFUSE*** Please return blood product.
OK
b. If you scan the signed-on user's bar code the Pre-Transfusion Checklist is displayed.
14. Check off several entries on the Pre-Transfusion checklist.
15. Start the transfusion by entering a Begin Date/Time. The status of the unit updates to “Transfused”.
16. Document the transfusion and enter BBK Vital Signs.
17. Enter the End Date/Time to end the transfusion. The unit status changes to "Transfused".
18. Reports to print for validation:
Issue/Transfuse Cards Transfusion Report Trans Product to Patient Report Print Specimens (Internal) BBK Product Inquiry BBK Transfusion Inquiry by MRI Print BBK History BBK History Audit Log BBK History Transfusion Inquiry Print One Medical Record Card Unit Inquiry NUR Transfusion Report
___________________________________________________________________
THIS ROUTINE VALIDATED BY: _______________________ DATE: ____________
ACCEPTABLE: ______________________ NOT ACCEPTABLE: _________________
HOSPITAL NAME: ____________________________________________________
- 214-

4.3 Part II. Entering Results on a Product Requiring pooling
Prerequisites:
Select a patient to be used in processing specimens. Enter specimen comments for this patient. If applicable, enter the unique wristband number for the patient.
Select a product for these exercises which requires the pooling of several random units (Example: platelets, cryoprecipitate). The units must be pooled.
The pooled product must have the following settings in the Product Dictionary: Issue only if Ready = N Automatically Ready = N
Order the product with a count of 5 (if the Product Dictionary is set to "Ask Order Count? Y".)
The specimen must be received into the performing lab site.
4.3 Validation Exercise D: Enter/Edit BBK Results
*Note: Some exercises may not be applicable for all procedures
1. Identify the specimen using one of the standard conventions. Before the user can enter results, one or more pop-up windows may display:
Received Specimens Expired Specimens HX Comments/Specimen Comments/Queries Reserved Units (donor directed and autologous) Product Test View Group
Expected Result:
Certain Blood Bank results (ie, identified antibodies and antigens) will display in the HX field in the Enter/Edit Result Screen.
2. If the product ordered has associated tests, these tests will be ordered automatically and will be placed on the same requisition with the ordered product. These product associated tests are defined in the Product Dictionary. (Example: ABO/RH)
Expected Results:The cursor will move to the Result prompt for the first test. The user can now begin to enter results.
3. If an ABO/RH is ordered to confirm the patient's blood type, result the profile. The T-Type tests necessary to determine the patient's ABO/RH may consist of: Anti-A, Anti-B, Anti-AB, Anti-D, Anti-Du, D Control, A cells and B cells. The patient's blood type may now be entered in the blood type test. Depending on how your hospital system is set-up, the blood type can be:
automatically calculated according to your systems blood type calculation and entered as the blood type
user calculated and entered manually. (The system will calculate the type in the background according to your systems blood type calculation and check it against the manual entry.)
4. Enter a blood type which is not consistent with the T-Type expected results.
- 215-

Expected Results:The following warning message appears: "Does not match calculated blood type __. Ok?" Users may still enter the type, but they may not verify it if the Blood Type does not agree with the Historical Blood Type.
5. Enter a blood type which is different from the type on the patient's history file. The system compares the
blood type entered with the history file for this patient.
Expected results:One of the following warning message appears: "Blood type does not match patient's blood type __. Ok?" or "Blood type does not match patient's blood type."
If the user is allowed to override the system's calculated blood type the prompt "Ok?" will appear. Users must have access to "Override BBK History Blood Type" in the Access Dictionary.
6. Enter "Y" at the "Ok?" prompt if you have access to override the warning.
Expected results: You are prevented from verifying the new blood type. The following message appears: "Specimen number: Can't verify BLD TYPE. It does not match history file."
7. Confirm that the user has been set up for "Edit BBK History Blood Type" in the Access Dictionary. This can be accomplished through the special function menu, "Edit BBK History Blood Type" or the "Change Blood Type” routines.
8. To verify the new blood type and make the result part of the blood bank history, edit the BBK History Blood Type for the patient.
Expected results:You are now able to verify the blood type on the specimen.
9. Confirm that the system provides functions that are consistent with your hospital’s procedures. Reports to print for validation:
Override Warning Report Interpreted Blood Type Audit Print Specimens (Internal) Print BBK History Blood Type Change Log BBK History Audit Log Print One Medical Record Card
____________________________________________________________________
THIS ROUTINE VALIDATED BY:_______________________ DATE:__ /__ /__
ACCEPTABLE: __________________NOT ACCEPTABLE:__________________ HOSPITAL NAME: ___________________________________________________
- 216-

4.3 Validation Exercise E: Assign/Unassign Units Routine
If a crossmatch is not necessary before issuing a product type, the unit may be manually assigned to a specific patient. An assignment card can be generated to tag the unit of blood. The assignment of non-crossmatched product types is optional. The unit may be issued with or without the assignment of the unit.
1. Identify the specimen containing the order for the product requiring pooled products such as platelets or cryoprecipitate. (NOTE: For the testing of pooling units, please refer to Section 3.8 POOLING INVENTORY UNITS)
2. The cursor moves to the Product prompt. Identify a product other than the ordered product. The following message appears: "Only products ordered on this specimen are valid here."
3. At the Product prompt, identify the product you want to assign for the specimen.
4. At the Unit number prompt assign a unit of the pooled product (this must be defined as a substitute in the Product Dictionary, i.e. pooled platelets). Identify it using one of the standard methods. Verify that the source, product and status are accurate. The following prompt appears: "Assign/Unassign unit(s) to specimen?". Enter "Y" to file your assignment.
5. If the REQUIRE CURRENT BTYPE prompt on page 4 of the BBK PRODUCT dictionary is set, a check will be performed at the time a unit of the product is selected for crossmatch and/or issue. This check is performed within the timeframe specified by the HOURS prompt. Any specimens collected within this timeframe will be checked for a verified blood type test. If one is not found the user will receive one of the following messages:
The HOURS value is not zero, for the issue routines:"Patient has no verified Blood Type within <HOURS> hours of <DATE> <TIME>."
The HOURS value is nonzero, for unit assignment/crossmatch: "Patient has no verified Blood Type within <HOURS> hours."
The HOURS value is 0, for any routine but Issue by Patient: "Patient has no verified Blood type on the current specimen."
The HOURS value is 0, for the routine Issue by Patient:"Patient has no verified Blood Type on the current specimen(s)."
If the BBK OVERRIDE REQ. CURRENT TESTS prompt in the ACCESS Dictionary is set to "N":"Patient has no blood type within __ hours of <issue date> <issue time>." The user will not be allowed to continue until a blood type test is performed.
If the BBK OVERRIDE REQ. CURRENT TESTS prompt in the ACCESS Dictionary is set to "T" or "B":Patient has no blood type within __ hours of <issue date> <issue time>. Continue?" A "Y" response will allow the user to continue and a comment box will appear. The warning and the comment will appear on the BBK OVERRIDE WARNING REPORT.
6. If the REQUIRE CURRENT ABSC prompt on page 4 of the BBK PRODUCT dictionary is set, a check will be performed at the time a unit of the product is crossmatched and/or issued. This check is performed within the timeframe specified by the HOURS prompt. Any specimens collected within this timeframe will be checked for a verified antibody screen. If one is not found the user will receive the following message:
- 217-

The HOURS value is not zero, for the issue routines:"Patient has no verified Antibody Screen within <HOURS> hours of <DATE><TIME>."
The HOURS value is nonzero, for unit assignment/crossmatch: "Patient has no verified Antibody Screen within <HOURS> hours."
The HOURS value is 0, for any routine but Issue by Patient: "Patient has no verified Blood type on the current specimen."
The HOURS value is 0, for the routine Issue by Patient:"Patient has no verified Antibody Screen on the current specimen(s)."
If the BBK OVERRIDE REQ. CURRENT TESTS prompt in the ACCESS Dictionary is set to "N":"Patient has no blood type within __ hours of <issue date> <issue time>." The user will not be allowed to continue until a blood type test is performed.
If the BBK OVERRIDE REQ. CURRENT TESTS prompt in the ACCESS Dictionary is set to "T" or "B":Patient has no blood type within __ hours of <issue date> <issue time>. Continue?" A "Y" response will allow the user to continue and a comment box will appear. The warning and the comment will appear on the BBK OVERRIDE WARNING REPORT.
NOTE: If the patient does not have a confirmed blood type in their BBK History file or the unit chosen is not compatible with the patients BBK Historical blood type, the following error message is displayed: "Incompatible blood type". The user will not be able to assign this unit to the patient.
7. Reports to print for validation:
Print Specimens (Internal) BBK Product Inquiry Print Assignment Cards Unit Inquiry
______________________________________________________________________
THIS ROUTINE VALIDATED BY:__________________________ DATE:__ /__ /__
ACCEPTABLE: __________________NOT ACCEPTABLE:____________________
HOSPITAL NAME: _____________________________________________________
- 218-

4.3 Validation Exercise F: Issue and Transfuse Units
Units may be issued using the Issue Unit or Issue Unit By Patient Routine. Units may be transfused using the E/E Transfusion Data or Transfuse Units By Patient Routine.
Requirements:
If the Ready Status is used (defined in the Product Dictionary) the units may be issued only if they are at a Ready Status.
Units must have one of the following statuses:
Available Crossmatched Assigned Expired (within cutoff hours) Ready
Units must be the same product type as ordered, or an acceptable substitute as defined in the Product Dictionary.
Unit assignment rule must be followed if one is defined in the Product Dictionary.
If the REQUIRE CURRENT BTYPE prompt on page 4 of the BBK PRODUCT dictionary is set, a check will be performed at the time a unit of the product is selected for crossmatch and/or issue. This check is performed within the timeframe specified by the HOURS prompt. Any specimens collected within this timeframe will be checked for a verified blood type test. If one is not found the user will receive one of the following messages:
The HOURS value is not zero, for the issue routines:
"Patient has no verified Blood Type within <HOURS> hours of <DATE> <TIME>."
The HOURS value is nonzero, for unit assignment/crossmatch:
"Patient has no verified Blood Type within <HOURS> hours."
The HOURS value is 0, for any routine but Issue by Patient:
"Patient has no verified Blood type on the current specimen."
The HOURS value is 0, for the routine Issue by Patient:
"Patient has no verified Blood Type on the current specimen(s)."
If the BBK OVERRIDE REQ. CURRENT TESTS prompt in the ACCESS Dictionary is set to "N":
"Patient has no blood type within __ hours of <issue date> <issue time>." The user will not be allowed to continue until a blood type test is performed.
If the BBK OVERRIDE REQ. CURRENT TESTS prompt in the ACCESS Dictionary is set to "T" or "B":
Patient has no blood type within __ hours of <issue date> <issue time>. Continue?"
- 219-

A "Y" response will allow the user to continue and a comment box will appear. The warning and the comment will appear on the BBK OVERRIDE WARNING REPORT.
If the REQUIRE CURRENT ABSC prompt on page 4 of the BBK PRODUCT dictionary is set, a check will be performed at the time a unit of the product is crossmatched and/or issued. This check is performed within the timeframe specified by the HOURS prompt. Any specimens collected within this timeframe will be checked for a verified antibody screen. If one is not found the user will receive the following message:
The HOURS value is not zero, for the issue routines:
"Patient has no verified Antibody Screen within <HOURS> hours of <DATE><TIME>."
The HOURS value is nonzero, for unit assignment/crossmatch:
"Patient has no verified Antibody Screen within <HOURS> hours."
The HOURS value is 0, for any routine but Issue by Patient:
"Patient has no verified Blood type on the current specimen."
The HOURS value is 0, for the routine Issue by Patient:
"Patient has no verified Antibody Screen on the current specimen(s)."
If the BBK OVERRIDE REQ. CURRENT TESTS prompt in the ACCESS Dictionary is set to "N":
"Patient has no blood type within __ hours of <issue date> <issue time>." The user will not be allowed to continue until a blood type test is performed.
If the BBK OVERRIDE REQ. CURRENT TESTS prompt in the ACCESS Dictionary is set to "T" or "B":
Patient has no blood type within __ hours of <issue date> <issue time>. Continue?" A "Y" response will allow the user to continue and a comment box will appear. The warning and the comment will appear on the BBK OVERRIDE WARNING REPORT.
- 220-

4.3 Exercise F-A. Issue Unit Routine:
1. Identify the specimen requiring the pooled product using one of the standard conventions. (NOTE: For the testing of pooling units, please refer to Section 3.8 POOLING INVENTORY UNITS.)
Expected Results:
Before the user can issue a unit a pop-up window will display entitled HX Comments/Specimen Comments/ Queries if any exist.
2. At the unit prompt, identify a unit which is not the pooled product or an acceptable substitute.
Expected Result:
The following warning message will appear: "Incompatible Product."
3. At the unit prompt, identify a unit that is a different blood type than the patient and is not defined as a compatible blood type in the Blood Type Dictionary.
Expected Result:
Incompatible Blood Type
4. If using the Ready Status, identify a unit which is at an available status.
Expected Result:
The following warning message will display: "Unit must be at Status READY to issue."
5. At the unit prompt, identify a substitute product for the random unit. (Example: For random platelets X5 use the product Pooled Platelets - which consists of 5 random Platelets.)
6. Indicate a valid unit to be issued by entering a "Y" in the Iss? column.
7. Enter a messenger.
8. Enter a card printer and a card form which will be used to print the Issue/Transfuse card.
9. Enter Unit Issue Comments and file.
ISSUE UNIT WITH WRISTBAND:Use this step if your Customer Defined Parameters are set to: BBK Ask Wristband # at Issue? = Y
10. Upon issuing the unit, if your specimen has a wristband number, you will be prompted to enter a wristband number.
If you do not enter the wristband number you will receive the following warning:
WARNING: There is a wristband number entered for this specimen.
The warning will be logged to the Override Warning Report and you will be allowed to issue.
- 221-

If you enter a wristband number that does not match the specimen, you will see the following warning:
WARNING: This does not match previously entered wristband number.
11. Reports to print for validation:
Override Warning Report Issue/Transfuse Cards Print Specimens (Internal) BBK Product Inquiry Unit Inquiry
12. In either the Enter/Edit Transfusion Data Routine identify the patient or specimen filed in step 9. Enter the transfusion date, volume, time when transfusion began and ended, person who transfused the unit and workload function for the transfusing units.
If a transfusion time is entered that is before the collection time of the specimen the following message appears "Transfusion cannot be before collection date/time."
13. If a transfusion Customer Defined Screen is defined in the Customer Defined Parameters Dictionary, enter responses to the queries.
14. Enter transfusion comments.
15. Transfuse the unit.
16. Reports to print for validation:
Issue/Transfuse Cards Transfusion Report Trans Product to Patient Report Print Specimens (Internal) BBK Product Inquiry BBK Transfusion Inquiry by MRI BBK History Inquiry BBK History Audit Log BBK History Transfusion Inquiry Print One Medical Record Card Unit Inquiry
____________________________________________________________________
THIS ROUTINE VALIDATED BY:________________________ DATE:__ /__ /__
ACCEPTABLE: _________________ NOT ACCEPTABLE:___________________ HOSPITAL NAME: ____________________________________________________
- 222-

4.3 Exercise F-B: Issue Unit By Patient Routine:
Prerequisite:
A patient with an ordered, assigned, and or ready pooled product.
1. Identify the patient using one of the standard conventions.
2. A list of available units for issue are displayed on the screen. The sort order for the display is as follows:
AUTOLOGOUS Units Product type
Expiration Date
DONOR DIRECTED Units Product type
Unit Blood Type Expiration date
HOMOLOGOUS Units Product type
Unit blood type Expiration date
3. Indicate which units are to be issued by entering a "Y" in the Iss? column.
4. Enter a messenger.
5. Enter a card printer and a card form which will be used to print the Issue/Transfuse card.
6. Enter Unit Issue Comments.
7. Issue the unit to the Patient.
Expected Result:
The system will ask the user to Enter Transfusion Data.
8. Enter "N" to the Enter Transfusion Data prompt.
9. Reports to print for validation:
Override Warning Report Issue/Transfuse Cards BBK Product Inquiry Print Specimens (Internal) Unit Inquiry
________________________________________________________________
THIS ROUTINE VALIDATED BY:________________________ DATE:__ /__ /__
ACCEPTABLE: _________________ NOT ACCEPTABLE:___________________ HOSPITAL NAME: ____________________________________________________
- 223-

4.3 Exercise F-C: Transfuse Units By Patient Routine:
Prerequisite:
A patient with an issued product that has not yet been transfused. The patient must have a Blood Bank History with an antibody, antigen, or marker
1. Identify the patient using one of the standard conventions.
Expected Result:
A pop-up window will display asking for transfusion default information.
2. A list of available units for transfusion are displayed on the screen. Units on this screen are sorted by unit number order.
3. Enter the transfusion date, volume, time, when the transfusion began and ended, the person who transfused the unit, and the workload function for the transfusing units. As transfusion data is entered a check mark will appear on the left column indicating that the unit has been selected for transfusion.
Expected Result:
If a transfusion date/time is entered that is before the issue date/time, the warning message “Transfused before issued date/time - Ok?" If you put in a transfusion date/time before the collection date/time of the specimen, the error message "Transfusion cannot be before collection date/time."
4. If a transfusion Customer Defined Screen is defined in the Customer Defined Parameters Dictionary, enter responses to the queries.
5. Enter transfusion comments.
6. Transfuse the unit.
7. In the Enter/Edit Transfusion Data routine select the specimen. Select the transfused unit and enter a second time.
8. If a transfusion Customer Defined Screen is defined in the Customer Defined Parameters Dictionary, enter a second set of responses to the queries.
9. Enter a second transfusion comment. File.
10. Reports to print for validation:
Issue/Transfuse Cards Transfusion Report Trans Product to Patient Report Print Specimens (Internal) BBK Product Inquiry BBK Transfusion Inquiry by MRI BBK History Inquiry BBK History Audit Log BBK History Transfusion Inquiry Print One Medical Record Card Unit Inquiry Unit Edit Log
- 224-

_____________________________________________________________________
THIS ROUTINE VALIDATED BY:________________________ DATE:__ /__ /__
ACCEPTABLE: ___________________NOT ACCEPTABLE:__________________
HOSPITAL NAME: ____________________________________________________
- 225-

4.3 Exercise F-D. NUR Process Transfusions Routine:
The following exercise can only be validated if the LIS System Parameter has the BBK/NUR prompt set to Y. Prerequisites:In the Customer-Defined OE/NUR Parameters the Patient Wristband for Issue is set to ACCT# or UNIT#. The settings for the scan parameters determine which fields will need to be scanned before transfusion:Scan BBK Wristband? Unit Identifiers? Blood Type? Expiration Dt/Tm? Verify User?
A patient with an issued unit of a pooled product.
The transfusion data is recorded in the Nursing application and the reports are accessed from the Lab application.
1. Identify a patient and enter your password and/or PIN if required.
2. The patient name and BBK History data, if any, is displayed.
3. A list of units display on the screen sorted by status then product. Only units at the following statuses will display:
Ready - The unit is ready for transfusion to the patient. In BBK, the following unit statuses will be considered: XM Compatible and Ready for crossmatchable products and Assigned for non-crossmatchable products.
Issued - The unit has been issued to the patient. Transfused - The unit has been transfused to the patient. Transfusing - NUR/PCS has sent back at least one set of vitals or the begin date/time to indicate the
transfusion has begun.
4. Select the unit to transfuse.
a. An asterisk is displayed in the "Cosign" field if the product has the 'Co-Signature for NUR Admin?' prompt in the BBK Product dictionary set to Y.
b. An asterisk is displayed in the "Instr" field if the unit has any issue comments.
c. An asterisk is displayed in the "Assoc Data" field if the product has a Test View Group defined and the field "Display At NUR Tx?" is set to Y in the BBK Product Dictionary.
5. Verify the Pre-Transfusion checklist.
If the specimen was collected before the number of hours defined in the BBK Spec Expire Hours parameter in the Custom-Defined Parameters, the error message is displayed: "Warning: Specimen was collected N hours ago. Continue?". Enter "Y" and confirm this message can be overridden.
6. Enter the Co-Signer and PIN # if required. This is determined by the parameter Co-Signature for NUR Admin? in the BBK Product dictionary.
7. Scan the patient wristband.
a. If the wrong wristband number is entered the error message is displayed: Scanned patient wristband does not match selected patient.
- 226-

***DO NOT TRANSFUSE *** Please return blood product.
b. If the correct wristband numbered is entered, the Pre-Transfusion Checklist is displayed.
8. Select one or more items on the checklist and press OK.
9. Document the transfusion and enter BBK Vital Signs. Start the transfusion by entering a Begin Date/Time. The status of the unit updates to “Transfused”.
10. Enter the End Date/Time to end the transfusion. The unit status changes to "Transfused".
11. LAB Reports to print for validation:
Issue/Transfuse Cards Transfusion Report Trans Product to Patient Report Print Specimens (Internal) BBK Product Inquiry BBK Transfusion Inquiry by MRI Print BBK History BBK History Audit Log BBK History Transfusion Inquiry Print One Medical Record Card Unit Inquiry NUR Transfusion Report
___________________________________________________________________
THIS ROUTINE VALIDATED BY: _______________________ DATE: ____________
ACCEPTABLE: ______________________ NOT ACCEPTABLE: _________________
HOSPITAL NAME: ____________________________________________________
- 227-

4.3 Exercise F-E. NUR Process Transfusions Routine with Bar Code Scanning
The following exercise can only be validated if page 1 of the LIS System Parameter has BBK/NUR set to Y.A Bar Code Reader is required for this exercise. Prerequisites:In the LIS System Parameters Dictionary the parameter 'Patient Wristband' is set to ACCNT# or UNIT#, and one or more of the following fields is set to Y: Scan BBK Wristband? Unit Identifiers? Blood Type? Expiration Dt/Tm? Verify User?
A unit of a pooled product is entered into inventory with a Bar Code Scanner. The unit is crossmatched or assigned and issued to a patient.
E. NUR Process Transfusions Routine:
1. Identify the patient and enter your password and/or PIN if required.
2. The patient name and BBK History data, if any, is displayed.
3. A list of available units for transfusion display on the screen. Units on this screen are sorted by status and product.
4. Select the unit to transfuse.
a. An asterisk will display in the 'Cosign' field if the product has the Co-Signature for NUR Admin? Prompt in the BBK Product dictionary set to Y.
b. An asterisk is displayed in the 'Instr' field if the unit has any issue comments.
c. An asterisk is displayed in the 'Assoc Data' field if the product has a Test View Group defined and the field 'Display at NUR Tx?' is set to Y in the BBK Product Dictionary.
5. Enter the Co-Signer and PIN # if required. This is determined by the parameter Co-Signature for NUR Admin? in the BBK Product dictionary.
6. Scan the patient's wristband.
a. If you scan another patient's wristband number the error message is displayed: Scanned patient wristband does not match selected patient. ***DO NOT TRANSFUSE*** Please return blood product.
OK
b. If you scan the correct patient's wristband number, it is accepted and you are prompted for the next scan.
7. Scan the patient's BBK wristband.
a. If you scan another patient's BBK wristband number the error message is displayed: Scanned blood bank wristband does not match selected patient. ***DO NOT TRANSFUSE*** Please return blood product.
- 228-

OK
b. If you scan the correct patient's BBK wristband number, it is accepted and you are prompted for the next scan.
c. If you scan a BBK wristband number and the patient does not have one on file, the error message is displayed:
Cannot verify scan: No blood bank wristband number on file. Continue anyway? Yes/No
8. Scan the product unit number.
a. If you scan the wrong product unit number the error message is displayed: Scanned product unit # does not match selected unit. ***DO NOT TRANSFUSE*** Please return blood product.
OK
b. If you scan the correct product unit number, it is accepted and you are prompted for the next scan.
9. Scan the product issued.
a. If you scan the wrong product the error message is displayed:Scanned product does not match selected unit. ***DO NOT TRANSFUSE*** Please return blood product.
OK
b. If you scan the correct product, it is accepted and you are prompted for the next scan.
10. Scan the source registration number. If using ISBT symbology, this prompt will not appear.
a. If you scan the wrong source registration number the error message is displayed: Scanned product source does not match selected unit. ***DO NOT TRANSFUSE*** Please return blood product.
OK
b. If you scan the correct source registration number, it is accepted and you are prompted for the next scan.
11. Scan the product blood type.
a. If you scan the wrong product blood type the error message is displayed: Scanned product blood type does not match selected unit. ***DO NOT TRANSFUSE*** Please return blood product.
OK
b. If you scan the correct product blood type, it is accepted and you are prompted for the next scan.
12. Scan the product expiration date/time.
a. If you scan an incorrect product expiration date/time the error message is displayed: Scanned product expiration date does not match selected unit. ***DO NOT TRANSFUSE*** Please return blood product.
- 229-

OK
b. If you scan the correct product expiration date/time, it is accepted.
13. Scan the user's bar code.
a. If you do not scan the signed-on user's bar code the error message is displayed: Scanned user does not match signed-on user. ***DO NOT TRANSFUSE*** Please return blood product.
OK
b. If you scan the signed-on user's bar code the Pre-Transfusion Checklist is displayed.
14. Check off several entries on the Pre-Transfusion checklist.
15. Start the transfusion by entering a Begin Date/Time. The status of the unit updates to “Transfused”.
16. Document the transfusion and enter BBK Vital Signs.
17. Enter the End Date/Time to end the transfusion. The unit status changes to "Transfused".
18. Reports to print for validation:
Issue/Transfuse Cards Transfusion Report Trans Product to Patient Report Print Specimens (Internal) BBK Product Inquiry BBK Transfusion Inquiry by MRI Print BBK History BBK History Audit Log BBK History Transfusion Inquiry Print One Medical Record Card Unit Inquiry NUR Transfusion Report
___________________________________________________________________
THIS ROUTINE VALIDATED BY: _______________________ DATE: ____________
ACCEPTABLE: ______________________ NOT ACCEPTABLE: _________________
HOSPITAL NAME: ____________________________________________________
- 230-

4.3 Exercise F-F. Transfuse Units By Patient Routine:
Prerequisite:
A patient with an ordered, crossmatched/assigned, and issued product that has not yet been transfused.
1. Identify the patient using one of the standard conventions.
Expected Result:
A pop-up window will appear displaying the Patient's History. Press the [ESC] key to display theIssued Unit and Product name of units requiring transfusion data.
2. A list of available units for transfusions are displayed on the screen. Units on this screen are sorted by unit number order.
3. Enter the transfusion date, volume, time, when the transfusion began and ended, the person who transfused the unit, and the workload function for the transfusing units. As transfusion data is entered a check mark will appear on the left column indicating that the unit has been selected for transfusion.
If a transfusion date/time is entered that is before the issue date/time the warning message "Transfused before issued date/time - Ok?" If you put in a transfusion date/time before the collection date/time of the specimen the error message "Transfusion cannot be before collection date/time."
4. If a transfusion Customer Defined Screen is defined in the Customer Defined Parameters Dictionary, enter responses to the queries.
5. Enter transfusion comments.
6. Transfuse the unit.
7. In the Enter/Edit Transfusion Data routine select the specimen. Select the unit transfused in Step 6 and enter a second time.
8. If a transfusion Customer Defined Screen is defined in the Customer Defined Parameters Dictionary, enter a second set of responses to the queries.
9. Enter a second transfusion comment. File.
10. Reports to print for validation:
Issue/Transfuse Cards Transfusion Report Trans Product to Patient Report Print Specimens (Internal) BBK Product Inquiry BBK Transfusion Inquiry by MRI Print BBK History BBK History Audit Log BBK History Transfusion Inquiry Print One Medical Record Card Unit Inquiry Unit Edit Log_____________________________________________________________________
- 231-

THIS ROUTINE VALIDATED BY:________________________ DATE:__ /__ /__
ACCEPTABLE: ___________________NOT ACCEPTABLE:__________________
HOSPITAL NAME: ____________________________________________________
- 232-

4.3 Part III. Entering Results on a Product Requiring Components/Substitute Products
Prerequisite:
Select a patient to be used in processing specimens. Order a product that requires components to be made from it. (Example: FFP is made into the component Thawed Plasma). Order an ABO/RH patient specimen. Receive the specimen into the performing lab site. If applicable, enter the unique wristband number for the patient. (Based upon LIS System Parameters the wristband number is unique by medical record number, account number, specimen number or none.)
4.3 Validation Exercise G: Enter/Edit BBK Result
*Note: Some exercises may not be applicable for all procedures.
1. Identify a specimen using one of the standard conventions. Before the user can enter results, one or more pop-up windows may display:
Received Specimens Expired Specimens HX Comments/Specimen Comments/Queries Reserved Units (donor directed and autologous) Product Test View Group
Expected Result:
Certain Blood Bank results (ie. identified antibodies and antigens) will display in the HX field in the Enter/Edit Result Screen if applicable for this patient. Use the left arrow key to proceed.
2. If the product ordered has associated tests, these tests will be ordered automatically and will be placed on the same requisition with the ordered product. These product associated tests are defined in the Product Dictionary. (Example: ABO/RH)
3. The cursor will move to the Result prompt for the first test. The user can now begin to enter results.
11. If an ABO/RH is ordered to confirm the patient's blood type the user may now result the profile. The T-Type tests necessary to determine the patient's ABO/RH may consist of: Anti-A, Anti-B, Anti-AB, Anti-D, Anti-Du, D Control, Reverse A and Reverse B. The patient's blood type may now be entered in the blood type test. Depending on how your hospital system is set-up, the blood type can be:
automatically calculated and entered as type user calculated and entered manually. (The system will calculate the type in the background and check
it against the entry.)
a. Enter a blood type that is not consistent with the calculation based on the T-type results. The following warning message appears: "Does not match calculated blood type_. Ok?" (The Access Dictionary must be defined as ‘Override Blood Type Calc Mismatch? “Y”es to receive this message). Users may still enter the blood type, but they may not verify it if the Blood Type does not agree with the Historical Blood Type.
b. If the user enters a blood type that does not match any of the calculated blood types from the Calculation Dictionary, the follow message appears: “Could not calculate blood type. Ok?”.
c. The system also compares the blood type entered with the history file for this patient. Enter a blood type which is different from the type on the patient's history file. The following warning message
- 233-

appears: "Blood type __ does not match patient's blood type __. Ok?" or "Blood type does not match patient's blood type." If the user is allowed to override the system's calculated blood type the prompt "OK?" will appear. Users must have access to "Override BBK History Blood Type" in the Access Dictionary.
d. Users can enter "Y" at the "Ok?" prompt but they may not verify the new blood type. The following message appears: "Can't verify BLD TYPE. It does not match history file."
e. To verify the new blood type and make the result part of the blood bank history users must have access to "Edit BBK History Blood Type" in the Access Dictionary. This can be accomplished through the special function key < >, "Edit BBK History Blood Type" or the "Change Blood Type Routines.
12. Reports to print for validation:
Override Warning Report Interpreted Blood Type Audit Print Specimens (Internal) BBK History Inquiry BBK History Audit Log Print One Medical Record Card
____________________________________________________________________
THIS ROUTINE VALIDATED BY:________________________ DATE:__ /__ /__
ACCEPTABLE: __________________ NOT ACCEPTABLE:__________________
HOSPITAL NAME: ___________________________________________________
- 234-

4.3 Validation Exercise H: Assign/Unassign Units Routine
Use the Make Components Routine to make a unit into components, for example a unit of FFP into components of Thawed Plasma. (NOTE: For the testing of making components on a unit, please refer to Section 3.6 INVENTORY COMPONENT PRODUCTION.) If a crossmatch is not necessary before issuing a certain type of product, the unit may be manually assigned to a specific patient. An assignment card can be generated to tag the unit of blood. The assignment of non-crossmatched product type is optional. The unit may be issued with or without the assignment of the unit.
1. Identify the specimen containing the order for the product requiring components to be made. (FFP into Thawed Plasma, etc).
2. The cursor moves to the Product prompt. Identify a product other than the ordered product. The following message appears: "Only products ordered on this specimen are valid here.”
3. At the Product prompt, identify the product you want to assign for the specimen.
4. At the Unit Number prompt assign a unit (this can be either a random product or a pooled product provided it is listed as a substitute product in the Product Dictionary). Identify it using one of the standard methods. Verify that the source, product and status are accurate. Perform a Unit Inquiry for verification. The following prompt appears: "Assign/Unassign unit(s) to specimen?". Enter "Y" to file your assignment.
5. If the REQUIRE CURRENT BTYPE prompt on page 4 of the BBK PRODUCT dictionary is set, a check will be performed at the time a unit of the product is selected for crossmatch and/or issue. This check is performed within the timeframe specified by the HOURS prompt. Any specimens collected within this timeframe will be checked for a verified blood type test. If one is not found the user will receive one of the following messages:
The HOURS value is not zero, for the issue routines:
"Patient has no verified Blood Type within <HOURS> hours of <DATE> <TIME>."
The HOURS value is nonzero, for unit assignment/crossmatch:
"Patient has no verified Blood Type within <HOURS> hours."
The HOURS value is 0, for any routine but Issue by Patient:
"Patient has no verified Blood type on the current specimen."
The HOURS value is 0, for the routine Issue by Patient:
"Patient has no verified Blood Type on the current specimen(s)."
If the BBK OVERRIDE REQ. CURRENT TESTS prompt in the ACCESS Dictionary is set to "N":
"Patient has no blood type within __ hours of <issue date> <issue time>." The user will not be allowed to continue until a blood type test is performed.
If the BBK OVERRIDE REQ. CURRENT TESTS prompt in the ACCESS Dictionary is set to "T" or "B":
- 235-

Patient has no blood type within __ hours of <issue date> <issue time>. Continue?" A "Y" response will allow the user to continue and a comment box will appear. The warning and the comment will appear on the BBK OVERRIDE WARNING REPORT.
6. If the REQUIRE CURRENT ABSC prompt on page 4 of the BBK PRODUCT dictionary is set, a check will be performed at the time a unit of the product is crossmatched and/or issued. This check is performed within the timeframe specified by the HOURS prompt. Any specimens collected within this timeframe will be checked for a verified antibody screen. If one is not found the user will receive the following message:
The HOURS value is not zero, for the issue routines:
"Patient has no verified Antibody Screen within <HOURS> hours of <DATE><TIME>."
The HOURS value is nonzero, for unit assignment/crossmatch:
"Patient has no verified Antibody Screen within <HOURS> hours."
The HOURS value is 0, for any routine but Issue by Patient:
"Patient has no verified Blood type on the current specimen."
The HOURS value is 0, for the routine Issue by Patient:
"Patient has no verified Antibody Screen on the current specimen(s)."
If the BBK OVERRIDE REQ. CURRENT TESTS prompt in the ACCESS Dictionary is set to "N":
"Patient has no blood type within __ hours of <issue date> <issue time>." The user will not be allowed to continue until a blood type test is performed.
If the BBK OVERRIDE REQ. CURRENT TESTS prompt in the ACCESS Dictionary is set to "T" or "B":
Patient has no blood type within __ hours of <issue date> <issue time>. Continue?" A "Y" response will allow the user to continue and a comment box will appear. The warning and the comment will appear on the BBK OVERRIDE WARNING REPORT.
7. Reports to print for validation:
Print Specimens (Internal) Print Assignment Cards Unit Inquiry
____________________________________________________________________
THIS ROUTINE VALIDATED BY:________________________ DATE:__ /__ /__
ACCEPTABLE:________________ NOT ACCEPTABLE:____________________ HOSPITAL NAME: ___________________________________________________
- 236-

4.3 Validation Exercise I: Issue and Transfuse Units
Units may be issued using the Issue Unit or Issue Unit By Patient Routine. Units may be transfused using the E/E Transfusion Data or Transfuse Units By Patient Routine.
Requirements:
1. If the Ready Status is used (defined in the Product Dictionary) the units may be issued only if they are at a Ready Status.
2. Units must have one of the following statuses:
available crossmatched assigned expired (within cutoff hours) ready
3. Units must be the same product type or an acceptable substitute as defined in the Product Dictionary.
4. Unit assignment rule must be followed if one is defined in the Product Dictionary.
5. Antigens and Antibodies on the unit and on the patient's specimen must not conflict. If they do the following warning message will be displayed: "Unit has incompatible antigens:___ Ok?"
6. Reserved units must be crossmatched or assigned. If not the following warning message will be displayed: "Crossmatch data incomplete for this unit."
7. If the REQUIRE CURRENT BTYPE prompt on page 4 of the BBK PRODUCT dictionary is set, a check will be performed at the time a unit of the product is selected for crossmatch and/or issue. This check is performed within the timeframe specified by the HOURS prompt. Any specimens collected within this timeframe will be checked for a verified blood type test. If one is not found the user will receive one of the following messages:
The HOURS value is not zero, for the issue routines:
"Patient has no verified Blood Type within <HOURS> hours of <DATE> <TIME>."
The HOURS value is nonzero, for unit assignment/crossmatch:
"Patient has no verified Blood Type within <HOURS> hours."
The HOURS value is 0, for any routine but Issue by Patient:
"Patient has no verified Blood type on the current specimen."
The HOURS value is 0, for the routine Issue by Patient:
"Patient has no verified Blood Type on the current specimen(s)."
If the BBK OVERRIDE REQ. CURRENT TESTS prompt in the ACCESS Dictionary is set to "N":
"Patient has no blood type within __ hours of <issue date> <issue time>." The user will not be allowed to continue until a blood type test is performed.
- 237-

If the BBK OVERRIDE REQ. CURRENT TESTS prompt in the ACCESS Dictionary is set to "T" or "B":
Patient has no blood type within __ hours of <issue date> <issue time>. Continue?" A "Y" response will allow the user to continue and a comment box will appear. The warning and the comment will appear on the BBK OVERRIDE WARNING REPORT.
8. If the REQUIRE CURRENT ABSC prompt on page 4 of the BBK PRODUCT dictionary is set, a check will be performed at the time a unit of the product is crossmatched and/or issued. This check is performed within the timeframe specified by the HOURS prompt. Any specimens collected within this timeframe will be checked for a verified antibody screen. If one is not found the user will receive the following message:
The HOURS value is not zero, for the issue routines:
"Patient has no verified Antibody Screen within <HOURS> hours of <DATE><TIME>."
The HOURS value is nonzero, for unit assignment/crossmatch:
"Patient has no verified Antibody Screen within <HOURS> hours."
The HOURS value is 0, for any routine but Issue by Patient:
"Patient has no verified Blood type on the current specimen."
The HOURS value is 0, for the routine Issue by Patient:
"Patient has no verified Antibody Screen on the current specimen(s)."
If the BBK OVERRIDE REQ. CURRENT TESTS prompt in the ACCESS Dictionary is set to "N":
"Patient has no blood type within __ hours of <issue date> <issue time>." The user will not be allowed to continue until a blood type test is performed.
If the BBK OVERRIDE REQ. CURRENT TESTS prompt in the ACCESS Dictionary is set to "T" or "B":
Patient has no blood type within __ hours of <issue date> <issue time>. Continue?" A "Y" response will allow the user to continue and a comment box will appear. The warning and the comment will appear on the BBK OVERRIDE WARNING REPORT.
1.
- 238-

4.3 Validation Exercise I-A: Issue Unit Routine:
NOTE: If the Ready Status is used (defined in the Product Dictionary) the units may be issued only if they are at a Ready Status.
1. Identify a specimen requiring the component product, using one of the standard conventions. (NOTE: For the testing of making components, on a unit, please refer to Section 3.6 INVENTORY COMPONENT PRODUCTION.
Expected Result:
Before the user can issue a unit a pop-up window may display if certain criteria met (Example: HX Comments/Specimen Comments/Queries/Reserved Units).
2. At the unit prompt, identify a unit which is not the component/substitute product.
Expected Result:
The following warning message will display: "Incompatible Product."
3. If using the Ready status, identify a unit which is at a status of available.
Expected result:
The following warning message will display: "Unit must be at status READY to issue."
4. At the unit prompt, identify a substitute product for the ordered product. (Example: thawed plasma for the ordered FFP).NUR
5. Confirmation message “Issue?” should appear. Enter “Y” and issue the unit to the patient.
6. After issue, confirm that the message “Enter Transfusion Data?” appears. Enter “N.” ISSUE UNIT WITH WRISTBAND: Use this step if your Customer Defined Parameters are set to: BBK Ask Wristband at Issue? = Y. 7. Upon issuing the unit, if your specimen has a wristband number, you will be prompted to enter a wristband number.
If you do not enter the wristband number you will receive the following warning:WARNING: There is a wristband number entered for this specimen.
The warning will be logged to the Override Warning Report and you will be allowed to Issue.
If you enter a wristband number that does not match the specimen, you will see the following warning:WARNING: This does not match previously entered wristband number.
The warning will be logged to the Override Warning Report and you will be allowed to Issue.
8. Reports to print for validation:
Override Warning Report Issue/Transfuse Cards
- 239-

Print Specimens (Internal) BBK Product Inquiry Unit Inquiry
____________________________________________________________________
THIS ROUTINE VALIDATED BY:________________________ DATE:__ /__ /__
ACCEPTABLE:________________ NOT ACCEPTABLE:____________________ HOSPITAL NAME: ___________________________________________________
- 240-

4.3 Validation Exercise I-B: Issue Unit By Patient Routine:
Note: For units to be issued via this routine, regardless of whether they are reserved as autologous or donor directed units, they must all be assigned or crossmatched to the specimen.
1. Identify a patient using one of the standard conventions.
2. A list of available units for issue are displayed on the screen. The sort order for the display is as follows:
AUTOLOGOUS Units Product type
Expiration date
DONOR DIRECTED Units Product type
Unit blood type Expiration date
HOMOLOGOUS Units Product type
Unit blood type Expiration date
3. Indicate which units are to be issued by entering a "Y" in the Iss? column.
4. Enter a messenger.
5. Enter a card printer which will be used to print the Issue/Transfuse card.
6. Enter Unit Issue Comments.
7. The confirmation message “Issue?” should appear. Enter “Y” and issue the unit to the patient.
Expected Result:
The system will ask the user "Enter Transfusion Data?".
8. Enter "N" to the Enter/Edit Transfusion Data prompt.
9. Reports to print for validation:
Override Warning Report Issue/Transfuse Cards Print Specimens (Internal) BBK Product Inquiry Unit Inquiry
____________________________________________________________________
THIS ROUTINE VALIDATED BY:________________________ DATE:__ /__ /__
ACCEPTABLE:________________ NOT ACCEPTABLE:____________________ HOSPITAL NAME: ___________________________________________________
- 241-

4.3 Validation Exercise I-C: Transfuse Units By Patient Routine:
1. Identify the patient using one of the standard conventions.
Expected Result:
A pop-up window will appear displaying the Patient's History. Press the left arrow key to display the Issued Unit and Product name of units requiring transfusion data.
2. A list of available units for transfusion are displayed on the screen. Units on this screen are sorted by unit number order.
3. If the user is in an access group with the prompt Allow Defaults for Transfusion? Set to "Y", a pop-up box will appear where users can enter in default transfusion information. Any entry as a default which does not comply with the below will keep the information from defaulting in. For testing purposes enter through the fields in this box.
4. Enter the transfusion date, volume, time, when the transfusion began and ended, the person who transfused the unit, and workload function for the transfusing units. As transfusion data is entered a check mark will appear on the left column indicating that the unit has been selected for transfusion.
If a transfusion date/time is entered that is before the collection date/time of the specimen the error message "Transfusion cannot be before collection date/time."
Was this message received?_____
If a transfusion date/time is entered that is before the issue date/time of the unit, the warning message "Transfused before issued date/time - Ok?"
Was this message received?_____
5. If a transfusion Customer Defined Screen is defined in the Customer Defined Parameters Dictionary, enter responses to the queries.
6. Enter transfusion comments.
7. Transfuse the unit.
8. In the Enter/Edit Transfusion Data routine select the specimen. Select the unit transfused in Step 6 and enter a second time.
9. If a transfusion Customer Defined Screen is defined in the Customer Defined Parameters Dictionary, enter a second set of responses to the queries.
10. Enter a second transfusion comment. File.
11. Reports to print for validation:
Issue/Transfuse Cards Transfusion Report Trans Product to Patient Report Print Specimens (Internal) BBK Product Inquiry BBK Transfusion Inquiry by MRI BBK History Inquiry
- 242-

BBK History Audit Log BBK History Transfusion Inquiry Print One Medical Record Card Unit Inquiry Unit Edit Log
____________________________________________________________________
THIS ROUTINE VALIDATED BY:________________________ DATE:__ /__ /__
ACCEPTABLE:_________________NOT ACCEPTABLE:____________________ HOSPITAL NAME: ____________________________________________________
- 243-

4.3 Validation Exercise I-D. NUR Process Transfusions Routine:
The following exercise can only be validated if the LIS System Parameter has the BBK/NUR prompt set to Y. Prerequisites:In the LIS System Parameters the Patient Wristband for Issue is set to ACCT# or UNIT#. The settings for the scan parameters determine which fields will need to be scanned before transfusion: Scan BBK Wristband? Unit Identifiers? Blood Type? Expiration Dt/Tm? Verify User?
A patient with an issued unit of a substitute component product.
The transfusion data is recorded in the Nursing application and the reports are accessed from the Lab application.
1. Identify a patient and enter your password and/or PIN if required.
2. The patient name and BBK History data, if any, is displayed.
3. A list of units display on the screen sorted by status then product. Only units at the following statuses will display:
Ready - The unit is ready for transfusion to the patient. In BBK, the following unit statuses will be considered: XM Compatible and Ready for crossmatchable products and Assigned for non-crossmatchable products.
Issued - The unit has been issued to the patient. Transfused - The unit has been transfused to the patient. Transfusing - NUR/PCS has sent back at least one set of vitals or the begin date/time to indicate the
transfusion has begun.
4. Select the unit to transfuse.
a. An asterisk is displayed in the "Cosign" field if the product has the 'Co-Signature for NUR Admin?' prompt in the BBK Product dictionary set to Y.
b. An asterisk is displayed in the "Instr" field if the unit has any issue comments.
c. An asterisk is displayed in the "Assoc Data" field if the product has a Test View Group defined and the field "Display At NUR Tx?" is set to Y in the BBK Product Dictionary.
5. Verify the Pre-Transfusion checklist.
If the specimen was collected before the number of hours defined in the BBK Spec Expire Hours parameter in the Custom-Defined Parameters, the error message is displayed: "Warning: Specimen was collected N hours ago. Continue?". Enter "Y" and confirm this message can be overridden.
6. Enter the Co-Signer and PIN # if required. This is determined by the parameter Co-Signature for NUR Admin? in the BBK Product dictionary.
7. Scan the patient wristband.
a. If the wrong wristband number is entered the error message is displayed:
- 244-

Scanned patient wristband does not match selected patient. ***DO NOT TRANSFUSE *** Please return blood product.
b. If the correct wristband numbered is entered, the Pre-Transfusion Checklist is displayed.
8. Select one or more items on the checklist and press OK.
9. Document the transfusion and enter BBK Vital Signs. Start the transfusion by entering a Begin Date/Time. The status of the unit updates to “Transfused”.
10. Enter the End Date/Time to end the transfusion. The unit status changes to "Transfused".
11. LAB Reports to print for validation:
Issue/Transfuse Cards Transfusion Report Trans Product to Patient Report Print Specimens (Internal) BBK Product Inquiry BBK Transfusion Inquiry by MRI Print BBK History BBK History Audit Log BBK History Transfusion Inquiry Print One Medical Record Card Unit Inquiry NUR Transfusion Report
___________________________________________________________________
THIS ROUTINE VALIDATED BY: _______________________ DATE: ____________
ACCEPTABLE: ______________________ NOT ACCEPTABLE: _________________
HOSPITAL NAME: ____________________________________________________
- 245-

4.3 Validation Exercise I-E. NUR Process Transfusions Routine with Bar Code Scanning
The following exercise can only be validated if page 1 of the LIS System Parameter has BBK/NUR set to Y.
A Bar Code Reader is required for this exercise. Prerequisites:
In the LIS System Parameters Dictionary the parameter 'Patient Wristband' is set to ACCNT# or UNIT#, and one or more of the following fields is set to Y:
Scan BBK Wristband? Unit Identifiers? Blood Type? Expiration Dt/Tm? Verify User?
A unit of a substitute/component product is entered into inventory with a Bar Code Scanner. The unit is crossmatched or assigned and issued to a patient.
1. Identify the patient and enter your password and/or PIN if required.
2. The patient name and BBK History data, if any, is displayed.
3. A list of available units for transfusion display on the screen. Units on this screen are sorted by status and product.
4. Select the unit to transfuse.
a. An asterisk will display in the 'Cosign' field if the product has the Co-Signature for NUR Admin? Prompt in the BBK Product dictionary set to Y.
b. An asterisk is displayed in the 'Instr' field if the unit has any issue comments.c. An asterisk is displayed in the 'Assoc Data' field if the product has a Test View Group defined
and the field 'Display at NUR Tx?' is set to Y in the BBK Product Dictionary.
5. Enter the Co-Signer and PIN # if required. This is determined by the parameter Co-Signature for NUR Admin? in the BBK Product dictionary.
6. Scan the patient's wristband.
a. If you scan another patient's wristband number the error message is displayed:
Scanned patient wristband does not match selected patient. ***DO NOT TRANSFUSE*** Please return blood product.
OK
b. If you scan the correct patient's wristband number, it is accepted and you are prompted for the next scan.
7. Scan the patient's BBK wristband.
a. If you scan another patient's BBK wristband number the error message is displayed:
Scanned blood bank wristband does not match selected patient. ***DO NOT TRANSFUSE***
- 246-

Please return blood product. OK
b. If you scan the correct patient's BBK wristband number, it is accepted and you are prompted for the next scan.
c. If you scan a BBK wristband number and the patient does not have one on file, the error message is displayed:
Cannot verify scan: No blood bank wristband number on file. Continue anyway? Yes/No
8. Scan the product unit number.
a. If you scan the wrong product unit number the error message is displayed:
Scanned product unit # does not match selected unit. ***DO NOT TRANSFUSE*** Please return blood product.
OK
b. If you scan the correct product unit number, it is accepted and you are prompted for the next scan.
9. Scan the product issued.
a. If you scan the wrong product the error message is displayed:
Scanned product does not match selected unit. ***DO NOT TRANSFUSE*** Please return blood product.
OK
b. If you scan the correct product, it is accepted and you are prompted for the next scan.
10. Scan the source registration number. If using ISBT symbology, this prompt will not appear.
a. If you scan the wrong source registration number the error message is displayed:
Scanned product source does not match selected unit. ***DO NOT TRANSFUSE*** Please return blood product.
OK
b. If you scan the correct source registration number, it is accepted and you are prompted for the next scan.
11. Scan the product blood type.
a. If you scan the wrong product blood type the error message is displayed:
Scanned product blood type does not match selected unit. ***DO NOT TRANSFUSE*** Please return blood product.
OK
b. If you scan the correct product blood type, it is accepted and you are prompted for the next scan.
- 247-

12. Scan the product expiration date/time.
a. If you scan an incorrect product expiration date/time the error message is displayed:
Scanned product expiration date does not match selected unit. ***DO NOT TRANSFUSE*** Please return blood product.
OK
b. If you scan the correct product expiration date/time, it is accepted.
13. Scan the user's bar code.
a. If you do not scan the signed-on user's bar code the error message is displayed:
Scanned user does not match signed-on user. ***DO NOT TRANSFUSE*** Please return blood product.
OK
b. If you scan the signed-on user's bar code the Pre-Transfusion Checklist is displayed.
14. Check off several entries on the Pre-Transfusion checklist.
15. Start the transfusion by entering a Begin Date/Time. The status of the unit updates to “Transfused”.
16. Document the transfusion and enter BBK Vital Signs
17. Enter the End Date/Time to end the transfusion. The unit status changes to "Transfused".
18. Reports to print for validation:
Issue/Transfuse Cards Transfusion Report Trans Product to Patient Report Print Specimens (Internal) BBK Product Inquiry BBK Transfusion Inquiry by MRI Print BBK History BBK History Audit Log BBK History Transfusion Inquiry Print One Medical Record Card Unit Inquiry NUR Transfusion Report
___________________________________________________________________
THIS ROUTINE VALIDATED BY: _______________________ DATE: ____________
ACCEPTABLE: ______________________ NOT ACCEPTABLE: _________________
HOSPITAL NAME: ____________________________________________________
- 248-

4.3 Part IV. Entering Results on a Product Requiring a Crossmatch
Prerequisites:
Select a patient to be used in processing a specimen who has a History blood type other than O Positive. Order a product that requires a crossmatch (Example: Packed Cells, Whole Blood). Order the product with a count of 2 (if Product Dictionary is set-up to ask order count "Y"). Receive the specimen into the performing lab site. If applicable, enter the unique wristband number for the patient. (Based on LIS System Parameters the wristband number is unique by medical record number, account number specimen number or none.)
4.3 Validation Exercise J: Enter/Edit BBK Results
*Note: Some exercises may not be applicable for all procedures.
1. Identify the specimen using one of the standard conventions. (Before the user can enter results, one or more pop-up windows may display:
Received Specimens Expired Specimens HX Comments/Specimen Comments/Queries Reserved Units (donor directed and autologous) Product Test View Group
Expected Result:
Certain blood bank data (ie. identified antibodies and antigens) will display in the HX field in the Enter/Edit Result Screen, if applicable for this patient. Use the left arrow key to proceed.
2. If the product ordered has associated tests, these tests will be ordered automatically and will be placed on the same requisition with the ordered product. These product associated tests are defined in the Product Dictionary. (Example: ABO/RH, Antibody Screen, Crossmatch).
3. The cursor will move to the Result prompt for the first test. The user can now begin to enter results.
4. If an ABO/RH is ordered to confirm the patient's blood type the user may now result the profile. The T-Type tests necessary to determine the patient's ABO/RH may consist of: Anti-A, Anti-B, Anti-AB, Anti-D, Anti-Du, D Control, Reverse A and Reverse B. The patient's blood type may now be entered in the blood type test. Depending on how the Calculation Dictionary is set-up, the blood type can be:
automatically calculated and entered as type user calculated and entered manually. (The system will calculate the type in the background and check
it against the entry.)
a. Enter a blood type which is not consistent with the T-Type expected results. The following warning message appears: "Does not match calculated blood type __. Ok?" Users may still enter the type, but they may not verify it if the Blood Type does not agree with the Historical Blood Type.
b. The system also compares the blood type entered with the history file for this patient. Enter a blood type which is different from the type on the patient's history file. The following warning message appears: "Blood type ___does not match patient's blood type __. Ok?" or "Blood type does not match patient's blood type." If the user is allowed to override the system's calculated blood type the prompt "Ok?" will appear. Users must have access to "Override BBK History Blood Type" in the Access Dictionary.
- 249-

c. Users can enter "Y" at the "Ok?" prompt but they may not verify the new blood type. The following message appears: "Can't verify BLD TYPE. It does not match history file."
d. To verify the new blood type and make the result part of the blood bank history users must have access to "Edit BBK History Blood Type" in the Access Dictionary. This can be accomplished through the special function menu, "Edit BBK History Blood Type" or the "Change Blood Type" Routines.
5. If an Antibody Screen is ordered the user may result the profile now. The T-Type test necessary to result the Antibody Screen may consist of Screening Cells I, II, and III at Immediate Spin, 37 degrees, and Anti-human Globulin phases. The Interpretation prompt is hard-coded and does not need to be set up as a T-test. In order to result an Antibody Screen, the user must use their right arrow key to access a second screen that contains the T-tests that are included in the Antibody Screen. The interpretation can be resulted as positive or negative.
a. Depending on how the Test Dictionary is set up for the Antibody Screen, a negative or positive result may initiate the evaluation of an Order Group. Typically, a positive Antibody Screen would be set up to reflex add an Antibody Identification.
b. Result the Antibody Screen as positive. You should see an "o" in the action column indicating that an Order Group is being evaluated. File and Verify the result. You will see the message "Evaluating reflex orders: ___". Most likely, there will be an Order group set up to add an Antibody ID test.
6. In order to Result the Antibody ID, the user must use their right arrow key to enter another screen. At the Cell Panel prompt, the user can perform a Lookup into the Cell Panel Dictionary and choose the panel they would like to result. The lot #, Expiration Date, and Manufacturer will automatically default in (from the Cell Panel Dictionary). Enter an Antibody on the patient.
7. In order to result the Crossmatch, the user must first select a unit to crossmatch to the patient. At the product prompt type in the unit number of the unit.
8. If the REQUIRE CURRENT BTYPE prompt on page 4 of the BBK PRODUCT dictionary is set, a check will be performed at the time a unit of the product is selected for crossmatch and/or issue. This check is performed within the timeframe specified by the HOURS prompt. Any specimens collected within this timeframe will be checked for a verified blood type test. If one is not found the user will receive one of the following messages:
The HOURS value is not zero, for the issue routines:
"Patient has no verified Blood Type within <HOURS> hours of <DATE> <TIME>."
The HOURS value is nonzero, for unit assignment/crossmatch:
"Patient has no verified Blood Type within <HOURS> hours."
The HOURS value is 0, for any routine but Issue by Patient:
"Patient has no verified Blood type on the current specimen."
The HOURS value is 0, for the routine Issue by Patient:
"Patient has no verified Blood Type on the current specimen(s)."
If the BBK OVERRIDE REQ. CURRENT TESTS prompt in the ACCESS Dictionary is set to "N":
- 250-

"Patient has no blood type within __ hours of <issue date> <issue time>." The user will not be allowed to continue until a blood type test is performed.
If the BBK OVERRIDE REQ. CURRENT TESTS prompt in the ACCESS Dictionary is set to "T" or "B":
Patient has no blood type within __ hours of <issue date> <issue time>. Continue?" A "Y" response will allow the user to continue and a comment box will appear. The warning and the comment will appear on the BBK OVERRIDE WARNING REPORT.
9. If the REQUIRE CURRENT ABSC prompt on page 4 of the BBK PRODUCT dictionary is set, a check will be performed at the time a unit of the product is crossmatched and/or issued. This check is performed within the timeframe specified by the HOURS prompt. Any specimens collected within this timeframe will be checked for a verified antibody screen. If one is not found the user will receive the following message:
The HOURS value is not zero, for the issue routines:
"Patient has no verified Antibody Screen within <HOURS> hours of <DATE><TIME>."
The HOURS value is nonzero, for unit assignment/crossmatch:
"Patient has no verified Antibody Screen within <HOURS> hours."
The HOURS value is 0, for any routine but Issue by Patient:
"Patient has no verified Blood type on the current specimen."
The HOURS value is 0, for the routine Issue by Patient:
"Patient has no verified Antibody Screen on the current specimen(s)."
If the BBK OVERRIDE REQ. CURRENT TESTS prompt in the ACCESS Dictionary is set to "N":
"Patient has no blood type within __ hours of <issue date> <issue time>." The user will not be allowed to continue until a blood type test is performed.
If the BBK OVERRIDE REQ. CURRENT TESTS prompt in the ACCESS Dictionary is set to "T" or "B":
Patient has no blood type within __ hours of <issue date> <issue time>. Continue?" A "Y" response will allow the user to continue and a comment box will appear. The warning and the comment will appear on the BBK OVERRIDE WARNING REPORT.
10. If the patient does not have a blood type in their history and the blood type during this session has not been verified, the following message will appear, "Missing blood type on patient." The user will not be able to crossmatch a unit to the patient until a verified blood type has been filed. Users can use the Verify function available on the special function menu to verify the blood type.
a. After the unit has been selected, a pop-up screen will show unit information. Verify that this information is compatible with the patient you are crossmatching to the unit. The system will ask "Ok?" Respond to this with "Y" and you will now be able to result the
- 251-

crossmatch tests. Respond to this with "N" and the user will be able to enter in another unit number or accept the one just entered.
b. Enter the results of the T-tests. If there are required tests listed for the Crossmatch in the Test Dictionary, the system will display the message, "Required test ___ not resulted. Ok?". If the user responds "Y", the system will accept the interpretation and continue. If the user responds with "N", the system will return back to the prompt and not allow the user to enter the interpretation until the required T-tests have been resulted.
NOTE: A default crossmatch test can be saved in the patient's Blood Bank history file. When ordering products the system uses this crossmatch test's components to override those for the crossmatch test in the Product Dictionary. If there is a Default Crossmatch test on the patient's history verify that the default crossmatch test's components override those for the crossmatch test in the Product dictionary.
c. Enter the interpretation as Y (Yes), N (No), P (Presumed Compatible), or L (Least Incompatible). If the result entered does not match the calculated result, the following message will appear "[X] Result does not match calculated (Z). Ok?" If the user responds "Y", the system will accept the interpretation and continue. If the user responds with "N", the system returns back to the prompt and allows the user to enter the interpretation again.
d. If the unit is not compatible (N) and the Test Dictionary (for the Crossmatch) has been set up to Ask or Automatically order another crossmatch, verify that this occurs.
11. For the other crossmatch, enter a unit which has a different blood type than the patient’s blood type. Confirm that the unit information pops up, as well as the “Ok?” but if you say “Y” the message “Blood types are not compatible” appears.
12. Reports to print for validation:
Override Warning Report Interpreted Blood Type Audit Antibody/Antigen Id Report Print Specimens (Internal) BBK Product Inquiry Print BBK History BBK History Audit Log Unit Inquiry
____________________________________________________________________
THIS ROUTINE VALIDATED BY:________________________ DATE:__ /__ /__ ACCEPTABLE: _____________________NOT ACCEPTABLE:_______________ HOSPITAL NAME: ___________________________________________________
- 252-

4.3 Validation Exercise K: Issue and Transfuse Units
Prerequisite: A patient with two current compatible crossmatches, at least one Antibody identified, and a wristband number defined.
Exercise K-A: Issue Units
1. Identify a specimen using one of the standard conventions.
2. If the unit was crossmatched to the patient the unit will be displayed on the screen.
3. Enter "Y" to issue. If the patient has antibodies and the unit was never tested for the associated antigens, the following warning message is displayed "Unit not tested for incompatible antigens ________. Ok?." Enter “Y” and confirm that this message can be overridden.
Note: For the above warning message to appear, the Antibody Dictionary must be set up to do this.
4. Enter a card printer which will be used to print the Issue/Transfuse card.
5. Enter Unit Issue Comments and file.
6. The message “Enter transfusion data?” should appear. Enter “N.”
ISSUE UNIT WITH WRISTBAND:Use this step if your Customer Defined Parameters are set to: BBK Ask Wristband at Issue? = Y.
7. Upon issuing the unit, if your specimen has a wristband number, you will be prompted to enter a wristband number.
If you do not enter the wristband number you will receive the following warning:WARNING: There is a wristband number entered for this specimen.
If you enter a wristband number that does not match the specimen, you will see the following warning:
WARNING: This does not match previously entered wristband number.
8. Reports to print for validation:
Override Warning Report Print Specimens (Internal) BBK Product Inquiry Print BBK History BBK History Audit Log Print One Medical Record Card Unit Inquiry
____________________________________________________________________
THIS ROUTINE VALIDATED BY:________________________ DATE:__ /__ /__ ACCEPTABLE: _____________________NOT ACCEPTABLE:_______________ HOSPITAL NAME: ___________________________________________________
- 253-

4.3 Exercise K-B: Issue Units By Patient Routine:
Note: If the REQUIRE CURRENT BTYPE prompt on page 4 of the BBK PRODUCT dictionary is set, a check will be performed at the time a unit of the product is selected for crossmatch and/or issue. This check is performed within the timeframe specified by the HOURS prompt. Any specimens collected within this timeframe will be checked for a verified blood type test. If one is not found the user will receive one of the following messages:
The HOURS value is not zero, for the issue routines:
"Patient has no verified Blood Type within <HOURS> hours of <DATE> <TIME>."
The HOURS value is nonzero, for unit assignment/crossmatch:
"Patient has no verified Blood Type within <HOURS> hours."
The HOURS value is 0, for any routine but Issue by Patient:
"Patient has no verified Blood type on the current specimen."
The HOURS value is 0, for the routine Issue by Patient:
"Patient has no verified Blood Type on the current specimen(s)."
If the BBK OVERRIDE REQ. CURRENT TESTS prompt in the ACCESS Dictionary is set to "N":
"Patient has no blood type within __ hours of <issue date> <issue time>." The user will not be allowed to continue until a blood type test is performed.
If the BBK OVERRIDE REQ. CURRENT TESTS prompt in the ACCESS Dictionary is set to "T" or "B":
Patient has no blood type within __ hours of <issue date> <issue time>. Continue?" A "Y" response will allow the user to continue and a comment box will appear. The warning and the comment will appear on the BBK OVERRIDE WARNING REPORT.
If the REQUIRE CURRENT ABSC prompt on page 4 of the BBK PRODUCT dictionary is set, a check will be performed at the time a unit of the product is crossmatched and/or issued. This check is performed within the timeframe specified by the HOURS prompt. Any specimens collected within this timeframe will be checked for a verified antibody screen. If one is not found the user will receive the following message:
The HOURS value is not zero, for the issue routines:
"Patient has no verified Antibody Screen within <HOURS> hours of <DATE><TIME>."
The HOURS value is nonzero, for unit assignment/crossmatch:
"Patient has no verified Antibody Screen within <HOURS> hours."
The HOURS value is 0, for any routine but Issue by Patient:
"Patient has no verified Blood type on the current specimen."
- 254-

The HOURS value is 0, for the routine Issue by Patient:
"Patient has no verified Antibody Screen on the current specimen(s)."
If the BBK OVERRIDE REQ. CURRENT TESTS prompt in the ACCESS Dictionary is set to "N":
"Patient has no blood type within __ hours of <issue date> <issue time>." The user will not be allowed to continue until a blood type test is performed.
If the BBK OVERRIDE REQ. CURRENT TESTS prompt in the ACCESS Dictionary is set to "T" or "B":
Patient has no blood type within __ hours of <issue date> <issue time>. Continue?" A "Y" response will allow the user to continue and a comment box will appear. The warning and the comment will appear on the BBK OVERRIDE WARNING REPORT.
Steps:
1. Identify a patient using one of the standard conventions.
Expected Result:
Certain Blood Bank data (i.e. identified antibodies and antigens) will display in the HX field in the Enter/Edit Result Screen if applicable for this patient. Use the left arrow key to proceed.
2. A list of available units for issue are displayed on the screen. The sort order for the display is as follows:
AUTOLOGOUS Units Product Type
Expiration Date
DONOR DIRECTED Units Product type
Unit Blood Type Expiration date
HOMOLOGOUS Units Product type
Unit Blood Type Expiration date
3. Indicate which units are to be issued by entering a "Y" in the Iss? column. If the patient has antibodies for which the unit has not been tested for the associated antigens, the following warning message displays "Unit not tested for incompatible antigens: ________. Ok?."
Note: For the above warning message to appear, the Antibody Dictionary must be set up to do this.
4. Enter a messenger.
5. Enter a card printer which will be used to print the Issue/Transfuse card.
6. Enter Unit Issue Comments.
- 255-

7. Confirm that the message “Issue?” appears. Enter “Y” and issue the unit to the patient.
Expected Result:
The system will ask the user to Enter/Edit Transfusion Data.
8. Confirm that the message “Enter Transfusion Data?” appears. Enter "N" to the Enter/Edit Transfusion Data prompt. File the issue data.
9. Reports to print for validation:
Override Warning Report Print Specimens (Internal) BBK Product Inquiry Unit Inquiry
_____________________________________________________________________
THIS ROUTINE VALIDATED BY:________________________ DATE:__ /__ /__
ACCEPTABLE: _________________NOT ACCEPTABLE:______________________
HOSPITAL NAME: ______________________________________________________
- 256-

4.3 Validation Exercise K-C. Transfuse Units By Patient Routine:
1. Identify a patient using one of the standard conventions.
Expected Result:
A pop-up window will appear displaying the Patient's History. Press the [ESC] key to display the Issued Unit and Product name of units requiring transfusion data.
2. A list of available units for transfusion are displayed on the screen. Units on this screen are sorted by unit number order.
3. If the user is in an access group with the prompt Allow Defaults for Transfusion? Set to "Y", a pop-up box will appear where users can enter in default transfusion information. Any entry as a default which does not comply with the below will keep the information from defaulting in. For testing purposes enter through the fields in this box.
4. Enter transfusion date, volume, time when the transfusion began and ended, the person who transfused the unit, and workload function for the transfusing units. As transfusion data is entered a check mark will appear on the left column indicating that the unit has been selected for transfusion.
a. If the transfusion date/time entered is before the collection date/time, the error message "Transfusion cannot be before collection date/time." is displayed.
b. If a transfusion date/time is entered that is before the issue date/time the warning message "Transfused before issue date/time - Ok?" displays.
5. If a transfusion Customer Defined Screen is defined in the Customer Defined Parameters, enter responses to the queries.
6. Enter transfusion comments.
7. Transfuse the unit.
8. In the Enter/Edit Transfusion Data routine select the specimen. Select the unit transfused in Step 6 and enter a second time.
9. If a transfusion Customer Defined Screen is defined in the Customer Defined Parameters Dictionary, enter a second set of responses to the queries.
10. Enter a second transfusion comment. File.
11. Reports to print for validation:
Issue/Transfuse Cards Transfusion Report Trans Product to Patient Report Print Specimens (Internal) BBK Product Inquiry BBK Transfusion Inquiry by MRI Print BBK History BBK History Audit Log BBK History Transfusion Inquiry Print One Medical Record Card Unit Inquiry Unit Edit Log
- 257-

_____________________________________________________________________
THIS ROUTINE VALIDATED BY:________________________ DATE:__ /__ /__
ACCEPTABLE: _________________NOT ACCEPTABLE:______________________
HOSPITAL NAME: ______________________________________________________
- 258-

4.3 Validation Exercise K-D. NUR Process Transfusions Routine:
The following exercise can only be validated if the LIS System Parameter has the BBK/NUR prompt set to Y. Prerequisites:In the LIS System Parameters the Patient Wristband for Issue is set to ACCT# or UNIT#. The settings for the scan parameters determine which fields will need to be scanned before transfusion:Scan BBK Wristband? Unit Identifiers? Blood Type? Expiration Dt/Tm? Verify User?
A patient with an issued unit of a crossmatchable product.
The transfusion data is recorded in the Nursing application and the reports are accessed from the Lab application.
1. Identify a patient and enter your password and/or PIN if required.
2. The patient name and BBK History data, if any, is displayed.
3. A list of units display on the screen sorted by status then product. Only units at the following statuses will display:
Ready - The unit is ready for transfusion to the patient. In BBK, the following unit statuses will be considered: XM Compatible and Ready for crossmatchable products and Assigned for non-crossmatchable products. Issued - The unit has been issued to the patient. Transfused - The unit has been transfused to the patient. Transfusing - NUR/PCS has sent back at least one set of vitals or the begin date/time to indicate the transfusion has begun.
4. Select the unit to transfuse.
a. An asterisk is displayed in the "Cosign" field if the product has the 'Co-Signature for NUR Admin?' prompt in the BBK Product dictionary set to Y.
b. An asterisk is displayed in the "Instr" field if the unit has any issue comments.
c. An asterisk is displayed in the "Assoc Data" field if the product has a Test View Group defined and the field "Display At NUR Tx?" is set to Y in the BBK Product Dictionary.
5. Verify the Pre-Transfusion checklist.
If the specimen was collected before the number of hours defined in the BBK Spec Expire Hours parameter in the Custom-Defined Parameters, the error message is displayed: "Warning: Specimen was collected N hours ago. Continue?". Enter "Y" and confirm this message can be overridden.
6. Enter the Co-Signer and PIN # if required. This is determined by the parameter Co-Signature for NUR Admin? in the BBK Product dictionary.
7. Scan the patient wristband.
a. If the wrong wristband number is entered the error message is displayed: Scanned patient wristband does not match selected patient.
- 259-

***DO NOT TRANSFUSE *** Please return blood product.
b. If the correct wristband numbered is entered, the Pre-Transfusion Checklist is displayed.
8. Select one or more items on the checklist and press OK.
9. Document the transfusion and enter BBK Vital Signs. Start the transfusion by entering a Begin Date/Time. The status of the unit updates to “Transfused”.
10. Enter the End Date/Time to end the transfusion. The unit status changes to "Transfused".
11. LAB Reports to print for validation:
Issue/Transfuse Cards Transfusion Report Trans Product to Patient Report Print Specimens (Internal) BBK Product Inquiry BBK Transfusion Inquiry by MRI Print BBK History BBK History Audit Log BBK History Transfusion Inquiry Print One Medical Record Card Unit Inquiry NUR Transfusion Report
___________________________________________________________________
THIS ROUTINE VALIDATED BY: _______________________ DATE: ____________
ACCEPTABLE: ______________________ NOT ACCEPTABLE: _________________
HOSPITAL NAME: ____________________________________________________
- 260-

4.3 Validation Exercise K-E. NUR Process Transfusions Routine with Bar Code Scanning
The following exercise can only be validated if page 1 of the LIS System Parameter has BBK/NUR set to Y.A Bar Code Reader is required for this exercise. Prerequisites:In the LIS System Parameters Dictionary the parameter 'Patient Wristband' is set to ACCNT# or UNIT#, and one or more of the following fields is set to Y: Scan BBK Wristband? Unit Identifiers? Blood Type? Expiration Dt/Tm? Verify User?
A unit of a crossmatchable product is entered into inventory with a Bar Code Scanner. The unit is crossmatched and issued to a patient.
E. NUR Process Transfusions Routine:
1. Identify the patient and enter your password and/or PIN if required.
2. The patient name and BBK History data, if any, is displayed.
3. A list of available units for transfusion display on the screen. Units on this screen are sorted by status and product.
4. Select the unit to transfuse.
a. An asterisk will display in the 'Cosign' field if the product has the Co-Signature for NUR Admin? Prompt in the BBK Product dictionary set to Y.
b. An asterisk is displayed in the 'Instr' field if the unit has any issue comments.
c. An asterisk is displayed in the 'Assoc Data' field if the product has a Test View Group defined and the field 'Display at NUR Tx?' is set to Y in the BBK Product Dictionary.
5. Enter the Co-Signer and PIN # if required. This is determined by the parameter Co-Signature for NUR Admin? in the BBK Product dictionary.
6. Scan the patient's wristband.
a. If you scan another patient's wristband number the error message is displayed: Scanned patient wristband does not match selected patient. ***DO NOT TRANSFUSE*** Please return blood product.
OK
b. If you scan the correct patient's wristband number, it is accepted and you are prompted for the next scan.
7. Scan the patient's BBK wristband.
a. If you scan another patient's BBK wristband number the error message is displayed: Scanned blood bank wristband does not match selected patient. ***DO NOT TRANSFUSE*** Please return blood product.
- 261-

OK
b. If you scan the correct patient's BBK wristband number, it is accepted and you are prompted for the next scan.
c. If you scan a BBK wristband number and the patient does not have one on file, the error message is displayed:
Cannot verify scan: No blood bank wristband number on file. Continue anyway? Yes/No
8. Scan the product unit number.
a. If you scan the wrong product unit number the error message is displayed: Scanned product unit # does not match selected unit. ***DO NOT TRANSFUSE*** Please return blood product.
OK
b. If you scan the correct product unit number, it is accepted and you are prompted for the next scan.
9. Scan the product issued.
a. If you scan the wrong product the error message is displayed:Scanned product does not match selected unit. ***DO NOT TRANSFUSE*** Please return blood product.
OK
b. If you scan the correct product, it is accepted and you are prompted for the next scan.
10. Scan the source registration number. If using ISBT symbology, this prompt will not appear.
a. If you scan the wrong source registration number the error message is displayed: Scanned product source does not match selected unit. ***DO NOT TRANSFUSE*** Please return blood product.
OK
b. If you scan the correct source registration number, it is accepted and you are prompted for the next scan.
11. Scan the product blood type.
a. If you scan the wrong product blood type the error message is displayed: Scanned product blood type does not match selected unit. ***DO NOT TRANSFUSE*** Please return blood product.
OK
b. If you scan the correct product blood type, it is accepted and you are prompted for the next scan.
12. Scan the product expiration date/time.
a. If you scan an incorrect product expiration date/time the error message is displayed: Scanned product expiration date does not match selected unit. ***DO NOT TRANSFUSE*** Please return blood product.
- 262-

OK
b. If you scan the correct product expiration date/time, it is accepted.
13. Scan the user's bar code.
a. If you do not scan the signed-on user's bar code the error message is displayed: Scanned user does not match signed-on user. ***DO NOT TRANSFUSE*** Please return blood product.
OK
b. If you scan the signed-on user's bar code the Pre-Transfusion Checklist is displayed.
14. Check off several entries on the Pre-Transfusion checklist.
15. Start the transfusion by entering a Begin Date/Time. The status of the unit updates to “Transfused”.
16. Document the transfusion and enter BBK Vital Signs
17. Enter the End Date/Time to end the transfusion. The unit status changes to "Transfused".
18. Reports to print for validation:
Issue/Transfuse Cards Transfusion Report Trans Product to Patient Report Print Specimens (Internal) BBK Product Inquiry BBK Transfusion Inquiry by MRI Print BBK History BBK History Audit Log BBK History Transfusion Inquiry Print One Medical Record Card Unit Inquiry NUR Transfusion Report
___________________________________________________________________
THIS ROUTINE VALIDATED BY: _______________________ DATE: ____________
ACCEPTABLE: ______________________ NOT ACCEPTABLE: _________________
HOSPITAL NAME: ____________________________________________________
- 263-

4.3.1 Algorithm: Unit Suitability for Crossmatch Check
Unit Suitability Algorithm: When a unit is to be crossmatched, the system will take the unit and utilize the suitability algorithm to make sure the unit is suitable for the patient and product order. Algorithm Description: Valid UnitOnce the user enters the unit number at the crossmatch test field, the algorithm will check to make sure the unit number entered by the user represents a valid unit from the unit inventory. If the unit does not exist in the unit inventory, the system will display the error message "Unit not found." to the user and the user will need to enter the unit number of a valid unit. Expiration DateIf the unit number is for a unit which exists in the system inventory, the algorithm will check the expiration date of the unit to make sure the unit has not expired. If the unit has expired, then the error message "Unit is at status EXPIRED." will be displayed to the user and the user must select another unit. Locked by UserIf the unit has not expired, the algorithm then checks to make sure that the unit is not being accessed by another user and therefore locked. If the unit is locked by another user, the user must then wait for the other user to release the unit lock, or choose another unit. Already CrossmatchedIf the unit is not locked by another user, the algorithm will check to see if the unit was already crossmatched to that specimen. If the unit was already crossmatched to that specimen, the error message "Unit is already crossmatched to this specimen." will be displayed to the user and the user must select another unit. Reserved UnitIf the unit was not already crossmatched to the specimen, the algorithm will check to see if the unit is reserved. If the unit is reserved, the algorithm checks to see if the unit is reserved for the current patient. If the unit is reserved for another patient, the error message "Unit is reserved for someone else." is displayed to the user and the user must select another unit.
Unit StatusIf the unit is either not reserved, or reserved for that patient, the algorithm will check the unit status to see if it is one of the following statuses, "AVA" (Available), "ASN" (Assigned), "RDY" (Ready), "XMC" (Crossmatched), "ISS" (Issued) or "TRS" (Transfused). If the unit is not at one of these statuses, the error message "Unit is at status XXXX", where XXXX represents the unit's status, will be displayed to the user and the user must select another unit. Issued to SpecimenIf the unit is at the status of "ISS", the algorithm will check to see if the unit is issued to the current specimen. If the unit is not issued to the current specimen, the error message "Unit is issued to another specimen." will be displayed to the user and the user must select another unit. Correct ProductIf the unit is issued to the current patient's specimen, the algorithm will check the product which was ordered on the patient specimen. If the product ordered on the specimen is not the same as the unit product, the algorithm checks to see if the unit product is a substitute product for the specimen's product in the Product Dictionary or if the unit product is a member of a product group that is listed as an acceptable substitute for the specimen's product in the Product Dictionary. If the unit product is not a substitute product for the specimen's product, the error message "Illegal product for this crossmatch." Is displayed to the user and the user must select another unit of the correct product type.
- 264-

Product Dictionary Blood Type RequiredIf the unit product is the same as the specimen's product, or the unit product is listed as a substitute product for the specimen's product, or if the unit product is a member of a product group that is listed as an acceptable substitute for the specimen's product, then the algorithm will check the Product Dictionary to see if the unit product requires a blood type. If the unit product does not require a blood type, the algorithm will skip the blood type compatibility check discussed below, and will proceed to check the customer defined assignment rules, also discussed below, after the blood type compatibility check. Blood TypeIf the unit product requires a blood type, the algorithm will check to see if both the patient specimen and the unit have a blood type entered. If the unit is missing the blood type, the error message "Missing blood type on unit." will be displayed to the user and the user must either type the unit or select another unit. If the patient specimen is missing a blood type, the error message "Missing blood type on patient." will be displayed to the user and the user must type the patient specimen in order to proceed. Blood Type MatchIf both the patient specimen and unit have a blood type defined, the algorithm will check to see if the unit blood type matches the specimen's blood type. If the blood types match, the algorithm proceeds to check the customer defined assignment rules which are discussed below, after the blood type compatibility check. Temporary Blood Type MatchIf the blood types do not match, the algorithm checks to see if there is a temporary blood type on file for the patient and if so, checks to see if it matches the unit blood type. If the blood types match, the algorithm proceeds to check the customer defined assignment rules which are discussed below, after the blood type compatibility check.
Compatible Blood TypeIf the blood types do not match, the algorithm checks to see if the product's blood type is listed as a compatible blood type for the specimen's blood type in the Blood Type Dictionary. Blood type compatibility is defined in the Blood Type Dictionary by product and/or by product group. If the product's blood type is compatible with the specimen's blood type, the algorithm proceeds to check the customer defined assignment rules which are discussed below, after the blood type compatibility check.. If the product's blood type is not compatible with the specimen's blood type, or there is no temporary blood type on file for the patient, the error message "Blood types are not compatible." is displayed to the user and the user must select another unit in order to proceed. Customer Defined Assignment RuleOnce the blood type compatibility check has been completed and a unit with a compatible blood type has been identified, the algorithm will check to see if there is a customer defined assignment rule for that product. For example, a user can define an assignment rule which checks to see if the patient has been marked as requiring Irradiated packed cells and if so, the assignment rule will check the unit to make sure it has been marked as being an irradiated unit. If the unit is not marked as an irradiated unit, the error message "Failed product's unit assignment rule." will be displayed to the user and will not be allowed to assign that unit to the specimen. Antibodies and AntigensThe algorithm will then check to see if there are any antibodies associated with the patient. If there are antibodies listed for that patient, the algorithm will check to see if the unit has been tested for the corresponding antigens. If the unit is positive for any corresponding antigens, the warning message "Unit has incompatible antigens: (list of antigens) Ok?" will be displayed to the user and the user can either respond "N" and select another unit, or continue assigning the current unit. If the user overrides the warning message and assigns the current unit, the override is logged on the Override Warning Report. The Override Warning Report can be set up to automatically print on a daily basis or it is printed daily by the Blood Bank Supervisor. Tested for AntigensIf the unit has not been tested for the corresponding antigens, the warning message "Unit not tested for incompatible antigens: (list of antigens) Ok?" will be displayed to the user. The user can either respond "N"
- 265-

and select another unit, or continue assigning the current unit. If the user overrides the warning message and assigns the current unit, the override is logged on the Override Warning Report. The Override Warning Report can be set up to automatically print on a daily basis or it is printed daily by the Blood Bank Supervisor. Crossmatched to SpecimenIf the unit has been tested for the corresponding antigens and is negative, the algorithm will check to see if the unit has already been crossmatched to the patient on another specimen. If the unit has been crossmatched to another specimen belonging to that patient, the warning message "Unit has already been crossmatched to patient. Ok?" will be displayed to the user. If the user overrides the warning message, the override is logged on the Override Warning Report. The Override Warning Report can be set up to automatically print on a daily basis or it is printed daily by the Blood Bank Supervisor. If the unit has never been crossmatched to that patient, the algorithm checks to see if there are any reserved units for the patient. If there are either autologous or donor directed units reserved for that patient, and the system parameters are set to require the use of reserved units, the system will display the warning message "Patient has a reserved unit on file. OK?" to the user. If all these checks pass, the algorithm will allow the unit to be crossmatched to that patient specimen.
- 266-

UNIT LEVEL TEST PLAN Prerequisites: For the following scenarios, assume that the following is true at the time of each example: The specimen being resulted is for two units of Packed Cells on BBK,PATIENT 1. In each example, the patient's information is as follows: Blood Type = A Positive (APOS) Markers* = Irradiated products (IRR) Antibodies = M positive * Markers are a way of tagging units/patients to denote special circumstances such as irradiated, CMV negative etc. Unit number PC05022 was crossmatched to BBK,PATIENT 1 with a previous specimen on 5/2/02 and is now available again. Unit number PC05142 is a Donor Directed unit reserved for BBK,PATIENT 1. Units currently entered into the system's unit inventory are as follows: Packed Cells:Unit # Exp. Date Status Blood Type Markers AntigensPC05022 6/1/02 AVA APOS IRR M – NegPC03281 5/1/02 EXP APOSPC05113 6/15/02 AVA APOS No marker on unitPC05114 6/15/02 XMC APOS Crossmatched to BBK,PATIENT1PC05115 6/15/02 ENT APOSPC05116 6/16/02 AVA APOSPC05117 6/15/02 AVA APOS Reserved for BBK,PATIENT2PC05119 5/22/02 COMP APOS Made into componentsPC051110 6/15/02 ISS APOS Issued to BBK,PATIENT2PC051111 6/15/02 TRANS APOS Transfused to BBK,PATIENT2PC051112 6/15/02 AVA BPOSPC05121 6/17/02 AVA APOSPC05142 6/17/02 AVA APOS Donor-directed unit for BBK,PATIENT1PC05181 6/21/02 AVA APOS Autologous unit for BBK,PATIENT1
Fresh Frozen Plasma:Unit # Exp. Date Status Blood Type Markers AntigensFFP05111 5/17/02 AVA APOS
Test # Type Description of Scenario 4.3.1.1 Invalid If a user enters the unit number PC21478 (which does not exist in the inventory) at the crossmatch test on 5/2/02, the
following error message will be displayed to the user:
- 267-

"Unit not found." 4.3.1.2 Invalid If a user enters the unit number PC03281 at the crossmatch test on 5/2/02, the system will run the unit suitability
algorithm and find that the unit exists in the inventory and will then check the unit's expiration date to find that the unit has already expired and the following error message is displayed to the user:
"Unit is at status EXP." The user will then need to select another unit.
* Note: Verify that the Exp Unit Cutoff Hrs/Type is not defined for the product.
4.3.1.3 Stress If USER1 is currently editing unit number PC05113, and
USER2 enters unit number PC05113 at the crossmatch test, the system will run the unit suitability algorithm and find that the unit is being accessed by another user. USER2 will not be able to continue and will have to choose another unit, or wait until USER1 has completed the edits.
4.3.1.4 Invalid If a user enters the unit number PC05114 at the crossmatch
test, the system will run the unit suitability algorithm and find that the unit is already crossmatched to that specimen and the following error message is displayed to the user:
"Unit is already crossmatched to this test on this specimen." 4.3.1.5 Invalid If a user enters the unit number PC05117 at the crossmatch
test, the system will run the unit suitability algorithm and find that the unit is reserved for another patient and the following error message is displayed to the user:
"Unit is reserved for someone else."
4.3.1.6 Invalid If a user enters the unit number PC05119 at the crossmatch test, the system will run the unit suitability algorithm and find that the unit is at a status other than "AVA" (Available), "ASN" (Assigned), "RDY" (Ready), "XMC" (Crossmatched), "ISS" (Issued) or "TRS" (Transfused), and the following error message is displayed to the user:
"No units eligible."
- 268-

4.3.1.7 Invalid If a user enters the unit number PC051110 at the crossmatch test, the system will run the unit suitability algorithm and find that the unit is issued to another patient and the following error message is displayed to the user:
"Unit is issued to another specimen." 4.3.1.8 Invalid If a user enters the unit number FFP05111 at the
crossmatch test, the system will run the unit suitability algorithm and find that the unit is for Fresh Frozen Plasma, which is not a substitute product for Packed Cells and the following error message is displayed to the user:
"Illegal product for this crossmatch." 4.3.1.9 Invalid If a user enters the unit number PC051112 at the
crossmatch test the system will run the unit suitability algorithm and find that the unit has a blood type which is not compatible with the patient's blood type and the following error message is displayed to the user:
"Blood types are not compatible." 4.3.1.10 Invalid If a user enters the unit number PC05113 at the crossmatch
test, the system will run the unit suitability algorithm and find that the unit has not been tested for any corresponding antigens and the following warning message is displayed to the user:
"Unit not tested for incompatible antigens: M Ok?"
The user may continue with the crossmatch by responding "Y" to the warning message. This override is logged on the Override Warning Report. The Override Warning Report can be set up to automatically print on a daily basis or it is printed daily by the Blood Bank Supervisor.
4.3.1.11 Invalid If a user enters the unit number PC05022 at the crossmatch
test, the system will run the unit suitability algorithm and find that the unit was already crossmatched to this patient with another specimen and the following warning message is displayed to the user:
"Unit has already been crossmatched to patient. Ok?" 4.3.1.12 Invalid If a user enters the unit number PC05121 at the crossmatch
test the system will run the unit suitability algorithm and find that there is Donor Directed unit reserved for the patient and the following error message is displayed to the user:
"Patient has a reserved unit available."
* Note: This is dependent on the ‘BBK Override Req use Resrvd Units?’ prompt on page 3 of the LIS Access Dictionary
- 269-

Prerequisites: For the following scenarios, assume that the following is true at the time of each example: The specimen being resulted is for two units of Packed Cells on BBK,PATIENT 3. In each example, the patient's information is as follows: Blood Type = A Positive (APOS) Temporary Blood Type = O Positive (OPOS) Antibodies = M positive Unit number PC05142 is a Donor Directed unit reserved for BBK,PATIENT 1. Units currently entered into the system's unit inventory are as follows:
Packed Cells:Unit # Exp. Date Status Blood Type Markers AntigensPC05022 6/1/02 AVA APOS IRR M – NegPC03281 5/1/02 EXP APOSPC05113 6/15/02 AVA APOS No marker on unitPC05114 6/15/02 XMC APOS Crossmatched to BBK,PATIENT1PC05115 6/15/02 ENT APOSPC05116 6/16/02 AVA APOSPC05117 6/15/02 AVA APOS Reserved for BBK,PATIENT2PC05119 5/22/02 COMP APOS Made into componentsPC051110 6/15/02 ISS APOS Issued to BBK,PATIENT2PC051111 6/15/02 TRANS APOS Transfused to BBK,PATIENT2PC051112 6/15/02 AVA BPOSPC05121 6/17/02 AVA APOSPC05142 6/17/02 AVA APOS Donor-directed unit for BBK,PATIENT1PC05181 6/21/02 AVA APOS Autologous unit for BBK,PATIENT1PC05143 6/17/02 AVA OPOS Test # Type Description of scenario 4.3.1.13 Invalid If a user enters the unit number PC051112 at the
crossmatch test, the system will run the unit suitability algorithm and find that the unit blood type does not match the patient's blood type or the patient's temporary blood type and the following error message is displayed to the user:
"Blood types are not compatible." 4.3.1.14 Normal If a user enters the unit number PC05143 at the crossmatch
test, the system will run the unit suitability algorithm and find that the unit blood type passes all the checks and can be assigned to the patient.
- 270-

Prerequisites: For the following scenario, assume that the following is true at the time of each example: The specimen being resulted is for two units of Packed Cells on BBK,PATIENT 4. In each example, the patient's information is as follows: Blood Type = no historical blood type
Test # Type Description of scenario 4.3.1.15 Invalid If a user enters the unit number PC05143 at the crossmatch
test, the system will run the unit suitability algorithm and find that the patient does not have a blood type and the following error message is displayed to the user:
"Missing blood type on patient" The user cannot continue.
_________________________________ ________________ Executor of test plan Date
- 271-
4.3.2 Algorithm: Unit Suitability for Transfusion Check
Algorithm to check transfusion:When a user accesses a patient in the Enter/Edit Transfusion Data routine, an algorithm is run to determine if any transfusable units (see **** below) are associated with the patient. If so, then the user is allowed to proceed. Algorithm Description:Upon entering the Enter/Edit Transfusion Data routine, the user is prompted to enter a specimen number. This algorithm takes the specimen, and checks to see if any data exists in the data structure "issued.units". The only units that will be part of this structure are those that have passed all checks at the crossmatch stage and at the issue stage. If no data exists in the structure for the identified specimen, the error message "No units to transfuse." is displayed to the user. The user is not allowed to proceed. If data does exist in this structure for the identified specimen, then those units that have been issued to that specimen will be displayed to the user, and the user may proceed with entering transfusion data on these units. Please be aware that users cannot enter unit numbers directly into this routine. Only those units that have been issued to the identified specimen are displayed on the screen for the user. If the incorrect specimen was identified, the desired unit number will not be displayed on the screen for the user, and they will be unable to enter transfusion data. ****Please note that the vast majority of checks to determine a unit's suitability for a patient are done under separate steps (see previous section). The routine ENTER/EDIT TRANSFUSION DATA is based upon the fact that all other checks have already been performed before a unit becomes eligible to be transfused.
- 272-

UNIT LEVEL TEST PLAN Prerequisites: For the following scenarios, assume that the following patients currently exist in the database: Patient Name Specimen Issued units on file PATIENT,BBK 1 <date>:BB6 PC0507991 PC0507992 PC0507993 PATIENT,BBK 2 <date>:BB7 PC0507994 PC0507995 PATIENT,BBK 3 <date>:BB9 No issued units on file. Test # Type Description of scenario 4.3.2.1 Invalid The user is currently holding an Issue/Transfuse Card for
Patient PATIENT,BBK 1, specimen <date>:BB6. Upon entering the ENTER/EDIT TRANSFUSION DATA Routine, the user mistakenly enters specimen <date>:BB9. At this point, the following error message will appear:
No units to transfuse.
4.3.2.2 Invalid The user is currently holding an Issue/Transfuse Card for
patient PATIENT,BBK 1, specimen <date>:BB6. Upon entering the ENTER/EDIT TRANSFUSION DATA Routine, the user mistakenly enters specimen <date>:BB7. The following units appears to the user:
PC0507994 PC0507995
These units do not match the units on the Issue/Transfuse
Card that the user is currently holding. The user will be able to enter transfusion information on the units but it should be noted that the name and units on the Issue/Transfuse Card do not match the user and units in the computer.
- 273-

4.3.2.3 Normal The user is currently holding an Issue/Transfuse Card for patient PATIENT,BBK 1, specimen <date>:BB6. Upon entering the ENTER/EDIT TRANSFUSION DATA routine, the user enters specimen <date>:BB6. The following units appear to the user:
PC0507991PC0507992
PC0507993
The user is allowed to proceed, as the correct units are now displayed.
______________________________ ________________ Executor of test plan Date
- 274-

4.4: Patient Blood Type Calculations
FUNCTION TO BE VALIDATED: Patient Blood Type Calculations
Introduction:
The testing of Patient Blood Type Calculations will be covered in this exercise. These calculations govern the correct forward and reverse typing of Patients.
Dictionaries:
Blood Bank Calculation Blood Bank Test Method Access Customer Defined Parameters Entry Screen Worksheet
Function may be accessed in:
Process Units Process/Build Worksheet Enter/Edit Results
Reports to Print:
Override Warning Report
NOTE: Users may have the ability to define CUSTOM REPORT FORMATS when printing standard reports. Customization to the reports may not supply all information contained in the standard version.
- 275-

4.4 Validation Exercise A:
Prerequisites:
Select multiple patients requiring a Type and Screen. Depending on your hospital you may need to do both a forward and reverse type on both adults and newborns. Make sure that each blood type is represented in the patients you have selected for this exercise. Print the Blood Bank Calculation Dictionary entry for the Patient Blood Type Target Test (NOTE: If a separate calculation is being used for newborns, print the Blood Bank Calculation Dictionary entry for the Newborn Blood Type Target Test also.) Refer to the printout for resulting scenarios for each Blood Type. Each scenario must be tested to validate that the Calculations are working properly.
Important Notice: The system will calculate the Blood Type of the patient depending on your Hospital's dictionary set-up. If Blood Types are not calculating correctly it may be due to an incorrect dictionary definition of the Blood Type Calculation being validated.
How to use the Patient Blood Type Worksheets:
Check your Calculation Dictionary for each Blood Typing scenario. Use multiple patient specimens and enter different results for each reaction test. Example: Specimen BB6 is on an OPOS patient - enter results that indicate an OPOS Blood Type. Check to see that the system correctly calculates the Blood Type. Make sure that the Blood Type is being calculated in the foreground for this exercise. It may be changed back to calculating in the background after validation is completed.
Please use the blank spaces under Reaction Tests for any additional ABO/RH tests that are not listed below.
A second worksheet is provided for the Blood Type and Reaction Tests to be used for the testing of the Newborn Calculation.
A third worksheet is provided with blanks for the Blood Type and Reaction Tests. This may be used for any additional Blood Types. (Example: A unconfirmed RH, B POS/NEG etc...)
- 276-

PATIENT BLOOD TYPE WORKSHEETPATIENT BLOOD TYPE
REACTIONTESTS
OP ON AP AN BP BN ABP ABN
ANTI A
ANTI-B
ANTI-AB
ANTI-D
ANTI-DU
A CELL
B CELL
CALCULATED BLOOD TYPE
PATIENT BLOOD TYPE WORKSHEETNEWBORN (CORD) BLOOD TYPE
REACTIONTESTS
OP ON AP AN BP BN ABP ABN
ANTI A
ANTI-B
ANTI-AB
ANTI-D
ANTI-DU
CALCULATED BLOOD TYPE
PATIENT BLOOD TYPE WORKSHEETPATIENT BLOOD TYPE
REACTIONTESTS
- 277-

CALCULATED BLOOD TYPE
Enter the Enter Results Routine. Choose a patient specimen whose Blood Bank History indicates that they are OPOS. Using the Blood Bank Calculation Dictionary List as a guide, enter in the results that match the OPOS scenario set up in the dictionary.
Expected Result:
The system will calculate the Blood Type as OPOS and the result will default into the Blood Type Target Test.
File the results.
Choose another patient specimen whose Blood Bank History indicates that they are OPOS. Enter the Blood Typing scenario for ABP from the Blood Bank Calculation Dictionary List.
Expected Result:
System will prompt "Blood Type ABP does not match patient's Blood Type". The system will not allow the user to go any further with the result if the user is not allowed to override the System's calculated Blood Type. If users have access to "Override BBK History Blood Type" in the Access Dictionary, the following message will appear, "Blood Type ABP does not match Patient's Blood Type. OK?" Upon filing the error message, "Can't verify BLD TYPE. It does not match history file", will appear. Blood Type must be changed in the BBK History Routines.
Change the results to a valid scenario and file the correct blood type.
Choose another patient specimen whose Blood Bank History indicates that they are OPOS. Enter in a Blood Typing scenario that does not match any of the calculated Blood Types from the Blood Bank Calculation Dictionary. Enter OPOS as the blood type.
Expected Result:
The message “Could not calculate blood type, Ok?” is generated.
Note: If your Blood Type calculation also contains the line “IF{‘X [f bbk err msg](“Invalid blood type calculation.”)},X;”, then the message "Invalid blood type calculation" will also be generated.
Change the results to a valid scenario. After the blood type defaults on the screen, linefeed out the calculated result and enter another valid blood type. The system will display the warning message " Does not match calculated blood type ___ Ok?".
Linefeed out the blood type and enter one that does not exist in the Blood Type Dictionary.
- 278-

Expected Result:
The System will only accept a valid entry from the Blood Type Dictionary. If an invalid entry is made, the system will display the following message: "This Blood Type is not defined."
Repeat all of the resulting steps with patient specimens that represent each Blood type. Make sure to write all of your information down on the Patient Worksheet.
Note: In the Access Dictionary, the prompt Override BBK History Blood Type pertains to Units/Donors only. If set to "Y" the error message, "SPECIMENT NUMBER: Can't verify Blood Type. It does not match history file", will not appear.
________________________________________________________________________
THIS ROUTINE VALIDATED BY:___________________________ DATE:__ /__ /__
ACCEPTABLE: _________________NOT ACCEPTABLE:______________________
HOSPITAL NAME: ______________________________________________________
- 279-

4.4.1 Algorithm: Donor Blood Type and Calculation Check
Donor Blood Type algorithm and calculation:When the users enters a blood type at the blood type test field, the system will check to make sure the blood type is a valid blood type and if so, compares the users entry against the calculated blood type. Donor Blood Type algorithm and calculation:When a new donor is entered into the system and a blood type is entered at the blood type field, the algorithm will check to make sure the blood type entered by the user exists in the Blood Type Dictionary. If the blood type does not exist in the Blood Type Dictionary, the following error message will be displayed to the user: "The entry is not defined." If the blood type exists in the Blood Type Dictionary, the algorithm will then check to see if there is an existing medical record for that donor. If a medical record exists for that donor, the algorithm checks the entered blood type against the blood type on the medical record. If the blood types do not match, the following error message is displayed to the user: "Blood type associated with Medical Record is (blood type)." If the blood types match, the algorithm will allow the user to enter the donor. Once the donor has been entered and the user is resulting the donor blood type test field on the donor's specimen, the algorithm will check to make sure the blood type entered by the user at the blood type test field also exists in the Blood Type Dictionary. If the blood type does not exist in the Blood TypeDictionary, the error message "This blood type is not defined." is displayed to the user and the user must enter a blood type which is defined in the Blood Type Dictionary. If the blood type exists in the Blood Type Dictionary, the algorithm checks to make sure the blood type is an active blood type. If the blood type is inactive, the error message "This blood type is not defined." will be displayed to the user and the user must enter an active blood type. If the blood type entered by the user is a valid blood type, the system will then compare the users entry with the blood type calculated by the system. The Blood Type calculation created in the MEDITECH system requires specific customer input which dependent upon the standard operating procedures of each hospital's Blood Bank. The algorithm MEDITECH provides for the Blood Type calculation is utilized through the Calculation Hook Dictionary. The hospital will define which tests should be evaluated (component tests) by the system and acceptable results for the calculation of each blood type. When defining the Blood Type Calculation, the Blood Type field accepts ten characters of data type FREE. Here, the user enters the Blood Type that they want to define interpretations for. Only Blood Types previously entered in the Blood Type Dictionary are allowed. The Result field accepts eight characters of data type CHOICE. Here the user enters the appropriate test result for each Blood Type. The algorithm will take the results entered at each component test during result entry and compare the results to those defined in the calculation. If a match is not found when the user enters a blood type at the blood type field, the error message "Could not calculate blood type. Ok?” is displayed to the user. If the user chooses "NO", the system returns the user to the result entry screen to correct any errors so that a blood type can be calculated. If the user responds "YES", the system allows the user's entry to be filed as the test result and the warning override is logged on the Override Warning Report. The Override Warning Report can be set up to automatically print on a daily basis or it is printed daily by the Blood Bank Supervisor.
When a match between the calculation hook's result and the user's result is found, the algorithm save the calculated Blood Type in a temporary file and compare it to the Blood Type entered at the Blood Type test field by the user. The comparison takes place in the background. If the system calculated blood type does not match
- 280-

the blood type entered by the user, the error message "Does not match calculated blood type (calc blood type). Ok?" is displayed to the user.If the user enters "N", the system returns the user to the result entry screen to correct any errors so that a blood type can be calculated. If the user responds "Y", the system allows the user's entry to be filed as the result and the warning override is logged on the Override Warning Report. The Override Warning Report can be set up to automatically print on a daily basis or it is printed daily by the Blood Bank Supervisor. If the system calculated blood type matches the blood type entered by the user, the system checks the entered blood type against the donor's history to see if it matches. If the blood types do not match, the warning message "Blood type does not match donor's blood type. Ok" is displayed to the user. If the user does not click on the "Ok" button, no further action takes place. If the user clicks on the "Ok" button, the system allows the user's entry to be filed as the result and the warning override is logged on the Override Warning Report. The Override Warning Report can be set up to automatically print on a daily basis or it is printed daily by the Blood Bank Supervisor. The user will be unable to verify the blood type result until the discrepancy between the donor's history blood type and the blood type entered on the specimen is resolved by the user and corrected in the system. If the blood types do match, the user is allowed to enter the blood type for that donor.
- 281-

UNIT LEVEL TEST PLAN Prerequisites:
For the following scenarios, assume that the following donors currently exist in the database: Donor Name Donor Number Medical Number Specimen Number Blood TypeBBK,DONOR 1 OPBBK,DONOR 2 OPBBK,DONOR 3 AP
The following patient medical record currently exists in the database:
Patient Name Donor Number Medical Number Specimen Number Blood TypeBBK,PATIENT N/A N/A OP Test # Type Description of Scenario4.4.1.1 Invalid If a user enters the new donor BBK,PATIENT with a blood type of A Positive
(AP) in the Enter/Edit Donors Routine, and links the donor to the existing medical record number , the algorithm will compare the entered blood type against the medical record. Since the entered blood type is AP and the medical record blood type is OP, the following error message will be displayed to the user: "Blood type associated with Medical Record is OP." The user will not be allowed to enter the donor with that blood type until the discrepancy is resolved.
4.4.1.2 Invalid If the user results each blood type component test for the specimen belonging to donor BBK,DONOR 1, and enters a result of APO at the blood type test field, the algorithm will check the Blood Type Dictionary to see if the entry exists. Since the blood type does not exist, the following error message is displayed to the user: "This blood type is not defined." The user is then returned to the blood type test field to correct the error.
- 282-

4.4.1.3 Invalid Using BBK, DONOR2, result each blood type component test for a specimen. The algorithm will take the results entered at each component test and compare the results to those defined in the calculation. If a pattern match is not found in the Calculation Hook Dictionary, when the user enters a blood type at the blood type field, the following error message is displayed to the user: "Could not calculate blood type. OK?" If the user chooses "NO", the system returns the user to the result entry screen to correct any errors so that a blood type can be calculated.
If the user chooses "YES", the system allows the entry to be filed as the test result and the warning override is logged on the Override Warning Report. The Override Warning Report can be set up to automatically print on a daily basis or it is printed daily by the Blood Bank Supervisor.
4.4.1.4 Invalid If the user results each blood type component test for the specimen of BBK,DONOR 3, and the algorithm finds a match with the OP pattern that is defined in the Calculation Hook Dictionary, the blood type of OP is placed in a temporary file. If the user results the blood type test with the blood type of OP, the algorithm sees that the entered blood types matches the calculated blood type and then checks the entered blood type against the donor's history to see if it matches. Since the blood types do not match, the following warning message is displayed to the user: "Blood type OP does not match donor's blood type. Ok?" If the user does not click on the "Ok" button, the system returns the user to the blood type test to correct the entry. If the user clicks on "Ok", the system allows the entry to be filed on the specimen but the user will not be allowed to verify the result until the discrepancy is addressed and corrected. Upon filing the user will be prompted with the following:
“Can’t verify BLD TYPE. It does not match history file.
The warning override is logged on the Override Warning Report. The Override Warning Report can be set up to automatically print on a daily basis or it is printed daily by the Blood Bank Supervisor.
_________________________________________________ ________________Executor of test plan Date
- 283-

4.5: Antibody Screen, Antibody ID, and Crossmatch Calculations
FUNCTION TO BE VALIDATED: Interpretive Result Calculations for ABS and XM Tests
Introduction:
The testing of the Interpretive Result Calculations for ABS and XM Tests will be covered in this exercise. These calculations will warn users when an interpretive result does not fit with the results entered for the component tests.
Dictionaries:
Calculation Canned Text
Function may be accessed in:
Enter/Edit Results BBK Spreadsheet Function
Reports to Print:
Override Warning Report
NOTE: Users may have the ability to define CUSTOM REPORT FORMATS when printing the standard reports mentioned above. Customization to the reports may not supply all information contained in the standard version.
- 284-

4.5 Validation Exercise A:
Prerequisites:
Create calculations for the Antibody Screen and Crossmatch tests using the appropriate keywords. Sample calculation can be found in the Canned Text Dictionary. See ZZBCABSI and ZZBCXMC in the View LIS Canned Text Dictionary routine.
Select multiple patients requiring an Antibody Screen and a Crossmatch. Refer to the printout of the calculations for resulting scenarios for both the Antibody Screen and Crossmatch tests. Each scenario must be tested to validate that the calculations are working properly.
How to use the Antibody Screen and Crossmatch Worksheets:
Check your Calculation Dictionary for each scenario. Use multiple patient specimens and enter different results for each reaction test. Check to see that the system correctly calculates the Interpretation or Compatibility. The system will check the entry that the user enters and if it matches the calculated value nothing will happen. If it does not match the calculated value, the following warning appears:
"[entered result] Result does not match calculated (calculated result). OK?" If the user responds "Y" the result logs the override response on the Override Warning Report.
Print the Override Warning Report to verify that any overrides are logged there.
A worksheet is provided for the Antibody Screen Tests to be used for testing the calculation. Please use the blank spaces under Reaction Tests for any additional Antibody Screen tests that are not listed below.
A second worksheet is provided for the Crossmatch Tests to be used for testing the calculation. Please use the blank spaces under Reaction Tests for any additional Crossmatch tests that are not listed below.
A third worksheet is provided with blanks for the Antibody Screen and Crossmatch Tests. This may be used for any additional testing.
- 285-

ANTIBODY SCREEN WORKSHEET
REACTION TESTS
Patient 1 Patient 2 Patient 3 Patient 4
Screening Cells I IS
Screening Cells I 37
Screening Cells I AHG
Screening Cells II IS
Screening Cells II 37
Screening Cells II AHG
Screening Cells III IS
Screening Cells III 37
Screening Cells III AHG
CROSSMATCH WORKSHEET
REACTION TESTS
Patient 1 Patient 2 Patient 3 Patient 4
Crossmatch IS
Crossmatch 37
Crossmatch AHG
INTERPRETATION
- 286-

WORKSHEET
REACTION TESTS
________________________________________________________________________** Please Note **
How Are Antibodies Calculated?
Users have the ability to calculate antibodies based on cell panels resulted through the computer. Exact methods for performing antibody identification will be found in the package inserts for reagent red blood cells. Discussed below are the principles involved in developing the methodology used for antibody identification.
Single antibody identification is accomplished by matching the pattern of reactions of the test results against the patterns displayed on the ANTIGRAM Antigen Profile. To rule out additional antibodies, antigens are noted (crossed out) that are present on the cells of the panel that were not agglutinated by the patient's serum. If all significant antigens are crossed out except the one corresponding to the antibody already selected, the specificity is confirmed and it is unlikely there is a second antibody. To prevent drawing false conclusion, only antigens that are expressed as homozygotes will be crossed out.
- 287-

A 95 percent confidence level is considered adequate in antibody identification; that is, a probability of one in twenty that chance alone accounts for the observed pattern. Provided three positive cells react and three negative cells do not react, this probability is established. In addition, if only two cells are positive and they react, five negative cells must be non-reactive.
Note: MEDITECH does not recommend defaulting calculated antibodies directly to the patient. Please set up your Blood Bank Test Dictionary for AB type tests appropriately.
In addition, after tentative identification has been made, confirmation should include testing the patient's cells for the corresponding antigen.
MEDITECH strongly recommends that hospitals utilizing the Cell Panel and Cell Donor dictionaries in the MEDITECH Blood Bank system carefully validate the antibody identification algorithm with their current dictionary entries. Hospitals should include a copy of the package inserts for the reagent red blood cells as well as the Cell Panel and Cell Donor dictionary lists in their validation documentation.
________________________________________________________________________
THIS ROUTINE VALIDATED BY:___________________________ DATE:__ /__ /__
ACCEPTABLE:___________________ NOT ACCEPTABLE:____________________ HOSPITAL NAME: ______________________________________________________
- 288-

4.6: Patient Emergency Issue
Various warning messages will appear during this exercise based on whether the Patient and/or Unit Blood Types are known and the settings of
Access Dictionary (‘BBK Emg Issue Unit Status ENT?’ and ‘BBK Emg Issue Unit Status HOLD?’ and ‘Reg Pt From Emg Iss?’),
Customer-Defined Parameters (‘Restrict If No Current Blood Type?’ and ‘Allow Blood Type Mismatch Override?’),
Blood Type Dictionary (‘Allow Emergency Issue?’ and ‘Emergency Issue For Products’)
Please see the different scenarios (below) and validate based on your Blood Bank system setup.
Note: Unit blood type UNK is set as Transfusable (All cases)? N, and Transfusable For Products = Blank.
SECTION 1: Exercises within this section should be used if your Customer-Defined Parameters are set to “Restrict if No Current Blood Type?” = Y.
4.6 Validation Exercise 1A:
Use this step if your Customer Defined Parameter and Blood Type Dictionary prompts are set to:
ALLOW BLOOD TYPE MISMATCH OVERRIDE? = YFor the OP (O Positive) blood type, set ALLOW EMERGENCY ISSUE? = YEMERGENCY ISSUE FOR PRODUCTS is either blank to allow for all products or is set to include Packed Cells.
Prerequisite:
Enter three units of Packed Cells into inventory with the blood type of O Positive. Enter one unit of Packed Cells with the Blood Type of UNKNOWN. Reserve one unit of Packed Cells for a patient other than the patient you will be using in the Emergency Issue Routine. Bring the reserved unit and one O Positive unit to an AVAILABLE status. Leave the other unit of O Positive at an ENTERED status.
1. Enter a patient who is not in your hospital’s database. The patient should not have a historical blood type. If you do not have access to REG PT FROM EMG ISSUE the system will display the warning “Patient not found.” You cannot continue at this point; the patient will need to be registered through the Admissions module.
If you do have access to REG PT FROM EMG ISSUE, the system will respond:
Patient not found….
Enter a new Account: answer with “Y” Registration screen: choose a registration screen Register and file the patient. Verify that the information entered on the registration screen appears on the BBK EMERGENCY ISSUE screen. The system will display the message: “There are no crossmatched/assigned units for patient”. Select “OK” to continue.
2. At the Unit prompt identify the unit of O POS Packed Cells at an ENTERED status.
- 289-
If you do not have access to BBK EMG ISSUE UNIT STATUS ENT?, the system will display the error: “Unit cannot be issued at status ENT.”
If you do have access to BBK EMG ISSUE UNIT STATUS ENT?, the system will allow you to continue.
3. Linefeed out the above unit and enter the unit with the blood type of UNK. You will get the warning message “Unit [ ] Blood Type is NOT TRANSFUSABLE. Ok?” Select “OK.” Verify you are not allowed to emergency issue this unit to the patient.
4. Linefeed out the above unit and enter the unit number of the reserved unit entered in the prerequisites. The system will display the error: “Unit is reserved for someone else.” You will not be able to issue this unit.
5. Linefeed out this unit and enter the unit number of a unit of O POS Packed Cells at an AVAILABLE status that is not reserved for a patient.
6. The system will bring the cursor to the specimen number prompt. If you have the prompt DEFAULT SPECIMEN TEXT in the Customer-Defined Parameters set to NEW, then the word “NEW” will appear under the SPEC prompt. You can accept this default to create a new specimen for this Emergency Issue or perform a lookup and choose a specimen to issue this unit to. If you do not have your Customer – Defined Parameters set up to default the word “NEW” then you can either perform a lookup and choose a specimen to add this Emergency Issue to or enter past the prompt so that the system will default the word “NEW” and create a new specimen.
Attempt to designate another patient’s specimen. Verify that the warning “Entered specimen is for a different patient.” appears and the specimen must be removed to continue.
Remove the incorrect specimen and create a new specimen for this emergency issue.
7. Enter a device at the CARD PRINTER and a form at the UNIT FORM prompt to obtain a copy of the Emergency Issue/Transfuse Form. If a Customer Defined Screen has been defined, answer all queries and then issue the unit by answering the prompt ISSUE? with “Y”.
8. Verify that a requisition and blood bank specimen are created for the correct patient.
What priority is the specimen?
Verify that this priority matches the BBK EMG ISSUE SPECIMEN PRIORITY as set in the Customer-Defined Parameters.
9. Enter results on the blood bank specimen. NOTE: The message “Receive from Collection?” will appear if you have access to receive via E/E Results. If you do not have access, first use the Receive Specimen Routine.
The units which were issued in the Emergency Issue Routine will display in the result column for the product’s crossmatch. Result the crossmatch for the emergency- issued unit. If associated tests were ordered, result the tests at this time.
- 290-

10. Print an Internal Inquiry (Long Form) on the specimen that was created to verify results and that the unit of Packed Cells is issued to the patient.
Does the flag “** EMERGENCY ISSUED **” appear below the unit number?
11. Enter Transfusion data to complete the specimen.
12. Print an Internal Inquiry (Long Form) to verify results.
_____________________________________________________________________
THIS ROUTINE VALIDATED BY:________________________ DATE:__ /__ /__
ACCEPTABLE:__________________ NOT ACCEPTABLE: ___________________
HOSPITAL NAME: _____________________________________________________
- 291-

4.6: Validation Exercise 1B:
Use this step if your Customer Defined Parameters and Blood Type Dictionary prompts are set to:
ALLOW BLOOD TYPE MISMATCH OVERRIDE? = YFor the AP (A Positive) blood type, set ALLOW EMERGENCY ISSUE? = N
Prerequisite:
Enter one unit of A Positive Packed Cells into inventory and bring it to an AVAILABLE status.
1. Enter a patient who is not in your hospital’s database. The patient should not have a blood type test verified within the BBK SPECIMEN EXPIRE HOURS (XX hours).
If you do not have access to REG PT FROM EMG ISSUE the system will display the warning “Patient not found.” Users cannot continue at this point; the patient will need to be registered through the Admissions module.
If you do have access to REG PT FROM EMG ISSUE, the system will respond:
Patient not found…
Enter a new Account: answer with “Y” Registration screen: choose a registration screen Register and file the patient. Verify that the information entered on the registration screen appears on the BBK EMERGENCY ISSUE screen. The system will display the message: “There are no crossmatched/assigned units for patient.” Select “OK” to continue.
2. At the Unit prompt identify a unit of A POS Packed Cells that is at an AVAILABLE status. The system will display the message:
“Patient has not had a Blood Type within XX hours. Use Historical Type? N” Respond “Y”.
3. The system will then display the following message:
“Patient Blood Type is UNKNOWN, UNIT [ ] Blood Type is A POS, OK?”
Respond “Y”.
4. The system will bring the cursor to the specimen number prompt. If you have the prompt DEFAULT SPECIMEN TEXT in the Customer-Defined Parameters set to NEW, then the word “NEW” will appear under the SPEC prompt. You can accept this default to create a new specimen for this Emergency Issue or perform a lookup and choose a specimen to issue this unit to.
If you do not have your Customer-Defined Parameters set up to default the word “NEW” then you can either perform a lookup and choose a specimen to add this Emergency Issue to or enter past the prompt so that the system will default the word
- 292-
“NEW” and create a new specimen.
Attempt to designate another patient’s specimen. Verify that the warning “Entered specimen is for a different patient.” appears and the specimen must be removed to continue. Remove the incorrect specimen and create a new specimen for this emergency issue.
5. Enter a device at the CARD PRINTER and a form at the UNIT FORM prompt to obtain a copy of the Emergency Issue/Transfuse Form. If a Customer Defined Screen has been defined, answer all queries and then issue the unit by answering the prompt ISSUE? with “Y”.
6. Verify that a requisition and blood bank specimen are created for the correct patient.
What priority is the specimen?
Verify that this priority matches the BBK EMG ISSUE SPECIMEN PRIORITY as set in the Customer-Defined Parameters.
7. Enter results on the blood bank specimen. NOTE: The message “Receive from Collection?” will appear if you have access to receive via E/E Results. If you do not have access, first use the Receive Specimen Routine.
The unit which was issued in the Emergency Issue Routine will display in the result column for the product’s crossmatch.
Result the crossmatch for the emergency-issued unit. If associated tests were ordered, result the tests at this time.
8. Print an Internal Inquiry (Long Form) on the specimen that was created to verify results and that the unit of Packed Cells is issued to the patient.
Does the flag “** EMERGENCY ISSUED **” appear below the unit number?
9. Enter Transfusion data to complete the specimen.
10. Print the Override Warning Report to verify that the warning overridden in Step 3 appears.____________________________________________________________________
THIS ROUTINE VALIDATED BY:________________________ DATE:__ /__ /__
ACCEPTABLE:__________________ NOT ACCEPTABLE: ___________________
HOSPITAL NAME: _____________________________________________________
- 293-

4.6: Validation Exercise 1C:
Use this exercise if your Customer Defined Parameters and Blood Type Dictionary prompts are set to:
ALLOW BLOOD TYPE MISMATCH OVERRIDE? = NFor the AP (A Positive) blood type, set ALLOW EMERGENCY ISSUE? = N
Prerequisite:
Enter a unit of Packed Cells into inventory with the blood type of A Positive. Bring the unit to an AVAILABLE status.
1. Enter a patient who is not in your hospital’s database. The patient should not have a blood type test verified within the BBK SPECIMEN EXPIRE HOURS (XX hours).
If you do not have access to REG PT FROM EMG ISSUE the system will display the warning “Patient not found.” Users cannot continue at this point; the patient will need to be registered through the Admissions module.
If you do have access to REG PT FROM EMG ISSUE, the system will respond:
Patient not found…
Enter a new Account: answer with “Y” Registration screen: choose a registration screen Register and file the patient. Verify that the information entered on the registration screen appears on the BBK EMERGENCY ISSUE screen. The system will display the message: “There are no crossmatched/assigned units for patient.” Select “OK” to continue.
2. At the Unit prompt identify the unit of A POS Packed Cells which is at an AVAILABLE status and which is not reserved for a patient.
Confirm that the system displays the error “Patient has not had a Blood Type within XX hours.” and that the unit cannot be issued to the patient. _____________________________________________________________________
THIS ROUTINE VALIDATED BY:________________________ DATE:__ /__ /__
ACCEPTABLE:__________________ NOT ACCEPTABLE: ___________________
HOSPITAL NAME: _____________________________________________________
- 294-

4.6: Validation Exercise 1D:
Use this exercise if your Customer-Defined Parameter and Blood Type Dictionary prompts are set to:
ALLOW BLOOD TYPE MISMATCH OVERRIDE? = NFor the AP (A Positive) blood type, set ALLOW EMERGENCY ISSUE? = YEMERGENCY ISSUE FOR PRODUCTS is set to include Packed Cells.
Prerequisite:
Enter a unit of Packed Cells into inventory with the blood type of A Positive. Bring the unit to an AVAILABLE status.
1. Enter a patient who is not in your hospital’s database. The patient should not have a blood type test verified within the BBK SPECIMEN EXPIRE HOURS (XX hours).
If you do not have access to REG PT FROM EMG ISSUE the system will display the warning “Patient not found.” Users cannot continue at this point; the patient will need to be registered through the Admissions module.
If you do have access to REG PT FROM EMG ISSUE, the system will respond:
Patient not found…
Enter a new Account: answer with “Y” Registration screen: choose a registration screen Register and file the patient. Verify that the information entered on the registration screen appears on the BBK EMERGENCY ISSUE screen. The system will display the message: “There are no crossmatched/assigned units for patient.” Select “OK” to continue.
2. At the Unit prompt identify a unit of A POS Packed Cells that is at an AVAILABLE status and that is not reserved for someone.
3. The system will bring the cursor to the specimen number prompt. If you have the prompt DEFAULT SPECIMEN TEXT in the Customer-Defined Parameters set to NEW, then the word “NEW” will appear under the SPEC prompt. You can accept this default to create a new specimen for this Emergency Issue or perform a lookup and choose a specimen to issue this unit to.
If you do not have your Customer-Defined Parameters set up to default the word “NEW” then you can either perform a lookup and choose a specimen to add this Emergency Issue to or enter past the prompt so that the system will default the word “NEW” and create a new specimen.
Attempt to designate another patient’s specimen. Verify that the warning “Entered specimen is for a different patient.” appears and the specimen must be removed to continue.
Remove the incorrect specimen and create a new specimen for this emergency issue.
4. Enter a device at the CARD PRINTER and a form at the UNIT FORM prompt to obtain a copy of the Emergency Issue/Transfuse Form. If a Customer Defined Screen has been defined, answer all queries and then issue the unit by answering the prompt
- 295-

ISSUE? with “Y”.
5. Verify that a requisition and blood bank specimen are created for the correct patient.
What priority is the specimen?
Verify that this priority matches the BBK EMG ISSUE SPECIMEN PRIORITY as set in the Customer-Defined Parameters.
6. Enter results on the blood bank specimen. NOTE: The message “Receive from Collection?” will appear if you have access to receive via E/E Results. If you do not have access, first use the Receive Specimen Routine.
The units which were issued in the Emergency Issue Routine will display in the result column for the product’s crossmatch.
Result the crossmatch for the emergency-issued unit. If associated tests were ordered, result the tests at this time.
7. Enter Transfusion data to complete the specimen.
8. Print an Internal Inquiry (Long Form) on the specimen that was created to verify results and that the unit of Packed Cells is issued to the patient.
Does the flag “** EMERGENCY ISSUED **” appear below the unit number? ____________________________________________________________________
THIS ROUTINE VALIDATED BY:________________________ DATE:__ /__ /__
ACCEPTABLE:__________________ NOT ACCEPTABLE: ___________________
HOSPITAL NAME: _____________________________________________________
- 296-

4.6: Validation Exercise 1E:
Use this exercise if your Customer Defined Parameters and Blood Type Dictionary prompts are set to:
ALLOW BLOOD TYPE MISMATCH OVERRIDE? = YFor the UNK (Unknown) blood type, set TRANSFUSABLE (All cases)? = N
Prerequisite:
Enter a unit into inventory with a source blood type of O Positive and a blood type of Unknown. Do not do the retype on the unit so that the blood type remains at UNK. Use a patient with a current blood type of O POS.
1. Select a patient who is currently in the system and has a current blood type of O Positive. Verify that the information that defaults on the screen for the selected patient is correct.
2. At the Unit prompt identify the unit of UNK Packed Cells at an ENTERED status.
If you do not have access to BBK EMG ISSUE UNIT STATUS ENT?, the system Will display the error: “Unit cannot be issued at status ENT.”
If you do have access to BBK EMG ISSUE UNIT STATUS ENT?, the system will allow you to continue.
Notes:
Since the unit you are issuing has a blood type of UNK, you will get the warning message “Unit [ ] Blood Type is NOT TRANSFUSABLE. Ok?” Verify you are not allowed to emergency issue this unit to the patient.
Note: If the Blood type UNK is set to TRANSFUSABLE? N and the product of Packed Cells (or equivalent) is entered for TRANSFUSABLE FOR PRODUCTS, you will get the warning message "Unit [ ] Blood Type is NOT TRANSFUSABLE. OK?".
If you respond "Y" to this warning, you can proceed to Emergency Issue the unit. If you respond "N" to this warning, you will not be able to Emergency Issue this unit to the patient.
If the patient also has antibodies in the BBK History and the unit chosen has not been tested for the associated antigens, the following warning message will appear: "Unit not tested for incompatible antigens: ___, ... Ok?"
If you respond "Y", you will be able to continue and issue the unit to the patient. If you respond "N", you will need to select another unit to issue to the patient.
____________________________________________________________________
THIS ROUTINE VALIDATED BY:________________________ DATE:__ /__ /__
ACCEPTABLE:__________________ NOT ACCEPTABLE: ___________________
HOSPITAL NAME: _____________________________________________________
- 297-

4.6: Validation Exercise 1F:
Use this exercise if your Customer Defined Parameter and Blood Type Dictionary prompts are set to:
ALLOW BLOOD TYPE MISMATCH OVERRIDE? = YFor the OP (O Positive) blood type, set ALLOW EMERGENCY ISSUE? = YEMERGENCY ISSUE FOR PRODUCTS is defined as blank.
Prerequisite:
Enter two units of Packed Cells into inventory with the blood type of O Positive and third unit of Packed Cells with blood type of UNK. Enter one unit of Packed Cells with the Blood Type of UNKNOWN. Reserve one unit of Packed Cells for a patient other than the patient you will be using in the Emergency Issue Routine. Bring the reserved unit and one O Positive unit to an AVAILABLE status. Leave the other unit of O Positive at an ENTERED status. You will need to use a patient with a current blood type of O Positive.
1. Select a patient who is currently in the system and has a current blood type of O POS. Verify that the information that defaults on the screen for the selected patient is correct.
2. At the Unit prompt identify the unit of O POS Packed Cells at an ENTERED status. If you do not have access to BBK EMG ISSUE UNIT STATUS ENT?, the system will display the error: “Unit cannot be issued at status ENT.”
If you do have access to BBK EMG ISSUE UNIT STATUS ENT?, the system will allow you to continue.
3. Linefeed out the above unit and enter the unit with a blood type of UNK. You will receive the warning “Unit [ ] Blood Type is NOT TRANSFUSABLE. Ok?” Verify you are not allowed to emergency issue this unit to the patient.
4. Linefeed out the above unit and enter the unit number of the reserved unit entered in the prerequisites. The system will display the error: “Unit is reserved for someone else.” You will not be able to issue this unit.
5. Linefeed out this unit and enter the unit number of a unit of O POS Packed Cells at an AVAILABLE status that is not reserved for a patient.
If the patient also has antibodies in the BBK History and the unit chosen has not been tested for the associated antigens, the following warning message will appear:
“Unit not tested for incompatible antigens: ___, ... Ok?”
If you respond “Y”, you will be able to continue and issue the unit to the patient. If you respond “N”, you will need to select another unit to issue to the patient. Respond “Y”.
6. The system will bring the cursor to the specimen number prompt. If you have the prompt DEFAULT SPECIMEN TEXT in the Customer-Defined Parameters set to NEW, then the word “NEW” will appear under the SPEC prompt. You can accept this default to create a new specimen for this Emergency Issue or
- 298-

perform a lookup and choose a specimen to issue this unit to.
If you do not have your Customer-Defined Parameters set up to default the word “NEW”, then you can either perform a lookup and choose a specimen to add this Emergency Issue to or enter past the prompt so that the system will default the word “NEW” and create a new specimen.
Attempt to designate another patient’s specimen.
Verify that the warning “Entered specimen is for a different patient.” appears and the specimen must be removed to continue.
Remove the incorrect specimen and create a new specimen for this emergency issue.
7. Enter a device at the CARD PRINTER and a form at the UNIT FORM prompt to obtain a copy of the Emergency Issue/Transfuse Form. If a Customer Defined Screen has been defined, answer all queries and then issue the unit by answering the prompt ISSUE? with “Y”.
8. Verify that a requisition and blood bank specimen are created for the correct patient.
What priority is the specimen?
Verify that this priority matches the BBK EMG ISSUE SPECIMEN PRIORITY as set in the Customer-Defined Parameters.
9. Enter results on the blood bank specimen. NOTE: The message “Receive from Collection?” will appear if you have access to receive via Enter/Edit Results. If you do not have access, first use the Receive Specimen Routine.
The units which were issued in the Emergency Issue Routine will display in the result column for the product’s crossmatch.
Result the crossmatch for the emergency-issued unit. If associated tests were ordered, result the tests at this time.
10. Enter Transfusion data to complete the specimen.
11. Print an Internal Inquiry (Long Form) on the specimen that was created to verify results and that the unit of Packed Cells is issued to the patient.
Does the flag “** EMERGENCY ISSUED **” appear below the unit number?
12. Print the Override Warning Report to verify that any overridden warnings appear. ____________________________________________________________________
THIS ROUTINE VALIDATED BY:________________________ DATE:__ /__ /__
ACCEPTABLE:__________________ NOT ACCEPTABLE: ___________________
HOSPITAL NAME: _____________________________________________________
- 299-

4.6: Validation Exercise 1G:
Use this exercise if your Customer Defined Parameter and Blood Type Dictionary prompts are set to:
ALLOW BLOOD TYPE MISMATCH OVERRIDE? = YFor the ON (O Negative) blood type, set ALLOW EMERGENCY ISSUE? = YEMERGENCY ISSUE FOR PRODUCTS is set to include Packed Cells.
Prerequisite:
Enter a unit of O Negative Packed Cells into inventory and bring it to an AVAILABLE status. Use a patient with a current blood type of O Positive. Make sure that in the Blood Type Dictionary O POS has been set up as compatible for the O NEG product of Packed Cells.
1. Select a patient who is currently in the system and has a current blood type of O Positive. Verify that the information that defaults on the screen for the selected patient is correct.
2. At the Unit prompt identify the unit of O NEG Packed Cells. The system displays “Patient and Unit Blood Types do NOT MATCH, but are Product Compatible ok?”
If you respond “Y”, you will be able to continue and issue the unit to the patient. If you respond “N”, you will need to select another unit to issue to the patient.
Respond “Y”.
3. The system will bring the cursor to the specimen number prompt. If you have the prompt DEFAULT SPECIMEN TEXT in the Customer-Defined Parameters set to NEW, then the word “NEW” will appear under the SPEC prompt. You can accept this default to create a new specimen for this Emergency Issue or perform a lookup and choose a specimen to issue this unit to.
If you do not have your Customer-Defined Parameters set up to default the word “NEW”, then you can either perform a lookup and choose a specimen to add this Emergency Issue to or enter past the prompt so that the system will default the word “NEW” and create a new specimen.
Attempt to designate another patient’s specimen. Verify that the warning “Entered specimen is for a different patient.” appears and the specimen must be removed to continue.
Remove the incorrect specimen and create a new specimen for this emergency issue.
4. Enter a device at the CARD PRINTER and a form at the UNIT FORM prompt to obtain a copy of the Emergency Issue/Transfuse Form. If a Customer Defined Screen has been defined, answer all queries and then issue the unit by answering the prompt ISSUE? with “Y”.
5. Verify that a requisition and blood bank specimen are created for the correct patient.
What priority is the specimen?
- 300-

Verify that this priority matches the BBK EMG ISSUE SPECIMEN PRIORITY as set in the Customer-Defined Parameters.
6. Enter results on the blood bank specimen. NOTE: The message “Receive from Collection?” will appear if you have access to receive via E/E Results. If you do not have access, first use the Receive Specimen Routine.
The units which were issued in the Emergency Issue Routine will display in the result column for the product’s crossmatch. Result the crossmatch for the emergency- issued unit. If associated tests were ordered, result the tests at this time. 7. Enter Transfusion data to complete the specimen.
8. Print an Internal Inquiry (Long Form) on the specimen that was created to verify results and that the unit of Packed Cells is issued to the patient.
Does the flag “** EMERGENCY ISSUED **” appear below the unit number?
9. Print the Override Warning Report to verify that any overridden warnings appear. ____________________________________________________________________
THIS ROUTINE VALIDATED BY:________________________ DATE:__ /__ /__
ACCEPTABLE:__________________ NOT ACCEPTABLE: ___________________
HOSPITAL NAME: _____________________________________________________
- 301-

4.6: Validation Exercise 1H:
Use this exercise if your Customer Defined Parameter and Blood Type Dictionary prompts are set to:
ALLOW BLOOD TYPE MISMATCH OVERRIDE? = NFor the ON (O Negative) blood type, set ALLOW EMERGENCY ISSUE? = YEMERGENCY ISSUE FOR PRODUCTS is set to include Packed Cells
Prerequisite:
Enter a unit of O Negative Packed Cells into inventory and bring it to an AVAILABLE status. Use a patient with a current blood type of O Positive. Make sure that in the Blood Type Dictionary O POS has been set up as compatible for the O NEG product of Packed Cells.
1. Select a patient who is currently in the system and has a current Blood Type of O Positive. Verify that the information that defaults on the screen for the selected patient is correct.
2. At the Unit prompt identify the unit of O NEG Packed Cells. The system displays “Patient and Unit Blood Types do not match, but are Product Compatible ok?”
If you respond “Y”, you will be able to continue and issue the unit to the patient. If you respond “N”, you will need to select another unit to issue to the patient.
Respond “Y”.
3. The system will bring the cursor to the specimen number prompt. If you have the prompt DEFAULT SPECIMEN TEXT in the Customer-Defined Parameters set to NEW, then the word “NEW” will appear under the SPEC prompt. You can accept this default to create a new specimen for this Emergency Issue or perform a lookup and choose a specimen to issue this unit to.
If you do not have your Customer-Defined Parameters set up to default the word “NEW”, then you can either perform a lookup and choose a specimen to add this Emergency Issue to or enter past the prompt so that the system will default the word “NEW” and create a new specimen.
Attempt to designate another patient’s specimen. Verify that the warning “Entered specimen is for a different patient.” appears and the specimen must be removed to continue.
Remove the incorrect specimen and create a new specimen for this emergency issue.
4. Enter a device at the CARD PRINTER and a form at the UNIT FORM prompt to obtain a copy of the Emergency Issue/Transfuse Form. If a Customer Defined Screen has been defined, answer all queries and then issue the unit by answering the prompt ISSUE? with “Y”.
- 302-

5. Verify that a requisition and blood bank specimen are created for the correct patient.
What priority is the specimen?
Verify that this priority matches the BBK EMG ISSUE SPECIMEN PRIORITY as set in the Customer-Defined Parameters.
6. Enter results on the blood bank specimen. NOTE: The message “Receive from Collection?” will appear if you have access to receive via E/E Results. If you do not have access, first use the Receive Specimen Routine.
The units which were issued in the Emergency Issue Routine will display in the result column for the product’s crossmatch. Result the crossmatch for the emergency-issued unit. If associated tests were ordered, result the tests at this time.
7. Enter Transfusion data to complete the specimen.
8. Print an Internal Inquiry (Long Form) on the specimen that was created to verify results and that the unit of Packed Cells is issued to the patient.
Does the flag “** EMERGENCY ISSUED **” appear below the unit number?
9. Print the Override Warning Report to verify that any overridden warnings appear. ____________________________________________________________________
THIS ROUTINE VALIDATED BY:________________________ DATE:__ /__ /__
ACCEPTABLE:__________________ NOT ACCEPTABLE: ___________________
HOSPITAL NAME: _____________________________________________________
- 303-

4.6: Validation Exercise 1I:
Use this exercise if your Customer Defined Parameters and Blood Type Dictionary prompts are set to:
ALLOW BLOOD TYPE MISMATCH OVERRIDE? = YFor the AP (A Positive) blood type, set ALLOW EMERGENCY ISSUE? = N
Prerequisite:
Enter a unit of A Positive Packed Cells into inventory and bring it to an AVAILABLE status. Use a patient with a current blood type of O Positive. Make sure that in the Blood Type Dictionary O POS has been set up as NOT compatible with the A POS product of Packed Cells.
1. Select a patient who is currently in the system and has a current blood type of O Positive. Verify that the information that defaults on the screen for the selected patient is correct.
2. At the Unit prompt identify the unit of A POS Packed Cells at an AVAILABLE status. The system displays “Patient and Unit Blood types do NOT MATCH, ok?”
If you respond “Y”, you will be able to continue and issue the unit to the patient. If you respond “N”, you will need to select another unit to issue to the patient.
Respond “Y”.
3. The system will bring the cursor to the specimen number prompt. If you have the prompt DEFAULT SPECIMEN TEXT in the Customer-Defined Parameters set to NEW, then the word “NEW” will appear under the SPEC prompt. You can accept this default to create a new specimen for this Emergency Issue or perform a lookup and choose a specimen to issue this unit to.
If you do not have your Customer-Defined Parameters set up to default the word “NEW”, then you can either perform a lookup and choose a specimen to add this Emergency Issue to or enter past the prompt so that the system will default the word “NEW” and create a new specimen.
Attempt to designate another patient’s specimen.
Verify that the warning “Entered specimen is for a different patient.” appears and the specimen must be removed to continue.
Remove the incorrect specimen and create a new specimen for this emergency issue.4. Enter a device at the CARD PRINTER and a form at the UNIT FORM prompt to obtain a copy of the Emergency Issue/Transfuse Form. If a Customer Defined Screen has been defined, answer all queries and then issue the unit by answering the prompt ISSUE? with “Y”.
5. Verify that a requisition and blood bank specimen are created for the correct patient.
What priority is the specimen?
Verify that this priority matches the BBK EMG ISSUE SPECIMEN PRIORITY as set in the Customer-Defined Parameters.
- 304-

6. Enter results on the blood bank specimen. NOTE: The message “Receive from Collection?” will appear if you have access to receive via E/E Results. If you do not have access, first use the Receive Specimen Routine.
The units which were issued in the Emergency Issue Routine will display in the result column for the product’s crossmatch. Result the crossmatch for the emergency-issued unit. If associated tests were ordered, result the tests at this time.
7. Enter Transfusion data to complete the specimen.
8. Print an Internal Inquiry (Long Form) on the specimen that was created to verify results and that the unit of Packed Cells is issued to the patient.
Does the flag “** EMERGENCY ISSUED **” appear below the unit number?
9. Print the Override Warning Report to verify that any overridden warnings appear. _______________________________________________________________________
THIS ROUTINE VALIDATED BY:________________________ DATE:__ /__ /__
ACCEPTABLE:__________________ NOT ACCEPTABLE: ___________________
HOSPITAL NAME: _____________________________________________________
- 305-

4.6: Validation Exercise 1J:
Use this exercise if your Customer Defined Parameter and Blood Type Dictionary prompts are set to:
ALLOW BLOOD TYPE MISMATCH OVERRIDE? = YFor the OP (O Positive) blood type, set ALLOW EMERGENCY ISSUE? = YEMERGENCY ISSUE FOR PRODUCTS is set to include Packed Cells.
Prerequisite:
Enter a unit of O Positive Packed Cells into inventory and bring it to an AVAILABLE status. Use a patient with a current blood type of O Negative. Make sure that in the Blood Type Dictionary O NEG has been set up as NOT compatible for the O POS product of Packed Cells.
1. Select a patient who is currently in the system and has a current Blood Type of O Negative. Verify that the information that defaults on the screen for the selected patient is correct.
2. At the Unit prompt identify the unit of O POS Packed Cells at an AVAILABLE status. The system displays “Patient and Unit Blood Types do NOT MATCH, ok?”
If you respond “Y”, you will be able to continue and issue the unit to the patient. If you respond “N”, you will need to select another unit to issue to the patient.
Respond “Y”.
3. The system will bring the cursor to the specimen number prompt.
If you have the prompt DEFAULT SPECIMEN TEXT in the Customer-Defined Parameters set to NEW, then the word “NEW” will appear under the SPEC prompt. You can accept this default to create a new specimen for this Emergency Issue or perform a lookup and choose a specimen to issue this unit to.
If you do not have your Customer-Defined Parameters set up to default the word “NEW” then you can either perform a lookup and choose a specimen to add this Emergency Issue to or enter past the prompt so that the system will default the word “NEW” and create a new specimen.
Attempt to designate another patient’s specimen. Verify that the warning “Entered specimen is for a different patient.” appears and the specimen must be removed to continue.
Remove the incorrect specimen and create a new specimen for this emergency issue.
4. Enter a device at the CARD PRINTER and a form at the UNIT FORM prompt to obtain a copy of the Emergency Issue/Transfuse Form. If a Customer Defined Screen has been defined, answer all queries and then issue the unit by answering the prompt ISSUE? with “Y”.
5. Verify that a requisition and blood bank specimen are created for the correct patient.
What priority is the specimen?
- 306-

Verify that this priority matches the BBK EMG ISSUE SPECIMEN PRIORITY as set in the Customer-Defined Parameters.
6. Enter results on the blood bank specimen. NOTE: The message “Receive from Collection?” will appear if you have access to receive via E/E Results. If you do not have access, first use the Receive Specimen Routine.
The units which were issued in the Emergency Issue Routine will display in the result column for the product’s crossmatch. Result the crossmatch for the emergency-issued unit. If associated tests were ordered, result the tests at this time.
7. Enter Transfusion data to complete the specimen.
8. Print an Internal Inquiry (Long Form) on the specimen that was created to verify results and that the unit of Packed Cells is issued to the patient.
Does the flag “** EMERGENCY ISSUED **” appear below the unit number?
9. Print the Override Warning Report to verify that any overridden warnings appear. ______________________________________________________________________
THIS ROUTINE VALIDATED BY:________________________ DATE:__ /__ /__
ACCEPTABLE:__________________ NOT ACCEPTABLE: ___________________
HOSPITAL NAME: _____________________________________________________
- 307-

4.6: Validation Exercise 1K:
Use this exercise if your Customer Defined Parameter and Blood Type Dictionary prompts are set to:
ALLOW BLOOD TYPE MISMATCH OVERRIDE? = NFor the OP (O Positive) blood type, set ALLOW EMERGENCY ISSUE? = YEMERGENCY ISSUE FOR PRODUCTS is set to include Packed Cells.
Prerequisite:
Enter a unit of O Positive Packed Cells into inventory and bring it to an AVAILABLE status. Use a patient with a current blood type of O Negative. Make sure that in the Blood Type Dictionary O NEG has been set up as NOT compatible for the O POS product of Packed Cells.
1. Select a patient who is currently in the system and has a current Blood Type of O Negative. Verify that the information that defaults on the screen for the selected patient is correct.
2. At the Unit prompt identify the unit of O POS Packed Cells at an AVAILABLE status.
The system will display the error “Incompatible blood type” and the unit cannot be issued to the patient.
_______________________________________________________________________
THIS ROUTINE VALIDATED BY:________________________ DATE:__ /__ /__
ACCEPTABLE:__________________ NOT ACCEPTABLE: ___________________
HOSPITAL NAME: _____________________________________________________
- 308-

4.6: Validation Exercise 1L:
Use this exercise if your Customer-Defined Parameters are set to:
ALLOW BLOOD TYPE MISMATCH OVERRIDE? = NFor the OP (O Positive) blood type, set ALLOW EMERGENCY ISSUE? = N
Prerequisite:
Enter a unit of O Positive Packed Cells into inventory and bring it to an AVAILABLE status. Use a patient with a current blood type of O NEG. Make sure that in the Blood Type Dictionary O NEG has been set up as NOT compatible for the O POS product of Packed Cells.
1. Select a patient who is currently in the system and has a current Blood Type of O Negative. Verify that the information that defaults on the screen for the selected patient is correct.
2. At the Unit prompt identify the unit of O POS Packed Cells at an AVAILABLE status.
The system will display the error “Incompatible blood type” and the unit cannot be issued to the patient.
_______________________________________________________________________
THIS ROUTINE VALIDATED BY:________________________ DATE:__ /__ /__
ACCEPTABLE:__________________ NOT ACCEPTABLE: ___________________
HOSPITAL NAME: _____________________________________________________
- 309-

4.6: Validation Exercise 1M:
Use this exercise if your Customer-Defined Parameter and Blood Type Dictionary prompts are set to:
ALLOW BLOOD TYPE MISMATCH OVERRIDE? = Y or NFor the AP (A Positive) blood type, set ALLOW EMERGENCY ISSUE? = YEMERGENCY ISSUE FOR PRODUCTS is set to include Packed Cells. Prerequisite:
Enter a unit of A Positive Packed Cells into inventory and bring it to an AVAILABLE status. Use a patient with a historical blood type of A Positive and a Temporary Historical Blood Type of B Positive. Make sure that in the Blood Type Dictionary BP has been set up as not compatible for the AP product.
1. Select a patient who is currently in the system and has a historical blood type of A Positive and a Temporary Historical Blood Type of B Positive. Verify that the information that defaults on the screen for the selected patient is correct.
2. At the Unit prompt identify the unit of A Positive Packed Cells at an AVAILABLE status.
The system displays “Unit [x] compatible with patient's Historical but not Temp Bld Type, Ok?”
If you respond “Y”, you will be able to continue and issue the unit to the patient. If you respond “N”, you will need to select another unit to issue to the patient.
Respond “Y”.
3. The system will bring the cursor to the specimen number prompt. If you have the prompt DEFAULT SPECIMEN TEXT in the Customer-Defined Parameters set to NEW, then the word “NEW” will appear under the SPEC prompt. You can accept this default to create a new specimen for this Emergency Issue or perform a lookup and choose a specimen to issue this unit to.
If you do not have your Customer-Defined Parameters set up to default the word “NEW” then you can either perform a lookup and choose a specimen to add this Emergency Issue to or enter past the prompt so that the system will default the word “NEW” and create a new specimen. Attempt to designate another patient’s specimen.
Verify that the warning “Entered specimen is for a different patient.” appears and the specimen must be removed to continue.
Remove the incorrect specimen and create a new specimen for this emergency issue.
1. Enter a device in the CARD PRINTER and a form at the UNIT FORM prompt to obtain a copy of the Emergency Issue/Transfuse Form.
If a Customer Defined Screen has been defined, answer all queries and then issue the unit by answering the prompt ISSUE? with “Y”.
5. Verify that a requisition and blood bank specimen are created for the correct patient.
- 310-

What priority is the specimen?
Verify that this priority matches the BBK EMG ISSUE SPECIMEN PRIORITY as set in the Customer-Defined Parameters.
6. Enter results on the blood bank specimen. NOTE: The message “Receive from Collection?” will appear if you have access to receive via E/E Results. If you do not have access, first use the Receive Specimen Routine.
The units which were issued in the Emergency Issue Routine will display in the result column for the product’s crossmatch.
Result the crossmatch for the emergency-issued unit. If associated tests were ordered, result the tests at this time.
7. Enter Transfusion data to complete the specimen.
8. Print an Internal Inquiry (Long Form) on the specimen that was created to verify results and that the unit of Packed Cells is issued to the patient.
Does the flag “** EMERGENCY ISSUED **” appear below the unit number?
9. Print the Override Warning Report to verify that any overridden warnings appear. _______________________________________________________________________
THIS ROUTINE VALIDATED BY:________________________ DATE:__ /__ /__
ACCEPTABLE:__________________ NOT ACCEPTABLE: ___________________
HOSPITAL NAME: _____________________________________________________
- 311-

4.6: Validation Exercise 1N:
Use this exercise if your Customer Defined Parameter and Blood Type Dictionary prompts are set to:
ALLOW BLOOD TYPE MISMATCH OVERRIDE? = Y or NFor the ON (O Negative) blood type, set ALLOW EMERGENCY ISSUE? = YEMERGENCY ISSUE FOR PRODUCTS is set to include Packed Cells.
Prerequisite:
Enter a unit of O Negative Packed Cells into inventory and bring it to an AVAILABLE status. Use a patient with a historical blood type of O Positive and a Temporary Historical Blood Type of B Positive. Make sure that in the Blood Type Dictionary O POS has been set up as compatible for the O NEG product of Packed Cells and B POS has been set up as not compatible for the O NEG product of Packed Cells.
1. Select a patient who is currently in the system with a historical blood type of O Positive and a Temporary Historical Blood Type of B Positive. Verify that the information that defaults on the screen for the selected patient is correct.
2. At the Unit prompt identify the unit of O NEG Packed Cells at an AVAILABLE status.
The system displays “Patient and Unit Blood Types do NOT MATCH, but are Product Compatible. Ok?”
Respond to this with “Y”.
“Unit [x] compatible with patient's Historical but not Temp Bld Type, Ok?”
If you respond “Y”, you will be able to continue and issue the unit to the patient. If you respond “N”, you will need to select another unit to issue to the patient.
Respond “Y”.
3. The system will bring the cursor to the specimen number prompt. If you have the prompt DEFAULT SPECIMEN TEXT in the Customer-Defined Parameters set to NEW, then the word “NEW” will appear under the SPEC prompt. You can accept this default to create a new specimen for this Emergency Issue or perform a lookup and choose a specimen to issue this unit to.
If you do not have your Customer-Defined Parameters set up to default the word “NEW” then you can either perform a lookup and choose a specimen to add this Emergency Issue to or enter past the prompt so that the system will default the word “NEW” and create a new specimen.
Attempt to designate another patient’s specimen.
Verify that the warning “Entered specimen is or a different patient.” appears and the specimen must be removed to continue.
Remove the incorrect specimen and create a new specimen for this emergency issue.
4. Enter a device at the CARD PRINTER and a form at the UNIT FORM prompt to obtain a copy of the Emergency Issue/Transfuse Form. If a Customer Defined Screen
- 312-

has been defined, answer all queries and then issue the unit by answering the prompt ISSUE? with “Y”.
5. Verify that a requisition and blood bank specimen are created for the correct patient.
What priority is the specimen?
Verify that this priority matches the BBK EMG ISSUE SPECIMEN PRIORITY as set in the Customer-Defined Parameters.
6. Enter results on the blood bank specimen. NOTE: The message “Receive from Collection?” will appear if you have access to receive via E/E Results. If you do not have access, first use the Receive Specimen Routine.
The units which were issued in the Emergency Issue Routine will display in the result column for the product’s crossmatch. Result the crossmatch for the emergency-issued unit. If associated tests were ordered, result the tests at this time.
7. Enter Transfusion data to complete the specimen.
8. Print an Internal Inquiry (Long Form) on the specimen that was created to verify results and that the unit of Packed Cells is issued to the patient.
Does the flag “** EMERGENCY ISSUED **” appear below the unit number?
9. Print the Override Warning Report to verify that any overridden warnings appear.
_______________________________________________________________________
THIS ROUTINE VALIDATED BY:________________________ DATE:__ /__ /__
ACCEPTABLE:__________________ NOT ACCEPTABLE: ___________________
HOSPITAL NAME: _____________________________________________________
- 313-

4.6: Validation Exercise 1O:
Use this exercise if your Customer-Defined Parameter and Blood Type Dictionary prompts are set to:
ALLOW BLOOD TYPE MISMATCH OVERRIDE? = Y or NFor the A POS (A Positive) blood type, set ALLOW EMERGENCY ISSUE? = YEMERGENCY ISSUE FOR PRODUCTS is set to include Packed Cells.
Prerequisite:
Enter a unit of A Positive Packed Cells into inventory and bring it to an AVAILABLE status. Use a patient with a historical blood type of B Positive and a Temporary Historical Blood Type of A Positive. Make sure that in the Blood Type Dictionary B POS has been set up as not compatible for the A POS product of Packed Cells.
1. Select a patient who is currently in the system and has a historical blood type of B Positive and a Temporary Historical Blood Type of A Positive. Verify that the information that defaults on the screen for the selected patient is correct.
2. At the Unit prompt identify the unit of A POS Packed Cells at an AVAILABLE status.
The system will display “Unit [x] compatible with patient's Temp but not Historical Bld Type. Ok?
If you respond “Y”, you will be able to continue and issue the unit to the patient. If you respond “N”, you will need to select another unit to issue to the patient.
Respond “Y”.
3. The system will bring the cursor to the specimen number prompt. If you have the prompt DEFAULT SPECIMEN TEXT in the Customer-Defined Parameters set to NEW, then the word “NEW” will appear under the SPEC prompt. You can accept this default to create a new specimen for this Emergency Issue or perform a lookup and choose a specimen to issue this unit to.
If you do not have your Customer-Defined Parameters set up to default the word “NEW”, then you can either perform a lookup and choose a specimen to add this Emergency Issue to or enter past the prompt so that the system will default the word “NEW” and create a new specimen.
Attempt to designate another patient’s specimen.
Verify that the warning “Entered specimen is for a different patient.” appears and the specimen must be removed to continue.
Remove the incorrect specimen and create a new specimen for this emergency issue.
4. Enter a device at the CARD PRINTER and a form at the UNIT FORM prompt to obtain a copy of the Emergency Issue/Transfuse Form. If a Customer Defined Screen has been defined, answer all queries and then issue the unit by answering the prompt ISSUE? with “Y”.
5. Verify that a requisition and blood bank specimen are created for the correct patient.
- 314-

What priority is the specimen?
Verify that this priority matches the BBK EMG ISSUE SPECIMEN PRIORITY as set in the Customer-Defined Parameters. 6. Enter results on the blood bank specimen. NOTE: The message “Receive from Collection?” will appear if you have access to receive via E/E Results. If you do not have access, first use the Receive Specimen Routine.
The units which were issued in the Emergency Issue Routine will display in the result column for the product’s crossmatch. Result the crossmatch for the emergency-issued unit. If associated tests were ordered, result the tests at this time.
7. Enter Transfusion data to complete the specimen.
8. Print an Internal Inquiry (Long Form) on the specimen that was created to verify results and that the unit of Packed Cells is issued to the patient.
Does the flag “** EMERGENCY ISSUED **” appear below the unit number?
9. Print the Override Warning Report to verify that any overridden warnings appear. _______________________________________________________________________
THIS ROUTINE VALIDATED BY:________________________ DATE:__ /__ /__
ACCEPTABLE:__________________ NOT ACCEPTABLE: ___________________
HOSPITAL NAME: _____________________________________________________
- 315-
4.6: Validation Exercise 1P:
Use this exercise if your Customer-Defined Parameter and Blood Type Dictionary prompts are set to:
ALLOW BLOOD TYPE MISMATCH OVERRIDE? = Y For the O NEG (O Negative) blood type, set ALLOW EMERGENCY ISSUE? = YEMERGENCY ISSUE FOR PRODUCTS is set to include Packed Cells.
Prerequisite:
Enter a unit of O Negative Packed Cells into inventory and bring it to an AVAILABLE status. Use a patient with a historical blood type of B Positive and a Temporary Historical Blood Type of O Positive. Make sure that in the Blood Type Dictionary O POS has been set up as a compatible type for the O NEG product of Packed Cells and B POS has been set up as not compatible for the O NEG product of Packed Cells.
1. Select a patient who is currently in the system and has a historical blood type of B Positive and a Temporary Historical Blood Type of O Positive. Verify that the information that defaults on the screen for the selected patient is correct.
2. At the Unit prompt identify the unit of O NEG Packed Cells at an AVAILABLE status.
The system will warn “Patient and Unit Blood Types do NOT MATCH, but are Product Compatible, Ok?”
Respond “Y”.
The system will warn “Unit [ ] compatible with patient’s Temp but not Historical Bld Type. Ok?”
Respond Y.
If the patient also has antibodies in the BBK History and the unit chosen has not been tested for the associated antigens, the following warning message will appear:
“Unit not tested for incompatible antigens: ___, ...Ok?”
If you respond “Y”, you will be able to continue and issue the unit to the patient. If you respond “N”, you will need to select another unit to issue to the patient.
Respond “Y”.
3. The system will bring the cursor to the specimen number prompt. If you have the prompt DEFAULT SPECIMEN TEXT in the Customer Defined Parameters set to NEW, then the word “NEW” will appear under the SPEC prompt. You can accept this default to create a new specimen for this Emergency Issue or perform a lookup and choose a specimen to issue this unit to.
If you do not have your Customer-Defined Parameters set up to default the word “NEW”, then you can either perform a lookup and choose a specimen to add this Emergency Issue to or enter past the prompt so that the system will default the word “NEW” and create a new specimen.
Attempt to designate another patient’s specimen.
Verify that the warning “Entered specimen is for a different patient.” appears and the specimen must be removed to continue.
- 316-
Remove the incorrect specimen and create a new specimen for this emergency issue.
4. Enter a device in the CARD PRINTER and a form at the UNIT FORM prompt to obtain a copy of the Emergency Issue/Transfuse Form. If a Customer Defined Screen has been defined, answer all queries and then issue the unit by answering the prompt ISSUE? with “Y”.
5. Verify that a requisition and blood bank specimen are created for the correct patient.
What priority is the specimen? Verify that this priority matches the BBK EMG ISSUE SPECIMEN PRIORITY as set in the Customer-Defined Parameters.
6. Enter results on the blood bank specimen. NOTE: The message “Receive from Collection?” will appear if you have access to receive via E/E Results. If you do not have access, first use the Receive Specimen Routine.
The units which were issued in the Emergency Issue Routine will display in the result column for the product’s crossmatch.
Result the crossmatch for the emergency-issued unit. If associated tests were ordered, result the tests at this time.
7. Enter Transfusion data to complete the specimen.
8. Print an Internal Inquiry (Long Form) on the specimen that was created to verify results and that the unit of Packed Cells is issued to the patient.
Does the flag “** EMERGENCY ISSUED **” appear below the unit number?
9. Print the Override Warning Report to verify that any overridden warnings appear. _______________________________________________________________________
THIS ROUTINE VALIDATED BY:________________________ DATE:__ /__ /__
ACCEPTABLE:__________________ NOT ACCEPTABLE: ___________________
HOSPITAL NAME: _____________________________________________________
- 317-

4.6: SECTION 2: Exercises within this section should be used if your Customer-Defined Parameters are set to “Restrict if No Current Blood Type?” = N
4.6: Validation Exercise 2A:
Use this exercise if your Customer Defined Parameter/Blood Type Dictionary prompts are set to:
ALLOW BLOOD TYPE MISMATCH OVERRIDE? = YFor the OP (O Positive) blood type, set ALLOW EMERGENCY ISSUE? = Y EMERGENCY ISSUE FOR PRODUCTS is set to include Packed Cells
Prerequisite:
Enter a unit of O Positive Packed Cells into inventory and bring the unit to an AVAILABLE status.
1. Enter a patient who is not in your hospital’s database. The patient should not have a blood type test verified within the BBK SPECIMEN EXPIRE HOURS (XX hours).
If you do not have access to REG PT FROM EMG ISSUE the system will display the warning “Patient not found.” Users cannot continue at this point; the patient will need to be registered through the Admissions module.
If you do have access to REG PT FROM EMG ISSUE, the system will respond: Patient not found.
Enter a new Account: answer with “Y” Registration screen: choose a registration screen Register and file the patient. Verify that the information entered on the registration screen appears on the BBK EMERGENCY ISSUE screen.
If the patient does not have any crossmatched or assigned units the following message will display: “There are no crossmatched/assigned units for patient”
If the patient has crossmatched or assigned units, a pop up box will display the crossmatched or assigned units.
2. At the Unit prompt identify a unit of O POS Packed Cells that is at an AVAILABLE status.
3. The system will bring the cursor to the specimen number prompt. If you have the prompt DEFAULT SPECIMEN TEXT in the Customer-Defined Parameters set to NEW, then the word “NEW” will appear under the SPEC prompt. You can accept this default to create a new specimen for this Emergency Issue or perform a lookup and choose a specimen to issue this unit to.
If you do not have your Customer-Defined Parameters set up to default the word “NEW” then you can either perform a lookup and choose a specimen to add this Emergency Issue to or enter past the prompt so that the system will default the word “NEW” and create a new specimen.
- 318-

Attempt to designate another patient’s specimen.
Verify that the warning “Entered specimen is for a different patient.” appears and the specimen must be removed to continue.
Remove the incorrect specimen and create a new specimen for this emergency issue.
4. Enter a device in the CARD PRINTER and a form at the UNIT FORM prompt to obtain a copy of the Emergency Issue/Transfuse Form. If a Customer Defined Screen has been defined, answer all queries and then issue the unit by answering the prompt ISSUE? with “Y”.
5. Verify that a requisition and blood bank specimen are created for the correct patient.
What priority is the specimen?
Verify that this priority matches the BBK EMG ISSUE SPECIMEN PRIORITY as set in the Customer-Defined Parameters.
6. Enter results on the blood bank specimen. NOTE: The message “Receive from Collection?” will appear if you have access to receive via E/E Results. If you do not have access, first use the Receive Specimen Routine.
The units which were issued in the Emergency Issue Routine will display in the result column for the product’s crossmatch. Result the crossmatch for the emergency-issued unit. If associated tests were ordered, result the tests at this time.
7. Enter Transfusion data to complete the specimen.
8. Print an Internal Inquiry (Long Form) on the specimen that was created to verify results and that the unit of Packed Cells is issued to the patient.
Does the flag “** EMERGENCY ISSUED **” appear below the unit number?
______________________________________________________________________
THIS ROUTINE VALIDATED BY:________________________ DATE:__ /__ /__
ACCEPTABLE:__________________ NOT ACCEPTABLE: ___________________
HOSPITAL NAME: _____________________________________________________
- 319-

4.6: Validation Exercise 2B:
Set up the Customer Defined Parameters as follows:
ALLOW BLOOD TYPE MISMATCH OVERRIDE? = YFor the AP (A Positive) blood type, set ALLOW EMERGENCY ISSUE? = N
Prerequisites:
Enter two units of Packed Cells with an A Positive blood type. Leave one unit at an ENTERED status with the blood type of UNKNOWN and bring the second unit to an AVAILABLE status.
1. Enter a patient who is not in your hospital’s database. The patient should not have a historical blood type. If you do not have access to REG PT FROM EMG ISSUE the system will display the warning “Patient not found.” Users cannot continue at this point; the patient will need to be registered through the Admissions module.
If you do have access to REG PT FROM EMG ISSUE, the system will respond:
Patient not found.
Enter a new Account: answer with “Y”. Registration screen: choose a registration screen Register and file the patient. Verify that the information entered on the registration screen appears on the BBK EMERGENCY ISSUE screen If the patient does not have any crossmatched or assigned units the following message will display: “There are no crossmatched/assigned units for patient”
If the patient has crossmatched or assigned units, a pop up box will display the crossmatched or assigned units
2. At the unit prompt identify the unit which is AP and at an available status.
3. The system will then display the following message:
“Patient Blood Type is UNKNOWN, UNIT [ ] Blood Type is A POS, OK?”
Respond “Y”. The system will bring the cursor to the specimen number prompt.
If you have the prompt DEFAULT SPECIMEN TEXT in the Customer-Defined Parameters set to NEW, then the word “NEW” will appear under the SPEC prompt. You can accept this default to create a new specimen for this Emergency Issue or perform a lookup and choose a specimen to issue this unit to.
If you do not have your Customer-Defined Parameters set up to default the word “NEW” then you can either perform a lookup and choose a specimen to add this Emergency Issue to or enter past the prompt so that the system will default the word “NEW” and create a new specimen.
Attempt to designate another patient’s specimen.
- 320-

Verify that the warning “Entered specimen is for a different patient.” appears and the specimen must be removed to continue.
Remove the incorrect specimen and create a new specimen for this emergency issue.
4. Enter a device at the CARD PRINTER and a form at the UNIT FORM prompt to obtain a copy if the Emergency Issue/Transfuse Form. If a Customer Defined Screen has been defined, answer all queries and then issue the unit by answering the prompt ISSUE? with “Y”.
Verify that a requisition and blood bank specimen are created for the correct patient. What priority is the specimen?
Verify that this priority matches the BBK EMG ISSUE SPECIMEN PRIORITY as set in the Customer-Defined Parameters.
5. Enter results on the blood bank specimen. NOTE: The message “Receive from Collection?” will appear if you have access to receive via E/E Results. If you do not have access, first use the Receive Specimen Routine.
The units which were issued in the Emergency Issue Routine will display in the result column for the product’s crossmatch. Result the crossmatch for the emergency-issued unit. If associated tests were ordered, result the tests at this time.
6. Enter Transfusion data to complete the specimen.
7. Go back into the Emergency Issue Routine and, following the steps in Step #1, enter a new patient into the system.
8. At the Unit number prompt, enter the unit of A Positive Packed Cells that is at an ENTERED status.
If you do not have access to BBK EMG ISSUE UNIT STATUS ENT?, the system will display the error: “Unit cannot be issued at status ENT.”
If you do have access to BBK EMG ISSUE UNIT STATUS ENT?, the system will allow you to continue.
NOTE: If the unit you are issuing has a blood type of UNK you will get the warning message “Unit [ ] Blood Type is NOT TRANSFUSABLE. Ok?” Verify you are not allowed to emergency issue this unit to the patient.
______________________________________________________________________
THIS ROUTINE VALIDATED BY:________________________ DATE:__ /__ /__
ACCEPTABLE:__________________ NOT ACCEPTABLE: ___________________
HOSPITAL NAME: _____________________________________________________
- 321-

4.6: Validation Exercise 2C:
Use this exercise if your Customer Defined Parameters are set to:
ALLOW BLOOD TYPE MISMATCH OVERRIDE? = YFor the UNK (Unknown) blood type, set TRANSFUSABLE? = N
TRANSFUSABLE FOR PRODUCTS=PACKED CELLS
Prerequisite:
Enter a unit of packed cells into inventory with a source blood type of O Positive and a blood type of Unknown. Do not do the retype on the unit so that the blood type remains at UNK. Use a patient with a current blood type of O POS.
1. Select a patient who is currently in the system and has a current blood type of O Positive. Verify that the information that defaults on the screen for the selected patient is correct.
If the patient does not have any crossmatched or assigned units the following message will display: “There are no crossmatched/assigned units for patient”
If the patient has crossmatched or assigned units, a pop up box will display the crossmatched or assigned units
2. At the Unit prompt identify the unit of UNK Packed Cells at an ENTERED status.
If you do not have access to BBK EMG ISSUE UNIT STATUS ENT?, the system will display the error: “Unit cannot be issued at status ENT.”
If you do have access to BBK EMG ISSUE UNIT STATUS ENT?, the system will allow you to continue.
NOTE: The system will display the following message: “Patient and Unit Blood Types do NOT MATCH, Ok?” Respond “Y”. For the UNK blood type, set TRANSFUSABLE?=Y
If you respond “Y” to this warning, you can proceed to Emergency Issue the unit. If you respond “N” to this warning, you will not be able to Emergency Issue this unit to the patient.
If the patient also has antibodies in the BBK History and the unit chosen has not been tested or the associated antigens, the following warning message will appear: “Unit not tested for incompatible antigens: ___, ... Ok?”
If you respond “Y”, you will be able to continue and issue the unit to the patient. If you respond “N”, you will need to select another unit to issue to the patient.
3. The system will bring the cursor to the specimen number prompt. If you have the prompt DEFAULT SPECIMEN TEXT in the Customer-Defined Parameters set to NEW, then the word “NEW” will appear under the SPEC prompt. You can accept this default to create a new specimen for this Emergency Issue or perform a lookup and choose a specimen to issue this unit to. If you do not have your Customer-Defined Parameters set up to default the word “NEW”, then you can either perform a lookup and choose a specimen to add this
- 322-
Emergency Issue to or enter past the prompt so that the system will default the word “NEW” and create a new specimen.
Attempt to designate another patient’s specimen.
Verify that the warning “Entered specimen is for a different patient.” appears and the specimen must be removed to continue.
Remove the incorrect specimen and create a new specimen for this emergency issue.
4. Enter a device at the CARD PRINTER and a form at the UNIT FORM prompt to obtain a copy of the Emergency Issue/Transfuse Form. If a Customer Defined Screen has been defined, answer all queries and then issue the unit by answering the prompt ISSUE? with “Y”.
5. Verify that a requisition and blood bank specimen are created for the correct patient. What priority is the specimen? Verify that this priority matches the BBK EMG ISSUE SPECIMEN PRIORITY as set in the Customer-Defined Parameters.
6. Enter results on the blood bank specimen. NOTE: The message “Receive from Collection?” will appear if you have access to receive via E/E Results. If you do not have access, first use the Receive Specimen Routine.
The units which were issued in the Emergency Issue Routine will display in the result column for the product’s crossmatch.
Result the crossmatch for the emergency-issued unit. If associated tests were ordered, result the tests at this time.
7. Enter Transfusion data to complete the specimen.
8. Print an Internal Inquiry (Long Form) on the specimen that was created to verify results and that the unit of Packed Cells is issued to the patient.
Does the flag “** EMERGENCY ISSUED **” appear below the unit number?
9. Print the Override Warning Report to verify that any overridden warnings appear.
_______________________________________________________________________
THIS ROUTINE VALIDATED BY:________________________ DATE:__ /__ /__
ACCEPTABLE:__________________ NOT ACCEPTABLE: ___________________
HOSPITAL NAME: _____________________________________________________
- 323-

4.6: Validation Exercise 2D:
Use this exercise if your Customer Defined Parameter/Blood Type Dictionary prompts are set to:
ALLOW BLOOD TYPE MISMATCH OVERRIDE? = YFor the OP (O Positive) blood type, set ALLOW EMERGENCY ISSUE? = YEMERGENCY ISSUE FOR PRODUCTS is set to include Packed Cells
TRANSFUSABLE FOR PRODUCTS=PACKED CELLS
Prerequisite:
Enter two units of Packed Cells into inventory with the blood type of O Positive and one unit of Packed Cells with a blood type of UNK. Reserve one unit of Packed Cells for a patient other than the patient you will be using in the Emergency Issue Routine. Bring the reserved unit and one other unit to an AVAILABLE status and leave one unit at an ENTERED status. You will need to use a patient with a current blood type of O Positive.
1. Select a patient who is currently in the system and has a current blood type of O POS. Verify that the information that that defaults on the screen for the selected patient is correct.
If the patient does not have any crossmatched or assigned units the following message will display: “There are no crossmatched/assigned units for patient”
If the patient has crossmatched or assigned units, a pop up box will display the crossmatched or assigned units
2. At the Unit prompt identify the unit of UNK Packed Cells at an ENTERED status.
If you do not have access to BBK EMG ISSUE UNIT STATUS ENT?, the system will display the error: “Unit cannot be issued at status ENT.”
If you do have access to BBK EMG ISSUE UNIT STATUS ENT?, the system will allow you to continue.
Note: The system will display the following message: You will receive the warning “Patient and Unit Blood Types do NOT MATCH, Ok?” Respond “N”.
3. Linefeed out the above unit and enter the unit number of the reserved unit entered in the prerequisites. The system will display the error: “Unit is reserved for someone else.” You will not be able to issue this unit.
4. Linefeed out this unit and enter the unit number of a unit of O POS Packed Cells at an AVAILABLE status that is not reserved for a patient.
If the patient also has antibodies in the BBK History and the unit chosen has not been tested for the associated antigens, the following warning message will appear: “Unit not tested for incompatible antigens: ___, ... Ok?”
If you respond “Y”, you will be able to continue and issue the unit to the patient. If you respond “N”, you will need to select another unit to issue to the patient.
Respond “Y”.
- 324-

5. The system will bring the cursor to the specimen number prompt. If you have the prompt DEFAULT SPECIMEN TEXT in the Customer-Defined Parameters set to NEW, then the word “NEW” will appear under the SPEC prompt. You can accept this default to create a new specimen for this Emergency Issue or perform a lookup and choose a specimen to issue this unit to.
If you do not have your Customer-Defined Parameters set up to default the word “NEW”, then you can either perform a lookup and choose a specimen to add this Emergency Issue to or enter past the prompt so that the system will default the word “NEW” and create a new specimen.
Attempt to designate another patient’s specimen. Verify that the warning “Entered specimen is for a different patient.” appears and the specimen must be removed to continue. Remove the incorrect specimen and create a new specimen for this emergency issue.
6. Enter a device at the CARD PRINTER and a form at the UNIT FORM prompt to obtain a copy of the Emergency Issue/Transfuse Form. If a Customer Defined Screen has been defined, answer all queries and then issue the unit by answering the prompt ISSUE? with “Y”.
7. Verify that a requisition and blood bank specimen are created for the correct patient.
What priority is the specimen?
Verify that this priority matches the BBK EMG ISSUE SPECIMEN PRIORITY as set in the Customer-Defined Parameters.
8. Enter results on the blood bank specimen. NOTE: The message “Receive from Collection?” will appear if you have access to receive via E/E Results. If you do not have access, first use the Receive Specimen Routine.
The units which were issued in the Emergency Issue Routine will display in the result column for the product’s crossmatch.
Result the crossmatch for the emergency-issued unit. If associated tests were ordered, result the tests at this time.
9. Enter Transfusion data to complete the specimen.
10. Print an Internal Inquiry (Long Form) on the specimen that was created to verify results and that the unit of Packed Cells is issued to the patient.
Does the flag “** EMERGENCY ISSUED **” appear below the unit number?
11. Print the Override Warning Report to verify that any overridden warnings appear.
______________________________________________________________________
THIS ROUTINE VALIDATED BY:________________________ DATE:__ /__ /__
ACCEPTABLE:__________________ NOT ACCEPTABLE: ___________________
HOSPITAL NAME: _____________________________________________________
- 325-

4.6: Validation Exercise 2E:
Use this exercise if your Customer Defined Parameter/Blood Type Dictionary prompts are set to:
ALLOW BLOOD TYPE MISMATCH OVERRIDE? = YFor the ON (O Negative) blood type, set ALLOW EMERGENCY ISSUE? = YEMERGENCY ISSUE FOR PRODUCT is set to include Packed Cells.
Prerequisite:
Enter a unit of O Negative Packed Cells into inventory and bring it to an AVAILABLE status. Use a patient with a current blood type of O Positive. Make sure that in the Blood Type Dictionary O Positive has been set up as compatible with the O Negative Packed Cells.
1. Select a patient who is currently in the system and has a current blood type of O Positive. Verify that the information that defaults on the screen for the selected patient is correct.
If the patient does not have any crossmatched or assigned units the following message will display: “There are no crossmatched/assigned units for patient”
If the patient has crossmatched or assigned units, a pop up box will display the crossmatched or assigned units
2. At the Unit prompt identify the unit of O NEG Packed Cells.
The system will display “Patient and Unit Blood Types do NOT MATCH but are Product Compatible Ok?“
If you respond “Y”, you will be able to continue and issue the unit to the patient. If you respond “N”, you will need to select another unit to issue to the patient.
Respond “Y”.
If the patient also has antibodies in the BBK History and the unit chosen has not been tested or the associated antigens, the following warning message will appear: “Unit not tested for incompatible antigens: ___, ... Ok?”
If you respond “Y”, you will be able to continue and issue the unit to the patient. If you respond “N”, you will need to select another unit to issue to the patient.
3. The system will bring the cursor to the specimen number prompt. If you have the prompt DEFAULT SPECIMEN TEXT in the Customer-Defined Parameters set to NEW, then the word “NEW” will appear under the SPEC prompt. You can accept this default to create a new specimen for this Emergency Issue or perform a lookup and choose a specimen to issue this unit to.
If you do not have your Customer-Defined Parameters set up to default the word “NEW”, then you can either perform a lookup and choose a specimen to add this Emergency Issue to or enter past the prompt so that the system will default the word “NEW” and create a new specimen.
Attempt to designate another patient’s specimen.
- 326-

Verify that the warning “Entered specimen is for a different patient.” appears and the specimen must be removed to continue.
Remove the incorrect specimen and create a new specimen for this emergency issue.
4. Enter a device at the CARD PRINTER and a form at the UNIT FORM prompt to obtain a copy of the Emergency Issue/Transfuse Form. If a Customer Defined Screen has been defined, answer all queries and then issue the unit by answering the prompt ISSUE? with “Y”.
5. Verify that a requisition and blood bank specimen are created for the correct patient.
What priority is the specimen?
Verify that this priority matches the BBK EMG ISSUE SPECIMEN PRIORITY as set in the Customer-Defined Parameters.
6. Enter results on the blood bank specimen. NOTE: The message “Receive from Collection?” will appear if you have access to receive via E/E Results. If you do not have access, first use the Receive Specimen Routine.
The units which were issued in the Emergency Issue Routine will display in the result column for the product’s crossmatch. Result the crossmatch for the emergency-issued unit. If associated tests were ordered, result the tests at this time.
7. Enter Transfusion data to complete the specimen.
8. Print an Internal Inquiry (Long Form) on the specimen that was created to verify results and that the unit of Packed Cells is issued to the patient.
Does the flag “** EMERGENCY ISSUED **” appear below the unit number?
9. Print the Override Warning Report to verify that any overridden warnings appear. _______________________________________________________________________
THIS ROUTINE VALIDATED BY:________________________ DATE:__ /__ /__
ACCEPTABLE:__________________ NOT ACCEPTABLE: ___________________
HOSPITAL NAME: _____________________________________________________
- 327-

4.6: Validation Exercise 2F:
Use this exercise if your Customer Defined Parameter/Blood Type Dictionary prompts are set to:
ALLOW BLOOD TYPE MISMATCH OVERRIDE? = NFor the ON (O Negative) blood type, set ALLOW EMERGENCY ISSUE? = YEMERGENCY ISSUE FOR PRODUCT is set to include Packed Cells.
Prerequisite:
Enter a unit of O Negative Packed Cells into inventory and bring it to an AVAILABLE status. Use a patient with a current blood type of O Positive. Make sure that in the Blood Type Dictionary O Positive has been set up as compatible with the O Negative product of Packed Cells.
1. Select a patient who is currently in the system and has a current Blood Type of O Positive. Verify that the information that defaults on the screen for the selected patient is correct.
If the patient does not have any crossmatched or assigned units the following message will display: “There are no crossmatched/assigned units for patient”
If the patient has crossmatched or assigned units, a pop up box will display the crossmatched or assigned units
2. At the Unit prompt identify the unit of O NEG Packed Cells. The system will display “Patient and Unit Blood Types do NOT MATCH but are Product Compatible Ok? “ If you respond “Y”, you will be able to continue and issue the unit to the patient. If you respond “N”, you will need to select another unit to issue to the patient.
Respond “Y”. If the patient also has antibodies in the BBK History and the unit chosen has not been tested for the associated antigens, the following warning message will appear:
“Unit not tested for incompatible antigens: ___, ... Ok?”
If you respond “Y”, you will be able to continue and issue the unit to the patient. If you respond “N”, you will need to select another unit to issue to the patient.
Respond “Y”.
3. The system will bring the cursor to the specimen number prompt. If you have the prompt DEFAULT SPECIMEN TEXT in the Customer-Defined Parameters set to NEW, then the word “NEW” will appear under the SPEC prompt. You can accept this default to create a new specimen for this Emergency Issue or perform a lookup and choose a specimen to issue this unit to.
If you do not have your Customer-Defined Parameters set up to default the word “NEW”, then you can either perform a lookup and choose a specimen to add this Emergency Issue to or enter past the prompt so that the system will default the word “NEW” and create a new specimen.
Attempt to designate another patient’s specimen.
- 328-

Verify that the warning “Entered specimen is for a different patient.” appears and the specimen must be removed to continue.
Remove the incorrect specimen and create a new specimen for this emergency issue.
4. Enter a device at the CARD PRINTER and a form at the UNIT FORM prompt to obtain a copy of the Emergency Issue/Transfuse Form. If a Customer Defined Screen has been defined, answer all queries and then issue the unit by answering the prompt ISSUE? with “Y”.
5. Verify that a requisition and blood bank specimen are created for the correct patient.
What priority is the specimen?
Verify that this priority matches the BBK EMG ISSUE SPECIMEN PRIORITY as set in the Customer-Defined Parameters.
6. Enter results on the blood bank specimen. NOTE: The message “Receive from Collection?” will appear if you have access to receive via E/E Results. If you do not have access, first use the Receive Specimen Routine.
The units which were issued in the Emergency Issue Routine will display in the result column for the product’s crossmatch.
Result the crossmatch for the emergency-issued unit. If associated tests were ordered, result the tests at this time.
7. Enter Transfusion data to complete the specimen.
8. Print an Internal Inquiry (Long Form) on the specimen that was created to verify results and that the unit of Packed Cells is issued to the patient.
Does the flag “** EMERGENCY ISSUED **” appear below the unit number?
9. Print the Override Warning Report to verify that any overridden warnings appear. _______________________________________________________________________
THIS ROUTINE VALIDATED BY:________________________ DATE:__ /__ /__
ACCEPTABLE:__________________ NOT ACCEPTABLE: ___________________
HOSPITAL NAME: _____________________________________________________
- 329-

4.6: Validation Exercise 2G:
Use this exercise if your Customer Defined Parameters are set to:
ALLOW BLOOD TYPE MISMATCH OVERRIDE? = YFor the AP (A Positive) blood type, set ALLOW EMERGENCY ISSUE? = N
Prerequisite:
Enter a unit of A Positive Packed Cells into inventory and bring it to an AVAILABLE status. Use a patient with a current blood type of O Positive. Make sure that in the Blood Type Dictionary O Positive has been set up as NOT compatible with the A Positive product of Packed Cells.
1. Select a patient who is currently in the system and has a current blood type of O Positive. Verify that the information that defaults on the screen for the selected patient is correct.
If the patient does not have any crossmatched or assigned units the following message will display: “There are no crossmatched/assigned units for patient”
If the patient has crossmatched or assigned units, a pop up box will display the crossmatched or assigned units
2. At the Unit prompt identify the unit of A POS Packed Cells at an AVAILABLE status.
The system will warn “Patient and Unit Blood Types do NOT MATCH, Ok?”
Respond “Y”.
If the patient also has antibodies in the BBK History and the unit chosen has not been tested for the associated antigens, the following warning message will appear:
“Unit not tested for incompatible antigens: ___, ... Ok?”
If you respond “Y”, you will be able to continue and issue the unit to the patient. If you respond “N”, you will need to select another unit to issue to the patient.
3. The system will bring the cursor to the specimen number prompt. If you have the prompt DEFAULT SPECIMEN TEXT in the Customer-Defined Parameters set to NEW, then the word “NEW” will appear under the SPEC prompt. You can accept this default to create a new specimen for this Emergency Issue or perform a lookup and choose a specimen to issue this unit to.
If you do not have your Customer-Defined Parameters set up to default the word “NEW”, then you can either perform a lookup and choose a specimen to add this Emergency Issue to or enter past the prompt so that the system will default the word “NEW” and create a new specimen.
Attempt to designate another patient’s specimen.
Verify that the warning “Entered specimen is for a different patient.” appears and the specimen must be removed to continue. Remove the incorrect specimen and create a new specimen for this emergency issue.
- 330-

4. Enter a device at the CARD PRINTER and a form at the UNIT FORM prompt to obtain a copy of the Emergency Issue/Transfuse Form. If a Customer Defined Screen has been defined, answer all queries and then issue the unit by answering the prompt ISSUE? with “Y”.
5. Verify that a requisition and blood bank specimen are created for the correct patient.
What priority is the specimen?
Verify that this priority matches the BBK EMG ISSUE SPECIMEN PRIORITY as set in the Customer-Defined Parameters.
6. Enter results on the blood bank specimen. NOTE: The message “Receive from Collection?” will appear if you have access to receive via E/E Results. If you do not have access, first use the Receive Specimen Routine.
The units which were issued in the Emergency Issue Routine will display in the result column for the product’s crossmatch.
Result the crossmatch for the emergency-issued unit. If associated tests were ordered, result the tests at this time.
7. Enter Transfusion data to complete the specimen.
8. Print an Internal Inquiry (Long Form) on the specimen that was created to verify results and that the unit of Packed Cells is issued to the patient.
Does the flag “** EMERGENCY ISSUED **” appear below the unit number?
9. Print the Override Warning Report to verify that any overridden warnings appear. _______________________________________________________________________
THIS ROUTINE VALIDATED BY:________________________ DATE:__ /__ /__
ACCEPTABLE:__________________ NOT ACCEPTABLE: ___________________
HOSPITAL NAME: _____________________________________________________
- 331-

4.6: Validation Exercise 2H:
Use this exercise if your Customer Defined Parameter/Blood Type Dictionary prompts are set to:
ALLOW BLOOD TYPE MISMATCH OVERRIDE? = YFor the OP (O Positive) blood type, set ALLOW EMERGENCY ISSUE? = YEMERGENCY ISSUE FOR PRODUCTS is set to include Packed Cells.
Prerequisite:
Enter a unit of O Positive Packed Cells into inventory and bring it to an AVAILABLE status. Use a patient with a current blood type of O Negative. Make sure that in the Blood Type Dictionary O Negative has been set up as NOT compatible with the O Positive product of Packed Cells.
1. Select a patient who is currently in the system and has a current Blood Type of O Negative. Verify that the information that defaults on the screen for the selected patient is correct.
If the patient does not have any crossmatched or assigned units the following message will display: “There are no crossmatched/assigned units for patient”
If the patient has crossmatched or assigned units, a pop up box will display the crossmatched or assigned units
2. At the Unit prompt identify the unit of O POS Packed Cells at an AVAILABLE status. Verify that the following warning message appears:
“Patient and Unit Blood Types do NOT MATCH, Ok?”
If you respond “Y”, you will be able to continue and issue the unit to the patient. If you respond “N”, you will need to select another unit to issue to the patient.
Respond “Y”.
If the patient also has antibodies in the BBK History and the unit chosen has not been tested for the associated antigens, the following warning message will appear:
“Unit not tested for incompatible antigens: ___, ... Ok?”
If you respond “Y”, you will be able to continue and issue the unit to the patient. If you respond “N”, you will need to select another unit to issue to the patient.
Respond “Y”.
3. The system will bring the cursor to the specimen number prompt. If you have the prompt DEFAULT SPECIMEN TEXT in the Customer-Defined Parameters set to NEW, then the word “NEW” will appear under the SPEC prompt. You can accept this default to create a new specimen for this Emergency Issue or perform a lookup and choose a specimen to issue this unit to.
If you do not have your Customer-Defined Parameters set up to default the word “NEW”, then you can either perform a lookup and choose a specimen to add this Emergency Issue to or enter past the prompt so that the system will default the word “NEW” and create a new specimen.
- 332-

Attempt to designate another patient’s specimen.
Verify that the warning “Entered specimen is for a different patient.” appears and the specimen must be removed to continue.
Remove the incorrect specimen and create a new specimen for this emergency issue.
4. Enter a device at the CARD PRINTER and a form at the UNIT FORM prompt to obtain a copy of the Emergency Issue/Transfuse Form.
If a Customer Defined Screen has been defined, answer all queries and then issue the unit by answering the prompt ISSUE? with “Y”.
5. Verify that a requisition and blood bank specimen are created for the correct patient.
What priority is the specimen?
Verify that this priority matches the BBK EMG ISSUE SPECIMEN PRIORITY as set in the Customer-Defined Parameters.
6. Enter results on the blood bank specimen. NOTE: The message “Receive from Collection?” will appear if you have access to receive via E/E Results. If you do not have access, first use the Receive Specimen Routine.
The units which were issued in the Emergency Issue Routine will display in the result column for the product’s crossmatch.
Result the crossmatch for the emergency-issued unit. If associated tests were ordered, result the tests at this time.
7. Enter Transfusion data to complete the specimen.
8. Print an Internal Inquiry (Long Form) on the specimen that was created to verify results and that the unit of Packed Cells is issued to the patient.
Does the flag “** EMERGENCY ISSUED **” appear below the unit number?
9. Print the Override Warning Report to verify that any overridden warnings appear. _______________________________________________________________________
THIS ROUTINE VALIDATED BY:________________________ DATE:__ /__ /__
ACCEPTABLE:__________________ NOT ACCEPTABLE: ___________________
HOSPITAL NAME: _____________________________________________________
- 333-

4.6: Validation Exercise 2I:
Use this exercise if your Customer Defined Parameter/Blood Type Dictionary prompts are set to:
ALLOW BLOOD TYPE MISMATCH OVERRIDE? = NFor the OP (O Positive) blood type, set ALLOW EMERGENCY ISSUE? = YEMERGENCY ISSUE FOR PRODUCT is set to include Packed Cells.
Prerequisite:
Enter a unit of O Positive Packed Cells into inventory and bring it to an AVAILABLE status. Use a patient with a current blood type of O Negative. Make sure that in the Blood Type Dictionary O Negative has been set up as NOT compatible with the O Positive product of Packed Cells.
1. Select a patient who is currently in the system and has a current Blood Type of O Negative. Verify that the information that defaults on the screen for the selected patient is correct.
If the patient does not have any crossmatched or assigned units the following message will display: “There are no crossmatched/assigned units for patient”
If the patient has crossmatched or assigned units, a pop up box will display the crossmatched or assigned units
2. At the Unit prompt identify the unit of O POS Packed Cells at an AVAILABLE status.
The system will display the error “Incompatible blood type” and the unit cannot be issued to the patient. _______________________________________________________________________
THIS ROUTINE VALIDATED BY:________________________ DATE:__ /__ /__
ACCEPTABLE:__________________ NOT ACCEPTABLE: ___________________
HOSPITAL NAME: _____________________________________________________
- 334-

4.6: Validation Exercise 2J:
Use this exercise if your Customer Defined Parameters are set to:
ALLOW BLOOD TYPE MISMATCH OVERRIDE? = NFor the OP (O Positive) blood type, set ALLOW EMERGENCY ISSUE? = N
Prerequisite:
Enter a unit of O Positive Packed Cells into inventory and bring it to an AVAILABLE status. Use a patient with a current blood type of O NEG. Make sure that in the Blood Type Dictionary O Negative has been set up as NOT compatible with the O Positive product of Packed Cells.
1. Select a patient who is currently in the system and has a current Blood Type of O Negative. Verify that the information that defaults on the screen for the selected patient is correct.
If the patient does not have any crossmatched or assigned units the following message will display: “There are no crossmatched/assigned units for patient”
If the patient has crossmatched or assigned units, a pop up box will display the crossmatched or assigned units
2. At the Unit prompt identify the unit of O POS Packed Cells at an AVAILABLE status.
The system will display the error “Incompatible blood type” and the unit cannot be issued to the patient.
______________________________________________________________________
THIS ROUTINE VALIDATED BY:________________________ DATE:__ /__ /__
ACCEPTABLE:__________________ NOT ACCEPTABLE: ___________________
HOSPITAL NAME: _____________________________________________________
- 335-

4.6: Validation Exercise 2K:
Use this exercise if your Customer Defined Parameter/Blood Type Dictionary prompts are set to:
ALLOW BLOOD TYPE MISMATCH OVERRIDE? = Y or NFor the AP (A Positive) blood type, set ALLOW EMERGENCY ISSUE? = YEMERGENCY ISSUE FOR PATIENT is set to include Packed Cells.
Prerequisite:
Enter a unit of A Positive Packed Cells into inventory and bring it to an AVAILABLE status. Use a patient with a historical blood type of A Positive and a Temporary Historical Blood Type of B Positive. Make sure that in the Blood Type Dictionary BP has been set up as not compatible for the AP product.
1. Select a patient who is currently in the system and has a historical blood type of A Positive and a Temporary Historical Blood Type of B Positive. Verify that the information that defaults on the screen for the selected patient is correct.
If the patient does not have any crossmatched or assigned units the following message will display: “There are no crossmatched/assigned units for patient”
If the patient has crossmatched or assigned units, a pop up box will display the crossmatched or assigned units
2. At the Unit prompt identify the unit of A Positive Packed Cells at an AVAILABLE status.
The system displays “Unit [x] compatible with patient's Historical but not Temp Bld Type, Ok?”
If you respond “Y”, you will be able to continue and issue the unit to the patient. If you respond “N”, you will need to select another unit to issue to the patient.
Respond “Y”.
3. The system will bring the cursor to the specimen number prompt. If you have the prompt DEFAULT SPECIMEN TEXT in the Customer-Defined Parameters set to NEW, then the word “NEW” will appear under the SPEC prompt. You can accept this default to create a new specimen for this Emergency Issue or perform a lookup and choose a specimen to issue this unit to.
If you do not have your Customer-Defined Parameters set up to default the word “NEW”, then you can either perform a lookup and choose a specimen to add this Emergency Issue to or enter past the prompt so that the system will default the word “NEW” and create a new specimen. Attempt to designate another patient’s specimen.
Verify that the warning “Entered specimen is for a different patient.” appears and the specimen must be removed to continue.
Remove the incorrect specimen and create a new specimen for this emergency issue.
- 336-

4. Enter a device at the CARD PRINTER and a form at the UNIT FORM prompt to obtain a copy of the Emergency Issue/Transfuse Form.
If a Customer Defined Screen has been defined, answer all queries and then issue the unit by answering the prompt ISSUE? with “Y”.
5. Verify that a requisition and blood bank specimen are created for the correct patient.
What priority is the specimen?
Verify that this priority matches the BBK EMG ISSUE SPECIMEN PRIORITY as set in the Customer-Defined Parameters.
6. Enter results on the blood bank specimen. NOTE: The message “Receive from Collection?” will appear if you have access to receive via E/E Results. If you do not have access, first use the Receive Specimen Routine.
The units which were issued in the Emergency Issue Routine will display in the result column for the product’s crossmatch.
Result the crossmatch for the emergency-issued unit. If associated tests were ordered, result the tests at this time.
7. Enter Transfusion data to complete the specimen.
8. Print an Internal Inquiry (Long Form) on the specimen that was created to verify results and that the unit of Packed Cells is issued to the patient.
Does the flag “** EMERGENCY ISSUED **” appear below the unit number?
9. Print the Override Warning Report to verify that any overridden warnings appear. _______________________________________________________________________
THIS ROUTINE VALIDATED BY:________________________ DATE:__ /__ /__
ACCEPTABLE:__________________ NOT ACCEPTABLE: ___________________
HOSPITAL NAME: _____________________________________________________
- 337-

4.6: Validation Exercise 2L:
Use this exercise if your Customer Defined Parameter/Blood Type Dictionary prompts are set to:
ALLOW BLOOD TYPE MISMATCH OVERRIDE? = Y or NFor the ON (O Negative) blood type, set ALLOW EMERGENCY ISSUE? = YEMERGENCY ISSUE FOR PRODUCTS is set to include Packed Cells.
Prerequisite:
Enter a unit of O Negative Packed Cells into inventory and bring it to an AVAILABLE status. Use a patient with a historical blood type of O Positive and a Temporary Historical Blood Type of B Positive. Make sure that in the Blood Type Dictionary O POS has been set up as compatible for the O NEG product of Packed Cells and B POS has been set up as not compatible for the O NEG product of Packed Cells.
1. Select a patient who is currently in the system with a historical blood type of O Positive and a Temporary Historical Blood Type of B Positive. Verify that the Information that defaults on the screen for the selected patient is correct.
If the patient does not have any crossmatched or assigned units the following message will display: “There are no crossmatched/assigned units for patient”
If the patient has crossmatched or assigned units, a pop up box will display the crossmatched or assigned units
2. At the Unit prompt identify the unit of O NEG Packed Cells at an AVAILABLE status. The system displays “Patient and Unit Blood Types do NOT MATCH, but are Product Compatible. Ok?”
Respond “Y”. The system then displays: “Unit [x] compatible with patient's Historical but not Temp Bld Type, Ok?”
If you respond “Y”, you will be able to continue and issue the unit to the patient. If you respond “N”, you will need to select another unit to issue to the patient.
Respond “Y”.
3. The system will bring the cursor to the specimen number prompt. If you have the prompt DEFAULT SPECIMEN TEXT in the Customer-Defined Parameters set to NEW, then the word “NEW” will appear under the SPEC prompt. You can accept this default to create a new specimen for this Emergency Issue or perform a lookup and choose a specimen to issue this unit to.
If you do not have your Customer-Defined Parameters set up to default the word “NEW”, then you can either perform a lookup and choose a specimen to add this Emergency Issue to or enter past the prompt so that the system will default the word “NEW” and create a new specimen. Attempt to designate another patient’s specimen.
Verify that the warning “Entered specimen is or a different patient.” appears and the specimen must be removed to continue.
- 338-

Remove the incorrect specimen and create a new specimen for this emergency issue.
4. Enter a device at the CARD PRINTER and a form at the UNIT FORM prompt to obtain a copy of the Emergency Issue/Transfuse Form. If a Customer Defined Screen has been defined, answer all queries and then issue the unit by answering the prompt ISSUE? with “Y”.
5. Verify that a requisition and blood bank specimen are created for the correct patient.
What priority is the specimen?
Verify that this priority matches the BBK EMG ISSUE SPECIMEN PRIORITY as set in the Customer-Defined Parameters.
6. Enter results on the blood bank specimen. NOTE: The message “Receive from Collection?” will appear if you have access to receive via E/E Results. If you do not have access, first use the Receive Specimen Routine.
The units which were issued in the Emergency Issue Routine will display in the result column for the product’s crossmatch. Result the crossmatch for the emergency-issued unit. If associated tests were ordered, result the tests at this time.
7. Enter Transfusion data to complete the specimen.
8. Print an Internal Inquiry (Long Form) on the specimen that was created to verify results and that the unit of Packed Cells is issued to the patient.
Does the flag “** EMERGENCY ISSUED **” appear below the unit number?
9. Print the Override Warning Report to verify that any overridden warnings appear. _______________________________________________________________________
THIS ROUTINE VALIDATED BY:________________________ DATE:__ /__ /__
ACCEPTABLE:__________________ NOT ACCEPTABLE: ___________________
HOSPITAL NAME: _____________________________________________________
- 339-

4.6: Validation Exercise 2M:
Use this exercise if your Customer Defined Parameter/Blood Type Dictionary prompts are set to:
ALLOW BLOOD TYPE MISMATCH OVERRIDE? = Y or NFor the A POS (A Positive) blood type, set ALLOW EMERGENCY ISSUE? = YEMERGENCY ISSUE FOR PRODUCTS is set to include Packed Cells.
Prerequisite:
Enter a unit of A Positive Packed Cells into inventory and bring it to an AVAILABLE status. Use a patient with a historical blood type of B Positive and a Temporary Historical Blood Type of A Positive. Make sure that in the Blood Type Dictionary B POS has been set up as not compatible for the A POS product of Packed Cells.
1. Select a patient who is currently in the system and has a historical blood type of B Positive and a Temporary Historical Blood Type of A Positive. Verify that the information that defaults on the screen for the selected patient is correct.
If the patient does not have any crossmatched or assigned units the following message will display: “There are no crossmatched/assigned units for patient”
If the patient has crossmatched or assigned units, a pop up box will display the crossmatched or assigned units
2. At the Unit prompt identify the unit of A POS Packed Cells at an AVAILABLE status.
The system will display “Unit [x] compatible with patient's Temp but not Historical Bld Type. Ok?
If you respond “Y”, you will be able to continue and issue the unit to the patient. If you respond “N”, you will need to select another unit to issue to the patient.
Respond “Y”.
3. The system will bring the cursor to the specimen number prompt. If you have the prompt DEFAULT SPECIMEN TEXT in the Customer-Defined Parameters set to NEW, then the word “NEW” will appear under the SPEC prompt. You can accept this default to create a new specimen for this Emergency Issue or perform a lookup and choose a specimen to issue this unit to.
If you do not have your Customer-Defined Parameters set up to default the word “NEW”, then you can either perform a lookup and choose a specimen to add this Emergency Issue to or enter past the prompt so that the system will default the word “NEW” and create a new specimen.
Attempt to designate another patient’s specimen.
Verify that the warning “Entered specimen is for a different patient.” appears and the specimen must be removed to continue.
Remove the incorrect specimen and create a new specimen for this emergency issue.
4. Enter a device at the CARD PRINTER and a form at the UNIT FORM prompt to
- 340-

obtain a copy of the Emergency Issue/Transfuse Form. If a Customer Defined Screen has been defined, answer all queries and then issue the unit by answering the prompt ISSUE? with “Y”.
5. Verify that a requisition and blood bank specimen are created for the correct patient.
What priority is the specimen?
Verify that this priority matches the BBK EMG ISSUE SPECIMEN PRIORITY as set in the Customer-Defined Parameters.
6. Enter results on the blood bank specimen. NOTE: The message “Receive from Collection?” will appear if you have access to receive via E/E Results. If you do not have access, first use the Receive Specimen Routine.
The units which were issued in the Emergency Issue Routine will display in the result column for the product’s crossmatch.
Result the crossmatch for the emergency-issued unit. If associated tests were ordered, result the tests at this time.
7. Enter Transfusion data to complete the specimen.
8. Print an Internal Inquiry (Long Form) on the specimen that was created to verify results and that the unit of Packed Cells is issued to the patient.
Does the flag “** EMERGENCY ISSUED **” appear below the unit number?
9. Print the Override Warning Report to verify that any overridden warnings appear. _______________________________________________________________________
THIS ROUTINE VALIDATED BY:________________________ DATE:__ /__ /__
ACCEPTABLE:__________________ NOT ACCEPTABLE: ___________________
HOSPITAL NAME: _____________________________________________________
- 341-

4.6: Validation Exercise 2N:
Use this exercise if your Customer Defined Parameter/Blood Type Dictionary prompts are set to:
ALLOW BLOOD TYPE MISMATCH OVERRIDE? = Y or NFor the O NEG (O Negative) blood type, set ALLOW EMERGENCY ISSUE? = YEMERGENCY ISSUE FOR PRODUCTS is set to include Packed Cells.
Prerequisite:
Enter a unit of O Negative Packed Cells into inventory and bring it to an AVAILABLE status. Use a patient with a historical blood type of B Positive and a Temporary Historical Blood Type of O Positive. Make sure that in the Blood Type Dictionary O POS has been set up as a compatible type for the O NEG product of Packed Cells and B POS has been set up as not compatible for the O NEG product of Packed Cells.
1. Select a patient who is currently in the system and has a historical blood type of B Positive and a Temporary Historical Blood Type of O Positive. Verify that the information that defaults on the screen for the selected patient is correct.
If the patient does not have any crossmatched or assigned units the following message will display: “There are no crossmatched/assigned units for patient”
If the patient has crossmatched or assigned units, a pop up box will display the crossmatched assigned units
2. At the Unit prompt identify the unit of O NEG Packed Cells at an AVAILABLE status.
The system will warn “ Patient and Unit Blood Types do NOT MATCH, but are Product Compatible, Ok?”
Respond “Y”.
The system will warn “Unit [ ] compatible with patient’s Temp but not Historical Bld Type. Ok?”
Respond “Y”.
If the patient also has antibodies in the BBK History and the unit chosen has not been tested for the associated antigens, the following warning message will appear:
“Unit not tested for incompatible antigens: ___, ... Ok?
If you respond “Y”, you will be able to continue and issue the unit to the patient. If you respond “N”, you will need to select another unit to issue to the patient.
Respond “Y”.
3. The system will bring the cursor to the specimen number prompt.
If you have the prompt DEFAULT SPECIMEN TEXT in the Customer-Defined Parameters set to NEW, then the word “NEW” will appear under the SPEC prompt. You can accept this default to create a new specimen for this Emergency Issue or perform a lookup and choose a specimen to issue this unit to.
If you do not have your Customer-Defined Parameters set up to default the word
- 342-

“NEW”, then you can either perform a lookup and choose a specimen to add this Emergency Issue to or enter past the prompt so that the system will default the word “NEW” and create a new specimen.
4. Attempt to designate another patient’s specimen.
Verify that the warning “Entered specimen is for a different patient.” appears and the specimen must be removed to continue.
5. Remove the incorrect specimen and create a new specimen for this emergency issue.
6. Enter a device at the CARD PRINTER and a form at the UNIT FORM prompt to obtain a copy of the Emergency Issue/Transfuse Form. If a Customer Defined Screen has been defined, answer all queries and then issue the unit by answering the prompt ISSUE? with “Y”.
7. Verify that a requisition and blood bank specimen are created for the correct patient.
What priority is the specimen?
Verify that this priority matches the BBK EMG ISSUE SPECIMEN PRIORITY as set in the Customer-Defined Parameters.
8. Enter results on the blood bank specimen.
NOTE: The message “Receive from Collection?” will appear if you have access to receive viaE/E Results. If you do not have access, first use the Receive Specimen Routine.
The units which were issued in the Emergency Issue Routine will display in the result column for the product’s crossmatch.
9. Result the crossmatch for the emergency-issued unit. If associated tests were ordered, result the tests at this time.
10. Enter Transfusion data to complete the specimen.
11. Print an Internal Inquiry (Long Form) on the specimen that was created to verify results and that the unit of Packed Cells is issued to the patient.
Does the flag “** EMERGENCY ISSUED **” appear below the unit number?
12. Print the Override Warning Report to verify that any overridden warnings appear.
_______________________________________________________________________
THIS ROUTINE VALIDATED BY:________________________ DATE:__ /__ /__
ACCEPTABLE:__________________ NOT ACCEPTABLE: ___________________ HOSPITAL NAME: _____________________________________________________
- 343-

4.7: Patient Wristbands
FUNCTION TO BE VALIDATED: Patient's Wristband
Introduction:
The testing of the patient's wristband will be covered in this section. The requirements of the wristband numbers will differ depending on the set up of the LIS System Parameters.
Dictionaries:
Product Customer Defined Parameters
LIS System Parameters Involved:
Wristband Required to Receive BBK Wristband Number
Wristband Number feature may be accessed in the following Routines:
E/E Requisition E/E & Result Receive by Batch/Location Receive by Specimen Receive by Patient Edit Wristband Print Wristband Issue Units
NOTE: Users may have the ability to define CUSTOM REPORT FORMATS when printing standard reports. Customization to the reports may not supply all information contained in the standard version.
- 344-

4.7 Validation Exercise A:
If your LIS System Parameter is set up in the following manner proceed with this exercise otherwise proceed to Exercise B.
WRISTBAND REQUIRED TO RECEIVE: Yes
1. Enter a requisition on a patient without receiving it. Enter past the Wristband prompt.
2. Receive the patient's specimen through any of the Receive routines listed previously.
3. Once the necessary information has been entered into the Receive routine, file to bring up the wristband prompt.
4. Enter past the wristband prompt.
5. The system will display the error message: "BBK specimens must have a wristband number to be received."
______________________________________________________________________
THIS ROUTINE VALIDATED BY:___________________________DATE:__ /__ /__
ACCEPTABLE: ___________________NOT ACCEPTABLE:____________________
HOSPITAL NAME: ______________________________________________________
4.7 Validation Exercise B:
If your parameter is set up in the following manner proceed with this exercise.
WRISTBAND REQUIRED TO RECEIVE: PRODUCT
This entry allows the users to require a wristband on the product level. Set up the prompt Wristband Required in the Product Dictionary (for Packed Cells) with a Yes response.
1. Order the product Packed Cells on a patient without receiving it. Enter past the Wristband prompt.
2. Receive this specimen through a Receive routine.
3. File without entering in a wristband number.
4. The system will display the error message "BBK specimens must have a wristband number to be received."
NOTE: If the prompt WRISTBAND REQUIRED TO RECEIVE is set up to N then the users may enter past the wristband prompt without getting prompted with a warning message.______________________________________________________________________
THIS ROUTINE VALIDATED BY:___________________________DATE:__ /__ /__
ACCEPTABLE: ___________________NOT ACCEPTABLE:____________________
HOSPITAL NAME: ______________________________________________________4.7 Validation Exercise C:
- 345-

If your parameter is set up in the following manner proceed with this exercise.
BBK WRISTBAND NUMBER: SPEC
1. Enter a requisition on a patient entering past the Wristband prompt. Receive the specimen through a Receive routine.
2. At the wristband prompt, enter in the patient's wristband number.
3. Order another requisition on the same patient. Receive it through a Receive routine.
4. At the wristband prompt, enter in the same wristband number that was used for the previous specimen.
5. The system will prompt you with a error message, "Wristband Number in Use" and not let you file.
6. Now enter the correct wristband number. You should not receive any warning messages this time and you should be able to proceed with receiving the specimen.
_____________________________________________________________________
THIS ROUTINE VALIDATED BY:___________________________DATE:__ /__ /__
ACCEPTABLE: ___________________NOT ACCEPTABLE:____________________
HOSPITAL NAME: ______________________________________________________
4.7 Validation Exercise D:
If your parameter is set up in the following manner, proceed with this exercise.
BBK WRISTBAND NUMBER: ACCT
1. Enter a requisition on a patient entering past the Wristband prompt.. Receive the specimen through a Receive routine.
2. At the wristband prompt, enter the patient's wristband number.
3. Repeat #1 on the same patient.
4. At the wristband prompt enter a different wristband then above. Verify that the system displays the error message: "Doesn't match patient's wristband number" and not let you file.
5. Enter the wristband number entered in step #2 and file. You should not receive any warning messages this time and you should be able to proceed with receiving the specimen.
______________________________________________________________________
THIS ROUTINE VALIDATED BY:___________________________DATE:__ /__ /__
ACCEPTABLE: ___________________NOT ACCEPTABLE:____________________
HOSPITAL NAME: ______________________________________________________
- 346-

4.7 Validation Exercise E:
If your parameter is set up in the following manner proceed with this exercise.
BBK WRISTBAND NUMBER: MRI
1. Enter a requisition entering past the Wristband prompt. Receive it through a Receive routine.
2. At the wristband prompt, enter the patient's wristband number.
3. Using the same patient, register him/her to a new account number. Repeat step #1. The patient should now have two account numbers under one medical record number.
4. Once at the wristband prompt in the receive routine, enter in a different wristband number than what was entered in step #2.
5. Verify that the system displays the error message: "Doesn't match patients wristband number."
6. Now enter the same wristband number that was entered in step #2 and file. You should not receive any error message this time and you should be able to proceed with receiving the specimen.
NOTE: If the parameter was set to NONE the users will not be prompted with the wristband number in any of the routines.
______________________________________________________________________
THIS ROUTINE VALIDATED BY:___________________________DATE:__ /__ /__
ACCEPTABLE: ___________________NOT ACCEPTABLE:____________________
HOSPITAL NAME: ______________________________________________________
4.7 Validation Exercise F:
If your parameter is set up in the following manner, proceed with this exercise.
WRISTBAND REQUIRED TO RECEIVE: YES/PRODUCT
BBK WRISTBAND NUMBER: SPEC/ACCT/MRI
1. Enter a requisition on a patient. Before filing the requisition enter the patient's wristband number at the wristband number prompt.
2. Receive the specimen through a Receive routine.
3. When receiving the specimen, enter in a wristband different from that used in Requisition Entry.
4. Verify that the system displays the error message: "Doesn't match patient's wristband number."
- 347-

5. Now enter the same wristband number that was entered in step #1 and file. You should not receive any error message this time and you should be able to proceed with receiving the specimen.
__________________________________________________________________
THIS ROUTINE VALIDATED BY:___________________________DATE:__ /__ /__
ACCEPTABLE: ___________________NOT ACCEPTABLE:____________________
HOSPITAL NAME: ______________________________________________________
- 348-

4.7 Validation Exercise G:
Exercise G tests the wristband prompt through the routine: E/E Requisition with Result Entry when the wristband number is required in order to receive a specimen.
1. Enter a requisition on a new patient.
2. Enter past the wristband prompt.
3. Verify that the system displays the error message: "Wristband number required to receive specimen."
4. The routine can be further validated by following the previous exercises in this section pertaining to your account's set up of the prompt BBK Wristband Number (whether it is set up to be original per ACCOUNT/MRI/SPEC.)
______________________________________________________________________
THIS ROUTINE VALIDATED BY:___________________________DATE:__ /__ /__
ACCEPTABLE: ___________________NOT ACCEPTABLE:____________________
HOSPITAL NAME: ______________________________________________________
- 349-

Edit Wristband
The Edit Wristband Routine allows the users to edit the wristband number after it has already been assigned to the patient.
4.7 Validation Exercise H:
1. Enter a specimen number.
2. At the New Wristband # prompt re-enter in the number that appears in the Old Wristband # prompt.
3. Verify that the system displays the error message: "Cannot enter same wristband number."
_______________________________________________________________________
THIS ROUTINE VALIDATED BY:___________________________DATE:__ /__ /__
ACCEPTABLE: ___________________NOT ACCEPTABLE:____________________
HOSPITAL NAME: ______________________________________________________
4.7 Validation Exercise I:
1. Enter in a specimen number.
2. At the New Wristband # prompt enter in another patient's wristband number.
3. Verify that the system displays the error message: "Wristband number in use."
______________________________________________________________________
THIS ROUTINE VALIDATED BY:___________________________DATE:__ /__ /__
ACCEPTABLE: ___________________NOT ACCEPTABLE:____________________
HOSPITAL NAME: ______________________________________________________
- 350-

4.7 Validation Exercise J:
1. Enter in a specimen number.
2. File without entering any Wristband Number.
3. Verify that the system prompts the user with the error message: "1 required field is missing."
______________________________________________________________________
THIS ROUTINE VALIDATED BY:___________________________DATE:__ /__ /__
ACCEPTABLE: ___________________NOT ACCEPTABLE:____________________
HOSPITAL NAME: ______________________________________________________
4.7 Validation Exercise K:
If the BBK WRISTBAND NUMBER Parameter is set to SPEC then proceed with the following exercise.
1. Enter two specimens on the same patient and receive both of them.
2. Enter the first specimen for the Edit Wristband Routine.
3. At the New Wristband # prompt enter the wristband number for the second specimen.
4. Verify that the system displays the error message: "Wristband number in use."
5. Enter a new wristband number for the first specimen, and file.
____________________________________________________________________
THIS ROUTINE VALIDATED BY:___________________________DATE:__ /__ /__
ACCEPTABLE: ___________________NOT ACCEPTABLE:____________________
HOSPITAL NAME: ______________________________________________________
- 351-

4.7 Validation Exercise L:
If the set up of the prompt BBK WRISTBAND NUMBER is set to either ACCT or MRI proceed with the following exercise.
1. Enter two specimens on the same patient (on the same Account and MRI).
2. Receive both of these specimens entering in the same wristband for each of the specimens.
3. Enter one of the specimens into the Edit Wristband Routine.
4. At the New Wristband # prompt enter in a new wristband for the patient.
5. Answer the prompt Change All Pt Specimens With Old WB #? with a No response and file.
6. Enter in another requisition on that same patient and receive it. Use the wristband from the unchanged specimen.
7. Verify that the system displays the error message: "Doesn't match patient's wristband number." The system now recognizes the edited wristband as the current band for the new specimens.
8. Do an internal inquiry (long form) on the specimen with the unchanged wristband number. Verify that the wristband number has not been changed.
9. Enter three specimens on another patient
10. Receive these specimens entering in the same wristband for each of the specimens.
11. Enter one of the specimens into the Edit Wristband Routine.
12. At the New Wristband # prompt enter in a new wristband for the patient. Write down the new wristband number.
13. Answer the prompt Change All Pt Specimens With Old WB #? with a No response and file
14. Repeat steps 11 and 12 for another of the specimens. Write down the new wristband number. Enter Yes response into the Change All Pt Specimens With Old WB #? prompt. You will receive the following warning “Warning: Patient has specimens which will not be changed. Ok?”
15. Perform an Internal Inquiry (long form) on all the specimens. Verify that the wristband numbers are correct.
______________________________________________________________________
THIS ROUTINE VALIDATED BY:___________________________DATE:__ /__ /__
ACCEPTABLE: ___________________NOT ACCEPTABLE:____________________
HOSPITAL NAME: ______________________________________________________
- 352-

Print Wristband
The Print Wristband Routine allows the users to print off the patient's Wristband Number or the patient's Account Number.
4.7 Validation Exercise M:
1. Enter a requisition on a patient. Do not receive the specimen and do not assign the specimen a wristband number.
2. In the Print Wristband Routine enter, BBK at the first prompt. (This specifies that we want the patient's Wristband Number to print.)
3. Enter past the Collection Batch prompt to enter the specimen number.
4. Print the wristband out on a laser jet printer.
5. Verify that the system assigned this patient a wristband number.
Note: The system will now keep this number unique depending upon how the LIS System Parameters are set up.
6. Repeat the above procedure on a different patient. Enter in a wristband number for the patient before filing the requisition.
7. Verify that the correct wristband number printed on the label. ______________________________________________________________________
THIS ROUTINE VALIDATED BY:___________________________DATE:__ /__ /__
ACCEPTABLE: ___________________NOT ACCEPTABLE:____________________
HOSPITAL NAME: ______________________________________________________
- 353-

4.7 Validation Exercise N:
1. Enter a requisition on a patient and assign this person a wristband number.
2. Using the Print Wristband Routine print the band using the patient's account number.
3. Verify that the patient's print out does not include the wristband number (it only includes the patient's account number).
4. Repeat the above steps using a specimen that does not have an assigned wristband number.
5. Verify that the system produces the same results.
6. Perform an internal inquiry (long form) on this last patient. Verify that the system did not assign this patient a wristband number.
______________________________________________________________________
THIS ROUTINE VALIDATED BY:___________________________DATE:__ /__ /__
ACCEPTABLE: ___________________NOT ACCEPTABLE:____________________
HOSPITAL NAME: ______________________________________________________
- 354-

Check Wristband at Issue
The Issue Units Routine allows the system to check the response of the wristband query entered at receipt against a response entered at issue.
4.7 Validation Exercise O:
The parameters should be set the following way before completing this exercise:
LIS Toolbox Parameters:
WRISTBAND REQUIRED TO RECEIVE: YES/PRODUCT.WRISTBAND NUMBER: SPEC/ACCT/MRI.
LIS Customer Defined Parameters:
BBK Ask Wristband At Issue: Yes
1. Order a Unit on a patient and enter a wristband number for that patient, as required by your parameters.
2. Crossmatch and result the unit to the patient.
3. In the Issue Units Routine, issue the unit to the patient. Notice you are prompted for a wristband number before filing.
4. Enter a different wristband number than entered previously for your patient. Verify that you receive the message: "Warning: This does not match previously entered wristband #."
5. Delete this wristband number, leave this prompt blank and try to file without a wristband number. Verify you get the warning message: "Warning: There is a wristband # entered for this specimen."
6. Verify that you may return past this warning message and file. Also verify this appears on the BBK Override Warning Report.
7. Repeat steps 1-5 with a new patient. After receiving the warning message in step #5, enter in the correct wristband number and file. You should not receive a warning message.
________________________________________________________________________
THIS ROUTINE VALIDATED BY:___________________________DATE:__ /__ /__
ACCEPTABLE: ___________________NOT ACCEPTABLE:____________________
HOSPITAL NAME: ______________________________________________________
- 355-

4.8: Canceling Patient's Product Orders
FUNCTION TO BE VALIDATED: Cancel Patient Product Orders
Introduction:
This routine allows the canceling of specific crossmatches and their associated product order(s). There are four functions that the user can perform using Cancel Product Orders: Cancel Product Order, Set/Reset NA, Set/Reset ND, and Return Issued Unit. Any valid specimen may be selected as long as its status is Ordered, Collected, Received, Worksheet, Unverified or Resulted, and as long as the specimen has products ordered.
LIS System Parameter:
Not Done Mnemonic
Dictionaries:
Access Product Test
The Cancel Product Order feature may be accessed in the following routines:
Cancel Product Orders Process Specimen Batch Process Patient's Specimens
Reports to print:
Result Inquiry Billing Inquiry
NOTE: Users may have the ability to define CUSTOM REPORT FORMATS when printing the standard reports mentioned above. Customization to the reports may not supply all information contained in the standard version.
- 356-

4.8 Validation Exercise A:
Access
1. On page 2 of the LIS Shared Access Dictionary, for your access group, do a lookup at the Function prompt in the Process Specimen Functions section. Verify that the Cancel Product function with the mnemonic of CPR shows up.
2. Verify that you have access to the Cancel Product Orders routine on the BBK Result Entry menu.
3. Verify that the Cancel Product orders function is available in the Process Patient's Specimens and Process Specimen Batch Routines.
4. In the LIS Shared Access Dictionary. Remove the Cancel Product function for your access group.
5. Go into the BBK Results Entry Menu and select the Cancel Product Orders Routine. You should receive the message "Access to Cancel Product Orders is not set up for this user".
6. Go into the LIS Shared Access Dictionary and enter ALL at the Process Specimen Functions. You should see the Cancel Product function as one of the default functions. File your access group.
_______________________________________________________________________
THIS ROUTINE VALIDATED BY:___________________________DATE:__ /__ /__
ACCEPTABLE_______________________NOT ACCEPTABLE__________________ HOSPITAL NAME: ______________________________________________________
- 357-

4.8 Validation Exercise B:
Using the Cancel Product Order Routine for Crossmatchable Products
Spec #1 ____________
Packed Cell Units ___________ _____________
Specimen #2 ____________
Specimen #3 ____________
Specimen #4 ___________
Packed Cell Units _____________ _____________
Specimen #5 ___________
Packed Cell Units _____________
1. In the Enter/Edit Requisition Routine order two units of Packed Cells on a patient.
2. Go back into the Enter/Edit Requisition Routine for the requisition you just entered. Press <enter> until you get to the Ordered field for the PC order. Go to the Count (CT) field and delete the 2 and try to enter 1. You should get the message: "Cannot Reduce Ordered Product Count."
3. For the specimen above, enter results and search for and result two units of packed cells. (If there are no compatible units you will need to enter units into inventory and enter results for them.) Issue the units and enter transfusion data for both of them.
4. In the Cancel Product Orders and type in the specimen number of the specimen you just completed . You should see this message: "Specimen status COMP. Must be RECD, WKST, UNV, RES."
5. Enter a requisition for a patient and order a Blood Type only. Identify this specimen in the Cancel Product Orders Routine. You should see this message: "No products associated with this specimen."
6. Enter a requisition on a patient and order two units of packed cells.
7. Go into Cancel Product Orders for the specimen in step #6. Under the Product you should see the mnemonic of your packed cells product. Next to the product, you should see the various product statuses. There should be a "2" under the ORD status. Under Results you should see two lines, each should say "Pending". Check off the #1 result, then do a lookup at the Function prompt. The functions displayed should be:
1. CP Cancel Product Order2. NA Set/Reset N/A3. ND Set/Reset ND4. RI Return Issued Unit
Select RI. You should see the message: "1 of 1 Rejected. Continue, Stop, or Report?" Type in "R" for Report and verify that the rejection reason is "NO UNIT ASSOCIATED WITH SELECTION(S)."
- 358-
8. Type in <Return> to get back to the Cancel Product Orders screen and "C" to Continue. Enter "CP" at the Function prompt. You should see the message: "Function will apply to all selected orders. Continue?" Type in "Y" to continue.
9. A green box will display 1 PC and the cursor should be at the Deletion Comment field. Try to bypass this field. You should see the message: "This is a required field". Now enter a deletion comment.
10. Verify that the result of #1 is now "ND". (This may vary depending on what is set up on page #1 of your toolbox parameters as the mnemonic for "NOT DONE".) You should also see the date and time of the cancellation under the Result Time column. Use the exit key (F11) to exit this routine.
11. Under Result Inquiry, choose Print Specimens (Internal) for the specimen from step 6. Verify that the ORD PRODS displays as PACKED CELLS/2/-1 and that Packed Cells is listed on the DELETED line along with the comment entered in step #9. Under the Crossmatch in the Result column, you should see "Test not performed"
12. Now go back into the Cancel Products Orders routine, and enter the specimen again. Use the <shift> <Ctrl> keys to check off all products. Type in CP at the function prompt. You should see the message: "1 of 2 rejected. Continue, Stop or Report:" . Type in "R" for Report, and note that the report states: "ORDER HAS ALREADY BEEN CANCELLED" as the rejection reason.
13. Type <Return> to get back to the Cancel Product Orders screen and "C" to Continue. Remove the checkmark from #1 and leave #2 checked. At the Function prompt type in ND (Set/Reset ND). You should see the prompt "Function will apply to all selected orders. Continue? Type in "Y" to continue and note that the result of #2 is now "ND". Keep #2 checked off and type in ND again at the Function prompt. Answer "Y" to "Function will apply to all selected orders. Continue?". Note that #2 now has Results of "Pending" again.
14. Use the exit key <F11> to exit from the Cancel Product Orders Routine.
15. Enter a requisition on a different patient. Order two units of Packed Cells.
16. In Enter/Edit BBK Results result the specimen. Search for two compatible units and enter crossmatch data. (If there are no compatible units you will need to enter units into inventory and enter results for them.)
17. Issue both units and enter transfusion data for the first unit only.
18. Go into Cancel Product Orders for the specimen from #15. Next to the PC Product you should see 2 under the ORD column, 2 under the ISS column and 1 under the TXN column. Below that, the Unit Status for #2 should be ISS and #1 should be TRS. Check off #1 and enter CP at the Function prompt. You should see the message: "1 of 1 rejected. Continue, Stop, or Report." Type in "R" for Report and note that the rejection reason displays as "UNIT(S) TRANSFUSED TO CURRENT SPECIMEN".
19. Enter <Return> to go back to the Cancel Product Orders Screen. Then type in "S" to Stop at the "1 of 1 rejected. Continue, Stop or Report" prompt. Remove the checkmark from #1 and check off #2 instead. Enter "RI" (Return Issued Unit) at the Function prompt. You should see the message: "Function will apply to all selected orders. Continue?". Type in "Y" to continue. You will see a green popup screen with "Remove Issue Order Group" (if your product dictionary is set up with an issue order group for packed cells) and "Delete Charge For Product". Answer Y to these prompts. Note that the unit status has changed to whatever it was prior to the crossmatch and that the Iss column now displays 1.
20. Use the Exit key <F11> to exit the Cancel Product Orders Routine.
21. Perform a Billing Inquiry on the specimen and verify that only one of the units is being charged.
- 359-

22. Perform a unit inquiry on the unit you released and verify that it is no longer issued to the patient.
23. Enter a requisition on another patient and order a unit of packed cells. Go into Enter Results and result the specimen. Search for a compatible unit and enter crossmatch data. (If there are no compatible units you will need to enter a unit into inventory and enter results for it.)
24. Go into Cancel Product Orders for the specimen from step #23. Check off the unit and enter "CP" at the Function prompt. You should see the message, Function will apply to all selected orders. Continue?". Type in "Y" to Continue. You will see a green screen and will be prompted for a Deletion Comment. Enter a Deletion Comment and you will be returned to the Cancel Product Orders screen.
25. On the Cancel Product Orders screen, verify that the result of the "CM Y?" column is now "Y <NA>" and that the "Unit Status" column result is "AVA".
_______________________________________________________________________
THIS ROUTINE VALIDATED BY:___________________________DATE:__ /__ /__
ACCEPTABLE_______________________NOT ACCEPTABLE__________________ HOSPITAL NAME: ______________________________________________________
- 360-

4.8 Validation Exercise C:
Using the Cancel Product Order Routine for Non-Crossmatchable Products
Specimen #1 ____________
Fresh Frozen Plasma Units ____________ _____________
Specimen #2 ____________
1. Enter a new requisition on a patient and order two units of a product that does not require a crossmatch such as fresh frozen plasma.
2. Issue two units of fresh frozen plasma to the specimen from step #1. (If there are no compatible units you will need to enter units into inventory and enter results for them.) Enter transfusion data for the first unit only.
3. Go into Cancel Product Orders for the specimen from above. Check off the first result and enter "CP" at the Function prompt. You should see the message "1 of 1 rejected. Continue, Stop, or Report." Type in "R" for Report and verify that the rejection reason is "UNITS(S) TRANSFUSED TO THE CURRENT SPECIMEN".
4. Press <return> to go back to Cancel Product Orders and then type in "C" to Continue. Remove the checkmark from the first result and check off the second one. Enter "NA" at the Function prompt. You should see the message "1 of 1 rejected. Continue, Stop, or Report." Type in "R" for Report and verify that the rejection reason is "NON CROSSMATCHABLE PRODUCT".
5. Press <return> to go back to Cancel Product Orders and then type in "C" to Continue. Keep the checkmark on the second product. Enter "ND" at the Function prompt. You should see the message "1 of 1 rejected. Continue, Stop, or Report." Type in "R" for Report and verify that the rejection reason is "NON CROSSMATCHABLE PRODUCT".
6. Press <return> to go back to Cancel Product Orders and type in "C" to continue. Keep the checkmark on the second product. Enter "CP" at the function prompt. You should see the message "Function will apply to all selected orders. Continue?" Type in "Y" to continue. You will see a green popup screen with "Remove Issue Order Group?" (if your product dictionary is set up with an issue order group for fresh frozen plasma) and "Delete Charge For Product?". Answer "Y" to these prompts. You should see a message on the bottom of your screen "Releasing issue for unit." and you will be prompted for a deletion comment in a pop-up screen. Notice that the second product has been removed from the Cancel Product Orders screen.
7. Under Result Inquiry, use Print Specimens (Internal) to print your specimen and verify that the data is correct.
8. Print a Billing Inquiry and verify that it is correct.
9. Enter a requisition on a patient and order a product that is set up in the Product Dictionary as "All Units Alike = Y", such as Rhogam.
10. Go into Cancel Product Orders for the specimen from step #9. Check off the result and enter "CP" at the Function prompt. You should see the message "Function will apply to all selected orders. Continue?". Type "Y" to continue. You should see a green box and will be prompted for a Deletion Comment. Enter a deletion comment. You will be returned to the Cancel Product screen.
- 361-

11. Under Result Inquiry use Print Specimens (Internal) to print your specimen and verify that the data is correct.
_______________________________________________________________________
THIS ROUTINE VALIDATED BY:___________________________DATE:__ /__ /__
ACCEPTABLE_______________________NOT ACCEPTABLE__________________ HOSPITAL NAME: ______________________________________________________
- 362-

4.9: Uncanceling a Patient's Cancelled Product Order
FUNCTION TO BE VALIDATED: UNCANCEL PRODUCT ORDERS
Introduction:
This routine allows the uncanceling of specific patient orders which have been cancelled using the Cancel Product Order function or routine (section 4.8). Within the Uncancel Product Order Routine, users can access the Uncancel Product Function (UPR) and the Set/Reset Crossmatch to N/A. The Uncancel Product Order Function is also available in the Process Patient's Specimen and the Process Specimen Batch Routines and will branch into the Uncancel Product Order Routine.
Any valid specimen may be selected in the Uncancel Product Order Routine as long as it has at least one cancelled product order on it.
Dictionaries:
Access Product Test
Functions may be accessed in:
Uncancel Product Order Routine Process Patient's Specimens Process Specimen Batch
Reports to print:
Result Inquiry
NOTE: Users may have the ability to define CUSTOM REPORT FORMATS when printing the standard reports mentioned above. Customization to the reports may not include all the information contained in the standard version.
- 363-

4.9 Validation Exercise A:
Access
Note: Remember to sign back on to the system whenever you make any changes to your access group.
1. On page 2 of the LIS Access Dictionary, for your access group, do a lookup at the Function prompt in the Process Specimen Functions section. Verify that the Uncancel Product function with the mnemonic of UPR appears in the lookup (if it has not already been entered). Enter this function.
2. Verify that you have access to the Uncancel Product Orders Routine on the BBK Result Entry menu.
3. Verify that the Uncancel Product Order function is available in the Process Patient's Specimens and Process Specimen Batch Routines.
4. In the LIS Access Dictionary remove the Uncancel Product function for your access group. In the BBK Result Entry Menu select the Uncancel Product Order Routine. You should receive the message "Access to uncancel product orders is not set up for this user."
5. In the LIS Access Dictionary enter ALL at the Process Specimen Functions. You should see the Uncancel Product Function (UPR) as one of the default functions. File your access group.
______________________________________________________________________
THIS ROUTINE VALIDATED BY:___________________________DATE:__ /__ /__
ACCEPTABLE: ___________________NOT ACCEPTABLE:____________________
HOSPITAL NAME: ______________________________________________________
- 364-

4.9 Validation Exercise B:
Using the Uncancel Product Order Routine For Crossmatchable Products
Steps with specimens and units to record below will be marked with an *.
Spec #1(step #1):____________
Spec #2 (step #11):____________
Spec #3 (step #15):____________
Packed Cells (step #15):_____________ ______________
Order Uncancelled for unit (step #18) ______________
Spec #4 (step #21):___________
Spec #5 (step #21):____________
Packed Cells for Spec #4 and #5 (step #21) ______________ ______________
1. Enter a requisition on a patient for 2 packed cells. In the Uncancel Product Order Routine enter in the specimen number. Verify that you get the message, " No cancelled product orders."*
2. In the Cancel Product Order Routine cancel both product orders.
3. In the Uncancel Product Order Routine pull up this specimen. Verify that there is a "2" in the CAN status column in the product display and that in the CAN column in the crossmatch multiple field below, there is a "Y" next to each of the crossmatches (which will list as Not Done or the customer defined Not Done parameter setting) indicating that these are cancelled orders.
4. Select one of the cancelled orders and enter the Uncancel Product Function. Verify that the message: "Function will apply to all selected orders. Continue?" appears. Answer Y.
5. Verify that the "2" in the CAN status column changes to a "1" and that the "Y" in the CAN column for the order you selected to uncancel, changes to "N."
6. Select the order that you have just uncancelled and try to use the Uncancel function on it again.7. Verify that you get the message: " 1 of 1 rejected. C)ontinue, S)top or R)eport:" Enter R to Report, and verify that you get the reason for rejection: "ORDER IS NOT CANCELLED".
8. Under Result Inquiry, choose Print Specimens (Internal, short form "N") for specimen #1. Verify that the ORD PRODS displays as PACKED CELLS/2/-1, indicating that one of the product orders has been restored. Also verify that the DELETED line displays that the cancellation of a product order was deleted, for example:
"PACKED CELLS\-1 - 12/15 MMG: * Product order uncancelled. *"
9. Verify that you can reset the Crossmatch from Not Done, back to pending using the Set/Reset Crossmatch to ND function via the Cancel Product Order Routine
10. In Result Entry verify that you are now able to crossmatch a unit of packed cells to this specimen.
- 365-

11. Enter a requisition on a different patient for 2 packed cells.*
12. In the Cancel Product Order Routine cancel only one of the product orders.
13. In the Uncancel Product Order Routine verify that only one of the orders is shown. Uncancel this order. Keep the order checked and try to use the Uncancel Function on it once more.
14. Verify that you get the message: " 1 of 1 rejected. C)ontinue, S)top or R)eport:" Choose R, and verify that you get the rejection reason: "UNCANCEL COUNT WOULD BECOME GREATER THAN CANCELLED." (This is because there are no cancelled orders left, as opposed to when other cancelled orders exist and the message "Order is not cancelled” appears, indicating that perhaps the user chose the wrong order to uncancel).
15. Enter a requisition on a different patient for 2 packed cells. In Result Entry crossmatch two compatible units to the specimen. (If there are no compatible units, you will need to enter units into inventory and result them.) Issue one of the units.*
16. In the Cancel Product Order Routine cancel both product orders. (Enter either N or Y to both "Remove Issue Order Group" and to "Delete Charge for Product").
17. In the Uncancel Product Order Routine verify that both of the cancelled orders display and that in the Cm Y? column, "Y <N/A>" appears.
18. Uncancel one of the cancelled product orders. Verify that the "2" in the CAN status column changes to a "1" and that the "Y" in the CAN column for the order you selected to uncancel, changes to a "N." Note that the Cm Y? column does not change and the unit status also does not change.*
19. To verify that these crossmatches can be used again, use the Set/ Reset Crossmatch to N/A function, available in the Uncancel Product Order Routine to reset the N/A'd crossmatch to available. Verify that in the Cm Y? column, "Y <N/A>" changes to "Y" and the unit status from AVA to RDY (or the equivalent statuses according to those defined in the LIS System Parameters)
20. In Issue Units verify that the unit for which you uncancelled the product order now pops up in the green box, and can be issued to the patient.
21. Enter in two requisitions for different patients with the same blood type and order 2 Packed Cells for both. For one specimen, crossmatch two compatible units to the specimen. For the second specimen, crossmatch the same two units to the specimen.*
22. Cancel the product orders for the first specimen (spec #4) from step #21. Then, for the second specimen (spec #5), issue both units and transfuse one of them.
23. In the Uncancel Product Order Routine enter the first specimen. Then select both orders and try to uncancel them. Verify that you received the message: "2 of 2 rejected. C)ontinue, S)top or R)eport:" Enter R and verify that you get the rejection reason: "UNIT(S) ARE AT AN ISSUED OR FINAL STATUS."
______________________________________________________________________
THIS ROUTINE VALIDATED BY:___________________________DATE:__ /__ /__
ACCEPTABLE: ___________________NOT ACCEPTABLE:____________________
HOSPITAL NAME: ______________________________________________________
- 366-

4.9 Validation Exercise C:
Using the Uncancel Product Order Routine for Non-Crossmatchable Products
Specimen #1 (Step #1)______________
1. Enter a requisition for a different patient for 2 units of platelets (or product with Crossmatch Required? N in Product Dictionary). Cancel both of the orders. *
2. In the Uncancel Product Routine pull up this specimen. Note that the order lists as pending and there is a 2 in the CAN status column of the product multiple but that there is not Y or N in the CAN column in the field below. Select one of the product orders and use the Uncancel function to uncancel the product order.
3. Verify that the message " Function will apply to all selected orders. Continue?" appears. Verify that the number in the CAN status column changes from 2 to 1, and that the order you uncancelled disappears from the display.
4. Print the Internal Result Inquiry (short form "N") and verify that the ORD PRODS line shows: "RANDOM PLTS/2/-1" indicating that one of the orders has been restored. Also verify that on the DELETED line, the following appears:
RANDOM PLTS\-1 - 12/15 MMG: * Product order uncancelled. *
Note: The Uncancel Product Function and Routine will behave the same as above for all Non-Crossmatched Products, including those with All Units Alike? Y in the Product Dictionary. Anytime an order has been cancelled, and thus is accessible in the Uncancel Routine, the order will list as "pending" rather than the unit number, and product statuses will not be displayed. This is because when an order which has an issued product is cancelled, the issue is released and the unit is no longer associated with the specimen since there is no crossmatch.
_______________________________________________________________________
THIS ROUTINE VALIDATED BY:___________________________DATE:__ /__ /__
ACCEPTABLE_______________________NOT ACCEPTABLE__________________ HOSPITAL NAME: ______________________________________________________
- 367-

4.10: Releasing Patient's Crossmatches
FUNCTION/ROUTINE TO BE VALIDATED: Releasing Crossmatched Products
Introduction:
The release of crossmatches can be done manually or your system can be defined to automatically release crossmatches at defined times for specific conditions. A hard copy notice to the patient's location would serve as notification that the patient no longer has units assigned to them and additional orders should be obtained if needed.
Function may be accessed in:
Set/Reset Xm not Available Process Specimen Batch (Release Crossmatch function) Process Patient’s Specimens (Release Crossmatch function) Change to Inactive Status Transfer Units Emergency Issue Units Cancel Product Order
NOTE: A crossmatch will also be flagged as N/A (not available) automatically when a crossmatched product is issued to another patient.
Dictionaries:
MIS Location Dictionary LIS System Parameters Test Dictionary Product Dictionary Access Dictionary Customer Defined Parameters
Reports to print:
Crossmatch Not Available Report Old Crossmatch Report Print Specimens (Internal) Print Specimens BBK Unit Inquiry Auto Activity Log
NOTE: Users may have the ability to define CUSTOM REPORT FORMATS when printing standard reports. Customization to the reports may not supply all information contained in the standard version.
- 368-

I. Manual Release of Crossmatches
LIS PARAMETERS:
BBK Release Xm Notice
4.10 Validation Exercise A: Set/Reset Crossmatch Not Available
Prerequisites:
Select a patient to be used in processing a specimen. Order a product that requires a crossmatch. Receive the specimen into the performing lab site. Result any associated tests and the crossmatch.
1. In the Set/Reset Crossmatch N/A Routine, select a specimen that does not have a crossmatched product associated to it. The message "This specimen has no valid crossmatched products." will appear.
Message received?______
2. Select a specimen that has a crossmatched product associated with it.
3. At the Change? prompt enter Y and file.
4. If the system parameter is set to ASK the message "Print Crossmatch Release Notices?" will display. Respond Y. If the system parameter is set to print ALL you will not be prompted and the notice will print automatically. If the system parameter is blank, there will be no XM Release Notice printed. Confirm that the release notice printed at the patient's location printer as defined in the MIS Location Dictionary.
5. The prompt " Order new crossmatch for specimen ____________? will appear. Respond Y.
6. Confirm that the XM count for the specimen increased by the number of released crossmatches, the Parent product count remained the same, and the released unit is flagged as N/A for the specimen.
7. Confirm that the released unit's assigned specimens includes the specimen from the previous step.
8. In the Enter Results Routine, access the above specimen. At the unresulted product order enter the unit that was released in step 3. Respond Y to the OK? prompt. The message "Unit is already crossmatched to this test on this specimen." will appear.
Message received?_____
9. In the Set/Reset Xm Not Available Routine, access the specimen. Note that the unit appears and is flagged as Not Available. Respond Y to the Change? prompt.
10. Confirm that the unit is now assigned to the specimen.
11. Confirm that the Crossmatch Not Available Report does not report this unit.
________________________________________________________________________
THIS ROUTINE VALIDATED BY:___________________________ DATE:__ /__ /__
ACCEPTABLE:__________________ NOT ACCEPTABLE:_____________________
HOSPITAL NAME: ______________________________________________________ 4.10 Validation Exercise B: Change to Inactive Status Routine
- 369-

1. In the Change to Inactive Status Routine, select a unit that is currently crossmatched to a patient.
2. At the New Status prompt select one of the listed statuses. Respond as follows to the remaining prompts:
Include All Associated Units? Y
Include Pooled Units? Y
3. Respond Y to the "Change to unit status________?" prompt.
4. If the system parameter is set to ASK the message "Print Crossmatch Release Notices?" will display. Respond Y. If the system parameter is set to print ALL you will not be prompted and the notice will print automatically. If the system parameter is blank, there will be no XM Release Notice printed. Confirm that the release notice printed at the patient's location printer as defined in the MIS Location Dictionary.
5. The following prompt will be received: "Crossmatch found on unit (product and unit #). Order a new one?" Respond Y.
6. Confirm that the crossmatch is now N/A on the patient's specimen.
7. Confirm the unit inquiry displays the proper statuses and assigned specimens.
8. In the Return To Prior Status Routine, select the unit used in step 1.
9. Perform a lookup at the Prior Status prompt. Note the display of the Effect On Unit information provided.
10. Choose either READY or the status that will "Reset applicable N/A flags".
11. At the "Change Status?" prompt, respond Y.
12. The following message will display: "N/A reset for(patient) - specimen number <Return>"
13. Confirm that the N/A flag has been removed from the crossmatch.
14. Confirm that the unit statuses and assigned specimens appear correctly.
________________________________________________________________________
THIS ROUTINE VALIDATED BY___________________________ DATE:__ /__ /__
ACCEPTABLE:___________________ NOT ACCEPTABLE:___________________ HOSPITAL NAME: ______________________________________________________
- 370-

4.10 Validation Exercise C: Transfer Unit Routine
1. In the Transfer Unit Routine select the same unit number used in the previous exercise.
2. Transfer? Y
3. If the system parameter is set to ASK the message "Print Crossmatch Release Notices?" will display. Respond Y. If the system parameter is set to print ALL you will not be prompted and the notice will print automatically. If the system parameter is blank, there will be no XM RELEASE NOTICE printed. Confirm that the release notice printed at the patient's location printer as defined in the MIS Location Dictionary.
4. The following message will display: "Crossmatch found on unit (product and number). Order a new one?" Respond Y.
5. Confirm that the crossmatch is flagged as N/A, the specimen crossmatch count increased and the product order remains unchanged.
6. Confirm that the transferred unit's status and assigned specimens appear correctly.
7. In the Enter Units Routine select the source the unit was from originally as the Source. At the BBK Unit Number prompt, enter the transferred unit number.
8. The following message will be received: "Unit exists with a TRANSFERRED status, re-enter?" Respond Y.
9. Confirm that the unit is now available and that the assigned specimens appear properly. Depending on how your system is defined, a second unit specimen may be ordered and require resulting for the unit to become available.
10. Confirm that the crossmatch is flagged as N/A.
11. In the Set/Reset Xm Not Available Routine, reset the crossmatch to available.
_______________________________________________________________________
THIS ROUTINE VALIDATED BY:___________________________ DATE:__ /__ /__
ACCEPTABLE: __________________NOT ACCEPTABLE:_____________________ HOSPITAL NAME: ______________________________________________________
- 371-

4.10 Validation Exercise D: ISSUE Unit to Another Patient
1. Enter an order for another patient for the same product used in the previous exercise.
2. Result the associated product order tests and crossmatch the same unit used in the previous exercise.
3. Issue the unit to the patient used in step 1.
4. If the system parameter is set to ASK the message "Print Crossmatch Release Notices?" will display. Respond Y. If the system parameter is set to print ALL you will not be prompted and the notice will print automatically. If the system parameter is blank, there will be no XM Release Notice printed. Confirm that the release notice printed at the patient's location printer as defined in the MIS Location Dictionary.
5. Confirm that the crossmatch is flagged as N/A on the previous specimen and the appropriate XM test was added.
6. Confirm that the unit status and assigned specimens appear properly.
________________________________________________________________________
THIS ROUTINE VALIDATED BY:___________________________ DATE:__ /__ /__
ACCEPTABLE: ___________________NOT ACCEPTABLE:____________________
HOSPITAL NAME: ______________________________________________________
- 372-

41.0 Validation Exercise E: Emergency Issue to Another Patient
1. Enter and result a crossmatched product order for a patient.
2. In the Emergency Issue Routine, select a second patient.
3. Enter the unit that was crossmatched to the other patient in step 1.
4. At the "Issue?" prompt, enter Y.
5. If the system parameter is set to ASK the message "Print Crossmatch Release Notices?" will display. Respond Y. If the system parameter is set to print ALL you will not be prompted and the notice will print automatically. If the system parameter is blank, there will be no XM Release Notice printed. Confirm that the release notice printed at the patient's location printer as defined in the MIS Location Dictionary.
6. Confirm that the Crossmatch Release Notice printed as expected.
7. A box will display requesting which crossmatch test should be ordered on the specimen for the first patient. The default may be accepted or a lookup is provided of XM type tests.
8. Confirm that the crossmatch for the first patient is flagged as N/A.
9. Confirm the status of the unit and that the assigned specimens appear properly.
________________________________________________________________________
THIS ROUTINE VALIDATED BY:___________________________ DATE:__ /__ /__
ACCEPTABLE: ____________________ NOT ACCEPTABLE:___________________
HOSPITAL NAME: ______________________________________________________
- 373-

II. Automatic release of crossmatches
LIS PARAMETERS:
BBK Auto Release Crossmatches? BBK Auto Release Xm Notice?
NOTE: This section may be omitted if your system parameters do not allow the automatic release of crossmatches.
4.10 Validation Exercise F: Auto Release of Expired Crossmatch
Prerequisites:
Select a patient to be used in processing a specimen. Order a product that requires a crossmatch. Receive the specimen into the performing lab site. Result all associated tests and the crossmatch.
1. The crossmatch will auto-release according to the LIS Customer Defined Parameters defined with in your system.
BBK Auto Release Crossmatch By___________
BBK Auto Release Crossmatch Hours___________
BBK Auto Release Crossmatch Time___________
BBK Auto Release Crossmatch Can Text_________
2. Allow the time defined in your Customer Defined Parameters to elapse.
3. Confirm that the crossmatch is flagged as N/A based on the Customer Defined Parameter, BBK Auto Release Crossmatch Time.
4. Confirm that the unit is at the appropriate status and the assigned specimens appear correctly.
5. Confirm that the crossmatch release notice printed at the patient's location if the BBK Auto Rel Xm Notice parameter is set to Y.
________________________________________________________________________
THIS ROUTINE VALIDATED BY:___________________________ DATE:__ /__ /__
ACCEPTABLE:____________________ NOT ACCEPTABLE:___________________
HOSPITAL NAME: ______________________________________________________
- 374-

4.10 Validation Exercise G: Auto Release of Crossmatches for Discharged Inpatients and Departed Outpatients
LIS PARAMETERS:
BBK Auto Rel Xm Notice BBK Rel Xm For Dis/Can Pts
Prerequisites:
Select a patient to be used in processing a specimen. Order a product that requires a crossmatch. Receive the specimen into the performing lab site. Result any associated tests and the crossmatch.
1. The crossmatch will auto-release according to the parameters defined with in your system.
BBK Auto Release Crossmatch By___________
BBK Auto Release Crossmatch Hours___________
BBK Auto Release Crossmatch Time___________
BBK Auto Release Crossmatch Can Text_________
BBK Auto Rel Hrs For DIS/Can Pts________
BBK Auto Rel DIS/Can Canned Text________
2. Enter and result an order for a crossmatch.
3. In the ADM module or via an other vendor admissions module, discharge the patient.
4. Allow the time defined in your Customer Defined Parameters to elapse. The midnight run will release the crossmatch if the patient has been cancelled or discharged for the defined number of hours.
5. Confirm that the crossmatch is flagged as N/A.
6. Confirm that the unit is at the appropriate status and the assigned specimens appear correctly.
7. Confirm that the crossmatch release notice printed at the patient's location if the BBK Auto Rel Xm Notice parameter is set to Y.
________________________________________________________________________
THIS ROUTINE VALIDATED BY:___________________________ DATE:__ /__ /__
ACCEPTABLE: ____________________ NOT ACCEPTABLE:___________________
HOSPITAL NAME:______________________________________________
- 375-

III. Automatic release of Assigned Units
Validation Exercise H: Auto Release of Assigned Products
LIS PARAMETERS:
BBK Auto Release Assigned?
Prerequisites:
Select a patient to be used in processing a specimen. Order a non-crossmatchable product on the patient. Receive the specimen into the performing lab site. Result any associated tests and assign a unit to the specimen.
1. The unit will auto-release according to the parameters defined in your system.
BBK Auto Release Assign Hours ________
BBK Auto Release Assign Time ________
BBK Auto Release Assign Text ________
2. Allow the time defined in your Customer-Defined Parameters to elapse.
3. Confirm that the assigned unit was released from the specimen.
4. Confirm that the unit is at the appropriate status and the assigned specimens no longer appear.________________________________________________________________________
THIS ROUTINE VALIDATED BY:___________________________ DATE:__ /__ /__
ACCEPTABLE: ____________________ NOT ACCEPTABLE:___________________
HOSPITAL NAME:_______________________________________________________
- 376-

4.11: Entering Patient Transfusion Reactions
ROUTINE TO BE VALIDATED: Enter/Edit Transfusion Reaction
Introduction: Allows you to enter a transfusion reaction on a patient and order any necessary blood work on the patient.
Dictionaries:
BBK Transfusion Reaction MIS Customer Defined Screens LIS Order Group LAB Test MIC Procedure BBK Test BBK Product
Function may be accessed in: Enter/Edit Transfusion Reaction
Reports to Print:
Unit Inquiry Print Medical Record Cards Print One Medical Record Card BBK History Inquiry Print BBK History Transfusion Reaction Report Transfusion Reaction Statistics Specimen Master Log Patient Master Log Cumulative Summary Activity Report Specimen Inquiry
NOTE: Users may have the ability to define CUSTOM REPORT FORMATS when printing standard reports. Customization to the reports may not supply all information contained in the standard version.
- 377-

4.11 Validation Exercise A:
1. Identify the patient, unit or donor, using any of the identification methods as explained in the corresponding section of the BBK User Manual.
2. At the BBK Unit prompt, perform a lookup to get a list of units that have been transfused to the patient. Choose one and record the unit number.
Unit Number: _____________________________________
3. At the Transfusion Reaction prompt, perform a lookup and choose one of the entries defined in the BBK Transfusion Reaction Dictionary.
Transfusion Reaction: _____________________________
4. Depending on how the Transfusion Reaction Dictionary is defined, you may or may not be prompted with queries on a Customer Defined Screen. If so, answer each query.
5. At the Enter/Edit Req prompt, the response will default to what is defined in the Transfusion Reaction Dictionary. File the entry and record the requisition number created.
Requisition Number: ______________________________
6. Perform a Requisition Inquiry. Were the tests ordered that are defined in the LIS Order Group Dictionary? Did the specimen comment "Transfusion reaction ZZ on unit NNN filed" appear (where NNN = unit number and ZZ = transfusion reaction)?
7. Print the following reports to verify that this new information is updated:
Unit Inquiry Print Medical Record Cards Print One Medical Record Card BBK History Inquiry Print BBK History Transfusion Reaction Report Transfusion Reaction Statistics Specimen Master Log Patient Master Log Cumulative Summary Activity Report Specimen Inquiry
_______________________________________________________________________
THIS ROUTINE VALIDATED BY:___________________________ DATE:__ /__ /__
ACCEPTABLE: ___________________NOT ACCEPTABLE:____________________
HOSPITAL NAME:_____________________________________________
- 378-

4.12: Deleting Patient Transfusion Reactions
ROUTINE TO BE VALIDATED: BBK Delete Transfusion Reaction
Introduction: Allows you to delete a transfusion reaction on a patient.
Dictionaries:
BBK Transfusion Reaction MIS Customer Defined Screens LIS Order Group LAB Test MIC Procedure BBK Test BBK Product
Function may be accessed in: Delete Transfusion Reaction
Reports to Print:
Unit Inquiry Print Medical Record Cards Print One Medical Record Card BBK History Inquiry Print BBK History Transfusion Reaction Report Transfusion Reaction Statistics Specimen Master Log Patient Master Log Cumulative Summary Activity Report Specimen Inquiry
NOTE: Users may have the ability to define CUSTOM REPORT FORMATS when printing standard reports. Customization to the reports may not supply all information contained in the standard version.
- 379-

4.12 Validation Exercise A:
1. Identify the patient from the previous exercise using any of the identification methods as explained in the corresponding section of the BBK User Manual.
2. At the BBK Unit prompt, perform a lookup to get a list of units that have been transfused to the patient. Choose the one from the previous exercise and record the unit number.
Unit Number: _____________________________________
3. At the Transfusion Reaction prompt, perform a lookup and choose the entry from the previous exercise.
Transfusion Reaction: _____________________________
4. At the Cancel Req? prompt, answer Y to cancel the requisition and file. You will be prompted with Delete Transfusion Reaction?. Answer Y.
5. You will then be branched to the Cancel Requisition Routine. Cancel the requisition.
6. Did the specimen comment “Transfusion reaction ZZ on unit NNN deleted” appear (where NNN=unit number and ZZ-transfusion reaction)?
7. Print the following reports to verify the deletion of the transfusion reaction:
Unit Inquiry Print Medical Record Cards Print One Medical Record Card BBK History Inquiry Print BBK History Transfusion Reaction Report Transfusion Reaction Statistics Specimen Master Log Patient Master Log Cumulative Summary Activity Report Specimen Inquiry
THIS ROUTINE VALIDATED BY____________________________ DATE:__ /__ /__
ACCEPTABLE: ___________________NOT ACCEPTABLE:____________________
HOSPITAL NAME: ______________________________________________________
- 380-

Chapter 5: AUTOLOGOUS AND DONOR-DIRECTED UNIT PROCESSING
5.1: Processing Autologous Units
FUNCTION TO BE VALIDATED: Autologous Unit Inventory
Introduction:
The following exercise will focus on entering autologous units into the Unit Inventory. This exercise is used in conjunction with the Patient Reserved Unit Exercise. All entered examples will be carried over to the Patient Reserved Unit Exercise. Write all examples on the attached Worksheet.
Dictionaries:
Product Blood Type Unit Location Antibody Antigen Marker Access
Toolbox Parameters involved:
BBK Reserve Units by BBK History Med Rec Entry
Reports to Print:
Reserved Donations List Reserved Unit Statistics Override Warning Report
NOTE: Users may have the ability to define CUSTOM REPORT FORMATS when printing standard reports. Customization to the reports may not supply all information contained in the standard version.
- 381-

Prerequisites:
All Unit and Patient validation should be completed before starting this exercise. There will be an emphasis on specific prompts that effect autologous transfusions. It will be assumed that the validation of general prompts has already been accomplished. Be sure to have patients available that have different confirmed Blood Types on file. Also write down all patient and Unit information on the Reserved Unit worksheet.
RESERVED UNIT WORKSHEET (DONOR-DIRECTED)
NameSSN Medical Record #
Sex DOB
BloodType
Unit #Product
Recipient NameMedical Record #Blood Type
Requisition #Specimen #
5.1 Validation Exercise A:
1. Proceed to the Enter Inventory Units Routine. Enter in a unit of either Whole Blood or Packed Cells. Make the Source Blood Type OPOS. Fill in all of the necessary information before the Reserved prompt.
2. At the Reserved prompt enter in A for Autologous.
3. The system will now prompt for Recipient.
4. Enter in a Patient who has a confirmed Blood Type on file that is not compatible with OPOS. Enter Last name, First name.
LIS Parameter is set to BBK RESERVE UNITS BY: Medical Record LIS Parameter is set to BBK HX MED REC ENTRY: U or I
Expected Result:
- 382-

The system will ask for the Sex and Birthdate of the Patient. Enter in both of these parameters. If you do not have this information, return past both of the prompts. The system will branch into a Soundex search. Choose your patient via the Soundex search. The system will display the following message: "Recipient's blood type does not match Blood Type.". This message is warning the user that the patient chosen has a different blood type then that of the unit.
5. Linefeed the patient name from the Recipient prompt.
6. Enter in a new patient that is not currently defined in the MEDITECH system.
Enter the patient's name in the format of Last name, First name.
Expected Result:
The system will ask for the Sex and Birthdate of the Patient. Return past both of these prompts. The system will force the user to check all levels of the Soundex search. After the system has searched Medical Records, and the patient has not been found, a new patient screen will appear. The name of the patient will default into the screen. Enter the new patient's Birthdate, sex and Social Security number. Make sure the Social Security number is unique. The name of the patient, DOB, and sex will default into the screen, and no edit is allowed.
7. File the unit of blood. Write down all information on your Reserved Unit Worksheet.
8. Enter in another unit of either Packed Cells or Whole Blood.
9. At the Reserved prompt enter in "A" for Autologous.
10. Enter in a new patient at the Recipient prompt. Enter the patient name in the format of Lastname<space>Firstname. After the Soundex search is completed, the new patient screen will appear.
Expected Result:
The system will display the following message:"Invalid name format. Use the format last name,first name"
11. Linefeed the name and enter in the patient's name in the correct format.
12. Enter in the patient's Birthdate and Sex.
13. Enter an incorrect Social Security number. Make sure that the Social Security number is being used by another patient in the system.
Expected Result:
The system will display the following message "Social Security number in use by another patient" OK? Enter "N" for No.
14. Enter the correct Social Security number for this patient.
15. File the unit and write the information on the Unit Worksheet.
LIS Parameter is set to BBK RESERVE UNITS BY: Social Security number LIS Parameter is set to BBK HX MED REC ENTRY: U or I.
- 383-

16. Stay in the Enter Unit routine. Enter in the necessary information on a new unit of Packed Cells or Whole Blood. Make the unit autologous.
17. At the Recipient prompt enter in a Social Security number that is not in the standard format.
Expected Result:
The system will respond with the following message:"Format must be NNN-NN-NNNN or NNN-NN-NNNNA.
18. Linefeed out the incorrect Social Security Number and enter in a valid Social Security number for your patient.
NOTE - When using social security numbers to reserve units, the system does not automatically default the patient's name, DOB and sex. If this is the first time that number has been used to reserve units, then the user can manually enter in the patient's name, DOB and sex at this time at the respective prompts. If the number has already been used to reserve other units in the past and the unit entry user entered in the patient's name, DOB and sex, this will appear in a pop-up box for the user to choose. If the user does not enter any patient information, then the word <none> will be seen in the pop-up box for that entry. This information is Lab Recipient Data only. It is not indexed anywhere else.
Expected Result:
If a match is found but not selected, the user will be prompted with a message "Duplicate use of this number - continue anyway? If they answer yes, they will be allowed to enter a name, DOB, and sex for this, recipient, and an entry will be made to the new Social Security number index. If there is no match, then the system will allow entry of a name, DOB, sex and then make an entry to the Social Security number index.
19. Accept the match and verify that the name, DOB, and sex will be displayed.
20. Enter the Unit Inquiry Routine and check Unit information for discrepancies.
21. Enter all Units and the corresponding recipients on the Reserved Unit Worksheet.
LIS Parameter is set to BBK RESERVE UNITS BY: EITHER LIS Parameter is set to BBK HX MED REC ENTRY: U or I
22. Stay in the Enter Units Routine. Enter in the necessary information on a new unit of Packed Cells or Whole Blood. Make the unit Autologous.
23. At the Recipient prompt enter the name in the correct format.
NOTE - The user may enter a name, MRI number or Social Security number. (please see 10 for additional information)
24. Enter in the patient's Birthdate and Sex for the soundex search.
Expected Result:
The system will do a lookup to MRI first. If a selection is made, the name, DOB, and sex will display. If no selection is made, the user will be prompted with “Enter (L)ab Recipient or new (M)edical Record?”. Enter L. The user will then be prompted to enter a Social Security Number. If a match is found, but not selected, the user will be prompted, "Duplicate use of this number - continue anyway?" The system will allow the entry of a duplicate to the Social Security number index.
- 384-

NOTE - A soundex search - outside of the MRI soundex search - is not provided. The entry point for reserving by Social Security number MUST be a valid social security number. If more than one patient is attached to that number, they will be displayed. You can attach any number of patients to a Social Security number.
25. Enter an incorrect Social Security number. Make sure that the Social Security number is being used by another patient in the system.
Expected Result:
The system will display the following message:"Duplicate use of this number- continue anyway?"
26. Enter the correct Social Security number for this patient.
27. File the unit and write the information on your Worksheet.
________________________________________________________________________
THIS ROUTINE VALIDATED BY:___________________________ DATE: __/__ /__
ACCEPTABLE:_____________________NOT ACCEPTABLE:___________________
HOSPITAL NAME: ______________________________________________________
- 385-

5.1.1: Algorithm Unit Linked to Donor Check
4. Donation filing algorithm:When a unit is entered into inventory, the capability exists to link the unit with a donor. The system will take the information entered on the unit, and compare it with the information on file for the donor in order to establish legitimacy of the link. Algorithm Description:When entering a unit into inventory, several checks are performed if the user attempts to link the unit with a donor. If the user attempts to enter a donor that does not exist (i.e. it is a new donor), the system will check the access dictionary to determine if this user has access to enter new donors from this routine. If the user does not have access, he/she cannot proceed, the error message "You are not allowed to enter a new donor." is displayed to the user. If the user has access, he/she can proceed. If the user attempts to enter an existing donor, several checks are performed. If the donor identified does not have an existing blood bank history, the user is allowed to proceed. Upon filing the unit/donor combination, a history will be set up for the donor with the blood type of the unit. If the donor identified has an existing blood bank history, a check is performed to compare the blood types. First, the history blood type of the donor is checked against the unit blood type. If there is a mismatch, the message "Donor's blood type does not match BLOOD TYPE" appears, and the user cannot proceed. Second, the history blood type of the donor is checked against the source blood type of the unit. If there is a mismatch, the message "Donor's blood type does not match SOURCE BLOOD TYPE" appears, and the user cannot proceed. The status of the donor is then checked. If the status of the donor is not equal to "Active", the error message "Donor's status is not ACTIVE. Ok?" appears. If the user wishes to continue with the linking of this unit to the donor, the user must choose "YES" to the prompt Ok?. The warning override is logged on the Override Warning Report. The Override Warning Report can be set up to automatically print on a daily basis or it is printed daily by the Blood BankSupervisor. If the user chooses "NO" at the Ok? prompt, he/she is not allowed to file the entry, and is returned to the donor prompt. If the type of donation being entered is of the Autologous type, a check is performed to ensure that the entered donor is the same as the entered recipient. If this is not the case, the error message "Donor and recipient Medical Records do not match." is displayed to the user and the user is not allowed to proceed.
- 386-

UNIT LEVEL TEST PLAN Prerequisites:For the following scenarios, assume that the following donors currently exist in the database: Donor Name Donor Blood Type Donor Status BBK,DONOR 1 OP - O Positive ActiveBBK,DONOR 2 AP - A Positive InactiveBBK,DONOR 3 No Historical Data Active
Test # Type Description of scenario5.1.1.1 Invalid The user (identified as USER1) attempts to enter BBK,DONOR 4 as the
donor for a particular unit. Since this donor does not exist, the Access Dictionary is checked to ensure that USER1 has sufficient access to enter a new donor at this point. If so, the user is allowed to proceed. If not, the following error message appears: "You are not allowed to enter a new donor."
5.1.1.2 Normal If USER1 attempts to link the unit to the donor BBK,DONOR 4, no additional checks are performed, and the user is allowed to link this donor. Upon filing the unit, and upon the subsequent ABO Confirmatory testing, the history of the donor will be updated with the appropriate information.
5.1.1.3 Invalid If the unit being entered has an identified blood type of AP - A Positive, and the user attempts to link this unit to the donor BBK,DONOR 1, the following error message is displayed to the user due to the mismatch between unit and donor: "Donor's blood type does not match Blood Type."
5.1.1.4 Invalid If the unit being entered has an identified source blood type of BP - B Positive, and the user attempts to link this unit to the donor BBK,DONOR 1, the following error message is displayed to the user due to the mismatch between unit and donor: "Donor's blood type does not match Source Blood Type."
5.1.1.5 Invalid If the user attempts to link a unit to the donor BBK,DONOR 2, the following warning message is displayed to the user: "Donor's status is not active. OK?" If the user responds "NO" at this point, he/she is returned to the donor prompt. If the user responds "YES" at this point, he/she is allowed to proceed, and the information is logged on the Override Warning Report. The Override Warning Report can be set up to automatically print on a daily basis or it is printed daily by the Blood Bank Supervisor.
5.1.1.6 Normal The user is entering a unit with the blood type of 0P - 0 Positive, and attempting to enter an autologous donation by BBK,DONOR 1. The blood type of the donor matches the blood type of the unit, and the status of the donor is active, therefore, the user is allowed to proceed. The donor defaults in as the RECIPIENT and this cannot be edited.
______________________________________________ ________________
- 387-

Executor of test plan Date
5.2: Processing Donor-Directed Units
FUNCTION TO BE VALIDATED: Donor-Directed Unit Inventory
Introduction:
The following exercise will focus on entering donor-directed units into the Unit Inventory. This exercise is to be used in conjunction with the Patient Reserved Unit Exercise. Write all entered examples on the worksheet provided.
Dictionaries:
Product Blood Type Unit Location Antibody Antigen Marker Access
Toolbox Parameters involved:
BBK Reserve Units by BBK History Med Rec Entry
Reports to Print:
Reserved Donations List Reserved Unit Statistics Override Warning Report
NOTE: Users may have the ability to define CUSTOM REPORT FORMATS when printing standard reports. Customization to the reports may not supply all information contained in the standard version.
- 388-

Prerequisites:
All Unit and Patient validation should be completed before starting this exercise. There will be an emphasis on specific prompts that effect donor-directed transfusions. It will be assumed that the validation of general prompts has already been accomplished. Be sure to have patients available that have different confirmed Blood Types on file. Also write down all patient information on the Reserved Unit worksheet (Donor-directed).
RESERVED UNIT WORKSHEET (DONOR-DIRECTED)
NameSSN Medical Record #
Sex DOB
BloodType
Unit #Product
Recipient NameMedical Record #Blood Type
Requisition #Specimen #
- 389-

5.2 Validation Exercise A:
The following portion can only be validated if page 4 of the LIS TOOLBOX Parameters is defined as follows:
BBK RESERVE UNITS BY: Medical RecordBBK HX MED REC ENTRY: U or I
1. Proceed to the Enter Inventory Units Routine. Enter in a unit of either Whole Blood or Packed Cells. Make the Source Blood Type OPOS. Fill in all of the necessary information before the Reserved prompt.
2. At the Reserved prompt enter in D for Donor-directed.
3. The system will now prompt for Recipient.
4. Enter in a Patient who has a confirmed Blood Type on file that is not OPOS and is not compatible with OPOS.
Enter Last name, First name.
Expected Result:
The system will ask for the Sex and Birthdate of the Patient. Enter in both of these parameters. If you do not have this information, return past both of the prompts. The system will branch into a Soundex search. Choose your patient via the Soundex search. If the Default Blood Type prompt is set to ‘U’ in the Product Dictionary, the system will display the following message: "Recipient's blood type incompatible with Source Blood Type." If the Default Blood Type prompt is set to ‘S’ in the Product Dictionary, the system will display the following message: “Recipient’s blood type incompatible with Blood Type.” This message is warning the user that the patient chosen has a different blood type than that of the unit.
5. Linefeed the patient's unit number from the Recipient prompt.
6. Enter in a new patient that is not currently defined in the MEDITECH system.
Enter the patient's name in the format of Lastname,Firstname.
Expected Result:
The system will ask for the Sex and Birthdate of the Patient. Return past both of these prompts. The system will force the user to check all levels of the Soundex search. After the system has searched Medical Records, and the patient has not been found, a new patient screen will appear. The name of the patient will default into the screen. Enter the new patient's Birthdate, sex and Social Security number. Make sure the Social Security number is unique. The name of the patient, DOB, and sex will default into the screen, and no edit is allowed.
7. File the unit of blood. Write down all information on your Worksheet.
8. Enter in another unit of either Packed Cells or Whole Blood.
9. At the Reserved prompt enter in "D" for Donor-directed.
10. Enter in a new patient at the Recipient prompt. Enter the patient name in the format of Lastname<space>Firstname. After the Soundex search is completed, the new patient screen will appear.
Expected Result:
- 390-

The system will display the following message: "Invalid name format. Use <last name>, <first name>".
11. Linefeed the name and enter in the patient's name in the correct format.
12. Enter in the patient's Birthdate and Sex.
13. Enter an incorrect Social Security number. Make sure that the Social Security number is being used by another patient in the system.
Expected Result:
The system will display the following message: "Social Security Number in use by another patient. OK?"
14. Enter the correct Social Security number for this patient.
15. File the unit and write the information on your Worksheet.
________________________________________________________________________
THIS ROUTINE VALIDATED BY:____________________________ DATE: __/__ __
ACCEPTABLE:______________NOT ACCEPTABLE:_________________________ HOSPITAL NAME: ______________________________________________________
- 391-

5.2 Validation Exercise B:
The following portion can only be validated if page 4 of the LIS TOOLBOX Parameters is defined as follows:
BBK RESERVE UNITS BY: Social Security numberBBK HX MED REC ENTRY: U or I
1. In the Enter Unit Routine, enter in the necessary information on a new unit of Packed Cells or Whole Blood. Make the unit Donor-directed.
2. At the Recipient prompt enter in a Social Security number that is not in the standard format.
Expected Result:
The system will respond with the following message: "Format must be NNN-NN-NNNN or NNN-NN-NNNNA."
3. Linefeed out the incorrect Social Security number and enter in a valid Social Security number for your patient.
NOTE - The user can enter a Social Security number only. The system will do a lookup into the Social Security number index, and if one is selected, the name, DOB, and sex will be displayed. (Additional note: The system will only look into the Social Security index if the patient already exists in the system as having donor-directed units.)
Expected Result:
If a match is found but not selected, the user will be prompted with a message "Duplicate use of this number – continue anyway?.” If they answer yes, they will be allowed to enter a name, DOB, and sex for this, recipient, and an entry will be made to the new Social Security number index. If there is no match, then the system will allow entry of a name, DOB, sex and then make an entry to the Social Security number index.
4. Accept the match and verify that the name, DOB and sex will be displayed.
5. Enter the Unit Inquiry Routine and check Unit information for discrepancies.
6. Enter all units and the corresponding recipients on the Reserved Unit Worksheet (Donor-Directed).
________________________________________________________________________
THIS ROUTINE VALIDATED BY:___________________________ DATE:__ /__ /__
ACCEPTABLE: _______________NOT ACCEPTABLE:________________________
HOSPITAL NAME: ______________________________________________________
- 392-

5.2 Validation Exercise C:
The following portion can only be validated if page 4 of the LIS TOOLBOX Parameters is defined as follows:
BBK RESERVE UNITS BY: EitherBBK HX MED REC ENTRY: U or I
1. In the Enter Units Routine, enter in the necessary information on a new unit of Packed Cells or Whole Blood. Make the unit Donor-directed.
2. At the Recipient prompt enter the Name in the correct format.
NOTE - The user may enter a name, MRI number or Social Security number. (please see 10 for additional information)
Expected Result:
The system will do a lookup to MRI first. If a selection is made, the name, DOB, and sex will display. If no selection is made, the user will be prompted with “Enter (L)ab Recipient or new (M)edical Record?”. Enter L. The user will then be prompted to enter a Social Security Number. If a match is found, but not selected, the user will be prompted, "Duplicate use of this number - continue anyway?" The system will allow the entry of a duplicate to the Social Security number index.
NOTE - A soundex search - outside of the MRI soundex search - is not provided. The entry point for reserving by Social Security number MUST be a valid social security number. If more than one patient is attached to that number, they will be displayed. You can attach any number of patients to a Social Security number.
3. Enter in the patient's Birthdate and Sex.
4. Enter an incorrect Social Security number. Make sure that the Social Security number is being used by another patient in the system.
Expected Result:
The system will display “LAB only recipient with this number lookup” providing the recipient associated with that Social Security number. If a recipient is not selected, the user will be prompted with "Duplicate use of this number – continue anyway?”
5. Enter the correct Social Security number for this patient.
6. File the unit and write the information on your Worksheet.
________________________________________________________________________
THIS ROUTINE VALIDATED BY:___________________________ DATE:__ /__ /__
ACCEPTABLE:__________________ NOT ACCEPTABLE:_____________________
HOSPITAL NAME: ______________________________________________________
- 393-
5.3: Entering Patient Results for Reserved Units
FUNCTION/ROUTINE TO BE VALIDATED: Reserved Unit Result Entry
Dictionaries:
Test Product Access
Customer Defined Parameters:
Calculation
System Parameters:
Reserving Autologous/Donor Direct Units
Reports to Print:
Print Specimen (Internal) Print Assignment Cards BBK History Inquiry Crossmatch Cards Unit Inquiry Unit Report Inventory Card Issue/Transfuse Cards Transfusion Report Reserved Donation List Override Warning Report View Available Products by Patient BBK Product Inquiry
NOTE: Users may have the ability to define CUSTOM REPORT FORMATS when printing standard reports. Customization to the reports may not supply all information contained in the standard version.
- 394-

I. Autologous Reserved Units
Prerequisites:
Enter an Autologous reserved unit of Packed Cells into inventory Retype the unit so it is available in inventory. Order two units of Packed Cells for the recipient of the autologous unit you entered into inventory.
NOTE: System parameters determine how units are reserved. Check with your Applications Specialist to determine if you are reserving units by:
M - MRI numberS - Social Security numberE - Either MRI or social security, depending on the user entry
The parameter selected above will be utilized when creating a link between the reserved unit and the recipient.
Please refer to the sections: Processing Autologous Units and Processing Donor Directed Units in NPR BLOOD BANK MODULE USER MANUAL for additional information.
5.3 Validation Exercise A: Enter/Edit BBK Results
1. Identify the specimen using one of the standard methods. Before the user can enter results, one or more pop-up windows may display:
Received SpecimensExpired SpecimensHX Comments/Specimen Comments/QueriesReserved Units (donor directed and autologous)Product Test View Group
Verify that the reserved unit you entered into inventory is displaying.
(OMIT THE FOLLOWING SECTION IF ASSOCIATED TESTS ARE NOT ORDERED)
2. If the product ordered has associated tests, these tests will be ordered automatically and will be placed on the same requisition with the ordered product. These product associated tests are defined in the Product Dictionary.
(Example: ABO/RH)Result all associated tests.
(Note: If users do not have access to BBK Override Required Use Of Reserved Units they will not be allowed to search for all available units. Only reserved units will appear for this specimen. Once the reserved unit is selected a complete lookup of all available units is displayed.)
3. Perform a search for available units on the first Packed Cell Crossmatch. A selection screen will appear listing the reserved unit. Select the unit. Result the crossmatch compatibility tests. Enter the interpretation of the crossmatch compatibility.
- 395-

4. Perform a search for the second Packed Cell Crossmatch. A selection screen of all compatible packed cell products will appear to the user. Select a unit. Result the crossmatch compatibility tests. Enter the interpretation of the crossmatch compatibility.
5. Use the Issue Units Routine to issue the units to the patient. What pop-up screens appear to the user? Does the crossmatched product and hours since crossmatch appear to the user?
6. Branch into the Enter/Edit Transfusion Data routine. Complete the specimen.
7. Perform an Internal and External Inquiry on the patient. Verify that all pertinent information is being displayed.
________________________________________________________________________
THIS ROUTINE VALIDATED BY:___________________________ DATE:__ /__ /__
ACCEPTABLE:________________ NOT ACCEPTABLE:_______________________ HOSPITAL NAME: ______________________________________________________
- 396-

II. Donor-Directed Reserved Units
Prerequisites:
Enter a Donor-directed reserved unit for Packed Cells into inventory Retype the unit so it is available in inventory Order two units of Packed Cells for the recipient of the donor-directed unit you entered into inventory.
5.3 Validation Exercise B: Enter/Edit BBK Results
1. Identify the specimen using one of the standard methods. Before the user can enter results, one or more pop-up windows may display:
Received SpecimensExpired SpecimensHX Comments/Specimen Comments/QueriesReserved Units (donor directed and autologous)Product Test View Group
Verify that the reserved unit you entered into inventory is displaying.
(OMIT THE FOLLOWING SECTION IF ASSOCIATED TESTS ARE NOT ORDERED)
2. If the product ordered has associated tests, these tests will be ordered automatically and will be placed on the same requisition with the ordered product. These product associated tests are defined in the Product Dictionary.
(Example: ABO/RH) Result all associated tests.
(Note: If users do not have access to BBK Override Required Use Of Reserved Units they will not be allowed to search for all available units. Only reserved units will appear for this specimen. Once the reserved unit is selected a complete lookup of all available units is displayed.)
3. Perform a search for available units on the first Packed Cell Crossmatch. A selection screen will appear listing the reserved unit. Select the unit. Result the crossmatch compatibility tests. Enter the interpretation of the crossmatch compatibility.
4. Perform a search for the second Packed Cell Crossmatch. A selection screen of all compatible packed cell products will appear to the user. Select a unit. Result the crossmatch compatibility tests. Enter the interpretation of the crossmatch compatibility.
5. Use the Issue Routine to issue the units to the patient. What pop-up screens appear to the user? Does the crossmatched product and hours since crossmatch appear to the user?
6. Branch into the Enter Transfusion Data Routine. Complete the specimen.
7. Perform an Internal and External Inquiry on the patient. Verify that all pertinent information is being displayed.
________________________________________________________________________THIS ROUTINE VALIDATED BY:___________________________ DATE:__ /__ /__
ACCEPTABLE:___________________ NOT ACCEPTABLE:____________________ HOSPITAL NAME:_______________________________________________________
- 397-

Chapter 6: ENTERING/EDITING BLOOD BANK HISTORICAL DATA
6.1: Entering/Editing Blood Bank Historical Transfusion Data
FUNCTION TO BE VALIDATED: Enter/Edit Historical Data
Introduction:
This is used to manually record patient blood bank and transfusion history from a previous system (either manual or computer) into MEDITECH.
Dictionaries:
Blood Bank Blood Type Blood Bank Antibody Blood Bank Antigen Blood Bank Source/Destination Blood Bank Product LIS Marker - Save on BBK History LIS Access - Edit BBK History Blood Type Edit BBK Ab/Ag
LIS Parameters:
Use Alternate Prefix
Reports to Print:
Blood Bank History Inquiry Print Medical Record Cards Print One Medical Record Card Blood Bank History Audit Log Blood Bank History Transfusion Inquiry
NOTE: Users may have the ability to define CUSTOM REPORT FORMATS when printing standard reports. Customization to the reports may not supply all information contained in the standard version.
- 398-
6.1 Validation Exercise A:
1. For this exercise, you need to use a patient that does not have any BBK History on file but does have a Medical Record number.
Patient Name:
Medical Record Number:
At which time the following warning message appears: "No History Record exists for <patient name> - Create one?" Enter "Y."
Message received? ________
After entering the patient's medical record number, notice that the patient's name and medical record number appear at the Patient prompt.
Is this information correct?
2. Enter information into the following fields, Blood Type, Antibody, Antigen and Marker.
3. At the Inventory Unit # field, enter in a unit number. From this point you will be branched into a window where you will be able to enter the following information pertaining to that unit number: Alternate unit number, unit's source, transfused product, volume transfused, product's blood type, unit count, expire date and time, lot number (if the product used is set up in the Product Dictionary as “All Units Alike = “Y”), unit transfused by, transfusion date, start and end time of transfusion, customer defined queries, transfusion comments. A unit entered in this manner will be designated as a "Historical Transfused Unit" and will have an "H" associated with it when viewing transfusion information in any of the Historical Inquiry routines. (*see note below)
*Note: Enter a blood type for the transfused product that is different from that of the patient. You will be prompted with the message "Does not match blood type - ok?".
4. Now enter a unit of a fractionated product such as Factor 8. Note that the product used in this step should be set up in the Product Dictionary as "All Units Alike" = "Y". Fill in the unit's Expiration Date and Time and Lot Number.
5. After filing, you will be prompted with the message"LASTNAME,FIRSTNAME (History Record Number NNNN) filed."
Example: "DOE,JANE (History Record Number 1890) filed."
6. Print the following reports to verify that the above information was filed to the patient's BBK History:
Print BBK History Print One Medical Record CardBBK History Audit LogBBK History Transfusion Inquiry
7. Using the E/E Historical Data Routine, delete the antibody and antigen. Verify that you are not able to edit the patient's Blood Type and Temporary Blood Type.
- 399-

8. Print the following reports to verify that the above information was filed to the patient’s BBK History:
Print BBK History Print One Medical Record Card BBK History Audit Log
________________________________________________________________________
THIS ROUTINE VALIDATED BY:___________________________ DATE:__ /__ /__
ACCEPTABLE: _____________________NOT ACCEPTABLE:__________________ HOSPITAL NAME: ______________________________________________________
- 400-

6.2: Editing Blood Bank Historical Data
FUNCTION TO BE VALIDATED: Edit BBK History
Introduction:
Allows you to identify a patient, donor or unit and enter/edit any antibodies, antigens, markers, comments entered on them. This routine will not allow the user to enter/change the patient's blood type.
Note: You may only edit those antibodies or antigens entered using this routine. If an antibody or antigen was entered on a specimen, they will not appear in this routine. To remove them, you will need to make the proper edit to the specimen's results.
Additional Note: If using the MEDITECH extraction for system downtime, please refer to Magic LAB 10900 for additional information. The BBK History Backup background job starts approximately every hour and will copy new or changed histories to a designated PC. This can also be done manually via the Re-queue Histories Routine for selected history records.
Dictionaries:
Blood Bank Antibody Blood Bank Antigen LIS Marker - Save on BBK History LIS Access - Edit BBK History Blood Type Edit BBK Ab/Ag
Function may be accessed in:
Enter/Edit BBK Results
Reports to Print:
Blood Bank History Inquiry Print Medical Record Cards Print One Medical Record Card Blood Bank History Audit Log
NOTE: Users may have the ability to define CUSTOM REPORT FORMATS when printing standard reports. Customization to the reports may not supply all information contained in the standard version.
- 401-

6.2 Validation Exercise A:
You will need two patients, units, or donors that meet the following criteria:
#1 - Only has a blood type defined.
Patient, Unit or Donor:
#2 - Patient or Donor that has a Antibody that was identified via a cell panel.
Patient or Donor:
Specimen Number:
1. For #1, identify the patient, unit or donor, using any of the standard identification methods.
2. Verify that you do not have access to changing the Blood Type or Temporary Blood Type fields for patients who currently have a BBK History Number assigned.
3. Enter an Antigen, Antibody, Marker and Comments. Print the following reports to verify that this new information is updated on the BBK History:
BBK History InquiryPrint BBK HistoryPrint Medical Record CardsPrint One Medical Record CardBBK History Audit Log
4. Using the Edit BBK History Routine, remove the marker. Print the above reports to verify that this edit is reflected on them.
5. For #2, verify that the Antibody Identified is not shown in the Edit History Routine.
6. Perform a BBK History Inquiry to verify that the Antibody is shown.
7. Using the BBK Enter Results Routine, remove the Antibody from the result. The warning message "Delete Antibody Results. Ok?” appears. Enter "Y."
8. Print the above reports to verify that the deleted Antibody is reflected on them.
________________________________________________________________________
THIS ROUTINE VALIDATED BY:___________________________ DATE:__ /__ /__
ACCEPTABLE: ___________________NOT ACCEPTABLE:____________________
HOSPITAL NAME:_______________________________________________________
- 402-

6.3: Changing a Historical Blood Type
FUNCTION TO BE VALIDATED: Change Blood Type
Introduction:
This routine allows the ability to edit the blood type of a patient, unit or donor. If a donor's blood type is changed, you will have the ability of changing the blood type of the units donated by them. In the rare situations where a patient's blood type seroconverts due to the massive transfusion, users have the ability of entering a temporary blood type.
Dictionaries:
Blood Bank Blood Type (Note: This is based on compatible blood types set up in the Blood Type Dictionary)
LIS Access - Edit BBK History Blood Type
Function may be accessed in:
Enter/Edit BBK Results
Reports To Print:
Blood Bank History Inquiry Print Medical Record Cards Print One Medical Record Card Blood Bank History Audit Log Blood Type Change Log Unit Inquiry Donor Inquiry
NOTE: Users may have the ability to define CUSTOM REPORT FORMATS when printing standard reports. Customization to the reports may not supply all information contained in the standard version.
- 403-

6.3 Validation Exercise A:
Prerequisites: For this exercise you will need the following:
Patient #1 - No blood type is defined.
Name: ____________________________________________________
Med. Rec. #: _____________________________________________
Patient #2 - A Blood type is defined.
Name: ____________________________________________________
Med. Rec. #: _____________________________________________
Unit #1 - A unit of blood that has a blood type defined and is not currently crossmatched.
Unit #: __________________________________________________
Unit #2 – A unit of blood that has a blood type defined and is not currently crossmatched.
Unit #: __________________________________________________
One unit should be compatible with the patient’s historical blood type and the other should be compatible with the patient’s temporary blood type in exercise below.
Donor #1 - Only has a blood type defined.
Donor: ___________________________________________________
Donor # __________________________________________________
Donor #2 - Has a blood type defined and has donated at least two products.
Donor: ___________________________________________________
Donor #: _________________________________________________
Unit #: __________________________________________________
Unit #: __________________________________________________
1. For patient #1, identify them at the History Record prompt. Verify that the correct patient name and medical record number appear at the Patient prompt. The following warning message appears: “No History Record for Patient Name”
Is this information correct? __________________________________________
2. For patient #2, enter a temporary blood type on the patient and record it below. The following warning message appears: “Are you SURE you want to change the blood type on history nnnn?”.
Blood Type: ______________________________________________
Temporary Blood Type: ____________________________________
- 404-
3. Order two units of packed cells on the patient, For the first unit, crossmatch a unit that is compatible to the patient's historical blood type.
Unit #: _________________ Unit Blood Type: _________________
Expected Result:
The following warning message appears: "Blood Type is compatible with Historical but not Temporary Blood Type. OK?"
Enter "Y."
Are you able to perform the crossmatch for this patient? _______
4. For the second unit, crossmatch a unit that is compatible with the patient's temporary Blood type.
Unit #: __________________ Unit Blood Type: ________________
Expected Result:
The following warning message appears: "Blood Type is compatible with Temporary but not Historical Blood Type. OK?" Enter "Y."
Are you able to perform the crossmatch for this patient? _______
5. Change the blood type of unit #1 (entered as prerequisite). The following warning message will appear: “Are you SURE you want to change the blood type on history nnnn? Verify that the blood type was changed on the following reports:
Blood Bank History Inquiry Blood Bank History Audit Log Blood Type Change Log Unit Inquiry
6. For Donor #1, identify the donor. Verify that the correct donor number and name appear at the Donor prompt. If the donor was linked to a medical record number in E/E Donor, verify that the correct medical record number and name appear at the Patient prompt.
Is this information correct? _________________
7. For the donor, change the blood type. The following warning message appears: “Are you SURE you want to change the blood type on history nnnn? Verify the blood type was changed on the following reports:
Blood Bank History Inquiry Print Medical Record Cards Print One Medical Record Card Blood Bank History Audit Log Donor Inquiry
8. For Donor #2, identify the donor. Verify that the correct donor number and name appear at the Donor prompt. If the donor was linked to a medical record number in E/E Donor, verify that the correct medical record number and name appear at the Patient prompt.
Is this information correct: _________________
- 405-

9. For the donor, change the blood type. You will then be prompted to change the blood type of the units that were donated. For the first unit number, at the Change? prompt, enter Y to change that blood type. For the second unit number, enter N at the Change? prompt. The following warning message will appear: “This will make the blood type on the Unit nnnn-Product XXXX different than the History blood type. Ok?” Click on “Y” and the following message will appear: “Are you SURE you want to change the blood type on history nnnn?”
10. Verify that all the blood types were or were not changed on the following reports:
Blood Bank History Inquiry Print Medical Record Cards Print One Medical Record Card Blood Bank History Audit Log Blood Type Change Log Donor Inquiry Unit Inquiry
For unit number #1, did the blood type change? ________________
For unit number #2, did the blood type remain the same? ________________
_________________________________________________________________
THIS ROUTINE VALIDATED BY:___________________________ DATE:__ /__ /__
ACCEPTABLE: ___________________NOT ACCEPTABLE:____________________
HOSPITAL NAME:_______________________________________________________
- 406-

6.4: Merge Patients in Medical Records
FUNCTION TO BE VALIDATED: Merge Patients Introduction:
If more than one medical record number has been mistakenly established for a patient, this routine can be used to merge all of the Master Patient Index (MPI) data into one record. Once you merge the patient's MPI data, the system automatically updates the Demo Recall information. If the patient has departmental files (e.g., laboratory files, radiology files, etc.), the system merges them as well. This routine will not allow a merge if there is a discrepancy in blood type. If there is a discrepancy, it will provide an error message detailing it. This discrepancy has to be corrected in the Blood Bank Module before the merge will be allowed. Dictionaries:
Enter/Edit LIS Access DictionaryRelease Frozen History? Toolbox Parameters involved: BBK Merge Chk Ab/Ag/Mk This function can also be accessed: None Reports to print:
Blood Bank History Inquiry Blood Bank History Merge/Unmerge/Switch Log Frozen BBK History List Blood Bank Override Warning Report Blood Bank History Merge/Unmerge/Switch Inquiry
Please note: The user should be defined in an Access Group with the Release frozen History set to “Y” in the Access Dictionary. The record of the patient will be frozen after a merge, unmerge or switch on the history’s medical record. Without the ability to release a frozen history the user will be unable to enter results on a BBK specimen, issue units, transfuse units, or assign units involving the patient. They will be flagged with the following message: “This patient’s history was involved in a Merge, Unmerge, or Switch and must be released.”
Additional Note: If using the MEDITECH extraction for system downtime, please refer to Magic LAB 10900 for additional information. The BBK History Backup background job starts approximately every hour and will copy new or changed histories to a designated PC. This can also be done manually via the Re-queue Histories Routine for selected history records.
- 407-

6.4 Part 1 :
This exercise was written for those BBK Systems that have the Toolbox Parameter, BBK Merge Chk Ab/Ag/Mk left blank. Discrepancies in Antibodies, Antigens and Markers will not be checked during merging.
Enter two patients that have a discrepancy in blood type.
Patient Name Blood Type Specimen #
6.4 Validation Exercise A:
1. Print the BBK History Inquiry for the above patients. Attach these reports to the validation exercise.
2. Access the Medical Records Routine, Merge Patients. At the Save Patient prompt, enter the full or partial name of the patient who will be saved.
Enter the Name of the patient in the format of LASTNAME,FIRSTNAME i.e. SMITH,JOHN.
3. Enter the patient’s Sex and Birthdate. The system will then branch you into a MPI search.
4. Select the correct patient from the MPI search.
5. Verify the additional information. If this information is correct, answer “Y” to the following question: Is this the one?.
6. If this is not the correct patient, answer “N” and continue searching.
7. At the Remove Patient prompt, enter the full or partial name of the patient who will be removed.
8. Enter the patient’s Sex and Birthdate. The system will then branch you into a MPI search.
9. Select the correct patient from the MPI search.
10. Verify the additional information. If this information is correct, answer “Y” to the following question: Is this the one?.
11. If this is not the correct patient, answer “N” and continue searching.
12. After identifying the removed patient, the following error message will be displayed:
These records cannot be merged due to a discrepancy in the Blood Bank Histories. The discrepancy exists in the BLOOD TYPE.
The Blood Bank Histories must be corrected in the Blood Bank before this merge will be allowed.
Did this message appear?_______________________
Were you allowed to continue with the merge?__________________
13. Resolve the discrepancies in the Blood Bank Module.
- 408-

14. Access the Medical Records routine, Merge Patients. At the Save Patient prompt, enter the full or partial name of the patient who will be saved.
Enter the NAME of the patient in the format of LASTNAME,FIRSTNAME i.e. SMITH,JOHN.
15. Enter the patient’s Sex and Birthdate. The system will then branch you into a MPI search.
16. Select the correct patient from the MPI search.
17. Verify the additional information. If this information is correct, answer “Y” to the following question: Is this the one?.
18. If this is not the correct patient, answer “N” and continue searching.
19. At the Remove Patient prompt, enter the full or partial name of the patient who will be removed.
20. Enter the patient’s Sex and Birthdate. The system will then branch you into a MPI search.
21. Select the correct patient from the MPI search.
22. Verify the additional information. If this information is correct, answer “Y” to the following question: Is this the one?.
23. If this is not the correct patient, answer “N” and continue searching.
24. No error message should display and you should be able to continue.
25. The system will display any demographic discrepancies between the two patients.
26. Answer “N” to the following question, Use Removed Pt Data?, for any discrepancies in Name, Birthdate, Sex, Maiden/Other Name, Mother’s Nm, Expired Date, Demo Recall Address, etc.
27. Answer “N” to the following prompt, Retain all names which were not copied as Patient’s Other Names?.
28. Hit the <OK> key to Merge the patients.
29. Answer “Y” to the question of Merge?.
30. Print the BBK History Merge/Unmerge/Switch Log to verify the merged patients are displayed. Attach the report to the validation exercise
31. Print the Frozen BBK History List to verify the merged patients are displayed. Attach the report to the validation exercise
32. Print the BBK History Inquiry and compare merged history with the two histories printed before the merge. Attach all reports to the validation exercise.
33. Perform a BBK History Merge/Unmerge/Switch Inquiry and verify that both the rejected and allowed merge appear correct.
34. Try to access one of the Blood Bank Specimens in the Enter/Edit BBK Results Routine. Confirm that the following message displays:
This specimen's history was involved in a Merge, Unmerge or Switch.
View Merge/Unmerge/Switch Inquiry? Y
- 409-

View Current BBK History record?
Did this message appear?______________________
35. View both the Inquiry and the History Record and confirm they are correct.
36. Answer N to the Release Frozen History Record? Prompt and verify the following Error Message and that you could not proceed:
This specimen’s history was involved in a Merge, Unmerge or Switch and must be released.
Did this message appear? _______________
Could you proceed? ____________________
37. Access the same specimen in the Enter/Edit BBK Results Routine and this time answer Y to the prompt:
Release Frozen History Record?
Verify you can access the specimen and result.
38. Print the Frozen BBK History List Log to verify the merged patient no longer displays. Attach the report to the validation exercise
______________________________________________________________________
THIS ROUTINE VALIDATED BY:___________________________DATE:__ /__ /__
ACCEPTABLE: ___________________NOT ACCEPTABLE:____________________
HOSPITAL NAME: ______________________________________________________
- 410-

6.4 Part 2
The following exercises were written for those BBK Systems that have the Toolbox Parameter, BBK Merge Chk Ab/Ag/Mk defined as “AbAgMk”. Before a merge is allowed in the MRI Merge Patient routine, the system will check for discrepancies in Antibodies, Antigens and Markers.
Note: You can enter one type or any combination of checks. For example, if your health care organization enters AgMk, the system checks for discrepancies of antigens and markers beforeallowing a merge.
You can choose from any of the following
To check for discrepancies of Parameter Setting--------------------------------------- -----------------------Antibodies only Ab
Antigens only Ag
Markers only Mk
Antibodies and Antigens only AbAg
Antibodies, Antigens, and Markers AbAgMk
Antibodies and Markers only AbMk Antigens and Markers only AgMk If one of the histories involved in the merge has antibodies, antigens, or markers and the other history has none then no discrepancy exists.
Based on your health care organization’s parameter settings the error messages in this section may differ. Please test accordingly.
6.4 Validation Exercise B:
Enter two patients that have a discrepancy in blood type.
Patient Name Blood Type Specimen #
1. Print the BBK History Inquiry for the above patients. Attach these reports to the validation exercise.
2. Access the Medical Records Routine, Merge Patients. At the Save Patient prompt, enter the full or partial name of the patient who will be saved.
Enter the Name of the patient in the format of LASTNAME,FIRSTNAME i.e. SMITH,JOHN.
3. Enter the patient's Sex and Birthdate. The system will then branch you into a MPI search.
4. Select the correct patient from the MPI search.
- 411-

5. Verify the additional information. If this information is correct, answer "Y" to the following question: Is this the one?.
6. If this is not the correct patient, answer "N" and continue searching.
7. At the Remove Patient prompt, enter the full or partial name of the patient who will be removed.
8. Enter the patient's Sex and Birthdate. The system will then branch you into a MPI search.
9. Select the correct patient from the MPI search.
10. Verify the additional information. If this information is correct, answer "Y" to the following question: Is this the one?.
11. If this is not the correct patient, answer "N" and continue searching.
12. After identifying the removed patient, the following error message will be displayed:
These records cannot be merged due to a discrepancy in the Blood Bank Histories. The discrepancy exists in the BLOOD TYPE.
The Blood Bank Histories must be corrected in the Blood Bank before this merge will be allowed.
Did this message appear?_______________________
Were you allowed to continue with the merge?__________________
13. Resolve the discrepancies in the Blood Bank Module.
14. At the Save Patient prompt, enter the full or partial name of the patient who will be saved.
Enter the NAME of the patient in the format of LASTNAME,FIRSTNAME i.e. SMITH,JOHN.
15. Enter the patient's Sex and Birthdate. The system will then branch you into a MPI search.
16. Select the correct patient from the MPI search.
17. Verify the additional information. If this information is correct, answer "Y" to the following question: Is this the one?.
18. If this is not the correct patient, answer "N" and continue searching.
19. At the Remove Patient prompt, enter the full or partial name of the patient who will be removed.
20. Enter the patient's Sex and Birthdate. The system will then branch you into a MPI search.
21. Select the correct patient from the MPI search.
22. Verify the additional information. If this information is correct, answer "Y" to the following question: Is this the one?.
23. If this is not the correct patient, answer "N" and continue searching.
24. No error message should display and you should be able to continue.
- 412-

25. The system will display any demographic discrepancies between the two patients.
26. Answer "N" to the following question, Use Removed Pt Data?, for any discrepancies in Name, Birthdate, Sex, Maiden/Other Name, Mother's Nm, Expired Date, Demo Recall Address, etc.
27. Answer "N" to the following prompt “Retain all names which were not copied as Patient’s Other Names?”.
28. Hit the <OK> key to Merge the patients.
29. Answer "Y" to the question of Merge?.
30. Print the BBK History Merge/Unmerge/Switch Log to verify the merged patients are displayed. Attach the report to the validation exercise
31. Print the Frozen BBK History List to verify that the merged patients are displayed. Attach the report to the validation exercise.
32. Print the BBK History Inquiry and compare merged history with the two histories printed before the merge. Attach all reports to the validation exercise.
33. Print the BBK History Merge/Unmerge/Switch Inquiry and verify that both the rejected and allowed merge appear correct.
34. Try to access one of the Blood Bank Specimens in the Enter/Edit BBK Results Routine. Confirm that the following message displays:
This specimen's history was involved in a Merge, Unmerge or Switch.
View Merge/Unmerge/Switch Inquiry? YView Current BBK History record?
Did this message appear?_______________________
35. View both the Inquiry and the History Record and confirm the are correct.
36. Answer N to the Release Frozen History Record Prompt and verify the following Error Message and that you cannot proceed:
This specimen's history was involved in a Merge, Unmerge or Switch and must be released.
Did this message appear?_______________________
Could you proceed?_______________________
37. Access the same specimen in the Enter/Edit BBK Result Routine and this time answer Y to the prompt:
Release Frozen History record?
Verify you can access the specimen and result.
38. Print the Frozen BBK History List to verify the merged patient no longer displays. Attach the report to the validation exercise
______________________________________________________________________
THIS ROUTINE VALIDATED BY:___________________________DATE:__ /__ /__
- 413-

ACCEPTABLE: ___________________NOT ACCEPTABLE:____________________
HOSPITAL NAME: ______________________________________________________
- 414-
6.4 Validation Exercise C
Prerequisite: Two patients that have exactly the same Blood Bank History, except for a discrepancy in antigens (the patients have two different antigens).
Patient Name Blood Type Antigen Result
1. Print the BBK History Inquiry for the above patients. Attach these reports to the validation exercise.
2. Access the Medical Records Routine, Merge Patients. At the Save Patient prompt, enter the full or partial name of the patient who will be saved.
Enter the Name of the patient in the format of LASTNAME,FIRSTNAME i.e. SMITH,JOHN.
3. Enter the patient's Sex and Birthdate. The system will then branch you into a MPI search.
4. Select the correct patient from the MPI search.
5. Verify the additional information. If this information is correct, answer "Y" to the following question: Is this the one?.
6. If this is not the correct patient, answer "N" and continue searching.
7. At the Remove Patient prompt, enter the full or partial name of the patient who will be removed.
8. Enter the patient's Sex and Birthdate. The system will then branch you into a MPI search.
9. Select the correct patient from the MPI search.
10. Verify the additional information. If this information is correct, answer "Y" to the following question: Is this the one?.
11. If this is not the correct patient, answer "N" and continue searching.
12. After identifying the removed patient, the following error message will be displayed:
These records cannot be merged due to a discrepancy in the Blood Bank Histories. The discrepancy exists in the ANTIGENS.
The Blood Bank Histories must be corrected in the Blood Bank before this merge will be allowed.
Did this message appear?_______________________
Were you allowed to continue with the merge?__________________
13. Resolve the discrepancies in the Blood Bank Module.
14. At the Save Patient prompt, enter the full or partial name of the patient who will be saved.
Enter the NAME of the patient in the format of LASTNAME,FIRSTNAME i.e. SMITH,JOHN.
- 415-

15. Enter the patient's Sex and Birthdate. The system will then branch you into a MPI search.
16. Select the correct patient from the MPI search.
17. Verify the additional information. If this information is correct, answer "Y" to the following question: Is this the one?.
18. If this is not the correct patient, answer "N" and continue searching.
19. At the Remove Patient prompt, enter the full or partial name of the patient who will be removed.
20. Enter the patient's Sex and Birthdate. The system will then branch you into a MPI search.
21. Select the correct patient from the MPI search.
22. Verify the additional information. If this information is correct, answer "Y" to the following question: Is this the one?.
23. If this is not the correct patient, answer "N" and continue searching.
24. No error message should display and you should be able to continue.
25. The system will display any demographic discrepancies between the two patients.
26. Answer "N" to the following question, Use Removed Pt Data?, for any discrepancies in Name, Birthdate, Sex, Maiden/Other Name, Mother's Nm, Expired Date, Demo Recall Address, etc.
27. Answer "N" to the following prompt, Retain all names which were not copied as Patient's Other Names?.
28. Hit the <OK> key to Merge the patients.
29. Answer "Y" to the question of Merge?.
30. Print the BBK History Merge/Unmerge/Switch Log to verify the merged patients are displayed. Attach the report to the validation exercise.
31. Print the Frozen BBK History List to verify that the merged patients are displayed. Attach the report to the validation exercise.
32. Print the BBK History Inquiry and compare merged history with the two histories printed before the merge. Attach all reports to the validation exercise.
33. Print the BBK History Merge/Unmerge/Switch Inquiry and verify that both the rejected and allowed merge appear correct.
34. Try to access one of the Blood Bank Specimens in the Enter/Edit BBK Results Routine. Confirm that the following message displays:
This specimen's history was involved in a Merge, Unmerge or Switch.
View Merge/Unmerge/Switch Inquiry? YView Current BBK History record?
Did this message appear?_______________________
- 416-

35. View both the Inquiry and the History Record and confirm the are correct.
36 Answer N to the Release Frozen History Record Prompt and verify the following Error Message and that you cannot proceed:
This specimen's history was involved in a Merge, Unmerge or Switch and must be released.
Did this message appear?_______________________
Could you proceed?_______________________
37. Access the same specimen in the Enter/Edit BBK Result Routine and this time answer Y to the prompt:
Release Frozen History record?
Verify you can access the specimen and result.
38. Print the Frozen BBK History List to verify the merged patient no longer displays. Attach the report to the validation exercise
______________________________________________________________________
THIS ROUTINE VALIDATED BY:___________________________DATE:__ /__ /__
ACCEPTABLE: ___________________NOT ACCEPTABLE:____________________
HOSPITAL NAME: ______________________________________________________
- 417-

6.4 Validation Exercise D:
Prerequisite: Two patients that have exactly the same Blood Bank History, except one patient has an antigen and one patient does not. Patient Name Blood Type Antigen and Result
1. Print the BBK History Inquiry for the above patients. Attach these reports to the validation exercise.
2. At the Save Patient prompt, enter the full or partial name of the patient who will be saved.
Enter the Name of the patient in the format of LASTNAME,FIRSTNAME i.e. SMITH,JOHN.
3. Enter the patient's Sex and Birthdate. The system will then branch you into a MPI search.
4. Select the correct patient from the MPI search.
5. Verify the additional information. If this information is correct, answer "Y" to the following question: Is this the one?.
6. If this is not the correct patient, answer "N" and continue searching.
7. At the Remove Patient prompt, enter the full or partial name of the patient who will be removed.
8. Enter the patient's Sex and Birthdate. The system will then branch you into a MPI search.
9. Enter the number in the prompt, See More Data For#, that corresponds to the correct patient.
10. Verify the additional information. If this information is correct, answer "Y" to the following question: Is this the one?.
11. If this is not the correct patient, answer "N" and continue searching.
12. No warning should display and you will be able to continue.
13. The system will display any demographic discrepancies between the two patients.
14. Answer "N" to the following question, Use Removed Pt Data?, for any discrepancies in Name, Birthdate, Sex, Maiden/Other Name, Mother's Nm, Expired Date, Demo Recall Address, etc.
15. Answer "N" to the following prompt, Retain all names which were not copied as Patient's Other Names?.
16. Hit the <OK> key to Merge the patients.
17. Answer "Y" to the question of Merge?.
18. Print the BBK History Merge/Unmerge/Switch Log to verify the merged patients are displayed. Attach the report to the validation exercise.
- 418-

19. Print the Frozen BBK History List to verify that the merged patients are displayed. Attach the report to the validation exercise.
20. Print the BBK History Inquiry and compare merged history with the two histories printed before the merge. Attach all reports to the validation exercise.
21. Print the BBK History Merge/Unmerge/Switch Inquiry and verify that the allowed merge appears correctly.
22. Try to access one of the Blood Bank Specimens in the Enter/Edit BBK Results Routine. Confirm that the following message displays:
This specimen's history was involved in a Merge, Unmerge or Switch.
View Merge/Unmerge/Switch Inquiry? YView Current BBK History record?
Did this message appear?_______________________
23. View both the Inquiry and the History Record and confirm the are correct.
24. Answer N to the Release Frozen History Record Prompt and verify the following Error Message and that you cannot proceed:
This specimen's history was involved in a Merge, Unmerge or Switch and must be released.
Did this message appear?_______________________
Could you proceed?_______________________
25. Access the same specimen in the Enter/Edit BBK Result Routine and this time answer Y to the prompt:
Release Frozen History record?
Verify you can access the specimen and result.
26. Print the Frozen BBK History List to verify the merged patient no longer displays. Attach the report to the validation exercise
______________________________________________________________________
THIS ROUTINE VALIDATED BY:___________________________DATE:__ /__ /__
ACCEPTABLE: ___________________NOT ACCEPTABLE:____________________
HOSPITAL NAME: ______________________________________________________
- 419-

6.4 Validation Exercise E:
Prerequisite: Two patients that have exactly the same Blood Bank History, except for the antigen testing (patients have same Antigen, result of positive and negative are different).
Patient Name Blood Type Antigen and Result
1. Print the BBK History Inquiry for the above patients. Attach these reports to the validation exercise.
2. At the Save Patient prompt, enter the full or partial name of the patient who will be saved.
Enter the Name of the patient in the format of LASTNAME,FIRSTNAME i.e. SMITH,JOHN.
3. Enter the patient's Sex and Birthdate. The system will then branch you into a MPI search.
4. Select the correct patient from the MPI search.
5. Verify the additional information. If this information is correct, answer "Y" to the following question: Is this the one?.
6. If this is not the correct patient, answer "N" and continue searching.
7. At the Remove Patient prompt, enter the full or partial name of the patient who will be removed.
8. Enter the patient's Sex and Birthdate. The system will then branch you into a MPI search.
9. Select the correct patient from the MPI search.
10. Verify the additional information. If this information is correct, answer "Y" to the following question: Is this the one?.
11. If this is not the correct patient, answer "N" and continue searching.
12. After identifying the removed patient, the following error message will be displayed:
These records cannot be merged due to a discrepancy in the Blood Bank Histories. The discrepancy exists in the ANTIGENS.
The Blood Bank Histories must be corrected in the Blood Bank before this merge will be allowed.
Did this message appear?_______________________
Were you allowed to continue with the merge?__________________
13. Resolve the discrepancies in the Blood Bank Module.
14. At the Save Patient prompt, enter the full or partial name of the patient who will be saved.
Enter the Name of the patient in the format of LASTNAME,FIRSTNAME i.e. SMITH,JOHN
- 420-

15. Enter the patient's Sex and Birthdate. The system will then branch you into a MPI search.
16. Select the correct patient from the MPI search.
17. Verify the additional information. If this information is correct, answer "Y" to the following question: Is this the one?.
18. If this is not the correct patient, answer "N" and continue searching.
19. At the Remove Patient prompt, enter the full or partial name of the patient who will be removed.
20. Enter the patient's Sex and Birthdate. The system will then branch you into a MPI search.
21. Select the correct patient from the MPI search.
22. Verify the additional information. If this information is correct, answer "Y" to the following question: Is this the one?.
23. If this is not the correct patient, answer "N" and continue searching.
24. No error message should display and you should be able to continue.
25. The system will display any demographic discrepancies between the two patients.
26. Answer "N" to the following question, Use Removed Pt Data?, for any discrepancies in Name, Birthdate, Sex, Maiden/Other Name, Mother's Nm, Expired Date, Demo Recall Address, etc.
27. Answer "N" to the following prompt, “Retain all names which were not copied as Patient's Other Names?”.
28. Hit the <OK> key to Merge the patients.
29. Answer "Y" to the question of Merge?.
30. Print the BBK History Merge/Unmerge/Switch Log to verify the merged patients are displayed. Attach the report to the validation exercise.
31. Print the Frozen BBK History List to verify that the merged patients are displayed. Attach the report to the validation exercise.
32. Print the BBK History Inquiry and compare merged history with the two histories printed before the merge. Attach all reports to the validation exercise.
33. Print the BBK History Merge/Unmerge/Switch Inquiry and verify that both the rejected and allowed merge appear correct.
34. Try to access one of the Blood Bank Specimens in the Enter/Edit BBK Results Routine. Confirm that the following message displays:
This specimen's history was involved in a Merge, Unmerge or Switch.
View Merge/Unmerge/Switch Inquiry? YView Current BBK History record?
Did this message appear?_______________________
- 421-

35. View both the Inquiry and the History Record and confirm the are correct.
36. Answer N to the Release Frozen History Record Prompt and verify the following Error Message and that you cannot proceed:
This specimen's history was involved in a Merge, Unmerge or Switch and must be released.
Did this message appear?_______________________
Could you proceed?_______________________
37. Access the same specimen in the Enter/Edit BBK Result Routine and this time answer Y to the prompt:
Release Frozen History record?
Verify you can access the specimen and result.
38. Print the Frozen BBK History List to verify the merged patient no longer displays. Attach the report to the validation exercise
______________________________________________________________________
THIS ROUTINE VALIDATED BY:___________________________DATE:__ /__ /__
ACCEPTABLE: ___________________NOT ACCEPTABLE:____________________
HOSPITAL NAME: ______________________________________________________
- 422-

6.4 Validation Exercise F
Prerequisite: Two patients that have exactly the same Blood Bank History, except for a discrepancy in Markers
Patient Name Blood Type Marker
1. Print the BBK History Inquiry for the above patients. Attach these reports to the validation exercise.
2. At the Save Patient prompt, enter the full or partial name of the patient who will be saved.
Enter the Name of the patient in the format of LASTNAME,FIRSTNAME i.e. SMITH,JOHN.
3. Enter the patient's Sex and Birthdate. The system will then branch you into a MPI search.
4. Select the correct patient from the MPI search.
5. Verify the additional information. If this information is correct, answer "Y" to the following question: Is this the one?.
6. If this is not the correct patient, answer "N" and continue searching.
7. At the Remove Patient prompt, enter the full or partial name of the patient who will be removed.
8. Enter the patient's Sex and Birthdate. The system will then branch you into a MPI search.
9. Select the correct patient from the MPI search.
10. Verify the additional information. If this information is correct, answer "Y" to the following question: Is this the one?.
11. If this is not the correct patient, answer "N" and continue searching.
12. After identifying the removed patient, the following error message will be displayed:
These records cannot be merged due to a discrepancy in the Blood Bank Histories. The discrepancy exists in the MARKERS.
The Blood Bank Histories must be corrected in the Blood Bank before this merge will be allowed.
Did this message appear?_______________________
Were you allowed to continue with the merge?__________________
13. Follow steps 13 through 38 of Exercise B._____________________________________________________________________
THIS ROUTINE VALIDATED BY:___________________________DATE:__ /__ /__
ACCEPTABLE: ___________________NOT ACCEPTABLE:____________________
HOSPITAL NAME: ______________________________________________________
- 423-

6.4 Validation Exercise G:
Prerequisite: Two patients that have exactly the same Blood Bank History, except one patient has a marker and the other doesn't.
Patient Name Blood Type Marker
1. Print the BBK History Inquiry for the above patients. Attach these reports to the validation exercise.
2. At the Save Patient prompt, enter the full or partial name of the patient who will be saved. Enter the name of the patient in the format of LASTNAME,FIRSTNAME i.e. SMITH,JOHN.
3. Enter the patient's Sex and Birthdate. The system will then branch you into a MPI search.
4. Select the correct patient from the MPI search.
5. Verify the additional information. If this information is correct, answer "Y" to the following question: Is this the one?.
6. If this is not the correct patient, answer "N" and continue searching.
7. At the Remove Patient prompt, enter the full or partial name of the patient who will be removed.
8. Enter the patient's Sex and Birthdate. The system will then branch you into a MPI search.
9. Select the correct patient from the MPI search.
10. Verify the additional information. If this information is correct, answer "Y" to the following question: Is this the one?.
11. If this is not the correct patient, answer "N" and continue searching.
12. No warning should display and you will be able to continue.
13. The system will display any demographic discrepancies between the two patients.
14. Answer "N" to the following question, Use Removed Pt Data?, for any discrepancies in Name, Birthdate, Sex, Maiden/Other Name, Mother's Nm, Expired Date, Demo Recall Address, etc.
15. Answer "N" to the following prompt, “Retain all names which were not copied as Patient's Other Names?”.
16. Hit the <OK> key to Merge the patients.
17. Answer "Y" to the question of Merge?.
18. Print the BBK History Merge/Unmerge/Switch Log to verify the merged patients are displayed. Attach the report to the validation exercise.
19. Print the Frozen BBK History List to verify that the merged patients are displayed. Attach the report to the validation exercise.
- 424-

20. Print the BBK History Inquiry and compare merged history with the two histories printed before the merge. Attach all reports to the validation exercise.
21. Print the BBK History Merge/Unmerge/Switch Inquiry and verify that the allowed merge appears correctly.
22. Try to access one of the Blood Bank Specimens in the Enter/Edit BBK Results Routine. Confirm that the following message displays:
This specimen's history was involved in a Merge, Unmerge or Switch.
View Merge/Unmerge/Switch Inquiry? YView Current BBK History record?
Did this message appear?_______________________
23. View both the Inquiry and the History Record and confirm the are correct.
24. Answer N to the Release Frozen History Record Prompt and verify the following Error Message and that you cannot proceed:
This specimen's history was involved in a Merge, Unmerge or Switch and must be released.
Did this message appear?_______________________
Could you proceed?_______________________
25. Access the same specimen in the Enter/Edit BBK Result Routine and this time answer Y to the prompt:
Release Frozen History record?
Verify you can access the specimen and result.
26. Print the Frozen BBK History List to verify the merged patient no longer displays. Attach the report to the validation exercise
______________________________________________________________________
THIS ROUTINE VALIDATED BY:___________________________DATE:__ /__ /__
ACCEPTABLE: ___________________NOT ACCEPTABLE:____________________
HOSPITAL NAME: ______________________________________________________
- 425-
6.4 Validation Exercise H:
Prerequisite: Two patients that have exactly the same Blood Bank History, except for a discrepancy in antibodies
Patient Name Blood Type Antibody
1. Print the BBK History Inquiry for the above patients. Attach these reports to the validation exercise.
2. At the Save Patient prompt, enter the full or partial name of the patient who will be saved.
Enter the Name of the patient in the format of LASTNAME,FIRSTNAME i.e. SMITH,JOHN.
3. Enter the patient's Sex and Birthdate. The system will then branch you into a MPI search.
4. Select the correct patient from the MPI search.
5. Verify the additional information. If this information is correct, answer "Y" to the following question: Is this the one?.
6. If this is not the correct patient, answer "N" and continue searching.
7. At the Remove Patient prompt, enter the full or partial name of the patient who will be removed.
8. Enter the patient's Sex and Birthdate. The system will then branch you into a MPI search.
9. Select the correct patient from the MPI search.
10. Verify the additional information. If this information is correct, answer "Y" to the following question: Is this the one?.
11. If this is not the correct patient, answer "N" and continue searching.
12. After identifying the removed patient, the following error message will be displayed:
These records cannot be merged due to a discrepancy in the Blood Bank Histories. The discrepancy exists in the ANTIBODIES.
The Blood Bank Histories must be corrected in the Blood Bank before this merge will be allowed.
Did this message appear?_______________________
Were you allowed to continue with the merge?__________________
13. Follow steps 13 through 38 of Exercise B.______________________________________________________________________
THIS ROUTINE VALIDATED BY:___________________________DATE:__ /__ /__
ACCEPTABLE: ___________________NOT ACCEPTABLE:____________________
HOSPITAL NAME: ______________________________________________________
- 426-

6.4 Validation Exercise I:
Prerequisite: Two patients that have exactly the same Blood Bank History, except one patient has an antibody and the other patient does not.
Patient Name Blood Type Antibody
1. Print the BBK History Inquiry for the above patients. Attach these reports to the validation exercise.
2. At the Save Patient prompt, enter the full or partial name of the patient who will be saved.
3. Enter the Name of the patient in the format of LASTNAME,FIRSTNAME i.e. SMITH,JOHN.
4. Enter the patient's Sex and Birthdate. The system will then branch you into a MPI search.
5. Select the correct patient from the MPI search.
6. Verify the additional information. If this information is correct, answer "Y" to the following question: Is this the one?.
7. If this is not the correct patient, answer "N" and continue searching.
8. At the Remove Patient prompt, enter the full or partial name of the patient who will be removed.
9. Enter the patient's Sex and Birthdate. The system will then branch you into a MPI search.
10. Select the correct patient from the MPI search.
11. Verify the additional information. If this information is correct, answer "Y" to the following question: Is this the one?.
12. If this is not the correct patient, answer "N" and continue searching.
13. No warning should display and you will be able to continue.
14. The system will display any demographic discrepancies between the two patients.
15. Answer "N" to the following question, Use Removed Pt Data?, for any discrepancies in Name, Birthdate, Sex, Maiden/Other Name, Mother's Nm, Expired Date, Demo Recall Address, etc.
16. Answer "N" to the following prompt, “Retain all names which were not copied as Patient’s Other Names?”.
17. Hit the <OK> key to Merge the patients.
18. Answer "Y" to the question of Merge?.
19. Print the BBK History Merge/Unmerge/Switch Log to verify the merged patients are displayed. Attach the report to the validation exercise.
- 427-
20. Print the Frozen BBK History List to verify that the merged patients are displayed. Attach the report to the validation exercise.
21. Print the BBK History Inquiry and compare merged history with the two histories printed before the merge. Attach all reports to the validation exercise.
22. Print the BBK History Merge/Unmerge/Switch Inquiry and verify that the allowed merge appears correctly.
23. Try to access one of the Blood Bank Specimens in the Enter/Edit BBK Results Routine. Confirm that the following message displays:
This specimen's history was involved in a Merge, Unmerge or Switch.
View Merge/Unmerge/Switch Inquiry? YView Current BBK History record?
Did this message appear?_______________________
24. View both the Inquiry and the History Record and confirm the are correct.
25. Answer N to the Release Frozen History Record Prompt and verify the following Error Message and that you cannot proceed:
This specimen's history was involved in a Merge, Unmerge or Switch and must be released.
Did this message appear?_______________________
Could you proceed?_______________________
26. Access the same specimen in the Enter/Edit BBK Result Routine and this time answer Y to the prompt:
Release Frozen History record?
27. Verify you can access the specimen and result.
28. Print the Frozen BBK History List to verify the merged patient no longer displays. Attach the report to the validation exercise
______________________________________________________________________
THIS ROUTINE VALIDATED BY:___________________________DATE:__ /__ /__
ACCEPTABLE: ___________________NOT ACCEPTABLE:____________________
HOSPITAL NAME: ______________________________________________________
- 428-

6.4 Validation Exercise J:
Prerequisite: Two patients that have the same blood type, discrepancies in antigens and antibodies, and one patient has a marker and the other does not
Patient Name Blood Type Antibody Antigen and Result Marker
1. Print the BBK History Inquiry for the above patients. Attach these reports to the validation exercise.
2. At the Save Patient prompt, enter the full or partial name of the patient who will be saved.
Enter the Name of the patient in the format of LASTNAME,FIRSTNAME i.e. SMITH,JOHN.
3. Enter the patient's Sex and Birthdate. The system will then branch you into a MPI search.
4. Select the correct patient from the MPI search.5. Verify the additional information. If this information is correct, answer "Y" to the following question: Is this the one?.
6. If this is not the correct patient, answer "N" and continue searching.
7. At the Remove Patient prompt, enter the full or partial name of the patient who will be removed.
8. Enter the patient's Sex and Birthdate. The system will then branch you into a MPI search.
9. Select the correct patient from the MPI search.
10. Verify the additional information. If this information is correct, answer "Y" to the following question: Is this the one?.
11. If this is not the correct patient, answer "N" and continue searching.
12. After identifying the removed patient, the following error message will be displayed:
These records cannot be merged due to discrepancies inthe Blood Bank Histories. Discrepancies exist in theANTIBODIES and ANTIGENS.
The Blood Bank Histories must be corrected in the Blood Bankbefore this merge will be allowed.
Did this message appear?_______________________
Were you allowed to continue with the merge?__________________
13. Follow steps 13 through 38 of Exercise B.
- 429-

_____________________________________________________________________
THIS ROUTINE VALIDATED BY:___________________________DATE:__ /__ /__
ACCEPTABLE: ___________________NOT ACCEPTABLE:____________________
HOSPITAL NAME: ______________________________________________________
- 430-

6.4 Validation Exercise K:
Prerequisite: Two patients that have the same blood type, discrepancies in antigens and markers, and one patient has an antibody and the other does not
Patient Name Blood Type Antibody Antigen and Result Marker
1. Print the BBK History Inquiry for the above patients. Attach these reports to the validation exercise.
2. At the Save Patient prompt, enter the full or partial name of the patient who will be saved.
Enter the Name of the patient in the format of LASTNAME,FIRSTNAME i.e. SMITH,JOHN.
3. Enter the patient's Sex and Birthdate. The system will then branch you into a MPI search.
4. Select the correct patient from the MPI search.
5. Verify the additional information. If this information is correct, answer "Y" to the following question: Is this the one?.
6. If this is not the correct patient, answer "N" and continue searching.
7. At the Remove Patient prompt, enter the full or partial name of the patient who will be removed.
8. Enter the patient's Sex and Birthdate. The system will then branch you into a MPI search.
9. Select the correct patient from the MPI search.
10. Verify the additional information. If this information is correct, answer "Y" to the following question: Is this the one?.
11. If this is not the correct patient, answer "N" and continue searching.
12. After identifying the removed patient, the following error message will be displayed:
These records cannot be merged due to discrepancies inthe Blood Bank Histories. Discrepancies exist in theANTIGENS and MARKERS.
The Blood Bank Histories must be corrected in the Blood Bankbefore this merge will be allowed.
Did this message appear?_______________________
Were you allowed to continue with the merge?__________________
- 431-

13. Follow steps 13 through 38 of Exercise B.
_____________________________________________________________________
THIS ROUTINE VALIDATED BY:___________________________DATE:__ /__ /__
ACCEPTABLE: ___________________NOT ACCEPTABLE:____________________
HOSPITAL NAME: ______________________________________________________
- 432-

6.5: Unmerge Patients in Medical Records
FUNCTION TO BE VALIDATED: Unmerge Patients
This routine is used to return merged Master Patient Index (MPI) files to their original, unmerged state. Once the Medical Records Department unmerges these files, the original number(s) and the accompanying patient data are automatically re-entered into the hospital's MPI and Demo Recall files.
Additional Note: If using the MEDITECH extraction for system downtime, please refer to Magic LAB 10900 for additional information. The BBK History Backup background job starts approximately every hour and will copy new or changed histories to a designated PC. This can also be done manually via the Re-queue Histories Routine for selected history records.
Dictionaries:
Enter/Edit LIS Access DictionaryRelease Frozen History? Toolbox Parameters involved: BBK Merge Chk Ab/Ag/Mk This function can also be accessed: None Reports to print:
Blood Bank History Inquiry Blood Bank History Merge/Unmerge/Switch Log Frozen BBK History List BBK History Merge/Unmerge/Switch Inquiry BBK Override Warning Report
- 433-

6.5 Validation Exercise A:
Prerequisite: Enter a requisition with a BBK test on one of the patients from the Exercise in Section 6.4.
From the Enter/Edit LIS Access Dictionary, using your access group, confirm on page 3 that the Release Frozen History? Prompt is defined as Y.
1. Print the BBK History Inquiry for the above patient. Attach the report to the validation exercise.
2. Access the MRI Unmerge Patients Routine. At the Patient prompt, enter the full or partial name of the patient who will be unmerged.
Enter the Name of the patient in the format of LASTNAME,FIRSTNAME i.e. SMITH,JOHN.
3. Enter the patient’s Sex and Birthdate. The system will then branch you into a MPI search.
4. Select the correct patient from the MPI search.
5. Verify the additional information. If this information is correct, answer “Y” to the following question: Is this the one?.
6. If this is not the correct patient, answer “N” and continue searching.
7. The routine will display the patient that was merged into the patient identified
8. At the Unmerge Number prompt, enter the number of the patient from step #3.
9. After identifying the number of the patient, the following message will be displayed:
”The Blood Bank history currently associated with these two patients has had activity since they were merged.
Patient: unit number patient namePatient: unit number patient name
As a result, after they are unmerged both Blood Bank histories need to be reviewed to ensure they are accurate. Do you want to continue?”
Did this message appear?_________________
10. Answer “N” to the Do you want to continue? question.
Were you allowed to continue with the unmerge?_________
11. Answer “Y” to the Do you want to continue? question.
Were you allowed to continue with the unmerge?_________
12. Answer “Y” to the question Unmerge?’
13. Print the BBK History Merge/Unmerge/Switch Log to verify the unmerged patient is
- 434-

displayed. Attach the report to the validation exercise.
14. Print the BBK History Inquiries for both patients and compare the individual histories to the merged history printed before the unmerge. Attach all reports to the validation exercise.
15. Print the Frozen BBK History List and verify that the unmerged patients appear on the List.
16. Print the BBK History Merge/Unmerge/Switch Inquiry and verify that both the Merge and Unmerge Type appear. Based on your testing scenario it is possible to have a Reject Type as well.
17. Try to access one of the Blood Bank Specimens from Exercise 6.4 in the Enter/Edit BBK Results Routine. Confirm that the following message displays:
This specimen's history was involved in a Merge, Unmerge or Switch.
View Merge/Unmerge/Switch Inquiry? YView Current BBK History record?
Did this message appear?_______________________
18. View both the Inquiry and the History Record and confirm they are correct.
19. Answer N to the “Release Frozen History Record” Prompt and verify the following Error Message and hat you cannot proceed:
This specimen's history was involved in a Merge, Unmerge or Switch and must be released.
Did this message appear? _______________
Could you proceed? ___________________
20. Access the same specimen in the Enter/Edit BBK Results Routine and this time answer Y to the prompt:
Release Frozen History record?
21. Verify you can enter results.
22. Print the Frozen BBK History List and verify that the patient you released no longer appears on the List.
23. Print the BBK Override Warning Report, Restrict To Type UNMRG and verify that the unmerge BBK History warning prints.
24. Access the Release Frozen BBK History Routine and at the History Record prompt enter the other patient that was involved in the merge and unmerge. View both the View Merge/Unmerge/Switch Inquiry and the Current BBK History record.
- 435-

25. Press OK and the system will prompt:
Release Frozen History record? N
Did this message appear?_______________________
26. Enter Y and the system will prompt:
History Record nnnn released.
27. Print the Frozen BBK History List and verify that the patient you released no longer appears on the List.
_______________________________________________________________________
THIS ROUTINE VALIDATED BY:___________________________ DATE:__ /__/__ ACCEPTABLE:_____________________NOT ACCEPTABLE:___________________
HOSPITAL NAME:_______________________________________________________
- 436-

6.6: Switching Blood Bank Medical Records
FUNCTION TO BE VALIDATED: Switch Patient Medical Records
Introduction:
This routine is used to switch a patient's visit from one unit number to another. For instance, if an ADM user accidentally admits a patient using another patient's unit number, this routine can be used to move the visit to the correct medical record without having to undo and re-register the visit.
When you switch a patient account to a new medical record, the system automatically checks for any blood type discrepancies between the specimens on the account being switched and the new medical record. If there are blood type discrepancies when you switch medical records, the system prevents the account from being switched.
If the system prevents the account from being switched, and the switch is valid, you must cancel the specimen in the LIS Cancel BBK Specimen Routine. Once you have done this you can switch the account using the ADM Switch Medical Records Routine.
The Account Number that was switched appears on the BBK History Merge/Unmerge Log.
Functions that may be accessed in the Admissions module:
Additional Patient Routineso Switch Medical Records.
Dictionaries:
Accesso Release Frozen History?
The user’s Access Group must have the Release Frozen History? Prompt defined as Y to be able to modify the DISPLAY WARNING field in the Edit Blood Bank History Routine.
Reports to print:
Blood Bank History Inquiry Blood Bank History Merge/Unmerge Log Blood Bank Override Warning Report Frozen BBK History List
- 437-

6.6 Validation Exercises A:
In this exercise you will be switching a patient account from one Medical Record to another. The account you are switching will have a Blood Type. The Medical Record you are switching the account to will have a different Blood Type.
In this scenario the user should not be permitted to complete the switch until the discrepant blood type is removed.
1. Enter a new patient, with a Medical Record Number.
Name _____________ Account # ___________ Unit # __________
2. Enter a requisition and Blood Type Test for the patient from step 1.
Requisition #_____________ Specimen # ___________
3. Result the Blood Type Test for the specimen entered in step 2.
History Record #____________ Blood Type __________
4. Print the Blood Bank History Inquiry.
5. Enter a second patient with a new Medical Record Number.
Name _____________ Account # ___________ Unit # __________
6. Access the Enter/Edit Historical Data Routine and enter a historical blood type for the patient in step 5. The blood type should be different from the blood type entered in step 3.
7. Print the Blood Bank History Inquiry.
8. In the Switch Medical Records Routine, enter the account from step 1 at the Patient Prompt.
9. At the New Unit # prompt enter the Unit # from the patient entered in step 5.
Expected Result:
The following error message should appear:
“Blood Bank - Switch Account to New Medical Record is **not** allowed. There is a blood type mismatch between the account and the new medical record:
Specimen 'Specimen Number' 'Date'”
Was this message received? __________
Were you allowed to continue with the switch? ___________
10. Cancel the specimen created in step 2 using the Cancel BBK Specimen Routine.
Expected Result:
You will receive the following warning message: “Warning: Specimen ‘Specimen Number’ has been resulted and reported.”
- 438-

The following warning message should appear:
“The BBK History Blood Type ‘BT’ will be removed. Continue? N”
Was this message received? __________
Answer Y and continue to cancel the specimen.
11. Print the BBK History Inquiry for the patient entered in step 1 to confirm that the Blood Type is now UNK.
12. In the Switch Medical Records Routine, enter the account from step 1 at the Patient Prompt.
13. At the New Unit # prompt enter the Unit # from the patient entered in step 5.
14. Proceed and File the Switch.
Expected Result:
The following error message should appear:
Blood Bank - Switch Account's Medical RecordSince this account has no Blood Bank activity, the switch willbe allowed. However, there is a blood type mismatch betweenthe old medical record and the new medical record:
Old Medical Record's Blood Type: UNKNew Medical Record's Blood Type: BT
Was this message received? __________
Were you allowed to continue with the switch? ___________
15. Uncancel the specimen cancelled in step 10 using the Uncancel Requisition/Specimens Routine.
Expected Result:
The following warning message should appear:
“The Blood type on the history is ‘Blood type'. You are uncancelling at least one specimen that has a verified blood type that does not match the history. Continue?”
Was this message received? __________ Choose to continue and uncancel the specimen.
16. Print the BBK History Inquiry to document that the histories were updated appropriately. Confirm that the specimen from step 2 is now appearing on the history for the patient from step 5 and that it was removed from the history record from step 1.
17. Print the Frozen BBK History List and verify that the SWITCHED patients appear on the List.
- 439-

18. Access the specimen in step 10 in the Result Entry Routines. Confirm that the frozen History Message correctly.
Expected Result:
The following warning message should appear:
This specimen's history was involved in a Merge, Unmerge or Switch. View Merge/Unmerge/Switch Inquiry? View Current BBK History record? Was this message received? _______________
19. Answer Y and confirm that you are brought into the BBK History Merge/Unmerge/Switch Inquiry Routine. 20. Press OK and the system will prompt
Release Frozen History record? N
Did this message appear?_______________________
21. Enter Y and verify you can enter results.
22. Print the BBK History Merge/Unmerge/Switch Log to verify that the SWITCH printed on the Report.
23. Print the BBK Override Warning Report and confirm that the following messages appear:
The BLOODTYPE Type message from cancelling the Blood Bank Specimen. The BLOODTYPE Type message from uncancelling the Blood Bank Specimen.
24. Again, access the BBK specimen in Result Entry Routine. Confirm that the HX Freeze Message no longer appears.
25. Attach all reports to the validation exercise.
________________________________________________________________________
THIS ROUTINE VALIDATED BY:_______________ DATE:__ /__ /__
ACCEPTABLE:__________________NOT ACCEPTABLE:______________________
HOSPITAL NAME:_____________________________________________________
- 440-

Chapter 7: Blood Bank Analyzers
7.1 Introduction
Introduction:
The purpose of this document is to provide the user with a tool to assist in the validation of the analyzer routines of the MEDITECH LIS software. This guide contains general scenarios designed to test basic setup of system dictionaries and commonly performed analyzer procedures.
Each facility should develop their own scenarios for validation of site-specific procedures and workflow.
This guide should also be kept with the MEDITECH laboratory user manual, application training notes, and laboratory reports manual to form a set of complete user documentation.
Where possible, we have attempted to include the most recent changes to the system. However, due to updates in the software, not all scenarios are included within this manual.
The purpose of system validation is to establish documented evidence that provides a high degree of confidence that the system will perform consistently.
The intent of this manual is to guide the user through various scenarios common to the laboratory system. This will also demonstrate that the system functions perform as designed. The user must also challenge each function, prompt or routine throughout the testing to confirm that the system performs no unexpected process. Where possible we have made every effort to include normal, abnormal and stress inputs.
There is a signoff at the end of each function test for documentation purposes. The user should also include any printouts of screens where necessary as well as output from the system. Again, we must stress that each facility design their own test plans and test scenarios to be used in validation of the system. MEDITECH will not be held responsible for any facility not performing system validation.
This manual can also be used as a guide for re-validation after an update or software fix has been installed. The documentation provided with any updates or program changes should be reviewed and any affected routines be re-validated and documented.
- 441-

7.2 Basic Operation
Function to be Validated: Interface Operation
Introduction:
This section will verify that the Analyzer and the Analyzer Type Dictionaries are all linked properly and that the correct information is appearing on the analyzer process screen.
Dictionaries:
Analyzer Analyzer Type
Prerequisites:
Analyzer and Analyzer Type need to be set up properly.
Validation Exercise:
1. In the Analyzer Batch Process Screen choose an analyzer. Enter "N" at the date prompt to open a new batch. Enter a free text batch ID.
2. Select "Start Interface" at the Function prompt. After the screen refreshes a few times the interface status should be at "Running" and the Convert status should be at "Idle".
Did this occur as expected? _______
3. Today's date and a batch number of "1" should appear in the "Current Batch" box.
Did this occur as expected? ________
4. Select "Stop Interface" at the Function prompt. After the screen refreshes a few times, the interface and convert boxes should both be at a status of "Stopped".
Did this occur as expected? _______
______________________________________________________________________
THIS ROUTINE VALIDATE BY:______________________________DATE:__/__/__
ACCEPTABLE:___________________ NOT ACCEPTABLE:____________________ HOSPITAL NAME: ______________________________________________________
- 442-

7.3: Process Unidirectional Instruments
Introduction:
This section will verify the proper communication of the Unidirectional Instrument with MEDITECH.
Dictionaries:
Analyzer Analyzer Type Test Department
Reports to Print:
Print Specimens (Internal)
Prerequisites:
In order to test the processing of unidirectional instruments three specimens must be ordered and received from the Enter/Edit Requisitions routine in the LIS Requisitions Menu.
Specimen #1 ___________ Specimen #2 ___________ Specimen #3 ___________
- 443-

Validation Exercise:
1. A. Run specimen #1 on the analyzer and upload the results to MEDITECH.
Did the identifier automatch to the MEDITECH specimen number? _______
B. Choose "Result Transmission" function at the Function prompt in the Process BBK Analyzer Batch Routine.
Do the results match those that print from the instrument? _______ C. Print an internal report. Is the status reported as pending? _______ D. Result the transmission, without verifying.
Does the transmission disappear from the batch screen? _______ E. Print an internal report.
Is the status reported as "unv"? _______
2. For specimen #2 first go to the Analyzer Type Dictionary and remove the default prefix.
A. Run specimen #2 on the analyzer and upload the results to MEDITECH.
Did the identifier automatch to the expected MEDITECH specimen number? ______
Expected Result:
When the default prefix is removed an automatch should not occur. In the event that the identifier sent was previously associated with a downloaded specimen an automatch may occur. However, this may not be to the expected specimen.
B. Choose "Match by Specimen" function at the Function prompt in the Process BBK Analyzer Batch Routine. Enter the specimen and Add a "Y" to the Match specimens box.
Is the identifier now matched to a MEDITECH specimen number? _______
C. Result the transmission. Verify all results.
Does the transmission disappear from the batch screen? _______
Print an internal specimen report.
Does the specimen have a status of "Resulted"? _______
- 444-

3. Before running Specimen #3 go back into the Analyzer Type Dictionary and replace the default prefix.
A. Run specimen #3 on the analyzer and upload the results to MEDITECH. Choose the "Delete" function at the Function prompt in the Process BBK Analyzer Batch Routine. Delete the transmission.
Did the transmission disappear from the batch screen? _______
B. Choose the "Sort" function at the Function prompt in the Process BBK Analyzer Batch Routine. Make "Omit Complete" no.
Is the deleted transmission on the batch screen with a status of deleted "D"? _____
C. Highlight the deleted transmission and choose the "Undelete" function at the Function prompt in the Process BBK Analyzer Batch Routine. Choose "sort" again and make "Omit Complete" yes.
Does the specimen return to the batch screen? _______ D. Choose the "Cancel" function at the Function prompt in the Process BBK Analyzer Batch Routine. Print an internal specimen report.
Is the specimen at a status of "cancelled"? _______
E. Delete the Transmission.
______________________________________________________________________
THIS ROUTINE VALIDATE BY:______________________________DATE:__/__/__
ACCEPTABLE:___________________ NOT ACCEPTABLE:____________________ HOSPITAL NAME: ______________________________________________________
- 445-

7.4: Process Bidirectional Instruments
Introduction:
This section will verify the proper communication of the Bidirectional Instruments with MEDITECH.
Dictionaries:
Analyzer Analyzer Type Test Department
Reports to print:
Print Specimens (Internal)
Prerequisites:
In order to test the processing of bidirectional instruments the validation of "Process Unidirectional Instruments" must have been completed successfully.
Validation Exercise:
1. BROADCAST DOWNLOAD
A. In the Analyzer Dictionary put a "Y" in the "Download upon receipt" box. If you are using barcode labels make "barcode as identifier-Y".
B. Enter and receive a requisition in the Enter/Edit Requisitions Routine in the LIS Requisitions Menu.
Does the specimen add to the batch screen with an initial status of "Q"? ____
C. As MEDITECH downloads to the instrument, and the instrument accepts, the status will go to "D".
Did this occur as expected? _______
Did the specimen appear on the instruments run list? _______
- 446-

2. MANUAL DOWNLOAD
A. In the Analyzer Dictionary remove the "Y" from the "Download upon receipt" box.
B. Enter and receive a requisition in the Enter/Edit Requisitions Routine in the LIS Requisitions Menu.
C. From the process batch screen choose "Add Specimen"(A). Enter the specimen number and put a "N" in the "Download Verified Test" box. Put a "Y" in "Add Specimens".
Expected Results:
The specimen should add to the batch screen with an initial status of "Q", as MEDITECH downloads to the instrument, and the instrument accepts, the status will change to "D".
Did this occur as expected? _______
Did the specimen appear on the instruments run list? _______
3. HOST/QUERY
For Host/Query operation, Broadcast Download should be set to "N" in the Analyzer Dictionary.
A. Order and receive a specimen in MEDITECH. Print a barcode label and attach it to a tube.
Expected Results:
The specimen should add to the batch screen with an initial status of "Q", as MEDITECH downloads to the instrument, and the instrument accepts, the status will change to "D".
5.2.1.1 Did this occur as expected?_______
Did the specimen appear on the instruments run list? ______
______________________________________________________________________
THIS ROUTINE VALIDATE BY:______________________________DATE:__/__/__
ACCEPTABLE:___________________ NOT ACCEPTABLE:____________________ HOSPITAL NAME: ______________________________________________________
- 447-
- 448-