chapter 2chapter 2 adjusting theadjusting the finger assembly d4u ch02.pdf · lower the assembly...
TRANSCRIPT

Adjusting theAdjusting theFinger Assembly
CHAPTER 2CHAPTER 2

A D J U S T I N G T H E F I N G E R A S S E M B LY
Chapter 2 D4 User Guide16
Chapter ForewordThe finger assembly is the heart of the Leigh jig. Spend a few minutes now to familiarize yourself with these simple adjustments.
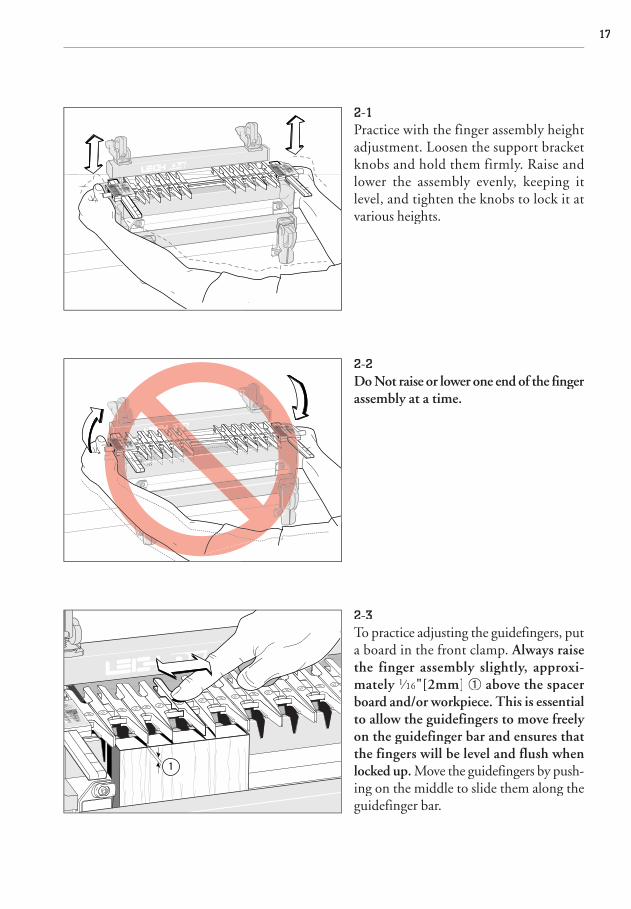
2-1Practice with the finger assembly height adjustment. Loosen the support bracket knobs and hold them firmly. Raise and lower the assembly evenly, keeping it level, and tighten the knobs to lock it at various heights.
2-2Do Not raise or lower one end of the finger assembly at a time.
2-3To practice adjusting the guidefingers, put a board in the front clamp. Always raise the finger assembly slightly, approxi-mately 1⁄1⁄1 16⁄16⁄ "[2mm] above the spacer board and/or workpiece. This is essential to allow the guidefingers to move freely on the guidefinger bar and ensures that the fingers will be level and flush when locked up. Move the guidefingers by push-ing on the middle to slide them along the guidefinger bar.
17
1

2-4Loosen about half the guidefingers and practice unlocking, moving, positioning and relocking them. Always press on the centre of the guidefinger when tightening the screws.
2-5Do Not over-tighten the guidefinger lock screws. The Leigh screwdriver provided will give ample torque for easy lock-up without strain.
2-6Always tighten unused guidefingers before routing, as router vibration may cause loose screws and wedge nuts to fall out and be lost.
A D J U S T I N G T H E F I N G E R A S S E M B LY
Chapter 2 D4 User Guide18
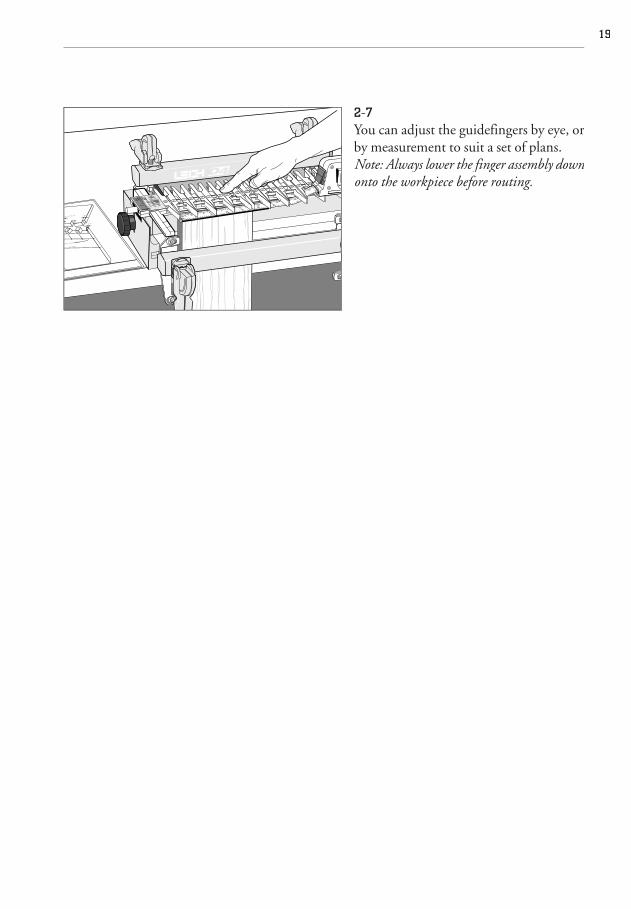
2-7You can adjust the guidefingers by eye, or by measurement to suit a set of plans.Note: Always lower the finger assembly down onto the workpiece before routing.
19

A D J U S T I N G T H E F I N G E R A S S E M B LY
Chapter 2 D4 User Guide20