chapter configuring, deploying, and troubleshooting...
TRANSCRIPT

Chapter
1
Configuring, Deploying, and Troubleshooting Security Templates
THE MICROSOFT EXAM OBJECTIVES COVERED IN THIS CHAPTER:
�
Plan security templates based on computer role.
Computer roles include SQL Server computer, Microsoft
Exchange Server computer, domain controller, Internet
Authentication Service (IAS) server, and Internet
Information Services (IIS) server.
�
Configure security templates.
�
Configure registry and file system permissions.�
Configure account policies.�
Configure
.pol
files.�
Configure audit policies.�
Configure user rights assignment.�
Configure security options.�
Configure system services.�
Configure restricted groups.�
Configure event logs.
�
Deploy security templates.
�
Plan the deployment of security templates.�
Deploy security templates by using Active Directory–based Group Policy Objects (GPOs).
�
Deploy security templates by using command-line tools and scripting.
4332c01.fm Page 1 Friday, June 4, 2004 7:59 PM
COPYRIG
HTED M
ATERIAL

�
Troubleshoot security template problems.
�
Troubleshoot security templates in a mixed operating system environment.
�
Troubleshoot security policy inheritance.�
Troubleshoot removal of security template settings.
4332c01.fm Page 2 Friday, June 4, 2004 7:59 PM

Windows Server 2003 provides a rich set of security features that enable administrators to secure information and activity on their Windows Server 2003–based networks. Through the use of
Group Policy Objects (GPOs), you can push configurations out to each Windows-based machine on the network to help ensure network-wide security. You can quickly create GPOs to perform this task by applying a template. A template is a preconfigured set of values that can be used to create a GPO. Security templates are text-based
.inf
files that allow the adminis-trator to create security configurations once and then apply those configurations to multiple servers. Templates also reduce the amount of administrative effort required to secure a group of Windows Server 2003 servers, Windows 2000 workstations and servers, and Windows XP Professional workstations. These templates are administered through the Microsoft Manage-ment Console (MMC) and are applied to multiple servers using one or more Group Policies.
Because this exam emphasizes the use of GPOs, we are going to spend some time going over how GPOs work and how you can deploy them effectively. We understand that this may be a review for many of you. If you are comfortable and confident in your GPO skills and depth of understanding, you can skip this section and start with the “Working with Security Templates” section later in this chapter.
This book jumps right in with the specific information you will need to pass the exam. If you need to get up to speed with the basics, try
Network Security JumpStart
by Matt Strebe (Sybex, 2002). For more information on general net-working theory and concepts, try
Mastering Network Security, 2nd Edition
by
Chris Brenton and Cameron Hunt (Sybex, 2002).
However, if you feel you need a refresher on Group Policies, read this section. You will need this information to do well on the exam and to better understand how to implement security in a Windows Server 2003 environment.
Group Policy Objects and Windows 2003 Server
Policies are not new to Microsoft products. Since the release of Windows 95, policies have been a way to ensure that Registry settings are configured correctly across multiple computers with a single administrative act. In previous versions of Windows, policies were difficult to configure and
4332c01.fm Page 3 Friday, June 4, 2004 7:59 PM

4
Chapter 1 �
Configuring, Deploying, and Troubleshooting Security Templates
did not meet the needs of most businesses when they were configured. Policies did not address as many configurable settings in earlier versions.
You can use GPOs to define a user’s work environment and then implement changes to that environment without the user needing to reboot their workstation. In almost every case, you can deploy a GPO without users even knowing that it has been deployed. The only way that users will know that there is a GPO deployed is if its settings conflict with a configuration that the user is trying to set. User and computer settings are defined once in a GPO, and then the object is used to push those settings out to the computers and user accounts you designate. Windows Server 2003 continually enforces the settings in the GPO. As updates to the settings in the GPO are configured, these updates are pushed out to the Windows Server 2003 and Windows XP Professional computers on your network.
In addition to handling security concerns, you can use Group Policies to reduce lost productivity—which is often due to user error—by removing unnecessary programs and abilities that ship standard with the Windows Server 2003 plat-
form. This also can lower the overall total cost of ownership (TCO).
GPOs are linked to a site, a domain, or an organizational unit (OU) container. When linked to a site or a domain container, GPOs allow you to centralize settings for an entire organization. When GPOs are linked to an OU container, you can apply different settings to different sets of user and/or computer accounts. In both cases, GPOs can be filtered to prevent some users and computers from having the GPO applied to them.
GPOs also ensure that users have the desktop environment necessary to perform their job effec-tively. You can configure settings to ensure that certain shortcuts, drive mappings, and other config-urations exist whenever the user is logged on. Furthermore, you can automate software installations, negating the need to send a technician to the desktop to install or update software packages.
Corporate security and business policies can also be enforced through the use of GPOs. For example, you can ensure that security requirements for all users match the security required by corporate policy.
Configuring Group Policies
When a GPO is first opened, you’ll find several types of settings that you can configure:
Administrative Templates
These are Registry-based settings for configuring application and user desktop environments. For example, these settings can be used to configure which short-cuts and objects will appear on the user’s desktop environment. They can also be used to redi-rect the My Documents location to the user’s home directory on a remote file server.
Security
Your choices here are local computer, domain, and network settings. These settings control user access to the network, account and audit policies, and user rights. For example, these settings can be used to configure the account policies, manage the event logs, and even manage client behavior when there are multiple wireless networks available to the client computer.
4332c01.fm Page 4 Friday, June 4, 2004 7:59 PM

Group Policy Objects and Windows 2003 Server
5
Software Installation
These settings centralize software management and deployment. Appli-cations can be either published or assigned. Applications can also be deployed based upon secu-rity group memberships as well as to individuals.
Scripts
These settings specify when Windows computers run a specific script. Scripts can be run at four different times using GPOs:
�
Computer startup: Startup scripts are run as the operating system boots up. All scripts will run, and when they are complete, the user will be prompted with the security win-dow to press Ctrl+Alt+Delete.
�
User logon: Logon scripts are run after the user submits their username and password
to the network. Once all scripts have been completed, the user desktop appears and the user is able to start interacting with the interface.
�
User logoff: Logoff scripts are run after the user has logged off the computer. Once all logoff scripts are complete, the computer will prompt the user with the security window to press Ctrl+Alt+Delete.
�
Computer shutdown: Shutdown scripts are run when the computer is being shut down or restarted. Once the scripts and the other shutdown processes are complete, the user will be prompted with the “It is now safe to turn off your computer” message. If the computer has the proper power configuration components, it will automatically shut down and power itself off. If the user was restarting the computer, all shutdown scripts must run before the server will prompt for the power to turn off the power.
Remote Installation Services
These settings control the options available to users when run-ning the Client Installation Wizard by Remote Installation Services (RIS). RIS can be configured with several options for client computer installations. For example, a client computer using RIS can automatically be supplied with a computer name or the user can be allowed to select their own computer name.
Internet Explorer Maintenance
These settings let you administer and customize Internet Explorer (IE) configurations on Windows Server 2003, Windows 2000, and Windows XP com-puters. IE can be configured for all users, or select network users, with a standard home page for the browser and standard favorites lists. GPOs can also be used to provide security config-uration information and other important information such as the proxy settings.
Folder Redirection
These settings store specific user profile information and take a shared folder on a server and make it look like a local folder on the desktop of the computer. The Folder Redi-rection option in a GPO is very important, because now network users can be forced to use net-work storage locations instead of local storage locations on their computers. By forcing storage to centralized server locations, the data can be properly backed up and scanned for viruses on a reg-ular basis. The data can be protected more efficiently if it is stored on a server.
Now, a GPO comprises two elements: the
Group Policy Container (GPC)
and the
Group Policy Template (GPT)
. The GPC is located in
Active Directory (AD)
and provides version infor-mation used by the domain controllers to discern which GPO is the most recent version. If a domain controller (DC) does not have the most recent version, it relies on replication with other DCs to obtain the latest GPO and thereby update its own GPC.
4332c01.fm Page 5 Friday, June 4, 2004 7:59 PM

6
Chapter 1 �
Configuring, Deploying, and Troubleshooting Security Templates
The GPT is a folder hierarchy in the shared
sysvol
folder on domain controllers. The GPT contains the settings that are applied to the computers on your network. Computers connect to the
sysvol
folder on the DC to read the settings in the GPT before applying them to their local Registry. The GPT is named after the Globally Unique Identifier (GUID) of the GPO. When the GPO is created, it is assigned a new GUID, and the GPT name is the GUID of the GPO.
Each GPO has two sets of configuration settings: one for computers and the other for users. This basic architecture has not changed since Windows 95, which used
user.dat
and
system.dat
as the basis for forming the policy file. This was also the case in Windows 98, but many additional con-figuration settings are available in Windows 2000 and Windows Server 2003.
The configuration settings for computers specify the following:�
Operating system behavior�
Desktop behavior�
Security settings�
Computer startup and shutdown scripts�
Application assignments, options, and settings
The configuration settings for users specify the following:�
Operating system behavior�
User-specific desktop settings�
User-specific security settings�
Assigned and published applications�
Folder redirection options�
User logon and logoff scripts
When a GPO is linked to a site, a domain, or an OU container, the user and computer accounts hosted in that object are affected by the policy. GPOs can be linked to more than one container such that the following statements are true:�
You can link one GPO to multiple sites, domains, and/or OUs.�
Linking at the site or domain level gives you centralized administrative abilities.�
Linking at the OU level decentralizes your administration, yet maintains uniformity for those objects affected by the GPO.
�
You can link multiple GPOs to a single site, domain, and/or OU.�
Creating multiple GPOs allows you to easily administer each group of settings you want to apply.
�
Link inheritance is maintained in AD; lower-level objects inherit the upper-level settings from a GPO. For example, all OUs in a domain inherit the settings of a GPO linked to the domain object.
�
You cannot link GPOs to default AD containers, including the Users, Computers, and Builtin containers.
4332c01.fm Page 6 Friday, June 4, 2004 7:59 PM

Group Policy Objects and Windows 2003 Server
7
After a GPO is created, it is not required to be linked to an object. GPOs can simply be cre-ated and then linked later to the desired object when the GPO’s settings are needed. In addition, when you work on GPOs from a domain controller, by default, you work in the memory space of the domain controller that has been assigned the Flexible Single Master Operations (FSMO) role of primary domain controller (PDC) emulator. The PDC emulator looks and feels like a PDC to Windows NT backup domain controllers (BDC) and Windows NT workstations. The FSMO role of PDC emulator is implemented for legacy compatibility purposes. You will use
Active Directory Users and Computers (ADUC)
to link a GPO to a domain or an OU. You will use
Active Directory Sites and Services (ADSS)
to link a GPO to a site. You must be a member of the Enterprise Admins security group to link a GPO to a site object.
If you would like to learn more about the PDC and BDC roles in Windows NT 4.0, please consult
Mastering Windows NT Server 4, 7th Edition
by Mark Minasi
(Sybex, 2000).
Applying Group Policies
To be successful in the real world, as well as on the exam, you’ll need to understand how GPOs are applied in AD. GPO inheritance constitutes the order in which policies are applied. GPOs are first applied to the site container, then to the domain container, and then to the OU container. As policies are applied, they override the previous policy, meaning that a policy setting at the OU level overrides the policy setting at the domain level and policy settings at the domain level override pol-icy settings at the site level. In other words, the most recently applied policy, the one that is applied last, has the greatest priority in setting the final configurations for objects hosting in the linked container.
However, bear in mind that inheritance is at work too. An OU could be inheriting multiple policies that have been linked to the site, domain, and upper-level OU objects. The policies are applied, even though no policy has been directly linked to the OU.
You’ll also need to understand how GPOs are processed, which is different from how they are inherited or linked. When we talk about policies being processed, we are talking about the order in which policies are applied when multiple policies are linked to the same container. And because there are two parts to every GPO, it is important to understand which part of the GPO is processed first.
The computer settings of a GPO are processed and applied before the user settings. When the Windows computer processes computer settings, the startup scripts run. When a user logs on, the logon scripts are processed. The reverse happens when a user cleanly shuts down a work-station; logoff scripts run first, and then shutdown scripts run.
If multiple polices are linked to the same container, the default setting is to process all policies synchronously. You can change the processing of a GPO to asynchronous by using a Group Pol-icy setting for both computers and users. In asynchronous processing, all policies are processed simultaneously using multiple threads. In synchronous processing, one policy must finish pro-cessing before the next policy can begin processing. Also in synchronous processing, the desktop for the user does not appear until all policies are processed and applied. If you decide to use
4332c01.fm Page 7 Friday, June 4, 2004 7:59 PM

8 Chapter 1 � Configuring, Deploying, and Troubleshooting Security Templates
asynchronous processing, you might possibly sacrifice reliability in each policy being enforced correctly system-wide. Best practice is to leave policy processing at the default of synchronous.
Windows Server 2003, Windows 2000, and Windows XP clients refresh their policies every 90 minutes with an additional, randomized offset of 30 minutes to ensure that the domain controller doesn’t become overloaded with policy calls from clients in the same site. Domain controllers refresh every 5 minutes within the same site. Thus, new policy settings are applied more quickly to domain controllers than to workstations. Updates for domain controllers must be done quickly to make sure that new account policies and other security settings are implemented across the organization.
When multiple policies are applied to a single container, they are applied in the order listed in the Group Policy tab of the object’s properties, from bottom to top. The GPO at the top of the list is applied last and thus can overwrite earlier settings; it has top priority in the application of the settings to the workstation or server. An exception occurs to the application priority when the most recent setting processed results in conflicts between the user and computer set-tings. In this case, the computer setting overrides the user settings.
As long as there are no conflicts or overwrites during the application of mul-tiple policies, the settings in all policies linked to a given container are cumu-lative for all objects that reside in that container.
Modifying Group Policy Inheritance
Policy inheritance is not absolute, however. Inheritance can be blocked and modified. You can prevent a child container from inheriting any GPOs from the parent containers by enabling Block Inheritance on the child container. Enabling Block Inheritance lets you set new policies for the child container. However, you need to bear the following in mind:� You cannot selectively choose which GPOs to block. It is an all-or-nothing proposition.� GPOs can be configured with the No Override setting, which means that the GPO is
applied even if inheritance is blocked. You can use this setting to push down necessary settings even if an OU administrator doesn’t like the settings. GPOs that represent critical, corporate-wide rules should have the No Override option enabled.
� The No Override option is really set on the link, not on the GPO itself. Thus, if you have a GPO that is linked to multiple containers, you can configure the No Override option on each container and gain administrative flexibility to decide to which containers the GPO will always be applied.
If you want to block some GPOs on a child container but apply others, the best practice is to block inheritance and then create new links on the child container to the desired GPOs.
You can also link a GPO to a container and then filter the application of the GPO to certain objects within the container. By default, for any given container, the GPO settings are applied to all objects within the container. However, you might not want this. You might want certain objects not to inherit the settings. Well, you can control or filter the application of those settings by using the Discretionary Access Control List (DACL) in the properties of the objects you want to filter.
4332c01.fm Page 8 Friday, June 4, 2004 7:59 PM
Working with Security Templates 9
You can modify the default permissions in three ways:� You can explicitly deny the Apply Group Policy permission for the group that contains the
user or computer account for whom you want to filter. � You can remove Authenticated Users Access Control Entry (ACE) from the DACL. When
you do so, Authenticated Users have no explicit permission on the GPO. However, if you remove Authenticated Users, you will need to create a security group for the other accounts in the container to whom the GPO should apply and then use that group account in place of the Authenticated Users security group account.
� You can use Windows Management Instrumentation (WMI) filters to identify which users or computers will receive the GPO. WMI filters can be created and then imported to any number of GPOs. Because WMI filters are so powerful, there are many different conditions that can be part of the query. For example, a GPO can be used to install a new application. The application, though, might require a certain service pack level. With WMI filtering, WMI can determine which computers have the appropriate service pack and then allow the GPO to be applied to just those computers.
You can also set a Loopback processing mode, which essentially ensures that the computer GPO is applied last rather than the user GPO. This setting might be useful if applications that are assigned to a user should not be automatically available on a server. Hence, you use the Loopback processing mode to ensure that the computer portion of the GPO is applied last.
Now that we’ve reviewed GPOs, we’ll look at security administrative templates for much of the rest of this chapter. Templates are a collection of settings that modify the Registry on the tar-get computer. You use administrative templates to configure user and computer Registry-based settings that control the user’s desktop environment. Specifically, the template settings modify the HKEY_LOCAL_MACHINE and HKEY_CURRENT_USER Registry trees.
Microsoft provides a number of preconfigured templates for security purposes that we will discuss in detail. It is important to understand what these templates do and their purposes because they will be a focus on this exam.
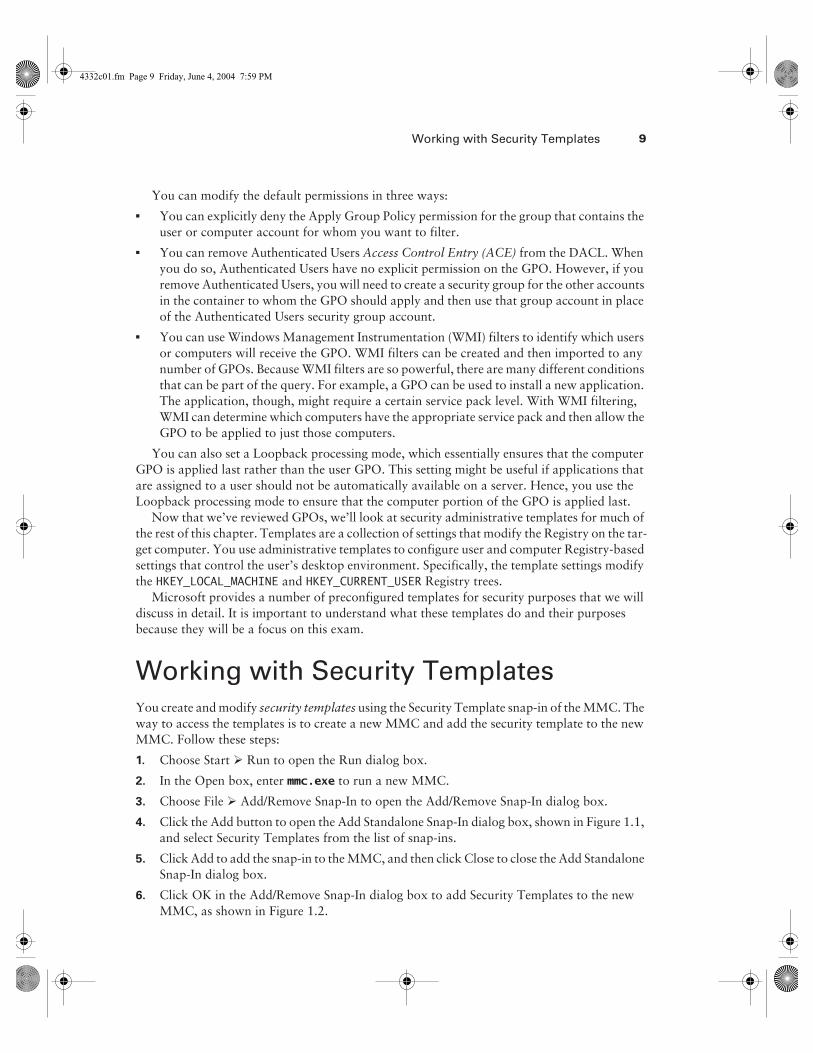
Working with Security TemplatesYou create and modify security templates using the Security Template snap-in of the MMC. The way to access the templates is to create a new MMC and add the security template to the new MMC. Follow these steps:
1. Choose Start � Run to open the Run dialog box.
2. In the Open box, enter mmc.exe to run a new MMC.
3. Choose File � Add/Remove Snap-In to open the Add/Remove Snap-In dialog box.
4. Click the Add button to open the Add Standalone Snap-In dialog box, shown in Figure 1.1, and select Security Templates from the list of snap-ins.
5. Click Add to add the snap-in to the MMC, and then click Close to close the Add Standalone Snap-In dialog box.
6. Click OK in the Add/Remove Snap-In dialog box to add Security Templates to the new MMC, as shown in Figure 1.2.
4332c01.fm Page 9 Friday, June 4, 2004 7:59 PM

10 Chapter 1 � Configuring, Deploying, and Troubleshooting Security Templates
F I G U R E 1 . 1 The Add Standalone Snap-In dialog box
F I G U R E 1 . 2 The Security Templates snap-in added to a new MMC
You’ll notice in the Security Templates MMC that the templates reside (by default) in the C:\WINNT\Security\Templates folder. If you were to look at this folder, you’d see a listing of .inf files that you can easily open in any text editor. What the Security Templates snap-in really does is provide a graphic front end to what would be a taxing task of modifying these .inf files.
If you select any template in the left pane of the MMC, you’ll see seven objects in the right pane, as shown in Figure 1.3. You might remember seeing some of these objects before as nodes in a GPO.
4332c01.fm Page 10 Friday, June 4, 2004 7:59 PM

Working with Security Templates 11
F I G U R E 1 . 3 The seven objects that can be secured in a Windows Server 2003 security template
Here is an explanation of each of these objects:
Account Policies This area covers a cluster of policies that pertain to user accounts. Even account policies are specified at the domain level; domain controllers receive their account pol-icies settings from the domain controller OU. Account policies include the following three indi-vidual policies:
Password policy With this policy, you can set restrictions on password length, age, unique-ness, and complexity.
Account lockout policy With this policy, you set the rules for account lockout, including duration and method of releasing the account after it has been locked out.
Kerberos policy This policy governs such settings as the ticket lifetime and the maximum tolerance for computer time differences.
Local Policies This object includes a cluster of policies that focus on auditing local and/or net-work access to the server. How events are audited is also included in this policy. This template includes the following three policies:
Auditing policy This policy specifies which events are recorded for later reference.
User rights policy With this object, you specify rights for user accounts and security groups. For example, with the Add Workstations To A Domain User right, users can add new computers to the domain without administrator intervention.
Security options policy This policy holds a wide-ranging set of configurable values, includ-ing the logon banner and SMB (Server Message Block) signing. Other important settings in this section allow renaming the guest account and renaming the administrator account.
Event Log This object contains configurable options on how the application, security, and system event logs behave. In particular, it specifies how large the logs can become, whether they can be overwritten automatically, and how long the logs should be maintained online.
4332c01.fm Page 11 Friday, June 4, 2004 7:59 PM

12 Chapter 1 � Configuring, Deploying, and Troubleshooting Security Templates
Restricted Groups This setting allows the administrator to define membership in the built-in security groups or other administrator-defined security groups that are given elevated privileges. With proper configuration, it is not possible for somebody to accidentally become a domain administrator group member or for an existing domain administrator to be accidentally removed from the group.
System Services This policy lets you specify the security attributes of all system services, including file, print, network, and telephone. This section of the policy will allow you to define which services are supposed to run or not run.
Registry This object contains the security settings for your Registry keys and lets you set audit-ing values and access permissions.
File System This object allows for the configuration of access permissions and the auditing of specific folders and files on the local server.
Two facts should be noted at this point:� These templates will not work on a FAT (file allocation table) partition, so make sure that you
are running NTFS (New Technology File System) on all partitions on the server that you want to secure.
� Never deploy these templates on production systems without first testing them in a lab envi-ronment. Unintended access or denials can occur if you don’t first test these templates on an offline server to observe their effects.
The names of the .inf files might appear confusing at first, but after you work with them for a while, they’ll make more sense. Let’s now take a look at each template type and the .inf files that are included in each type.
Default Security Templates
Microsoft has some predefined templates that you can use as is or customize to meet your spe-cific needs. Some of these templates only modify existing templates, and others install an entire set of values on the computer.
The security templates provide Windows Server 2003, Windows 2000, and Windows XP set-tings for workstations, servers, and domain controllers. You can use these templates to reverse unwanted behavior that is a result of a customized template being applied. You can also use these templates to apply an initial set of security values to any computer that has been installed or upgraded to Windows Server 2003. These templates contain settings for the following areas as well as for others:� Account policies� Local policies� Event log maintenance� Basic permissions for system services� Access permissions for files
4332c01.fm Page 12 Friday, June 4, 2004 7:59 PM

Working with Security Templates 13
These policies do not include configuration values for user rights assignments so that these policies will not overwrite any assignments made by an installed application. Because the mem-bers of the Windows Server 2003 Users group have stricter permissions than members of the Windows NT Users group, Windows NT applications that are not certified for Windows Server 2003 may not run under the security context of the Windows Server 2003 Users group. You can fix this by doing one of the following:� Add all user accounts to the Power Users group (not recommended for most security envi-
ronments due to the added permissions enjoyed by the Power Users group).� Apply the compatible security template (compatws.inf).� Upgrade the application to be Windows Server 2003 certified.
Each of these security templates can also be applied to Windows 2000 family products. It is possible that there are some settings that are available in the templates that do not exist in Win-dows 2000 products. In these cases, the Windows 2000 computer will not be able to enforce those particular settings.
Incremental Templates
Windows Server 2003 ships with several templates that modify only existing security settings. When working with these templates, you’ll need to first have a default template applied. These templates include only modifications. They do not include the default settings, and they elevate security settings from the default settings found in the default templates.
Secure templates Two templates fall into this area: securews (workstations and servers) and securedc (domain controllers). These templates provide increased security for the operating system. Resources secured by permissions are not covered in these templates. These templates do remove members of the Power Users group from the DACL on resources.
High security templates The hisecws (workstation and server) and hisecdc (domain controller) templates increase security for parameters that affect network protocols such as SMB Signing. Use this template only in pure Windows Server 2003, Windows 2000, and Windows XP environments; applying this template will likely degrade the performance of your servers. Moreover, this template removes the Terminal Server Security Identifier (TS SID) from your system and removes members from the Power Users group and gives them permissions similar to that for the Users group.
Compatible template This template (compatws) is for workstations and servers. Because the permissions for the Users group in Windows Server 2003 were tightened, you might need to “loosen” them just a bit to allow older applications to run on your servers and workstations. This template makes these applications “compatible” with the Windows Server 2003 and Win-dows XP operating systems so that these older applications can run as they did under older operating systems.
Other templates You might run across a few other templates that provide a specific func-tion. First, the setup security template resets all values to default, which means that you’ll be taking your server or workstation back to the state it was in when first installed.
4332c01.fm Page 13 Friday, June 4, 2004 7:59 PM

14 Chapter 1 � Configuring, Deploying, and Troubleshooting Security Templates
The rootsec template is used to secure the system root on a Windows Server 2003 Profes-sional computer. The DC security template is used to reset all values to their defaults on domain controllers.
Configuring TemplatesYou can select numerous options in each section to increase security on your systems. However, because it would be of little value to discuss each and every one in detail, we’ll discuss at a high level how you configure each area.
Account Policies
To modify any of the account policies settings, expand the Account Policies settings node inside the Group Policy that you want to configure. Beneath this node, you’ll see three policies that you can configure: password, account lockout, and Kerberos. When you select a policy, the actual settings appear in the right pane (see Figure 1.4).
To configure an individual setting, double-click it in the right pane to open a dialog box that is specific to that setting. However, you’ll also be given the choice to either enable or disable the setting by selecting or clearing the Define This Policy Setting In The Template check box. In Figure 1.5, you can see that a minimum password length of seven characters is being enforced.
F I G U R E 1 . 4 Individual security policy settings under the Account Policies node
4332c01.fm Page 14 Friday, June 4, 2004 7:59 PM

Configuring Templates 15
F I G U R E 1 . 5 The individual policy setting dialog box for setting a minimum password length
Once you define the setting and click OK, the MMC displays the new configuration in the Computer Setting column in the right pane (see Figure 1.6).
F I G U R E 1 . 6 The results of the new minimum password setting displayed in the Computer Setting column in the Security Templates MMC
In Exercise 1.1, you will configure an account policy.
4332c01.fm Page 15 Friday, June 4, 2004 7:59 PM

16 Chapter 1 � Configuring, Deploying, and Troubleshooting Security Templates
.pol Files
Down-level client operating systems—including Windows NT 4.0 and Windows 9x operating sys-tems—use .pol files to maintain their profile information. Windows 9x clients use a config.pol file, and Windows NT 4.0 clients use an ntconfig.pol file. The two .pol files are not the same and cannot be interchanged.
The .pol file is used to store information such as which shortcuts appear on the Desktop and which applications appear in the Start menu. The .pol file also provides control for access to Control Panel and the command prompt, restricting access for the user to certain settings such as the Desktop wallpaper, among many others.
The .pol files are created using the System Policy Editor that matches each operating system. The .pol files can also be copied from the client machine and hosted on domain controllers to provide support for roaming users that benefit from having their profile available to them, no matter which computer they use. Of course, the Windows 9x profile is available only to Win-dows 9x clients, and the Windows NT 4.0 profile is available only to Windows NT 4.0 clients.
Once the .pol files have been created, they are placed in the NETLOGON share point (c:\winnt\system32\repl\import\scripts) on the primary domain controller (PDC). They are replicated from the PDC to all backup domain controllers (BDCs) so that the user can access the .pol file, no matter which server logs them in. However, in Windows Server 2003, there is no BDC, so you need to configure the replication from the domain controller (DC) host-ing the PDC emulator role to all other domain controllers.
Audit Policies
Auditing is both a proactive and reactive security measure. It informs administrators of events that might be potentially dangerous and leaves a trail of accountability that can be referenced in the future. By default, all auditing is turned off; if you want to use this feature, you’ll need to turn it on. The easiest way to do this is through a security template that is applied to all your servers.
E X E R C I S E 1 . 1
Configuring an Account Policy
1. Open the Active Directory Users And Computers MMC.
2. Open the properties of the domain or OU that you wish to apply the account policy against.
3. Click the Group Policy tab.
4. Click Edit to open the Group Policy dialog box.
5. Navigate to the Account Policies section of the Group Policy.
6. Make your configuration changes in either the Password or Account Lockout policy or both.
7. Close the Group Policy dialog box.
8. Click OK to close the Properties dialog box.
4332c01.fm Page 16 Friday, June 4, 2004 7:59 PM

Configuring Templates 17
Before you can configure a template for auditing, you must first plan your audit policy. The following categories are available for auditing:� Account logon events� Account management� Directory service access� Logon events� Object access� Policy change� Privilege use� Process tracking� System events
On non–domain controller computers, you’ll use either Computer Management or a GPO to enable auditing on the local machine. On a domain controller, you’ll use a Group Policy to edit the audit policy.
When developing your audit policy, you’ll need to account for three elements:� Who will be audited� Whether to audit failed events, successful events, or both� What type of object access will be audited
When you want to audit an individual resource such as a folder or printer, you’ll need to enable object access auditing on the computer hosting the resource. Then you’ll need to go to the resource’s Properties dialog box and enable auditing there as well. Hence, when auditing for object access, there is always a two-step process that doesn’t exist with other event categories.
The results of your auditing policy are displayed in the Security Event Log. This log displays detailed information about the chosen events.
The “Event Logs” section of this chapter discusses how to use security tem-plates to configure the behavior of all logs on your Windows Server 2003 serv-ers, Windows 2000–based servers, and Windows 2000 and Windows XP Professional workstations.
The auditing options are as follows:
Audit account logon events Tracks events related to user logon and logoff activity system-wide. Events are recorded on the domain controllers in your domain even if they occur on mem-ber servers or workstations.
Audit account management Tracks account management actions in Active Directory Users And Computers. Any time that a user, a computer, or a group account is created, modified, or deleted, an event can be generated and placed in the log file.
Audit directory service access Tracks access to Active Directory by users or computers. You will need to configure the object’s properties to audit either success or failed events.
4332c01.fm Page 17 Friday, June 4, 2004 7:59 PM

18 Chapter 1 � Configuring, Deploying, and Troubleshooting Security Templates
Audit logon events This is the same as Windows NT’s Logon and Logoff audit category. User logon and logoff activities are recorded in the local server’s logs. This policy records only activ-ity for the local server to which the policy is applied.
Audit object access Tracks access to objects on non–domain controllers. You will need to configure the object’s properties to audit either success or failed events.
Audit policy change Tracks changes to user rights, auditing, and trust relationships.
Audit privilege use Tracks the use of user rights and privileges, such as when a user shuts down a server.
The audit privilege use policy does not track the following user rights: bypass traverse checking, debug programs, create a token object, replace process-level token, generate security audits, back up files and folders, and restore files and folders. If you want to track backup and restore activities, you’ll need to override this default behavior by enabling Audit Use Of Backup and Restore Privilege under the Security node nested inside the Local Policies node.
Audit process tracking Tracks each process running on the server and the resources that it uses.
Audit system events Tracks system events such as startup, shutdown, and restart. It also tracks actions that affect system security or changes to the security log.
To turn on auditing, navigate to the desired template, drill down to the Audit Policy node as shown in Figure 1.7, and make your selections.
F I G U R E 1 . 7 Audit log selections for a security template
4332c01.fm Page 18 Friday, June 4, 2004 7:59 PM

Configuring Templates 19
To enable auditing for object access, you’ll need to access the folder or file properties directly and enable it. To do so, follow these steps:
1. Open the object’s Properties dialog box.
2. Click the Security tab.
3. Click the Advanced button to open the object’s Access Control Settings dialog box, as shown in Figure 1.8.
4. Click the Auditing tab, click Add, select the accounts that you want to audit, and then click OK.
In the Auditing Entry For name_of_object dialog box (see Figure 1.9), you can select exactly which actions you want to audit and how to apply your selections. The information in the Auditing Entry dialog box will depend on the object, because the auditing options are different for folders, files, and printers.
You have two other options that you can use to specify the objects to which your auditing policy should be applied. At the bottom of the Auditing Entry dialog box, you’ll see an Apply These Auditing Entries To Objects And/Or Containers Within This Container Only check box. Select this check box to specify that the auditing policy you are implementing be applied only to objects that reside within the target container (or folder).
At the bottom of the Auditing tab in the Access Control Settings dialog box, you can push down the auditing configurations you’ve selected to all child objects of the target object you are configuring by selecting the Replace Auditing Entries On All Child Objects With Entries Shown Here That Apply To Child Objects check box.
Selecting this check box does not override settings on individual child folders after the values have been applied. For example, if you have a parent folder named Payroll and a subfolder named ShopWorkers, you can set auditing on both folders by making your configuration choices on the Payroll folder and then selecting the Replace Auditing Entries On All Child Objects With Entries Shown Here That Apply To Child Objects check box. Thereafter, if you make further selections on the ShopWorkers folder, you’ll find that those choices will be added to the settings being pushed down from the Payroll folder.
F I G U R E 1 . 8 The Access Control Settings dialog box, open at the Auditing tab
4332c01.fm Page 19 Friday, June 4, 2004 7:59 PM

20 Chapter 1 � Configuring, Deploying, and Troubleshooting Security Templates
F I G U R E 1 . 9 Selecting auditing options for a folder
You can also block auditing inheritance from parent objects by clearing the Allow Inher-itable Auditing Entries From The Parent To Propagate To This Object And All Child Objects check box. This allows you to either copy or remove the current auditing policies and create a new set of policies for an individual folder or for a new hierarchy of folders. However, this can be overridden by selecting the Replace Auditing Entries On All Child Objects With Entries Shown Here That Apply To Child Objects check box on a parent folder.
To enable auditing for an Active Directory object, you’ll need to access the object in Active Directory Users And Computers and open the object’s Properties dialog box. From there, create a new Group Policy and create your audit policy for that object. If necessary, you can block pol-icy inheritance so that you can create a new, fresh policy on an individual AD object.
In Exercise 1.2, you will configure an audit policy.
E X E R C I S E 1 . 2
Configuring an Audit Policy
1. Select a target container upon which to configure the audit policy, such as an OU.
2. Open the container’s Properties dialog box.
3. Click the Group Policy tab.
4. Highlight the Group Policy that you want to use and click Edit to open the Group Policy.
5. Navigate to the Audit Policy node under the Local Policies node.
6. Double-click an individual policy setting.
4332c01.fm Page 20 Friday, June 4, 2004 7:59 PM

Configuring Templates 21
User Rights Assignment
You use the User Rights Assignment node to assign user and/or group rights to perform activities on the network (see Figure 1.10). To configure user rights, select the User Rights Assignment node and then double-click the right that you want to configure in the right pane. Select the Define The Policy Settings In The Template check box, and then add the users and/or groups to the setting. Click OK to display the new settings next to the right in the Computer Setting column in the right pane.
In Exercise 1.3, you will configure a user rights policy.
7. Click the Define These Policy Settings check box.
8. Make your configuration choices.
9. Click OK to close the Policy Settings dialog box.
10. Close the Group Policy dialog box by selecting Close from the Group Policy menu.
11. Click OK to close the container’s Properties dialog box.
E X E R C I S E 1 . 3
Configuring a User Rights Policy
1. Select a target container upon which to configure the user rights, such as an OU.
2. Open the container’s Properties dialog box.
3. Click the Group Policy tab.
4. Select the Group Policy that you want to use and click Edit. This will open the Group Policy.
5. Navigate to the User Rights Assignments node under the Local Policies node.
6. Double-click an individual policy setting.
7. Click the Define These Policy Settings check box.
8. Click Add to open the Add User Or Group input box. Select the user and/or group accounts that you want to apply this policy setting to by clicking the Browse button. This will open the Select Users Or Groups box.
9. Click OK to close the Select Users Or Groups box after making your selection.
10. Click OK to close the User And Group Names box.
11. Click OK to close the policy setting.
12. Close the Group Policy dialog box by selecting Close from the Group Policy menu.
13. Click OK to close the container’s Properties dialog box.
E X E R C I S E 1 . 2 ( c o n t i n u e d )
4332c01.fm Page 21 Friday, June 4, 2004 7:59 PM

22 Chapter 1 � Configuring, Deploying, and Troubleshooting Security Templates
F I G U R E 1 . 1 0 The User Rights Assignment node and settings in the Security Templates console
Security Options
The Security Options node provides many options to strengthen security on your network. The options are too numerous to list here, but some of the highlights include the following:� Do Not Display Last Username In Logon Screen� Automatically Logoff Users When Logon Time Expires� Message Text For Users Attempting To Logon� Force Communications Between Servers To Be Digitally Signed
You set options in this node in the same way that you assign user rights.In Exercise 1.4, you will configure the last logged-on username so that it does not appear in
the Logon dialog box. This practice is highly encouraged on production networks. After all, an intruder only needs only two pieces of information to break into most networks: a valid user account and the password. By leaving the logged-on username configured in the default setting, an intruder will be able to acquire a valid username with very little effort.
E X E R C I S E 1 . 4
Configuring the Last Logged-On Username So That It Doesn’t Appear in the Logon Dialog Box
1. Select a target container upon which to configure the account policy. In this example, you’ll select the domain object.
2. Open the container’s Properties dialog box.
3. Click the Group Policy tab.
4332c01.fm Page 22 Friday, June 4, 2004 7:59 PM

Configuring Templates 23
System Services
You use the System Services node to configure the startup and access control settings for each of the system services such as the Server service, Workstation server, DHCP (Dynamic Host Configuration Protocol) server, and so forth.
Setting a system service policy can be both useful and destructive. Make sure that the services configured in your template don’t conflict with any of the roles that your servers or worksta-tions are performing.
To configure a system service setting, select the System Services node in the left pane (see Figure 1.11). Double-click the target service in the right pane. Click the Define This Policy In The Template check box to open the security dialog box for this service. Edit the security as needed and then select the startup mode for the service. Click OK to configure a policy for a system service.
F I G U R E 1 . 1 1 The System Services node in the Security Template console
4. Select the Group Policy that you want to use and click Edit to open the Group Policy.
5. Navigate to the Security Options node under the Local Policies node.
6. Double-click Do Not Display Last Logged On Username In Logon Screen policy setting to open this policy setting.
7. Select the Define This Policy Setting check box.
8. Make your desired configuration choices.
9. Click OK to close the policy setting.
10. Close the Group Policy dialog box by selecting Close from the Group Policy menu.
11. Click OK to close the container’s Properties dialog box.
E X E R C I S E 1 . 4 ( c o n t i n u e d )
4332c01.fm Page 23 Friday, June 4, 2004 7:59 PM

24 Chapter 1 � Configuring, Deploying, and Troubleshooting Security Templates
In Exercise 1.5, you will configure a policy for a system service.
Registry and File System Permissions
You use the Registry node to configure both access control entries and auditing values for spe-cific Registry keys. To modify the Registry settings, first select the Registry node in the left pane. Some templates may not display anything in the right pane, but those that can modify the Reg-istry entries will display a list of Registry settings in the right pane. The hisecdc template does not show the registry settings (see Figure 1.12). Use the compatws template, for example, to show the registry settings.
In the left pane, right-click Registry and then select Add Key and browse the registry to the section you would like to select. Click OK. Verify that the security settings are appropriate and click OK again. In the Add Object window, you can configure the settings for the new permissions for that Registry key (see Figure 1.13). From here, you can configure the key and then do the following:� Add permissions to existing permissions on the key and subkeys.� Replace existing permissions on all subkeys.
E X E R C I S E 1 . 5
Configuring a System Service Security and Startup Policy
1. Select a target container upon which to configure the account policy, such as an OU.
2. Open the container’s Properties dialog box.
3. Click the Group Policy tab.
4. Select the Group Policy that you want to use and click Edit to open the Group Policy.
5. Navigate to the System Services node under the Security Settings node.
6. Double-click an individual security policy setting.
7. Select the Define These Policy Settings check box. The Security tab for this setting will automatically appear.
8. Make your configurations by clicking the Browse button to add user and/or group accounts from the Select Users, Groups Or Computers dialog box. If you are happy with the Every-one Group as the only choice, then you need not click the Add or Remove buttons. Once you’ve made your selections, they will appear on the Security tab of the service. Click OK to close the Security tab.
9. Select the Service Startup Mode that you need for this service and click OK to close the policy setting.
10. Close the Group Policy dialog box by selecting Close from the Group Policy menu.
11. Click OK to close the container’s Properties dialog box.
4332c01.fm Page 24 Friday, June 4, 2004 7:59 PM

Configuring Templates 25
You can also select to not allow permissions to be replaced on this key. This selection is most helpful after the desired permissions have been applied to the key or if you want to essentially block permission inheritance on a particular key.
To change the permissions on the key, click the Edit Security button and make your selection.If you right-click the Registry node, you can add a key and then configure permissions on
that individual key. By designating individual keys, you can set and then block permissions for an individual key in the Registry and ensure that those permissions will persist after other set-tings have been applied.
File system permissions work exactly the same way as described for the Registry permission set-tings, except you will be working on file and folder hierarchies and not on Registry keys. The look and feel of the dialog boxes is the same under the File System node as it is for the Registry node.
F I G U R E 1 . 1 2 The Registry node in the Security Templates console
F I G U R E 1 . 1 3 The Add Object dialog box
4332c01.fm Page 25 Friday, June 4, 2004 7:59 PM

26 Chapter 1 � Configuring, Deploying, and Troubleshooting Security Templates
In Exercise 1.6, you will configure a Registry setting for a security policy.
Restricted Groups
You use the Restricted Groups node to define who should and should not belong to a specific group. When a template with a restricted Group Policy is applied to a system, the Security Con-figuration Tool Set adds and deletes members from specified groups to ensure that the actual group membership coincides with the settings defined in the template.
For example, you might want to add the Enterprise Admins to all Domain Admins security groups or to add the Domain Admins group to all Local Administrators groups on your work-stations and servers.
To create a restricted Group Policy, right-click the Restricted Groups node and choose Add Group from the shortcut menu. Select the group that you want to modify by either entering the group’s name or browsing to find and select the group. Then click OK.
E X E R C I S E 1 . 6
Configuring a Registry Setting Policy
1. Select a target container upon which to configure the Registry setting, such as a domain.
2. Open the container’s Properties dialog box.
3. Click the Group Policy tab.
4. Select the Group Policy that you want to use and click Edit to open the Group Policy.
5. Navigate to the Registry Settings node under the Security Settings node.
6. Right-click the Registry Settings node and select Add Key from the context menu. This will open the Select Registry Key box.
7. Select a key from the list to be entered into the policy. The Security tab for this key’s prop-erties will automatically appear.
8. Make your security choices for this key by clicking the Browse button on the Security tab to select user and/or group accounts from the Add Users, Groups Or Computers dialog box.
9. Select the type of permission(s) that you want the account to enjoy for this key.
10. Click OK to close the Security tab.
11. Configure how you want permissions to be applied to the key in the Add Object dialog box and then click OK to close the dialog box.
12. Close the Group Policy dialog box by selecting Close from the Group Policy menu.
13. Click OK to close the container’s Properties dialog box.
4332c01.fm Page 26 Friday, June 4, 2004 7:59 PM

Configuring Templates 27
You’ll see the group in the right pane. Right-click the group and select Security from the shortcut menu to open the Configure Membership tab, as shown in Figure 1.14. You can con-figure the membership of this group or configure the groups of which this group will be a mem-ber. Make your choices about membership and then click OK. The group membership policy will now be set.
F I G U R E 1 . 1 4 The Configure Membership tab
In Exercise 1.7, you will add the Domain Administrators Global Security group to a new security group that you have created. For this exercise to work properly, you’ll first need to cre-ate a new security group.
Using Security Policies to Configure Settings for DNS Dynamic Updates
You have decided that you want to prevent your Windows XP and 2000 Professional worksta-tions from registering an A (host) and PTR (pointer) record with your DNS (Domain Name Ser-vice) server. You’d like to rely on your Domain Host Configuration Protocol (DHCP) server to perform the registrations for your workstations. How would you go about this?
Well, the way to do this is to configure the following Registry key on each workstation:
HKLM\System\CurrentControlSet\Services\Tcpip\Parameters\DisableDynamicUpdate
How would you configure this Registry key network-wide? Create a GPO and apply it to the OU that hosts your workstations. Modify the GPO to include this registry key. Wait two hours to ensure that the Registry key has been applied to all your workstations. Thereafter, when the workstations reboot, the DHCP server will register their DNS settings.
4332c01.fm Page 27 Friday, June 4, 2004 7:59 PM

28 Chapter 1 � Configuring, Deploying, and Troubleshooting Security Templates
Event Logs
The settings for the event logs are configured under a common policy, regardless of the log type. As you can see in Figure 1.15, you can set the log size, guest access, the log retention period, and other options unique to log files in Windows Server 2003, Windows 2000 Server and Profes-sional, and Windows XP Professional. To change the configurations on these settings, simply double-click the setting in the right pane and make your configuration choices. Changing these settings works the same as it does for account and local polices, described earlier in this chapter.
E X E R C I S E 1 . 7
Adding the Domain Administrators Global Security Group to a New Security Group That You Have Created
1. Select a target container upon which to configure the account policy, usually a domain container.
2. Open the container’s Properties dialog box.
3. Click the Group Policy tab.
4. Select the Group Policy that you want to use and click Edit to open the Group Policy.
5. Navigate to the Restricted Groups node.
6. Right-click the Restricted Groups node and choose Add Group from the shortcut menu to open the Add Group box. Click the Browse button to open the Select Groups box and select the Domain Administrators Security Global Group.
7. Click OK to close the Select Groups box.
8. Click OK to close the Add Group box.
9. Right-click the Domain Administrators group in the right pane of the Group Policy and select Security from the context menu to open the Configure Membership For Guests dialog box.
10. In the This Group Is A Member Of section, click Add to display the Group Membership box. If you don’t know the name of the group that you wish to use, click Browse to display the Select Group selection box and select the group from this box.
11. Click OK to close the Select Groups box.
12. Click OK to close the Group membership box.
13. Click OK to close the Configure Membership box.
14. Close the Group Policy dialog box by selecting Close from the Group Policy menu.
15. Click OK to close the container’s Properties dialog box.
4332c01.fm Page 28 Friday, June 4, 2004 7:59 PM

Deploying Security Templates 29
F I G U R E 1 . 1 5 Event log settings in the Security Template console
Deploying Security TemplatesAfter you configure your security templates to your requirements, you’ll need to deploy them. This section describes two ways to do so, using group policies and using scripts.
Using Group Policies to Deploy Templates
The best way to deploy security templates is to use a GPO. As mentioned earlier in this chapter, a GPO is a collection of policy settings that is applied in a uniform manner across a set of objects. You can import security templates into a GPO and then apply that GPO to a site, a domain, or an OU.
If you need to apply security settings to one or more Windows Server 2003 computers in a workgroup setting, the only way to do so is to use a local policy template and apply it to the local system directly. Use this method when you are in a workgroup environment, when your Windows Server 2003 server is on a non-Microsoft network, or when no Active Directory is present.
The effective policy applied to a Windows Server 2003, Windows 2000, and Windows XP computer is really the culmination of several policies applied in a particular order. The policies on a Windows 2000 computer are processed in the following order:
1. Local policy of the computer
2. Policies applied at the site level
3. Policies applied at the domain level
4332c01.fm Page 29 Friday, June 4, 2004 7:59 PM

30 Chapter 1 � Configuring, Deploying, and Troubleshooting Security Templates
4. Policies applied at the parent OU level
5. Policies applied at the child OU level
The policy applied last takes precedence. Hence, policies processed at the local OU level override any policy settings defined at other levels. The only exception to this is domain con-trollers, whose account policy settings defined in the default domain controller’s policy over-ride any account policy setting from other GPOs. Hence, domain controllers use the account policies defined in the default domain controller’s policy regardless of the account policies set on the domain.
To assign a GPO to a container in Active Directory, follow these steps:
1. Navigate to the container and open its Properties dialog box.
2. Click the Group Policy tab then click Edit to open the Group Policy.
3. Navigate to the Security Settings node and then right-click the node and select Import Policy from the shortcut menu (see Figure 1.16) to open the Import Policy From selec-tion box.
4. Select the template that you wish to import and click Open. You will be returned to the group policy focused on the Security Settings node.
5. Select Close from the Group Policy menu. You’ve just applied a template to multiple com-puters using a GPO.
Remember that domain controllers update their GPO assignments every 5 min-utes, whereas servers and workstations update every 90 minutes, with a ran-dom offset of 30 minutes.
F I G U R E 1 . 1 6 Selecting Import Policy from the shortcut menu
4332c01.fm Page 30 Friday, June 4, 2004 7:59 PM

Deploying Security Templates 31
To import a policy template for an individual server, use the Local Security Policy console on the Administrative Tools menu.
Using Scripts to Deploy Templates
You can also use the command-line version of the Security Configuration and Analysis tool (secedit.exe) to deploy security templates. Specifically, you use secedit /configure to apply a stored template to one or more computers. Here are the switches and what they mean:
/db filename Use this switch, which is required, to specify the location of the database file that you want to use. The database referred to here is one that is created using the Security Con-figuration and Analysis tool (SCA). We’ll discuss how to do this shortly.
/cfg filename This switch can only be used in conjunction with the /db switch. Use this switch to import a template into an existing database.
/overwrite This switch can only be used when the /cfg switch is used. This switch specifies whether the template in the /cfg switch should be appended to current settings or whether the template should overwrite current settings in the selected database. If you don’t use this switch, the template settings are appended to the current settings.
/areas area1, area2 Use this switch to specify which security areas should be applied with this command. If you don’t use this switch, you apply all the areas of the template. Separate area designations using a single space. Here are the area names and their meanings:
SECURITYPOLICY Apply the local and domain policies.
GROUP_MGMT Apply Restricted Group settings.
USER_RIGHTS Apply User Logon Rights settings.
REGKEYS Apply Registry settings.
FILESTORE Apply File System settings.
SERVICES Apply System Services settings.
/logpath Use this switch to specify the path and name of the log file in which you want to record the results of this command.
/verbose Use this switch if you want to know everything there is to know about the progress of your command and how it is working or not working.
/Quiet This switch suppresses both screen and log file output.
If this is the first time you’re applying the template to one or more computers, your database is named basic.sdb, and the path to the database is x:\securitydbs, use this syntax:
Secedit /configure /db x:\securitydbs\basic.sdb
4332c01.fm Page 31 Friday, June 4, 2004 7:59 PM

32 Chapter 1 � Configuring, Deploying, and Troubleshooting Security Templates
If this is not the first time you’re applying the template to one or more computers, and you want to use a new template to overwrite the existing configurations in basic.sdb, and the new template file is named highsecurity.inf, use this syntax:
Secedit /configure /db x:\securitydbs\basic.sdb /cfg
f:emplates\highsecurity.inf /overwrite
To create a new database in the SCA tool, follow these steps:
1. Create a new MMC with the SCA snap-in.
2. Open the snap-in.
3. Right-click Security Configuration And Analysis and choose Open Database from the shortcut menu to open the Open Database dialog box.
4. In the File Name box, enter a name for the database. The example in Figure 1.17 named the new database HighSecurity.
5. Click Open to open the Import Template dialog box, as shown in Figure 1.18.
F I G U R E 1 . 1 7 The Open Database dialog box
F I G U R E 1 . 1 8 Associating the hisecdc template with the HighSecurity database
4332c01.fm Page 32 Friday, June 4, 2004 7:59 PM

Troubleshooting Security Templates 33
6. Select the template to apply to the database (in this example, the hisecdc template is selected) and then click Open again.
7. By default, the database is saved in the My Documents\security folder of the user account under which you are logged on when the database is created. You can, of course, move the data-base to another location for easier path administration when using the secedit command.
Troubleshooting Security TemplatesWhen troubleshooting security settings, you need to understand which GPO has been applied and at what level that GPO resides. You can determine where a GPO has been applied in the overall folder structure in two ways: look at each site, domain, and OU container or use the gpresult resource kit utility. Let’s look at each technique briefly.
If you want to know which objects a particular GPO has been assigned to, open the Prop-erties dialog box of the GPO in either Active Directory Users And Computers or Active Direc-tory Sites And Services. This dialog box has three tabs: General, Links, and Security. On the Links tab, click Find Now to find all the objects to which this GPO has been explicitly applied. Containers that are inheriting the GPO will not appear on this list.
The gpresult resource kit is a command-line tool that quickly runs through Active Direc-tory and displays the results for your currently logged-on user account as well as the computer at which you are logged on. For your purposes, look to the end of this report and find all the GPOs that have been applied to this computer and user and what areas were affected (see Figure 1.19). Use this information to direct your efforts when troubleshooting the deployment of security templates.
F I G U R E 1 . 1 9 The results of running the gpresult utility at the command prompt
4332c01.fm Page 33 Friday, June 4, 2004 7:59 PM

34 Chapter 1 � Configuring, Deploying, and Troubleshooting Security Templates
One of the most common scenarios when troubleshooting templates is that once applied, they don’t do what you thought they would do. If this happens, bear in mind the following:� Deleting the Group Policy will not remove the configurations.� Appending a policy to current configurations will not remove the configurations.� You will need to overwrite the configurations with the correct configurations.
To overwrite the configurations with a new policy, you can use the secedit command. A more labor-intensive method is to manually make the changes in the currently applied GPO. At this workstation, use the secedit /refresh command to force this new policy to be applied immediately. Either way, you’ll need to somehow rewrite the settings that are amiss in your overall security configuration.
Troubleshooting Group Policy–Applied Templates
Not only do you need the skills necessary to apply security templates via GPOs or command-line tools, but you also need to know how to troubleshoot security templates when something doesn’t work as expected.
This section covers some basic troubleshooting tips for GPOs and discusses the “gotchas” for applying GPOs in a mixed client environment and after a server’s operating system has been upgraded to Windows Server 2003 from Windows NT 4.
A GPO can be applied incorrectly for a number of reasons, but they can be distilled into two common occurrences:� Network problems are preventing the GPO from being applied.� The policy was assigned to the wrong AD container and therefore is not being applied to
the desired objects in AD.
First, eliminate all your network connectivity issues. Check DNS to ensure proper name res-olution, ping your servers, check your cables, and ensure that other traffic is passing over your network. Check the event logs to ensure that there are no warning or stop error messages. If there are, troubleshoot them as needed.
Second, if you’ve applied the GPO to the wrong container—maybe you wanted to apply it to one OU and instead it was applied to another OU—explicitly apply it to the correct OU and then use the secedit /overwrite command to apply a default template to the first OU to remove the unwanted configurations.
If you find that your policies are not being applied after waiting an appropriate amount of time, use the secedit command to refresh the policies in the folder. In other words, if the policy is applied to the correct container and you have eliminated connectivity issues, perhaps the problem is that you haven’t waited long enough for the policy to be applied on its own. Remem-ber that domain controllers update their policies every 5 minutes, but member servers and workstations update every 90 minutes, with a randomized offset of 30 minutes. Hence, you may need to run the secedit command to force the policies to refresh before their scheduled inter-val. The secedit command is run from the command prompt.
4332c01.fm Page 34 Friday, June 4, 2004 7:59 PM

Summary 35
Troubleshooting after Upgrading Operating Systems
Remember that Windows NT 4 policies will not migrate to Windows Server 2003 or Windows 2000, so any *.pol files that were created in your Windows NT 4 domain will not be migrated.
In addition, after you upgrade a Windows NT 4 server to Windows Server 2003, group pol-icies are not automatically applied to that server. Hence, after upgrading a Windows NT 4 server to Windows Server 2003, apply the proper templates to the server to apply at least a base-line of values to the server.
Troubleshooting Mixed Client Environments
If you have a mix of Windows 9x, Windows NT, Windows 2000, and Windows XP clients on your network, pushing out security templates via group policies will not be easy. But you can enable a policy setting to allow the use of Windows NT 4–style policies for your legacy clients.
When configured this way, legacy clients will connect to the Netlogon share to find their .pol file and apply it during logon or logoff. However, if you change the policy, your legacy clients will need to log off and log back on to effect those changes right away. Unlike a Win-dows 2000 client that refreshes its policy settings every 90 minutes, legacy clients apply pol-icies only during logon or logoff. This inefficient method can create some real headaches for administrators who might be more comfortable having their policy changes applied without client intervention.
If the new policies conflict with the old settings, some clients can be in conflict with others; for example, some clients can access a resource and others cannot.
The only real solution here is to adapt to the legacy clients and implement changes during times when you know your legacy clients will soon be logging off or on to the network.
SummaryThis chapter started with an overview of Group Policies and then discussed what security templates are, how you can modify them, and how you can use them to update a GPO. You learned about the various security templates, including the basic and incremental templates. You also learned how to create a new template using the SCA tool, as well as how to trouble-shoot templates.
You also learned that you can use the SCA tool to create new templates for GPOs. You saw how to use the secedit command-line utility to push out new policies to workstations and servers using customized templates.
This chapter also covered troubleshooting policies, which can be a bit tricky. The main thing to remember is that most problems occur from either applying the policy to the wrong container or configuring the wrong settings on the container. The best practice is to always apply a new template to an offline server first to observe the results of the policy before applying it to your production servers.
4332c01.fm Page 35 Friday, June 4, 2004 7:59 PM

36 Chapter 1 � Configuring, Deploying, and Troubleshooting Security Templates
Exam EssentialsKnow how to configure security templates. Be sure that you understand which templates to use when configuring a new template. Be sure that you understand which templates write an entire set of configuration values and which ones merely write new information and assume that a base set of values is already in place.
Know the methods for deploying templates. Be sure to understand that templates can be deployed in several different ways. You can deploy policies by importing them into an existing or a new Group Policy Object, or you can deploy them by using the secedit /configure com-mand. You can use the secedit command to push out templates immediately. You can use a Group Policy to push out changes that don’t need to be pushed out immediately.
Understand the potential hazards of working in mixed client environments. Understand that you can enable the functionality of a Windows NT 4 policy in a Windows 2000 Server envi-ronment using a Group Policy. However, be aware of the timing differences between legacy sys-tems and Windows 2000 Professional systems. Such differences can result in significant headaches when trying to reconfigure policies on your network.
4332c01.fm Page 36 Friday, June 4, 2004 7:59 PM

Review Questions 37
Review Questions1. You have 50 Windows 2000 Professional computers and four Windows 2000 domain control-
lers. Seven of your workstations are running an old application that has not been upgraded to be Windows 2000 compatible. You need to enable this application to run on those seven Win-dows 2000 Professional computers. What actions should you take? (Choose all that apply.)
A. Apply the basicws.inf template. Modify the local policies to allow the application to run.
B. Apply the compatws.inf template to the computers OU.
C. Apply the compatws.inf template.
D. Move the seven computers into their own OU and apply the compatws.inf template to this new OU.
2. You are developing a new security template to be used on all workstations in the engineering lab. You have been told that these computers must have the strongest security settings possi-ble. Which template should you use as the starting point for your customer template?
A. Use the compatws.inf template.
B. Use the DC security.inf template.
C. Use the hisecdc.inf template.
D. Use the hisecws.inf template.
3. You imported the hisecws.inf template to all of your Windows XP and Windows 2000 Pro-fessional workstations. Ever since you imported this template, everyone who uses ACT-T.exe reports problems trying to run the application. ACT-T is a custom application written for use by Windows 95 clients. What should you do?
A. Create a new Group Policy to apply security at the Local Policies level for all worksta-tions that need to run the application.
B. Create a new OU named ACT-T. Create a new Group Policy to apply the hisecdc.inf template to the new OU. Move all workstations that need to run the application to the new OU.
C. Create a new OU named ACT-T. Create a new Group Policy to apply the compatws.inf template to the new OU. Move all workstations that need to run the application to the new OU.
D. Convert the new application to work with Windows Terminal Server in Windows 2000 and then apply the notssid.inf template.
4332c01.fm Page 37 Friday, June 4, 2004 7:59 PM

38 Chapter 1 � Configuring, Deploying, and Troubleshooting Security Templates
4. The Maximum Lifetime For User Ticket Renewal is an example of what kind of policy setting?
A. Password
B. Local
C. Kerberos
D. User Rights Assignment
E. System Services
5. You have a new Windows Server 2003. On this server, you have an industry-specific application that needs a unique set of system rights applied. You have applied those rights correctly. Now you want to install a new security template. You decide to first apply the hisecws.inf template. What will be the result of this action on the permissions that you’ve created for your application?
A. Permissions will be modified.
B. Permissions will not be modified.
C. Permissions will be retained.
D. Permission will be overwritten.
6. You have a special legacy application that needs to run on your Windows Server 2003 server. You do not want to apply the compatws.inf template. What should you do?
A. Add all the user accounts that need to use this application to the Power Users security group.
B. Give the Everyone security group Write permissions to the Netlogon share.
C. Give the Authenticated Users security group Read permissions to the Sysvol folder.
D. Add all the user accounts that need to use this application to the Authenticated Users security group and then add this group to the Power Users security group.
7. You want to implement a high degree of security on three of your Windows Server 2003 member servers. Which template should you use?
A. hisecws.inf
B. hisecdc.inf
C. DC security.inf
D. rootsec.inf
8. You want to enforce a minimum password length of eight characters. You create a new Group Policy object, open the Account Polices node, and select the Minimum Password Length setting. What should you do after double-clicking this setting? (Choose all that apply.)
A. Click the Reset All Passwords To This Length check box.
B. Click the Define This Policy Setting In This Template check box.
C. Clear the Define This Policy Setting In This Template check box.
D. Clear the Reset All Passwords To This Length check box.
E. Select 8 as the number of characters for the minimum password length.
4332c01.fm Page 38 Friday, June 4, 2004 7:59 PM

Review Questions 39
9. You want to enable auditing on the company’s payroll printer. You believe that a malicious user is attempting to use the printer to print bogus payroll checks. You want to find out who this user is before they are successful. What is the best way to do this? (Choose all that apply.)
A. Enable failed logon events.
B. Enable failed object access.
C. Enable successful object access.
D. Enable privilege use tracking.
E. Audit the Authenticated Users security group in the printer’s Properties dialog box.
F. Audit the Power Users security group in the printer’s Properties dialog box.
10. You need to audit all successful and failed logon attempts for 40 Windows Server 2003 member servers and 15 Windows Server 2003 domain controllers. Which option should you use to ensure that all servers are covered by your policy?
A. Account Logon Events
B. Account Management
C. Directory Service Access
D. Logon Events
E. Privilege Use
11. You need to audit who is backing up and restoring files as part of a larger effort to track user activity on your network and ensure overall security. What action should you take?
A. Audit Privilege Use.
B. Audit Process Tracking.
C. Enable Audit Use Of Backup And Restore Privilege under the Security node.
D. Enable Audit Use Of Backup And Restore Privilege under the Local Policies node.
12. You have a folder named Confidential Memos that is accessed only by executives in your com-pany. Inside this folder are two other folders: Current Memos and Past Memos. You need to ensure that auditing is set on all three folders and their files so that your manager can track who is access-ing these folders and their contents. What actions should you take? (Choose all that apply.)
A. Enable successful object access on the domain GPO.
B. Enable Authenticated Users group in the Properties dialog box of the Confidential Memos folder.
C. Select Reset Auditing Entries On All Child Objects in the Confidential Memos folder.
D. Select Apply These Auditing Entries To Objects And/Or Containers Within This Con-tainer Only.
4332c01.fm Page 39 Friday, June 4, 2004 7:59 PM

40 Chapter 1 � Configuring, Deploying, and Troubleshooting Security Templates
13. Your manager has told you that a new Authorized Users message must appear when users log on to your Windows Server 2003 network. Which node will you need to look inside to find the Message Text For Users Attempting To Logon setting?
A. Local Policies
B. User Rights Assignment
C. System Services
D. Security Options
14. You have opened the hisecdc.inf template in the Security Template snap-in. You attempt to modify a permission setting on a Registry value. You discover that the Registry entries are miss-ing. What is the problem?
A. You are working with a template that won’t display the Registry entries.
B. You are working with a corrupt template. Copy an uncorrupted version of the template from another Windows 2000 server.
C. You need to refresh your view to display the Registry entries.
D. You need to be logged on as a member of the Enterprise Administrators security group to see these Registry entries.
15. When applying an audit policy on your network, what part of the object is modified?
A. The object’s properties
B. The object’s System Access Control List
C. The object’s Discretionary Access Control List
D. The object’s advanced properties
16. Which of the following are methods for deploying a security template to one or more comput-ers? (Choose all that apply.)
A. Systems Management Server
B. Group Policy Object
C. secedit /export
D. secedit /configure
17. In your site Group Policy, you selected to remove the Run command from the Start menu. In your computer’s OU Group Policy, you deselected to have the Run command removed from the Start menu. In your domain Group Policy Object, you selected Not Defined for the Remove The Run Command From The Start Menu. What is the effective result of these three policies?
A. The Run command will appear on the Start menu.
B. The Run command will not appear on the Start menu.
C. The Run command will appear but will be grayed out on the Start menu.
D. The Run command will not appear on the Start menu but will be published in Add/Remove Programs in Control Panel.
4332c01.fm Page 40 Friday, June 4, 2004 7:59 PM

Review Questions 41
18. You’ve just implemented a change to your domain security policy. The Group Policy is being applied to the domain controllers OU and is also linked to the computers OU. After 45 minutes, you discover that only a few of the Windows 2000 Professional workstations on your network have the new settings applied. What should you do?
A. Use the secedit /export command to force all the workstations to update with the new security settings.
B. Use the secedit /configure command to force all the workstations to update with the new security settings.
C. Reboot the PDC emulator, because this domain controller is the default domain con-troller on which all group policies are initially applied and modified. Rebooting the server will apply the Group Policy to all the machines on your network.
D. Do nothing. This is expected behavior.
19. You configured new account policy settings in the domain Group Policy Object. You find that it is not being applied to your Windows Server 2003–based computers on your network. You run the secedit /refresh command on each domain controller and wait two hours. Network connectivity issues are not preventing non-policy traffic from working on your network. The policy settings are still not being applied. What should you do?
A. Apply the account policy settings at the site level.
B. Make sure that you have saved the Group Policy settings correctly by rebooting your PDC emulator.
C. Apply the account policy settings at the domain controllers OU.
D. Ensure that you have refreshed all the workstations on your network by running the secedit /refresh command in their logon script. Have all users log off and log back on.
20. You have a user whom you have explicitly denied access to a folder on a Windows Server 2003 member server. How will Windows Server 2003 apply that configuration when the user attempts to open that folder? (Choose all that apply.)
A. By reading the SACL
B. By reading the DACL
C. By reading the ACL
D. By reading the Access Token
4332c01.fm Page 41 Friday, June 4, 2004 7:59 PM

42 Chapter 1 � Configuring, Deploying, and Troubleshooting Security Templates
Answers to Review Questions1. C, D. The compatws.inf template is written to “loosen” permissions on Windows 2000 computers
and servers to allow older applications to work correctly. If you applied this template to the com-puters OU, all 50 computers would have their permissions loosened. Best practice is to move the seven computers to their own OU and have them apply the template to their own OU.
2. D. The hisecws.inf file is the most secure of the existing templates for use with workstations. The compatws template is the least secure. The DC security and the hisecdc templates are for domain controllers and are not meant to be used for workstations.
3. C. The best solution is to apply the compatws template to the workstations running the legacy application. Local Policies will be overwritten by GPOs; the hisecdc template is for domain controllers; and using Windows 2000 is not a good solution because it requires a new server and configuration of terminal services, which is cost prohibitive and actually means taking a step backward in operating systems.
4. C. The Kerberos protocol uses tickets, session tickets, ticket-granting tickets, and user tickets.
5. C. The default security templates do not include configuration values for user rights assignments, including rights assignments created by an application that is installed on Windows 2000 Server.
6. A. The Power Users group enjoys additional permissions that will allow a legacy application not written for Windows 2000 to run on the Windows 2000 platform.
7. A. Even though hisecws.inf may indicate that this is a template for workstations, it is also the template used for member servers (not domain controllers).
8. B, E. By default, all settings are not selected in a new GPO. Therefore, you first need to define the setting in the Group Policy template and then indicate the number of characters that you want to use in the setting.
9. B, E. Because you know that the user has not been successful at printing any checks, it would be better to see who is attempting to print to the printer unsuccessfully. Auditing the Authenticated Users group will include all users who have logged on to your domain.
10. A. This option tracks events related to user logon and logoff activity domain-wide, and the events are recorded on the domain controllers.
11. C. The Audit Privilege node does not track user activity related to backup and restore proce-dures. Therefore, under the Security node, you’ll need to enable Audit Use Of Backup And Restore Privilege.
12. A, B, C. The last option is set only when you want to limit the scope of the policies being applied to the local container and its objects. If more folders are created under the Confidential Memos folder and you have this folder selected, these folders will not inherit the policy settings.
13. C. This node includes many options that you can select to strengthen security on your network.
4332c01.fm Page 42 Friday, June 4, 2004 7:59 PM

Answers to Review Questions 43
14. A. Some templates won’t display the Registry entries. If you need to configure permissions on Registry entries for a new policy template, you’ll need to work with a template that will display these entries.
15. B. Auditing places entries in the System Access Control List.
16. B, D. You can use the Group Policy Object or the secedit / configure command to deploy a security template. The secedit /export command is used to export a security template stored in a security database to a stand-alone template. You can use Microsoft’s Systems Management Server to deploy a secedit script, but that would be unnecessary.
17. A. The most local policy is applied last, and because the policy for the OU deselects this restric-tion, the Run command will appear.
18. D. The workstations are configured to update every 90 minutes, with a random offset of an additional 30 minutes. That the policy has not been applied after 45 minutes to most worksta-tions is not a problem, and you should take no action.
19. C. Domain controllers receive their account policy settings only from the Group Policy object that is applied to the domain controllers OU. Your domain controllers will not recognize account policies applied at any other level or object.
20. B, D. The Windows 2000 operating system will find the explicitly denied access configuration in the discretionary portion of the ACL. The user’s SID, which is found in the Access Token, will be compared to the list of SIDs in the DACL. If there is a match, the match will be enforced. Because the user has been denied access, the user’s SID will be found at the top of the DACL and marked as Denied Access. The Local Security Services on the Windows 2000 server will enforce this setting first, meaning that all other settings in the ACL will be ignored.
4332c01.fm Page 43 Friday, June 4, 2004 7:59 PM

4332c01.fm Page 44 Friday, June 4, 2004 7:59 PM