charcoal burning how to make charcoal at home · your own kiln is to acquire a steel barrel ... you...
TRANSCRIPT
How to make charcoal at homeAfter a day learning how to make charcoal on production scale, Rob Exton tries his hand at DIY burning
T he cheapest and easiest way to create your own kiln is to acquire a steel barrel
(but be careful what has been in it before!). You can create a kiln by removing the top and bottom and making a tight fitting lid similar to the manufactured kilns. Alex Arthur had one for us to use which has a chimney but this is not necessary as long as you can put a lid on at the appropriate time and seal it with sand. After an hour or two the barrel burn is ready to inspect. An alternative method is to cut a section out of the side of the barrel, load and get a good fire burning inside. When you think it’s appropriate roll it over into a shallow trench and earth up the sides to seal. I cannot vouch for the efficacy of this approach as we did not try it with Alex. Those that have used it assure me that it does work, with some practice a good result can be obtained. I have also spent some time experimenting with making small batches of charcoal from twig-sized round wood and some very basic tools. You really can use any size tin that you can find but please make sure it hasn’t had any volatiles in it or you could create a rocket. Alex uses a small metal electrical fuse box, I have used a biscuit tin
before but they seem to be rarer these days. On this occasion I had a clean can with a spring closure to the lid which was ideal.
Releasing the gassesYou still need to let the gasses and steam out, so create a hole about the size of a 5p and fashion a plug to fill the hole at the appropriate time. I was lucky in having a bundle of seasoned willow to use as this appears to be an artist’s favorite, but you can use any wood that is available. Stick-sized pieces of dry twig which clearly snap by hand
Rural Woodcrafts
pressure will do. Load up your tin and put it on a good outside fire (not to be tried indoors on the kitchen cooker!) Within minutes the wood will be cooking and steaming and giving off the volatiles, and you need to assess when to stop the process. This is when the escaping gasses change from white to a hazy blue grey with a heat tremor. I cannot teach this in a magazine article as it needs to be experienced and I do not have enough practice, so you will need a little trial and error, but it’s not a costly process. A small tin will take approximately 30 minutes, a standard size biscuit tin maybe 45 minutes. It all depends on the fire temperature, the ambient temperature, the state of the wood etc..., so don’t expect perfection.
Moving the barrelAfter an hour or so, on a reasonable fire, the results in a much larger tin were disappointing with half the twigs still brown, but there was some progress on the other side. I stoked up the fire with some brown ends and charcoal to a good blaze and put the can back on the fire on the brown side. After a further 30 or so minutes the smoke had cleared again. The can was removed to safety, turned upside down, earthed up and left to cook for an hour or so. After cooling and opening the results were really quite good with prime charcoal sticks any artist would be proud to use. With some 400 sticks produced in this one burn and the cost in art supply
00 November/December 2009 January/February 2010 45
Charcoal Burning
shops of £3 for a dozen sticks we had really added some value to the wood which can now be used as a resource for school visits to Cherry Wood this autumn. Now all you have to do is buy a roll of lining paper and release the inner artist!
For details of Chew Valley Charcoal and their courses contact Alex Arthur on 07742 629769.
Learn more At the end of two hard days in the woods all agreed that it was a fascinating subject but really hard work. I doubt if any of the participants will become full time charcoal burners but their awareness levels were so much higher I am sure the experience will rub off on others as well. If you want to know more about charcoal burning I can highly recommend Charcoal Alex as the man to visit. The only down side is you do get very dirty but it’s good clean dirty – don’t forget that charcoal is used in medicine and cosmetics as well.
Try this!
Alex Arthur uses an old fuse box in a fire to produce small quantities of charcoal. You can use a biscuit tin or similar.You need to make a hole in the lid, about 5p
diameter, to let the gasses escape. Rob had to return the barrel to the fire after the first hour because it had only burnt on one side
A single barrel like this can produce in the range of 400 sticks of charcoal
Move the barrel from the fire to keep cooking for an hour or so, earthed up to keep the oxygen out
You don’t need many tools to make charcoal
Stacking the barrel. Rob used seasoned willow, which is said to be popular with artists
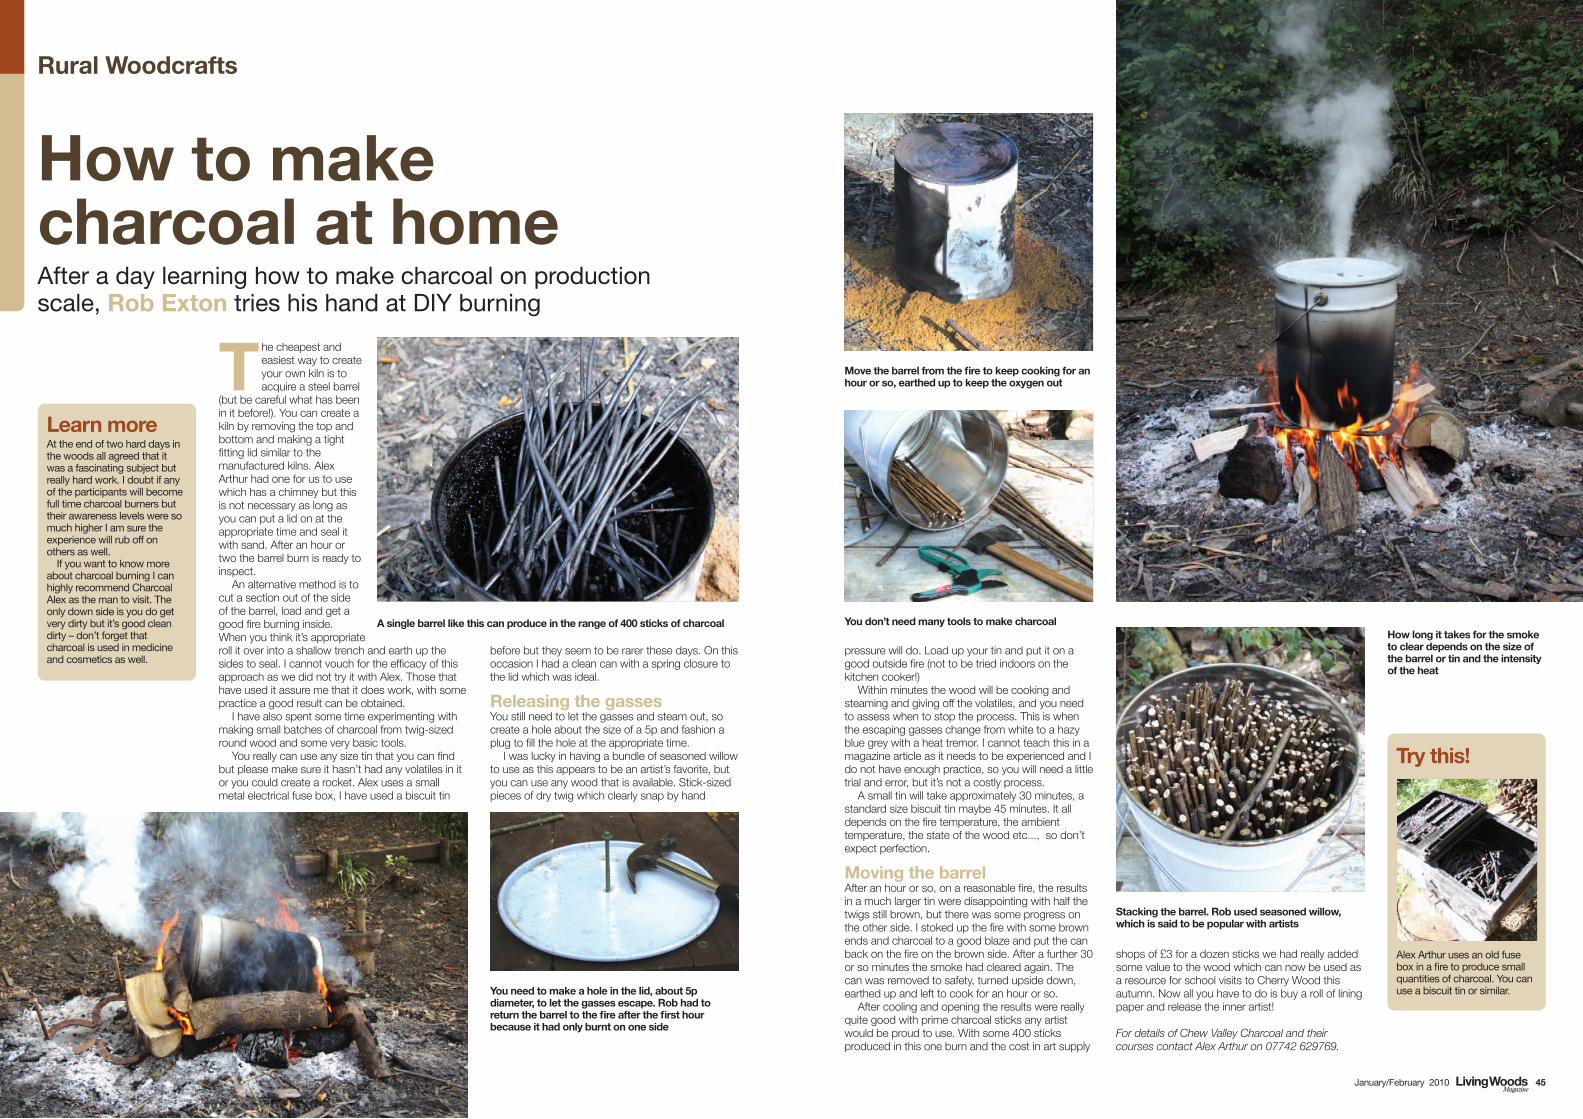
How long it takes for the smoke to clear depends on the size of the barrel or tin and the intensity of the heat