chemistry i - state college area school district · web viewchemistry i. name ... you may find an...
TRANSCRIPT

Laboratory Manual
Introductory Experiments and Procedures
Chemistry I
Name ________________________________
Period ________
Lab Station _____
Mr. Gallagher
0

Room 132Contents:
Introduction p. 2Lab #1 Observations of a Burning Candle p. 3Lab #2 Percent Oxygen in the Atmosphere p. 7Lab #3 Using the Bunsen Burner p. 8Lab #4 Separation of a Simple Mixture p. 11Lab #5 Classification of Matter p. 14Lab #6 Density Lab p. 16Lab #7 Percent Sugar in Soda p. 22Lab #8 Testing the Mettle of Metal p. 24Lab #9 Striking It Rich p. 27Lab #10 Emission Spectroscopy p. 29Lab #11 Types of Chemical Bonds p. 33Lab #12 Polar and Nonpolar Molecules p. 37Lab #13 Microscale Crystallization p. 40Lab #14 Pyrolysis of Wood p. 43Lab #15 Formula of a Hydrate p. 45Lab #16 Types of Chemical Reactions p. 47Lab #17 The Iron Chemist p. 55Lab #18 Copper Cycle Lab p. 57Lab #19 Serial Dilutions p. 62Lab #20 Acid-Base Properties of Com. Sub. p. 65Lab #21 Acid-Base Titration p. 66Lab #22 Heat of Combustion Lab p. 68Lab #23 Radioactive Decay and Half-Life p. 71Common Laboratory Equipment List p. 74Lab Drawer Equipment List p. 75Interpreting Chemical Hazard Labels p. 76Unit Conversions and Formulas p. 78Rules for Proper Graphing Technique p. 79Chemistry I Course Guidelines p. 80Student Safety Contract Rules p. 81Student Safety Contract Sign-off Sheet p. 83
Lab Partners:
Names Phone # email
________________________ _________________ __________________
________________________ _________________ __________________
1

Introduction:
The study of chemistry is vital to understanding the natural world around you. The principles of chemistry are at the heart of nearly every aspect of life that you perhaps take for granted, but nevertheless, depend upon every day. The agricultural, automotive, cosmetics, energy, food service, pharmaceutical, and plastics industries, just to name a few, are directly dependent upon an in-depth understanding of chemistry. New advances in chemistry will eventually have a positive impact on the quality of your life. Chemists will play a major role in finding ways to clean up the environment, develop alternative sources of fuel, and increase crop yields around the world. In addition to all of these practical benefits, chemistry is a fascinating subject, worthy of study for curiosity’s sake.
Chemistry is also an experimental science. Experimentation is the key to discovery and valid experiments depend on accurate measurements and detailed observations. Therefore, we will be focusing on measurement and observation techniques in our first unit. One of the main objectives of this course is for you to develop the thinking skills and habits of a scientist. Here is a partial list of some of these characteristics.
Scientists: Pay attention to detail. Are careful to record their observations and results Look for connections. Never stop asking questions. Are not afraid to try new things. Talk to other scientists about their results and ideas.
The laboratory activities in this unit are designed to challenge you to utilize these skills. As the year goes on, you will need to employ these skills in order to succeed in this class, and hopefully you will utilize them for the rest of your life.
“The most important of my discoveries have been suggested to me by my failures.”
~ Sir Humphrey Davy
2

Lab #1 Observations of a Burning Candle
“The Greatest enemy of knowledge is not ignorance, it is the illusion of knowledge.” ~Stephen Hawking
Objectives:1. To improve your observation skills.2. To learn to ask questions that lead to discovery.3. To develop a hypothesis of the process of the burning of a candle based on evidence
derived from your observations.
Note: Include labeled drawings with all of your observations.
Part A – Initial ObservationsProcedure:Light a candle and record your observations with as much detail as you can. Here are some suggestions to help you observe more thoroughly: What are the colors of the flame? What is the shape of the flame? Is the candle’s flame hollow? What is the color and shape of the wick? Does the wick give visible evidence of being hot? Does the wick get longer as the candle wax is consumed? Is the wick combustible? Does the wick burn right at the surface of the candle wax?
Observations:
Unanswered questions:
Part B - What’s in a Flame?Blow gently at the candle flame through a horizontal straw that is held about one inch from the flame. Start at the top and work down. What do you see? Record your observations in the form of several labeled diagrams. You may want to include this method of recording observations throughout this lab.
Observations:
3

Part C – Where There’s Smoke!Blow out the flame. What do you see? Describe the smoke. From what part of the candle does the smoke originate? What is the last site of smoke generation? Hypothesize as to the composition of the smoke. What other event(s) occurs with the cessation of smoke generation?
Observations:
Relight the candle and allow it to burn for about a minute. With a lighted match in one hand, blow out the candle and hold the burning match in the rising column of smoke about an inch above the candle’s wick. What happens? Does this support your hypothesis about the composition of the smoke?
Observations:
Part D – Scorch MarksMove a horizontally held notecard (that has been moistened with water on the underside) quickly down over the flame to a height where the card almost touches the wick. Hold the notecard in this position just long enough for the flame to scorch through to the upper side of the card, but not long enough to cause it to burst into flames. (If the card begins to burn, toss it into the sink and run water to extinguish the flame.) Draw a pattern of the scorched area on the top of the card. Note the shading.
Observations:
4

Part E – The Chimney EffectWind a length of copper wire (16 gauge or heavier) around a pencil about ten times, leaving enough uncoiled to serve as a handle. Carefully slip the coiled wire off the pencil. Lower the coiled portion over the flame so that the flame is passing through the center of the coils and the copper coils wrap around the flame. You may need to vary the height of the coiled wire to achieve the desired effect. Record your observations.
Observations:
Vary the length of the coiled portion and the spacing between the individual coils. Note how each affects the candle flame.
Observations:
Crush the head of a burnt match into a fine powder and place some of this material into the liquid in the bowl of the burning candle. Observe the motion of these particles in the liquid.
Observations:
Part F – Wikipee?Lengthen the wick to about 1 cm by removing some of the wax. Light the candle and allow it to burn for a minute or so. Place the edge of a clean scoopula against the wick about halfway up the wick. Do not allow the scoopula to touch the wax. Observe for at least one minute and record your observations.
Observations:
5

Analysis and Conclusions:
Based on all of your observations propose a hypothesis for how a candle burns. Describe the entire process. Be specific. Include all of the components of the candle; the solid wax, the melted wax, the wick, the flame, and any other relevant facts. Be sure to refer to your observations in parts A-F to support your hypothesis.
Grading:
Observations (Completion) Part A (2) ___Part B (2) ___Part C (3) ___Part D (2) ___Part E (3) ___Part F (2) ___
Observations (Quality)Excellent - Thoughtful & Detailed 6Good - requires more detail/thought 4Average – be more observant 3Poor – superficial 2
Conclusion (5) ___
Total (25) ___
6

Lab #2 Percent Oxygen in the Atmosphere
Objective: In this lab you will be determining the percentage of oxygen in the air you breathe.
Procedure:1. Clean the outside of a large ignition tube with alcohol and let dry.2. Obtain a metric ruler and glass marking pencil. Starting from the open-end of the
tube mark every centimeter on the outside of the tube with the marking pencil.3. Fill a 400 mL beaker about ¾ full with tap water.4. Obtain a small piece of steel wool. Prepare a 50:50 mixture of vinegar and water
by mixing 10 mL of vinegar with 10 mL of water in a beaker. Soak the steel wool in a 50:50 mixture of vinegar/water for 1 minute. Remove the steel wool and carefully squeeze out any excess solution.
5. Pull the steel wool apart to increase the surface area. Push the steel wool into the marked ignition tube with a stirring rod.
6. Cover the end of the tube with your finger and invert tube into beaker of water. 7. Every 5 minutes, move the test tube so that the water level inside the tube is equal
to the water level in the beaker. Record the height of the water.8. Continue to measure and record the height every five until the water level stops
changing. Allow the tube with steel wool to sit over night.9. Carefully measure the height of the water and record.10. Record the color of the steel wool.
Analysis: (Complete on separate paper)1. Complete the following calculation;
distance water traveled up in the tube ----------------------------------------------- x 100% =
total length of tube
2. Where did the oxygen go?3. Were the changes that you observed physical or chemical? Explain.4. Air is about 20.8% oxygen. How does your value compare to this value?
Calculate the percent error for your value and propose some reasons as to why your value is different.
5. Write a procedure to determine the mass of oxygen that was removed from the air in the tube.
Grading Rubric: Lab procedure and technique ___ (5)Observations and results ___ (3)Analysis Questions (2,3) ___ (3)Analysis Questions (4,5) ___ (4)
Total ___ (15)
7

“All truths are easy to understand once they are discovered; the point is to discover them.” ~ Galileo Galilei
8

9

10

Lab #4 Separation of a Simple MixtureObjectives:
1. To separate a mixture of iron, sulfur and salt.2. To recover as much of the original mass as possible.3. To learn important laboratory techniques.
Pre-Lab:Define the following terms:
1. Pure substance –
2. Element –
3. Compound –
4. Homogeneous mixture –
5. Heterogeneous mixture –
Procedure:1. Mass a clean, dry watch-glass.2. Place a scoop of the iron-sulfur-salt mixture on the watch-glass, and determine the
mass of the mixture.3. Use a magnet to remove the iron from the mixture. Transfer the iron to a pre-
massed piece of weighing paper. You may need to go over the mixture more than once. Determine the mass of the iron.
4. Transfer the sulfur-salt mixture to a 50 mL beaker. Add 25 mL of water and stir with a glass stirring rod to dissolve the salt.
5. Place a piece of pre-massed filter paper in a funnel and place the funnel in a 125 mL Erlenmeyer flask.
6. Filter the mixture and collect the filtrate – the liquid that passes through the filter.7. Wash the residue in the filter with 15 mL of water and collect the rinse water with
the filtrate. Set the filter paper and residue aside to dry.8. Transfer the filtrate to a pre-massed evaporating dish. Set up a ring stand to hold
the evaporating dish and evaporate the water from the filtrate using a #2 flame with the Bunsen burner. Try to avoid spattering during evaporation.
9. Allow the evaporating dish to cool and then determine the mass of the recovered salt.
10. Determine the mass of sulfur once it has completely dried.
Science is built up of facts, as a house is built of
11

stones; but an accumulation of facts is no more a science than a heap of stones is a house. Henri Poincaré
Data:
Table 1 – Mass of original mixture
Mass of original mixture + watch-glass ______________ gMass of watch-glass ______________ gMass of original mixture ______________ g
Table 2 – Mass of iron
Mass of iron + weighing paper ______________ gMass of weighing paper ______________ gMass of iron ______________ g
Table 3 – Mass of sulfur
Mass of filter paper + sulfur ______________ gMass of filter paper ______________ gMass of sulfur ______________ g
Table 4 – Mass of salt
Mass of evaporating dish + salt ______________ gMass of evaporating dish ______________ gMass of salt ______________ g
Table 5 – Summary of results
Mass of original mixture _______________ gMass of recovered iron + sulfur + salt _______________ g
12

Mass difference _______________ g
Analysis:
1. What properties did you observe in each of the components of the mixture?
2. How did these properties help you to separate the components of the mixture?
3. What types of changes (chemical / physical) were involved in the separation of the components of the mixture?
4. List at least 5 specific factors that may have contributed to the mass difference that you observed.
5. What changes could be made to this procedure to increase the accuracy of the results?
Grading Rubric:
Pre-Lab ____ (2)Laboratory technique ____ (5)Data ____ (5)Analysis ____ (6)Safety and Clean-up ____ (2)
Total ____ (20)
13

Lab #5 Classification of Matter
“Science is organized knowledge. Wisdom is organized life.”~Immanuel Kant:
Introduction: Matter can be classified according to its composition and its properties. Upon careful inspection, matter can first be divided into categories based on whether the composition is uniform throughout or non-uniform and therefore, can be separated into distinct parts. Matter that is uniform in composition and properties can be further categorized as either pure substances or mixtures. Finally, those that are pure substances may be either elements or compounds. Elements are pure substances that cannot be broken down into simpler substances by physical or chemical means. Compounds, on the other hand, are pure substances made of two or more elements that can be broken down into simpler substances by chemical means.
Objective: In this lab you will distinguish between elements and compounds based on mass changes that occur during a chemical reaction.
Materials: crucibles (2) sand papercrucible lid (1) crucible tongsring stand iron ringclay triangle Bunsen burnerelectronic balance
PreLab: Fill in the each box with one of the terms listed below to create a classification scheme that describes all matter.
( Compounds, Elements, Heterogeneous matter, Homogeneous Matter,Homogeneous mixtures / Solutions, Matter, Pure Substances)
14

Procedure:Part 11. Set up the ring stand, iron ring, and clay triangle as shown by your teacher.2. Obtain a clean, dry crucible and record its mass. If you need to use water to clean
it, then you will need to heat the crucible for about 3 minutes to dry it completely. Allow it to cool before proceeding.
3. Place about 0.5 g of the white powder into the crucible and record the mass.4. Place the crucible on the clay triangle and heat it with a #3 flame for 6 minutes.
Allow the crucible to cool for 5 minutes, or until it is cool enough to touch.5. Re-mass the crucible. Calculate the change in mass of the white powder.6. Dispose of the white powder in the trash.
Part 21. While you are waiting for the crucible in part 1 to cool, obtain a second clean, dry
crucible. 2. Record the mass of the crucible and a lid.3. Obtain a metal ribbon and lightly sand its entire surface. Wipe the surface with a
Kim-wipe to remove any dust.4. Loosely coil the metal ribbon and place it in the bottom of the crucible. 5. Mass the crucible and lid with the metal ribbon.6. Place the crucible on the clay triangle, and place the lid on the crucible so that
only a small gap is visible.7. Heat the crucible for 12 minutes with the hottest flame. Allow it to cool for at
least 5 minutes.8. Re-mass the crucible and lid with the contents. Calculate the change in mass of
the metal ribbon.
Data:Data Table 1: Mass of White Powder Before and After Heating
Mass of crucible and powder before heating ________ gMass of crucible ________ gCalculated mass of white powder before heating ________ gMass of crucible and powder after heating ________ gCalculated mass of white powder after heating ________ gChange in mass of white powder ________ g
Data Table 2: Mass of Metal Ribbon Before and After Heating
Mass of crucible, lid and metal before heating ________ gMass of crucible and lid ________ gCalculated mass of metal ribbon ________ g
15

Mass of crucible, lid and metal after heating ________ gCalculated mass of metal (remaining) ________ gChange in mass of metal ________ g
Analysis: [Refer to the stated objective for the lab to answer these questions.]
1. Based on your calculation for the change in mass that you observed in part 1, classify the white powder that you placed in the crucible according to the classification scheme that you created in the pre-lab.
2. Classify the product that was obtained after heating the white powder.
3. Based on your calculation for the change in mass that you observed in part 2, classify the metal ribbon that you placed in the crucible.
4. Classify the product that was obtained after heating the metal ribbon.
5. Hypothesize as to what may have happened in each of the crucibles to cause the changes in mass. Be as specific as possible.
Grading Scale:
PreLab (3) ____Data Table 1 (3) ____Data Table 2 (3) ____Analysis #1 (1) ____
2 (1) ____ 3 (1) ____
16

4 (1) ____ 5 (4) ____
Total (17) ____
Lab # 6 Density Lab
An experiment is a question, which science poses to Nature, and a measurement is the recording of Nature's answer. ~Max Planck
Objectives:
1. To learn the proper use of significant digits in calculations involving measurements.2. To identify seven unknown metals from their measured densities.3. To learn proper graphing techniques and analysis.
Part A - Identifying Unknown Metals
Procedure:
1. Mass each metal object on the balance that is provided at that station.2. Use the measuring instrument available at each station to determine the volume of the
metal object.3. Calculate the density of the metal and report it to the correct number of significant
digits.4. Look up the densities of the metals listed in reference table A.5. Identify each of the metals A – G.
Reference Table A1
Accepted Densities of Metals
Density (g/cm3)AluminumChromiumCopperGalliumIronLeadNickelTinTitaniumZinc
17

Use your periodic table to find the densities of the metals in Table A.
Table A2 – Mass and Volume Measurements of Various Metals
Metal Mass (g) Volume Measurements(cm3)
Calculated Density(g/cm3)
A
B
C
D
E
F
G
Volume formulas:
Rectangular solids: V = length x width x height
Cylinders: V= r2 x height
18

Table A3 – Summary of Results
Metal Balance Precision
(0.1-0.001)
Volume Method
Volume precision
(0.1 – 0.001)
Density (g/cm3)Sig figs
Identity of Metal
A
B
C
D
E
F
G
Calculations:
Part B - Densities of Plastic Cylinders
Procedure:
1. Mass each cylinder on the electronic balance.
19

2. Measure the length and diameter of each cylinder using a ruler.3. Calculate the volume of each cylinder. 4. Create a graph of mass vs. volume and plot the data points from the 12 cylinders
that you measured. (Follow the guidelines listed for proper graphing technique in Appendix B on p. 79.)
Table B1 – Mass and Volume Measurements of Plastic Cylinders
Cylinder # Mass (g) Length (cm) Diameter (cm) Volume (cm3)1
2
3
4
5
6
7
8
9
10
11
12
Analysis:
1. Determine the proper type of line or curve that should be drawn to fit your data.
2. What does this line or curve represent?
3. What are the densities of each of the plastic cylinders?
20

4. What conclusions can be drawn from your graph pertaining to the composition of the plastic cylinders?
Grading Rubric:
Accepted densities of metals (2) ___Data Table A2 (5) ___Summary Table A3 (5) ___
Correct Sig Figs (5) ___Correct Identities (7) ___
21

Data Table B1 (6) ___Graph (6) ___Analysis questions (4) ___
Total (40) ___
Lab #7 Percent Sugar in Soft Drinks
Introduction:In this lab exercise you will gain skill in producing proper graphs from laboratory
data. Graphs are important tools used to express a set of data visually. They enable us to quickly identify trends and relationships among experimental variables. Graphs can also be used to determine the value of an unknown variable such as concentration. Therefore, it is important that the graphs that you create are both neat and accurate.
Refer to the guidelines for proper graphing technique found in Appendix B as you construct your graphs from the data given and obtained. You will be expected to follow these guidelines for all of the graphs you create in this course.
Pre-Lab: Define the following terms and explain how these techniques are used in graphing.
1. extrapolate -
2. interpolate -
3. Describe a real-world situation where extrapolation or interpolation is used.
Objective: To determine the percent sugar found in 2 different soft drinks by graphical analysis.
Materials: Graduated Cylinder (10mL) Sugar solutions: (1%, 5%, 10%, and 20%)Graph paper Soft DrinksBalance
Procedure:Part 11. Tare a dry 10 mL graduated cylinder.2. Pour out 8-10 mL of 1% sugar solution. Do not pour out more than 10 mL!3. Record the volume of the sugar solution.4. Mass the graduated cylinder and sugar solution. Record the mass.5. Calculate the density of the sugar solution and record on the table.6. Use a separate graduated cylinder for each solution or rinse the graduated cylinder
with distilled water and dry before going on.
22

7. Repeat steps 1-5 for the 5%, 10%, and 20% sugar solutions.
Research is to see what everybody else has seen, and to think what nobody else has thought. Albert Szent-Györgi Part 28. Obtain a piece of graph paper.9. Graph the density and the % solution. Refer to proper graphing technique to
determine which variable should go on the x-axis, and which should go on the y-axis.10. Draw the appropriate type of line for these data points. Attach your graph to the lab.
Part 311. Repeat steps 1-5 using three of the soft drinks. Record the data on the table.12. Calculate the density of each soft drink.13. Using the density, determine the percent sugar in each soft drink by interpolating on
the graph from Part 1. Draw the interpolation lines on the graph.
Data Table A: Sugar Solution DensitiesSugar Solution mass (g) volume (mL) density (g/mL)
1%5%10%20%
Soda:_____________Soda:_____________Soda:_____________
Density Calculations- (show your work!)
Analysis:1. What is the percent sugar in each soft drink? % Sugar
__________________________ __________
__________________________ __________
__________________________ __________
2. Which measurement, mass or volume, limits the precision of the value of the % sugar? Explain your choice.
23

3. List at least 4 very specific sources of error that could affect your calculated % sugar in your soda samples. Simply saying incorrect mass or volume measurements does not count! Specify what could have contributed to incorrect mass or volume measurements.
Lab #8 Testing the Mettle of MetalA Controlled Experiment
Introduction:How closely matched are a series of measurements or observations is called
reproducibility. Scientific measurements are usually repeated to show reproducibility. If measurements or observations are not reproducible, there must be a reason. Anything that affects reproducibility is called a variable. Experiments are usually designed to study only one variable at a time. All other variables are held constant so that they do not affect the experimental results with repeated measurements. Such experiments are called “controlled experiments”. Conclusions that are drawn from experiments that are not controlled, and/or that have not demonstrated reproducible results are invalid.
In this experiment you will study the effects that various methods of heating and cooling have on the physical properties of a certain metal. In order to establish the effect that is caused by each method of heating and cooling you will first perform the bending test on metal that has not been heated. This will serve as the experimental control. You will also perform multiple trials for each experiment so that you can demonstrate reproducibility and therefore draw valid conclusions from your results.
Metals are used for a wide variety of applications. In certain uses, the metal must be able to bend easily without breaking, and in other applications we may need the metal to resist bending. We may be able to find the desired property by choosing different metals or by mixing metals to create an alloy. However, another option available to metallurgists is to heat treat a metal to create the desired properties required for a specific application. In this experiment you will investigate the effects of the heat treatment techniques known as annealing, quenching, and tempering.
Objective:To determine the effects of annealing, quenching, and tempering on metals.
Pre-Lab:
A. Define the following terms:
1. Annealing –
2. Quenching –
3. Tempering –
24

B. Create a hypothesis as to which process will enable the metal to be bent the most without breaking and which process will cause the metal to be the most brittle.
C. Read the procedure and prepare the appropriate data tables.Procedure:
Control Sample
1. Straighten a bobby pin and determine the number of times it must be bent in order to break it in two. Record this on the data table. Repeat this procedure two more times.
Annealing
1. Heat a bobby pin to red-hot by holding it over a #3 flame with crucible tongs. It must remain red hot for thirty seconds. Then gradually lift it straight up until it is about 12 inches out of the flame. Let the sample cool gradually for about three minutes. This process of strong heating and slow cooling is called annealing.
2. After it has cooled, bend it back and forth until it breaks and record the number of bends that it takes to break the metal.
3. Repeat this procedure two more times.
Quenching
1. Heat a bobby pin to red-hot by holding it over a #3 flame with crucible tongs. When it is red hot, immediately place it in a beaker of water. This process of strong heating and quick cooling is called quenching.
2. Bend the pin back and forth until it breaks and record the number of bends needed to break the pin.
3. Repeat this procedure two more times.
Tempering
1. Heat a bobby pin to red-hot by holding it over a #3 flame with crucible tongs and keep it red-hot for thirty seconds. Then place it in a beaker of water. Reheat the pin until it glows with a dull redness and remove it gradually from the flame as you did in the annealing process. This process of strong heating, quick cooling, strong heating and then slow cooling is called tempering.
2. Bend the pin as before and determine the number of bends needed to break the pin.
3. Repeat this procedure two more times.
Repeat these four procedures (control, annealing, quenching, and tempering) for any other metals that are available for you to test.
25

Those who have an excessive faith in their theories or in their ideas are not only poorly disposed to make discoveries, but they also make very poor observations. Claude Bernard
Analysis:
1. Describe the effects of annealing on a metal.
2. What applications of metals would benefit from the annealing process?
3. Describe the effects of quenching on a metal.
4. What applications of metals would benefit from the quenching process?
5. Describe the effects of tempering on a metal.
6. What applications of metals would benefit from the tempering process?
7. Based on the requirements for controlled experiments, evaluate the validity of the conclusions that you drew from results of your experiments.
26

Lab # 9 Striking It Rich!
Safety Precautions :
Sodium hydroxide is very caustic! It will burn your eyes and your skin. Keep your safety goggles on at all times and wear a lab apron. Be sure to clean up any spills and wash your hands when you are finished.
Refer to pp. 89-91 in the ChemCom textbook for the procedure for this experiment. Note that there are a few additional steps that you will be required to perform.
Additions to lab procedure:
1. Mass each of the pennies before beginning the experiment.2. Mass each of the pennies after you have completed the experiment. Be sure to rinse
and dry the pennies that you altered.
Data / Observations:
Penny YearInitialMass (g)
Final mass(g)
Initial appearance
Appearance after NaOHtreatment
Appearanceafter heating
1
2
3
Analysis:
1. Describe the changes in mass for each penny.
27

2. What tests could you perform to determine if penny #2 was really silver and penny #3 was really gold?
3. Were the changes that you observed physical changes or chemical changes? Explain your answer.
4. Do you think that it would be possible to convert the pennies back to their initial condition? Explain your answer.
5. What is the Law of Conservation of Matter?
6. Explain how your lab results relate to this law.
7. Think about what happened to the copper atoms as the pennies went through their various changes. Also consider any other atoms that may have been involved in these changes. Propose a hypothesis to explain what happened to all of the atoms involved to cause the visible changes that you saw. Pay particular attention to the sequence of events involving the atoms and their changes. Draw a labeled diagram to help with your written explanation.
Grading: Lab technique (5) ___Observations (3)
___Analysis #1 (1) ___
#2 (1) ___ #3 (2) ___ #4 (2) ___ #5 (1) ___ #6 (2) ___ #7 (5) ___Total (22) ___
28

Science progresses best when observations force us to alter our preconceptions.
Vera Rubin
Lab #10 EMISSION SPECTROSCOPY
Introduction:When you look at a rainbow you are looking at an example of a continuous
spectrum, which is produced when white light is refracted through a prism or water droplets. In a continuous spectrum all the wavelengths of light are present and so the colors of light appear to gradually blend from one to the next. However, a bright-line spectrum seems to have many of the colors missing and only a few or in some cases dozens of bright colored lines are visible. What causes these bright-line spectra and what do they have to do with atomic theory or the structure of the atom? When atoms of various gases are excited with heat or electrical energy, they emit light of characteristic color. The color that is visible is actually a composite of light of specific wavelengths that can be seen as bright lines when viewed through a spectroscope. The color and therefore the wavelength of each bright line are determined by the energy of the light that is emitted from the atom. Each bright line corresponds to a specific amount of energy that is emitted (hence the term “emission spectroscopy”) when an electron loses the energy that it absorbed and returns to a lower energy level. This series of bright lines or bright-line spectrum is unique for each gas, and serves as an atomic fingerprint that can be used to identify the gas. This method actually led to the discovery of Helium on the sun before it was discovered on earth.
But why are there only a few distinct bright lines generated instead of a continuous spectrum? The reason is that the electrons moving around in an atom may only possess certain specific amounts of energy. Think of electrons as occupying positions on a staircase. You may find an electron on the first step or the second step or the fifth step, but you’ll never find an electron hanging out in between two steps. Therefore, the difference in energy between two given steps will be a set value for a given staircase. Now think about how this analogy relates to the atom. The steps on the staircase represent the allowable energy levels or quantum shells. When an electron moves from a higher energy level to a lower energy level the excess energy is given off in the form of light. The energy of the light and therefore its color will depend on the difference in energy between the two levels.
Before you perform this experiment, you are going to calculate the wavelengths of light that you should observe when you look at the bright-line spectrum of Hydrogen.You may want to refer to pp. 92-94 in your textbook for more background on this topic.
29

Pre-Lab Assignment:
Show all of your work, including the units for your calculations!
1. What is the difference between a continuous spectrum and a bright-line spectrum?
2. The energies of the four visible bright lines in the Hydrogen spectrum are as follows: (3.027 x 10⁻¹⁹ J), (4.086 x 10⁻¹⁹ J), (4.576 x 10⁻¹⁹ J), and (4.843 x 10⁻¹⁹J). Remember as you work on this lab that these energies represent two related things; the energy of the light given off and the difference in energy (DE) between two different energy levels. Calculate the frequency (n) of each of the bright lines of Hydrogen. Use Planck’s equation, which states that the energy of light is equal to Planck’s constant times the frequency of the light. E = h . n where Planck’s constant, h = 6.626 x 10⁻³⁴ J. s The units for frequency are 1/s or a Hertz (Hz). One Hertz is a cycle per second.
3. Once you have calculated the frequency of each bright line, you will now be able to calculate the wavelength of each bright line. The frequency of a wave and the wavelength are related by the equation c = l . n , where c is the speed of light and l (lambda) is the wavelength. The speed of light is a constant and is equal to 2.9979 x 10⁸ m/s. Convert the wavelengths from meters to Angstroms. 1 m = 1010 A
5. Now that you have the wavelengths of each line, use the chart below to predict the color of each of the bright lines.
Color wavelength range
Violet 3800 – 4500 A
30

Indigo 4200 – 4500 ABlue 4500 – 4950 AGreen 4950 – 5700 AYellow 5700 – 5900 AOrange 5900 – 6200 ARed 6200 – 7500 A
Summary of Predicted Results:
Line Energy (J) Frequency (1/s) Wavelength (A) Predicted Color
1.2.3.4.
Objectives:You will observe the bright-line or emission spectra for several gases. You will use the emission spectra to identify 3 unknown gases. You will also calculate the energy involved in producing the bright lines of certain colors for hydrogen.
Procedure:
1. Create four charts on graph paper like the one below. You will use colored pencils to record the emission spectra for each of the gases observed. Be as precise as you can when recording the location of each line.
Identity of Gas _________________wavelength (Angstroms)
4000 5000 6000 7000
|_|_|_|_|_|_|_|_|_|_|_|_|_|_|_|_|_|_|_|_|_|_|_|_|_|_|_|_|_|_|_| || |___________________________________________
2. Use the reference chart provided to identify the unknown gases.
Analysis: (Show your work for all calculations, including the units!)
1. Compare the wavelengths of the spectral lines that you observed for hydrogen and compare them with the wavelengths that you calculated in the pre-lab assignment. Calculate the percent error for each of the lines that you observed.
2. Which of the values were more precise; your observed wavelengths or the calculated wavelengths? How do you account for this difference in precision?
31

3. Now you will be performing the same calculations that you did in the Pre-lab, but in reverse order. You will start with your observed wavelengths and calculate the energies of each observed bright line. First calculate the frequency of each line and then calculate the energy of each line. Remember to report your answer to the correct number of significant digits!
4. The visible lines in the Hydrogen spectrum all result when electrons return to the n=2 energy level. From which of the energy levels (n=3, n=4, etc.) did the electrons that created each of the four bright lines originate? Explain on what you base your answers.
Summary of Calculated Results:
Line Color Wavelength (A) Frequency (1/s) Energy (J)
1.2.3.4.
5. Read section 3.3 pp. 92-94 in your textbook (Holt). Write a significantly detailed summary that explains your observations from the lab. This will serve as your conclusion for the lab.
Grading Rubric: Pre-Lab Assignment ____ (12)Spectra of Elements (4) ____ (12)Identities of unknowns ____ (3)
32

Percent Errors ____ (3)Analysis ____ (8)Summary ____ (2)Conclusion ____ (4)
Total ____ (44)
Lab #11 Types of Chemical Bonds and Physical Properties
Introduction:The type of chemical bonds present in a compound will determine the general
physical properties of that compound. In this experiment the properties of solubility, melting point and conductivity will be compared for typical ionic and covalent compounds. Each of these properties is primarily determined by how easily the particles that make up these compounds can be separated under various circumstances. However, it is important to note that whenever an ionic substance undergoes one of these physical changes, the individual ions that make up the crystal must be separated. Therefore, with ionic compounds the ionic bonds must, in essence, be broken. On the other hand, when a covalent compound undergoes one of these physical changes, the chemical bonds between the atoms are not broken, rather the forces of attraction that exist between molecules must be broken.
Objectives: To compare the properties of solubility, conductivity, and melting point for six compounds and to classify these compounds as ionic or covalent on the basis of these properties.
Materials: 24-well plate oxalic acid iron (II) sulfatecapillary tubes potassium iodide sodium chloridemelt-temp apparatus p-dichlorobenzene sucrosestirring rod cyclohexane in dropperconductivity apparatus distilled water bottles
Prelab: Use the CRC Handbook, the Merck Index, your textbook, or the internet to find the chemical formulas for each of the six compounds to be tested.
Name Formula
Oxalic acid
Iron (II) sulfate
1,4-dichlorobenzene
potassium iodide
33

Sodium chloride
Sucrose
Safety Precaution: While some of these chemicals are common and harmless, some of them are toxic and/or quite reactive. Therefore, do not touch any of them, and wash your hands afterwards as a precaution.
Procedure:
Part 1 – Solubility Tests
1. Place the plastic well-plate on the 24 well-plate guide.2. Half fill the first row of wells with distilled water.3. Use a wood-splint to place a small amount of each chemical into its
designated well, and stir with a plastic stirrer.4. Record your observations, and note if the chemical dissolves completely,
mostly, slightly, or not at all. Do not discard yet, set the well-plate aside for part 2.
5. Repeat this procedure using the ceramic well-plate and the cyclohexane as a solvent, and record your observations. [Note: The cyclohexane will ruin the plastic well-plates, so be sure to use the ceramic plates!]
6. Use a plastic Beral pipet to remove the cyclohexane mixtures from the wells and place them in the organic waste container.
Part 2 – Conductivity Tests
1. Test the conductivity of each compound in the wells containing the distilled water only. Rinse the prongs with distilled water and dry them with a paper towel after each test.
2. Record your observations, and note if the chemical is a strong conductor (bright light), a weak conductor (dim light), or a nonconductor.
3. Discard the distilled water mixtures in the aqueous waste container.
Part 3 – Melting Point Tests
1. Six mortars and pestles are set out for each of the six compounds.2. Grind up a small amount of each compound using the designated mortar and
pestle.3. Place a small amount of the compound into a capillary tube.4. Four Mel-Temp’s are stationed around the lab. Each one is set at a specific
setting. Starting with the one set at the lowest setting, place the capillary tube into the apparatus and watch the substance for about two minutes. If the compound melts, then record the melting point for that substance as less than or equal to the set temperature.
34

5. If the compound does not melt, then remove the capillary tube and place it in the apparatus at the next highest setting, and repeat the procedure.
6. If the compound does not melt after a couple of minutes at the highest temperature, then record its melting point as above that temperature.
7. Repeat this procedure for the remaining compoundsData:
Substance Solubility in water
Solubility in cyclohexane
Electrical conductivity in
H2O
Melting point (oC)
Oxalic acid
Iron (II)sulfate
p-dichloro-benzene
Potassium iodide
Sodium chloride
sucrose
Results : Summarize the results of the tests for each chemical:
Oxalic iron(II) p-dichloro- potassium sodium sucroseAcid sulfate benzene iodide chloride
Solubility*
Conductivity#
Melting point+
35

*For solubility results indicate whether the compound was soluble in only water, only cyclohexane, both solvents or neither solvent.#For conductivity results indicate whether the compound was very conductive, slightly conductive, or non-conductive.+For melting point results indicate whether the compound melted at a high temperature (T >350oC), a moderate temperature (350oC >T > 200oC), or a low temperature (T < 200oC).Analysis:1. Based on the results of your tests, classify each of the six chemicals as either
possessing ionic or covalent bonds.
2. Summarize how the properties of ionic compounds differ from the properties of covalent compounds.
3. Which of the properties that you tested does not seem to give a clear-cut difference between ionic and covalent compounds? Suggest a possible reason for why this ambiguity exists.
4. Write a paragraph describing the difference between how ionic and covalent bonds are formed, and explain how these differences may account for the physical properties of ionic and covalent compounds.
Ref: Chemistry Text, Myers Chapter 5 pp.170-173 Chapter 6 pp.197-198
Grading Scale:Prelab (3) ____Data / Results (6) ____Lab Technique (5) ____Analysis:
1. correct classification (3) ____2. summary of properties (2) ____3. not clear-cut/reason (2) ____
36

4. conclusion (4) ____Total (25) ____
Science, at bottom, is really anti-intellectual. It always distrusts pure reason, and demands the production of objective fact. H.L. Mencken
Lab #12 Polar and Nonpolar Molecules
Model Kit Lab
Introduction:
At this point in your study of chemical bonding, it is important that you learn how to make the distinction between polar / nonpolar bonds vs polar / nonpolar molecules. A polar bond is formed between two atoms if they do not share electrons equally. However, in order to determine if a molecule is polar or nonpolar, you must consider the shape of the molecule in addition to the polarity of the bonds that make up the molecule. Some molecules that contain polar bonds are also polar molecules, but it is possible for a molecule to be nonpolar even though it contains polar bonds. In general, polar molecules will have an asymmetrical shape and nonpolar molecules tend to be symmetrical. (See your note packet).
Pre-Lab Study: Refer to: Chapter 6, Sec. 1 pp. 194-198 in your textbook (Myers) Chapter 4, Sec. 4.4 pp. 106-112 in Miller/Lygre
1-4 Define the following terms:1. electronegativity –
2. polar covalent bond –
3. nonpolar covalent bond –
4. dipole –
5. If a molecule has covalent bonds between different atoms, the shared electrons are pulled toward the (more / less) electronegative atom.
6. Use either your periodic table or figure 4.15 on p. 108 in Miller/Lygre to calculate the electronegativity difference between the following pairs of atoms. Use the chart on the back of this sheet to indicate the type of bond that would be formed between these pairs.
Electronegativity type of bond Difference
37

a. H, Cl _____________ ________________b. Na, Cl _____________ ________________c. C, O _____________ ________________d. H, O _____________ ________________e. C, H _____________ ________________f. N, O _____________ ________________g. N, H _____________ ________________h. Mg, O _____________ ________________
Electronegativity Difference and Bond Type
Electronegativity difference type of bond
0 – 0.49 nonpolar covalent(equal sharing of electrons)
0.50 – 2.1 polar covalent(unequal sharing of electrons)
2.1 – 4.0 ionic(transfer of electrons)
Procedure:Use the model kit to build the following molecules. You must fill every hole in
each “atom” with a peg or spring when you build your molecules. Nitrogen is an exception; you only need to use 3 of the holes. Use the following terms to describe the shape of each molecule: linear, bent, trigonal planar, trigonal pyramid, tetrahedral, ring, then determine whether each molecule is polar or nonpolar.
Data: Shape Polarity
1. CH4 _________________ __________________
2. CH3Cl _________________ __________________
3. O2 _________________ __________________
4. CH3OH _________________ __________________
5. H2O _________________ __________________
6. HBr _________________ __________________
7. CO2 _________________ __________________
8. N2 _________________ __________________
38

9. C2H6 _________________ __________________
10. CCl4 _________________ __________________
11. C2H4O _________________ __________________
12. C6H6 _________________ __________________
Analysis Questions:
1. How does the shape of a molecule affect its polarity?
2. Why do water and carbon dioxide have different polarities? Draw a diagram to help explain your answer.
3. If four pairs of negatively charged electrons are located on the surface a sphere they will repel each other to reach maximum separation. What is the angle between each pair of electrons and the center of the sphere?
4. Explain why CH3Cl is polar but CCl4 is nonpolar.
5. What practical difference does it make whether a molecule is polar or nonpolar? Give an example. See p. 111 in Miller/Lygre.
6. Draw the Lewis-dot structures for molecule #’s 1, 3, 5, 7, 8 and 11.
39

Grading: PreLab (5) ____Data (10) ____Analysis:
1. shape (2) ____2. water/CO2 (2) ____3. angle (1) ____4. CH3Cl v CCl4 (1) ____5. practical diff. (2) ____6. dot structures (3) ____
Total (26) ____
Lab #13 Microscale Crystallization Lab
Introduction:
Crystallization is usually the best technique for purifying a solid. Solubility differences allow the separation of one type of molecule from another, or from various contaminants. Usually the sample is dissolved in an appropriate hot solvent. As the solvent cools, the solution becomes saturated with respect to the substance; further cooling results in crystallization of the solute. In the crystallization process, molecules gradually deposit from solution and attach to each other in an orderly array, or lattice. As the deposit grows, it takes on a characteristic appearance, unique to that substance. The crystal lattice has a high degree of symmetry which excludes molecules with different geometries, size, or intermolecular force characteristics.
The purity of the substance may be checked by its melting point. The key to obtaining an accurate melting point is to raise the temperature slowly. Use the CRC or Merck Index to find the melting point of the pure substance. Impurities usually lower the
Molecules packing in orderly array.
Impurities with different shapes or sizes are excluded.
40

melting point. Impurities may be solvent, water, by-products of reaction, or unreacted starting material. Recrystallization helps eliminate these impurities.
Selecting the proper solvent is critical. The best solvent is one in which the material is insoluble at room temperature but completely soluble when heated. Remember the rule, “like dissolves like.” In the event that you cannot find a single solvent to use the use of solvent pairs may work.
Note: Be sure to include a detailed drawing or photograph of all the crystals that you obtain in this lab.
Theory guides. Experiment decides. An old saying in science, seen attributed to many different persons
Pre-Lab Assignment:Use the CRC, Merck Index or other references to prepare a table of solubilities,
melting points, molecular and structural formulas, and crystalline forms for acetanilide, benzoic acid, caffeine, citric acid, glycine, malonic acid, salicylic acid, and urea. Read over the information sheets carefully. You will need to these throughout the experiment.
Procedure:Note: Keep a detailed record of your procedure and data and observations on
separate paper.
A. Crystallization of Benzoic Acid
Prepare a hot sand bath by half-filling a 250 mL beaker with sand. Place a wire gauze on the hot plate and place the beaker on top. Turn the hot plate to setting 5 and allow the sand to heat up while you are Place 0.050 g of benzoic acid in a medium test tube. Add approximately 10 drops of water to the test tube. Gently heat the solution to boiling on a hot sand bath. The deeper the tube is placed in the sand, the hotter it will be. As soon as boiling begins, continue to add water drop-wise until all the solid just dissolves. Then remove the tube from the sand bath and cork the tube and clamp it; as it cools, observe the phenomenon of crystallization.
After the tube reaches room temperature, cool it in ice, stir the crystals with a Pasteur pipette. Expel the air from the pipette as the tip is pushed to the bottom of the tube. When the tip is firmly and squarely seated in the bottom of the tube, release the bulb and withdraw the water. (See figure 1) Rap the tube sharply on a wood surface to compress the crystals and remove as much of the water as possible with the pipette. Using a stainless steel spatula, scrape the crystals onto a piece of filter paper, fold the paper over the crystals, and squeeze out excess water before allowing the crystals to dry to constant mass. Mass the dry crystals and calculate the percent recovery of product. Determine the melting point with the Mel-Temp apparatus.
B. Crystallization of An Unknown
41

Obtain a sample of an unknown crystal from your teacher. Follow the procedure for selecting a proper solvent to determine the best solvent to use for recrystallizing your unknown. You do not need to mass out precise amounts of your unknown when you are simply trying to determine the best solvent to use. Once you have determined which solvent to use, then dissolve another 0.050 g sample of your assigned unknown in the minimum volume of the appropriate solvent. Heat the solvent in the reaction tube until the unknown crystals completely dissolves. Once the crystals have dissolved, then remove the tube from the sand bath, cork it and place it in the ice bath. Observe the crystallization process. Dry the crystals as before and determine the melting point with the Mel-Temp apparatus. You must submit your purified crystals in a clean, labeled glass vial to Mr. Gallagher for grading.
Analysis:
Part A
1. Determine the melting point of your benzoic acid crystals.2. Calculate the percent error for the melting point of your benzoic acid crystals.3. Calculate the percent recovery of your benzoic acid crystals.
% recovery = mass of recovered crystals/ mass of original x 100
4. Describe the structure of your benzoic acid crystals.
Part B
4. Determine the melting point of your unknown crystals.5. Find the compound from the list in the Pre-lab that has the closest melting point to
your unknown crystals and calculate the percent error for your crystals.6. Determine the identity of your unknown crystals.
Grading RubricPre-Lab Assignment ____ (10)Laboratory technique ____ (10)Data and observations ____ (5)Percent error mp BA ____ (2)Percent recovery ____ (2)Crystal description ____ (2)Percent error mp unknown ____ (2)Identity of unknown ____ (5)Submission of crystals ____ (4)
42

Total ____ (42)
Lab #14 Pyrolysis of Wood
Introduction:Everyone knows that wood will burn. Burning is a process that we call
combustion. Combustion is a process in which a substance is combined with oxygen to produce new compounds and heat is typically released as a by-product. In some cases, such as those involving metals, the combustion process will produce more complex substances. For example, the elemental metal magnesium will be oxidized to produce the compound magnesium oxide. However, many organic compounds, such as those found in wood, also burn but the products of these combustion reactions result in the formation of smaller and simpler substances. This occurs because the combustion process also involves some sort of thermal decomposition in which heat is used to break apart large complex molecules into smaller simpler ones that will readily combine with oxygen. This process of thermal decomposition is known as pyrolysis. Is it possible to perform pyrolysis without combustion? What if you were to remove or limit the amount of oxygen that is available while heating a substance? What happens if you heat wood without actually burning it? What do you think will happen?
Objectives:1. To investigate the differences between direct combustion and pyrolysis.2. To discover what substances are produced from the pyrolysis of wood.
Hypothesis:1. Predict how you think the results of burning wood directly will differ from simply heating the wood without catching the wood on fire.2. Predict which process you think will produce the most residue and state your reasons for your answer.
Pyrolysis vs. Direct Combustion
Procedure:
43

1. Obtain a large test tube and attach it to the ring stand with a utility clamp.2. Adjust the clamp so that the test tube is set at a 45o angle.3. Obtain 3 or 4 wooden splints and break them into thirds.4. Record the mass of the wood and place the pieces in the bottom of the large test tube.5. Adjust the height of the test tube so that it is about 5 or 6 cm above the top of the
Bunsen burner.6. Light the Bunsen burner and heat the bottom of the test tube with a #3 flame. Move
the burner periodically to ensure that the heat is distributed evenly to all of the wood pieces.
7. Record your observations.8. After you have been heating for a minute or so, bring a lit match near the mouth of
the test tube. If the vapors do not ignite, then try again.9. Continue heating the wood until the vapors no longer burn.10. Allow the set-up to cool and then transfer the charcoal into a pre-massed crucible.11. Determine the mass of the remaining charcoal.12. Place the crucible containing the charcoal on a clay triangle that is resting on a small
iron ring attached to the ring stand.13. Heat the crucible strongly with a #3 flame until all of the charcoal is consumed.
Record your observations. Allow the crucible to cool and then mass the crucible and its contents to determine the mass of the remaining ash.
14. Obtain a single wood splint and record its mass.15. Obtain a watch glass and record its mass.16. Hold the wood splint over the watch glass using crucible tongs and light the wood
splint. Try to burn the wood splint as completely as possible. Allow the remaining ash to fall onto the watch glass. Relight any unburned portions of the wood splint if necessary and collect all of the ash. Record your observations.
17. Record the mass of the ash.
Teacher Demonstration:
1. Your instructor will conduct an experiment similar to your first procedure. However, instead of burning the vapors, we will attempt to collect them by condensation.
2. Draw a diagram of your instructor’s experimental set-up.3. Record your observations as your instructor performs the experiment.
Analysis:
1. Calculate the percent of charcoal that remains after the pyrolysis process.2. Calculate the percent of ash that remains after the pyrolysis process.3. Charcoal is primarily composed of carbon. Approximately what percent of the wood
do you think is made of carbon? Is it the same as the percent of charcoal, or is it more or less. Explain your answer.
4. How does the ash differ from the charcoal? What do you think the ash is made up of?5. Calculate the percent of ash that remains after the direct combustion process.
44

6. In what ways does pyrolysis differ from direct combustion? Base your answer at least partly on your results and observations.
7. What did you learn about some of the products of the pyrolysis of wood from your teacher’s experiment?
Conclusion:
1. Evaluate the hypotheses that you made at the beginning of this experiment.2. Summarize what you learned from this experiment.
Scientific principles and laws do not lie on the surface of nature. They are hidden, and must be wrested from nature by an active and elaborate technique of inquiry. John DeweyChem I
Lab # 15 Formula of a Hydrate
Introduction:Some compounds are hygroscopic, which means that they have the ability to
absorb water. When a hygroscopic compound is dissolved in water and then the water evaporates, the remaining crystal contains some of the water and is known as a hydrate. For example, copper (II) sulfate readily dissolves in water to form a blue solution. When the water is evaporated, some of the water molecules remain “trapped” as part of the crystalline structure, and they do so in a specific ratio. The formula of this hydrate would be written as CuSO4 . X H2O where X represents the ratio of water molecules to one CuSO4 formula unit. The objective of this lab is to determine the specific formula of the hydrate of copper (II) sulfate. You will do this by massing the hydrate and then heating it vigorously to drive off the water molecules that are incorporated within the crystalline structure. This process will leave behind the “dry” copper (II) sulfate, known as anhydrous copper (II) sulfate.
Procedure:
Your teacher will demonstrate the proper handling of crucibles.
1. Obtain a crucible and matching lid. Clean if necessary.2. Place the crucible on the clay triangle with the lid slightly ajar. Heat with a #3 flame
for 3 to 4 minutes, gently at first, then strongly, to drive off any water that is adsorbed to the crucible.
3. Allow the crucible and lid to cool on the triangle. When cool to the touch, mass the crucible and lid to the nearest milligram. Record the mass of the empty crucible and lid in your data table.
45

4. Transfer approximately 3 grams of copper (II) sulfate hydrate to the crucible. Mass to the nearest milligram and record the mass of crucible + lid + hydrate. Describe the original appearance of the compound.
5. Calculate and record the mass of copper (II) sulfate hydrate before heating.6. Replace the crucible on the clay triangle. With the lid slightly ajar as before, heat the
contents gently at first, then strongly for 8 to 10 minutes.7. Slide the lid to completely close the crucible and allow it to cool. When cool to the
touch, mass the crucible + lid + anhydrous copper (II) sulfate to the nearest milligram. Calculate and record the mass of the anhydrous copper (II) sulfate.
8. Calculate and record the mass of water lost. Describe the appearance of the compound after heating.
9. After massing the anhydrous compound, carefully transfer it to a clean test tube. Add about 20 drops of distilled water. Observe (visually and by touch) the behavior of the mixture. You may dispose of this solution down the drain with lots of water.
Data: Mass Data for Copper (II) Sulfate
Mass of crucible + lid + hydrate (before) (g)Mass of empty crucible + lid (g)Mass of hydrate (g)Mass of crucible + lid + anhydrous CuSO4 (g)Mass of anhydrous copper (II) sulfate (g)Mass of water lost (g)
Observations: Initial appearance before heating:
Final appearance after heating:
Results of water addition to anhydrous crystals:
Analysis: (Show all of your work including units for all calculations.)1. Calculate the number of moles of anhydrous copper (II) sulfate.
2. Calculate the number of moles of water lost.
3. Calculate the ratio of moles of water to moles of anhydrous copper (II) sulfate.
4. Write the formula you determined for this hydrate.
5. Ask the teacher about the correct formula and then calculate your percent error.
46

% error = calculated value – actual value x 100 actual value
6. Discuss at least three specific sources of experimental error that could have affected your results.
7. Propose a hypothesis to explain your observations in step 9 of the procedure. Think in terms of what was required to create the anhydrous compound and what you did to re-create the hydrate.
Grading Rubric:Data and lab technique (8) ___ % error calculation (1) ___Observations (quality) (4) ___ Sources of error (2) ___Calcualtions (1-3) (3) ___ Hypothesis step 9 (2) ___Accuracy of formula (4) ___ Total (24) ___
Chemical Reactions Unit
Lab # 16 Types of Chemical Reactions LabVerifying Products
Introduction: In class you are learning about the different types of chemical reactions, and now is your chance to see them in action. The objective of this lab is for you to conduct two successful reactions for four of the five types. You will conduct the experiments while making careful observations. If a reaction is successful, then you will have to verify that your predicted reaction did indeed take place by matching your observations with the known properties of the chemicals that you claim have been produced. This will require that you look up the properties of the suspected products in the CRC Handbook or the Merck Index, or you can use the reference charts provided at the end of this lab handout.
Pre-Lab Assignment: (See page 7)1. Give the general patterns, i.e., (A + B C + D) for the following reaction types.
Composition ________________________________________
Complete Combustion __________________________________
Decomposition ________________________________________
Double Replacement __________________________________
Single Replacement __________________________________
47

2. What determines if a single replacement reaction will occur spontaneously or not?
3. What determines if a double replacement reaction will occur spontaneously or not?
4. What are the seven diatomic elemental molecules?
5. How do you test for the presence of hydrogen gas?
6. How do you test for the presence of oxygen gas?
7. Which reagent provided can act as a catalyst for certain reactions?
Reagent List:
Metals: Cu, Mg, Zn Solids: MnO2 Liquids: H2O2, H2O
Aqueous solutions: AgNO3, BaCl2, CuSO4, NaCl, Na2CO3, HCl, H2SO4, Na2SO4
Safety Precautions: You must wear your safety goggles at all times!!!
Procedure:
Composition 1
1. Obtain a strip of copper metal and hold it in the hottest part of a #3 Bunsen burner flame with crucible tongs for about 1 minute.
2. Remove the copper from the flame and allow it to cool in the air.3. Record your observations. 4. Reheat the copper strip in the flame and then cool it by placing it in a beaker of tap
water. Record your observations.5. Write the balanced equation for the reaction that you think has occurred.6. Provide physical evidence to verify that your predicted reaction did in fact take place.
Refer to pages 7 and 8 of this lab for all reactions.
Composition 2
1. Obtain a 5 cm strip of magnesium metal.2. Using crucible tongs, hold the magnesium in a #3 Bunsen burner flame until it
ignites. (Caution: Do not stare directly at the flame!)3. Record your observations and write the balanced equation for this reaction.
48

4. Provide evidence to verify this reaction. See pages 7 and 8 of this lab.
Observations for Composition Reactions:
1.
2.
Single Replacement 1
1. Place about 5 mL of the copper (II) sulfate solution into a medium test tube.2. Place a piece of zinc metal into the solution and observe for approximately 5 minutes.3. Write the balanced equation for the reaction that occurred and provide evidence to
verify your prediction.
Single Replacement 2
1. Obtain a small test tube to serve as a reaction vessel and a Beral pipet bulb to serve as a gas collection chamber. See figure 1 below.
2. Completely fill the gas collection chamber with water.3. Fill the test tube (reaction vessel) 1/3 full with 1 M hydrochloric acid (HCl). 4. Fold a 3-cm strip of magnesium metal, and place it into the test tube.5. Immediately attach the cork with the plastic tube on the reaction vessel and place the
collection chamber over the tube to begin collecting gas.6. Stop collecting gas when the collection chamber is 7/8 full of gas.7. Remove the collection chamber but keep the opening of the chamber pointed
downwards to prevent the gas from escaping.8. Squeeze the collected gas into the flame of a Bunsen burner and record your
observations. If nothing happens, then repeat the procedure.
Observations for Single Replacement Reactions:
1.
49

2.
Figure 1 Gas Collection Reaction Vessel
Double Replacement 1
1. Place about 10 drops of the silver nitrate solution into a well plate. 2. Add 10 drops of the sodium chloride solution to the same well.3. Record your observations and write the balanced equation for the predicted reaction.4. Supply evidence from your observations that your predicted reaction occurred.5. Dispose of the reaction mixture in the aqueous waste container.
Double Replacement 2
1. Place about 10 drops of the barium chloride solution into a well plate. 2. Add 10 drops of the sodium sulfate solution to the same well.3. Record your observations and write the balanced equation for the predicted reaction.4. Supply evidence from your observations that your predicted reaction occurred.5. Dispose of the reaction mixture in the aqueous waste container.
Observations for Double Replacement Reactions:
1.
2.
50

Decomposition 1
1. Obtain a small test tube to serve as a reaction vessel and a Beral pipet bulb to serve as a gas collection chamber. See figure 1 on p. 3.
2. Completely fill the gas collection chamber with water.3. Half fill the test tube (reaction vessel) with hydrogen peroxide. 4. Place a small scoop of MnO2 into the test tube.5. Immediately attach the cork with the plastic tube on the reaction vessel and place the
collection chamber over the tube to begin collecting gas.6. Stop collecting gas when the collection chamber is 7/8 full of gas.7. Remove the collection chamber but keep the opening of the chamber pointed
downwards to prevent the gas from escaping.8. Test the gas by lighting a wood splint, allow it to burn for several seconds and then
blow it out.9. Immediately squeeze a puff of the collected gas toward the glowing splint. Record
your observations. If nothing happens, then repeat the procedure.Decomposition 2
1. Obtain an electrolysis apparatus as described by your teacher. See Figure 2 below.2. Fill the reservoir ¾ full with tap water and then add about 10 mL of 3M sulfuric acid
solution (H2SO4) to the reservoir and stir to mix.3. Fill two medium test tubes with water from the reservoir. 4. Invert the test tubes into the reservoir without allowing any air to fill the test tubes.5. Attach the test tubes to the electrolysis apparatus and connect the wires to the power
source provided.6. Turn on the power source and record your observations. You may need to look
closely to see the tiny gas bubbles that are forming. Allow the apparatus to run long enough to collect at least 5 cm of gas in one of the test tubes.
7. Record your observations. Pay particular attention to the relative amounts of gas that is collected in each test tube.
Observations for Decomposition Reactions:
1.
2.
51

Figure 2 Electrolysis Apparatus
Composition Reactions:
Predicted Balanced EquationSpontaneous
(Y / N)Evidence
1.
2.
Single Replacement Reactions:
Predicted Balanced EquationSpontaneous
(Y / N)Evidence/Source
1.
2.
Double Replacement
Predicted Balanced EquationSpontaneous
(Y / N)Evidence/Source
52

1.
2.
Decomposition Reactions:
Predicted Balanced EquationSpontaneous
(Y / N)Evidence/Source
1.
2.
Additional Notes: You must read this before beginning the lab!
1. Record detailed observations for each reaction. Remember that you must verify that the substances that you predicted to form were actually produced.
2. Small amounts of MnO2 can be used as a catalyst for a decomposition reaction involving hydrogen peroxide. A catalyst is not used up during a chemical reaction and therefore, it is not listed as a reactant but it is written above the arrow in a chemical equation.
3. To test for the presence of oxygen gas, light a wooden split and blow it out. Quickly place the splint near the source of the gas. If oxygen is present in sufficient quantity, the splint will re-ignite or at least glow more brightly.
4. To test for the presence of hydrogen gas, bring a burning wooden splint or Bunsen burner flame near the source of the gas. If hydrogen is present in sufficient quantity, you will hear a sudden pop.
5. Remember that seven elements form diatomic molecules when they occur by themselves. (H2, N2, O2, F2, Cl2, Br2, I2)
6. Single replacement reactions will occur spontaneously if the lone metal reactant is more active than the metal ion present in the compound.
7. Double replacement reactions will be spontaneous if either of the following occurs:- the formation of an insoluble precipitate.- the formation of a stable covalent compound such as H2O or CO2
8. The reaction of an element with oxygen gas can often occur if the element is heated strongly in a #3 flame and then removed from the flame and exposed to the air.
9. A chemical reaction is considered to be spontaneous in this lab if it occurs to a significant extent at room temperature without the input of additional energy.
53

Physical Properties of Selected Substances:
Name color solubility in water
Copper (II) hydroxide blue gel, or light blue crystals insolubleCopper (I) oxide yellow, red, or brown powder insolubleCopper (II) oxide black, to brownish black powder insolubleCopper (I) sulfide blue, to grayish black powder insolubleCopper (II) sulfide black powder insolubleMagnesium hydroxide colorless crystals insolubleMagnesium oxide very fine white powder insolubleZinc sulfide grayish-white to yellowish powder insoluble
Types of Chemical Reactions LabGrading Rubric
Pre-Lab Assignment (5) ____Observations (quality) (12) ____
54

Predicted Reactions (20) ____Evidence (verification) (8) ____Lab Technique (10) ____Clean-up (5) ____
Total (60) ____
Lab # 17 The Iron Chemist
Objective - To produce 0.750 grams of iron (III) oxide from iron (III) chloride hexahydrate.
Reactions:
FeCl3 + NH4OH Fe(OH)3 + NH4Cl
Fe(OH)3 Fe2O3 + H2O
Materials: Iron (III) chloride hexahydrate, 250 mL beaker, 3.0 M HCl, 3.0 M NH4OH, distilled water, filter paper, funnel, clay triangle, crucible, crucible tongs, and Bunsen burner.
Procedure:1. Based on the reactions, determine the mass of iron chloride hexahydrate needed to
produce 0.750 grams of iron (III) oxide. 2. Dissolve the iron compound in a minimal amount of 3.0 M HCl.3. This is a very important step! Add 3.0 M NH4OH to the solution until it turns
basic. Test with red litmus paper. Stir thoroughly and let the solution sit for a minute and test with litmus again. If it is not blue add several drops of 7 M NH4OH.
4. Gently boil the solution for approximately five minutes.5. Fold a piece of filter paper and place in a funnel. Transfer all of the precipitate to
the filter paper by washing with distilled water and filter. Make sure to transfer
55

all of the precipitate to the filter paper. The effluent should be colorless and clear. If is not then go back to step 3.
6. Mass a clean, dry crucible. Record the mass.7. Remove the filter paper from the funnel and gently squeeze out the water. 8. Place the wet filter into the crucible and gently heat to char the paper. Once the
paper has begun to burn, place the lid on the crucible and increase the heat. Oxygen can be added by gently and carefully blowing into the crucible.
9. Once the paper has completely burned, heat strongly for 10 more minutes.10. Place the crucible on a wire gauze and allow to cool. 11. Once cool, mass the crucible and its contents. Record the mass. 12. Determine the mass of the iron (III) oxide by subtracting the mass of the crucible.
Observations:
Analysis
1. Calculate the percent yield.
Experimental mass of Fe2O3
---------------------------------- x 100% = % yieldTheoretical mass of Fe2O3
2. What are some possible sources of error in this lab? Be specific and describe how these errors would affect you results.
3. What chemical reaction is happening in procedure step 10 as the contents of the crucible are cooling? Refer to your observations to help answer this question.
Conclusion
56

Write a short paragraph that addresses the following;
Did you meet your objective for the lab? How was this accomplished? What types of reactions did you observe? What mass of iron (III) oxide did you produce? What was your percent yield? How can you improve your yield?
Lab # 18 Copper Cycle Lab
Introduction:In this experiment you will take a sample of pure copper, follow it through a
series of reactions, and recover the copper in the end. You will need to record your observations in detail as you attempt to identify the products as well as the type of reaction that occurred at each step. You will then determine the percent of the original copper that you recovered.
Safety:You must wear safety goggles at all times while in the laboratory. Several
corrosive and dangerous chemicals will be used. Handle concentrated nitric acid (HNO3), 3M sodium hydroxide (NaOH), 3M sulfuric acid (H2SO4), and 3M hydrochloric acid (HCl) with care. If you spill any chemicals on your hands, wash them thoroughly. The gas produced when copper reacts with nitric acid is toxic – perform this reaction under the fume hood. Read the procedure for each section through completely before beginning that section!
Procedure:Part A Disappearing Copper
1. Obtain a sheet of copper and mass it to the nearest milligram.2. Place the copper in a clean 250 mL beaker. Label the beaker with your initials.3. UNDER DIRECT SUPERVISION OF THE TEACHER, place the beaker in the fume hood and add 10 mL of concentrated nitric acid. DO NOT BREATHE THE FUMES! Leave the beaker in the hood until the reaction is complete.4. Record all your observations.
Part B Basic Blue Goo
57

1. Be aware that the contents of the beaker are still very acidic!2. Set the beaker in an ice bath.3. Very slowly, add about 20 mL of 3M NaOH to the beaker, stirring constantly.4. Use a glass stirring rod to place a small drop of the liquid from the beaker
onto a piece of red litmus paper. (Do not place the litmus paper directly on the lab bench.) If the litmus paper does not turn dark blue, then continue to add NaOH several drops at a time until the litmus paper turns dark blue. Note: Some of the light blue precipitate may stick to the litmus paper. This does not mean that the litmus paper has turned blue. A positive result can be confirmed when the paper that absorbs the liquid has turned dark blue.
Part C Muddying the Water (Safety Note: Potential Explosion Hazard!)1. Set up a ring stand to hold the beaker over the Bunsen burner. Use the small
iron ring to hold the wire gauze on which you will place the beaker. Use the large iron ring to place around the beaker to keep it from tipping over.
2. Use a small, light blue flame to gently heat the contents of the beaker.3. Continue gentle heating until the reaction is complete. Aggressive heating
will cause the contents to spatter out of the beaker in a violent manner. You should periodically remove the Bunsen burner from beneath the beaker to slow the heating process.
Part D Clearing Things Up1. Allow the product from part C to settle.2. Carefully decant and discard the clear portion down the drain with lots of
water. Be careful not to lose any of the solid.3. Add 25 mL of 3M H2SO4.4. Stir until the reaction is complete. The change is very obvious.
Part E Completing the Cycle1. Add a few pieces of mossy zinc to the product of part D. Do not breathe the
fumes given off during this reaction. The gas is a product of the reaction between the zinc and the excess sulfuric acid from part D.
2. This reaction is complete when all of the blue color has been removed from the solution. If the reaction appears to stop before it is complete, your teacher will add some powdered zinc to the beaker to speed up the reaction.
3. This reaction will produce a lot of heat which may convert the free copper back to an oxide, an undesirable result. Therefore, as the reaction nears completion, place the beaker in a cool water bath.
4. After the reaction is complete, remove any large chunks of un-reacted zinc. Before you remove the zinc from the beaker, use a distilled water bottle to squirt off any copper that is sticking to the zinc back into the beaker.
Part F Mopping Up1. Add 20 mL of 3M HCl to the beaker. The purpose of the HCl is to use up the
excess zinc that could not be removed by hand. The HCl reacts readily with zinc, but not with copper.
2. When the reaction is complete (no more bubbles), decant the liquid carefully, so as not to lose any of the copper.
3. Rinse the product with distilled water at least 3 times, decanting each time.
58

4. Mass a piece of filter paper, fold it, and place it in a plastic funnel. Wet the filter paper to keep it in place. Place the funnel in a 250 mL Erlenmeyer flask.
5. Add about 50 mL of distilled water to the copper in the beaker. Swirl the beaker to stir up the copper, and carefully pour it into the funnel.
6. Add more water to the copper as needed to transfer it to the funnel.7. Use the rubber policeman to transfer any remaining copper to the filter paper.8. After the water has dripped through, carefully remove the filter paper, unfold
it, place it on a paper towel, and allow it to dry overnight.9. Mass the dry copper and filter paper.
Data and Observations:
Table 1 - Mass Data:Mass of copper metal (part A) ________Mass of filter paper + recovered copper ________Mass of filter paper ________Mass of recovered copper (part F) ________Percent recovery of impure copper ________
Part ABalanced Equation
+ + +
Chemical name
State of matter(s, l, g, aq)Grams
Molar mass
Moles
Detailed Observations:
Type of reaction: _________________________ + _________________________ (combination of 2 types)
59

Calculations: Show a sample calculation for each type of calculation. Show all of your work, including units and significant digits.
Part BBalanced Equation
+ +
Chemical name
State of matter(s, l, g, aq)Grams
Molar mass
Moles
Detailed Observations
Type of reaction: _______________________
Part CBalanced Equation +
60

Chemical name
State of matter(s, l, g, aq)Grams
Molar mass
Moles
Detailed Observations:
Type of reaction: ________________________
Part DBalanced Equation
+ +
Chemical name
State of matterGrams
Molar mass
Moles
Detailed Observations:
Type of reaction: ___________________________
Part E
61

Balanced Equation
+ +
Chemical name
State of matterGrams
Molar mass
Moles
Detailed Observations:
Type of reaction: ___________________________
Part FBalanced Equation
+ +
Chemical name
State of matterObservations:
Type of reaction: ____________________________
Analysis:1. Show a sample calculation for each of the different calculations that you had to
perform. Be sure to include all of the proper units and report your answers to the proper number of significant digits.
2. Calculate the percent yield for the recovered copper.
% yield = (mass of recovered copper/mass of original copper) x 100
3. Evaluate the relative purity of your recovered copper and discuss at least three specific substances that are likely candidates that could be contaminating your recovered copper, and describe at which part of the lab these contaminants originated.
62

4. Create a detailed diagram showing each step of this experiment. Be sure to illustrate the cyclic nature of the entire process. This diagram should be drawn neatly on a separate sheet of paper / poster, and it should be done in color.
Grading Rubric: Mass Data (2) ____Balanced equations (6) ____Chemical names (3) ____Calculations (15) ____Observations (9) ____Percent yield (2) ____Purity evaluation (3) ____Diagram* (10) ____
Total (50) ____
Lab # 19 Serial Dilutions
Introduction: Making accurate dilutions of an original stock solution is a very important laboratory skill. Many systematic errors that occur during the course of an experiment occur while making dilutions. Since the original solution is usually much more concentrated than the diluted solution you are making, any excess from the original solution will have a profound impact on the concentration of the new solution. Therefore, it is imperative that you work carefully and accurately. This is especially true when you are making “serial dilutions”. It is a good practice to use a new pipette each time you are making a new dilution. If this is not possible, then you should thoroughly rinse the pipette several times with distilled water. Also, note that if you dilute a solution in a volumetric flask above the graduation line, it is impossible to reverse that mistake by removing the excess solution, since some mixing has inevitably occurred.
Objectives: You will make a stock solution of known concentration*. You will then perform a series of dilutions of this solution as accurately as possible. You will be graded on technique and accuracy.
Pre-Lab:Read step 1 of the procedure, and calculate the mass of KMnO4 that you will need
to weigh in order to create a 0.0150 M solution using a 50.00 mL volumetric flask. You must show the instructor your calculation before you may begin the lab.
63

Procedure: 1. Make a 0.01500 M solution of KMnO4. (Toxic! Do not touch!)a. You will first need to calculate the mass of KMnO4 that you will
need to place in a total volume of 50.00 mL to create a 0.01500 M solution. Use a plastic weigh boat to mass this amount of solute.
b. Refer to the figure at the bottom of p. 463 in your textbook, Holt, for the proper technique for making solutions.
c. This first solution is referred to a the Stock solution.2. Make a ten-fold (1:10) dilution of stock solution.
a. Transfer the stock solution to a clean and dry beaker.b. Use a 10.00 mL pipet to transfer 10.00 mL of the stock solution
from the beaker into a 100.00 mL volumetric flask.c. Be certain that all of the solute is completely dissolved before
proceeding to the next step.3. Make a 12.5-fold (1:12.5) dilution of this new solution. a. Transfer the solution from the 100.00 mL volumetric flask to a
clean and dry 250 mL beaker. b. Use a 5.00 mL pipet to transfer 2.00 mL of the solution from the
beaker into a 25.00 mL volumetric flask. c. Be sure to shake the solution with the stopper on to ensure proper
mixing.4. Place approximately 5 mL of this final dilution into a clean cuvette and
bring this solution to your instructor.5. Record the absorbance from the Spec 20 of your final solution.
Calculations:1. Create a standard concentration curve of Absorbance vs. [KMnO4]
from the standard data provided by your teacher. From your standard curve, determine the molarity of your final solution.
2. Compare your actual molarity with the calculated molarity, and calculate the percent error of your dilution.
3. Calculate the mass of KMnO4 that can be obtained upon the evaporation of the water from your final solution based on the concentration determined from the standard curve.
4. Discuss the specific sources of possible errors that may have contributed to the inaccuracy of your results. Indicate whether these sources would have caused the measured concentration to be too high or too low.
[The accuracy of your solution will be determined spectrophotometrically.]
64

Grading: Pre-Lab calculation (2) ____ +/- 2% = 10/10Lab technique and clean-up (6) ____ +/- 5% = 8/10Standard Concentration curve (3) ____ +/- 8% = 7/10Calculation of final molarity (2) ____ +/- 12%= 6/10Calculation of mass of KMnO4 (2) ____ +/- 15%= 5/10Accuracy of final solution (10) ____ +/- 20%= 4/10Sources of error (5) ____ +/- 25%= 2/10
Total (30) ____ >25%=1/10
* When massing a solid solute to make a solution, you must determine if the solid is anhydrous, a hydrate or if it is hygroscopic. If it is a hydrate, you must take into account the additional mass from the water. If the solid is hygroscopic, such as sodium hydroxide, you can only make a solution of approximate concentration. To determine the concentration more precisely, you would need to standardize the solution by titrating it with a solution of known concentration. KMnO4 is anhydrous.
Lab #20 Acid – Base Properties of Common Substances
Sample Predict A/B/N
Predict Rank (1-16)
Red Litmus
Blue Litmus
pH paper
pH meter
conducts? Y/N/S
Rank(1-16)
AmmoniaBaking sodaBleachCocoaCoffeeDistilled waterMilkOrange juiceRain waterSodaShampooTap waterTeaVinegar0.10M HCl0.10M NaOH
Analysis Questions:
65

1. Which substance is the most acidic? ________________
2. Which substance is the most basic? ________________
3. Rank all 16 substances from most acidic (1) to most basic (16) to the left of the table.
4. What is the purpose of red litmus paper?
5. What is the purpose of blue litmus paper?
6. List at least 4 properties of acids.
7. List at least 4 properties of bases.
8. When you take the pH of something, what do you think it is actually measuring?
9. How is it possible for us to consume substances with such a wide range of pH’s?
10. What may account for the differences in properties between tap water, rain water, and distilled water?
Lab #21 Acid – Base Titration
Objective: To determine the concentration of an acid.
Pre-Lab: Look up definitions for the following terms: (See pp. 550-555, Holt)
Titration –
End point –
Equivalence point –
Titrant –
Standard solution –
Safety Precautions: Wear your safety goggles at all times while in the lab!!
Procedure: [See pp. 552-553 in your textbook (Holt)]
66

1. Fill each buret with the appropriate solution. Open the valve to allow a small amount of solution to flow out into a waste beaker. This will allow each solution to fill the tip of the buret. Be sure to accurately record the starting volume of both the acid and the base. Remember that a buret is calibrated to measure the volume of liquid that has been dispensed.
2. Place approximately 20 mL of HCl into a clean 125 mL Erlenmeyer flask. Be sure to record the precise starting and final volumes. Also record the precise concentration of the NaOH.
3. Place several drops of phenolphthalein into the flask with the HCl and swirl the flask.4. Begin adding NaOH to the flask approximately 1 mL at a time. Note the rate of the
color change. When the change starts to take longer to return to its original color, begin adding base at a slower rate. Your goal is to add one drop of base that just causes the solution to form a faint pink color. The color should persist for at least one minute.
5. If you add too much base and the solution turns a dark pink color, you over shot the equivalence point. Therefore, you will have to add more acid to return to the equivalence point.
6. Record the final volumes of both the acid and the base added.7. Repeat this titration two more times if time permits.8. You may dispose of these solutions down the drain with lots of water.
Data:Reported concentration of NaOH __________ (M)
Part A Titration of HCl -
Solution Trail 1 Trial 2 Trial 3
HCl Final buret reading (mL) ______ ______ ______ Initial buret reading (mL) ______ ______ ______ Volume of HCl added (mL) ______ ______ ______
NaOH Final buret reading (mL) ______ ______ ______ Initial buret reading (mL) ______ ______ ______ Volume of NaOH added (mL) ______ ______ ______
Part B Titration of H2SO4 –
Solution Trail 1 Trial 2 Trial 3
H2SO4 Final buret reading (mL) ______ ______ ______ Initial buret reading (mL) ______ ______ ______ Volume of H2SO4 added (mL) ______ ______ ______
67

NaOH Final buret reading (mL) ______ ______ ______ Initial buret reading (mL) ______ ______ ______ Volume of NaOH added (mL) ______ ______ ______
Analysis:1. Calculate the average molarity of the HCl solution. Show all of you work, including
units. Your grade will be determined on how close you are to the actual concentration of the HCl. Report your answer to the correct number of significant digits.
2. Calculate the average molarity of the H2SO4 solution. Show all of you work, including units. Your grade will be determined on how close you are to the actual concentration of the H2SO4. Report your answer to the correct number of significant digits.
3. If while performing the titration there was an unseen air bubble in the tip of the buret, describe how your calculated molarity of the acid would differ from the actual molarity. Explain.
Lab # 22 Heat of Combustion Lab
Objective: You will investigate the relationship between the thermal energy released when a fuel burns and its molecular structure.
Hypothesis:Prior to beginning the experiment, predict which of the fuels that you
think will produce the highest heat of combustion and which will produce the lowest heat of combustion,Procedure:
Follow the same procedure for the following fuels:Methanol, Ethanol, Kerosene, Biodiesel, and Paraffin Wax
1. Determine the mass of the fuel before burning. (For the candle, mass the candle and the glass plate together.)
2. Hang a clean soda can on the iron ring attached to the ring stand as shown by your instructor.3. Adjust the height of the soda can so that the can is about 1 inch above the wick of the fuel source.4. Place 100.0 mL of cold tap water into the soda can.5. Record the temperature of the water in the can to the nearest 0.2oC.6. Light the fuel source and heat the water for 2 minutes. Gently stir the water as it heats up and monitor the temperature. Do not allow the water to boil.
68

7. Extinguish the flame and record the highest temperature the water attains.8. Re-mass the fuel and determine the mass of fuel that was burned.9. Pour the water out of the can and clean off any soot from the bottom of the can.
Data:Fuel Final H2O
Temp (oC)Initial
H2O Temp (oC)
Temp Change
(oC)
Final mass of fuel (g)
Initial mass of fuel (g)
Mass of fuel
burned (g)
Biodiesel
Ethanol
Kerosene
Methanol
Paraffin
Calculations:
Calorimetry a method in which you calculate the thermal energy released from a combustion reaction by measuring the amount of heat absorbed by a given mass of water. Water was used to capture the heat form the burning fuel because water has such a high specific heat. The specific heat of the substance is defined as the amount of energy required to raise one gram of that substance one degree Celsius. The specific heat of water is 1.00 calorie/g . oC or 4.184 J/g . oC.
To calculate the amount of heat that the water absorbed you need to know three values:
1. The mass of the water that was heated. (Remember that the density of water is 1.00 g/mL, so 100.0 mL of water is the same as 100.0 g of water.)2. The specific heat of water; you will be using the 4.184 j/g.oC value.3. The change in the temperature of the water as it was heated.
The formula for calculating the amount of heat absorbed by the water is:
H = mw x Cp x DT
Where, mw = mass of water, Cp = specific heat of water, DT = change in temp of waterThe units cancel to give the heat absorbed in units of Joules. It is typical to divide the heat by 1000 to give your answer in kilojoules (kJ)
69

At this point you have simply calculated the amount of heat absorbed by the water. In order to properly compare the different fuels that you tested, you need to calculate the heat of combustion of each fuel in units of kilojoules per gram (kJ/g). To do this, simply divide the heat absorbed by the water in each trial by the mass of the fuel burned. This will allow you to determine which fuels released the most heat for every gram of fuel that was burned.
Calculate the heat of combustion in kJ/g for each of the fuels that you tested. Be sure to show all of your work, including the units and report your answers to the proper number of significant digits.
Results for Heat of Combustion Calculations (kJ/g)
Biodeisel Ethanol Kerosene Methanol Paraffin
Show work here:
Questions:
1. Why was water used in this lab?
2. Why is it important that you do not allow the water to boil during this lab?
3. Rank the fuels from the lowest heat of combustion to the highest.
4. What other factors besides heat of combustion would you consider when choosing the best overall fuel? (List at least 3 additional factors and explain your reasons.)
70

5. Discuss the assumptions that you made in calculating the heats of combustion and explain how these assumptions may have affected your final results. Be specific!
Grading Rubric:
Lab Technique and Clean-up _____ (10)Data _____ (10)Calculations _____ (7)Results _____ (2)Questions _____ (8)
Total _____ (37)
Lab # 23 Radioactive Decay and Half-Lives Lab
Procedure
1. Spread out a few paper towels on your table and count the total number of M&M’s provided. (This represents the original number of radioactive atoms.)
2. Place the M&M’s in the cup and then dump them onto the paper towels on the table.3. Separate the candies with the M&M side up from the ones that are face down.
Record the number that are face up (decayed) and face down (undecayed). Place the face down candies back into the cup.
4. Continue dumping the M&M’s and removing the “decayed atoms” until they are all decayed. Each toss represents one half-life.
5. Convert the numbers of undecayed atoms to percentages in your data table.6. Collect class data for the percentages of undecayed atoms vs. half-lives.7. Create a graph of % undecayed atoms vs. half-lives. Use different colors to draw two
lines; one for your data and one for the class data.
Data:
Half- Average
71

Lives (tosses)
Number decayed
Number undecayed
Percent undecayed
Percent undecayed class data
0123456789101112
Percent Undecayed Atoms vs. Number of Half-Lives
72

Analysis Questions:
1. Which line on your graph do you think more accurately represents the decay of a radioactive isotope? Why?
2. If the half-life of M&Msium is 1268 years, how long would it take for the sample to decay to 8.5% of its original amount? Use your graph to answer this question.
3. If you started with a 1000 gram sample of M&Msium, what mass would remain after 6974 years? Show your work.
4. In this simulation is there a way to predict when a particular “atom” will decay? Explain.
5. In what ways do you think that this lab simulation is a good representation of radioactive decay? In what ways do you think that this simulation differs from the process of radioactive decay?
73

6. What other ways (not including coins or other candies) could you use to model the concept of radioactive decay and half-lives? Explain how this would work.
Grading Rubric:Data (5) ____Graph (5) ____Questions (10) ____
Total (20) ____
74

75
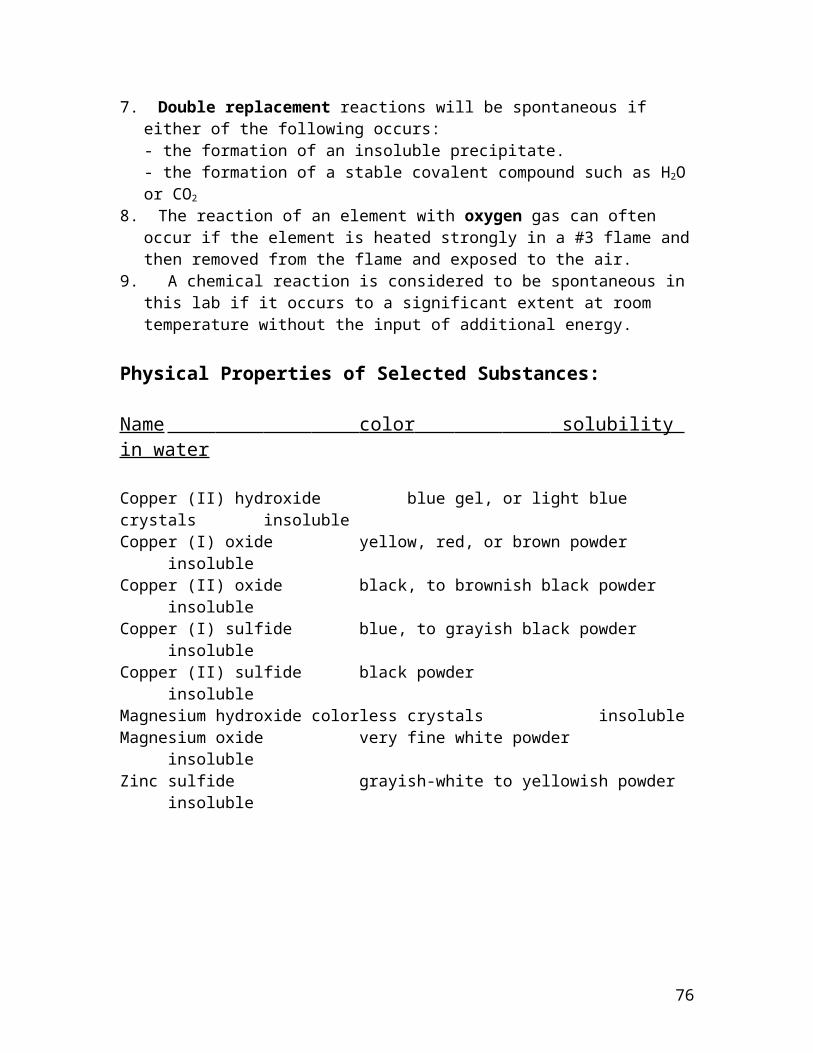
Interpreting NFPA Hazard Identification System Labels
(Blue)Health Hazard Type of Possible Injury
0 Material that on exposure under fire conditions would offer no hazard beyond that of ordinary combustible material.
Example: peanut oil
1 Material that on exposure would cause irritation but only minor residual injury. Example: turpentine
76

2 Material that on intense or continued but not chronic exposure could cause temporary incapacitation or possible residual injury. Example: ammonia gas
3 Material that on short exposure could cause serious temporary or residual injury. Example: chlorine gas
4 Material that on very short exposure could cause death or major residual injury. Example: hydrogen cyanide
(Red)Flammability Susceptibility of Material to Burning
0 Material will not burn. Example: water
1 Material must be pre-heated before ignition can occur. Example: corn oil
2 Material must be moderately heated or exposed to relatively high ambient temperature before ignition can occur. Example: diesel fuel
3 Liquids and solids that can be ignited under almost all ambient temperature conditions. Example: gasoline
4 Materials that will rapidly or completely vaporize at atmospheric pressure and normal ambient temperature, or that are readily dispersed in air and that will burn readily.
Example: propane gas(Yellow)Reactivity Susceptibility of Material to Burning0 Material that in itself is normally stable, even under fire exposure
conditions, and is not reactive with water. Example: liquid nitrogen
1 Material that in itself is normally stable, but which can become unstable at elevated temperatures and pressures. Example: phosphorus (red or white)
2 Material that readily undergoes violent chemical change at elevated temperatures and pressures or which reacts violently with water or which may form explosive mixtures with water. Example: calcium metal
3 Material that in itself is capable of detonation or explosive decomposition or reaction but requires a strong initiating source or which must be heated under confinement before initiation or which reacts explosively with water.
Example: fluorine gas
4 Material that in itself is readily capable of detonation or of explosive decomposition or reaction at normal temperatures and pressures.
77

Example: trinitrotoluene (TNT)
(White)Special PrecautionsW Material shows unusual reactivity with water (i.e. don't put water on it).
Example: magnesium metal
OX Material possesses oxidizing properties. Example: ammonium nitrate
Other symbols commonly used:
ACID Material is an acid.
ALK Material is a base (alkaline).
COR Material is corrosive.
Material is radioactive.
Unit Conversions and Formulas
Unit Conversions
1 inch = 2.54 cm 1 mL = 1 cm3 1 gallon = 3.785 L1 mile = 5280 ft 1 L = 1000 mL 1 fluid ounce = 29.575 mL1 mile = 1.609 km 1 L = 1 dm3 speed of light = 2.9979 x 10⁸ m/s1 lb = 453.6 g 1 kg = 1000g1 kg = 2.205 lb 1 g = 1000 mg
Standard SI Units
Length meter (m)Mass kilogram (kg)Time second (s)
78

Temperature Kelvin (K)Electric current ampere (A)Amount of substance mole (mol)Luminosity candela (cd)
Standard SI Prefixes
Prefix Symbol Decimal notation Exponential notation
tera T 1,000,000,000,000 1012
giga G 1,000,000,000 109
mega M 1,000,000 106
kilo k 1,000 103
hecto h 100 102
deca da 10 101
deci d 0.1 10-1
centi c 0.01 10-2
milli m 0.001 10-3
micro m 0.000001 10-6
nano n 0.000000001 10-9
pico p 0.000000000001 10-12
Formulas
Volume of a sphere = 4/3 r3 Volume of a cylinder = r2 . h
Percent error = [(experimental value – accepted value) / accepted value] x 100
Proper Graphing Technique
1. Use as much of the paper as possible. Do not scrunch all of the data points into a small corner of the paper. A larger graph is more precise than a smaller graph.
2. Use a ruler to create your lines. A neat graph is more precise than a messy one.
3. Create a scale on each axis that is consistent. Every block must represent the same interval on a given axis, and you cannot have gaps in your scale. There is no rule that says the graph must start at 0,0.
79

4. Be sure to label the axis with the appropriate variables including the units. The independent variable should be plotted along the x-axis and the dependent variable should be plotted along the y-axis.
5. Do not plot your data points as simple dots. It is easy to confuse stray marks with intended data points. Rather, circle or box your dots or use an “X” to represent your data points.
6. Consider the best method for interpreting your data. Options include; best-fit lines, exponential curves, quadratic curves, sigmoidal curves, or scatter plots.
7. Always include a descriptive title for your graph. A common title would read the dependent variable on the y-axis vs. the independent variable on the x-axis.
8. Create a key if your graph involves more than one line on the same plot.
Chemistry I Course Guidelines
Course Description - Chem I is an introductory general chemistry course designed for students who plan to attend college, but may not plan to pursue a career in the sciences. Basic chemical principles will be explored from an experimental and theoretical perspective. An emphasis will be placed on thought processes and the practical application and relevance of the principles covered.
Expectations - Chemistry is a challenging subject for most students. Most of the concepts will be new to you, and you will be required to do much more than memorize facts. In addition to learning basic concepts, you will need to organize your thoughts and observations, think critically, and solve complex problems using a systematic approach. Furthermore, you will have the opportunity to participate in a variety of labs and activities in which you will be expected to strive for accuracy and precision. While these
80

may seem like very high expectations, be assured that if you are willing to put forth the effort, I will do my best to help you succeed.
Student Responsibilities - 1. Arrive to class on time and bring all required materials.2. After any excused absences, you should obtain any notes that
you may have missed, and make up any missed assignments. 3. Do your homework! Homework will not be accepted late.4. Obey all safety rules when in the lab. I take this very seriously!5. Read the procedure for an experiment, and know the objective
before you begin working in the lab.6. Make every effort not to be absent on lab days. If you should
miss a lab, you must make it up within two weeks from the day you return. It is your responsibility to make the
arrangements.7. If you have relevant questions during class, do not be afraid to ask them!
Thoughtful questions will only serve to make the class more interesting.8. However, do not expect the teacher to simply give you the answers. You
are here to learn chemistry, but more importantly, you are here to learn to how to think! Be prepared to be challenged.
9. Cell phone use is not permitted during class! Failure to comply will result in the confiscation of your cell phone. The use of a cell phone, camera or similar electronic device during a test will result in a grade of zero!
10. You may not use the hall pass during a test or quiz. If you must, use the bathroom prior to taking the test or quiz.
Grading - Your grade will be based on the following formula:Tests and Quizzes 45%Labs and Projects 35% [-10% for each day late]Homework and Activities 20% [Not accepted late]
Final Exam - There will be a comprehensive final exam given at the end of the year. The final exam will be worth 10% of your final grade.
Student Safety Contract
Laboratory Safety Rules
General Conduct
1. Conduct yourself in a responsible manner at all times while in the lab. Never fool around in the lab. Inappropriate behavior will result in the loss of lab privileges for a specified length of time. Intentional dangerous behavior will result in a grade of zero for the lab.
2. Follow all written and verbal instructions carefully.3. Read all procedures thoroughly before entering the lab. If you do not understand
any part of the procedure, ask the instructor before proceeding.
81

4. Never work alone in the lab. No student may work in the lab or chemical storage area without an instructor present.
5. Do not touch any equipment, chemicals, or other materials until you are instructed to do so.
6. Never eat, drink, or chew gum during lab. Some materials you will be using are toxic!
7. Perform only those experiments authorized by the instructor.8. Notify the instructor immediately of any unsafe conditions that you observe.9. Experiments must be monitored at all times. You will be assigned a lab station at
which to work. Do not wander around the room, distract other students, or interfere with the experiments of others.
10. Work areas should be kept clean and tidy at all times. You could lose points for failing to clean up your lab area.
11. Never taste any chemical in the lab!!12. Know the locations and operating procedures of all safety equipment including
the first-aid kit, eye-wash station, safety shower, fire extinguisher, fire blanket, and emergency gas-shut-off button. Know where the fire alarm and exits are located.
13. During fire drills close all containers and turn off all gas valves, fume hoods, and electrical equipment.
14. Read all labels and equipment instructions carefully before use.15.You must wear safety goggles any time you are told to and any
time glassware, flame, heat, or chemicals are used.16. Contact lenses present special dangers and should not be worn in the lab without
the instructor’s permission.17. Long hair must be tied back, and loose or baggy clothing must be secured. It is
best to wear durable, close-fitting clothing. Lab aprons are provided for your use.18. You must wear closed-toed shoes in the lab. Sandals and flip-flops are not
permitted.19. Always wash your hands after working in the lab.20. Report any accident (spill, breakage, etc.) or injury (cut, burn, etc.) to the
instructor immediately, no matter how trivial it may seem.Handling Glassware and Lab Equipment
21. Examine glassware before each use. Never use chipped, cracked, or dirty glassware – report it to the instructor.
22. Do not immerse hot glassware in cold water; it may shatter.23. Do not use your hands to handle hot glassware. Remember, hot glassware looks
the same as cold glassware.24. Never handle broken glass with your bare hands. Use a brush and dustpan to
clean up broken glass. Place broken glass in the designated glass disposal container.
25. Fill wash bottles only with distilled water and use only as intended. Squirting other students is considered dangerous and disruptive behavior and will result in disciplinary action.
82

26. If you spill any chemicals on a balance, it is your responsibility to clean up your mess. Do not leave it for another group or for the instructor to clean up.
Heating Substances
27. Keep flammable and volatile substances away from heat sources and open flames!28. Never leave a lit burner unattended.29. Never leave unattended anything that is being heated or is visibly reacting.
Always turn the burner or hot plate off when not in use.30. Never look directly into a container that is being heated.31. Never reach over an exposed flame, and be certain that long hair and loose
clothing is secured.32. Do not point the open end of a test tube being heated at yourself or anyone else.33. Do not place hot apparatus directly on the lab bench. Always use an insulating
wire gauze pad.34. Rinse lit matches with water before placing them in the trash. Do not leave them
in the sink.
Handling Chemicals
35. All chemicals in the lab are to be considered dangerous.36. Double check labels to make sure that you are using the proper chemical.37. Take only as much chemical as you need, and never return a chemical to a reagent
bottle once it has been placed in another container.38. Take great care when transferring acids and other chemicals from one part of the
lab to another. Hold them securely and walk carefully.39. Keep backpacks out of the traffic isles near the lab.40. Keep your hands away from your face, eyes, and mouth while using chemicals.41. Never use mouth suction to fill a pipet.42. When diluting an acid, always add acid to water, never the other way around.43. Dispose of all chemical waste in their designated waste containers. Do not put
solids or unauthorized chemicals in the sink. If you are unsure, ask the instructor.44. Never remove chemicals or other materials from the lab.
Name _________________________ Period ________
Student Laboratory Safety Contract
Chemistry is a hands-on laboratory class. You will be performing many laboratory activities which require the use of hazardous chemicals. Safety in the laboratory is the #1 priority for students, teachers, and parents. To ensure a safe chemistry laboratory experience for you and your classmates, the list of safety rules given to you must be followed at all times. It is your responsibility to read all of these rules and you will be held accountable for any violations.
In order to be given permission to participate in the laboratory activities you must read and sign this contract and have a parent or guardian read and sign it as well. You
83

will also be tested on this information and you will be required to pass this test with a score of 80% or better before you may enter the lab.
Personal Information Do you wear contact lenses? Yes ____ No ____ Do you have allergies? Yes ____ No ____
If so, list specific allergies _______________________________________ Do you have any medical conditions that I should be aware of? Yes ___ No ___
If so, list specific conditions _____________________________________
Agreement
I have read and agree to follow all the safety rules set forth in this contract. I realize that I must obey these rules to ensure my own safety and that of my fellow students and instructors. I will cooperate to the fullest extent with my instructor and fellow students to maintain a safe lab environment. I will also closely follow the oral and written instructions provided by the instructor. I am aware that any violation of this safety contract that results in unsafe conduct in the laboratory or misbehavior on my part, may result in my being removed from the laboratory, receiving a failing grade, detention, or other disciplinary action in accordance with the school code as outlined in the student handbook.
______________________________________________Student signature____________Date
Parent or GuardianWe feel that you should be informed regarding the school’s effort to create and maintain a safe
chemistry laboratory environment. Our gola is to eliminate, prevent and correct possible hazards. Please read the list of safety rules outlined in this contract. No student will be permitted to perform laboratory experiments unless the contract is signed by both the student and parent/guardian and is on file with the teacher. Your signature on this contract indicates that you have read the laboratory safety rules, are aware of the measures taken to insure the safety of your son/daughter in the chemistry lab, and will instruct your son/daughter to uphold his/her agreement to follow these rules and procedures in the laboratory.
______________________________________________Parent/Guardian signature
_______________Date
84