cisco anyconnect vpn install guide for mac os x · cisco anyconnect vpn install guide for mac os x...
TRANSCRIPT

Cisco AnyConnect VPN Install Guide for Mac OS X Quick Start
Download the Mac VPN installation package from SJCloud.
Install the software with administrator privileges.
VPN server: vpn.sjhsyr.org
Username: Your Network username (printed on your accounts card)
Password: Your Network password (printed on your accounts card)
Group: Students (NOT ‘STUDENT’) Detailed instructions are provided below: Downloading the VPN software 1. Download the Mac VPN installation package from the SJCloud. 2. Save the file at an easily findable location, such as your desktop. Installing the VPN software 1. Go to the location where you saved the VPN installation package. 2. Double-click on the .pkg file. 3. The AnyConnect Installer will launch. Click Continue.
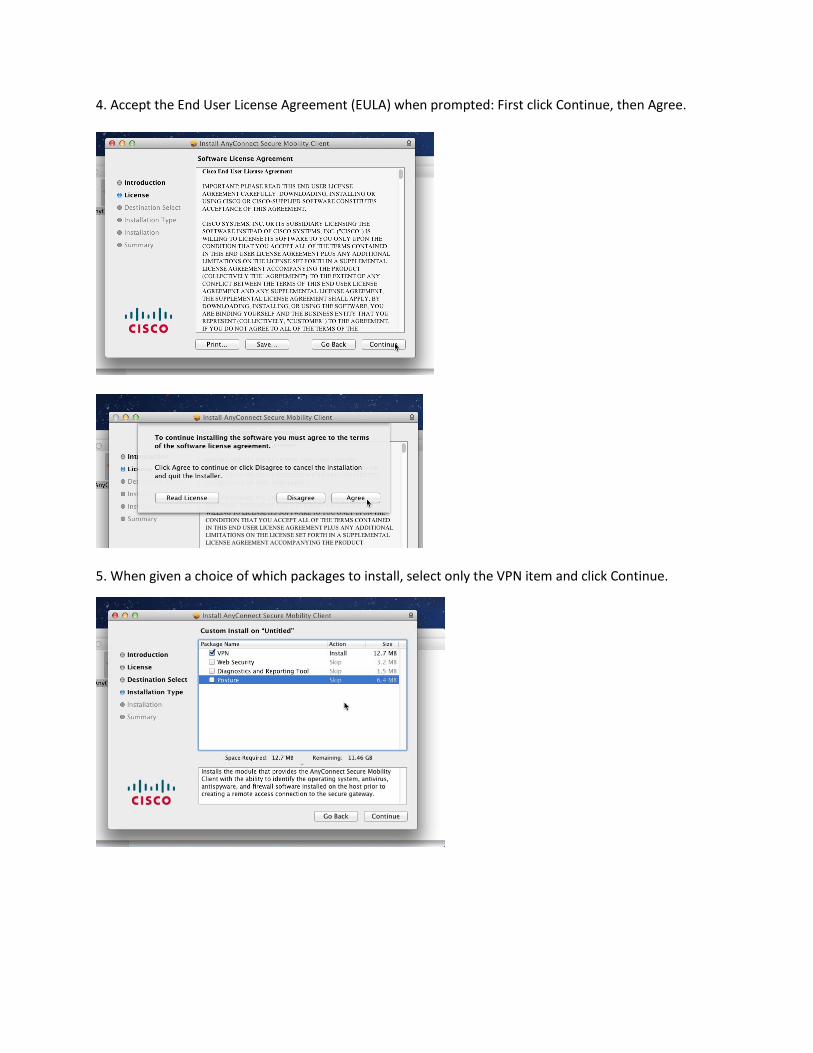
4. Accept the End User License Agreement (EULA) when prompted: First click Continue, then Agree.
5. When given a choice of which packages to install, select only the VPN item and click Continue.
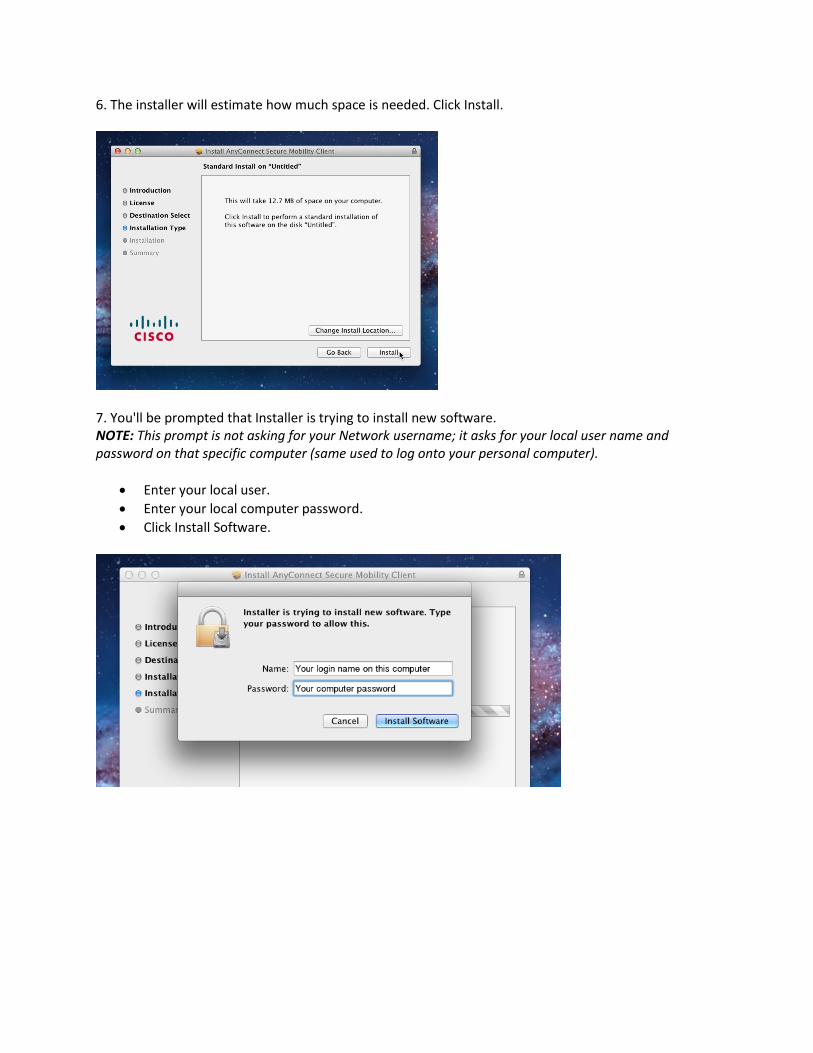
6. The installer will estimate how much space is needed. Click Install.
7. You'll be prompted that Installer is trying to install new software. NOTE: This prompt is not asking for your Network username; it asks for your local user name and password on that specific computer (same used to log onto your personal computer).
Enter your local user.
Enter your local computer password.
Click Install Software.
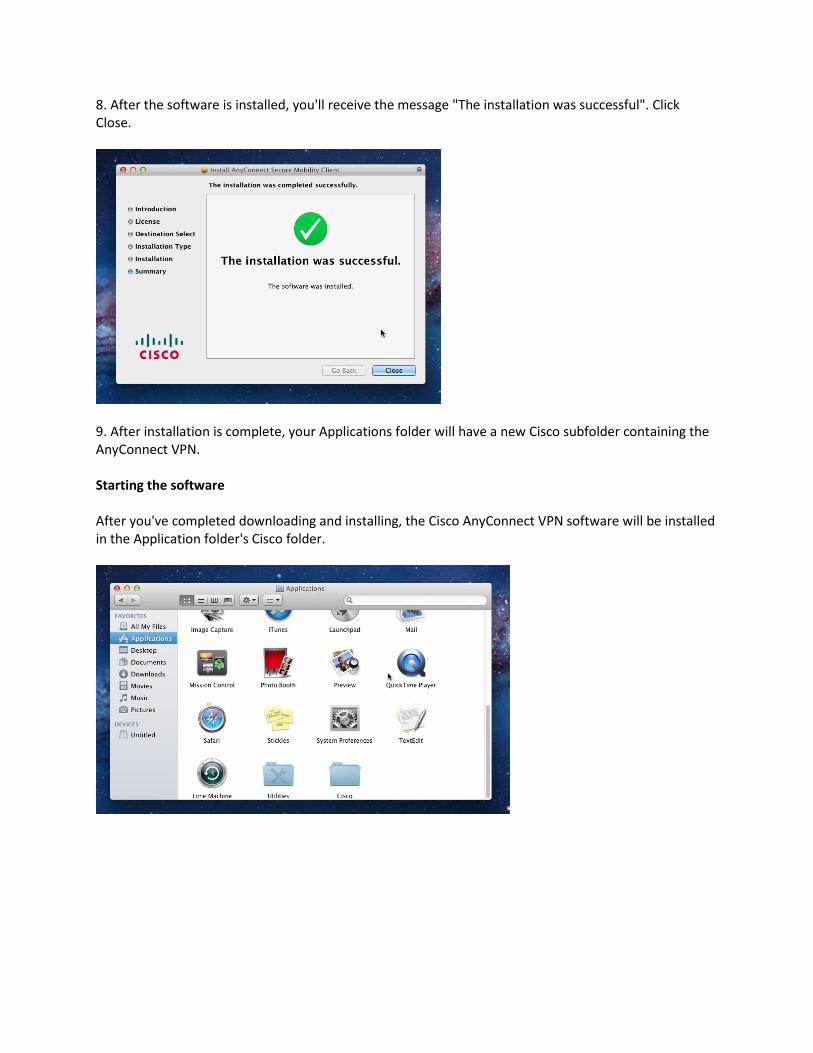
8. After the software is installed, you'll receive the message "The installation was successful". Click Close.
9. After installation is complete, your Applications folder will have a new Cisco subfolder containing the AnyConnect VPN. Starting the software After you've completed downloading and installing, the Cisco AnyConnect VPN software will be installed in the Application folder's Cisco folder.
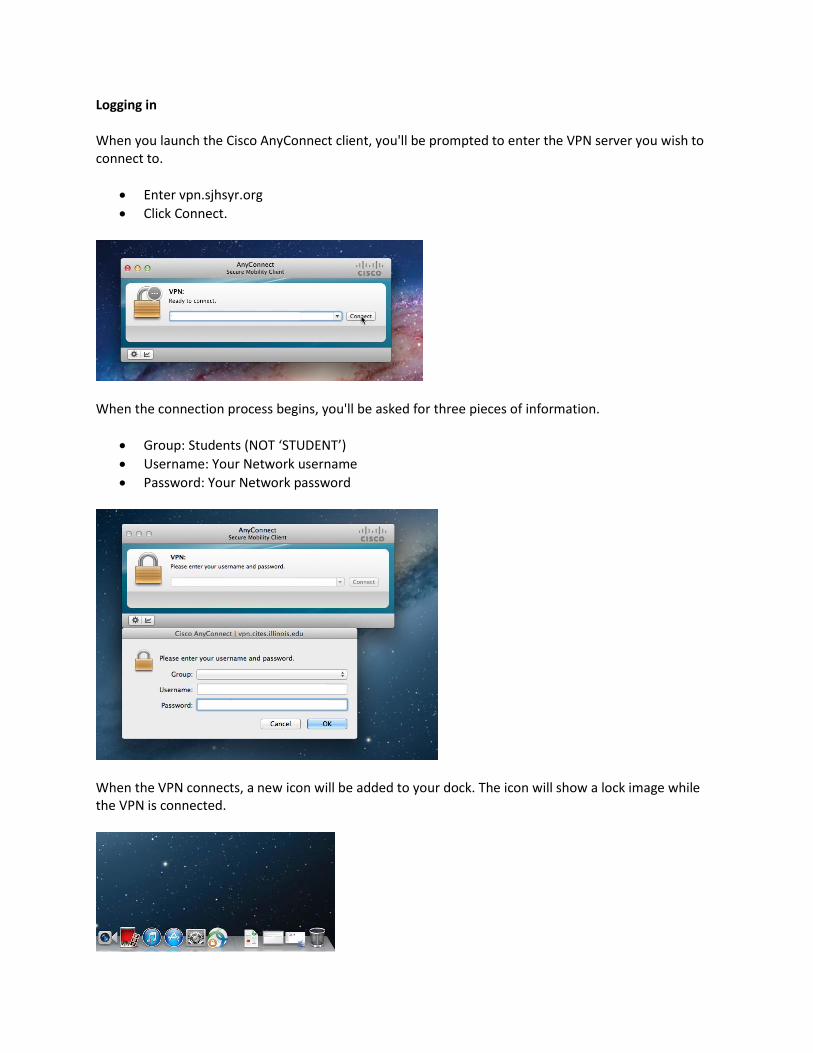
Logging in When you launch the Cisco AnyConnect client, you'll be prompted to enter the VPN server you wish to connect to.
Enter vpn.sjhsyr.org
Click Connect.
When the connection process begins, you'll be asked for three pieces of information.
Group: Students (NOT ‘STUDENT’)
Username: Your Network username
Password: Your Network password
When the VPN connects, a new icon will be added to your dock. The icon will show a lock image while the VPN is connected.
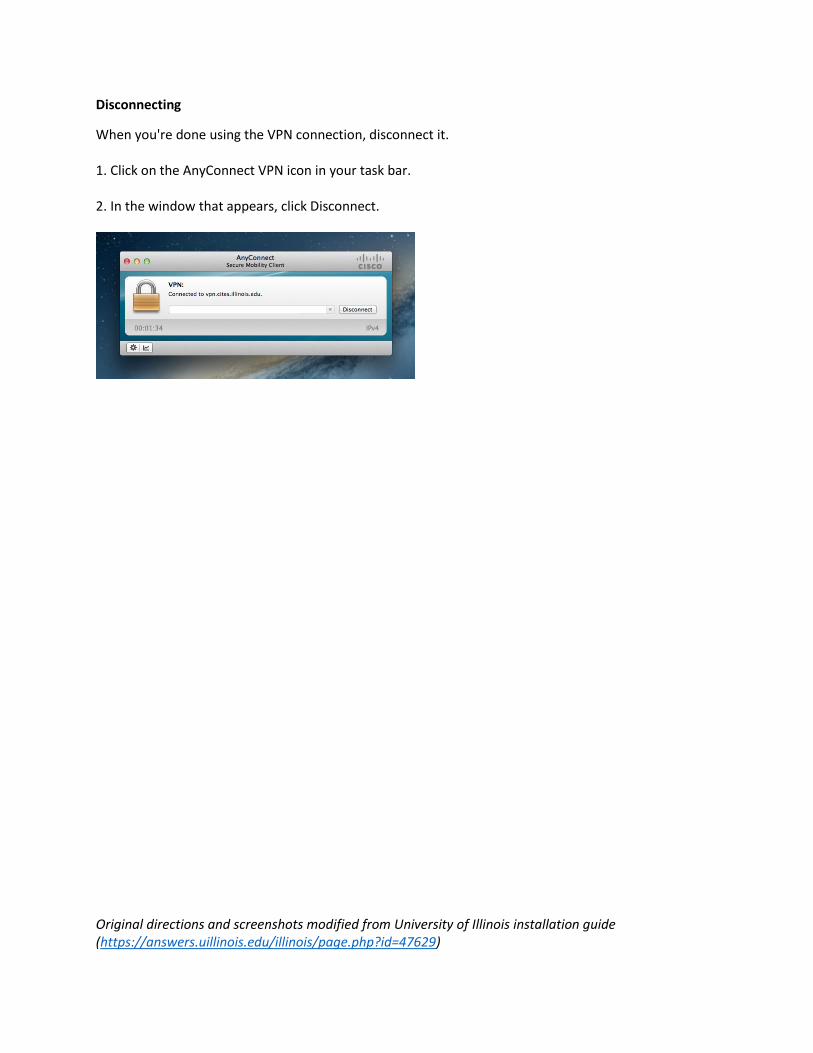
Disconnecting
When you're done using the VPN connection, disconnect it. 1. Click on the AnyConnect VPN icon in your task bar. 2. In the window that appears, click Disconnect.
Original directions and screenshots modified from University of Illinois installation guide (https://answers.uillinois.edu/illinois/page.php?id=47629)