citrix netscaler 1000v nitro getting started guide, … · the specifications and information...
TRANSCRIPT

Citrix NetScaler 1000V NITRO Getting Started GuideCitrix NetScaler 10.5December 11, 2014
Cisco Systems, Inc.www.cisco.com
Cisco has more than 200 offices worldwide. Addresses, phone numbers, and fax numbers are listed on the Cisco website at www.cisco.com/go/offices.

THE SPECIFICATIONS AND INFORMATION REGARDING THE PRODUCTS IN THIS MANUAL ARE SUBJECT TO CHANGE WITHOUT NOTICE. ALL STATEMENTS, INFORMATION, AND RECOMMENDATIONS IN THIS MANUAL ARE BELIEVED TO BE ACCURATE BUT ARE PRESENTED WITHOUT WARRANTY OF ANY KIND, EXPRESS OR IMPLIED. USERS MUST TAKE FULL RESPONSIBILITY FOR THEIR APPLICATION OF ANY PRODUCTS.
THE SOFTWARE LICENSE AND LIMITED WARRANTY FOR THE ACCOMPANYING PRODUCT ARE SET FORTH IN THE INFORMATION PACKET THAT SHIPPED WITH THE PRODUCT AND ARE INCORPORATED HEREIN BY THIS REFERENCE. IF YOU ARE UNABLE TO LOCATE THE SOFTWARE LICENSE OR LIMITED WARRANTY, CONTACT YOUR CISCO REPRESENTATIVE FOR A COPY.
The following information is for FCC compliance of Class A devices: This equipment has been tested and found to comply with the limits for a Class A digital device, pursuant to part 15 of the FCC rules. These limits are designed to provide reasonable protection against harmful interference when the equipment is operated in a commercial environment. This equipment generates, uses, and can radiate radio-frequency energy and, if not installed and used in accordance with the instruction manual, may cause harmful interference to radio communications. Operation of this equipment in a residential area is likely to cause harmful interference, in which case users will be required to correct the interference at their own expense.
The following information is for FCC compliance of Class B devices: This equipment has been tested and found to comply with the limits for a Class B digital device, pursuant to part 15 of the FCC rules. These limits are designed to provide reasonable protection against harmful interference in a residential installation. This equipment generates, uses and can radiate radio frequency energy and, if not installed and used in accordance with the instructions, may cause harmful interference to radio communications. However, there is no guarantee that interference will not occur in a particular installation. If the equipment causes interference to radio or television reception, which can be determined by turning the equipment off and on, users are encouraged to try to correct the interference by using one or more of the following measures:
• Reorient or relocate the receiving antenna.
• Increase the separation between the equipment and receiver.
• Connect the equipment into an outlet on a circuit different from that to which the receiver is connected.
• Consult the dealer or an experienced radio/TV technician for help.
Modifications to this product not authorized by Cisco could void the FCC approval and negate your authority to operate the product.
The Cisco implementation of TCP header compression is an adaptation of a program developed by the University of California, Berkeley (UCB) as part of UCB’s public domain version of the UNIX operating system. All rights reserved. Copyright © 1981, Regents of the University of California.
NOTWITHSTANDING ANY OTHER WARRANTY HEREIN, ALL DOCUMENT FILES AND SOFTWARE OF THESE SUPPLIERS ARE PROVIDED “AS IS” WITH ALL FAULTS. CISCO AND THE ABOVE-NAMED SUPPLIERS DISCLAIM ALL WARRANTIES, EXPRESSED OR IMPLIED, INCLUDING, WITHOUT LIMITATION, THOSE OF MERCHANTABILITY, FITNESS FOR A PARTICULAR PURPOSE AND NONINFRINGEMENT OR ARISING FROM A COURSE OF DEALING, USAGE, OR TRADE PRACTICE.
IN NO EVENT SHALL CISCO OR ITS SUPPLIERS BE LIABLE FOR ANY INDIRECT, SPECIAL, CONSEQUENTIAL, OR INCIDENTAL DAMAGES, INCLUDING, WITHOUT LIMITATION, LOST PROFITS OR LOSS OR DAMAGE TO DATA ARISING OUT OF THE USE OR INABILITY TO USE THIS MANUAL, EVEN IF CISCO OR ITS SUPPLIERS HAVE BEEN ADVISED OF THE POSSIBILITY OF SUCH DAMAGES.
Cisco and the Cisco logo are trademarks or registered trademarks of Cisco and/or its affiliates in the U.S. and other countries. To view a list of Cisco trademarks, go to this URL: www.cisco.com/go/trademarks. Third-party trademarks mentioned are the property of their respective owners. The use of the word partner does not imply a partnership relationship between Cisco and any other company. (1110R)
Any Internet Protocol (IP) addresses and phone numbers used in this document are not intended to be actual addresses and phone numbers. Any examples, command display output, network topology diagrams, and other figures included in the document are shown for illustrative purposes only. Any use of actual IP addresses or phone numbers in illustrative content is unintentional and coincidental.
Citrix and other Citrix product names referenced herein are trademarks of Citrix Systems, Inc. and/or one of its subsidiaries, and may be registered in the United States Patent and Trademark Office and in other countries. All other product names, company names, marks, logos, and symbols are trademarks of their respective owners.
© 2014 Cisco Systems, Inc. All rights reserved.
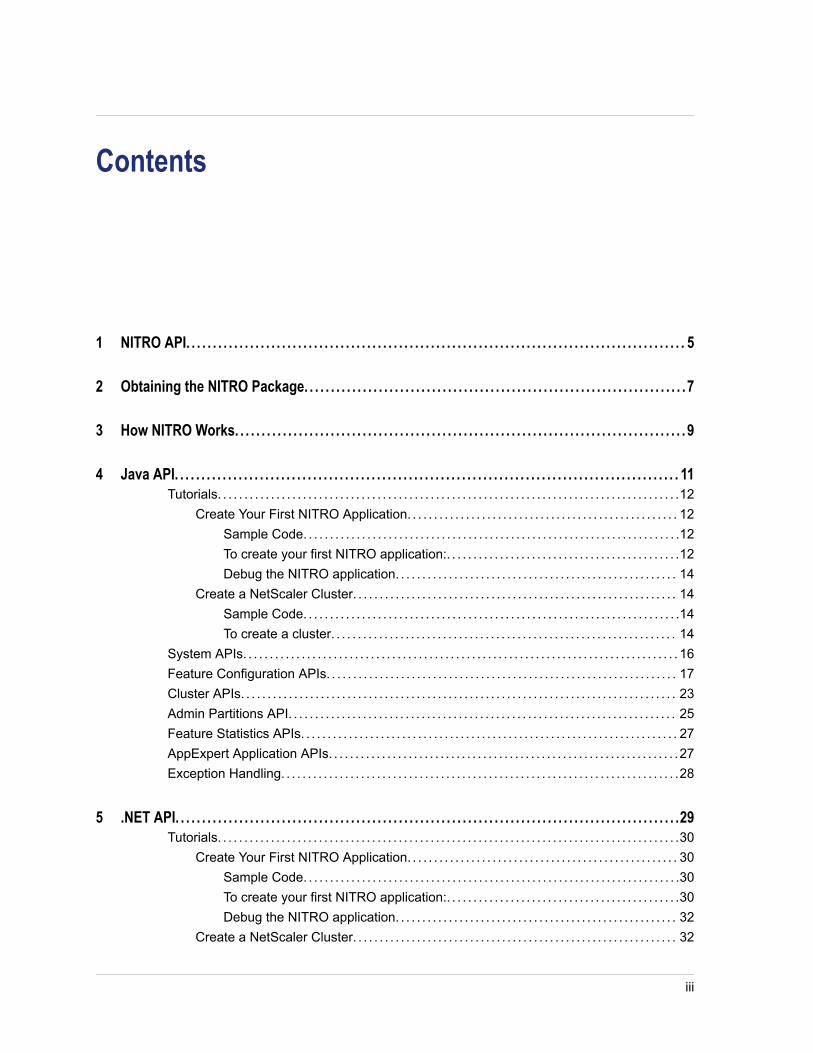
Contents
1 NITRO API. . . . . . . . . . . . . . . . . . . . . . . . . . . . . . . . . . . . . . . . . . . . . . . . . . . . . . . . . . . . . . . . . . . . . . . . . . . . . . . . . . . . . . . . . . . . . . 5
2 Obtaining the NITRO Package. . . . . . . . . . . . . . . . . . . . . . . . . . . . . . . . . . . . . . . . . . . . . . . . . . . . . . . . . . . . . . . . . . . . . . . .7
3 How NITRO Works. . . . . . . . . . . . . . . . . . . . . . . . . . . . . . . . . . . . . . . . . . . . . . . . . . . . . . . . . . . . . . . . . . . . . . . . . . . . . . . . . . . . . 9
4 Java API. . . . . . . . . . . . . . . . . . . . . . . . . . . . . . . . . . . . . . . . . . . . . . . . . . . . . . . . . . . . . . . . . . . . . . . . . . . . . . . . . . . . . . . . . . . . . . . 11Tutorials. . . . . . . . . . . . . . . . . . . . . . . . . . . . . . . . . . . . . . . . . . . . . . . . . . . . . . . . . . . . . . . . . . . . . . . . . . . . . . . . . . . . . . .12
Create Your First NITRO Application. . . . . . . . . . . . . . . . . . . . . . . . . . . . . . . . . . . . . . . . . . . . . . . . . . . 12Sample Code. . . . . . . . . . . . . . . . . . . . . . . . . . . . . . . . . . . . . . . . . . . . . . . . . . . . . . . . . . . . . . . . . . . . . . .12To create your first NITRO application:. . . . . . . . . . . . . . . . . . . . . . . . . . . . . . . . . . . . . . . . . . . .12Debug the NITRO application. . . . . . . . . . . . . . . . . . . . . . . . . . . . . . . . . . . . . . . . . . . . . . . . . . . . . 14
Create a NetScaler Cluster. . . . . . . . . . . . . . . . . . . . . . . . . . . . . . . . . . . . . . . . . . . . . . . . . . . . . . . . . . . . . 14Sample Code. . . . . . . . . . . . . . . . . . . . . . . . . . . . . . . . . . . . . . . . . . . . . . . . . . . . . . . . . . . . . . . . . . . . . . .14To create a cluster. . . . . . . . . . . . . . . . . . . . . . . . . . . . . . . . . . . . . . . . . . . . . . . . . . . . . . . . . . . . . . . . . 14
System APIs. . . . . . . . . . . . . . . . . . . . . . . . . . . . . . . . . . . . . . . . . . . . . . . . . . . . . . . . . . . . . . . . . . . . . . . . . . . . . . . . . . 16Feature Configuration APIs. . . . . . . . . . . . . . . . . . . . . . . . . . . . . . . . . . . . . . . . . . . . . . . . . . . . . . . . . . . . . . . . . . 17Cluster APIs. . . . . . . . . . . . . . . . . . . . . . . . . . . . . . . . . . . . . . . . . . . . . . . . . . . . . . . . . . . . . . . . . . . . . . . . . . . . . . . . . . 23Admin Partitions API. . . . . . . . . . . . . . . . . . . . . . . . . . . . . . . . . . . . . . . . . . . . . . . . . . . . . . . . . . . . . . . . . . . . . . . . . 25Feature Statistics APIs. . . . . . . . . . . . . . . . . . . . . . . . . . . . . . . . . . . . . . . . . . . . . . . . . . . . . . . . . . . . . . . . . . . . . . . 27AppExpert Application APIs. . . . . . . . . . . . . . . . . . . . . . . . . . . . . . . . . . . . . . . . . . . . . . . . . . . . . . . . . . . . . . . . . .27Exception Handling. . . . . . . . . . . . . . . . . . . . . . . . . . . . . . . . . . . . . . . . . . . . . . . . . . . . . . . . . . . . . . . . . . . . . . . . . . .28
5 .NET API. . . . . . . . . . . . . . . . . . . . . . . . . . . . . . . . . . . . . . . . . . . . . . . . . . . . . . . . . . . . . . . . . . . . . . . . . . . . . . . . . . . . . . . . . . . . . . .29Tutorials. . . . . . . . . . . . . . . . . . . . . . . . . . . . . . . . . . . . . . . . . . . . . . . . . . . . . . . . . . . . . . . . . . . . . . . . . . . . . . . . . . . . . . .30
Create Your First NITRO Application. . . . . . . . . . . . . . . . . . . . . . . . . . . . . . . . . . . . . . . . . . . . . . . . . . . 30Sample Code. . . . . . . . . . . . . . . . . . . . . . . . . . . . . . . . . . . . . . . . . . . . . . . . . . . . . . . . . . . . . . . . . . . . . . .30To create your first NITRO application:. . . . . . . . . . . . . . . . . . . . . . . . . . . . . . . . . . . . . . . . . . . .30Debug the NITRO application. . . . . . . . . . . . . . . . . . . . . . . . . . . . . . . . . . . . . . . . . . . . . . . . . . . . . 32
Create a NetScaler Cluster. . . . . . . . . . . . . . . . . . . . . . . . . . . . . . . . . . . . . . . . . . . . . . . . . . . . . . . . . . . . . 32
iii

Sample Code. . . . . . . . . . . . . . . . . . . . . . . . . . . . . . . . . . . . . . . . . . . . . . . . . . . . . . . . . . . . . . . . . . . . . . .32To create a cluster. . . . . . . . . . . . . . . . . . . . . . . . . . . . . . . . . . . . . . . . . . . . . . . . . . . . . . . . . . . . . . . . . 32
System APIs. . . . . . . . . . . . . . . . . . . . . . . . . . . . . . . . . . . . . . . . . . . . . . . . . . . . . . . . . . . . . . . . . . . . . . . . . . . . . . . . . . 34Feature Configuration APIs. . . . . . . . . . . . . . . . . . . . . . . . . . . . . . . . . . . . . . . . . . . . . . . . . . . . . . . . . . . . . . . . . . 35Cluster APIs. . . . . . . . . . . . . . . . . . . . . . . . . . . . . . . . . . . . . . . . . . . . . . . . . . . . . . . . . . . . . . . . . . . . . . . . . . . . . . . . . . 40Admin Partitions API. . . . . . . . . . . . . . . . . . . . . . . . . . . . . . . . . . . . . . . . . . . . . . . . . . . . . . . . . . . . . . . . . . . . . . . . . 42Feature Statistics APIs. . . . . . . . . . . . . . . . . . . . . . . . . . . . . . . . . . . . . . . . . . . . . . . . . . . . . . . . . . . . . . . . . . . . . . . 44AppExpert Application APIs. . . . . . . . . . . . . . . . . . . . . . . . . . . . . . . . . . . . . . . . . . . . . . . . . . . . . . . . . . . . . . . . . .45Exception Handling. . . . . . . . . . . . . . . . . . . . . . . . . . . . . . . . . . . . . . . . . . . . . . . . . . . . . . . . . . . . . . . . . . . . . . . . . . .45
6 Python API. . . . . . . . . . . . . . . . . . . . . . . . . . . . . . . . . . . . . . . . . . . . . . . . . . . . . . . . . . . . . . . . . . . . . . . . . . . . . . . . . . . . . . . . . . . . 47System APIs. . . . . . . . . . . . . . . . . . . . . . . . . . . . . . . . . . . . . . . . . . . . . . . . . . . . . . . . . . . . . . . . . . . . . . . . . . . . . . . . . . 48Feature Configuration APIs. . . . . . . . . . . . . . . . . . . . . . . . . . . . . . . . . . . . . . . . . . . . . . . . . . . . . . . . . . . . . . . . . . 49Cluster APIs. . . . . . . . . . . . . . . . . . . . . . . . . . . . . . . . . . . . . . . . . . . . . . . . . . . . . . . . . . . . . . . . . . . . . . . . . . . . . . . . . . 54Admin Partitions API. . . . . . . . . . . . . . . . . . . . . . . . . . . . . . . . . . . . . . . . . . . . . . . . . . . . . . . . . . . . . . . . . . . . . . . . . 57Feature Statistics APIs. . . . . . . . . . . . . . . . . . . . . . . . . . . . . . . . . . . . . . . . . . . . . . . . . . . . . . . . . . . . . . . . . . . . . . . 58AppExpert Application APIs. . . . . . . . . . . . . . . . . . . . . . . . . . . . . . . . . . . . . . . . . . . . . . . . . . . . . . . . . . . . . . . . . .59Exception Handling. . . . . . . . . . . . . . . . . . . . . . . . . . . . . . . . . . . . . . . . . . . . . . . . . . . . . . . . . . . . . . . . . . . . . . . . . . .59
7 REST Web Services. . . . . . . . . . . . . . . . . . . . . . . . . . . . . . . . . . . . . . . . . . . . . . . . . . . . . . . . . . . . . . . . . . . . . . . . . . . . . . . . . . 61Performing System Level Operations. . . . . . . . . . . . . . . . . . . . . . . . . . . . . . . . . . . . . . . . . . . . . . . . . . . . . . . .63Configuring NetScaler Features. . . . . . . . . . . . . . . . . . . . . . . . . . . . . . . . . . . . . . . . . . . . . . . . . . . . . . . . . . . . . 66Binding NetScaler Resources. . . . . . . . . . . . . . . . . . . . . . . . . . . . . . . . . . . . . . . . . . . . . . . . . . . . . . . . . . . . . . . .72Configuring a NetScaler Cluster. . . . . . . . . . . . . . . . . . . . . . . . . . . . . . . . . . . . . . . . . . . . . . . . . . . . . . . . . . . . . 74Admin Partitions API. . . . . . . . . . . . . . . . . . . . . . . . . . . . . . . . . . . . . . . . . . . . . . . . . . . . . . . . . . . . . . . . . . . . . . . . . 78Retrieving Feature Statistics. . . . . . . . . . . . . . . . . . . . . . . . . . . . . . . . . . . . . . . . . . . . . . . . . . . . . . . . . . . . . . . . . 81Managing AppExpert Applications. . . . . . . . . . . . . . . . . . . . . . . . . . . . . . . . . . . . . . . . . . . . . . . . . . . . . . . . . . . 82Performing File Operations. . . . . . . . . . . . . . . . . . . . . . . . . . . . . . . . . . . . . . . . . . . . . . . . . . . . . . . . . . . . . . . . . . 84Handling Exceptions. . . . . . . . . . . . . . . . . . . . . . . . . . . . . . . . . . . . . . . . . . . . . . . . . . . . . . . . . . . . . . . . . . . . . . . . . 86
8 NITRO Changes Across NetScaler Releases. . . . . . . . . . . . . . . . . . . . . . . . . . . . . . . . . . . . . . . . . . . . . . . . . . . . . .89Resources Removed. . . . . . . . . . . . . . . . . . . . . . . . . . . . . . . . . . . . . . . . . . . . . . . . . . . . . . . . . . . . . . . . . . . . . . . . . 90APIs Removed. . . . . . . . . . . . . . . . . . . . . . . . . . . . . . . . . . . . . . . . . . . . . . . . . . . . . . . . . . . . . . . . . . . . . . . . . . . . . . . .90API Return Type Changed. . . . . . . . . . . . . . . . . . . . . . . . . . . . . . . . . . . . . . . . . . . . . . . . . . . . . . . . . . . . . . . . . . . 90Attribute Type Changed. . . . . . . . . . . . . . . . . . . . . . . . . . . . . . . . . . . . . . . . . . . . . . . . . . . . . . . . . . . . . . . . . . . . . . 91Attributes Removed. . . . . . . . . . . . . . . . . . . . . . . . . . . . . . . . . . . . . . . . . . . . . . . . . . . . . . . . . . . . . . . . . . . . . . . . . . 91SDK Specific Changes. . . . . . . . . . . . . . . . . . . . . . . . . . . . . . . . . . . . . . . . . . . . . . . . . . . . . . . . . . . . . . . . . . . . . . . 93
9 Unsupported NetScaler Operations. . . . . . . . . . . . . . . . . . . . . . . . . . . . . . . . . . . . . . . . . . . . . . . . . . . . . . . . . . . . . . . . 95
Contents
iv

Chapter 1
NITRO API
The NetScaler NITRO protocol allows you to configure andmonitor the NetScaler appliance programmatically.
NITRO exposes its functionality through RepresentationalState Transfer (REST) interfaces. Therefore, NITROapplications can be developed in any programming language.Additionally, for applications that must be developed in Javaor .NET or Python, NITRO APIs are exposed through relevantlibraries that are packaged as separate Software DevelopmentKits (SDKs).
Note: You must have a basic understanding of the NetScalerappliance before using NITRO.
To use the NITRO protocol, the client application needs onlythe following:
w Access to a NetScaler appliance, version 9.2 or later.
w To use REST interfaces, you must have a system togenerate HTTP or HTTPS requests (payload in JSON format)to the NetScaler appliance. You can use any programminglanguage or tool.
w For Java clients, you must have a system where JavaDevelopment Kit (JDK) 1.5 or later is available. The JDKcan be downloaded from http://www.oracle.com/technetwork/java/javase/downloads/index.html.
w For .NET clients, you must have a system with .NETframework 3.5 or later installed. The .NET framework canbe downloaded from http://www.microsoft.com/downloads/en/default.aspx.
w For Python clients, you must have a system with Python2.7 or above version and the Requests library (available in<NITRO_SDK_HOME>/lib) installed.
5

Chapter 1 NITRO API
6

Chapter 2
Obtaining the NITRO Package
The NITRO package is available as a tar file on the Downloadspage of the NetScaler appliance's configuration utility. Youmust download and un-tar the file to a folder on your localsystem. This folder is referred to as <NITRO_SDK_HOME> inthis documentation.
The folder contains the NITRO libraries in the lib subfolder.The libraries must be added to the client applicationclasspath to access NITRO functionality. The<NITRO_SDK_HOME> folder also provides samples anddocumentation that can help you understand the NITRO SDK.
Note:
w The REST package contains only documentation for usingthe REST interfaces.
w For the Python SDK, the library must be installed on theclient path. For installation instructions, read the<NITRO_SDK_HOME>/README.txt file.
7

Chapter 2 Obtaining the NITRO Package
8

Chapter 3
How NITRO Works
The NITRO infrastructure consists of a client application andthe NITRO Web service running on a NetScaler appliance. Thecommunication between the client application and the NITROweb service is based on REST architecture using HTTP orHTTPS.
Figure 3-1. NITRO execution flow
As shown in the above figure, a NITRO request is executed asfollows:
1. The client application sends REST request message to theNITRO web service. When using the SDKs, an API call istranslated into the appropriate REST request message.
2. The web service processes the REST request message.
3. The NITRO web service returns the corresponding RESTresponse message to the client application. When usingthe SDKs, the REST response message is translated intothe appropriate response for the API call.
To minimize traffic on the NetScaler network, you retrieve thewhole state of a resource from the server, make modificationsto the state of the resource locally, and then upload it back tothe server in one network transaction. For example, to updatea load balancing virtual server, you must retrieve the object,update the properties, and then upload the changed object ina single transaction.
9

Note: Local operations on a resource (changing itsproperties) do not affect its state on the server until the stateof the object is explicitly uploaded.
NITRO APIs are synchronous in nature. This means that theclient application waits for a response from the NITRO webservice before executing another NITRO API.
Chapter 3 How NITRO Works
10

Chapter 4
Java API
Topics:• Tutorials
• System APIs
• Feature Configuration APIs
• Cluster APIs
• Admin Partitions API
• Feature Statistics APIs
• AppExpert Application APIs
• Exception Handling
NetScaler NITRO APIs are categorized depending on the scopeand purpose of the APIs into system APIs, featureconfiguration APIs, and feature statistics APIs. Additionally,you can import and export AppExpert applications. You canalso troubleshoot NITRO operations.
Note: All NITRO operations are logged in the /var/log/nitro.log file on the appliance.
11

TutorialsThese tutorials demonstrate the end-to-end usage of NITRO to achieve the following:
w Create Your First NITRO Application
w Create a NetScaler Cluster
Create Your First NITRO ApplicationAfter completing this tutorial, you will understand and be able to perform the followingtasks:
w Integrate NITRO with the IDE
w Log in to the appliance
w Create a load balancing virtual server (lbvserver)
w Retrieve details of an lbvserver
w Delete an lbvserver
w Save the configurations on the appliance
w Log out of the appliance
w Debug the NITRO application
Before you begin, make sure that you have the latest NITRO SDK and that the clientapplication satisfies the prerequisites for using the NITRO SDK.
Sample CodeFor the executable code, see the <NITRO_SDK_HOME>/sample/MyFirstNitroApplication.java sample file.
To create your first NITRO application:1. Copy the libraries from <NITRO_SDK_HOME>/lib folder to the project classpath.
2. Create a new class and name it MyFirstNitroApplication.
3. Create an instance ofcom.citrix.netscaler.nitro.service.nitro_service class. Thisinstance is used to perform all operations on the appliance:
nitro_service ns_session = new nitro_service("10.102.29.170","HTTP");
This code establishes a connection with an appliance that has IP address10.102.29.170 and uses the HTTP protocol. Replace 10.102.29.170 with the IPaddress of the NetScaler appliance that you have access to.
Chapter 4 Java API
12

4. Use the nitro_service instance to log in to the appliance using yourcredentials:
ns_session.login("admin","verysecret");
This code logs into the appliance, with user name as admin and password asverysecret. Replace the credentials with your login credentials.
5. Enable the load balancing feature:
String[] features_to_be_enabled = {"lb"};ns_session.enable_features(features_to_be_enabled);
This code first sets the features to be enabled in an array and then enables the LBfeature.
6. Create an instance of thecom.citrix.netscaler.nitro.resource.config.lb.lbvserver class.You will use this instance to perform operations on the lbvserver.
lbvserver new_lbvserver_obj = new lbvserver();
7. Use the lbvserver instance to create a new lbvserver:
new_lbvserver_obj.set_name("MyFirstLbVServer");new_lbvserver_obj.set_ipv46("10.102.29.88");new_lbvserver_obj.set_servicetype("HTTP");new_lbvserver_obj.set_port(88);new_lbvserver_obj.set_lbmethod("ROUNDROBIN");lbvserver.add(ns_session,new_lbvserver_obj);
This code first sets the attributes (name, IP address, service type, port, and loadbalancing method) of the lbvserver locally and then adds it to the appliance byusing the corresponding add() method.
8. Retrieve the details of the lbvserver you have created:
new_lbvserver_obj = lbvserver.get(ns_session,new_lbvserver_obj.get_name());System.out.println("Name : " +new_lbvserver_obj.get_name() +"\n" +"Protocol : " +new_lbvserver_obj.get_servicetype());
This code first retrieves the details of the lbvserver as an object from theNetScaler, extracts the required attributes (name and service type) from theobject, and displays the results.
9. Delete the lbvserver you created in the above steps:
lbvserver.delete(ns_session, new_lbvserver_obj.get_name());
10. Save the configurations:
ns_session.save_config();
Citrix NetScaler NITRO Getting Started Guide
13

11. Log out of the appliance:
ns_session.logout();
Debug the NITRO applicationAll NITRO exceptions are captured by thecom.citrix.netscaler.nitro.exception.nitro_exception class. For a moredetailed description, see Exception Handling.
Create a NetScaler ClusterAfter completing this tutorial you will be able to create a two-node NetScaler cluster.To add more appliances to the cluster you must repeat the procedure that adds andjoins the node to the cluster.
Sample CodeFor the executable code, see the <NITRO_SDK_HOME>/sample/CreateCluster.java sample file.
To create a cluster1. Copy the libraries from <NITRO_SDK_HOME>/lib folder to the project classpath.
2. Create a new class and name it CreateCluster.
3. Log on to one of the appliances that you want to add to the cluster and create acluster:
//Connect to the first appliance that you want to add to the clusternitro_service nonClipSession0 = new nitro_service(nsipAddress0,protocol);nonClipSession0.login(uName,password);
//Create a cluster instanceclusterinstance newClusterInstance = new clusterinstance();newClusterInstance.set_clid(1);clusterinstance.add(nonClipSession0,newClusterInstance);
//Add the appliance to the clusterclusternode ClusterNode0 = new clusternode();ClusterNode0.set_nodeid(0);ClusterNode0.set_ipaddress(nsipAddress0);ClusterNode0.set_state("ACTIVE");ClusterNode0.set_backplane("0/1/1");clusternode.add(nonClipSession0,ClusterNode0);
//Add the cluster IP addressnsip newNSIPAddress = new nsip();newNSIPAddress.set_ipaddress(clipAddress);newNSIPAddress.set_netmask("255.255.255.255");newNSIPAddress.set_type("CLIP");nsip.add(nonClipSession0,newNSIPAddress);
Chapter 4 Java API
14

//Enable the cluster instanceclusterinstance.enable(nonClipSession0, newClusterInstance);
//Save the configurationsnonClipSession0.save_config();
//Warm reboot the appliancenonClipSession0.reboot(true);
The cluster is created and the first node is added to the cluster. This nodebecomes the initial configuration coordinator of the cluster.
4. Log on to the cluster IP address to add other appliances to the cluster:
//Connect to the cluster IP addressnitro_service clipSession = new nitro_service(clipAddress,protocol);clipSession.login(uName,password);
//Add the node to the clusterclusternode ClusterNode1 = new clusternode();ClusterNode1.set_nodeid(1);ClusterNode1.set_ipaddress(nsipAddress1);ClusterNode1.set_state("ACTIVE");ClusterNode1.set_backplane("1/1/1");clusternode.add(clipSession,ClusterNode1);
//Save the configurationsclipSession.save_config();
5. Log on to the appliance that you added in the previous step and join it to thecluster:
//Connect to the node that you have just added to the clusternitro_service nonClipSession1 = new nitro_service(nsipAddress1,protocol);nonClipSession1.login(uName,password);
//Join the node to the clustercluster newCluster = new cluster();newCluster.set_clip(clipAddress);newCluster.set_password(password);cluster.join(nonClipSession1,newCluster);
//Save the configurationsnonClipSession1.save_config();
//Warm reboot the appliancenonClipSession1.reboot(true);
The second node is now a part of the cluster.
Citrix NetScaler NITRO Getting Started Guide
15

6. Verify the details of the cluster by logging on to the cluster IP address
//Retrieving the cluster node detailsLong id = new Long(1);clusternode node= clusternode.get(clipSession, id);System.out.println("Node ID: "+ node.get_nodeid() + " | Admin state: " + node.get_state() + " | Backplane interface: "+ node.get_backplane());
//Retrieving the cluster instance detailsLong id1 = new Long(1);clusterinstance instance= clusterinstance.get(clipSession, id1);System.out.println("Cluster instance ID: "+ instance.get_clid() + " | Operational state: " +instance.get_operationalstate());
System APIsThe first step towards using NITRO is to establish a session with the NetScaler applianceand then authenticate the session by using the NetScaler administrator's credentials.
You must create an object of thecom.citrix.netscaler.nitro.service.nitro_service class by specifying theNetScaler IP (NSIP) address and the protocol to connect to the appliance (HTTP orHTTPS). You then use this object and log on to the appliance by specifying the username and the password of the NetScaler administrator.
Note: You must have a user account on that appliance. The configuration operationsthat you perform are limited by the administrative roles assigned to your account.
The following sample code establishes a session with a NetScaler appliance with IPaddress 10.102.29.60 by using the HTTPS protocol:
//Specify the NetScaler appliance IP address and protocolnitro_service ns_session = new nitro_service("10.102.29.60","https");
//Specify the login credentialsns_session.login("admin","verysecret");
Note: When using HTTPS, you must make sure that the root CA is added to thetruststore. By default, NITRO validates the SSL certificate and verifies the hostname.To disable this validation, use the following:
ns_session.set_certvalidation(false);ns_session.set_hostnameverification(false);
Chapter 4 Java API
16

Note: By default, the connection to the appliance expires after 30 minutes of inactivity.You can modify the timeout period by specifying a new timeout period (in seconds) inthe login method. For example, to modify the timeout period to 60 minutes:
ns_session.login("admin","verysecret",3600);
Note: In a NetScaler 1000V deployment, you must specify the eula parameter as truefor accepting the End User License Agreement (EULA) as follows:
ns_session.login("admin","verysecret",3600,true);
You must use the nitro_service object in all further NITRO operations on theappliance. For example to save the configurations on the appliance, you must use thenitro_service object as follows:
ns_session.save_config();
The nitro_service class also provides APIs to perform other system-level operationssuch as enabling and disabling NetScaler features and modes, saving and clearingNetScaler configurations, setting the session timeout, setting the severity of theexceptions to be handled, setting the behavior of bulk operations, and disconnectingfrom the appliance.
Feature Configuration APIsNetScaler resources are organized into a set of packages or namespaces. Each packageor namespace corresponds to a NetScaler feature. For example, all load-balancingrelated resources, such as load balancing virtual server, load balancing group, and loadbalancing monitor are available incom.citrix.netscaler.nitro.resource.config.lb.
Similarly, all application firewall related resources, such as application firewall policyand application firewall archive are available incom.citrix.netscaler.nitro.resource.config.appfw.
Each NetScaler resource is represented by a class. For example, the class thatrepresents a load balancing virtual server is called lbvserver (incom.citrix.netscaler.nitro.resource.config.lb). The state of a resource isrepresented by properties of a class. You can set the value for these properties by usingthe set_<propertyname>() methods provided by the resource class. For example toset the IP address of a load balancing virtual server, the lbvserver class provides theset_ipv46() method. Similarly, you can get the value of these properties by usingthe get_<propertyname>() methods of the resource class.
Citrix NetScaler NITRO Getting Started Guide
17

Note: The setter and getter properties are always executed locally on the client. Theydo not involve any network interaction with the NITRO web service. All properties havebasic simple types: integer, long, boolean, and string.
A resource class provides APIs to perform the following operations:
Create | Retrieve | Update | Delete | Enable/Disable | Unset | Bind/Unbind | Globalbind | Bulk operations
Create
To create a new resource, instantiate the resource class, configure the resource bysetting its properties locally, and then upload the new resource instance to theNetScaler appliance.
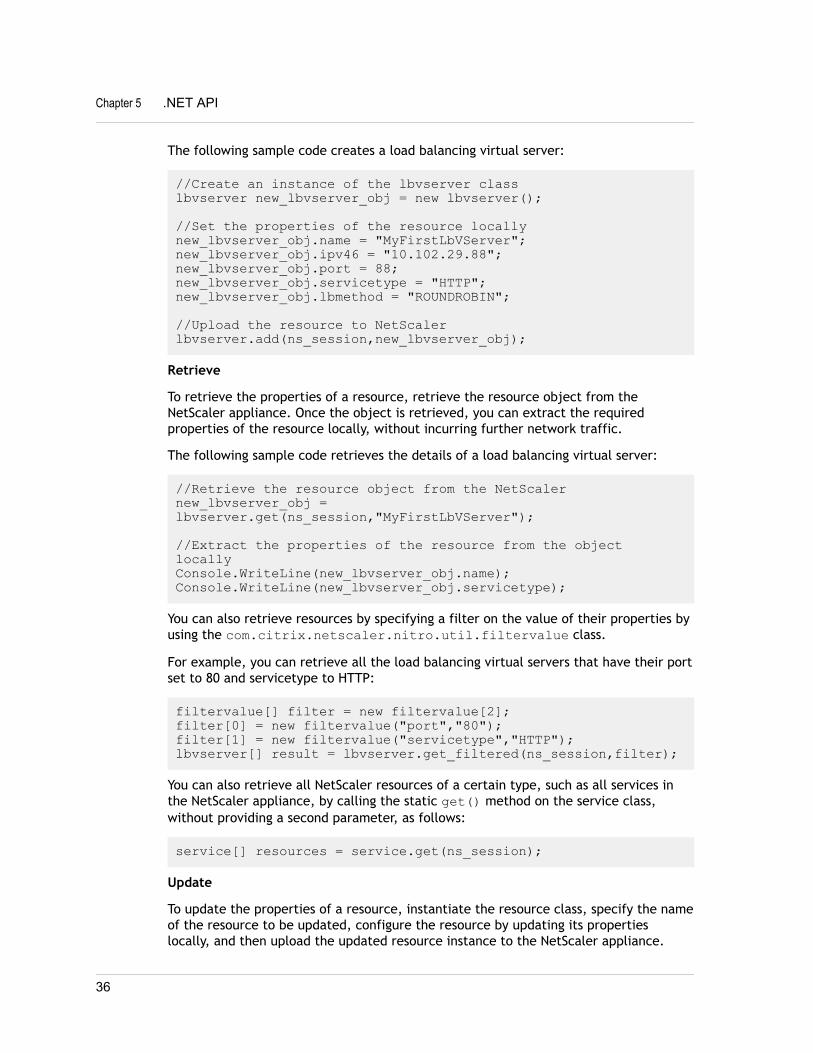
The following sample code creates a load balancing virtual server:
//Create an instance of the lbvserver classlbvserver new_lbvserver_obj = new lbvserver();
//Set the properties of the resource locallynew_lbvserver_obj.set_name("MyFirstLbVServer");new_lbvserver_obj.set_ipv46("10.102.29.88");new_lbvserver_obj.set_port(88);new_lbvserver_obj.set_servicetype("HTTP");new_lbvserver_obj.set_lbmethod("ROUNDROBIN");
//Upload the resource to NetScalerlbvserver.add(ns_session,new_lbvserver_obj);
Retrieve
To retrieve the properties of a resource, you retrieve the resource object from theNetScaler appliance. Once the object is retrieved, you can extract the requiredproperties of the resource locally, without further network traffic.
The following sample code retrieves the details of a load balancing virtual server:
//Retrieve the resource object from the NetScalernew_lbvserver_obj = lbvserver.get(ns_session,"MyFirstLbVServer");
//Extract the properties of the resource from the object locallySystem.out.println(new_lbvserver_obj.get_name());System.out.println(new_lbvserver_obj.get_servicetype());
You can also retrieve resources by specifying a filter on the value of their properties byusing the com.citrix.netscaler.nitro.util.filtervalue class.
Chapter 4 Java API
18

For example, you can retrieve all the load balancing virtual servers that have their portset to 80 and servicetype to HTTP:
filtervalue[] filter = new filtervalue[2];filter[0] = new filtervalue("port","80");filter[1] = new filtervalue("servicetype","HTTP");lbvserver[] result = lbvserver.get_filtered(ns_session,filter);
You can also retrieve all NetScaler resources of a certain type, such as all services inthe NetScaler appliance, by calling the static get() method on the service class,without providing a second parameter, as follows:
service[] resources = service.get(ns_session);
Update
To update the properties of a resource, instantiate the resource class, specify the nameof the resource to be updated, configure the resource by updating its propertieslocally, and then upload the updated resource instance to the NetScaler appliance.
The following sample code updates the service type and load balancing method of aload balancing virtual server:
//Create an instance of the lbvserver classlbvserver update_lb = new lbvserver();
//Specify the name of the lbvserver to be updatedupdate_lb.set_name("MyFirstLbVServer");
//Specify the updated service type and lb methodupdate_lb.set_servicetype("https");update_lb.set_lbmethod("LEASTRESPONSETIME");
//Upload the resource to NetScalerlbvserver.update(ns_session,update_lb);
Note: Some properties in some NetScaler resources are not allowed to be modifiedafter creation. The port number or the service type (protocol) of a load balancing virtualserver or a service, are examples of such properties. Even though the update methodappears to succeed, these properties retain their original values on the appliance.
Delete
To delete an existing resource, invoke the delete() method on the resource class, bypassing the name of the resource.
The following sample code deletes a load balancing virtual server with name"MyFirstLbVServer":
lbvserver remove_lb = new lbvserver();remove_lb.set_name("MyFirstLbVServer");lbvserver.delete(ns_session, remove_lb);
Citrix NetScaler NITRO Getting Started Guide
19

Enable/Disable
To enable a resource, invoke the enable() method.
The following sample code enables a load balancing virtual server named "lb_vip":
lbvserver obj = new lbvserver();obj.set_name = "lb_vip";lbvserver.enable(ns_session, obj);
Note: To disable a resource, invoke the disable() method.
lbvserver.disable(ns_session,obj);
Unset
To unset the value that is set to a parameter, invoke the unset() method on theresource class, by passing the name of the resource and the parameters to be unset. Ifthe parameter has a default value, the value is reset to that value.
The following sample code unsets the load balancing method and the comments of aload balancing virtual server named "lb_123":
lbvserver lb1 = new lbvserver();lb1.set_name("lb_123");String args[] = {"comment", "lbmethod"};lbvserver.unset(ns_session, lb1, args);
Bind/Unbind
NetScaler resources form relationships with each other through the process of binding.This is how services are associated with a load balancing virtual server (by bindingthem to it), or how various policies are bound to a load balancing virtual server. Eachbinding relationship is represented in NITRO by its own class.
To bind one NetScaler resource to another, you must instantiate the appropriatebinding class (for example, to bind a service to a load balancing virtual server, youmust instantiate the lbvserver_service_binding class) and add it to theNetScaler configuration (by using the static add() method on this class).
Binding classes have a property representing the name of each resource in the bindingrelationship. They can also have other properties related to that relationship (forexample, the weight of the binding between a load balancing virtual server and aservice).
The following sample code binds a service to a load balancing virtual server, byspecifying a certain weight for the binding:
lbvserver_service_binding bindObj = new lbvserver_service_binding();bindObj.set_name("MyFirstLbVServer");bindObj.set_servicename("svc_prod");
Chapter 4 Java API
20

bindObj.set_weight(20);lbvserver_service_binding.add(ns_session,bindObj);
Note: To unbind a resource from another, invoke the delete() method from theresource binding class, by passing the name of the two resources.The following code sample unbinds a service from a server:
lbvserver_service_binding bindObj = new lbvserver_service_binding();bindObj.set_name("MyFirstLbVServer");bindObj.set_servicename("svc_prod");lbvserver_service_binding.delete(ns_session,bindObj);
Global bind
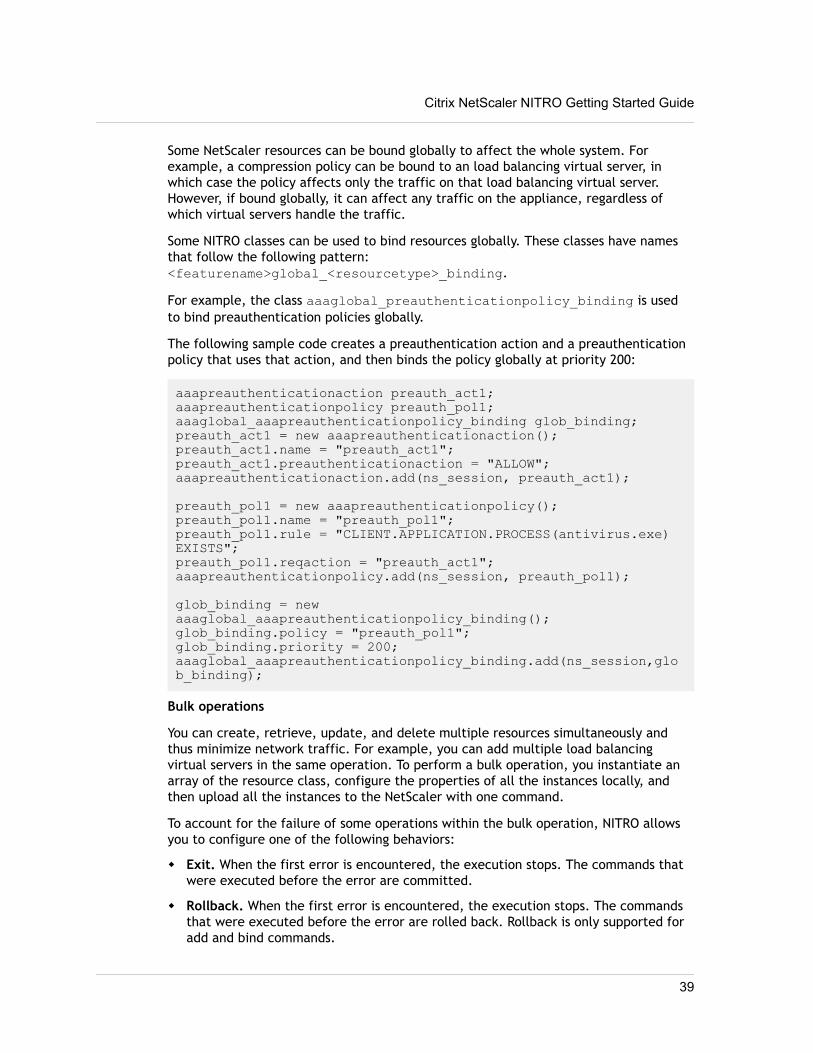
Some NetScaler resources can be bound globally to affect the whole system. Forexample, a compression policy can be bound to an load balancing virtual server, inwhich case the policy affects only the traffic on that load balancing virtual server.However, if bound globally, it can affect any traffic on the appliance, regardless ofwhich virtual servers handle the traffic.
Some NITRO classes can be used to bind resources globally. These classes have namesthat follow the following pattern:<featurename>global_<resourcetype>_binding.
For example, the class aaaglobal_preauthenticationpolicy_binding is usedto bind preauthentication policies globally.
The following sample code creates a preauthentication action and a preauthenticationpolicy that uses that action, and then binds the policy globally at priority 200:
aaapreauthenticationaction preauth_act1;aaapreauthenticationpolicy preauth_pol1;aaaglobal_aaapreauthenticationpolicy_binding glob_binding;preauth_act1 = new aaapreauthenticationaction();preauth_act1.set_name("preauth_act1");preauth_act1.set_preauthenticationaction("ALLOW");aaapreauthenticationaction.add(ns_session,preauth_act1);
preauth_pol1 = new aaapreauthenticationpolicy();preauth_pol1.set_name("preauth_pol1");preauth_pol1.set_rule("CLIENT.APPLICATION.PROCESS(antivirus.exe) EXISTS");preauth_pol1.set_reqaction("preauth_act1");aaapreauthenticationpolicy.add(ns_session,preauth_pol1);
glob_binding = new aaaglobal_aaapreauthenticationpolicy_binding();glob_binding.set_policy("preauth_pol1");glob_binding.set_priority(200);aaaglobal_aaapreauthenticationpolicy_binding.add(ns_session,glob_binding);
Citrix NetScaler NITRO Getting Started Guide
21

Bulk operations
You can create, retrieve, update, and delete multiple resources simultaneously andthus minimize network traffic. For example, you can add multiple load balancingvirtual servers in the same operation. To perform a bulk operation, you instantiate anarray of the resource class, configure the properties of all the instances locally, andthen upload all the instances to the NetScaler with one command.
To account for the failure of some operations within the bulk operation, NITRO allowsyou to configure one of the following behaviors:
w Exit. When the first error is encountered, the execution stops. The commands thatwere executed before the error are committed.
w Rollback. When the first error is encountered, the execution stops. The commandsthat were executed before the error are rolled back. Rollback is only supported foradd and bind commands.
w Continue. All the commands in the list are executed even if some commands fail.
Note: You must configure the required behavior while establishing a connection withthe appliance.
nitro_service ns_session = new nitro_service("10.102.29.60","http");ns_session.set_onerror(OnerrorEnum.CONTINUE);ns_session.login("admin","verysecret");
The following sample code creates two load balancing virtual servers:
//Create an array of lbvserver instanceslbvserver[] lbs = new lbvserver[2];
//Specify properties of the first lbvserverlbs[0] = new lbvserver();lbs[0].set_name("lbvserv1");lbs[0].set_servicetype("http");lbs[0].set_ipv46("10.70.136.5");lbs[0].set_port(80);
//Specify properties of the second lbvserverlbs[1] = new lbvserver();lbs[1].set_name("lbvserv2");lbs[1].set_servicetype("https");lbs[1].set_ipv46("10.70.136.5");lbs[1].set_port(443);
//Upload the properties of the two lbvservers to the NetScalerlbvserver.add(ns_session,lbs);
Chapter 4 Java API
22

Cluster APIsFor managing clusters, you can add or remove a cluster instance or an individual nodeand perform a few other instance or node operations such as viewing instance or nodeproperties. You can also configure the cluster IP address. Other cluster-managementtasks include joining a NetScaler appliance to the cluster and configuring a linkset.
Cluster Instance Operations
Thecom.citrix.netscaler.nitro.resource.config.cluster.clusterinstance class provides APIs to manage a cluster instance.
The following sample code creates a cluster instance with ID 1:
clusterinstance new_cl_inst_obj = new clusterinstance();//Set the properties of the cluster instance locallynew_cl_inst_obj.set_clid(1);new_cl_inst_obj.set_preemption("ENABLED");
//Upload the cluster instanceclusterinstance.add(ns_session,new_cl_inst_obj);
Cluster Node Operations
The com.citrix.netscaler.nitro.resource.config.cluster.clusternodeclass provides APIs to manage cluster nodes.
The following sample code adds a cluster node with NSIP address 10.102.29.60:
clusternode new_cl_node_obj = new clusternode();//Set the properties of the cluster node locallynew_cl_node_obj.set_nodeid(0);new_cl_node_obj.set_ipaddress("10.102.29.60");new_cl_node_obj.set_state("ACTIVE");new_cl_node_obj.set_backplane("0/1/1");
//Upload the cluster nodeclusternode.add(ns_session,new_cl_node_obj);
Add a Cluster IP Address
The com.citrix.netscaler.nitro.resource.config.ns.nsip class providesthe add() API to configure an IP address. To configure the IP address as a cluster IPaddress, you must specify the type as CLIP.
The following sample code configures a cluster IP address on NetScaler appliance withIP address 10.102.29.60:
nsip new_nsip_obj = new nsip();//Set the properties locallynew_nsip_obj.set_ipaddress("10.102.29.61");new_nsip_obj.set_netmask("255.255.255.255");
Citrix NetScaler NITRO Getting Started Guide
23

new_nsip_obj.set_type("CLIP");
//Upload the cluster nodensip.add(ns_session,new_nsip_obj);
Add a Spotted IP Address
The com.citrix.netscaler.nitro.resource.config.ns.nsip class providesthe add() API to configure an IP address. To configure the IP address as spotted, youmust specify the ID of the node that must own the IP address. This configuration mustbe done on the cluster IP address.
The following sample code configures a spotted SNIP address on a node with ID 1:
nsip new_nsip_obj = new nsip();//Set the properties locallynew_nsip_obj.set_ipaddress("10.102.29.77");new_nsip_obj.set_netmask("255.255.255.0");new_nsip_obj.set_type("SNIP");new_nsip_obj.set_ownernode(1);
//Upload the cluster nodensip.add(ns_session,new_nsip_obj);
Join NetScaler Appliance to Cluster
The com.citrix.netscaler.nitro.resource.config.cluster.cluster classprovides the join() API to join a NetScaler appliance to the cluster. You must specifythe cluster IP address and the nsroot password of the configuration coordinator.
The following sample joins a NetScaler appliance to a cluster:
cluster new_cl_obj = new cluster();//Set the properties of the cluster locallynew_cl_obj.set_clip("10.102.29.61");new_cl_obj.set_password("verysecret");
//Upload the clustercluster.add(ns_session,new_cl_obj);
Linkset Operations
The com.citrix.netscaler.nitro.resource.config.network.linkset classprovides the APIs to manage linksets.
To configure a linkset, do the following:
1. Add a linkset by invoking the add() method of the linkset class.
2. Bind the interfaces to the linkset using the add() method of thelinkset_interface_binding class.
Chapter 4 Java API
24

The following sample code creates a linkset LS/1 and bind interfaces 1/1/2 and 2/1/2to it:
//Create the linksetlinkset new_linkset_obj = new linkset();new_linkset_obj.set_id("LS/1");linkset.add(ns_session,new_linkset_obj);
//Bind the interfaces to the linksetlinkset_interface_binding new_linkif_obj = new linkset_interface_binding();new_linkif_obj.set_id("LS/1");new_linkif_obj.set_ifnum("1/1/2 2/1/2");linkset_interface_binding.add(ns_session,new_linkif_obj);
Admin Partitions APITo create an admin partition, you must perform a set of operations on the defaultpartition. To understand this procedure, let us consider a company that has twodepartments each of which has an application that requires the NetScaler functionality.The NetScaler admin wants to have a different partition for each department so thatthere is isolation of users and configurations. The NetScaler admin must do thefollowing (the sample shows configurations only for a single admin partition):
Note: For detailed information and best practices, see Admin Partitions.
1. Create a partition and allocate the required resources to that partition.
//Creating a new partition...nspartition nspartitionObject = new nspartition();nspartitionObject.set_partitionname("partition-dept1");nspartitionObject.set_maxbandwidth(10240);nspartitionObject.set_maxconn(1024);nspartitionObject.set_maxmemlimit(10);nspartitionObject.set_minbandwidth(1240);base_response result = nspartition.add(nitroService, nspartitionObject);
2. Associate the appropriate users with the partition.
//Associating user1 to partition-dept1... systemuser_nspartition_binding systemuser_nspartition_binding_object = new systemuser_nspartition_binding();systemuser_nspartition_binding_object.set_partitionname("partition-dept1");systemuser_nspartition_binding_object.set_username("user1");base_response result = systemuser_nspartition_binding.add(nitroService, systemuser_nspartition_binding_object);
Citrix NetScaler NITRO Getting Started Guide
25

3. Associate an appropriate command policy to the admin partition user.
//Associating partition-admin to user1... systemuser_systemcmdpolicy_binding systemuser_systemcmdpolicy_binding_object = new systemuser_systemcmdpolicy_binding();systemuser_systemcmdpolicy_binding_object.set_username("user1");systemuser_systemcmdpolicy_binding_object.set_policyname("partition-admin");systemuser_systemcmdpolicy_binding_object.set_priority(1);base_response result = systemuser_systemcmdpolicy_binding.add(nitroService,systemuser_systemcmdpolicy_binding_object);
4. Specify the VLANs or bridgegroups to be associated with the partition. This stepensures network isolation of the traffic. Traffic received on the interfaces of theVLAN or bridgegroup is isolated from the traffic of other partitions.
//Specifying the VLAN to be associated with the partition...nspartition_vlan_binding nspartition_vlan_binding_object = new nspartition_vlan_binding();nspartition_vlan_binding_object.set_vlan(2);nspartition_vlan_binding_object.set_partitionname("partition-dept1");base_response result = nspartition_vlan_binding.add(nitroService, nspartition_vlan_binding_object);
5. Save the configurations
//Saving the configurations...nitroService.save_config();
The admin partition is created.
6. Now, to configure this admin partition, you must logout of the default partitionand logon again. You are automatically taken to the admin partition to which youwere first bound and once there you can configure the NetScaler.
Note: If you want to configure another admin partition, perform the switchoperation given in the next step before performing this step.
7. [Optional] If you are associated with multiple admin partitions, you can switch tothe required partition.
//Switching to other partition named partition-dept2... nspartition nspartitionObject = new nspartition();nspartitionObject.set_partitionname("partition-dept2");base_response result = nspartition.Switch(nitroService, nspartitionObject);
Chapter 4 Java API
26

Feature Statistics APIsThe NetScaler appliance collects statistics about the usage of its features and thecorresponding resources. You can retrieve these statistics by using NITRO API. Thestatistics APIs are available in different packages from the configuration APIs.
The APIs to retrieve statistics of NetScaler features are available in packages that havethe following pattern:com.citrix.netscaler.nitro.resource.stat.<feature>.
For example, APIs to retrieve statistics of the load balancing virtual server areavailable in the com.citrix.netscaler.nitro.resource.stat.lb package.
The following sample code retrieves the statistics of a load balancing virtual server anddisplays some of the statistics returned:
lbvserver_stats stats = lbvserver_stats.get(ns_session,"MyFirstLbVServer");System.out.println(stats.get_curclntconnections());System.out.println(stats.get_deferredreqrate());
Note: Not all NetScaler features and resources have statistic objects associated withthem.
AppExpert Application APIsTo export an AppExpert application, you must instantiate thecom.citrix.netscaler.nitro.resource.config.app.application class,configure the properties of the AppExpert locally, and then export the AppExpertapplication.
The following sample code exports an AppExpert application named "MyApp1":
application myapp = new application();myapp.set_appname("MyApp1");myapp.set_apptemplatefilename("myapp_template");application.export(ns_session,myapp);
You can also import an AppExpert application. You must instantiate thecom.citrix.netscaler.nitro.resource.config.app.application class,configure the properties of the AppExpert locally, and then import the AppExpertapplication.
The following sample code imports an AppExpert application named "MyApp1":
application myapp = new application();myapp.set_appname("MyApp1");myapp.set_apptemplatefilename("myapp_template");application.Import(ns_session,myapp);
Citrix NetScaler NITRO Getting Started Guide
27

Exception HandlingThe status of a NITRO request is captured in thecom.citrix.netscaler.nitro.exception.nitro_exception class. This classprovides the following details of the exception:
w Session ID. The session in which the exception occurred.
w Severity. The severity of the exception: error or warning. By default, only errors arecaptured. To capture warnings, you must set the warning flag to true, whileconnecting to the appliance.
w Error code. The status of the NITRO request. An error code of 0 indicates that theNITRO request is successful. A non-zero error code indicates an error in processingthe NITRO request.
w Error message. Provides a brief description of the exception.
For a list of error codes, see the errorlisting.html file available in the<NITRO_SDK_HOME>/doc/api_reference folder.
Chapter 4 Java API
28

Chapter 5
.NET API
Topics:• Tutorials
• System APIs
• Feature Configuration APIs
• Cluster APIs
• Admin Partitions API
• Feature Statistics APIs
• AppExpert Application APIs
• Exception Handling
NetScaler NITRO APIs are categorized depending on the scopeand purpose of the APIs into system APIs, featureconfiguration APIs, and feature statistics APIs. Additionally,you can import and export AppExpert applications. You canalso troubleshoot NITRO operations.
Note: All NITRO operations are logged in the /var/log/nitro.log file on the appliance.
29

TutorialsThese tutorials demonstrate the end-to-end usage of NITRO to achieve the following:
w Create Your First NITRO Application
w Create a NetScaler Cluster
Create Your First NITRO ApplicationAfter completing this tutorial, you will understand and be able to perform the followingtasks:
w Integrate NITRO with the IDE
w Log in to the appliance
w Create a load balancing virtual server (lbvserver)
w Retrieve details of an lbvserver
w Delete an lbvserver
w Save the configurations on the appliance
w Log out of the appliance
w Debug the NITRO application
Before you begin, make sure that you have the latest NITRO SDK and that the clientapplication satisfies the prerequisites for using the NITRO SDK.
Sample CodeFor the executable code, see the <NITRO_SDK_HOME>/sample/MyFirstNitroApplication.cs sample file.
To create your first NITRO application:1. Copy the libraries from <NITRO_SDK_HOME>/lib folder to the project classpath.
2. Create a new class and name it MyFirstNitroApplication.
3. Create an instance ofcom.citrix.netscaler.nitro.service.nitro_service class. Thisinstance is used to perform all operations on the appliance:
nitro_service ns_session = new nitro_service("10.102.29.170", "http");
This code establishes a connection with an appliance that has IP address10.102.29.170 and uses the HTTP protocol. Replace 10.102.29.170 with the IPaddress of the NetScaler appliance that you have access to.
Chapter 5 .NET API
30

4. Use the nitro_service instance to log in to the appliance using yourcredentials:
ns_session.login("admin","verysecret");
This code logs into the appliance, with user name as admin and password asverysecret. Replace the credentials with your login credentials.
5. Enable the load balancing feature:
String[] features_to_be_enabled = {"lb"};ns_session.enable_features(features_to_be_enabled);
This code enables load balancing on the appliance.
6. Create an instance of thecom.citrix.netscaler.nitro.resource.config.lb.lbvserver class.You will use this instance to perform operations on the lbvserver.
lbvserver new_lbvserver_obj = new lbvserver();
7. Use the lbvserver instance to create a new lbvserver:
new_lbvserver_obj.name = "MyFirstLbVServer";new_lbvserver_obj.ipv46 = "10.102.29.88";new_lbvserver_obj.servicetype = "HTTP";new_lbvserver_obj.port = 80;new_lbvserver_obj.lbmethod = "ROUNDROBIN";lbvserver.add(ns_session,new_lbvserver_obj);
This code first sets the attributes (name, IP address, service type, port, and loadbalancing method) of the lbvserver locally and then adds it to the appliance byusing the corresponding add() method.
8. Retrieve the details of the lbvserver you have created:
lbvserver new_lbvserver_obj1 = lbvserver.get(ns_session,new_lbvserver_obj.name);System.Console.Out.WriteLine("Name : " +new_lbvserver_obj1.name +"\n" +"Protocol : " +new_lbvserver_obj1.servicetype);
This code first retrieves the details of the lbvserver as an object from theNetScaler, extracts the required attributes (name and service type) from theobject, and displays the results.
9. Delete the lbvserver you created in the above steps:
lbvserver.delete(ns_session, new_lbvserver_obj.name);
10. Save the configurations:
ns_session.save_config();
Citrix NetScaler NITRO Getting Started Guide
31

11. Log out of the appliance:
ns_session.logout();
Debug the NITRO applicationAll NITRO exceptions are captured by thecom.citrix.netscaler.nitro.exception.nitro_exception class. For a moredetailed description, see Exception Handling.
Create a NetScaler ClusterAfter completing this tutorial you will be able to create a two-node NetScaler cluster.To add more appliances to the cluster you must repeat the procedure that adds andjoins the node to the cluster.
Sample CodeFor the executable code, see the <NITRO_SDK_HOME>/sample/CreateCluster.cssample file.
To create a cluster1. Copy the libraries from <NITRO_SDK_HOME>/lib folder to the project classpath.
2. Create a new class and name it CreateCluster.
3. Log on to one of the appliances that you want to add to the cluster and create acluster:
//Connect to the first appliance that you want to add to the clusternitro_service nonClipSession0 = new nitro_service(nsipAddress0,protocol);nonClipSession0.login(uName,password);
//Create a cluster instanceclusterinstance newClusterInstance = new clusterinstance();newClusterInstance.clid = 1;clusterinstance.add(nonClipSession0,newClusterInstance);
//Add the appliance to the clusterclusternode ClusterNode0 = new clusternode();ClusterNode0.nodeid = 0;ClusterNode0.ipaddress = nsipAddress0;ClusterNode0.state = "ACTIVE";ClusterNode0.backplane = "0/1/1";clusternode.add(nonClipSession0,ClusterNode0);
//Add the cluster IP addressnsip newNSIPAddress = new nsip();newNSIPAddress.ipaddress = clipAddress;newNSIPAddress.netmask = "255.255.255.255";newNSIPAddress.type = "CLIP";nsip.add(nonClipSession0,newNSIPAddress);
Chapter 5 .NET API
32

//Enable the cluster instanceclusterinstance.enable(nonClipSession0, newClusterInstance);
//Save the configurationsnonClipSession0.save_config();
//Warm reboot the appliancenonClipSession0.reboot(true);
The cluster is created and the first node is added to the cluster. This nodebecomes the initial configuration coordinator of the cluster.
4. Log on to the cluster IP address to add other appliances to the cluster:
//Connect to the cluster IP addressnitro_service clipSession = new nitro_service(clipAddress,protocol);clipSession.login(uName,password);
//Add the node to the clusterclusternode ClusterNode1 = new clusternode();ClusterNode1.nodeid = 1;ClusterNode1.ipaddress = nsipAddress1;ClusterNode1.state = "ACTIVE";ClusterNode1.backplane = "1/1/1";clusternode.add(clipSession,ClusterNode1);
//Save the configurationsclipSession.save_config();
5. Log on to the appliance that you added in the previous step and join it to thecluster:
//Connect to the node that you have just added to the clusternitro_service nonClipSession1 = new nitro_service(nsipAddress1,protocol);nonClipSession1.login(uName,password);
//Join the node to the clustercluster newCluster = new cluster();newCluster.clip = clipAddress;newCluster.password = password;cluster.join(nonClipSession1,newCluster);
//Save the configurationsnonClipSession1.save_config();
//Warm reboot the appliancenonClipSession1.reboot(true);
The second node is now a part of the cluster.
Citrix NetScaler NITRO Getting Started Guide
33

6. Verify the details of the cluster by logging on to the cluster IP address
//Retrieving the cluster node detailsuint id = 1;clusternode node= clusternode.get(clipSession, id);System.Console.Out.WriteLine("Node ID: " + node.nodeid + " | Admin state: " + node.state + " | Backplane interface: " + node.backplane);
//Retrieving the cluster instance detailsuint id1 = 1;clusterinstance instance= clusterinstance.get(clipSession, id1);System.Console.Out.WriteLine("Cluster instance ID: "+ instance.clid + " | Operational state: " +instance.operationalstate);
System APIsThe first step towards using NITRO is to establish a session with the NetScaler applianceand then authenticate the session by using the NetScaler administrator's credentials.
You must create an object of thecom.citrix.netscaler.nitro.service.nitro_service class by specifying theNetScaler IP (NSIP) address and the protocol to connect to the appliance (HTTP orHTTPS). You then use this object and log on to the appliance by specifying the username and the password of the NetScaler administrator.
Note: You must have a user account on that appliance. The configuration operationsthat you perform are limited by the administrative roles assigned to your account.
The following sample code establishes a session with a NetScaler appliance with IPaddress 10.102.29.60 by using the HTTPS protocol:
//Specify the NetScaler appliance IP address and protocolnitro_service ns_session = new nitro_service("10.102.29.60","https");
//Specify the login credentialsns_session.login("admin","verysecret");
Note: By default, the connection to the appliance expires after 30 minutes of inactivity.You can modify the timeout period by specifying a new timeout period (in seconds) inthe login method. For example, to modify the timeout period to 60 minutes:
ns_session.login("admin","verysecret",3600);
Chapter 5 .NET API
34

Note: In a NetScaler 1000V deployment, you must specify the eula parameter as truefor accepting the End User License Agreement (EULA) as follows:
ns_session.login("admin","verysecret",3600,true);
You must use the nitro_service object in all further NITRO operations on theappliance. For example to save the configurations on the appliance, you must use thenitro_service object as follows:
ns_session.save_config();
The nitro_service class also provides APIs to perform other system-level operationssuch as enabling and disabling NetScaler features and modes, saving and clearingNetScaler configurations, setting the session timeout, setting the severity of theexceptions to be handled, setting the behavior of bulk operations, and disconnectingfrom the appliance.
Feature Configuration APIsNetScaler resources are organized into a set of packages or namespaces. Each packageor namespace corresponds to a NetScaler feature. For example, all load-balancingrelated resources, such as load balancing virtual server, load balancing group, and loadbalancing monitor are available incom.citrix.netscaler.nitro.resource.config.lb.
Similarly, all application firewall related resources, such as application firewall policyand application firewall archive are available incom.citrix.netscaler.nitro.resource.config.appfw.
Each NetScaler resource is represented by a class. For example, the class thatrepresents a load balancing virtual server is called lbvserver (incom.citrix.netscaler.nitro.resource.config.lb). The state of a resource isrepresented by properties of a class. You can get and set the properties of the class.
Note: The setter and getter properties are always executed locally on the client. Theydo not involve any network interaction with the NITRO web service. All properties havebasic simple types: integer, long, boolean, and string.
A resource class provides APIs to perform the following operations:
Create | Retrieve | Update | Delete | Enable/Disable | Unset | Bind/Unbind | Globalbind | Bulk operations
Create
To create a new resource, instantiate the resource class, configure the resource bysetting its properties locally, and then upload the new resource instance to theNetScaler appliance.
Citrix NetScaler NITRO Getting Started Guide
35
The following sample code creates a load balancing virtual server:
//Create an instance of the lbvserver classlbvserver new_lbvserver_obj = new lbvserver();
//Set the properties of the resource locallynew_lbvserver_obj.name = "MyFirstLbVServer";new_lbvserver_obj.ipv46 = "10.102.29.88";new_lbvserver_obj.port = 88;new_lbvserver_obj.servicetype = "HTTP";new_lbvserver_obj.lbmethod = "ROUNDROBIN";
//Upload the resource to NetScalerlbvserver.add(ns_session,new_lbvserver_obj);
Retrieve
To retrieve the properties of a resource, retrieve the resource object from theNetScaler appliance. Once the object is retrieved, you can extract the requiredproperties of the resource locally, without incurring further network traffic.
The following sample code retrieves the details of a load balancing virtual server:
//Retrieve the resource object from the NetScalernew_lbvserver_obj = lbvserver.get(ns_session,"MyFirstLbVServer");
//Extract the properties of the resource from the object locallyConsole.WriteLine(new_lbvserver_obj.name);Console.WriteLine(new_lbvserver_obj.servicetype);
You can also retrieve resources by specifying a filter on the value of their properties byusing the com.citrix.netscaler.nitro.util.filtervalue class.
For example, you can retrieve all the load balancing virtual servers that have their portset to 80 and servicetype to HTTP:
filtervalue[] filter = new filtervalue[2];filter[0] = new filtervalue("port","80");filter[1] = new filtervalue("servicetype","HTTP");lbvserver[] result = lbvserver.get_filtered(ns_session,filter);
You can also retrieve all NetScaler resources of a certain type, such as all services inthe NetScaler appliance, by calling the static get() method on the service class,without providing a second parameter, as follows:
service[] resources = service.get(ns_session);
Update
To update the properties of a resource, instantiate the resource class, specify the nameof the resource to be updated, configure the resource by updating its propertieslocally, and then upload the updated resource instance to the NetScaler appliance.
Chapter 5 .NET API
36

The following sample code updates the service type and load balancing method of aload balancing virtual server:
//Create an instance of the lbvserver classlbvserver update_lb = new lbvserver();
//Specify the name of the lbvserver to be updatedupdate_lb.name = "MyFirstLbVServer";
//Specify the updated service type and lb methodupdate_lb.servicetype = "https";update_lb.lbmethod = "LEASTRESPONSETIME";
//Upload the resource to NetScalerlbvserver.update(ns_session, update_lb);
Note: Some properties in some NetScaler resources are not allowed to be modifiedafter creation. The port number or the service type (protocol) of a load balancing virtualserver or a service, are examples of such properties. Even though the update methodappears to succeed, these properties retain their original values on the appliance.
Delete
To delete an existing resource, invoke the static method delete() on the resource class,by passing the name of the resource.
The following sample code deletes a load balancing virtual server with name"MyFirstLbVServer":
lbvserver remove_lb = new lbvserver();remove_lb.name("MyFirstLbVServer");lbvserver.delete(ns_session, remove_lb);
Enable/Disable
To enable a resource, invoke the enable() method.
The following sample code enables a load balancing virtual server named "lb_vip":
lbvserver obj = new lbvserver();obj.name = "lb_vip";lbvserver.enable(ns_session, obj);
Note: To disable a resource, invoke the disable() method.
lbvserver.disable(ns_session, obj);
Unset
Citrix NetScaler NITRO Getting Started Guide
37

To unset the value that is set to a parameter, invoke the unset() method on theresource class, by passing the name of the resource and the parameters to be unset. Ifthe parameter has a default value, the value is reset to that value.
The following sample code unsets the load balancing method and the comments of aload balancing virtual server named "lb_123":
lbvserver obj = new lbvserver();obj.name = "lb_123";String[] args = { "lbmethod","comment" };lbvserver.unset(ns_session, lb1, args);
Bind/Unbind
NetScaler resources form relationships with each other through the process of binding.This is how services are associated with a load balancing virtual server (by bindingthem to it), or how various policies are bound to a load balancing virtual server. Eachbinding relationship is represented in NITRO by its own class.
To bind one NetScaler resource to another, you must instantiate the appropriatebinding class (for example, to bind a service to a load balancing virtual server, youmust instantiate the lbvserver_service_binding class) and add it to theNetScaler configuration (by using the static add() method on this class).
Binding classes have a property representing the name of each resource in the bindingrelationship. They can also have other properties related to that relationship (forexample, the weight of the binding between a load balancing virtual server and aservice).
The following sample code binds a service to a load balancing virtual server, byspecifying a certain weight for the binding:
lbvserver_service_binding bindObj = new lbvserver_service_binding();bindObj.name = "MyFirstLbVServer";bindObj.servicename = "svc_prod";bindObj.weight = 20;lbvserver_service_binding.add(ns_session,bindObj);
Note: To unbind a resource from another, invoke the delete() method from theresource binding class, by passing the name of the two resources.The following code sample unbinds a service from a server:
lbvserver_service_binding bindObj = new lbvserver_service_binding();bindObj.name("MyFirstLbVServer");bindObj.servicename("svc_prod");lbvserver_service_binding.delete(ns_session,bindObj);
Global bind
Chapter 5 .NET API
38
Some NetScaler resources can be bound globally to affect the whole system. Forexample, a compression policy can be bound to an load balancing virtual server, inwhich case the policy affects only the traffic on that load balancing virtual server.However, if bound globally, it can affect any traffic on the appliance, regardless ofwhich virtual servers handle the traffic.
Some NITRO classes can be used to bind resources globally. These classes have namesthat follow the following pattern:<featurename>global_<resourcetype>_binding.
For example, the class aaaglobal_preauthenticationpolicy_binding is usedto bind preauthentication policies globally.
The following sample code creates a preauthentication action and a preauthenticationpolicy that uses that action, and then binds the policy globally at priority 200:
aaapreauthenticationaction preauth_act1;aaapreauthenticationpolicy preauth_pol1;aaaglobal_aaapreauthenticationpolicy_binding glob_binding;preauth_act1 = new aaapreauthenticationaction();preauth_act1.name = "preauth_act1";preauth_act1.preauthenticationaction = "ALLOW";aaapreauthenticationaction.add(ns_session, preauth_act1);
preauth_pol1 = new aaapreauthenticationpolicy();preauth_pol1.name = "preauth_pol1";preauth_pol1.rule = "CLIENT.APPLICATION.PROCESS(antivirus.exe) EXISTS";preauth_pol1.reqaction = "preauth_act1";aaapreauthenticationpolicy.add(ns_session, preauth_pol1);
glob_binding = new aaaglobal_aaapreauthenticationpolicy_binding();glob_binding.policy = "preauth_pol1"; glob_binding.priority = 200;aaaglobal_aaapreauthenticationpolicy_binding.add(ns_session,glob_binding);
Bulk operations
You can create, retrieve, update, and delete multiple resources simultaneously andthus minimize network traffic. For example, you can add multiple load balancingvirtual servers in the same operation. To perform a bulk operation, you instantiate anarray of the resource class, configure the properties of all the instances locally, andthen upload all the instances to the NetScaler with one command.
To account for the failure of some operations within the bulk operation, NITRO allowsyou to configure one of the following behaviors:
w Exit. When the first error is encountered, the execution stops. The commands thatwere executed before the error are committed.
w Rollback. When the first error is encountered, the execution stops. The commandsthat were executed before the error are rolled back. Rollback is only supported foradd and bind commands.
Citrix NetScaler NITRO Getting Started Guide
39

w Continue. All the commands in the list are executed even if some commands fail.
Note: You must configure the required behavior while establishing a connection withthe appliance.
nitro_service ns_session = new nitro_service("10.102.29.60","http");ns_session.onerror = OnerrorEnum.CONTINUE;ns_session.login("admin","verysecret");
The following sample code creates two load balancing virtual servers:
//Create an array of lbvserver instanceslbvserver[] lbs = new lbvserver[2];
//Specify details of first lbvserverlbs[0] = new lbvserver();lbs[0].name = "lbvserv1";lbs[0].servicetype = "http";lbs[0].ipv46 = "10.70.136.5";lbs[0].port = 80;
//Specify details of second lbvserverlbs[1] = new lbvserver();lbs[1].name = "lbvserv2";lbs[1].servicetype = "https";lbs[1].ipv46 = "10.70.136.5";lbs[1].port = 443;
//upload the details of the lbvservers to the NITRO serverlbvserver.add(ns_session,lbs);
Cluster APIsFor managing clusters, you can add or remove a cluster instance or an individual nodeand perform a few other instance or node operations such as viewing instance or nodeproperties. You can also configure the cluster IP address. Other cluster-managementtasks include joining a NetScaler appliance to the cluster and configuring a linkset.
Cluster Instance Operations
Thecom.citrix.netscaler.nitro.resource.config.cluster.clusterinstance class provides APIs to manage a cluster instance.
The following sample code creates a cluster instance with ID 1:
clusterinstance new_cl_inst_obj = new clusterinstance();//Set the properties of the cluster instance locallynew_cl_inst_obj.clid = 1;new_cl_inst_obj.preemption = "ENABLED";
Chapter 5 .NET API
40

//Upload the cluster instanceclusterinstance.add(ns_session,new_cl_inst_obj);
Cluster Node Operations
The com.citrix.netscaler.nitro.resource.config.cluster.clusternodeclass provides APIs to manage cluster nodes.
The following sample code adds a cluster node with NSIP address 10.102.29.60:
clusternode new_cl_node_obj = new clusternode();//Set the properties of the cluster node locallynew_cl_node_obj.nodeid = 0;new_cl_node_obj.ipaddress = "10.102.29.60";new_cl_node_obj.state = "ACTIVE";new_cl_node_obj.backplane = "0/1/1";
//Upload the cluster nodeclusternode.add(ns_session,new_cl_node_obj);
Add a Cluster IP Address
The com.citrix.netscaler.nitro.resource.config.ns.nsip class providesthe add() API to configure an IP address. To configure the IP address as a cluster IPaddress, you must specify the type as CLIP.
The following sample code configures a cluster IP address on NetScaler appliance withIP address 10.102.29.60:
nsip new_nsip_obj = new nsip();//Set the properties locallynew_nsip_obj.ipaddress = "10.102.29.61";new_nsip_obj.netmask = "255.255.255.255";new_nsip_obj.type = "CLIP";
//Upload the cluster nodensip.add(ns_session,new_nsip_obj);
Add a Spotted IP Address
The com.citrix.netscaler.nitro.resource.config.ns.nsip class providesthe add() API to configure an IP address. To configure the IP address as spotted, youmust specify the ID of the node that must own the IP address. This configuration mustbe done on the cluster IP address.
The following sample code configures a spotted SNIP address on a node with ID 1:
nsip new_nsip_obj = new nsip();//Set the properties locallynew_nsip_obj.ipaddress = "10.102.29.77";new_nsip_obj.netmask = "255.255.255.0";new_nsip_obj.type = "SNIP";new_nsip_obj.ownernode = 1;
Citrix NetScaler NITRO Getting Started Guide
41

//Upload the cluster nodensip.add(ns_session,new_nsip_obj);
Join NetScaler Appliance to Cluster
The com.citrix.netscaler.nitro.resource.config.cluster.cluster classprovides the join() API to join a NetScaler appliance to the cluster. You must specifythe cluster IP address and the nsroot password of the configuration coordinator.
The following sample code joins a NetScaler appliance to a cluster:
cluster new_cl_obj = new cluster();//Set the properties of the cluster locallynew_cl_obj.clip = "10.102.29.61";new_cl_obj.password = "verysecret";
//Upload the cluster nodecluster.add(ns_session,new_cl_node_obj);
Linkset Operations
The com.citrix.netscaler.nitro.resource.config.network.linkset classprovides the APIs to manage linksets.
To configure a linkset, do the following:
1. Add a linkset by invoking the add() method of the linkset class.
2. Bind the interfaces to the linkset using the add() method of thelinkset_interface_binding class.
The following sample code creates a linkset LS/1 and bind interfaces 1/1/2 and 2/1/2to it:
//Create the linksetlinkset new_linkset_obj = new linkset();new_linkset_obj.id = "LS/1";linkset.add(ns_session,new_linkset_obj);
//Bind the interfaces to the linksetlinkset_interface_binding new_linkif_obj = new linkset_interface_binding();new_linkif_obj.id = "LS/1";new_linkif_obj.ifnum = "1/1/2 2/1/2";linkset_interface_binding.add(ns_session,new_linkif_obj);
Admin Partitions APITo create an admin partition, you must perform a set of operations on the defaultpartition. To understand this procedure, let us consider a company that has twodepartments each of which has an application that requires the NetScaler functionality.The NetScaler admin wants to have a different partition for each department so that
Chapter 5 .NET API
42

there is isolation of users and configurations. The NetScaler admin must do thefollowing (the sample shows configurations only for a single admin partition):
Note: For detailed information and best practices, see Admin Partitions.
1. Create a partition and allocate the required resources to that partition.
//Creating a new partition...nspartition nspartitionObject = new nspartition();nspartitionObject.partitionname = "partition-dept1";nspartitionObject.maxbandwidth = 10240;nspartitionObject.maxconn = 1024;nspartitionObject.maxmemlimit = 10;nspartitionObject.minbandwidth = 1240;base_response result = nspartition.add(nitroService, nspartitionObject);
2. Associate the appropriate users with the partition.
//Associating user1 to partition-dept1... systemuser_nspartition_binding systemuser_nspartition_binding_object = new systemuser_nspartition_binding();systemuser_nspartition_binding_object.partitionname = "partition-dept1";systemuser_nspartition_binding_object.username = "user1";base_response result = systemuser_nspartition_binding.add(nitroService, systemuser_nspartition_binding_object);
3. Associate an appropriate command policy to the admin partition user.
//Associating partition-admin to user1... systemuser_systemcmdpolicy_binding systemuser_systemcmdpolicy_binding_object = new systemuser_systemcmdpolicy_binding();systemuser_systemcmdpolicy_binding_object.username = "user1";systemuser_systemcmdpolicy_binding_object.policyname = "partition-admin";systemuser_systemcmdpolicy_binding_object.priority = 1;base_response result = systemuser_systemcmdpolicy_binding.add(nitroService,systemuser_systemcmdpolicy_binding_object);
4. Specify the VLANs or bridgegroups to be associated with the partition. This stepensures network isolation of the traffic. Traffic received on the interfaces of theVLAN or bridgegroup is isolated from the traffic of other partitions.
//Specifying the VLAN to be associated with the partition...nspartition_vlan_binding nspartition_vlan_binding_object = new nspartition_vlan_binding();nspartition_vlan_binding_object.vlan = 2;nspartition_vlan_binding_object.partitionname = "partition-dept1";
Citrix NetScaler NITRO Getting Started Guide
43

base_response result = nspartition_vlan_binding.add(nitroService, nspartition_vlan_binding_object);
5. Save the configurations
//Saving the configurations...nitroService.save_config();
The admin partition is created.
6. Now, to configure this admin partition, you must logout of the default partitionand logon again. You are automatically taken to the admin partition to which youwere first bound and once there you can configure the NetScaler.
Note: If you want to configure another admin partition, perform the switchoperation given in the next step before performing this step.
7. [Optional] If you are associated with multiple admin partitions, you can switch tothe required partition.
//Switching to other partition named partition-dept2... nspartition nspartitionObject = new nspartition();nspartitionObject.partitionname = "partition-dept2";base_response result = nspartition.Switch(nitroService, nspartitionObject);
Feature Statistics APIsThe NetScaler appliance collects statistics about the usage of its features and thecorresponding resources. You can retrieve these statistics by using NITRO API. Thestatistics APIs are available in different namespaces from the configuration APIs.
The APIs to retrieve statistics of NetScaler features are available in namespaces thathave the following pattern:com.citrix.netscaler.nitro.resource.stat.<feature>.
For example, APIs to retrieve statistics of the load balancing virtual server areavailable in the com.citrix.netscaler.nitro.resource.stat.lb namespace.
The following sample code retrieves the statistics of a load balancing virtual server anddisplays some of the statistics returned:
lbvserver_stats stats = lbvserver_stats.get(ns_session,"MyFirstLbVServer");Console.WriteLine(stats.curclntconnections);Console.WriteLine(stats.deferredreqrate);
Note: Not all NetScaler features and resources have statistic objects associated withthem.
Chapter 5 .NET API
44

AppExpert Application APIsTo export an AppExpert application, you must instantiate thecom.citrix.netscaler.nitro.resource.config.app.application class,configure the properties of the AppExpert locally, and then export the AppExpertapplication.
The following sample code exports an AppExpert application named "MyApp1":
application myapp = new application();myapp.appname = "MyApp1";myapp.apptemplatefilename = "myapp_template";application.export(ns_session,myapp);
You can also import an AppExpert application. You must instantiate thecom.citrix.netscaler.nitro.resource.config.app.application class,configure the properties of the AppExpert locally, and then import the AppExpertapplication.
The following sample code imports an AppExpert application named "MyApp1":
application myapp = new application();myapp.appname = "MyApp1";myapp.apptemplatefilename = "myapp_template";application.Import(ns_session,myapp);
Exception HandlingThe status of a NITRO request is captured in thecom.citrix.netscaler.nitro.exception.nitro_exception class. This classprovides the following details of the exception:
w Session ID. The session in which the exception occurred.
w Severity. The severity of the exception: error or warning. By default, only errors arecaptured. To capture warnings, you must set the warning flag to true, whileconnecting to the appliance.
w Error code. The status of the NITRO request. An error code of 0 indicates that theNITRO request is successful. A non-zero error code indicates an error in processingthe NITRO request.
w Error message. Provides a brief description of the exception.
For a list of error codes, see the errorlisting.html file available in the<NITRO_SDK_HOME>/doc/api_reference folder.
Citrix NetScaler NITRO Getting Started Guide
45

Chapter 5 .NET API
46

Chapter 6
Python API
Topics:• System APIs
• Feature Configuration APIs
• Cluster APIs
• Admin Partitions API
• Feature Statistics APIs
• AppExpert Application APIs
• Exception Handling
NetScaler NITRO APIs are categorized depending on the scopeand purpose of the APIs into system APIs, featureconfiguration APIs, feature statistics APIs, and cluster APIs.Additionally, you can import and export AppExpertapplications. You can also troubleshoot NITRO operations.
Note: All NITRO operations are logged in the /var/log/nitro.log file on the appliance.
47

System APIsThe first step towards using NITRO is to establish a session with the NetScaler applianceand then authenticate the session by using the NetScaler administrator's credentials.
You must create an object of thenssrc.com.citrix.netscaler.nitro.service.nitro_service class byspecifying the NetScaler IP (NSIP) address and the protocol to connect to the appliance(HTTP or HTTPS). You then use this object and log on to the appliance by specifying theuser name and the password of the NetScaler administrator.
Note: You must have a user account on that appliance. The configuration operationsthat you perform are limited by the administrative roles assigned to your account.
The following sample code establishes a session with a NetScaler appliance with IPaddress 10.102.29.60 by using the HTTPS protocol:
//Specify the NetScaler appliance IP address and protocolnitro_service ns_session = new nitro_service("10.102.29.60","https")
//Specify the login credentialsns_session.login("admin","verysecret")
Note: When using HTTPS, you must make sure that the root CA is added to thetruststore. By default, NITRO validates the SSL certificate and verifies the hostname.To disable this validation, use the following:
ns_session.certvalidation = falsens_session.hostnameverification = false
Note: By default, the connection to the appliance expires after 30 minutes of inactivity.You can modify the timeout period by specifying a new timeout period (in seconds) inthe login method. For example, to modify the timeout period to 60 minutes:
ns_session.login("admin","verysecret",3600)
Note: In a NetScaler 1000V deployment, you must specify the eula parameter as truefor accepting the End User License Agreement (EULA) as follows:
ns_session.login("admin","verysecret",3600,true)
Chapter 6 Python API
48

You must use the nitro_service object in all further NITRO operations on theappliance. For example to save the configurations on the appliance, you must use thenitro_service object as follows:
ns_session.save_config()
The nitro_service class also provides APIs to perform other system-level operationssuch as enabling and disabling NetScaler features and modes, saving and clearingNetScaler configurations, setting the session timeout, setting the severity of theexceptions to be handled, setting the behavior of bulk operations, and disconnectingfrom the appliance.
Feature Configuration APIsNetScaler resources are organized into a set of packages or namespaces. Each packageor namespace corresponds to a NetScaler feature. For example, all load-balancingrelated resources, such as load balancing virtual server, load balancing group, and loadbalancing monitor are available innssrc.com.citrix.netscaler.nitro.resource.config.lb.
Similarly, all application firewall related resources, such as application firewall policyand application firewall archive are available innssrc.com.citrix.netscaler.nitro.resource.config.appfw.
Each NetScaler resource is represented by a class. For example, the class thatrepresents a load balancing virtual server is called lbvserver (innssrc.com.citrix.netscaler.nitro.resource.config.lb). The state of aresource is represented by properties of a class. You can get and set the properties ofthe class.
Note: The setter and getter properties are always executed locally on the client. Theydo not involve any network interaction with the NITRO web service. All properties havebasic simple types: integer, long, boolean, and string.
A resource class provides APIs to perform the following operations:
Create | Retrieve | Update | Delete | Enable/Disable | Unset | Bind/Unbind | Globalbind | Bulk operations
Create
To create a new resource, instantiate the resource class, configure the resource bysetting its properties locally, and then upload the new resource instance to theNetScaler appliance.
The following sample code creates a load balancing virtual server:
//Create an instance of the lbvserver classlbvserver new_lbvserver_obj = new lbvserver()
//Set the properties of the resource locally
Citrix NetScaler NITRO Getting Started Guide
49

new_lbvserver_obj.name = "MyFirstLbVServer"new_lbvserver_obj.ipv46 = "10.102.29.88"new_lbvserver_obj.port = 88new_lbvserver_obj.servicetype = "HTTP"new_lbvserver_obj.lbmethod = "ROUNDROBIN"
//Upload the resource to NetScalerlbvserver.add(ns_session, new_lbvserver_obj)
Retrieve
To retrieve the properties of a resource, you retrieve the resource object from theNetScaler appliance. Once the object is retrieved, you can extract the requiredproperties of the resource locally, without further network traffic.
The following sample code retrieves the details of a load balancing virtual server:
//Retrieve the resource object from the NetScalernew_lbvserver_obj = lbvserver.get(ns_session,"MyFirstLbVServer")
//Extract the properties of the resource from the object locallyprint(new_lbvserver_obj.name)print(new_lbvserver_obj.servicetype)
You can also retrieve resources by specifying a filter on the value of their properties byusing the nssrc.com.citrix.netscaler.nitro.util.filtervalue class.
For example, you can retrieve all the load balancing virtual servers that have their portset to 80 and servicetype to HTTP:
filtervalue[] filter = new filtervalue[2]filter[0] = new filtervalue("port","80")filter[1] = new filtervalue("servicetype","HTTP")lbvserver[] result = lbvserver.filtered(ns_session, filter)
You can also retrieve all NetScaler resources of a certain type, such as all services inthe NetScaler appliance, by calling the static get() method on the service class,without providing a second parameter, as follows:
service[] resources = service.get(ns_session)
Update
To update the properties of a resource, instantiate the resource class, specify the nameof the resource to be updated, configure the resource by updating its propertieslocally, and then upload the updated resource instance to the NetScaler appliance.
The following sample code updates the service type and load balancing method of aload balancing virtual server:
//Create an instance of the lbvserver classlbvserver update_lb = new lbvserver()
Chapter 6 Python API
50

//Specify the name of the lbvserver to be updatedupdate_lb.name = "MyFirstLbVServer"
//Specify the updated service type and lb methodupdate_lb.servicetype = "https"update_lb.lbmethod = "LEASTRESPONSETIME"
//Upload the resource to NetScalerlbvserver.update(ns_session, update_lb)
Note: Some properties in some NetScaler resources are not allowed to be modifiedafter creation. The port number or the service type (protocol) of a load balancing virtualserver or a service, are examples of such properties. Even though the update methodappears to succeed, these properties retain their original values on the appliance.
Delete
To delete an existing resource, invoke the delete() method on the resource class, bypassing the name of the resource.
The following sample code deletes a load balancing virtual server with name"MyFirstLbVServer":
lbvserver remove_lb = new lbvserver()remove_lb.name = "MyFirstLbVServer"lbvserver.delete(ns_session, remove_lb)
Enable/Disable
To enable a resource, invoke the enable() method.
The following sample code enables a load balancing virtual server named "lb_vip":
lbvserver obj = new lbvserver()obj.name = "lb_vip"lbvserver.enable(ns_session, obj)
Note: To disable a resource, invoke the disable() method.
lbvserver.disable(ns_session, obj)
Unset
To unset the value that is set to a parameter, invoke the unset() method on theresource class, by passing the name of the resource and the parameters to be unset. Ifthe parameter has a default value, the value is reset to that value.
Citrix NetScaler NITRO Getting Started Guide
51

The following sample code unsets the load balancing method and the comments of aload balancing virtual server named "lb_123":
lbvserver lb1 = new lbvserver()lb1.name = "lb_123"String args[] = {"comment", "lbmethod"}lbvserver.unset(ns_session, lb1, args)
Bind/Unbind
NetScaler resources form relationships with each other through the process of binding.This is how services are associated with a load balancing virtual server (by bindingthem to it), or how various policies are bound to a load balancing virtual server. Eachbinding relationship is represented in NITRO by its own class.
To bind one NetScaler resource to another, you must instantiate the appropriatebinding class (for example, to bind a service to a load balancing virtual server, youmust instantiate the lbvserver_service_binding class) and add it to theNetScaler configuration (by using the static add() method on this class).
Binding classes have a property representing the name of each resource in the bindingrelationship. They can also have other properties related to that relationship (forexample, the weight of the binding between a load balancing virtual server and aservice).
The following sample code binds a service to a load balancing virtual server, byspecifying a certain weight for the binding:
lbvserver_service_binding bindObj = new lbvserver_service_binding()bindObj.name = "MyFirstLbVServer"bindObj.servicename = "svc_prod"bindObj.weight = 20lbvserver_service_binding.add(ns_session, bindObj)
Note: To unbind a resource from another, invoke the delete() method from theresource binding class, by passing the name of the two resources.The following code sample unbinds a service from a server:
lbvserver_service_binding bindObj = new lbvserver_service_binding()bindObj.name = "MyFirstLbVServer"bindObj.servicename = "svc_prod"lbvserver_service_binding.delete(ns_session, bindObj)
Global bind
Some NetScaler resources can be bound globally to affect the whole system. Forexample, a compression policy can be bound to an load balancing virtual server, inwhich case the policy affects only the traffic on that load balancing virtual server.
Chapter 6 Python API
52

However, if bound globally, it can affect any traffic on the appliance, regardless ofwhich virtual servers handle the traffic.
Some NITRO classes can be used to bind resources globally. These classes have namesthat follow the following pattern:<featurename>global_<resourcetype>_binding.
For example, the class aaaglobal_preauthenticationpolicy_binding is usedto bind preauthentication policies globally.
The following sample code creates a preauthentication action and a preauthenticationpolicy that uses that action, and then binds the policy globally at priority 200:
aaapreauthenticationaction preauth_act1aaapreauthenticationpolicy preauth_pol1aaaglobal_aaapreauthenticationpolicy_binding glob_bindingpreauth_act1 = new aaapreauthenticationaction()preauth_act1.name = "preauth_act1"preauth_act1.preauthenticationaction = "ALLOW"aaapreauthenticationaction.add(ns_session, preauth_act1)
preauth_pol1 = new aaapreauthenticationpolicy()preauth_pol1.name = "preauth_pol1"preauth_pol1.rule = "CLIENT.APPLICATION.PROCESS(antivirus.exe) EXISTS"preauth_pol1.reqaction = "preauth_act1"aaapreauthenticationpolicy.add(ns_session, preauth_pol1)
glob_binding = new aaaglobal_aaapreauthenticationpolicy_binding()glob_binding.policy = "preauth_pol1"glob_binding.priority = 200aaaglobal_aaapreauthenticationpolicy_binding.add(ns_session, glob_binding)
Bulk operations
You can create, retrieve, update, and delete multiple resources simultaneously andthus minimize network traffic. For example, you can add multiple load balancingvirtual servers in the same operation. To perform a bulk operation, you instantiate anarray of the resource class, configure the properties of all the instances locally, andthen upload all the instances to the NetScaler with one command.
To account for the failure of some operations within the bulk operation, NITRO allowsyou to configure one of the following behaviors:
w Exit. When the first error is encountered, the execution stops. The commands thatwere executed before the error are committed.
w Rollback. When the first error is encountered, the execution stops. The commandsthat were executed before the error are rolled back. Rollback is only supported foradd and bind commands.
w Continue. All the commands in the list are executed even if some commands fail.
Citrix NetScaler NITRO Getting Started Guide
53

Note: You must configure the required behavior while establishing a connection withthe appliance.
nitro_service ns_session = new nitro_service("10.102.29.60","http")ns_session.onerror = OnerrorEnum.CONTINUEns_session.login("admin","verysecret")
The following sample code creates two load balancing virtual servers:
//Create an array of lbvserver instanceslbvserver[] lbs = new lbvserver[2]
//Specify properties of the first lbvserverlbs[0] = new lbvserver()lbs[0].name = "lbvserv1"lbs[0].servicetype = "http"lbs[0].ipv46 = "10.70.136.5"lbs[0].port = 80
//Specify properties of the second lbvserverlbs[1] = new lbvserver()lbs[1].name = "lbvserv2"lbs[1].servicetype = "https"lbs[1].ipv46 = "10.70.136.5"lbs[1].port = 443
//Upload the properties of the two lbvservers to the NetScalerlbvserver.add(ns_session, lbs)
Cluster APIsFor managing clusters, you can add or remove a cluster instance or an individual nodeand perform a few other instance or node operations such as viewing instance or nodeproperties. You can also configure the cluster IP address. Other cluster-managementtasks include joining a NetScaler appliance to the cluster and configuring a linkset.
Cluster Instance Operations
Thenssrc.com.citrix.netscaler.nitro.resource.config.cluster.clusterinstance class provides APIs to manage a cluster instance.
The following sample code creates a cluster instance with ID 1:
clusterinstance new_cl_inst_obj = new clusterinstance()
//Set the properties of the cluster instance locallynew_cl_inst_obj.clid = 1new_cl_inst_obj.preemption = "ENABLED"
Chapter 6 Python API
54
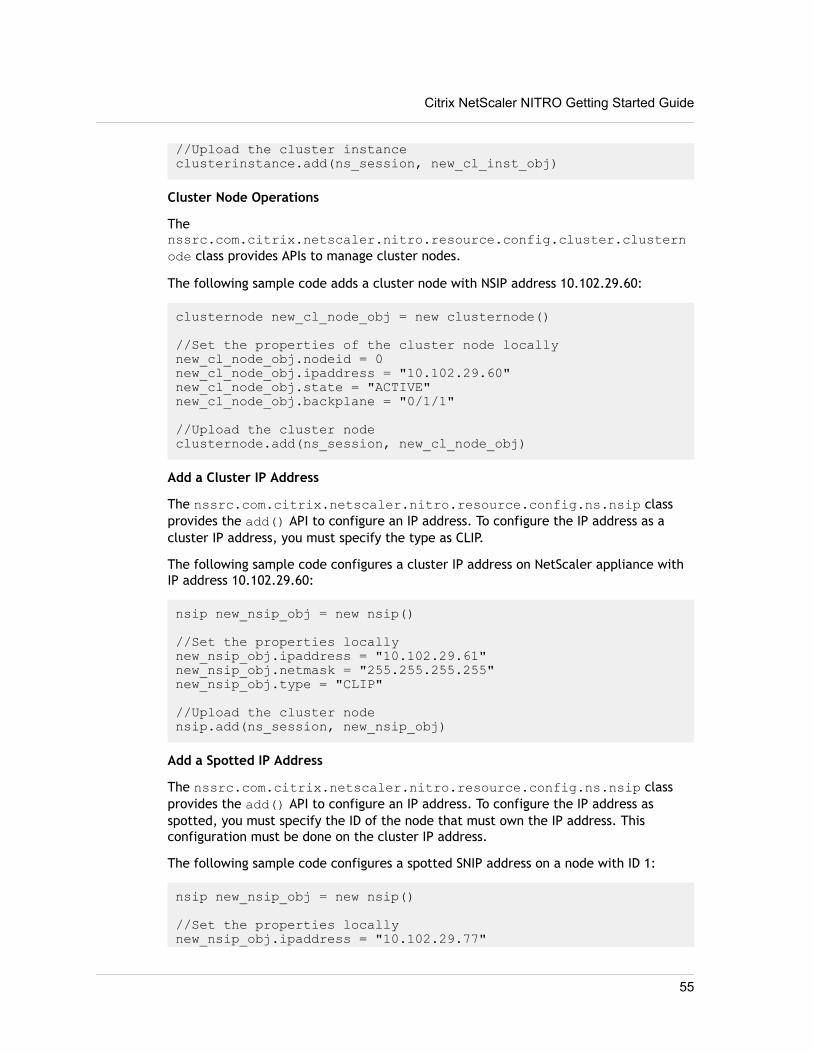
//Upload the cluster instanceclusterinstance.add(ns_session, new_cl_inst_obj)
Cluster Node Operations
Thenssrc.com.citrix.netscaler.nitro.resource.config.cluster.clusternode class provides APIs to manage cluster nodes.
The following sample code adds a cluster node with NSIP address 10.102.29.60:
clusternode new_cl_node_obj = new clusternode()
//Set the properties of the cluster node locallynew_cl_node_obj.nodeid = 0new_cl_node_obj.ipaddress = "10.102.29.60"new_cl_node_obj.state = "ACTIVE"new_cl_node_obj.backplane = "0/1/1"
//Upload the cluster nodeclusternode.add(ns_session, new_cl_node_obj)
Add a Cluster IP Address
The nssrc.com.citrix.netscaler.nitro.resource.config.ns.nsip classprovides the add() API to configure an IP address. To configure the IP address as acluster IP address, you must specify the type as CLIP.
The following sample code configures a cluster IP address on NetScaler appliance withIP address 10.102.29.60:
nsip new_nsip_obj = new nsip()
//Set the properties locallynew_nsip_obj.ipaddress = "10.102.29.61"new_nsip_obj.netmask = "255.255.255.255"new_nsip_obj.type = "CLIP"
//Upload the cluster nodensip.add(ns_session, new_nsip_obj)
Add a Spotted IP Address
The nssrc.com.citrix.netscaler.nitro.resource.config.ns.nsip classprovides the add() API to configure an IP address. To configure the IP address asspotted, you must specify the ID of the node that must own the IP address. Thisconfiguration must be done on the cluster IP address.
The following sample code configures a spotted SNIP address on a node with ID 1:
nsip new_nsip_obj = new nsip()
//Set the properties locallynew_nsip_obj.ipaddress = "10.102.29.77"
Citrix NetScaler NITRO Getting Started Guide
55

new_nsip_obj.netmask = "255.255.255.0"new_nsip_obj.type = "SNIP"new_nsip_obj.ownernode = 1
//Upload the cluster nodensip.add(ns_session, new_nsip_obj)
Join NetScaler Appliance to Cluster
Thenssrc.com.citrix.netscaler.nitro.resource.config.cluster.clusterclass provides the join() API to join a NetScaler appliance to the cluster. You mustspecify the cluster IP address and the nsroot password of the configuration coordinator.
The following sample joins a NetScaler appliance to a cluster:
cluster new_cl_obj = new cluster()
//Set the properties of the cluster locallynew_cl_obj.clip = "10.102.29.61"new_cl_obj.password = "verysecret"
//Upload the clustercluster.add(ns_session, new_cl_obj)
Linkset Operations
Thenssrc.com.citrix.netscaler.nitro.resource.config.network.linksetclass provides the APIs to manage linksets.
To configure a linkset, do the following:
1. Add a linkset by invoking the add() method of the linkset class.
2. Bind the interfaces to the linkset using the add() method of thelinkset_interface_binding class.
The following sample code creates a linkset LS/1 and bind interfaces 1/1/2 and 2/1/2to it:
//Create the linksetlinkset new_linkset_obj = new linkset()new_linkset_obj.id = "LS/1"linkset.add(ns_session, new_linkset_obj)
//Bind the interfaces to the linksetlinkset_interface_binding new_linkif_obj = new linkset_interface_binding()new_linkif_obj.id = "LS/1"new_linkif_obj.ifnum = "1/1/2 2/1/2"linkset_interface_binding.add(ns_session, new_linkif_obj)
Chapter 6 Python API
56

Admin Partitions APITo create an admin partition, you must perform a set of operations on the defaultpartition. To understand this procedure, let us consider a company that has twodepartments each of which has an application that requires the NetScaler functionality.The NetScaler admin wants to have a different partition for each department so thatthere is isolation of users and configurations. The NetScaler admin must do thefollowing (the sample shows configurations only for a single admin partition):
Note: For detailed information and best practices, see Admin Partitions.
1. Create a partition and allocate the required resources to that partition.
//Creating a new partition...nspartition nspartitionObject = new nspartition()nspartitionObject.partitionname = "partition-dept1"nspartitionObject.maxbandwidth = 10240nspartitionObject.maxconn = 1024nspartitionObject.maxmemlimit = 10nspartitionObject.minbandwidth = 1240base_response result = nspartition.add(nitroService, nspartitionObject)
2. Associate the appropriate users with the partition.
//Associating user1 to partition-dept1... systemuser_nspartition_binding systemuser_nspartition_binding_object = new systemuser_nspartition_binding()systemuser_nspartition_binding_object.partitionname = "partition-dept1"systemuser_nspartition_binding_object.username = "user1"base_response result = systemuser_nspartition_binding.add(nitroService, systemuser_nspartition_binding_object)
3. Associate an appropriate command policy to the admin partition user.
//Associating partition-admin to user1... systemuser_systemcmdpolicy_binding systemuser_systemcmdpolicy_binding_object = new systemuser_systemcmdpolicy_binding()systemuser_systemcmdpolicy_binding_object.username = "user1"systemuser_systemcmdpolicy_binding_object.policyname = "partition-admin"systemuser_systemcmdpolicy_binding_object.priority = 1base_response result = systemuser_systemcmdpolicy_binding.add(nitroService,systemuser_systemcmdpolicy_binding_object)
Citrix NetScaler NITRO Getting Started Guide
57

4. Specify the VLANs or bridgegroups to be associated with the partition. This stepensures network isolation of the traffic. Traffic received on the interfaces of theVLAN or bridgegroup is isolated from the traffic of other partitions.
//Specifying the VLAN to be associated with the partition...nspartition_vlan_binding nspartition_vlan_binding_object = new nspartition_vlan_binding()nspartition_vlan_binding_object.vlan = 2nspartition_vlan_binding_object.partitionname = "partition-dept1"base_response result = nspartition_vlan_binding.add(nitroService, nspartition_vlan_binding_object)
5. Save the configurations
//Saving the configurations...nitroService.save_config()
The admin partition is created.
6. Now, to configure this admin partition, you must logout of the default partitionand logon again. You are automatically taken to the admin partition to which youwere first bound and once there you can configure the NetScaler.
Note: If you want to configure another admin partition, perform the switchoperation given in the next step before performing this step.
7. [Optional] If you are associated with multiple admin partitions, you can switch tothe required partition.
//Switching to other partition named partition-dept2... nspartition nspartitionObject = new nspartition()nspartitionObject.partitionname = "partition-dept2"base_response result = nspartition.Switch(nitroService, nspartitionObject)
Feature Statistics APIsThe NetScaler appliance collects statistics about the usage of its features and thecorresponding resources. You can retrieve these statistics by using NITRO API. Thestatistics APIs are available in different packages from the configuration APIs.
The APIs to retrieve statistics of NetScaler features are available in packages that havethe following pattern:nssrc.com.citrix.netscaler.nitro.resource.stat.<feature>.
For example, APIs to retrieve statistics of the load balancing virtual server areavailable in the nssrc.com.citrix.netscaler.nitro.resource.stat.lbpackage.
Chapter 6 Python API
58

The following sample code retrieves the statistics of a load balancing virtual server anddisplays some of the statistics returned:
lbvserver_stats stats = lbvserver_stats.get(ns_session,"MyFirstLbVServer")print(stats.curclntconnections)print(stats.deferredreqrate)
Note: Not all NetScaler features and resources have statistic objects associated withthem.
AppExpert Application APIsTo export an AppExpert application, you must instantiate thenssrc.com.citrix.netscaler.nitro.resource.config.app.applicationclass, configure the properties of the AppExpert locally, and then export the AppExpertapplication.
The following sample code exports an AppExpert application named "MyApp1":
application myapp = new application()myapp.appname = "MyApp1"myapp.apptemplatefilename = "myapp_template"application.export(ns_session, myapp)
You can also import an AppExpert application. You must instantiate thenssrc.com.citrix.netscaler.nitro.resource.config.app.applicationclass, configure the properties of the AppExpert locally, and then import the AppExpertapplication.
The following sample code imports an AppExpert application named "MyApp1":
application myapp = new application()myapp.appname = "MyApp1"myapp.apptemplatefilename = "myapp_template"application.Import(ns_session, myapp)
Exception HandlingThe status of a NITRO request is captured in thenssrc.com.citrix.netscaler.nitro.exception.nitro_exception class.This class provides the following details of the exception:
w Session ID. The session in which the exception occurred.
w Severity. The severity of the exception: error or warning. By default, only errors arecaptured. To capture warnings, you must set the warning flag to true, whileconnecting to the appliance.
Citrix NetScaler NITRO Getting Started Guide
59

w Error code. The status of the NITRO request. An error code of 0 indicates that theNITRO request is successful. A non-zero error code indicates an error in processingthe NITRO request.
w Error message. Provides a brief description of the exception.
For a list of error codes, see the errorlisting.html file available in the<NITRO_SDK_HOME>/doc/api_reference folder.
Chapter 6 Python API
60
Chapter 7
REST Web Services
Topics:• Performing System Level
Operations
• Configuring NetScalerFeatures
• Binding NetScaler Resources
• Configuring a NetScalerCluster
• Admin Partitions API
• Retrieving Feature Statistics
• Managing AppExpertApplications
• Performing File Operations
• Handling Exceptions
REST (REpresentational State Transfer) is an architecturalstyle based on simple HTTP requests and responses betweenthe client and the server. REST is used to query or change thestate of objects on the server side. In REST, the server side ismodeled as a set of entities where each entity is identified bya unique URL. For example, the load balancing virtual serverentity is identified by the URL http://<NSIP>/nitro/v1/config/<lbvserver>/<lbvserver_name>.
Each resource also has a state on which the followingoperations can be performed:
w Create. Clients can create new server-side resources on a"container" resource. You can think of container resourcesas folders, and child resources as files or subfolders. Thecalling client provides the state for the resource to becreated. The state can be specified in the request by usingXML or JSON format. The client can also specify the uniqueURL that will identify the new object. Alternatively, theserver can choose and return a unique URL identifying thecreated object. The HTTP method used for Create requestsis POST.
w Read. Clients can retrieve the state of a resource byspecifying its URL with the HTTP GET method. Theresponse message contains the resource state, expressedin JSON format.
w Update. You can update the state of an existing resourceby specifying the URL that identifies that object and itsnew state in JSON or XML, using the PUT HTTP method.
w Delete. You can destroy a resource that exists on theserver-side by using the DELETE HTTP method and the URLidentifying the resource to be removed.
In addition to these four CRUD operations (Create, Read,Update, and Delete), resources can support other operationsor actions. These operations use the HTTP POST method, withthe URL specifying the operation to be performed and therequest body specifying the parameters for that operation.
61

NetScaler NITRO APIs are categorized depending on the scopeand purpose of the APIs into system APIs, featureconfiguration APIs, and feature statistics APIs.
Note: All NITRO operations are logged in the /var/log/nitro.log file on the appliance.
Chapter 7 REST Web Services
62

Performing System Level OperationsThe first step towards using NITRO is to establish a session with the NetScaler applianceand then authenticate the session by using the NetScaler administrator's credentials.You must specify the username and password in the login object. The session ID thatis created must be specified in the request header of all further operations in thesession.
Note: You must have a user account on the appliance to log on to it. The configurationoperations that you can perform are limited by the administrative roles assigned toyour account.
To connect to a NetScaler appliance with NSIP address 10.102.29.60 by using the HTTPprotocol:
w URL. https://10.102.29.60/nitro/v1/config/login/
w Method. POST
w Request.
• Header.
Content-Type:application/vnd.com.citrix.netscaler.login+json
Note: Content types such as 'application/x-www-form-urlencoded'that were supported in earlier versions of NITRO can also be used. You mustmake sure that the payload is the same as used in earlier versions. Thepayloads provided in this documentation are only applicable if the content typeis of the form 'application/vnd.com.citrix.netscaler.login+json'.
• Payload.
{ "login": { "username":"admin", "password":"verysecret" }}
w Response.
• Header.
HTTP/1.0 201 CreatedSet-Cookie:NITRO_AUTH_TOKEN=##87305E9C51B06C848F0942; path=/nitro/v1
Citrix NetScaler NITRO Getting Started Guide
63
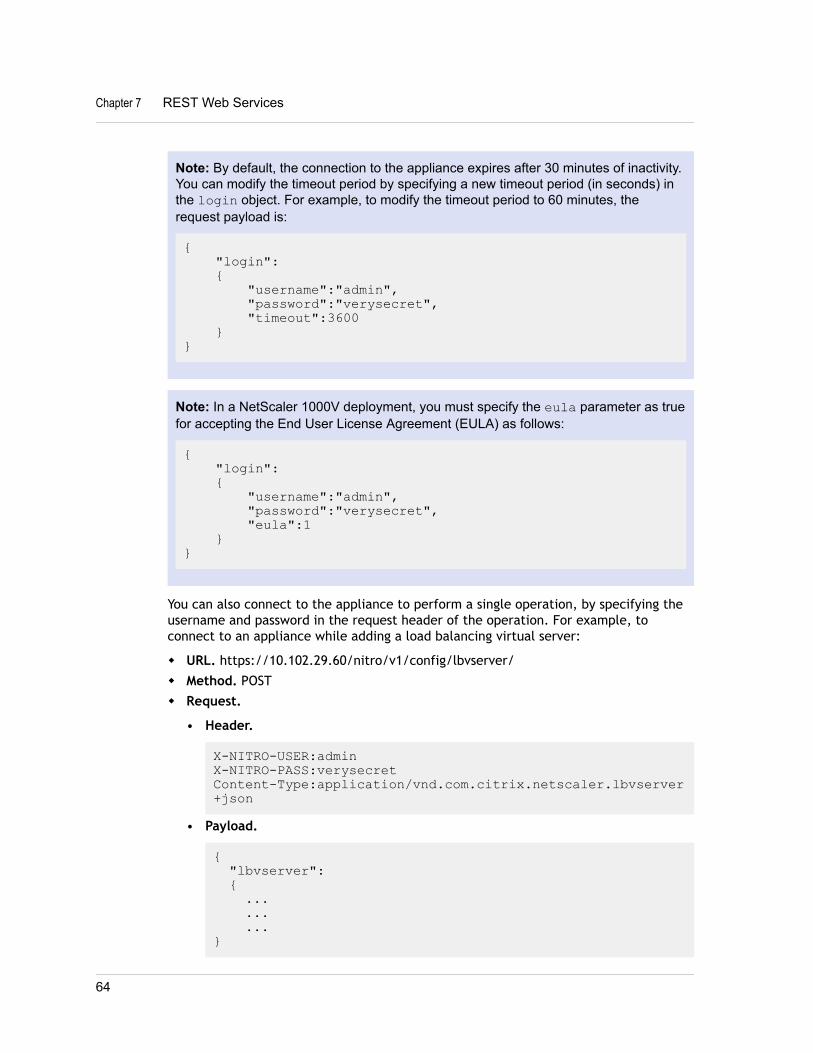
Note: By default, the connection to the appliance expires after 30 minutes of inactivity.You can modify the timeout period by specifying a new timeout period (in seconds) inthe login object. For example, to modify the timeout period to 60 minutes, therequest payload is:
{ "login": { "username":"admin", "password":"verysecret", "timeout":3600 }}
Note: In a NetScaler 1000V deployment, you must specify the eula parameter as truefor accepting the End User License Agreement (EULA) as follows:
{ "login": { "username":"admin", "password":"verysecret", "eula":1 }}
You can also connect to the appliance to perform a single operation, by specifying theusername and password in the request header of the operation. For example, toconnect to an appliance while adding a load balancing virtual server:
w URL. https://10.102.29.60/nitro/v1/config/lbvserver/
w Method. POST
w Request.
• Header.
X-NITRO-USER:adminX-NITRO-PASS:verysecretContent-Type:application/vnd.com.citrix.netscaler.lbvserver+json
• Payload.
{ "lbvserver": { ... ... ...}
Chapter 7 REST Web Services
64

w Response.
• Header.
HTTP/1.0 201 Created
You can also perform other system-level operations such as enabling NetScaler featuresand modes, saving and clearing NetScaler configurations, setting the session timeout,setting the severity of the exceptions to be handled, setting the behavior of bulkoperations, and disconnecting from the appliance.
For more information on the REST messages, see the Configuration node of the<NITRO_SDK_HOME>/index.html file.
Example 1: Enable the load balancing feature
w URL. http://10.102.29.60/nitro/v1/config/nsfeature?action=enable
w HTTP Method. POST
w Request.
• Header
Cookie:NITRO_AUTH_TOKEN=tokenvalueContent-Type:application/vnd.com.citrix.netscaler.nsfeature+json
• Payload
{ "nsfeature": { "feature": [ "LB", ] }}
Example 2: Save NetScaler configurations
w URL. http://10.102.29.60/nitro/v1/config/nsconfig?action=save
w HTTP Method. POST
w Request.
• Header
Cookie:NITRO_AUTH_TOKEN=tokenvalueContent-Type:application/vnd.com.citrix.netscaler.nsconfig+json
Citrix NetScaler NITRO Getting Started Guide
65

• Payload
{ "nsconfig":{}}
Example 3: Disconnecting from the appliance
w URL. https://10.102.29.60/nitro/v1/config/logout/
w HTTP Method. POST
w Request.
• Header
Cookie:NITRO_AUTH_TOKEN=tokenvalueContent-Type:application/vnd.com.citrix.netscaler.logout+json
• Payload
{ "logout":{}}
Note: Make sure that you have saved the configurations before performing thisoperation.
Configuring NetScaler FeaturesA NetScaler appliance has multiple features, and each feature has multiple resources.Each NetScaler resource, depending on the operation to be performed on it, has aunique URL associated with it. URLs for configuration operations have the formathttp://<NSIP>/nitro/v1/config/<resource_type>/<resource_name>. Forexample, to access the lbvserver named MyFirstLbVServer on a NetScaler with IP10.102.29.60, the URL is http://10.102.29.60/nitro/v1/config/lbvserver/MyFirstLbVServer.
Using NITRO you can perform the following operations:
Create | Retrieve | Update | Delete | Enable/Disable | Unset | Bind/Unbind | Bulkoperations
For more information on the REST messages, see the Configuration node of the<NITRO_SDK_HOME>/index.html file.
Create
To create a new resource (for example, an lbvserver) on the appliance, specify theresource name and other related arguments in the specific resource object. For albvserver resource, the object would be an lbvserver object.
Chapter 7 REST Web Services
66

To create an lbvserver named "MyFirstLbVServer":
w URL. http://10.102.29.60/nitro/v1/config/lbvserver/
w HTTP Method. POST
w Request.
• Header
Cookie:NITRO_AUTH_TOKEN=tokenvalueContent-Type:application/vnd.com.citrix.netscaler.lbvserver+json
• Payload
{ "lbvserver": { "name":"MyFirstLbVServer", "servicetype":"http" }}
Retrieve
NetScaler resource properties can be retrieved as follows:
w To retrieve details of all resources of a specific type, specify the resource type inthe URL.
URL format: http://<NSIP>/nitro/v1/config/<resource_type>w To retrieve details of a specific resource on the NetScaler appliance, specify the
resource name in the URL.
URL format: http://<NSIP>/nitro/v1/config/<resource_type>/<resource_name>
w To retrieve specific details of a resource, specify the resource details that you wantto view in the URL.
URL format: http://<NSIP>/nitro/v1/config/<resource_type>/<resource_name>?attrs=<attrib1>,<attrib2>
w To retrieve details of resources on the basis of some filter, specify the filterconditions in the URL.
URL format: http://<NSIP>/nitro/v1/config/<resource_type>?filter=<attrib1>:<value>,<attrib2>:<value>
w If the request is likely to result in a large number of resources, you can divide theresults into pages and retrieve them page by page.
For example, assume that you have a NetScaler that has 53 lbvservers and you wantto retrieve all the lbvservers. So, instead of retrieving all 53 in one response, youcan configure the results to be divided into pages of 10 lbvservers each (6 pagestotal), and retrieve them from the NetScaler page by page.
Citrix NetScaler NITRO Getting Started Guide
67
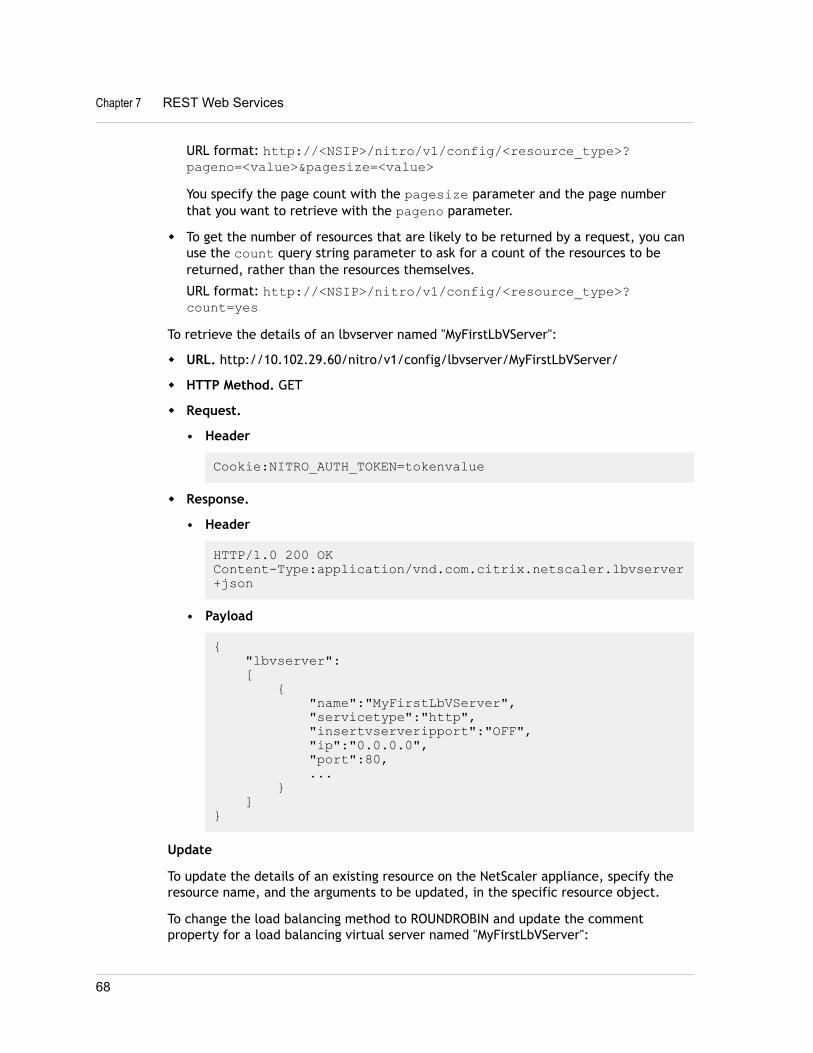
URL format: http://<NSIP>/nitro/v1/config/<resource_type>?pageno=<value>&pagesize=<value>You specify the page count with the pagesize parameter and the page numberthat you want to retrieve with the pageno parameter.
w To get the number of resources that are likely to be returned by a request, you canuse the count query string parameter to ask for a count of the resources to bereturned, rather than the resources themselves.
URL format: http://<NSIP>/nitro/v1/config/<resource_type>?count=yes
To retrieve the details of an lbvserver named "MyFirstLbVServer":
w URL. http://10.102.29.60/nitro/v1/config/lbvserver/MyFirstLbVServer/
w HTTP Method. GET
w Request.
• Header
Cookie:NITRO_AUTH_TOKEN=tokenvalue
w Response.
• Header
HTTP/1.0 200 OKContent-Type:application/vnd.com.citrix.netscaler.lbvserver+json
• Payload
{ "lbvserver": [ { "name":"MyFirstLbVServer", "servicetype":"http", "insertvserveripport":"OFF", "ip":"0.0.0.0", "port":80, ... } ]}
Update
To update the details of an existing resource on the NetScaler appliance, specify theresource name, and the arguments to be updated, in the specific resource object.
To change the load balancing method to ROUNDROBIN and update the commentproperty for a load balancing virtual server named "MyFirstLbVServer":
Chapter 7 REST Web Services
68

w URL. http://10.102.29.60/nitro/v1/config/lbvserver/MyFirstLbVServer/
w HTTP Method. PUT
w Request.
• Header
Cookie:NITRO_AUTH_TOKEN=tokenvalueContent-Type:application/vnd.com.citrix.netscaler.lbvserver+json
• Payload
{ "lbvserver": { "name":"MyFirstLbVServer", "lbmethod":"ROUNDROBIN", "comment":"Updated comments" }}
Delete
To delete a NetScaler resource, specify the resource name in the URL.
To delete a load balancing virtual server named "MyFirstLbVServer":
w URL. http://10.102.29.60/nitro/v1/config/lbvserver/MyFirstLbVServer
w HTTP Method. DELETE
Enable/Disable
To enable a resource on the NetScaler appliance, specify the resource name in thespecific resource object.
To enable a load balancing virtual server named "MyFirstLbVServer":
w URL. http://10.102.29.60/nitro/v1/config/lbvserver?action=enable
w HTTP Method. POST
w Request.
• Header
Cookie:NITRO_AUTH_TOKEN=tokenvalueContent-Type:application/vnd.com.citrix.netscaler.lbvserver+json
• Payload
{ "lbvserver": { "name":"MyFirstLbVServer"
Citrix NetScaler NITRO Getting Started Guide
69

}}
Note: To disable a resource, in the URL specify the action as "disable".
Unset
To unset the value that is set to a parameter, specify the action as "unset" and in thepayload, specify the parameters to be unset.
To unset the load balancing method and the comments specified for a load balancingvirtual server named "MyFirstLbVServer":
w URL. http://10.102.29.60/nitro/v1/config/lbvserver?action=unset
w HTTP Method. POST
w Request.
• Header
Cookie:NITRO_AUTH_TOKEN=tokenvalueContent-Type:application/vnd.com.citrix.netscaler.lbvserver+json
• Payload
{ "lbvserver": { "name":"MyFirstLbVServer", "lbmethod":true, "comment":true, }}
Bind/Unbind
To bind a resource to another, specify the name of the two resources and specify theweight for the binding.
To bind a service named "svc_prod" to a load balancing virtual server named"MyFirstLbVServer", by specifying a certain weight for the binding:
w URL. http://10.102.29.60/nitro/v1/config/lbvserver_service_binding/
w HTTP Method. PUT
w Request.
• Header
Cookie:NITRO_AUTH_TOKEN=tokenvalueContent-Type:application/vnd.com.citrix.netscaler.lbvserver_service_binding+json
Chapter 7 REST Web Services
70

• Payload
{ "lbvserver_service_binding": { "name":"MyFirstLbVServer", "servicename":"svc_prod", "weight":111, }}
Note: To unbind, specify the arguments in the URL as follows:
w URL. http://10.102.29.60/nitro/v1/config/lbvserver_service_binding/MyFirstLbVServer?args=servicename:svc_prod
w HTTP Method. DELETE
Bulk operations
You can create, retrieve, update, and delete multiple resources simultaneously andthus minimize network traffic. For example, you can add multiple load balancingvirtual servers in the same operation. To perform a bulk operation, specify the requiredparameters in the same request payload.
To account for the failure of some operations within the bulk operation, NITRO allowsyou to configure one of the following behaviors:
w Exit. When the first error is encountered, the execution stops. The commands thatwere executed before the error are committed.
w Rollback. When the first error is encountered, the execution stops. The commandsthat were executed before the error are rolled back. Rollback is only supported foradd and bind commands.
w Continue. All the commands in the list are executed even if some commands fail.
You must specify the behavior of the bulk operation in the request header using the X-NITRO-ONERROR parameter.
To add two load balancing virtual servers in one operation and continue if onecommand fails:
w URL. http://10.102.29.60/nitro/v1/config/lbvserver/
w HTTP Method. POST
w Request.
• Header
Cookie:NITRO_AUTH_TOKEN=tokenvalueContent-Type:application/vnd.com.citrix.netscaler.lbvserver_list+jsonX-NITRO-ONERROR:continue
Citrix NetScaler NITRO Getting Started Guide
71

• Payload
{ "lbvserver": [ { "name":"new_lbvserver1", "servicetype":"http" },
{ "name":"new_lbvserver2", "servicetype":"http" } ]}
w Response
• Header
HTTP/1.0 207 Multi Status
• Payload
{ "errorcode":273, "message":"Resource already exists", "severity":"ERROR", "response": [ { "errorcode": 0, "message": "Done", "severity": "NONE" }, { "errorcode": 273, "message":"Resource already exists", "severity": "ERROR" } ]}
Binding NetScaler ResourcesNetScaler resources form relationships with each other through the process of binding.This is how services are associated with an lbvserver (by binding them to it), or howvarious policies are bound to an lbvserver. Each binding relationship is represented byits own object. A binding resource has properties representing the name of eachNetScaler resource in the binding relationship. It can also have other properties relatedto that relationship (for example, the weight of the binding between an lbvserverresource and a service resource).
Chapter 7 REST Web Services
72

Note: Unlike for NetScaler entities, you use a PUT HTTP method, instead of POST, foradding new binding resources.
For more information on the REST messages, see the Configuration node of the<NITRO_SDK_HOME>/index.html file.
To bind a service to a load balancing virtual server named "MyFirstLbVServer" andspecify a weight for the binding:
w URL. http://10.102.29.60/nitro/v1/config/lbvserver_service_binding/MyFirstLbVServer?action=bind
w HTTP Method. PUT
w Request.
• Header
Cookie:NITRO_AUTH_TOKEN=tokenvalueContent-Type:application/vnd.com.citrix.netscaler.lbvserver_service_binding+json
• Payload
{ "lbvserver_service_binding": { "servicename":"svc_prod", "weight":20, "name":"MyFirstLbVServer" }}
To retrieve list of all the services bound to a virtual server "lbv1":
w URL. http://10.102.29.60/nitro/v1/config/lbvserver_service_binding/lbv1?attrs=servicename
w HTTP Method. GET
For more information on retrieving information, see the "Retrieving properties of aresource" section in Configuring NetScaler Features.
Globally Bind Resources
Some NetScaler resources can be bound globally to affect the whole system. Forexample, if a compression policy is bound to an lbvserver, the policy affects only thetraffic on that lbvserver. However, if bound globally, it can affect any traffic on theappliance, regardless of which virtual servers handle the traffic.
The names of NITRO resources that can be used to bind resources globally have thepattern <featurename>global_<resourcetype>_binding. For example, theobject aaaglobal_preauthenticationpolicy_binding is used to bind preauthenticationpolicies globally.
To bind the policy named preautpol1 globally at priority 200:
Citrix NetScaler NITRO Getting Started Guide
73

w URL. http://10.102.29.60/nitro/v1/config/aaaglobal_aaapreauthenticationpolicy_binding?action=bind
w HTTP Method. PUT
w Request.
• Header
Cookie:NITRO_AUTH_TOKEN=tokenvalueContent-Type:application/vnd.com.citrix.netscaler.aaaglobal_aaapreauthenticationpolicy_binding+json
• Payload
{ "aaaglobal_aaapreauthenticationpolicy_binding": { "policy":"preautpol1", "priority":200 }}
Configuring a NetScaler ClusterYou can use NITRO to add or create and manage a NetScaler cluster.
Cluster Instance Operations
All operations on a cluster instance must be performed on the clusterinstanceobject.
To create a cluster instance with ID 1:
w URL. http://10.102.29.60/nitro/v1/config/clusterinstance/
w HTTP Method. POST
w Request.
• Header
Cookie:NITRO_AUTH_TOKEN=tokenvalueContent-Type:application/vnd.com.citrix.netscaler.clusterinstance+json
• Payload
{ "clusterinstance": { "clid":1, "preemption":"ENABLED" }}
Chapter 7 REST Web Services
74

Cluster Node Operations
All operations on a cluster node must be performed on the clusternode object.
To add a cluster node with NSIP address 10.102.29.60:
w URL. http://10.102.29.60/nitro/v1/config/clusternode/
w HTTP Method. POST
w Request.
• Header
Cookie:NITRO_AUTH_TOKEN=tokenvalueContent-Type:application/vnd.com.citrix.netscaler.clusternode+json
• Payload
{ "clusternode": { "nodeid":1, "ipaddress":"10.102.29.60", "state":"ACTIVE", "backplane":"1/1/2" }}
Add a Cluster IP Address
To define a cluster IP address, specify the required parameters in the nsip object.
To configure a cluster IP address on NetScaler appliance with IP address 10.102.29.60:
w URL. http://10.102.29.60/nitro/v1/config/nsip/
w HTTP Method. POST
w Request.
• Header
Cookie:NITRO_AUTH_TOKEN=tokenvalueContent-Type:application/vnd.com.citrix.netscaler.nsip+json
• Payload
{ "nsip": { "ipaddress":"10.102.29.61", "netmask":"255.255.255.255", "type":"CLIP" }}
Citrix NetScaler NITRO Getting Started Guide
75
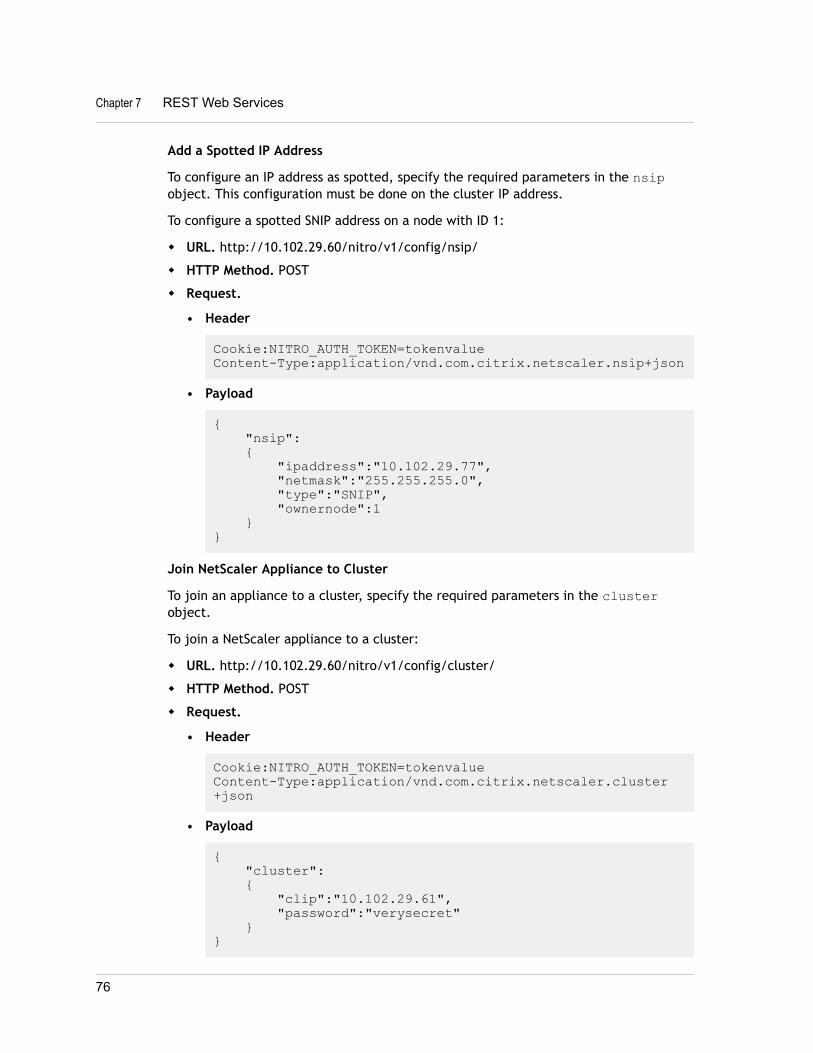
Add a Spotted IP Address
To configure an IP address as spotted, specify the required parameters in the nsipobject. This configuration must be done on the cluster IP address.
To configure a spotted SNIP address on a node with ID 1:
w URL. http://10.102.29.60/nitro/v1/config/nsip/
w HTTP Method. POST
w Request.
• Header
Cookie:NITRO_AUTH_TOKEN=tokenvalueContent-Type:application/vnd.com.citrix.netscaler.nsip+json
• Payload
{ "nsip": { "ipaddress":"10.102.29.77", "netmask":"255.255.255.0", "type":"SNIP", "ownernode":1 }}
Join NetScaler Appliance to Cluster
To join an appliance to a cluster, specify the required parameters in the clusterobject.
To join a NetScaler appliance to a cluster:
w URL. http://10.102.29.60/nitro/v1/config/cluster/
w HTTP Method. POST
w Request.
• Header
Cookie:NITRO_AUTH_TOKEN=tokenvalueContent-Type:application/vnd.com.citrix.netscaler.cluster+json
• Payload
{ "cluster": { "clip":"10.102.29.61", "password":"verysecret" }}
Chapter 7 REST Web Services
76

Linkset Operations
To configure a linkset, do the following:
1. Create a linkset by specifying the required parameters in the linkset object.
To add a linkset LS/1:
• URL. http://10.102.29.60/nitro/v1/config/linkset/
• HTTP Method. POST
• Request.
w Header
Cookie:NITRO_AUTH_TOKEN=tokenvalueContent-Type:application/vnd.com.citrix.netscaler.linkset+json
w Payload
{ "linkset": { "id":"LS/1" }}
2. Bind the required interfaces to the linkset by specifying the interfaces in thelinkset_interface_binding object.
To bind interfaces 1/1/2 and 2/1/2 to linkset LS/1:
• URL. http://10.102.29.60/nitro/v1/config/linkset_interface_binding/ LS%2F1?action=bind
• HTTP Method. PUT
• Request.
w Header
Cookie:NITRO_AUTH_TOKEN=tokenvalueContent-Type:application/vnd.com.citrix.netscaler.linkset_interface_binding+json
w Payload
{ "linkset_interface_binding": { "id":"LS/1", "ifnum":"1/1/2 2/1/2" }}
Citrix NetScaler NITRO Getting Started Guide
77

Admin Partitions APITo create an admin partition, you must perform a set of operations on the defaultpartition. To understand this procedure, let us consider a company that has twodepartments each of which has an application that requires the NetScaler functionality.The NetScaler admin wants to have a different partition for each department so thatthere is isolation of users and configurations. The NetScaler admin must do thefollowing (the sample shows configurations only for a single admin partition):
Note: For detailed information and best practices, see Admin Partitions.
1. Create a partition and allocate the required resources to that partition.
• URL. http://10.102.29.60/nitro/v1/config/nspartition
• HTTP Method. POST
• Request.
w Header
Cookie:NITRO_AUTH_TOKEN=tokenvalueContent-Type:application/vnd.com.citrix.netscaler.nspartition+json
w Payload
{ "nspartition": { "partitionname":"partition-dept1", "maxbandwidth":10240, "minbandwidth":10240, "maxconn":1024, "maxmemlimit":10 }}
2. Associate the appropriate users with the partition.
• URL. http://10.102.29.60/nitro/v1/config/systemuser_nspartition_binding/user1
• HTTP Method. PUT
• Request.
w Header
Cookie:NITRO_AUTH_TOKEN=tokenvalueContent-Type:application/vnd.com.citrix.netscaler.systemuser_nspartition_binding+json
Chapter 7 REST Web Services
78

w Payload
{ "systemuser_nspartition_binding": { "username":"user1", "partitionname":"partition-dept1" }}
3. Associate an appropriate command policy to the admin partition user.
• URL. http://10.102.29.60/nitro/v1/config/systemuser_systemcmdpolicy_binding/user1
• HTTP Method. PUT
• Request.
w Header
Cookie:NITRO_AUTH_TOKEN=tokenvalueContent-Type:application/vnd.com.citrix.netscaler.systemuser_systemcmdpolicy_binding+json
w Payload
{ "systemuser_systemcmdpolicy_binding": { "username":"user1", "policyname":"partition-admin", "priority":1 }}
4. Specify the VLANs or bridgegroups to be associated with the partition. This stepensures network isolation of the traffic. Traffic received on the interfaces of theVLAN or bridgegroup is isolated from the traffic of other partitions.
• URL. http://10.102.29.60/nitro/v1/config/nspartition_vlan_binding/partition-dept1
• HTTP Method. PUT
• Request.
w Header
Cookie:NITRO_AUTH_TOKEN=tokenvalueContent-Type:application/vnd.com.citrix.netscaler.nspartition_vlan_binding+json
w Payload
{ "nspartition_vlan_binding":
Citrix NetScaler NITRO Getting Started Guide
79

{ "partitionname":"partition-dept1", "vlan":2 }}
5. Save the configurations
• URL. http://10.102.29.60/nitro/v1/config/nsconfig?action=save
• HTTP Method. POST
• Request.
w Header
Cookie:NITRO_AUTH_TOKEN=tokenvalueContent-Type:application/vnd.com.citrix.netscaler.nsconfig+json
w Payload
{ "nsconfig": { }}
The admin partition is created.
6. Now, to configure this admin partition, you must logout of the default partitionand logon again. You are automatically taken to the admin partition to which youwere first bound and once there you can configure the NetScaler.
Note: If you want to configure another admin partition, perform the switchoperation given in the next step before performing this step.
7. [Optional] If you are associated with multiple admin partitions, you can switch tothe required partition.
• URL. http://10.102.29.60/nitro/v1/config/nspartition?action=Switch
• HTTP Method. POST
• Request.
w Header
Cookie:NITRO_AUTH_TOKEN=tokenvalueContent-Type:application/vnd.com.citrix.netscaler.nspartition+json
w Payload
{ "nspartition": {
Chapter 7 REST Web Services
80

"partitionname":"partition-dept2" }}
Retrieving Feature StatisticsThe NetScaler appliance collects statistics about the usage of its features and thecorresponding resources. NITRO can retrieve these statistics.
w URL to get statistics of a feature must have the format http://<NSIP>/nitro/v1/stat/<feature_name>.
w URL to get the statistics of a resource must have the format: http://<NSIP>/nitro/v1/stat/<resource_type>/<resource_name>.
For more information on the REST messages, see the Statistics node of the<NITRO_SDK_HOME>/index.html file.
To get the statistics of a lbvserver named "MyFirstLbVServer":
w URL. http://10.102.29.60/nitro/v1/stat/lbvserver/MyFirstLbVServer
w HTTP Method. GET
w Request.
• Header.
Content-Type:application/vnd.com.citrix.netscaler.lbvserver+json
w Response.
• Header
HTTP/1.0 200 OK
• Payload
{ "lbvserver": [ { "name":"MyFirstLbVServer", "establishedconn":0, "vslbhealth":0, "primaryipaddress":"0.0.0.0", ... } ]}
Citrix NetScaler NITRO Getting Started Guide
81

Note: Not all NetScaler features and resources have statistic objects associated withthem.
Managing AppExpert ApplicationsTo export an AppExpert application, specify the parameters needed for the exportoperation in the apptemplateinfo object. Optionally, you can specify basicinformation about the AppExpert application template, such as the author of theconfiguration, a summary of the template functionality, and the template versionnumber, in the template_info object. This information is stored as part of thetemplate file that is created.
To export an AppExpert application named "MyApp1":
w URL. http://10.102.29.60/nitro/v1/config/apptemplateinfo?action=export
w HTTP Method. POST
w Request.
• Header
Cookie:NITRO_AUTH_TOKEN=tokenvalueContent-Type:application/vnd.com.citrix.netscaler.apptemplateinfo+json
• Payload
{ "apptemplateinfo": { "appname":"MyApp1", "apptemplatefilename":"BizAp.xml", "template_info": { "templateversion_major":"2", "templateversion_minor":"1", "author":"XYZ", "introduction":"Intro", "summary":"Summary" }, }}
To import an AppExpert application, specify the parameters needed for the importoperation in the apptemplateinfo object.
To import an AppExpert application named "MyApp1":
w URL. http://10.102.29.60/nitro/v1/config/apptemplateinfo?action=import
w HTTP Method. POST
Chapter 7 REST Web Services
82

w Request.
• Header
Cookie:NITRO_AUTH_TOKEN=tokenvalueContent-Type:application/vnd.com.citrix.netscaler.apptemplateinfo+jsonX-NITRO-ONERROR:rollback
• Payload
{ "apptemplateinfo": { "apptemplatefilename":"BizAp.xml", "deploymentfilename":"BizAp_deployment.xml", "appname":"MyApp1" }}
To import an AppExpert application by specifying different deployment settings:
w URL. http://10.102.29.60/nitro/v1/config/apptemplateinfo?action=import
w HTTP Method. POST
w Request.
• Header
Cookie:NITRO_AUTH_TOKEN=tokenvalueContent-Type:application/vnd.com.citrix.netscaler.apptemplateinfo+jsonX-NITRO-ONERROR:rollback
• Payload
{ "apptemplateinfo": { "apptemplatefilename":"BizAp.xml", "appname":"Myapp2" "deploymentinfo": { "appendpoint": [ { "ipv46":"11.2.3.8", "port":80, "servicetype":"HTTP" } ], "service": [ { "ip":"12.3.3.15", "port":80,
Citrix NetScaler NITRO Getting Started Guide
83

"servicetype":"SSL" }, { "ip":"14.5.5.16", "port":443, "servicetype":"SSL" } ], } }}
Performing File OperationsNetScaler operations such as configuring SSL certificates requires the input files to beavailable locally on the NetScaler appliance. NITRO allows you to perform fileoperations such as uploading file to the NetScaler, retrieving a list of files and the filecontent from the NetScaler, and also delete files from the NetScaler. These operationscan be performed for files of type: txt, cert, req, xml, and key.
Note: NITRO file operations can be performed only on files of size less than or equalto 2 MB.
Uploading a File to the NetScaler
To upload a file to the NetScaler, specify a name for the file, the location where thefile must be created on the NetScaler, and the content of the file.
w URL. http://<netscaler-ip-address>/nitro/v1/config/systemfile
w HTTP Method. POST
w Request.
• Header
Content-Type:application/vnd.com.citrix.netscaler.systemfile+json
• Payload
{ "systemfile": { "filename": "cert1.crt", "filelocation": "/nsconfig/ssl/", "filecontent":"VGhpcyBpcyBteSBmaWxl", "fileencoding": "BASE64" }}
Retrieving the Files from a NetScaler Directory
Specify the directory path from which you want to get a list of files.
Chapter 7 REST Web Services
84

w URL. http://<netscaler-ip-address>/nitro/v1/config/systemfile?args=filelocation:<path>
w HTTP Method. GET
w Response
• Header
HTTP/1.0 200 OKAccept:application/vnd.com.citrix.netscaler.systemfile_list+json
• Payload
{ "errorcode": 0, "message": "Done", "severity": "NONE", "systemfile": [ { "filename": "ns-root.key", "filelocation": "\/nsconfig\/ssl", "fileaccesstime": "Tue Jan 14 19:27:01 2014", "filemodifiedtime": "Tue Nov 5 17:16:00 2013" }, { "filename": "ns-root.req", "filelocation": "\/nsconfig\/ssl", "fileaccesstime": "Tue Jan 14 19:27:01 2014", "filemodifiedtime": "Tue Nov 5 17:16:00 2013" } ]}
Retrieving Contents of a Specific File
To retrieve the contents of a file, specify the filename and its location.
w URL. http://<netscaler-ip-address>/nitro/v1/config/systemfile/<filename>?args=filelocation:<path>
w HTTP Method. GET
w Response.
• Header
HTTP/1.0 200 OKAccept:application/vnd.com.citrix.netscaler.systemfile+json
• Payload
{ "errorcode": 0, "message": "Done", "severity": "NONE",
Citrix NetScaler NITRO Getting Started Guide
85

"systemfile": [ { "filename": "ns-root.key", "filelocation": "\/nsconfig\/ssl", "filecontent": "LS0tLS1CRUdJTiBSU0EgUFJJVkFU0tLQo=", "fileencoding": "BASE64", "fileaccesstime": "Tue Jan 14 19:27:01 2014", "filemodifiedtime": "Tue Nov 5 17:16:00 2013" } ] }
Deleting a File from the NetScaler
To delete a file from the NetScaler, specify the filename along with the full file path.
w URL. http://<netscaler-ip-address>/nitro/v1/config/systemfile/<filename>?args=filelocation:<path>
w HTTP Method. DELETE
w Response.
• Header
HTTP/1.0 200 OK
• Payload
{ "errorcode": 0, "message": "Done", "severity": "NONE" }
Handling ExceptionsThe response header provides the status of an operation by using HTTP status codesand the response payload provides the requested resource object (for GET method) anderror details (for unsuccessful operation). NITRO does not provide a response payloadfor successful POST, PUT and DELETE methods. For successful GET method, theresponse payload consists only the requested resource object.
The following table provides the HTTP status codes:
Status HTTP StatusCode
Description
Success 200 OK Request successfully executed.
201 CREATED Entity created.
Chapter 7 REST Web Services
86

Status HTTP StatusCode
Description
Failure 400 BadRequest
Incorrect request provided.
401unauthorized
Not provided login credentials.
403 forbidden User is unauthorized
404 Not Found User is trying to access a resource not present inthe NetScaler.
405 MethodNot Allowed
User is trying to access request methods notsupported by NITRO.
406 NotAcceptable
None of the values supplied by the user in theAccept header can be satisfied by the server.
409 Conflict The resource already exists on the NetScaler.
503 ServiceUnavailable
The service is not available.
599 NetScaler specific error code.
Warning 209 X-NITRO-WARNING
Warnings are captured by specifying the loginURL as http://<nsip>/nitro/v1/config/login/?warning=yes.
Combination ofsuccess andfailure (for bulkoperation withX-NITRO-ONERROR set ascontinue)
207 MultiStatus
Some commands are executed successfully andsome have failed.
Note: The content-type in the response header of an unsuccessful operation, consistsof error MIME type instead of resource MIME type.
For a more detailed description of the error codes, see the API reference available inthe <NITRO_SDK_HOME>/doc folder.
Citrix NetScaler NITRO Getting Started Guide
87

Chapter 7 REST Web Services
88

Chapter 8
NITRO Changes Across NetScalerReleases
NetScaler has introduced some changes in the NITRO API sincethe NetScaler 9.3 release. This could raise some compatibilityissues for the following users:
w Users migrating from NetScaler 9.3 to 10.1
w Users migrating from NetScaler 9.3 to 10.5
Note: There are no changes introduced since the NetScaler10.1 release. Therefore, you should not face anycompatibility issues when migrating from NetScaler 10.1 to10.5.
These NITRO changes from 9.3 to 10.1 or 10.5 are categorizedas follows:
w Resources Removed
w APIs Removed
w API Return Type Changed
w Attribute Type Changed
w Attributes Removed
w SDK Specific Changes
Note: Unless otherwise specified, these changes areapplicable to both REST and SDKs.
89

Resources RemovedResource Replace
with...Comments
lbmonitor_lbmetrictable_binding
lbmonitor_metric_binding
APIs RemovedResource API Comments
vserver GET Perform the GET operationon specific virtual servertypes such as lb/cr/cs.
filterpolicy POST with"action=unset"
This API is removed asunsetting theattributes('action') of apolicy makes it invalid.
auditsyslogpolicy
POST with"action=unset"
This API is removed asunsetting theattributes('action') of apolicy makes it invalid.
auditnslogpolicy
POST with"action=unset"
This API is removed asunsetting theattributes('action') of apolicy makes it invalid.
authorizationpolicy
POST with"action=unset"
This API is removed asunsetting theattributes('action') of apolicy makes it invalid.
API Return Type ChangedResource API Comments
snmpengineid
GET Return type changed to anarray.
Chapter 8 NITRO Changes Across NetScaler Releases
90

Resource API Comments
nshostname GET Return type changed to anarray.
Attribute Type ChangedResource Attribute Comments
appfwpolicy_lbvserver_binding
activepolicy Data type changed fromBoolean to Integer.
appfwpolicy_appfwglobal_binding
activepolicy Data type changed fromBoolean to Integer.
vlan portbitmap Data type changed from uintto ulong.
vlan tagbitmap Data type changed from uintto ulong.
Attributes RemovedResource Attribute Replace
with...Comments
policypatset_pattern_binding
indextype - NA - Thisattribute ismoved to'policypatset'resource asthis attributeis applicableat patsetlevel.
system_stats powersupply1failure
powersupply1status
Change isapplicablefromNetScaler 9.3(65.8).
system_stats powersupply2failure
powersupply2status
Change isapplicable
Citrix NetScaler NITRO Getting Started Guide
91

Resource Attribute Replacewith...
Comments
fromNetScaler 9.3(65.8).
server_servicegroup_binding
servicetype svctype
server_service_binding
servicetype svctype
crvserver hits - NA - Hits arecalculatedper policybindinghence movedthisparameter tobindingresources.
crvserver dstvsvr destinationvserver
crvserver destvserver domain
crvserver dnsvserver dnsvservername
appflowpolicylabel
type policylabeltype
sslcipher ciphgrpals ciphergroupname
This changeis applicableforsslcipher_*_bindingresourcesalso.
csvserver_cspolicy_binding
targetvserver targetlbvserver
csvserver_cspolicy_binding
targetvserver targetlbvserver
Chapter 8 NITRO Changes Across NetScaler Releases
92

Resource Attribute Replacewith...
Comments
rewriteaction
allow_unsafe_pi1,allow_unsafe_pi
bypassSafetyCheck
SDK Specific ChangesClass Method Replace
with...Comments
Routerbgp - NA - - NA - This class isremoved asall routerconfigurations aredeprecatedin 9.2.
dnsptrrec get(dnsptrrec obj,nitro_servicesession)
get(nitro_service session,Stringreversedomain)
dnsaddrec get(dnsaddrec obj,nitro_servicesession)
get(nitro_service session,Stringhostname)
dnsnsrec get(dnsnsrecobj,nitro_servicesession)
get(nitro_service session,Stringdomain)
snmpengineid
unset(nitro_servicesession,String[] args)
unset(nitro_servicesession,snmpengineid resource,String[] args)
arp arp.get(nitro_servicesession,
arp.get(nitro_servicesession, arpresource)
Citrix NetScaler NITRO Getting Started Guide
93

Class Method Replacewith...
Comments
Stringipaddress)
nsip get(nitro_service session,Stringipaddress)
get(nitro_service client,nsipresource)
nsip6 get(nitro_service session,Stringipv6address)
get(nitro_service session,nsip6resource)
dnsmxrec dnsmxrec.get(dnsmxrecobj,nitro_servicesession)
dnsmxrec[]get(nitro_service service,dnsmxrec_args args)
Chapter 8 NITRO Changes Across NetScaler Releases
94

Chapter 9
Unsupported NetScaler Operations
Some NetScaler operations that are available through thecommand line interface and through the configuration utility,are not available through NITRO APIs. The following listprovides the NetScaler operations not supported by NITRO:
w install API
w diff API on nsconfig resource (supported from NetScaler10.5 onwards)
w UI-internal APIs (update, unset, and get)
w show ns info
w Application firewall APIs:
• importwsdl• importcustom• importxmlschema• importxmlerrorpage• importhtmlerrorpage• rmcustom• rmxmlschema• rmxmlerrorpage• rmhtmlerrorpage
w CLI-specific APIs:
• ping/ping6• traceroute/traceroute6• start nstrace/stop nstrace/show nstrace• scp• configaudit• show defaults• show permission
95

• batch• source
Chapter 9 Unsupported NetScaler Operations
96