cli-guide
TRANSCRIPT

OpenStack CLI Guide
1
1. OpenStack CLI Guide
Table of ContentsOverview of CLIs ............................................................................................................. 1Getting Credentials for a CLI ........................................................................................... 2Checking the version of a CLI .......................................................................................... 4Get Help for a CLI ........................................................................................................... 4Install OpenStack nova CLI .............................................................................................. 4Command List for nova Client ......................................................................................... 5OpenStack Nova CLI Guide ............................................................................................. 8
Get Command, Parameter, and Subcommand Help ................................................. 8List Instances, Images, and Flavors .......................................................................... 8Launch a New Instance ........................................................................................... 9Change Server Configuration ................................................................................. 13Stop and Start an Instance .................................................................................... 15Rebooting an instance ........................................................................................... 15Manage Security Groups ....................................................................................... 15Manage Floating IP Addresses ............................................................................... 19Manage Images .................................................................................................... 21Manage Volumes .................................................................................................. 21Terminate an Instance ........................................................................................... 21Get an Instance Console ........................................................................................ 22Usage statistics ...................................................................................................... 22
Install OpenStack glance CLI .......................................................................................... 24Command List for glance CLI ......................................................................................... 25OpenStack Glance CLI Guide ......................................................................................... 26
Getting Command, Parameter, and Subcommand Help ......................................... 27List Images ............................................................................................................ 27Add a New Image ................................................................................................. 27Managing Images .................................................................................................. 28
Install OpenStack keystone CLI ...................................................................................... 28Command List for keystone CLI ..................................................................................... 29Install OpenStack swift CLI ............................................................................................ 31Command List for swift CLI ........................................................................................... 31Install OpenStack quantum CLI ...................................................................................... 32Command List for quantum CLI ..................................................................................... 33OpenStack Quantum CLI Guide ..................................................................................... 34
Overview ............................................................................................................... 34
Each OpenStack project has a Command-Line-Interface (CLI) that interacts with the service'sREST API.
Overview of CLIsThe CLIs are open-source Python clients used to run commands to make API calls. Forexample, each nova client command runs cURL commands that embed API v2 requests.You can run the CLI from a desktop machine or remote system. For example, to use the

OpenStack CLI Guide
2
Compute API from the command-line, install the nova client. A common openstack CLI is indevelopment also.
To install a client on a Mac OS X or Linux system, you can use easy_install or pip or installthe package from your Linux distribution. Using pip is recommended because it is easy andit ensures that you get the latest version of the nova client from the Python Package Index.Also, it lets you update the package later on.
Here are the CLIs for use with OpenStack clouds:
• glance - Enables interaction with images, such as adding and setting permissions onimages.
• keystone - Controls and creates users, tenants, roles, endpoints, and credentials.
• nova - Enables you to launch servers, set security groups, control IP addresses on servers,control volumes and snapshot images.
• quantum - Offers network configuration for guest servers.
• swift - Provides access to a swift installation for adhoc processing, to gather statistics, listitems, update metadata, upload, download and delete files stored by the object storageservice.
Getting Credentials for a CLIBefore you can issue commands with a command-line-interface, you must ensure that yourenvironment contains the necessary variables so that you can prove to the CLI who you areand what credentials you have to issue the commands.
Procedure 1.1. To authenticate a user to interact with CLIs
1. Set environment variables
You can either edit your bash profile to add and set environment variables or use anopenrc file downloaded from an OpenStack Dashboard.
Either edit your .bash_profile file:
$ nano ~/.bash_profile
Add the following lines to the bash profile. Edit the values for the OS_USERNAME,OS_PASSWORD, and OS_TENANT_NAME variables:
export OS_USERNAME=usernameexport OS_PASSWORD=passwordexport OS_TENANT_NAME=tenantexport OS_AUTH_URL=https://identity.api.rackspacecloud.com/v2.0/ #an example, insert your endpoint hereexport NOVACLIENT_DEBUG=1export NOVA_VERSION=2
Or download an openrc file from the OpenStack Dashboard:
#!/bin/bash
OpenStack CLI Guide
3
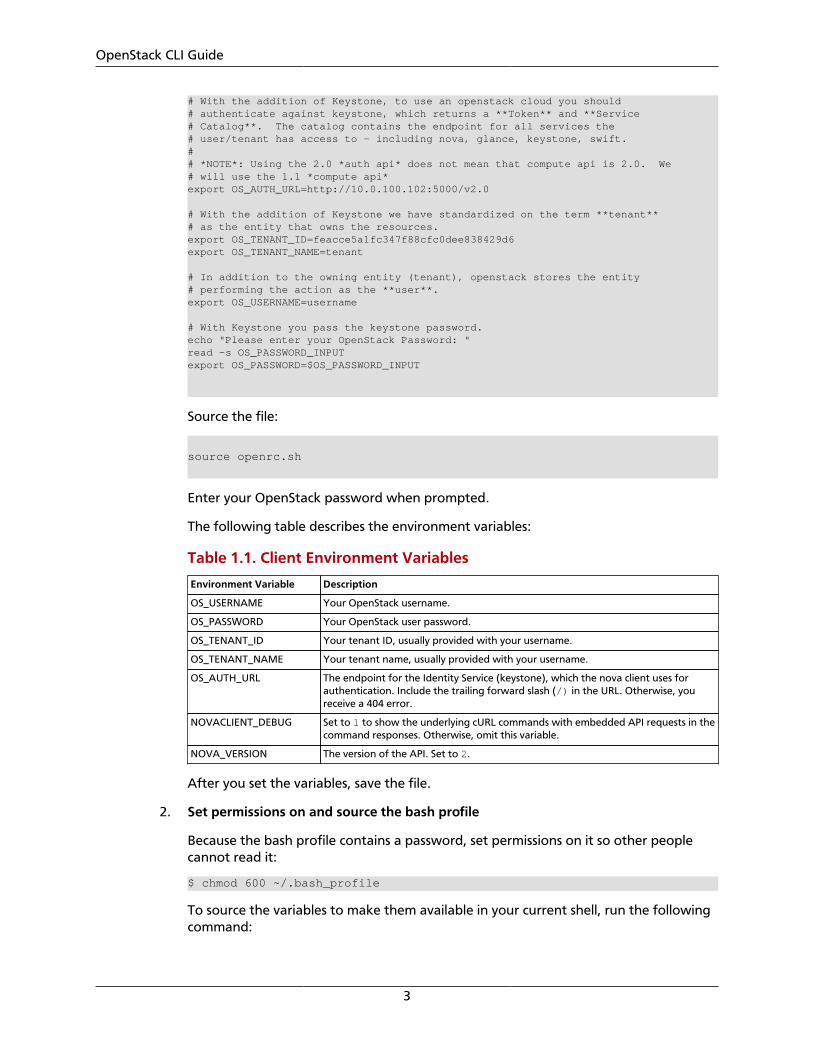
# With the addition of Keystone, to use an openstack cloud you should# authenticate against keystone, which returns a **Token** and **Service# Catalog**. The catalog contains the endpoint for all services the# user/tenant has access to - including nova, glance, keystone, swift.## *NOTE*: Using the 2.0 *auth api* does not mean that compute api is 2.0. We# will use the 1.1 *compute api*export OS_AUTH_URL=http://10.0.100.102:5000/v2.0
# With the addition of Keystone we have standardized on the term **tenant**# as the entity that owns the resources.export OS_TENANT_ID=feacce5a1fc347f88cfc0dee838429d6export OS_TENANT_NAME=tenant
# In addition to the owning entity (tenant), openstack stores the entity# performing the action as the **user**.export OS_USERNAME=username
# With Keystone you pass the keystone password.echo "Please enter your OpenStack Password: "read -s OS_PASSWORD_INPUTexport OS_PASSWORD=$OS_PASSWORD_INPUT
Source the file:
source openrc.sh
Enter your OpenStack password when prompted.
The following table describes the environment variables:
Table 1.1. Client Environment Variables
Environment Variable Description
OS_USERNAME Your OpenStack username.
OS_PASSWORD Your OpenStack user password.
OS_TENANT_ID Your tenant ID, usually provided with your username.
OS_TENANT_NAME Your tenant name, usually provided with your username.
OS_AUTH_URL The endpoint for the Identity Service (keystone), which the nova client uses forauthentication. Include the trailing forward slash (/) in the URL. Otherwise, youreceive a 404 error.
NOVACLIENT_DEBUG Set to 1 to show the underlying cURL commands with embedded API requests in thecommand responses. Otherwise, omit this variable.
NOVA_VERSION The version of the API. Set to 2.
After you set the variables, save the file.
2. Set permissions on and source the bash profile
Because the bash profile contains a password, set permissions on it so other peoplecannot read it:
$ chmod 600 ~/.bash_profile
To source the variables to make them available in your current shell, run the followingcommand:
OpenStack CLI Guide
4
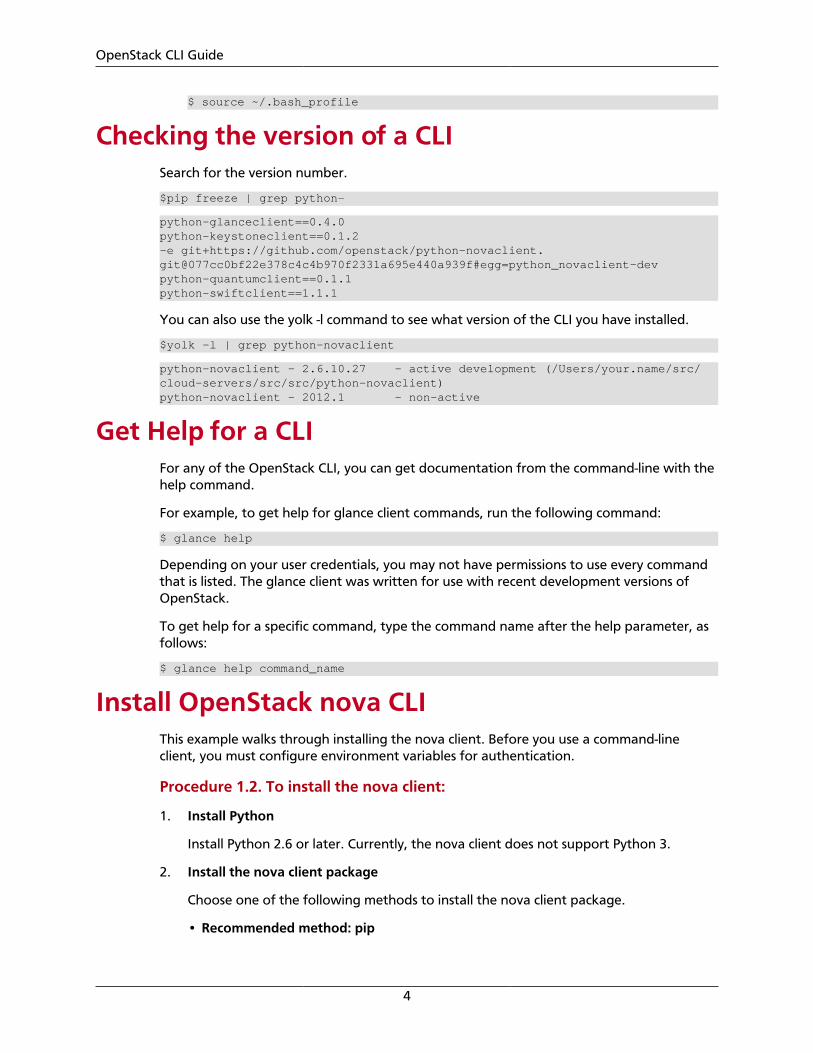
$ source ~/.bash_profile
Checking the version of a CLISearch for the version number.
$pip freeze | grep python-
python-glanceclient==0.4.0python-keystoneclient==0.1.2-e git+https://github.com/openstack/python-novaclient.git@077cc0bf22e378c4c4b970f2331a695e440a939f#egg=python_novaclient-devpython-quantumclient==0.1.1python-swiftclient==1.1.1
You can also use the yolk -l command to see what version of the CLI you have installed.
$yolk -l | grep python-novaclient
python-novaclient - 2.6.10.27 - active development (/Users/your.name/src/cloud-servers/src/src/python-novaclient)python-novaclient - 2012.1 - non-active
Get Help for a CLIFor any of the OpenStack CLI, you can get documentation from the command-line with thehelp command.
For example, to get help for glance client commands, run the following command:
$ glance help
Depending on your user credentials, you may not have permissions to use every commandthat is listed. The glance client was written for use with recent development versions ofOpenStack.
To get help for a specific command, type the command name after the help parameter, asfollows:
$ glance help command_name
Install OpenStack nova CLIThis example walks through installing the nova client. Before you use a command-lineclient, you must configure environment variables for authentication.
Procedure 1.2. To install the nova client:
1. Install Python
Install Python 2.6 or later. Currently, the nova client does not support Python 3.
2. Install the nova client package
Choose one of the following methods to install the nova client package.
• Recommended method: pip
OpenStack CLI Guide
5
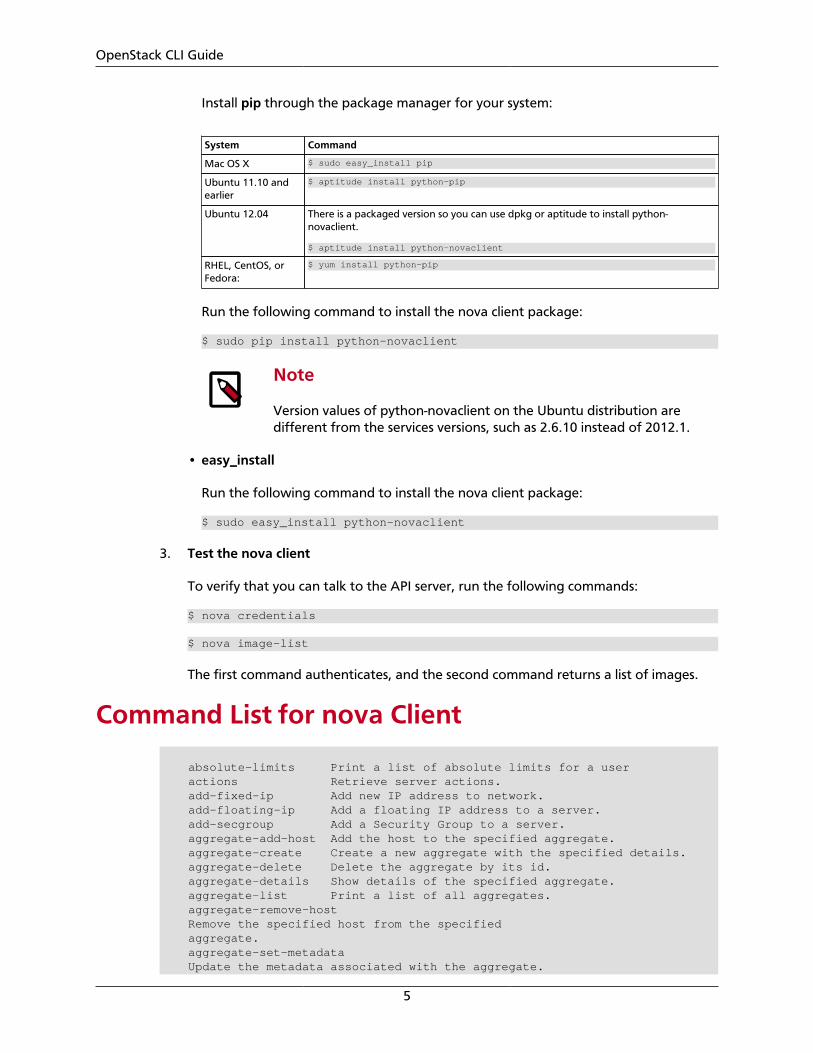
Install pip through the package manager for your system:
System Command
Mac OS X $ sudo easy_install pip
Ubuntu 11.10 andearlier
$ aptitude install python-pip
Ubuntu 12.04 There is a packaged version so you can use dpkg or aptitude to install python-novaclient.
$ aptitude install python-novaclient
RHEL, CentOS, orFedora:
$ yum install python-pip
Run the following command to install the nova client package:
$ sudo pip install python-novaclient
Note
Version values of python-novaclient on the Ubuntu distribution aredifferent from the services versions, such as 2.6.10 instead of 2012.1.
• easy_install
Run the following command to install the nova client package:
$ sudo easy_install python-novaclient
3. Test the nova client
To verify that you can talk to the API server, run the following commands:
$ nova credentials
$ nova image-list
The first command authenticates, and the second command returns a list of images.
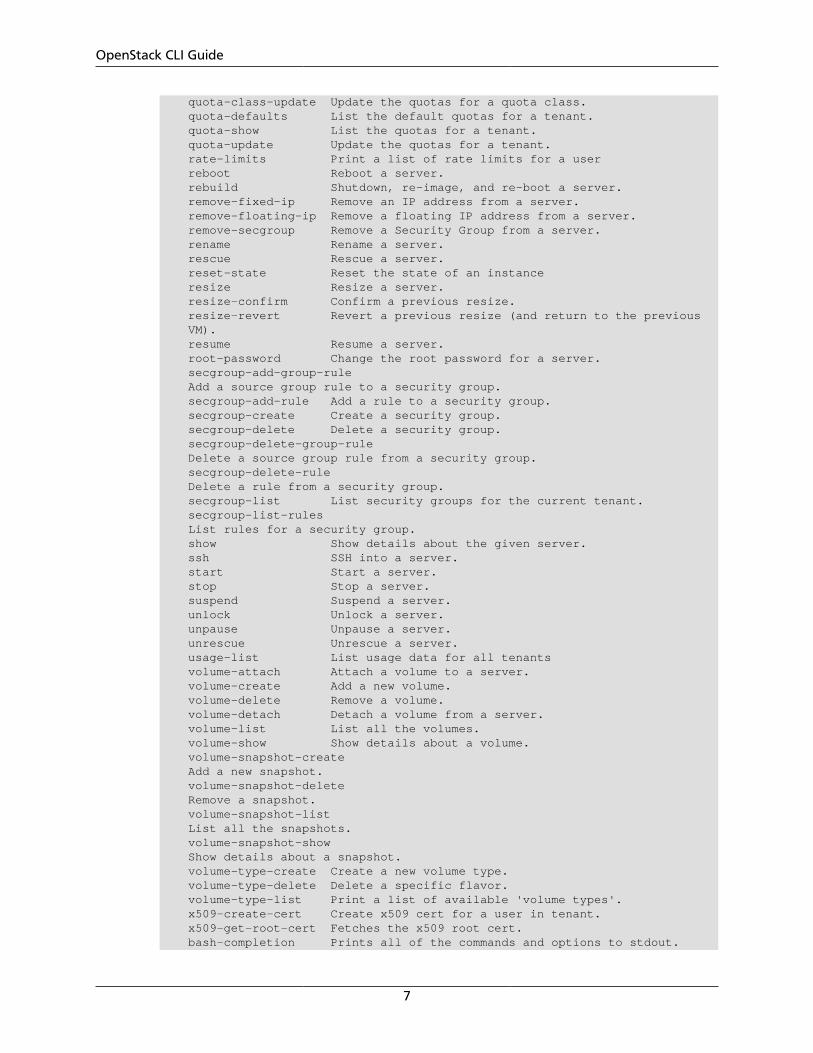
Command List for nova Client
absolute-limits Print a list of absolute limits for a user actions Retrieve server actions. add-fixed-ip Add new IP address to network. add-floating-ip Add a floating IP address to a server. add-secgroup Add a Security Group to a server. aggregate-add-host Add the host to the specified aggregate. aggregate-create Create a new aggregate with the specified details. aggregate-delete Delete the aggregate by its id. aggregate-details Show details of the specified aggregate. aggregate-list Print a list of all aggregates. aggregate-remove-host Remove the specified host from the specified aggregate. aggregate-set-metadata Update the metadata associated with the aggregate.

OpenStack CLI Guide
6
aggregate-update Update the aggregate's name and optionally availability zone. boot Boot a new server. cloudpipe-create Create a cloudpipe instance for the given project cloudpipe-list Print a list of all cloudpipe instances. console-log Get console log output of a server. credentials Show user credentials returned from auth delete Immediately shut down and delete a server. diagnostics Retrieve server diagnostics. dns-create Create a DNS entry for domain, name and ip. dns-create-private-domain Create the specified DNS domain. dns-create-public-domain Create the specified DNS domain. dns-delete Delete the specified DNS entry. dns-delete-domain Delete the specified DNS domain. dns-domains Print a list of available dns domains. dns-list List current DNS entries for domain and ip or domain and name. endpoints Discover endpoints that get returned from the authenticate services flavor-create Create a new flavor flavor-delete Delete a specific flavor flavor-key Set or unset extra_spec for a flavor. flavor-list Print a list of available 'flavors' (sizes of servers). flavor-show Show details about the given flavor. floating-ip-create Allocate a floating IP for the current tenant. floating-ip-delete De-allocate a floating IP. floating-ip-list List floating ips for this tenant. floating-ip-pool-list List all floating ip pools. get-vnc-console Get a vnc console to a server. host-action Perform a power action on a host. host-describe Describe a specific host host-list List all hosts by service host-update Update host settings. hypervisor-list List hypervisors. hypervisor-servers List instances belonging to specific hypervisors. hypervisor-show Display the details of the specified hypervisor. hypervisor-stats Get hypervisor statistics over all compute nodes. hypervisor-uptime Display the uptime of the specified hypervisor. image-create Create a new image by taking a snapshot of a running server. image-delete Delete an image. image-list Print a list of available images to boot from. image-meta Set or Delete metadata on an image. image-show Show details about the given image. keypair-add Create a new key pair for use with instances keypair-delete Delete keypair by its id keypair-list Print a list of keypairs for a user list List active servers. live-migration Migrates a running instance to a new machine. lock Lock a server. meta Set or Delete metadata on a server. migrate Migrate a server. network-list Print a list of available networks. network-show Show details about the given network. pause Pause a server. quota-class-show List the quotas for a quota class.
OpenStack CLI Guide
7
quota-class-update Update the quotas for a quota class. quota-defaults List the default quotas for a tenant. quota-show List the quotas for a tenant. quota-update Update the quotas for a tenant. rate-limits Print a list of rate limits for a user reboot Reboot a server. rebuild Shutdown, re-image, and re-boot a server. remove-fixed-ip Remove an IP address from a server. remove-floating-ip Remove a floating IP address from a server. remove-secgroup Remove a Security Group from a server. rename Rename a server. rescue Rescue a server. reset-state Reset the state of an instance resize Resize a server. resize-confirm Confirm a previous resize. resize-revert Revert a previous resize (and return to the previous VM). resume Resume a server. root-password Change the root password for a server. secgroup-add-group-rule Add a source group rule to a security group. secgroup-add-rule Add a rule to a security group. secgroup-create Create a security group. secgroup-delete Delete a security group. secgroup-delete-group-rule Delete a source group rule from a security group. secgroup-delete-rule Delete a rule from a security group. secgroup-list List security groups for the current tenant. secgroup-list-rules List rules for a security group. show Show details about the given server. ssh SSH into a server. start Start a server. stop Stop a server. suspend Suspend a server. unlock Unlock a server. unpause Unpause a server. unrescue Unrescue a server. usage-list List usage data for all tenants volume-attach Attach a volume to a server. volume-create Add a new volume. volume-delete Remove a volume. volume-detach Detach a volume from a server. volume-list List all the volumes. volume-show Show details about a volume. volume-snapshot-create Add a new snapshot. volume-snapshot-delete Remove a snapshot. volume-snapshot-list List all the snapshots. volume-snapshot-show Show details about a snapshot. volume-type-create Create a new volume type. volume-type-delete Delete a specific flavor. volume-type-list Print a list of available 'volume types'. x509-create-cert Create x509 cert for a user in tenant. x509-get-root-cert Fetches the x509 root cert. bash-completion Prints all of the commands and options to stdout.

OpenStack CLI Guide
8
OpenStack Nova CLI GuideThis section describes what you can do with the OpenStack Nova client (CLI).
Get Command, Parameter, and Subcommand HelpHelp for commands, parameters, and subcommands is available with the nova helpcommand.
$ nova help
Include the command name to get usage information about an individual command, as inthe following example.
$ nova help actionsusage: nova actions <server>
Retrieve server actions.
Positional arguments: <server> Name or ID of server.
List Instances, Images, and FlavorsBefore you can go about the business of building your cloud, you want to know whatimages are available to you by asking the image service what kinds of configurations areavailable. The image service could be compared to iTunes for your cloud - you can view theplaylist of images before using your favorite image to create a new instance in the cloud.To get the list of images, their names, status, and ID, use this command:
$ nova image-list+--------------------------------------+----------------+--------+--------+| ID | Name | Status | Server |+--------------------------------------+----------------+--------+--------+| 53b205cc-7abc-46eb-aa60-eabc449b4217 | natty-image | ACTIVE | || 588d93af-645d-4312-a5b0-81347715a91b | tty-image | ACTIVE | || ac6f83b7-078c-47bd-b4c2-4053282da49e | oneiric-image | ACTIVE | || e110fb7d-2a9e-4da5-923f-5565867ce87a | maverick-image | ACTIVE | |+--------------------------------------+----------------+--------+--------+
Next you need to know the relative sizes of each of these.
$ nova flavor-list+----+-----------+-----------+------+-----------+------+-------+-------------+| ID | Name | Memory_MB | Disk | Ephemeral | Swap | VCPUs | RXTX_Factor |+----+-----------+-----------+------+-----------+------+-------+-------------+| 1 | m1.tiny | 512 | 0 | 0 | | 1 | 1.0 || 2 | m1.small | 2048 | 10 | 20 | | 1 | 1.0 || 3 | m1.medium | 4096 | 10 | 40 | | 2 | 1.0 || 4 | m1.large | 8192 | 10 | 80 | | 4 | 1.0 |
OpenStack CLI Guide
9
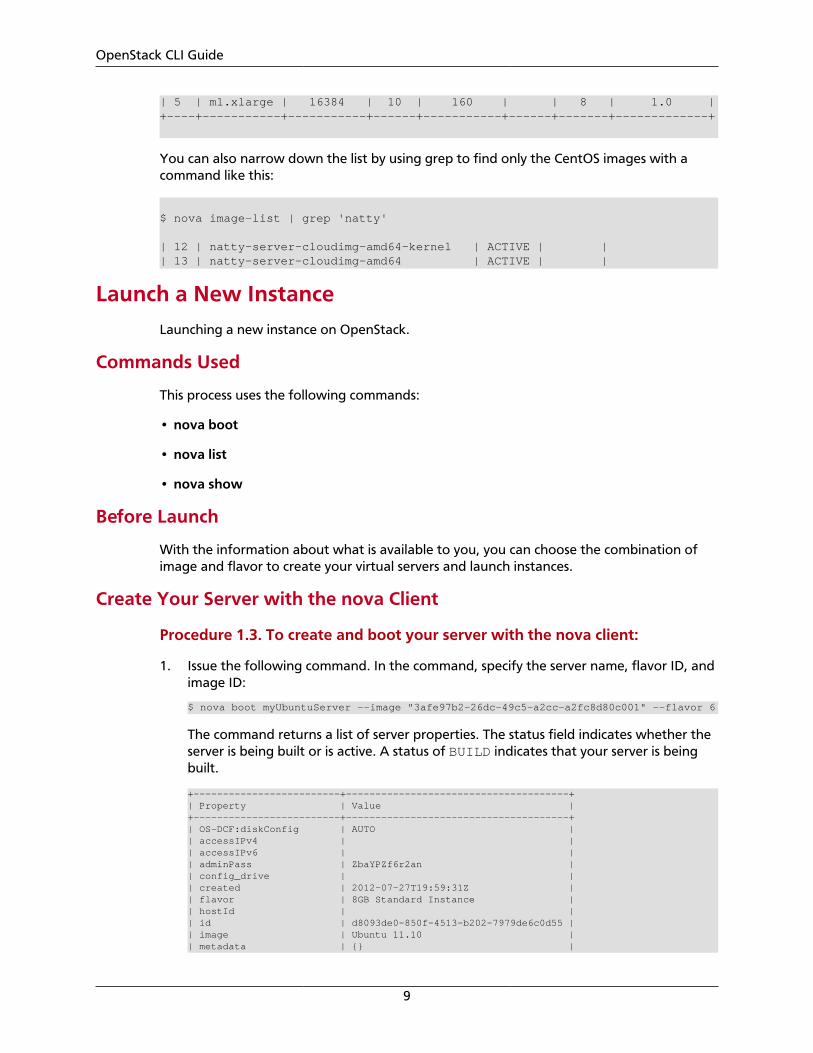
| 5 | m1.xlarge | 16384 | 10 | 160 | | 8 | 1.0 |+----+-----------+-----------+------+-----------+------+-------+-------------+
You can also narrow down the list by using grep to find only the CentOS images with acommand like this:
$ nova image-list | grep 'natty'
| 12 | natty-server-cloudimg-amd64-kernel | ACTIVE | || 13 | natty-server-cloudimg-amd64 | ACTIVE | |
Launch a New InstanceLaunching a new instance on OpenStack.
Commands Used
This process uses the following commands:
• nova boot
• nova list
• nova show
Before Launch
With the information about what is available to you, you can choose the combination ofimage and flavor to create your virtual servers and launch instances.
Create Your Server with the nova Client
Procedure 1.3. To create and boot your server with the nova client:
1. Issue the following command. In the command, specify the server name, flavor ID, andimage ID:
$ nova boot myUbuntuServer --image "3afe97b2-26dc-49c5-a2cc-a2fc8d80c001" --flavor 6
The command returns a list of server properties. The status field indicates whether theserver is being built or is active. A status of BUILD indicates that your server is beingbuilt.
+-------------------------+--------------------------------------+| Property | Value |+-------------------------+--------------------------------------+| OS-DCF:diskConfig | AUTO || accessIPv4 | || accessIPv6 | || adminPass | ZbaYPZf6r2an || config_drive | || created | 2012-07-27T19:59:31Z || flavor | 8GB Standard Instance || hostId | || id | d8093de0-850f-4513-b202-7979de6c0d55 || image | Ubuntu 11.10 || metadata | {} |

OpenStack CLI Guide
10
| name | myUbuntuServer || progress | 0 || status | BUILD || tenant_id | 345789 || updated | 2012-07-27T19:59:31Z || user_id | 170454 |+-------------------------+--------------------------------------+
2. Copy the server ID value from the id field in the output. You use this ID to get detailsfor your server to determine if it built successfully.
Copy the administrative password value from the adminPass field. You use this valueto log into your server.
Launch from a Volume
The Compute service has preliminary support for booting an instance from a volume.
Creating a bootable volume
To create a bootable volume, mount the volume to an existing instance, and then build avolume-backed image. Here is an example based on exercises/boot_from_volume.sh. Thisexample assumes that you have a running instance with a 1GB volume mounted at /dev/vdc. These commands will make the mounted volume bootable using a CirrOS image. Asroot:
# mkfs.ext3 -b 1024 /dev/vdc 1048576 # mkdir /tmp/stage # mount /dev/vdc /tmp/stage # cd /tmp # wget https://launchpad.net/cirros/trunk/0.3.0/+download/cirros-0.3.0-x86_64-rootfs.img.gz # gunzip cirros-0.3.0-x86_64-rootfs.img.gz # mkdir /tmp/cirros # mount /tmp/cirros-0.3.0-x86_64-rootfs.img /tmp/cirros # cp -pr /tmp/cirros/* /tmp/stage # umount /tmp/cirros # sync # umount /tmp/stage
Detach the volume once you are done.
Booting an instance from the volume
To boot a new instance from the volume, use the nova boot command with use the --block-device-mapping flag. The output for nova help boot shows the followingdocumentation about this flag:
--block-device-mapping <dev-name=mapping> Block device mapping in the format <dev-name=<id>:<type>:<size(GB)>:<delete-on-terminate>.
The command arguments are:
dev-name A device name where the volume will be attached in thesystem at /dev/dev_name. This value is typically vda.

OpenStack CLI Guide
11
id The ID of the volume to boot from, as shown in the output ofnova volume-list.
type This is either snap, which means that the volume was createdfrom a snapshot, or anything other than snap (a blankstring is valid). In the example above, the volume was notcreated from a snapshot, so we will leave this field blank in ourexample below.
size (GB) The size of the volume, in GB. It is safe to leave this blank andhave the Compute service infer the size.
delete-on-terminate A boolean to indicate whether the volume should be deletedwhen the instance is terminated. True can be specified as Trueor 1. False can be specified as False or 0.
Note
Because of bug #1008622, you must specify an image when booting from avolume, even though this image will not be used.
The following example will attempt boot from volume with ID=13, it will not delete onterminate. Replace the --image flag with a valid image on your system, and the --key-name with a valid keypair name:
$ nova boot --image f4addd24-4e8a-46bb-b15d-fae2591f1a35 --flavor 2 --key-name mykey \ --block-device-mapping vda=13:::0 boot-from-vol-test
Associating ssh keys with instances
Creating New Keys
The command:
$ nova keypair-add mykey > mykey.pem
will create a key named mykey which you can associate with instances. Save the filemykey.pem to a secure location as it will allow root access to instances the mykeykey isassociated with.
Uploading Existing Keys
The command:
$ nova keypair-add --pub-key mykey.pub mykey
will upload the existing public key mykey.pub and associate it with the name mykey. Youwill need to have the matching private key to access instances associated with this key.
Adding Keys to Your Instance
To associate a key with an instance on boot add --key_name mykey to your commandline for example:
OpenStack CLI Guide
12
$ nova boot --image ubuntu-cloudimage --flavor 1 --key_name mykey
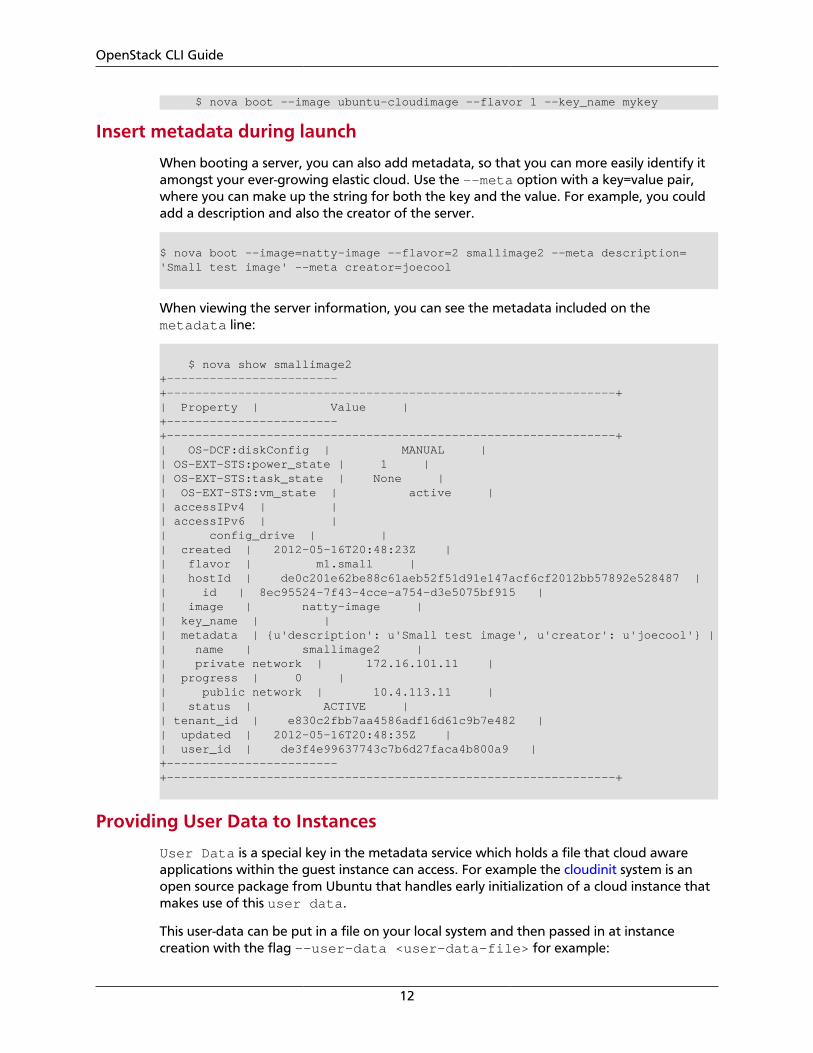
Insert metadata during launch
When booting a server, you can also add metadata, so that you can more easily identify itamongst your ever-growing elastic cloud. Use the --meta option with a key=value pair,where you can make up the string for both the key and the value. For example, you couldadd a description and also the creator of the server.
$ nova boot --image=natty-image --flavor=2 smallimage2 --meta description='Small test image' --meta creator=joecool
When viewing the server information, you can see the metadata included on themetadata line:
$ nova show smallimage2+------------------------+---------------------------------------------------------------+| Property | Value |+------------------------+---------------------------------------------------------------+| OS-DCF:diskConfig | MANUAL || OS-EXT-STS:power_state | 1 || OS-EXT-STS:task_state | None || OS-EXT-STS:vm_state | active || accessIPv4 | || accessIPv6 | || config_drive | || created | 2012-05-16T20:48:23Z || flavor | m1.small || hostId | de0c201e62be88c61aeb52f51d91e147acf6cf2012bb57892e528487 || id | 8ec95524-7f43-4cce-a754-d3e5075bf915 || image | natty-image || key_name | || metadata | {u'description': u'Small test image', u'creator': u'joecool'} || name | smallimage2 || private network | 172.16.101.11 || progress | 0 || public network | 10.4.113.11 || status | ACTIVE || tenant_id | e830c2fbb7aa4586adf16d61c9b7e482 || updated | 2012-05-16T20:48:35Z || user_id | de3f4e99637743c7b6d27faca4b800a9 |+------------------------+---------------------------------------------------------------+
Providing User Data to Instances
User Data is a special key in the metadata service which holds a file that cloud awareapplications within the guest instance can access. For example the cloudinit system is anopen source package from Ubuntu that handles early initialization of a cloud instance thatmakes use of this user data.
This user-data can be put in a file on your local system and then passed in at instancecreation with the flag --user-data <user-data-file> for example:
OpenStack CLI Guide
13
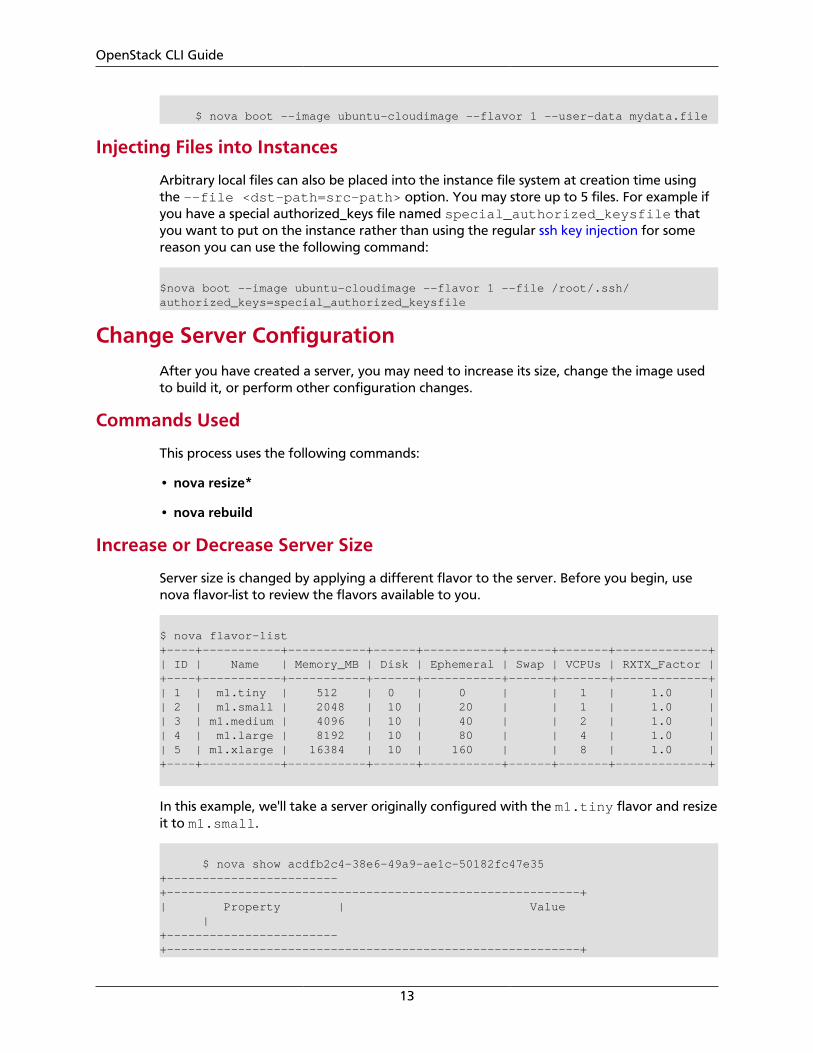
$ nova boot --image ubuntu-cloudimage --flavor 1 --user-data mydata.file
Injecting Files into Instances
Arbitrary local files can also be placed into the instance file system at creation time usingthe --file <dst-path=src-path> option. You may store up to 5 files. For example ifyou have a special authorized_keys file named special_authorized_keysfile thatyou want to put on the instance rather than using the regular ssh key injection for somereason you can use the following command:
$nova boot --image ubuntu-cloudimage --flavor 1 --file /root/.ssh/authorized_keys=special_authorized_keysfile
Change Server ConfigurationAfter you have created a server, you may need to increase its size, change the image usedto build it, or perform other configuration changes.
Commands Used
This process uses the following commands:
• nova resize*
• nova rebuild
Increase or Decrease Server Size
Server size is changed by applying a different flavor to the server. Before you begin, usenova flavor-list to review the flavors available to you.
$ nova flavor-list+----+-----------+-----------+------+-----------+------+-------+-------------+| ID | Name | Memory_MB | Disk | Ephemeral | Swap | VCPUs | RXTX_Factor |+----+-----------+-----------+------+-----------+------+-------+-------------+| 1 | m1.tiny | 512 | 0 | 0 | | 1 | 1.0 || 2 | m1.small | 2048 | 10 | 20 | | 1 | 1.0 || 3 | m1.medium | 4096 | 10 | 40 | | 2 | 1.0 || 4 | m1.large | 8192 | 10 | 80 | | 4 | 1.0 || 5 | m1.xlarge | 16384 | 10 | 160 | | 8 | 1.0 |+----+-----------+-----------+------+-----------+------+-------+-------------+
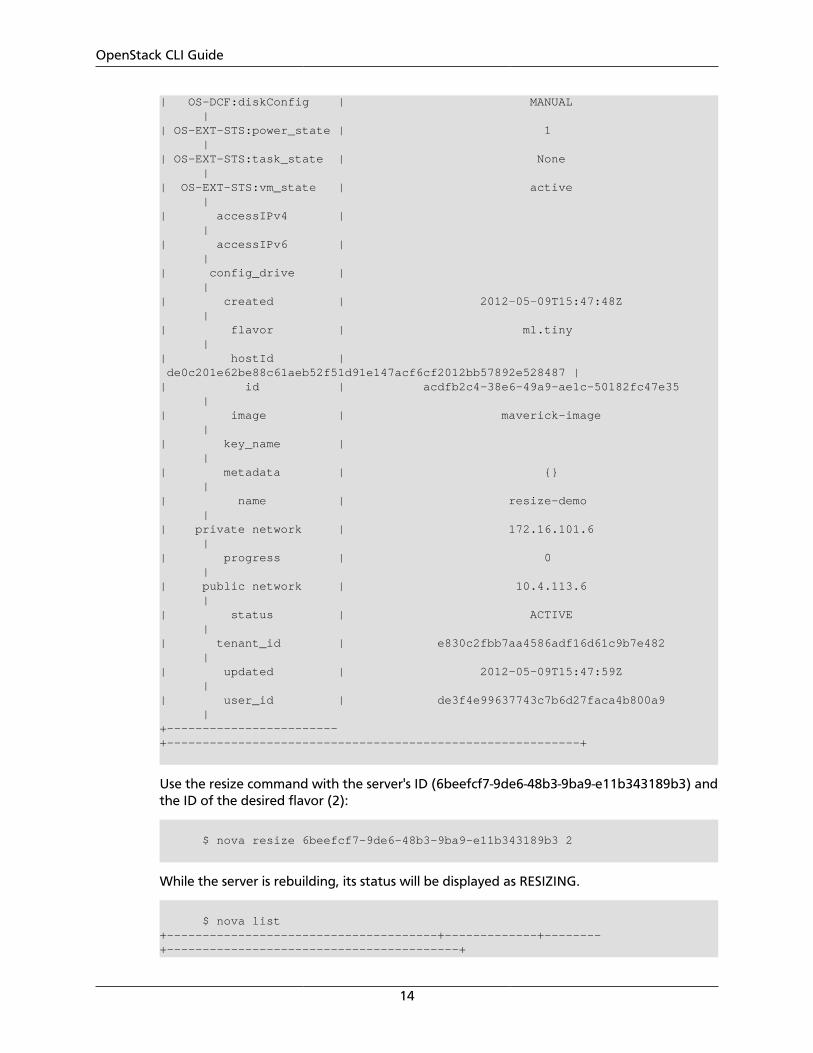
In this example, we'll take a server originally configured with the m1.tiny flavor and resizeit to m1.small.
$ nova show acdfb2c4-38e6-49a9-ae1c-50182fc47e35+------------------------+----------------------------------------------------------+| Property | Value |+------------------------+----------------------------------------------------------+
OpenStack CLI Guide
14
| OS-DCF:diskConfig | MANUAL || OS-EXT-STS:power_state | 1 || OS-EXT-STS:task_state | None || OS-EXT-STS:vm_state | active || accessIPv4 | || accessIPv6 | || config_drive | || created | 2012-05-09T15:47:48Z || flavor | m1.tiny || hostId | de0c201e62be88c61aeb52f51d91e147acf6cf2012bb57892e528487 || id | acdfb2c4-38e6-49a9-ae1c-50182fc47e35 || image | maverick-image || key_name | || metadata | {} || name | resize-demo || private network | 172.16.101.6 || progress | 0 || public network | 10.4.113.6 || status | ACTIVE || tenant_id | e830c2fbb7aa4586adf16d61c9b7e482 || updated | 2012-05-09T15:47:59Z || user_id | de3f4e99637743c7b6d27faca4b800a9 |+------------------------+----------------------------------------------------------+
Use the resize command with the server's ID (6beefcf7-9de6-48b3-9ba9-e11b343189b3) andthe ID of the desired flavor (2):
$ nova resize 6beefcf7-9de6-48b3-9ba9-e11b343189b3 2
While the server is rebuilding, its status will be displayed as RESIZING.
$ nova list+--------------------------------------+-------------+--------+-----------------------------------------+
OpenStack CLI Guide
15
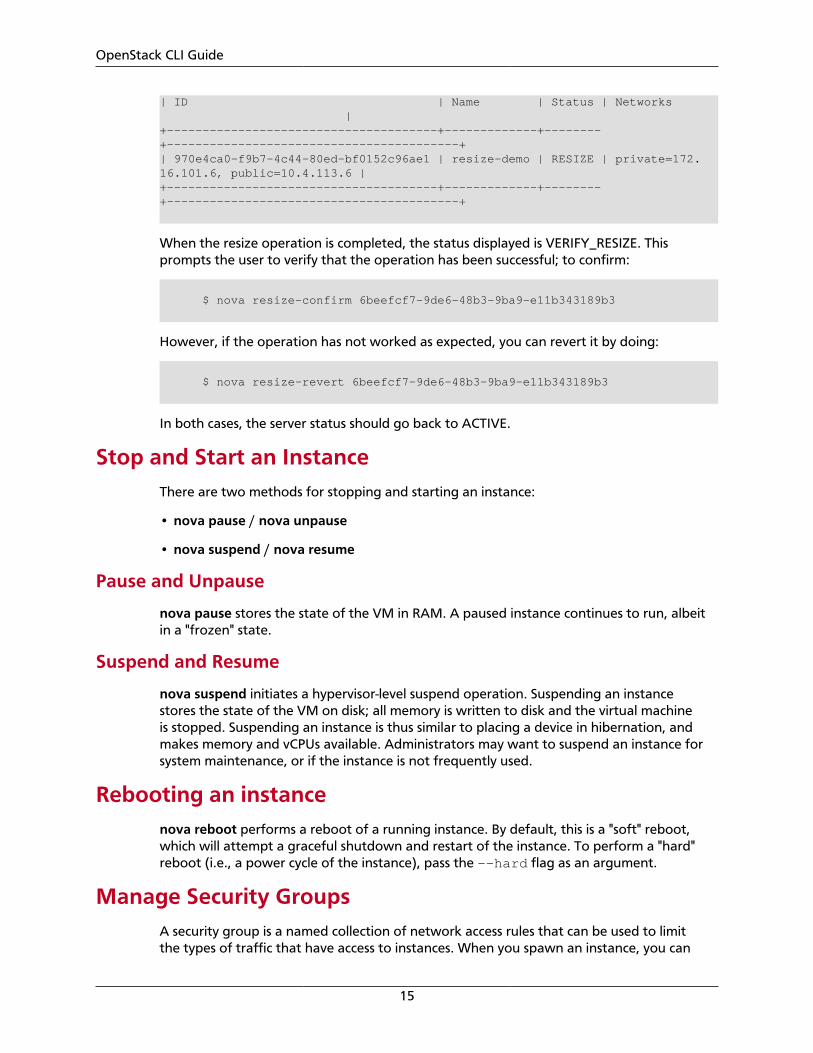
| ID | Name | Status | Networks |+--------------------------------------+-------------+--------+-----------------------------------------+| 970e4ca0-f9b7-4c44-80ed-bf0152c96ae1 | resize-demo | RESIZE | private=172.16.101.6, public=10.4.113.6 |+--------------------------------------+-------------+--------+-----------------------------------------+
When the resize operation is completed, the status displayed is VERIFY_RESIZE. Thisprompts the user to verify that the operation has been successful; to confirm:
$ nova resize-confirm 6beefcf7-9de6-48b3-9ba9-e11b343189b3
However, if the operation has not worked as expected, you can revert it by doing:
$ nova resize-revert 6beefcf7-9de6-48b3-9ba9-e11b343189b3
In both cases, the server status should go back to ACTIVE.
Stop and Start an InstanceThere are two methods for stopping and starting an instance:
• nova pause / nova unpause
• nova suspend / nova resume
Pause and Unpause
nova pause stores the state of the VM in RAM. A paused instance continues to run, albeitin a "frozen" state.
Suspend and Resume
nova suspend initiates a hypervisor-level suspend operation. Suspending an instancestores the state of the VM on disk; all memory is written to disk and the virtual machineis stopped. Suspending an instance is thus similar to placing a device in hibernation, andmakes memory and vCPUs available. Administrators may want to suspend an instance forsystem maintenance, or if the instance is not frequently used.
Rebooting an instancenova reboot performs a reboot of a running instance. By default, this is a "soft" reboot,which will attempt a graceful shutdown and restart of the instance. To perform a "hard"reboot (i.e., a power cycle of the instance), pass the --hard flag as an argument.
Manage Security GroupsA security group is a named collection of network access rules that can be used to limitthe types of traffic that have access to instances. When you spawn an instance, you can

OpenStack CLI Guide
16
assign it to one or more groups. For each security group, the associated rules permit youto manage the allowed traffic to instances within the group. Any incoming traffic which isnot matched by a rule is denied by default. At any time, it is possible to add or remove ruleswithin a security group. Rules are automatically enforced as soon as they are created.
Before you begin, use nova secgroup-list to view the available security groups (specify --all-tenants if you are a cloud administrator wanting to view all tenants' groups) . Youcan also view the rules for a security group with nova secgroup-list-rules.
$ nova secgroup-list+---------+-------------+| Name | Description |+---------+-------------+| default | default |+---------+-------------+
$ nova secgroup-list-rules default+-------------+-----------+---------+-----------+--------------+| IP Protocol | From Port | To Port | IP Range | Source Group |+-------------+-----------+---------+-----------+--------------+| tcp | 80 | 80 | 0.0.0.0/0 | |+-------------+-----------+---------+-----------+--------------+
In this example, the default security group has been modified to allow HTTP traffic on theinstance by permitting TCP traffic on Port 80.
Add or delete a security group
Security groups can be added with nova secgroup-create.
The following example shows the creation of the security group secure1. After the groupis created, it can be viewed in the security group list.
$ nova secgroup-create secure1 "Test security group"+---------+---------------------+| Name | Description |+---------+---------------------+| secure1 | Test security group |+---------+---------------------+
$ nova secgroup-list+---------+---------------------+| Name | Description |+---------+---------------------+| default | default || secure1 | Test security group |+---------+---------------------+
Security groups can be deleted with nova secgroup-delete. The default security groupcannot be deleted. The default security group contains these initial settings:
• All the traffic originated by the instances (outbound traffic) is allowed
• All the traffic destined to instances (inbound traffic) is denied
• All the instances inside the group are allowed to talk to each other
OpenStack CLI Guide
17
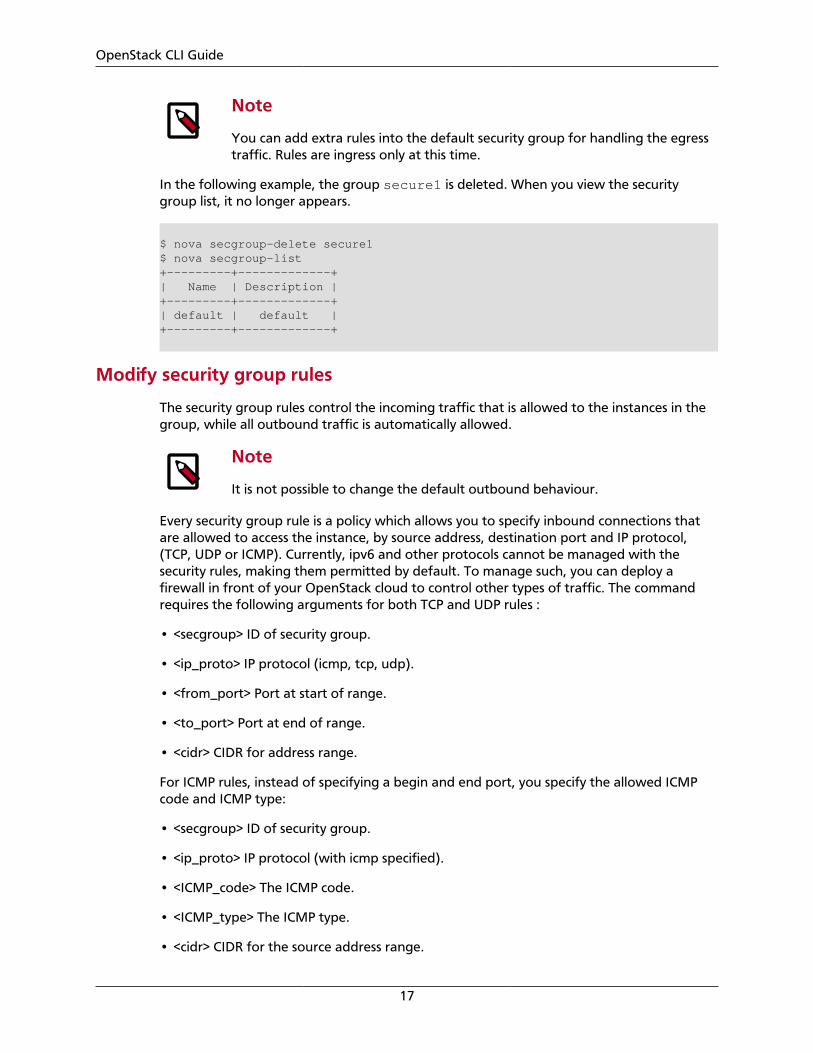
Note
You can add extra rules into the default security group for handling the egresstraffic. Rules are ingress only at this time.
In the following example, the group secure1 is deleted. When you view the securitygroup list, it no longer appears.
$ nova secgroup-delete secure1$ nova secgroup-list+---------+-------------+| Name | Description |+---------+-------------+| default | default |+---------+-------------+
Modify security group rules
The security group rules control the incoming traffic that is allowed to the instances in thegroup, while all outbound traffic is automatically allowed.
Note
It is not possible to change the default outbound behaviour.
Every security group rule is a policy which allows you to specify inbound connections thatare allowed to access the instance, by source address, destination port and IP protocol,(TCP, UDP or ICMP). Currently, ipv6 and other protocols cannot be managed with thesecurity rules, making them permitted by default. To manage such, you can deploy afirewall in front of your OpenStack cloud to control other types of traffic. The commandrequires the following arguments for both TCP and UDP rules :
• <secgroup> ID of security group.
• <ip_proto> IP protocol (icmp, tcp, udp).
• <from_port> Port at start of range.
• <to_port> Port at end of range.
• <cidr> CIDR for address range.
For ICMP rules, instead of specifying a begin and end port, you specify the allowed ICMPcode and ICMP type:
• <secgroup> ID of security group.
• <ip_proto> IP protocol (with icmp specified).
• <ICMP_code> The ICMP code.
• <ICMP_type> The ICMP type.
• <cidr> CIDR for the source address range.

OpenStack CLI Guide
18
Note
Entering "-1" for both code and type indicates that all ICMP codes and typesshould be allowed.
The CIDR notation
That notation allows you to specify a base IP address and a suffix thatdesignates the number of significant bits in the IP address used to identifythe network. For example, by specifying a 88.170.60.32/27, you specify88.170.60.32 as the base IP and 27 as the suffix. Since you use an IPV4format, there are only 5 bits available for the host part (32 minus 27). The0.0.0.0/0 notation means you allow the entire IPV4 range, meaning allowing alladdresses.
For example, in order to allow any IP address to access to a web server running on one ofyour instance inside the default security group:
$ nova secgroup-add-rule default tcp 80 80 0.0.0.0/0+-------------+-----------+---------+-----------+--------------+| IP Protocol | From Port | To Port | IP Range | Source Group |+-------------+-----------+---------+-----------+--------------+| tcp | 80 | 80 | 0.0.0.0/0 | |+-------------+-----------+---------+-----------+--------------+
In order to allow any IP address to ping an instance inside the default security group (Code0, Type 8 for the ECHO request.):
$ nova secgroup-add-rule default icmp 0 8 0.0.0.0/0+-------------+-----------+---------+-----------+--------------+| IP Protocol | From Port | To Port | IP Range | Source Group |+-------------+-----------+---------+-----------+--------------+| icmp | 0 | 8 | 0.0.0.0/0 | |+-------------+-----------+---------+-----------+--------------+
$ nova secgroup-list-rules default+-------------+-----------+---------+-----------+--------------+| IP Protocol | From Port | To Port | IP Range | Source Group |+-------------+-----------+---------+-----------+--------------+| tcp | 80 | 80 | 0.0.0.0/0 | || icmp | 0 | 8 | 0.0.0.0/0 | |+-------------+-----------+---------+-----------+--------------+
In order to delete a rule, you need to specify the exact same arguments you used to createit:
• <secgroup> ID of security group.
• <ip_proto> IP protocol (icmp, tcp, udp).
• <from_port> Port at start of range.
OpenStack CLI Guide
19
• <to_port> Port at end of range.
• <cidr> CIDR for address range.
$ nova secgroup-delete-rule default tcp 80 80 0.0.0.0/0
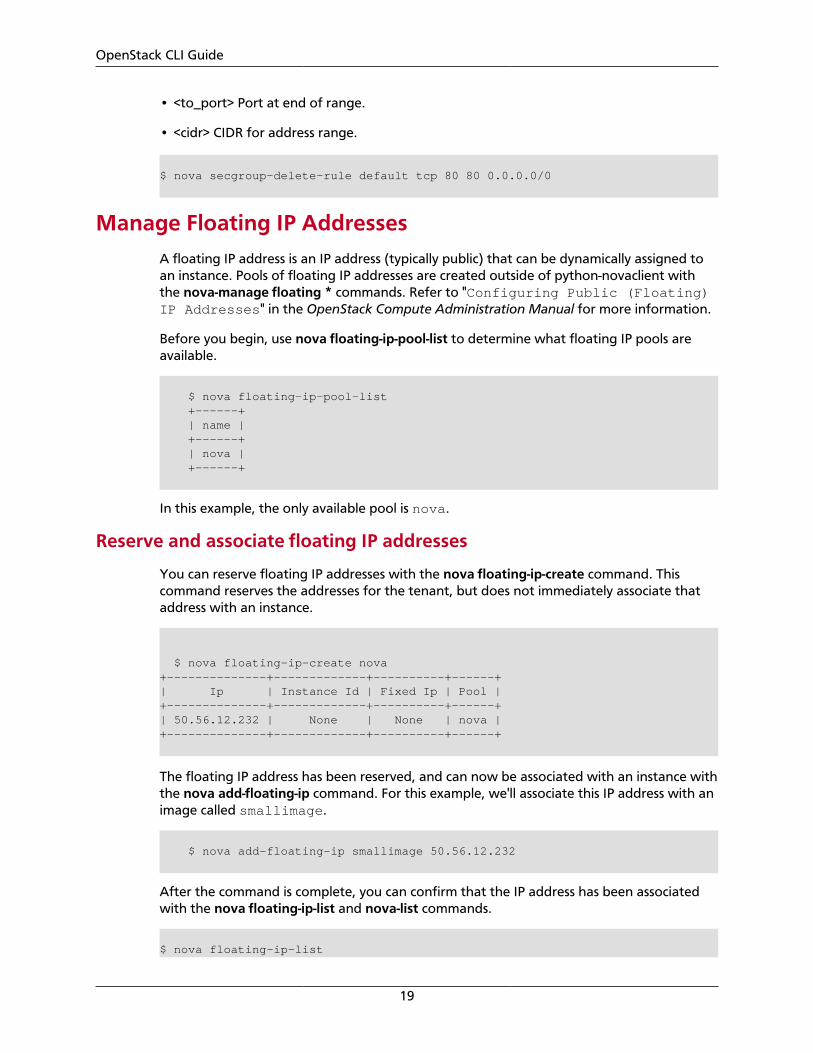
Manage Floating IP AddressesA floating IP address is an IP address (typically public) that can be dynamically assigned toan instance. Pools of floating IP addresses are created outside of python-novaclient withthe nova-manage floating * commands. Refer to "Configuring Public (Floating)IP Addresses" in the OpenStack Compute Administration Manual for more information.
Before you begin, use nova floating-ip-pool-list to determine what floating IP pools areavailable.
$ nova floating-ip-pool-list +------+ | name | +------+ | nova | +------+
In this example, the only available pool is nova.
Reserve and associate floating IP addresses
You can reserve floating IP addresses with the nova floating-ip-create command. Thiscommand reserves the addresses for the tenant, but does not immediately associate thataddress with an instance.
$ nova floating-ip-create nova+--------------+-------------+----------+------+ | Ip | Instance Id | Fixed Ip | Pool | +--------------+-------------+----------+------+ | 50.56.12.232 | None | None | nova |+--------------+-------------+----------+------+
The floating IP address has been reserved, and can now be associated with an instance withthe nova add-floating-ip command. For this example, we'll associate this IP address with animage called smallimage.
$ nova add-floating-ip smallimage 50.56.12.232
After the command is complete, you can confirm that the IP address has been associatedwith the nova floating-ip-list and nova-list commands.
$ nova floating-ip-list

OpenStack CLI Guide
20
+--------------+--------------------------------------+------------+------+| Ip | Instance Id | Fixed Ip | Pool |+--------------+--------------------------------------+------------+------+| 50.56.12.232 | 542235df-8ba4-4d08-90c9-b79f5a77c04f | 10.4.113.9 | nova |+--------------+--------------------------------------+------------+------+
$ nova list+--------------------------------------+------------+--------+-------------------------------------------------------+| ID | Name | Status | Networks |+--------------------------------------+------------+--------+-------------------------------------------------------+| 4bb825ea-ea43-4771-a574-ca86ab429dcb | tinyimage2 | ACTIVE | public=10.4.113.6; private=172.16.101.6 || 542235df-8ba4-4d08-90c9-b79f5a77c04f | smallimage | ACTIVE | public=10.4.113.9, 50.56.12.232; private=172.16.101.9 |+--------------------------------------+------------+--------+-------------------------------------------------------+
The first table shows that the 50.56.12.232 is now associated with the smallimageinstance ID, and the second table shows the IP address included under smallimage'spublic IP addresses.
Remove and de-allocate a floating IP address
To remove a floating IP address from an instance, use the nova remove-floating-ipcommand.
$ nova remove-floating-ip smallimage 50.56.12.232
After the command is complete, you can confirm that the IP address has been associatedwith the nova floating-ip-list and nova-list commands.
$ nova floating-ip-list+--------------+-------------+----------+------+| Ip | Instance Id | Fixed Ip | Pool |+--------------+-------------+----------+------+| 50.56.12.232 | None | None | nova |+--------------+-------------+----------+------+$ nova list+--------------------------------------+------------+--------+-----------------------------------------+| ID | Name | Status | Networks |+--------------------------------------+------------+--------+-----------------------------------------+| 4bb825ea-ea43-4771-a574-ca86ab429dcb | tinyimage2 | ACTIVE | public=10.4.113.6; private=172.16.101.6 || 542235df-8ba4-4d08-90c9-b79f5a77c04f | smallimage | ACTIVE | public=10.4.113.9; private=172.16.101.9 |+--------------------------------------+------------+--------+-----------------------------------------+
You can now de-allocate the floating IP address, returning it to the pool so that it can beused by another tenant.
OpenStack CLI Guide
21
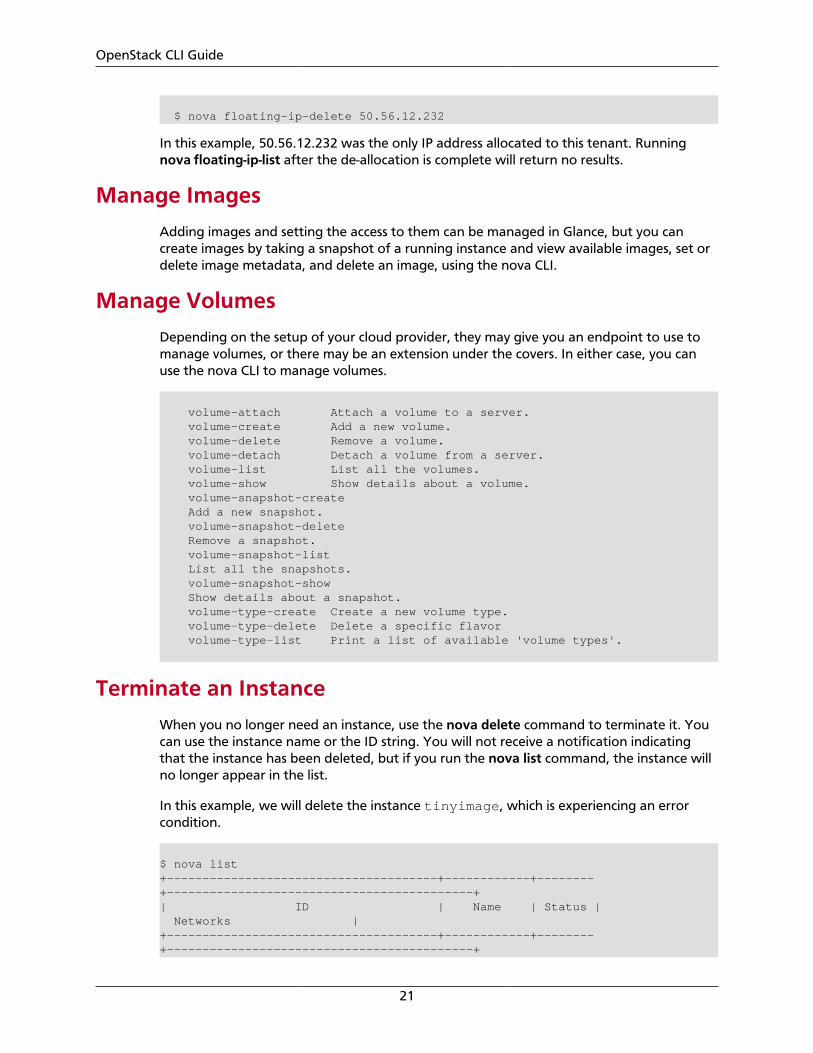
$ nova floating-ip-delete 50.56.12.232
In this example, 50.56.12.232 was the only IP address allocated to this tenant. Runningnova floating-ip-list after the de-allocation is complete will return no results.
Manage Images
Adding images and setting the access to them can be managed in Glance, but you cancreate images by taking a snapshot of a running instance and view available images, set ordelete image metadata, and delete an image, using the nova CLI.
Manage Volumes
Depending on the setup of your cloud provider, they may give you an endpoint to use tomanage volumes, or there may be an extension under the covers. In either case, you canuse the nova CLI to manage volumes.
volume-attach Attach a volume to a server. volume-create Add a new volume. volume-delete Remove a volume. volume-detach Detach a volume from a server. volume-list List all the volumes. volume-show Show details about a volume. volume-snapshot-create Add a new snapshot. volume-snapshot-delete Remove a snapshot. volume-snapshot-list List all the snapshots. volume-snapshot-show Show details about a snapshot. volume-type-create Create a new volume type. volume-type-delete Delete a specific flavor volume-type-list Print a list of available 'volume types'.
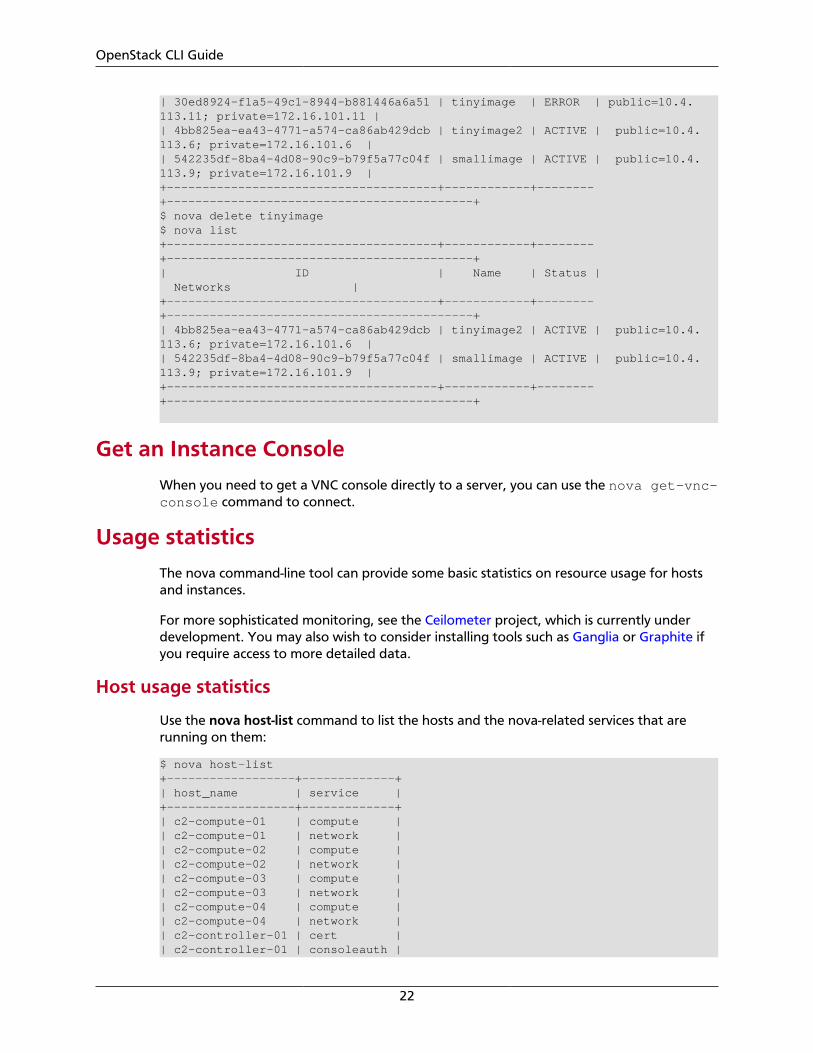
Terminate an Instance
When you no longer need an instance, use the nova delete command to terminate it. Youcan use the instance name or the ID string. You will not receive a notification indicatingthat the instance has been deleted, but if you run the nova list command, the instance willno longer appear in the list.
In this example, we will delete the instance tinyimage, which is experiencing an errorcondition.
$ nova list+--------------------------------------+------------+--------+-------------------------------------------+| ID | Name | Status | Networks |+--------------------------------------+------------+--------+-------------------------------------------+
OpenStack CLI Guide
22
| 30ed8924-f1a5-49c1-8944-b881446a6a51 | tinyimage | ERROR | public=10.4.113.11; private=172.16.101.11 || 4bb825ea-ea43-4771-a574-ca86ab429dcb | tinyimage2 | ACTIVE | public=10.4.113.6; private=172.16.101.6 || 542235df-8ba4-4d08-90c9-b79f5a77c04f | smallimage | ACTIVE | public=10.4.113.9; private=172.16.101.9 |+--------------------------------------+------------+--------+-------------------------------------------+$ nova delete tinyimage$ nova list+--------------------------------------+------------+--------+-------------------------------------------+| ID | Name | Status | Networks |+--------------------------------------+------------+--------+-------------------------------------------+| 4bb825ea-ea43-4771-a574-ca86ab429dcb | tinyimage2 | ACTIVE | public=10.4.113.6; private=172.16.101.6 || 542235df-8ba4-4d08-90c9-b79f5a77c04f | smallimage | ACTIVE | public=10.4.113.9; private=172.16.101.9 |+--------------------------------------+------------+--------+-------------------------------------------+
Get an Instance Console
When you need to get a VNC console directly to a server, you can use the nova get-vnc-console command to connect.
Usage statistics
The nova command-line tool can provide some basic statistics on resource usage for hostsand instances.
For more sophisticated monitoring, see the Ceilometer project, which is currently underdevelopment. You may also wish to consider installing tools such as Ganglia or Graphite ifyou require access to more detailed data.
Host usage statistics
Use the nova host-list command to list the hosts and the nova-related services that arerunning on them:
$ nova host-list+------------------+-------------+| host_name | service |+------------------+-------------+| c2-compute-01 | compute || c2-compute-01 | network || c2-compute-02 | compute || c2-compute-02 | network || c2-compute-03 | compute || c2-compute-03 | network || c2-compute-04 | compute || c2-compute-04 | network || c2-controller-01 | cert || c2-controller-01 | consoleauth |
OpenStack CLI Guide
23
| c2-controller-01 | scheduler |+------------------+-------------+
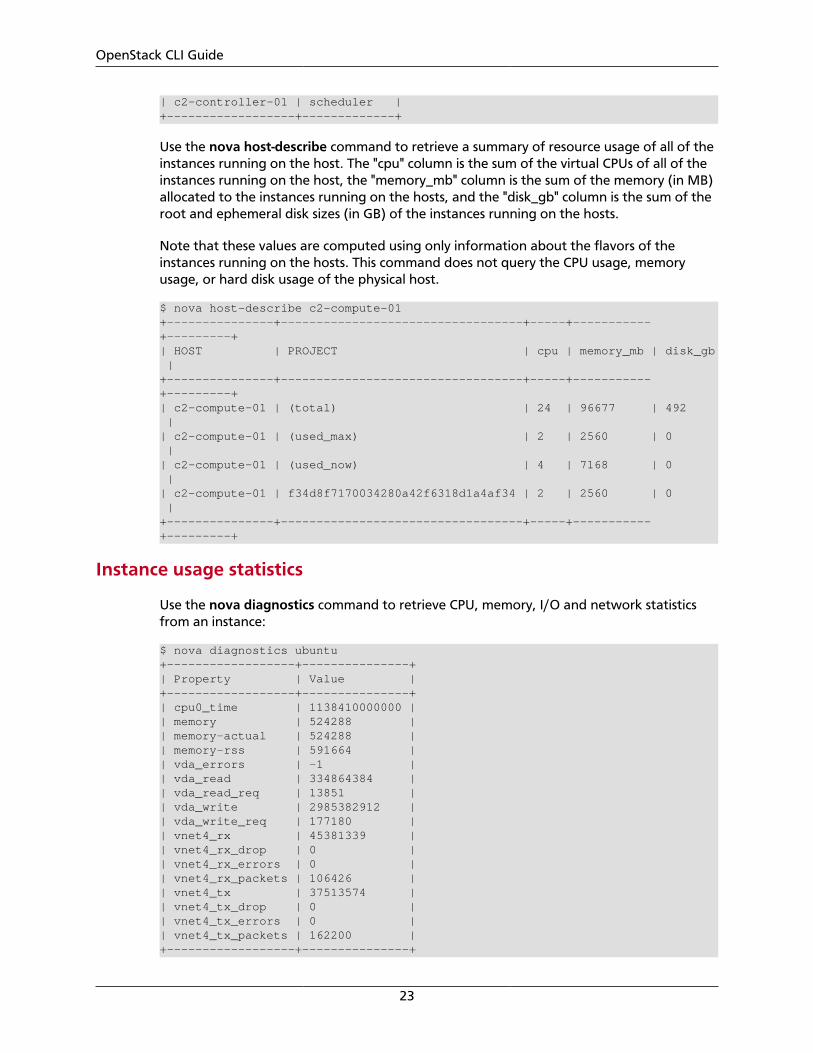
Use the nova host-describe command to retrieve a summary of resource usage of all of theinstances running on the host. The "cpu" column is the sum of the virtual CPUs of all of theinstances running on the host, the "memory_mb" column is the sum of the memory (in MB)allocated to the instances running on the hosts, and the "disk_gb" column is the sum of theroot and ephemeral disk sizes (in GB) of the instances running on the hosts.
Note that these values are computed using only information about the flavors of theinstances running on the hosts. This command does not query the CPU usage, memoryusage, or hard disk usage of the physical host.
$ nova host-describe c2-compute-01+---------------+----------------------------------+-----+-----------+---------+| HOST | PROJECT | cpu | memory_mb | disk_gb |+---------------+----------------------------------+-----+-----------+---------+| c2-compute-01 | (total) | 24 | 96677 | 492 || c2-compute-01 | (used_max) | 2 | 2560 | 0 || c2-compute-01 | (used_now) | 4 | 7168 | 0 || c2-compute-01 | f34d8f7170034280a42f6318d1a4af34 | 2 | 2560 | 0 |+---------------+----------------------------------+-----+-----------+---------+
Instance usage statistics
Use the nova diagnostics command to retrieve CPU, memory, I/O and network statisticsfrom an instance:
$ nova diagnostics ubuntu+------------------+---------------+| Property | Value |+------------------+---------------+| cpu0_time | 1138410000000 || memory | 524288 || memory-actual | 524288 || memory-rss | 591664 || vda_errors | -1 || vda_read | 334864384 || vda_read_req | 13851 || vda_write | 2985382912 || vda_write_req | 177180 || vnet4_rx | 45381339 || vnet4_rx_drop | 0 || vnet4_rx_errors | 0 || vnet4_rx_packets | 106426 || vnet4_tx | 37513574 || vnet4_tx_drop | 0 || vnet4_tx_errors | 0 || vnet4_tx_packets | 162200 |+------------------+---------------+
OpenStack CLI Guide
24
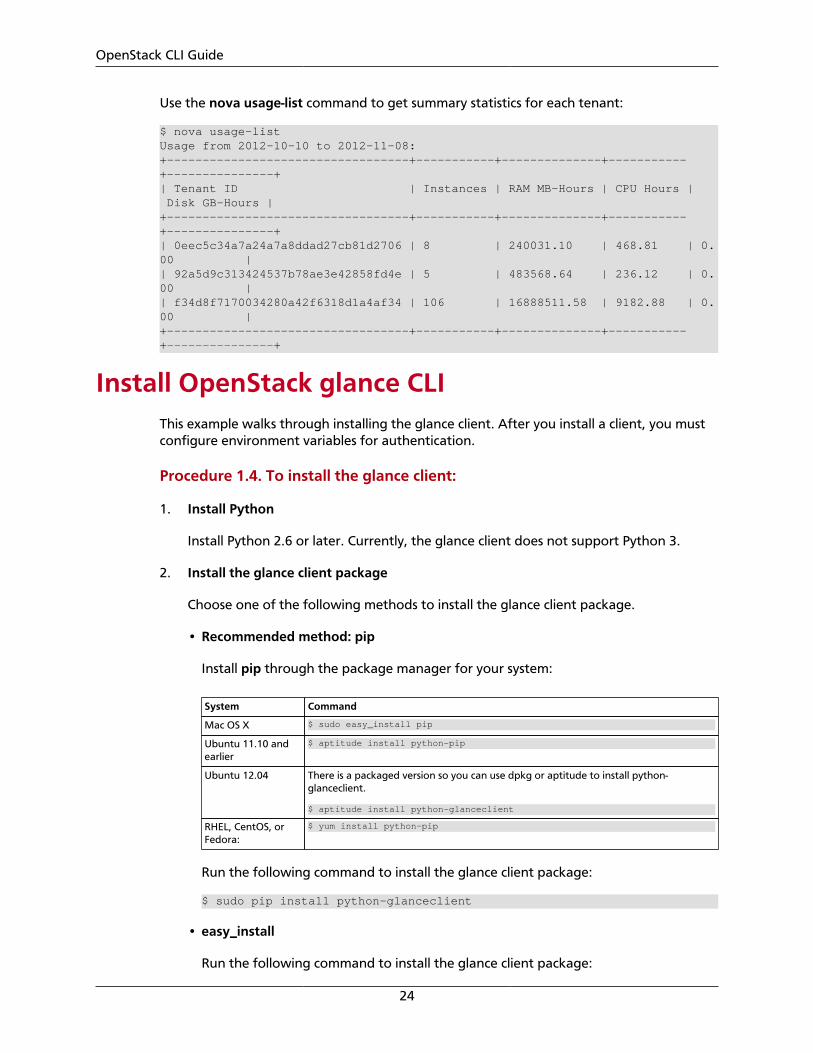
Use the nova usage-list command to get summary statistics for each tenant:
$ nova usage-listUsage from 2012-10-10 to 2012-11-08:+----------------------------------+-----------+--------------+-----------+---------------+| Tenant ID | Instances | RAM MB-Hours | CPU Hours | Disk GB-Hours |+----------------------------------+-----------+--------------+-----------+---------------+| 0eec5c34a7a24a7a8ddad27cb81d2706 | 8 | 240031.10 | 468.81 | 0.00 || 92a5d9c313424537b78ae3e42858fd4e | 5 | 483568.64 | 236.12 | 0.00 || f34d8f7170034280a42f6318d1a4af34 | 106 | 16888511.58 | 9182.88 | 0.00 |+----------------------------------+-----------+--------------+-----------+---------------+
Install OpenStack glance CLIThis example walks through installing the glance client. After you install a client, you mustconfigure environment variables for authentication.
Procedure 1.4. To install the glance client:
1. Install Python
Install Python 2.6 or later. Currently, the glance client does not support Python 3.
2. Install the glance client package
Choose one of the following methods to install the glance client package.
• Recommended method: pip
Install pip through the package manager for your system:
System Command
Mac OS X $ sudo easy_install pip
Ubuntu 11.10 andearlier
$ aptitude install python-pip
Ubuntu 12.04 There is a packaged version so you can use dpkg or aptitude to install python-glanceclient.
$ aptitude install python-glanceclient
RHEL, CentOS, orFedora:
$ yum install python-pip
Run the following command to install the glance client package:
$ sudo pip install python-glanceclient
• easy_install
Run the following command to install the glance client package:

OpenStack CLI Guide
25
$ sudo easy_install python-glanceclient
3. Test the glance client
To verify that you can talk to the API server, run the following commands:
$ glance image-list
The glance image-list command returns a list of images available in the Imageservice.
Command List for glance CLIusage: glance [-d] [-v] [-k] [--cert-file CERT_FILE] [--key-file KEY_FILE] [--ca-file CA_FILE] [--timeout TIMEOUT] [-f] [--dry-run] [--ssl] [-H ADDRESS] [-p PORT] [--os-username OS_USERNAME] [-I OS_USERNAME] [--os-password OS_PASSWORD] [-K OS_PASSWORD] [--os-tenant-id OS_TENANT_ID] [--os-tenant-name OS_TENANT_NAME] [-T OS_TENANT_NAME] [--os-auth-url OS_AUTH_URL] [-N OS_AUTH_URL] [--os-region-name OS_REGION_NAME] [-R OS_REGION_NAME] [--os-auth-token OS_AUTH_TOKEN] [-A OS_AUTH_TOKEN] [--os-image-url OS_IMAGE_URL] [-U OS_IMAGE_URL] [--os-image-api-version OS_IMAGE_API_VERSION] [--os-service-type OS_SERVICE_TYPE] [--os-endpoint-type OS_ENDPOINT_TYPE] [-S OS_AUTH_STRATEGY]
add DEPRECATED! Use image-create instead. clear DEPRECATED! delete DEPRECATED! Use image-delete instead. details DEPRECATED! Use image-list instead. image-create image-delete Delete a specific image. image-list List images. image-members DEPRECATED! Use member-list instead. image-show Describe a specific image. image-update index DEPRECATED! Use image-list instead. member-add DEPRECATED! Use member-create instead. member-create member-delete member-images DEPRECATED! Use member-list instead. member-list members-replace DEPRECATED! show update DEPRECATED! Use image-update instead. help Display help about this program or one of its subcommands.
Optional arguments: -d, --debug Defaults to env[GLANCECLIENT_DEBUG] -v, --verbose Print more verbose output -k, --insecure Explicitly allow glanceclient to perform "insecure" SSL (https) requests. The server's certificate will

OpenStack CLI Guide
26
not be verified against any certificate authorities. This option should be used with caution. --cert-file CERT_FILE Path of certificate file to use in SSL connection. This file can optionally be prepended with the private key. --key-file KEY_FILE Path of client key to use in SSL connection. This option is not necessary if your key is prepended to your cert file. --ca-file CA_FILE Path of CA SSL certificate(s) used to sign the remote server's certificate. --timeout TIMEOUT Number of seconds to wait for a response -f, --force Prevent select actions from requesting user confirmation. --dry-run DEPRECATED! Only used for deprecated legacy commands. --ssl DEPRECATED! Send a fully-formed endpoint using --os- image-url instead. -H ADDRESS, --host ADDRESS DEPRECATED! Send a fully-formed endpoint using --os- image-url instead. -p PORT, --port PORT DEPRECATED! Send a fully-formed endpoint using --os- image-url instead. --os-username OS_USERNAME Defaults to env[OS_USERNAME] -I OS_USERNAME DEPRECATED! Use --os-username. --os-password OS_PASSWORD Defaults to env[OS_PASSWORD] -K OS_PASSWORD DEPRECATED! Use --os-password. --os-tenant-id OS_TENANT_ID Defaults to env[OS_TENANT_ID] --os-tenant-name OS_TENANT_NAME Defaults to env[OS_TENANT_NAME] -T OS_TENANT_NAME DEPRECATED! Use --os-tenant-name. --os-auth-url OS_AUTH_URL Defaults to env[OS_AUTH_URL] -N OS_AUTH_URL DEPRECATED! Use --os-auth-url. --os-region-name OS_REGION_NAME Defaults to env[OS_REGION_NAME] -R OS_REGION_NAME DEPRECATED! Use --os-region-name. --os-auth-token OS_AUTH_TOKEN Defaults to env[OS_AUTH_TOKEN] -A OS_AUTH_TOKEN, --auth_token OS_AUTH_TOKEN DEPRECATED! Use --os-auth-token. --os-image-url OS_IMAGE_URL Defaults to env[OS_IMAGE_URL] -U OS_IMAGE_URL, --url OS_IMAGE_URL DEPRECATED! Use --os-image-url. --os-image-api-version OS_IMAGE_API_VERSION Defaults to env[OS_IMAGE_API_VERSION] or 1 --os-service-type OS_SERVICE_TYPE Defaults to env[OS_SERVICE_TYPE] --os-endpoint-type OS_ENDPOINT_TYPE Defaults to env[OS_ENDPOINT_TYPE] -S OS_AUTH_STRATEGY, --os_auth_strategy OS_AUTH_STRATEGY DEPRECATED! This option is completely ignored.
OpenStack Glance CLI GuideThis section describes what you can do with the OpenStack Glance client (CLI).
OpenStack CLI Guide
27
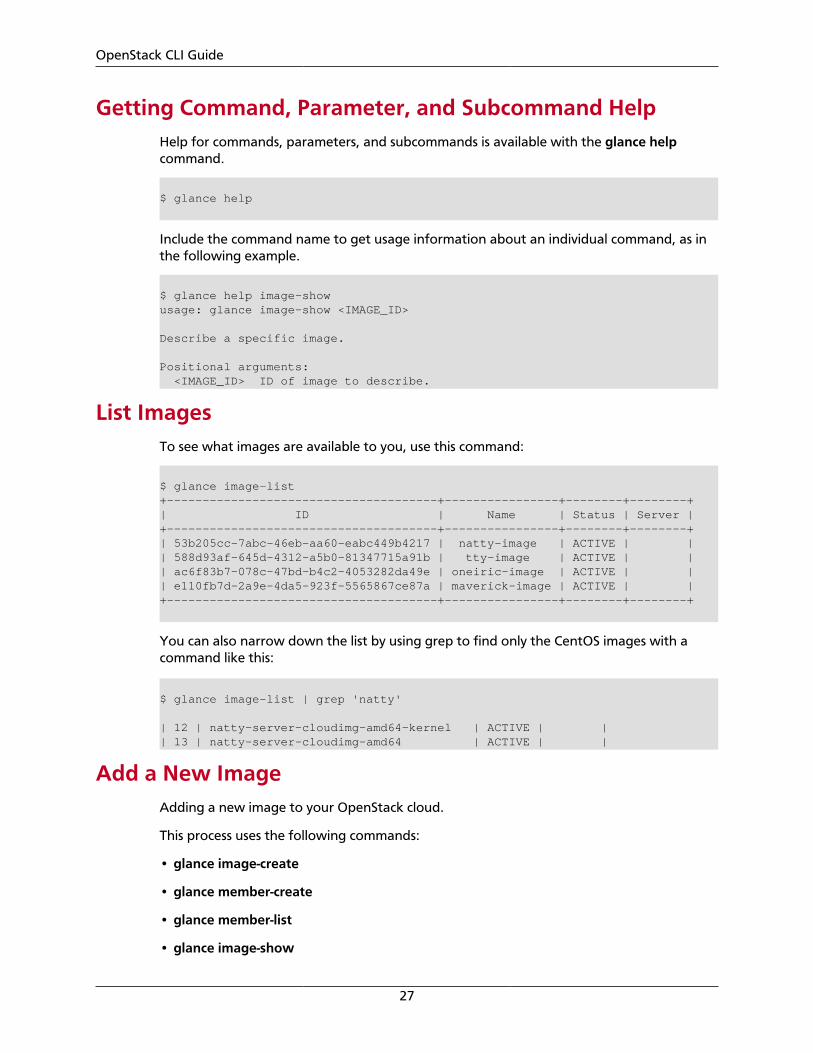
Getting Command, Parameter, and Subcommand HelpHelp for commands, parameters, and subcommands is available with the glance helpcommand.
$ glance help
Include the command name to get usage information about an individual command, as inthe following example.
$ glance help image-showusage: glance image-show <IMAGE_ID>
Describe a specific image.
Positional arguments: <IMAGE_ID> ID of image to describe.
List ImagesTo see what images are available to you, use this command:
$ glance image-list+--------------------------------------+----------------+--------+--------+| ID | Name | Status | Server |+--------------------------------------+----------------+--------+--------+| 53b205cc-7abc-46eb-aa60-eabc449b4217 | natty-image | ACTIVE | || 588d93af-645d-4312-a5b0-81347715a91b | tty-image | ACTIVE | || ac6f83b7-078c-47bd-b4c2-4053282da49e | oneiric-image | ACTIVE | || e110fb7d-2a9e-4da5-923f-5565867ce87a | maverick-image | ACTIVE | |+--------------------------------------+----------------+--------+--------+
You can also narrow down the list by using grep to find only the CentOS images with acommand like this:
$ glance image-list | grep 'natty'
| 12 | natty-server-cloudimg-amd64-kernel | ACTIVE | || 13 | natty-server-cloudimg-amd64 | ACTIVE | |
Add a New ImageAdding a new image to your OpenStack cloud.
This process uses the following commands:
• glance image-create
• glance member-create
• glance member-list
• glance image-show

OpenStack CLI Guide
28
Before You Add a New Image
Ensure you have created an image that is OpenStack compatible. Refer to the OpenStackCompute Administration Manual Image Management chapter for details.
Upload an image to glance
Assuming you had a CentOS 6.3 image in qcow2 format called centos63.qcow2, thefollowing example will upload it to glance and configure it for public access.
$ glance image-create --name centos63-image --disk-format=qcow2 --container-format=raw --is-public=True < ./centos63.qcow2
Assigning metadata to an image
TBD
Managing ImagesAdding images and setting the access to them can be managed in glance, but you cancreate images by taking a snapshot of a running instance and view available images, set ordelete image metadata, and delete an image, using the nova CLI.
Install OpenStack keystone CLIThis example walks through installing the keystone client. After you install a client, youmust configure environment variables for authentication.
Procedure 1.5. To install the keystone client:
1. Install Python
Install Python 2.6 or later. Currently, the keystone client does not support Python 3.
2. Install the keystone client package
Choose one of the following methods to install the keystone client package.
• Recommended method: pip
Install pip through the package manager for your system:
System Command
Mac OS X $ sudo easy_install pip
Ubuntu 11.10 andearlier
$ aptitude install python-pip
Ubuntu 12.04 There is a packaged version so you can use dpkg or aptitude to install python-keystoneclient.
$ aptitude install python-keystoneclient
RHEL, CentOS, orFedora:
$ yum install python-pip
Run the following command to install the keystone client package:
OpenStack CLI Guide
29
$ sudo pip install python-keystoneclient
• easy_install
Run the following command to install the keystone client package:
$ sudo easy_install python-keystoneclient
3. Test the keystone client
To verify that you can talk to the API server, run the following commands:
$ keystone discover
The keystone discover command shows the keystone servers available.
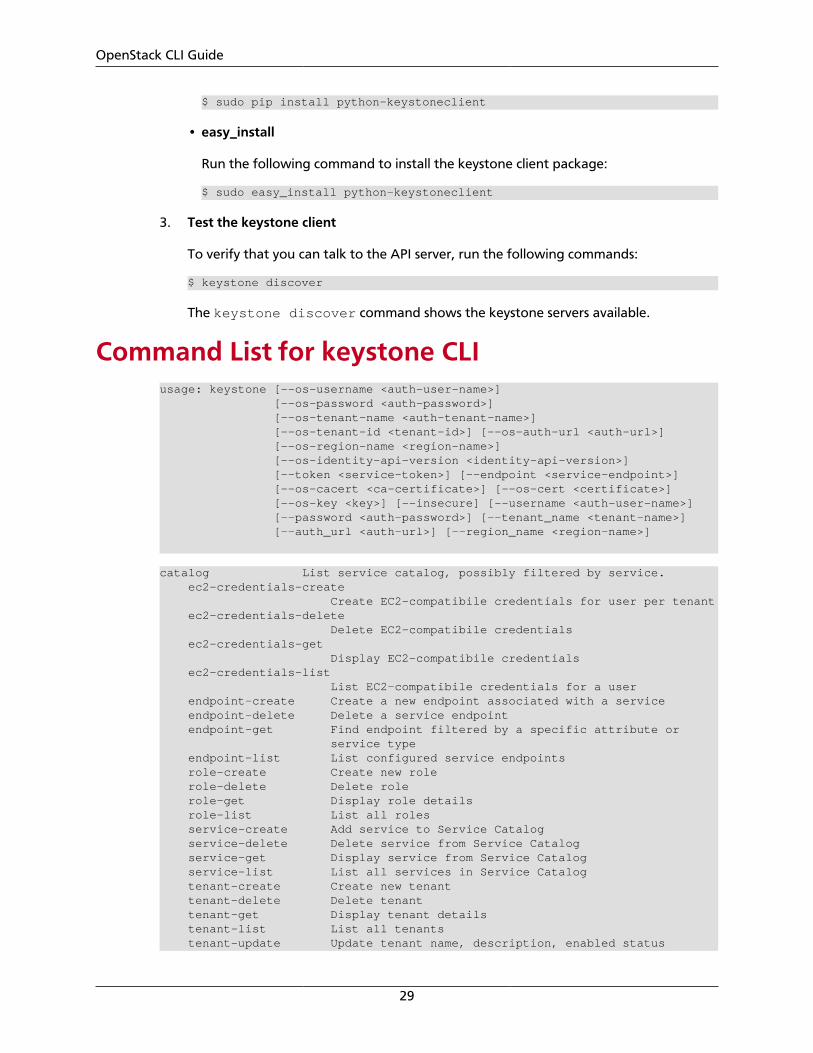
Command List for keystone CLIusage: keystone [--os-username <auth-user-name>] [--os-password <auth-password>] [--os-tenant-name <auth-tenant-name>] [--os-tenant-id <tenant-id>] [--os-auth-url <auth-url>] [--os-region-name <region-name>] [--os-identity-api-version <identity-api-version>] [--token <service-token>] [--endpoint <service-endpoint>] [--os-cacert <ca-certificate>] [--os-cert <certificate>] [--os-key <key>] [--insecure] [--username <auth-user-name>] [--password <auth-password>] [--tenant_name <tenant-name>] [--auth_url <auth-url>] [--region_name <region-name>]
catalog List service catalog, possibly filtered by service. ec2-credentials-create Create EC2-compatibile credentials for user per tenant ec2-credentials-delete Delete EC2-compatibile credentials ec2-credentials-get Display EC2-compatibile credentials ec2-credentials-list List EC2-compatibile credentials for a user endpoint-create Create a new endpoint associated with a service endpoint-delete Delete a service endpoint endpoint-get Find endpoint filtered by a specific attribute or service type endpoint-list List configured service endpoints role-create Create new role role-delete Delete role role-get Display role details role-list List all roles service-create Add service to Service Catalog service-delete Delete service from Service Catalog service-get Display service from Service Catalog service-list List all services in Service Catalog tenant-create Create new tenant tenant-delete Delete tenant tenant-get Display tenant details tenant-list List all tenants tenant-update Update tenant name, description, enabled status

OpenStack CLI Guide
30
token-get Display the current user token user-create Create new user user-delete Delete user user-get Display user details. user-list List users user-password-update Update user password user-role-add Add role to user user-role-list List roles granted to a user user-role-remove Remove role from user user-update Update user's name, email, and enabled status discover Discover Keystone servers and show authentication protocols and bash-completion Prints all of the commands and options to stdout. help Display help about this program or one of its subcommands.
Optional arguments: --os-username <auth-user-name> Defaults to env[OS_USERNAME] --os-password <auth-password> Defaults to env[OS_PASSWORD] --os-tenant-name <auth-tenant-name> Defaults to env[OS_TENANT_NAME] --os-tenant-id <tenant-id> Defaults to env[OS_TENANT_ID] --os-auth-url <auth-url> Defaults to env[OS_AUTH_URL] --os-region-name <region-name> Defaults to env[OS_REGION_NAME] --os-identity-api-version <identity-api-version> Defaults to env[OS_IDENTITY_API_VERSION] or 2.0 --token <service-token> Defaults to env[SERVICE_TOKEN] --endpoint <service-endpoint> Defaults to env[SERVICE_ENDPOINT] --os-cacert <ca-certificate> Defaults to env[OS_CA_CERT] --os-cert <certificate> Defaults to env[OS_CERT] --os-key <key> Defaults to env[OS_KEY] --insecure Explicitly allow keystoneclient to perform "insecure" SSL (https) requests. The server's certificate will not be verified against any certificate authorities. This option should be used with caution. --username <auth-user-name> Deprecated --password <auth-password> Deprecated --tenant_name <tenant-name> Deprecated --auth_url <auth-url> Deprecated --region_name <region-name> Deprecated

OpenStack CLI Guide
31
Install OpenStack swift CLIThis example walks through installing the swift client. After you install a client, you mustconfigure environment variables for authentication.
Procedure 1.6. To install the swift client:
1. Install Python
Install Python 2.6 or later. Currently, the swift client does not support Python 3.
2. Install the swift client package
Choose one of the following methods to install the swift client package.
• Recommended method: pip
Install pip through the package manager for your system:
System Command
Mac OS X $ sudo easy_install pip
Ubuntu 11.10 andearlier
$ aptitude install python-pip
Ubuntu 12.04 There is a packaged version so you can use dpkg or aptitude to install python-swiftclient.
$ aptitude install python-swiftclient
RHEL, CentOS, orFedora:
$ yum install python-pip
Run the following command to install the swift client package:
$ sudo pip install python-swiftclient
• easy_install
Run the following command to install the swift client package:
$ sudo easy_install python-swiftclient
3. Test the swift client
To verify that you can talk to the API server, run the following commands:
$ swift stat
The swift stat command shows the latest statistics on your swift cluster.
Command List for swift CLI
Usage: swift <command> [options] [args]
Commands: stat [container] [object]

OpenStack CLI Guide
32
Displays information for the account, container, or object depending on the args given (if any). list [options] [container] Lists the containers for the account or the objects for a container. -p or --prefix is an option that will only list items beginning with that prefix. -d or --delimiter is option (for container listings only) that will roll up items with the given delimiter (see Cloud Files general documentation for what this means). upload [options] container file_or_directory [file_or_directory] [...] Uploads to the given container the files and directories specified by the remaining args. -c or --changed is an option that will only upload files that have changed since the last upload. -S <size> or --segment-size <size> and --leave-segments are options as well (see --help for more). post [options] [container] [object] Updates meta information for the account, container, or object depending on the args given. If the container is not found, it will be created automatically; but this is not true for accounts and objects. Containers also allow the -r (or --read-acl) and -w (or --write-acl) options. The -m or --meta option is allowed on all and used to define the user meta data items to set in the form Name:Value. This option can be repeated. Example: post -m Color:Blue -m Size:Large download --all OR download container [options] [object] [object] ... Downloads everything in the account (with --all), or everything in a container, or a list of objects depending on the args given. For a single object download, you may use the -o [--output] <filename> option to redirect the output to a specific file or if "-" then just redirect to stdout. delete [options] --all OR delete container [options] [object] [object] ... Deletes everything in the account (with --all), or everything in a container, or a list of objects depending on the args given. Segments of manifest objects will be deleted as well, unless you specify the --leave-segments option.
Example: swift -A https://auth.api.rackspacecloud.com/v1.0 -U user -K key stat
Install OpenStack quantum CLIThis example walks through installing the quantum client. After you install a client, youmust configure environment variables for authentication.
Procedure 1.7. To install the quantum client:
1. Install Python
Install Python 2.6 or later. Currently, the quantum client does not support Python 3.
2. Install the quantum client package
Choose one of the following methods to install the quantum client package.
• Recommended method: pip

OpenStack CLI Guide
33
Install pip through the package manager for your system:
System Command
Mac OS X $ sudo easy_install pip
Ubuntu 11.10 andearlier
$ aptitude install python-pip
Ubuntu 12.04 There is a packaged version so you can use dpkg or aptitude to install python-quantumclient.
$ aptitude install python-quantumclient
RHEL, CentOS, orFedora:
$ yum install python-pip
Run the following command to install the quantum client package:
$ sudo pip install python-quantumclient
• easy_install
Run the following command to install the quantum client package:
$ sudo easy_install python-quantumclient
3. Get help for quantum client commands
To get help for quantum client commands, run the following command:
$ quantum -h
Depending on your user credentials, you may not have permissions to use everycommand that is listed. The quantum client was written for use with recentdevelopment versions of OpenStack.
To get help for a specific command, type the command name after the helpparameter, as follows:
$ quantum help <command_name>
Another way to get help for a given command is to type -h after the command name:
$ quantum <command_name> -h
Command List for quantum CLI
ext-list List all exts. ext-show Show information of a given resource floatingip-associate Create a mapping between a floating ip and a fixed ip. floatingip-create Create a floating ip for a given tenant. floatingip-delete Delete a given floating ip. floatingip-disassociate Remove a mapping from a floating ip to a fixed ip. floatingip-list List floating ips that belong to a given tenant. floatingip-show Show information of a given floating ip. help print detailed help for another command net-create Create a network for a given tenant.
OpenStack CLI Guide
34
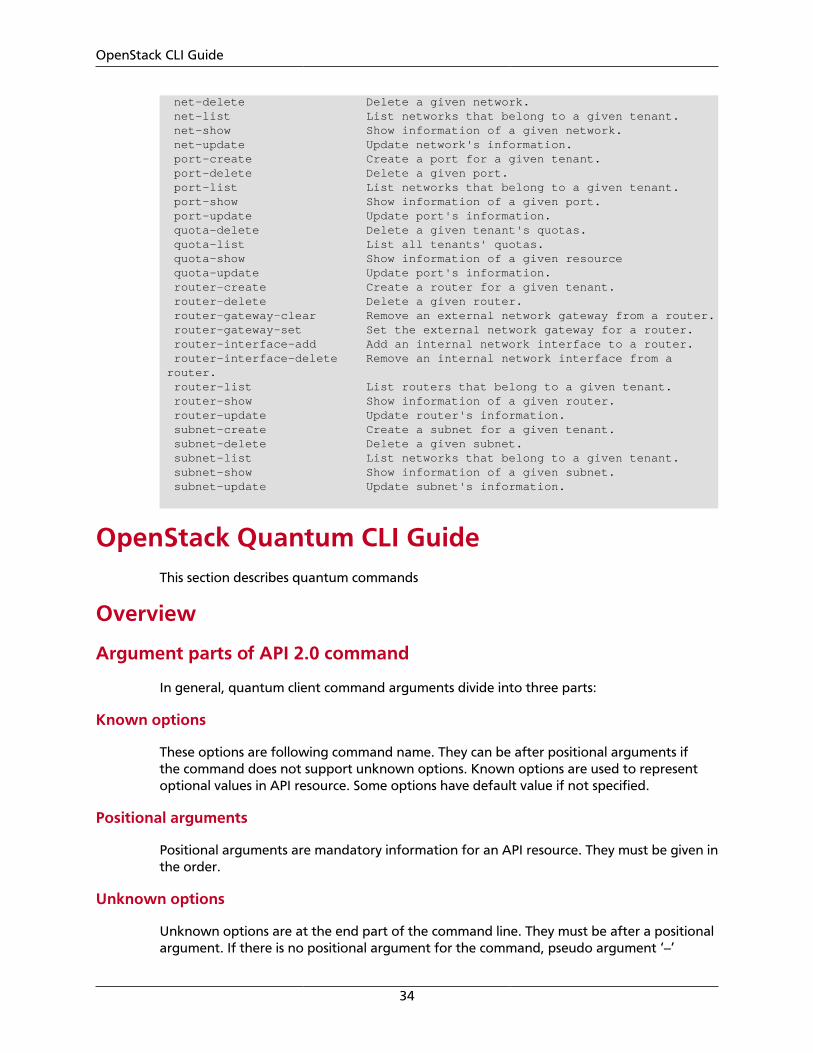
net-delete Delete a given network. net-list List networks that belong to a given tenant. net-show Show information of a given network. net-update Update network's information. port-create Create a port for a given tenant. port-delete Delete a given port. port-list List networks that belong to a given tenant. port-show Show information of a given port. port-update Update port's information. quota-delete Delete a given tenant's quotas. quota-list List all tenants' quotas. quota-show Show information of a given resource quota-update Update port's information. router-create Create a router for a given tenant. router-delete Delete a given router. router-gateway-clear Remove an external network gateway from a router. router-gateway-set Set the external network gateway for a router. router-interface-add Add an internal network interface to a router. router-interface-delete Remove an internal network interface from a router. router-list List routers that belong to a given tenant. router-show Show information of a given router. router-update Update router's information. subnet-create Create a subnet for a given tenant. subnet-delete Delete a given subnet. subnet-list List networks that belong to a given tenant. subnet-show Show information of a given subnet. subnet-update Update subnet's information.
OpenStack Quantum CLI GuideThis section describes quantum commands
Overview
Argument parts of API 2.0 command
In general, quantum client command arguments divide into three parts:
Known options
These options are following command name. They can be after positional arguments ifthe command does not support unknown options. Known options are used to representoptional values in API resource. Some options have default value if not specified.
Positional arguments
Positional arguments are mandatory information for an API resource. They must be given inthe order.
Unknown options
Unknown options are at the end part of the command line. They must be after a positionalargument. If there is no positional argument for the command, pseudo argument ‘--’
OpenStack CLI Guide
35
should be used. To define an unknown option, the format is --optionname [type=int|bool|list...] [optionvalue]*. There can be multiple option values for a certain optionname. Whenthere is no optionvalue given, the option is regarded as a bool one and value is true. Thetype is python built-in type, such as int, bool, float and list, defaulted to string if not given.Most of time, quantum server will convert the value into wanted type. Unknown optionsare used to provides values for update_command, implement new features of API v2.0. Itcan also be used to provide information for API extension.
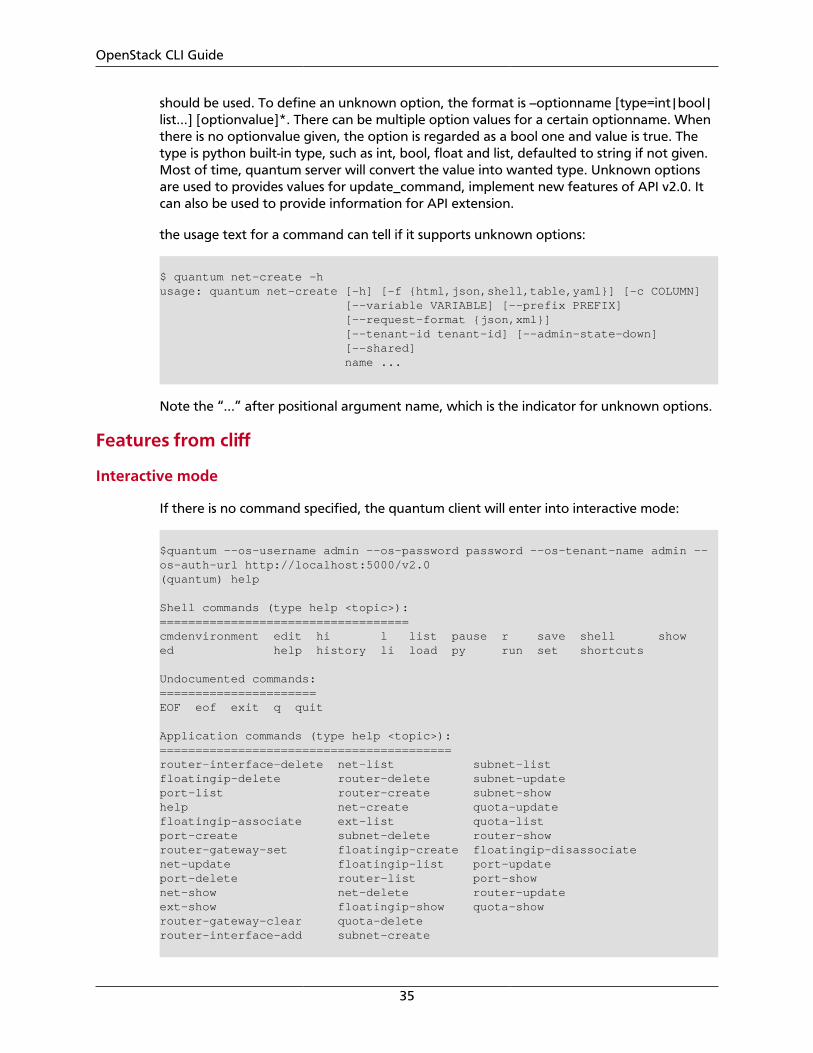
the usage text for a command can tell if it supports unknown options:
$ quantum net-create -husage: quantum net-create [-h] [-f {html,json,shell,table,yaml}] [-c COLUMN] [--variable VARIABLE] [--prefix PREFIX] [--request-format {json,xml}] [--tenant-id tenant-id] [--admin-state-down] [--shared] name ...
Note the “...” after positional argument name, which is the indicator for unknown options.
Features from cliff
Interactive mode
If there is no command specified, the quantum client will enter into interactive mode:
$quantum --os-username admin --os-password password --os-tenant-name admin --os-auth-url http://localhost:5000/v2.0(quantum) help
Shell commands (type help <topic>):===================================cmdenvironment edit hi l list pause r save shell showed help history li load py run set shortcuts
Undocumented commands:======================EOF eof exit q quit
Application commands (type help <topic>):=========================================router-interface-delete net-list subnet-listfloatingip-delete router-delete subnet-updateport-list router-create subnet-showhelp net-create quota-updatefloatingip-associate ext-list quota-listport-create subnet-delete router-showrouter-gateway-set floatingip-create floatingip-disassociatenet-update floatingip-list port-updateport-delete router-list port-shownet-show net-delete router-updateext-show floatingip-show quota-showrouter-gateway-clear quota-deleterouter-interface-add subnet-create

OpenStack CLI Guide
36
(quantum) net-list+--------------------------------------+----------------+--------------------------------------+| id | name | subnets |+--------------------------------------+----------------+--------------------------------------+| 11fc08b7-c3b2-4b0c-bd04-66e279d9c470 | public_net1 | 13cc61f6-b33b-495a-a49f-83bdc9e439ab || 22f53ed1-3f3d-49c7-9162-7ba94d9c0a7e | private_mynet1 | b5a9b952-dd4f-445a-89c5-f15d0707b8bd || 2a405f54-aea0-47d7-8a43-4d5129e22b35 | test1 | || d322e1ae-e068-4249-b9b3-7ed8b820bfa2 | mynetwork | |+--------------------------------------+----------------+--------------------------------------+
Output format
We can use -h after each command to show the usage of each command:
(quantum) net-list -husage: net-list [-h] [-f {csv,html,json,table,yaml}] [-c COLUMN] [--quote {all,minimal,none,nonnumeric}] [--request-format {json,xml}] [-D] [-F FIELDS] ...
List networks that belong to a given tenant.
positional arguments: filter_specs filters options: --key1 [type=int|bool|...] value [--key2 [type=int|bool|...] value ...]
optional arguments: -h, --help show this help message and exit --request-format {json,xml} the xml or json request format -D, --show-details show detailed info -F FIELDS, --fields FIELDS specify the field(s) to be returned by server, can be repeated
output formatters: output formatter options
-f {csv,html,json,table,yaml}, --format {csv,html,json,table,yaml} the output format, defaults to table -c COLUMN, --column COLUMN specify the column(s) to include, can be repeated
CSV Formatter: --quote {all,minimal,none,nonnumeric} when to include quotes, defaults to nonnumeric
We can see the output formatters cliff provides to each command. By default, the outputformat is table. Now we choose csv output to run the command net-list:

OpenStack CLI Guide
37
(quantum) net-list -f csv"id","name","subnets""11fc08b7-c3b2-4b0c-bd04-66e279d9c470","public_net1","13cc61f6-b33b-495a-a49f-83bdc9e439ab""22f53ed1-3f3d-49c7-9162-7ba94d9c0a7e","private_mynet1","b5a9b952-dd4f-445a-89c5-f15d0707b8bd""2a405f54-aea0-47d7-8a43-4d5129e22b35","test1","""d322e1ae-e068-4249-b9b3-7ed8b820bfa2","mynetwork",""
Column selection
We can see -c COLUMN in previous usage output. It can be used to limit the output fields:
(quantum) net-list -c id -c name+--------------------------------------+----------------+| id | name |+--------------------------------------+----------------+| 11fc08b7-c3b2-4b0c-bd04-66e279d9c470 | public_net1 || 22f53ed1-3f3d-49c7-9162-7ba94d9c0a7e | private_mynet1 || 2a405f54-aea0-47d7-8a43-4d5129e22b35 | test1 || d322e1ae-e068-4249-b9b3-7ed8b820bfa2 | mynetwork |+--------------------------------------+----------------+
Features from API
Fields selection
If there are ‘fields’ in request URL, V2.0 API will extract the list of fields to return. A sampleof such URLs is http://localhost:9696/v2.0/networks.json?fields=id&fields=name
quantumv2 client supports this feature by -F option in known options part and --fields inunknown options part. For example, quantum -F id net-list -- --fields name. Only xx-list andxx-show commands support this feature.
Value filtering
Any other fields except the ‘fields’ are used as value filtering. A sample of such URLs ishttp://localhost:9696/v2.0/networks.json?name=test1&name=test2&tag=a. By the currentquantum server's sample DB plugin, the filtering has the same meaning as a SQL clause:name in [‘test1’, ‘test2’]. Quantum client supports this feature by any key options inunknown option part. For example quantum net-list -- --name test1 test2 --tag a. Only xx-listand xx-show commands support this feature.