clock radio sound machine with time projection ...€¦ · • projection feature projects time and...
TRANSCRIPT
© 2005-2007 HoMedics, Inc. y sus compañías afiliadas, reservados todos losderechos. HoMedics® es una marca registrada de HoMedics, Inc. y sus compañías
afiliadas. SoundSpa™ es una marca comercial de HoMedics Inc. y sus compañíasafiliadas. Reservados todos los derechos.
IB-SS5000B
GGAARRAANNTTÍÍAA LLIIMMIITTAADDAA PPOORR UUNN AAÑÑOOHoMedics vende sus productos con la intención de que no tengan defectos de fabricación ni de mano deobra por un plazo de un año a partir de la fecha de compra original, con las siguientes excepciones.HoMedics garantiza que sus productos no tendrán defectos de material ni de mano de obra bajo condicionesde uso y servicio normales. Esta garantía se extiende únicamente a consumidores y no a distribuidores.Para obtener servicio para su producto HoMedics, envíe por correo el producto y su recibo de compra fecha-do (como comprobante de compra), con franqueo pago, a la siguiente dirección:HoMedics Consumer RelationsService Center Dept. 1683000 Pontiac TrailCommerce Township, MI 48390No se aceptarán pagos contra entrega.HoMedics no autoriza a nadie, incluyendo, pero sin limitarse a, distribuidores, posteriores consumidorescompradores del producto a un distribuidor, o compradores remotos, a obligar a HoMedics de forma algunamás allá de las condiciones aquí establecidas. La garantía de este producto no cubre daños causados poruso inadecuado o abuso, accidente, conexión de accesorios no autorizados, alteración del producto, insta-lación inadecuada, reparaciones o modificaciones no autorizadas, uso inadecuado de la fuente deenergía/electricidad, cortes de energía, caída del producto, funcionamiento incorrecto o daño de una pieza defuncionamiento debido al no cumplimiento del mantenimiento recomendado por el fabricante, daños duranteel transporte, robo, descuido, vandalismo, condiciones climáticas, pérdida de uso en el período durante elcual el producto está en una instalación de reparación o a la espera de piezas o reparación, o cualquier otracondición, sin importar cual sea, que se encuentre fuera del control de HoMedics.Esta garantía es válida únicamente si el producto es comprado y operado en el país en el cual se compró elproducto. Un producto que requiera modificaciones o adaptación para habilitar su funcionamiento encualquier país que no sea aquél para el que fue diseñado, fabricado, aprobado y/o autorizado, o la reparaciónde productos dañados por estas modificaciones no están cubiertos bajo esta garantía.LA GARANTÍA AQUÍ ESTABLECIDA SERÁ LA ÚNICA Y EXCLUSIVA GARANTÍA. NO HABRÁ NINGUNA OTRAGARANTÍA EXPRESA NI IMPLÍCITA, INCLUYENDO NINGUNA GARANTÍA DE COMERCIALIZACIÓN O APTITUDNI NINGUNA OTRA OBLIGACIÓN POR PARTE DE LA COMPAÑÍA CON RESPECTO A PRODUCTOS CUBIERTOSPOR ESTA GARANTÍA. HOMEDICS NO TENDRÁ RESPONSABILIDAD ALGUNA POR NINGÚN DAÑO INCIDEN-TAL, CONSECUENTE NI ESPECIAL. BAJO NINGÚN CONCEPTO ESTA GARANTÍA REQUERIRÁ MÁS QUE LAREPARACIÓN O CAMBIO DE ALGUNA PIEZA O PIEZAS QUE SE HALLEN DEFECTUOSAS DENTRO DELPERÍODO DE VIGENCIA DE ESTA GARANTÍA. NO SE EFECTUARÁN REEMBOLSOS. SI NO HAY PIEZAS DEREPUESTO DISPONIBLES PARA LOS MATERIALES DEFECTUOSOS, HOMEDICS SE RESERVA EL DERECHODE REALIZAR SUSTITUCIONES EN VEZ DE REPARAR O CAMBIAR.Esta garantía no se extiende a la compra de productos abiertos, usados, reparados, embalados otra vez y/oabiertos y vueltos a cerrar, incluyendo entre otras cosas la venta de dichos productos en sitios de remate porInternet y/o la venta de dichos productos por revendedores o mayoristas. Todas y cada una de las garantíascesarán y terminarán inmediatamente con respecto a cualquier producto o pieza del mismo que estén repara-dos, cambiados, alterados o modificados sin el consentimiento previo explícito y por escrito de HoMedics. Esta garantía le proporciona derechos legales específicos. Es posible que usted tenga derechos adicionalesque pueden variar de un país a otro. Debido a las regulaciones de ciertos países, es posible que algunas delas limitaciones y exclusiones no se apliquen en su caso.
Por más información con respecto a nuestra línea de productos en los EE.UU., visítenos en:www.homedics.com
Dirección postal:
HoMedicsConsumer Relations
Service Center Dept. 168
3000 Pontiac Trail
Commerce Township, MI48390
Correo electrónico:
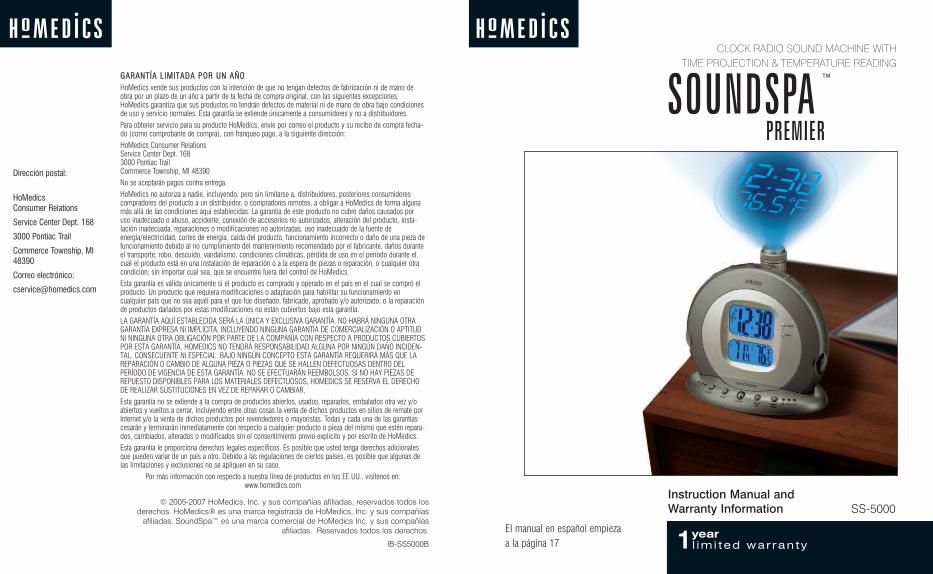
CLOCK RADIO SOUND MACHINE WITH TIME PROJECTION & TEMPERATURE READING
Instruction Manual andWarranty Information SS-5000
El manual en español empieza a la página 17
SOUNDSPAPREMIER
™
2 3
Create your perfect sleep environment.Thank you for purchasing SoundSpa Premier, the HoMedics acoustic relaxationmachine. This, like the entire HoMedics product line, is built with high-quality craftsmanship to provide you years of dependable service. We hope that you willfind it to be the finest product of its kind. SoundSpa helps create your perfect sleep environment. Fall asleep to any of its six calming sounds, then wake to sound, radio or alarm. SoundSpa can also mask distractions to improve your concentration while you read, work or study.
IMPORTANT SAFETY INSTRUCTIONS:When using an electrical appliance, basic precautions should always be followed, including the following:
READ ALL INSTRUCTIONS BEFORE USING
DANGER - To reduce the risk of electric shock:• Always unplug the appliance from the electrical outlet immediately before cleaning.• Do not reach for an appliance that has fallen into water. Unplug it immediately.• Do not place or store appliance where it can fall or be pulled into a tub or sink.
Do not place in or drop into water or other liquid.
WARNING - To reduce the risk of burns, fire, electric shock or injury topersons:• Close supervision is necessary when this appliance is used by or near children,
invalids or disabled persons.• Use this appliance only for its intended use as described in this manual. Do not
use attachments not recommended by HoMedics; specifically any attachmentsnot provided with the unit.
• Never operate this appliance if it has a damaged cord, plug,cable or housing. If it is not working properly, if it has beendropped or damaged, return it to Homedics Service Center forexamination and repair.
• Keep cord away from heated surfaces.• Never drop or insert any object into any opening.• Do not operate where aerosol (spray) products are being used or
where oxygen is being administered.• Do not carry this appliance by power cord or use cord as handle.• To disconnect, remove plug from outlet.• This appliance is designed for indoor use only. Only the remote
sensor should be used outdoors.• Only set on dry surfaces. Do not place on surface wet from water
or cleaning
SAVE THESE INSTRUCTIONSCaution – Please read all instructions carefully before operating.• Never leave the appliance unattended, especially if children
are present.• Never cover the appliance when it is in operation.• This unit should not be used by children without adult supervision.• Always keep the cord away from high temperature and fire.• Do not lift, carry, hang, or pull the product by the power cord.• If the adaptor sustains damage, you must stop using this product
immediately and contact the HoMedics Service Center. (See thewarranty section for the HoMedics address.)
Caution: All servicing ofthis productmust be performed byauthorizedHoMedicsServicePersonnel only.

54
SoundSpa Clock Radio Features• 6 Nature Sounds: rain forest, ocean, thunder, summer night,
rain, and waterfall• Atomic time• Indoor and outdoor temperature• Dual alarm• AM/FM radio with alarm and snooze• Three gentle-wake options - radio, alarm or soothing sound• Easy-to-read LCD display• Projection feature projects time and temperature on the
ceiling or wall• Auto-timer lets you choose how long you listen - 15, 30, or
60 minutes• Volume control adjusts the volume of the radio, beep, or sounds
Figure 1
Figure 3
Figure 4
Figure 2
Projection
Alarm Set
Alarm Mode
Timer
Atomic Time Icon withAntenna Bands
Time Zone
PM Indicator
Indoor Temperature Outdoor Temperature
Alarm Bell
Tuner
Snooze
LCD Display
Power
Radio
Sounds
Volume
Hour
Focus Knob
Time Rotation Knob
FM/AM Switch
Antenna
C/F Button
Projector On/Off Switch
DC Jack
Minute
Adaptor
Remote Sensor
Projector Tube
AlarmSwitch
Backlight High/Low/Off Button
DST/Time Zone AtomicOn/Off Button
Selecting a Time Zone1. Press the ATOMIC ON/OFF button (Fig. 3) to turn off the atomic time function.
To indicate you are at the off position, the atomic time icon (Fig. 2) will beremoved from the display.
2. Toggle through the DST/TIME ZONE button (Fig. 3) until you reach your desiredtime zone. (P - Pacific Standard Time, M - Mountain Standard Time, C - CentralStandard Time, E - Eastern Standard Time)
3. Once you have selected your time zone, press the ATOMIC ON/OFF buttonagain to turn on the atomic time function. To indicate you are at the on position,the atomic time time icon will reappear with flashing antenna bands. (When theantenna bands appear flashing the unit is searching for the atomic time signal.)
4. If the atomic time icon disappears afterwards, the atomic time signal is not availableat that moment. Try setting the unit in other locations. Remember to place the unitaway from sources of interference such as mobile phones, appliances, TV etc.
5. The atomic time icon will appear on screen if the atomic time reception is successful.(The antenna bands will stop flashing when atomic time reception is successful.)The radio-controlled clock will have a daily synchronization at 1:00 am everyday.If previous attempts of reception were unsuccessful, the home receiver willattempt synchronization each hour until successful. Each reception cycle rangesfrom 2 - 10 minutes.
Manual Setting of Clock1. Press the HOUR button (Fig 1) until you reach the correct hour.2. Press the MIN button (Fig 1) until you reach the correct minute.3. Press the BACKLIGHT HI/LOW/OFF button (Fig 3) to adjust the backlight intensity.
Note: A PM indicator will appear in the upper left hand corner of the LCDdisplay during the PM hours. Be sure to set the time for the correct 12-hourperiod - AM (morning) or PM (evening).
6 7
Assembly and Instructions for Use1. Unpack the product and check to make sure everything is included (Fig 1).2. This unit is powered by a DC adaptor.3. The battery power is designed only to provide MEMORY BACK-UP for the clock
and alarm settings. Three “AAA” batteries (not included) should be inserted intothe battery compartment if memory back-up is desired (in the event of poweroutages or if the unit is unplugged). The time will be illuminated on the clockdisplay, however, the backlight will not be illuminated and all other functions ofthe unit will be unavailable. As soon as the power supply returns, the display willindicate the correct time, and the functions will become available again.NOTE: Battery must be installed in order for clock memory back-up tooperate. In the event of a power failure or disconnection, if the battery isnot installed, the clock and alarm will need to be re-set when power isrestored.
4. To install batteries, remove compartment cover. Insert three “AAA” batteries intothe compartment on the bottom of the unit according to the polarity directionindicated. Replace cover and snap into place.
5. Attach the adaptor into the DC jack on the base of the unit (Fig 3) and insert thecord into a 120V household outlet.
Setting TimeUsing the Atomic TimeThe National Institute of Standard and Technology (NIST) in Fort Collins, Coloradobroadcasts the time signal (WWVB at 60kHz AM radio signal) with an accuracy of 1second per every 3,000 years. The signal will cover a distance up to 2,000 miles fromthe source. Like a typical AM radio, your Atomic Clock will not able to receive theWWVB signal in places surrounded by heavy concrete or metal panels. The receptionof the time signal can be affected by mobile phones, TV, electrical appliances orother electronic interference. To get the best performance of the Atomic clock, pleaseinstall the home receiver (SoundSpa Premier) near a window and away from largemetallic objects. If the unit is not working properly, change its position. There maybe some interference at this location. The Sound Spa Premier will start synchronizingthe clock to the Pacific Time Zone as soon as the unit is plugged in.

8 9
Listening to Nature Sounds1. Select the sound you wish to listen to and press
the corresponding button (Fig 5). 2. To adjust the volume, turn the VOLUME knob
(Fig 1) to your desired level.3. When finished listening to the sounds you may
turn them off by pressing the POWER button, orswitch to the radio by pressing RADIO (Fig 4).Note: When the unit is turned on it will always default to the last mode used.
Listening to the Radio1. Press the RADIO button (Fig. 4).2. Use the AM/FM switch located on the back of the unit (Fig. 3) to change
between bands.3. Rotate the TUNER (Fig. 1) to select a radio station.4. To adjust the volume turn the VOLUME knob (Fig 1) to your desired level.5. When finished listening to the radio you may turn it off by pressing the
POWER button. (Fig. 4)Note: Adjust the antenna on the back of the unit to better the radio reception if needed.
Using the Auto-TimerWhen the power is on and you are listening to a nature sound or the radio you may set a timer so the unit will automatically turn off.1. Toggle through the TIMER button (Fig 4) until the corresponding green
LED illuminates next to the time of your choice, 15, 30 or 60 minutes.2. To cancel the timer, toggle through the TIMER button until the green LED
light is not illuminated, which indicates you are at the off position or press POWER (Fig. 4).
Setting and Using The AlarmSetting and using Alarm 1 or Alarm 2 (Individually)1. Slide the alarm switch to ALARM 1 or Alarm 2. (Fig. 3) An ALARM BELL (Fig. 2)
icon will appear on the LCD display. 2. Press the ALARM SET button. (Fig 4.) The time will flash.3. While the time is flashing press the HOUR button (Fig 1) until you reach the correct
hour. Then press the MIN button (Fig 1) until you reach the desired minute.4. After 5 seconds the alarm set time will stop flashing and it will be programmed,
or you may press the ALARM SET button to confirm.Note: The PM indicator also applies to the alarm. You can review the alarmsetting anytime by pressing the ALARM SET button.
5. You may choose one of 3 wake options; BEEP, SOUND, or RADIO by pressingthe ALARM MODE button. A green LED will appear next to the wake modeselected. (Fig. 4)NOTE: When using the sound mode, the unit will set to the last sound youlistened to. If you wish to change it press the sound you wish to wake to(Fig. 5) and then press the POWER button (Fig 4).
6. When the alarm sounds you may:a. SNOOZE: Press the SNOOZE button (Fig 1). Your sleep time will be
extended by 9 minutes. You may use this feature until you turn the alarm off.
b. RESET: Turn the alarm off by pressing ANY button on the unit, except for the SNOOZE button (Fig 4). The alarm clock will automatically reset for the next day in its current mode. The ALARM BELL icon and green LED will remain displayed to indicate the alarm is set. If you wish to change the wake mode follow step 5 under Setting and Using Alarm 1 and Alarm 2 Individually.
c. OFF: To completely turn off the alarm so it is not set for the next day, slide the alarm switch to OFF.
NOTE: If the alarm sounds for 30 minutes continuously it will automaticallyturn off.
Figure 5
10 11
Setting and using Alarm 1 and Alarm 2 (Together)1. Slide the alarm switch to ALARM 1&2 (Fig. 3) Both ALARM BELL (Fig. 2) icons
will appear on the LCD display. Note: You can not change the alarm time when ALARM 1&2 is selected. Ifyou need to change the alarm time for either alarm follow step 1 underSetting and Using Alarm 1 or Alarm 2.
2. You may choose one of 3 wake options; BEEP, SOUND, or RADIO by pressingthe ALARM MODE button. A green LED will appear next to the wake modeselected. (Fig. 4)NOTE: When using the sound mode, the unit will set to the last sound youlistened to. If you wish to change it press the sound you wish to wake to(Fig. 5) and then press the POWER button (Fig. 4).
3. When the alarm sounds you may:a. SNOOZE: Press the SNOOZE button (Fig. 1) Your sleep time will be
extended by 9 minutes. You may use this feature until you turn the alarm off.
b. RESET: Turn the alarm off by pressing ANY button on the unit, except for the SNOOZE button (Fig. 4). The alarm clock will automatically reset for the next day in its current mode. The ALARM BELL icons and green LED will remain displayed to indicate the alarm is set. If you wish to change the wake mode follow step 2 under Setting and Using Alarm 1 and Alarm 2 Together.
c. OFF: To completely turn off the alarm so it is not set for the next day, slide the alarm switch to OFF.
Note: If one of the Alarm users still needs their alarm set, you will need toslide the switch on the back of the unit to the alarm that corresponds totheir wake time.NOTE: If the alarm sounds for 30 minutes continuously it will automaticallyturn off.
Using the Projection Feature1. To turn the projection feature on, slide the ON/OFF switch (Fig 3) on the back
of the unit to the ON position. The time & outdoor temperature is now projectedon the wall or ceiling.NOTE: If the projection feature is OFF, you may hit the SNOOZE button (Fig. 1) to trigger 15 seconds of projection.
2. The angle of the projector can be adjusted to angle on the ceiling or wall by moving the PROJECTOR TUBE (Fig. 3) forward or backward.
3. To turn the angle of the time & temperature that appears on the wall or ceiling, rotate the TIME ROTATION KNOB (Fig. 3) until you have reached your desired result.NOTE: The TIME ROTATION KNOB will rotate up to 350 degrees.
4. To focus the time & temperature on the wall or ceiling rotate the FOCUS KNOB (Fig. 3) until you have reached your desired result.
Using Indoor TemperatureThe unit will begin reading indoor temperature when it is plugged in. Allow a few minutes for the correct temperature to register on the LCD display. (Fig. 2)
Using Outdoor Temperature Be sure the SoundSpa unit is plugged in prior to the remote sensor battery installation.

Remote Sensor Battery Installation: 1. Loosen the 4 screws securing the battery cover with a small
screwdriver (included) and remove. Insert 2 alkaline AAA batteriesaccording to the polarity direction indicated.
2. Place the home receiver (SoundSpa Premier) as close as possibleto the remote sensor. This will help with synchronization betweenthe two units.NOTE: Once you are ready to position your remote sensorand home receiver, ensure that the distance is not outside theeffective transmission range (100 feet). Some building materialsand location of the home receiver or remote sensor can affecttransmission quality and range. Try various locations for bestresults.
3. Press the C/F button inside the remote sensor to change betweenºC and ºF. (The remote sensor is preset on ºF.)
4. Press the TX button inside of the remote sensor to verify thereception.
5. Replace the cover and tighten the 4 screws.NOTE: It is recommended to test the units next to each otherto ensure that both the remote sensor and home receiver areproperly synchronized.
Remote Sensor Mounting InstructionsThe Remote Sensor comes with a table stand or can be wall mounted.
Table Stand -Simply fold out the attached stand from the mounting bracket.
Wall Mounting -Set a screw in the desired hanging location and mount. A screw andwall anchor have been included for your convenience.NOTE: Keep the remote sensor out of direct sunlight and rain.Do not mount on metal surface.
Remote Sensor Low Battery Indication Low battery indication is available for the remote sensor. A battery life “ ” icon will display on the remote sensor. Replace the batteries as necessary and follow thesetup procedure.
MAINTENANCE AND CARE INSTRUCTIONS• Extreme temperatures, shock or areas of unusual vibration should be avoided
to prevent damage to the units.• Clean the units using only a soft, damp cloth to wipe. Do not use solvents,
abrasives, detergents or other strong cleaning agents. After cleaning, wipe surfaces with a dry cloth.
• Do not submerge units in water or other liquids.• Do not subject the units to extremely severe temperatures - DO NOT
PLACE UNITS INTO OVENS, FREEZERS or MICROWAVE UNITS.NOTE: Opening the housing (other than the battery compartment) of theRemote Sensor or the SoundSpa Unit will invalidate your warranty. Do not attempt to repair this unit - There are no consumer serviceable parts.
12 13
TROUBLE SHOOTINGIndoor and Outdoor temperatures do not match when placed next toeach other - The sensor is manufactured to be +/- 2 degree in accuracy under normal conditions. So it is possible to have up to four degrees difference shown on the separate temperature sensors (one could be “+2 degree” and the other “-2 degree”. Additionally, the calibration curve is different between the two units because of the greater temperature range of the outdoor sensor. Errors are usually noted on the extreme ends of the temperature ranges.
SoundSpa unit is not accepting remote transmissions -The units may not be properly synchronized or the batteries may need to be replaced. See “USING OUTDOOR TEMPERATURE” section for detailed instructions. With the two units next to each other, attempt synchronization.Remember to always place the remote sensor within the effective transmission range and away from large metal surfaces.
What is the recommended battery type?We recommend using only alkaline batteries.
Where can I mount the remote sensor?To get accurate readings and to prolong the life of your sensor, we recommend that you mount it out of direct sunlight and rain. Fog and mist will not affect the sensor, but large volumes of soaking rain may. To guard against this, we recommend that you mount it under the eve of your house, your garage or any other suitable place that will keep it out of direct sun and rain. Modifications notauthorized by the manufacturer may void users authority to operate this device.
Outdoor Temperature Reading shows “- -”This may indicate a low battery or out of transmission range.
SPECIFICATIONSRange of temperature measurement:Indoor temp : +32º F to +122º F (0º C to + 50º C)Remote sensor: -4º F to +140º F (-20º C to +60º C)Transmission: max. 100 ft. (30 m) open area, RF434 MHz
FCC DISCLAIMERThis device complies with part 15 of the FCC rules. Operation is subject to the following two conditions:1. This device may not cause harmful interference, and2. This device must accept any interference received, including interference
that may cause undesired operation.Freq. 434 MHzFCC ID: TG3SS-5000TX (Transmitter)Modifications not authorized by the manufacturer may void users authority to operate this device.
Note: This equipment has been tested and found to comply with the limits for aClass B digital device, pursuant to Part 15 of the FCC Rules. These limits aredesigned to provide reasonable protection against harmful interference in a resi-dential installation. This equipment generates, uses and can radiate radio fre-quency energy and, if not installed and used in accordance with the instruc-tions, may cause harmful interference to radio communications. However, thereis no guarantee that interference will not occur in a particular installation. If thisequipment does cause harmful interference to radio or television reception,which can be determined by turning the equipment off and on, the user isencouraged to try to correct the interference by one or more of the followingmeasures:• Reorient or relocate the receiving antenna.• Increase the separation between the equipment and receiver.• Connect the equipment into an outlet on a circuit different from that to
which the receiver is connected.• Consult the dealer or an experienced radio/TV technician for helpNNoottee:: TThhee mmaannuuffaaccttuurreerr iiss nnoott rreessppoonnssiibbllee ffoorr aannyy rraaddiioo oorr TTVV iinntteerrffeerr--
eennccee ccaauusseedd bbyy uunnaauutthhoorriizzeedd mmooddiiff iiccaattiioonnss ttoo tthhiiss eeqquuiippmmeenntt.. SSuucchhmmooddiiffiiccaattiioonnss ccoouulldd vvooiidd tthhee uusseerrss aauutthhoorriittyy ttoo ooppeerraattee tthhee eeqquuiippmmeenntt..
14 15

©2005-2007 HoMedics, Inc. and its affiliated companies, all rights reserved.HoMedics® is a registered trademark of HoMedics, Inc. and its affiliated companies.
SoundSpa™ is a trademark of HoMedics, Inc. and its affiliated companies. All rights reserved.
IB-SS5000B
LLIIMMIITTEEDD OONNEE YYEEAARR WWAARRRRAANNTTYYHoMedics sells its products with the intent that they are free of defects in manufacture and workmanship for aperiod of one year from the date of original purchase, except as noted below. HoMedics warrants that its productswill be free of defects in material and workmanship under normal use and service. This warranty extends only toconsumers and does not extend to Retailers.
To obtain warranty service on your HoMedics product, mail the product and your dated sales receipt (as proof ofpurchase), postpaid, to the following address:
HoMedics Consumer RelationsService Center Dept. 1683000 Pontiac TrailCommerce Township, MI 48390
No COD's will be accepted.
HoMedics does not authorize anyone, including, but not limited to, Retailers, the subsequent consumer purchas-er of the product from a Retailer or remote purchasers, to obligate HoMedics in any way beyond the terms setforth herein. This warranty does not cover damage caused by misuse or abuse; accident; the attachment of anyunauthorized accessory; alteration to the product; improper installation; unauthorized repairs or modifications;improper use of electrical/power supply; loss of power; dropped product; malfunction or damage of an operatingpart from failure to provide manufacturer’s recommended maintenance; transportation damage; theft; neglect;vandalism; or environmental conditions; loss of use during the period the product is at a repair facility or other-wise awaiting parts or repair; or any other conditions whatsoever that are beyond the control of HoMedics.
This warranty is effective only if the product is purchased and operated in the country in which the product is pur-chased. A product that requires modifications or adoption to enable it to operate in any other country than thecountry for which it was designed, manufactured, approved and/or authorized, or repair of products damaged bythese modifications is not covered under this warranty.
THE WARRANTY PROVIDED HEREIN SHALL BE THE SOLE AND EXCLUSIVE WARRANTY. THERE SHALL BE NOOTHER WARRANTIES EXPRESS OR IMPLIED INCLUDING ANY IMPLIED WARRANTY OF MERCHANTABILITY ORFITNESS OR ANY OTHER OBLIGATION ON THE PART OF THE COMPANY WITH RESPECT TO PRODUCTS COV-ERED BY THIS WARRANTY. HOMEDICS SHALL HAVE NO LIABILITY FOR ANY INCIDENTAL, CONSEQUENTIALOR SPECIAL DAMAGES. IN NO EVENT SHALL THIS WARRANTY REQUIRE MORE THAN THE REPAIR ORREPLACEMENT OF ANY PART OR PARTS WHICH ARE FOUND TO BE DEFECTIVE WITHIN THE EFFECTIVE PERI-OD OF THE WARRANTY. NO REFUNDS WILL BE GIVEN. IF REPLACEMENT PARTS FOR DEFECTIVE MATERIALSARE NOT AVAILABLE, HOMEDICS RESERVES THE RIGHT TO MAKE PRODUCT SUBSTITUTIONS IN LIEU OFREPAIR OR REPLACEMENT.
This warranty does not extend to the purchase of opened, used, repaired, repackaged and/or resealed products,including but not limited to sale of such products on Internet auction sites and/or sales of such products by sur-plus or bulk resellers. Any and all warranties or guarantees shall immediately cease and terminate as to any prod-ucts or parts thereof which are repaired, replaced, altered, or modified, without the prior express and written con-sent of HoMedics.
This warranty provides you with specific legal rights. You may have additional rights which may vary from countryto country. Because of individual country regulations, some of the above limitations and exclusions may notapply to you.
For more information regarding our product line in the USA, please visit: www.homedics.com
Mail To:
HoMedicsConsumer Relations
Service Center Dept. 168
3000 Pontiac Trail
Commerce Township, MI48390
e-mail: [email protected]
EQUIPO DE RADIO RELOJ Y SONIDO WITH TIME PROJECTION & TEMPERATURE READING
Manual de instrucciones einformación de garantía SS-5000
SOUNDSPAPREMIER
™

18 19
Cree su ambiente perfecto para dormir.Gracias por comprar el SoundSpa Premier, equipo de relajación acústica deHoMedics. Éste, al igual que toda la línea de productos HoMedics, está fabricadocon mano de obra de alta calidad para brindarle años de servicio confiable.Esperamos que lo encuentre como el mejor producto de su clase. SoundSpa ayudaa crear su ambiente perfecto para dormir. Duérmase con cualquiera de sus seissonidos calmantes, luego despiértese con el sonido, el radio o la alarma. ElSoundSpa puede también encubrir distracciones para mejorar su concentraciónmientras lee, trabaja o estudia.
IMPORTANTES INSTRUCCIONES DE SEGURIDAD:Cuando se utiliza un artefacto eléctrico, siempre se deben seguir ciertasprecauciones básicas, incluyendo lo siguiente:
LEA TODAS LAS INSTRUCCIONES ANTES DE USAR
PELIGRO - Para reducir el riesgo de choque eléctrico:
• Always unplug the appliance from the electrical outlet immediately beforecleaning.
• Do not reach for an appliance that has fallen into water. Unplug it immediately.• Do not place or store appliance where it can fall or be pulled into a tub or sink.
Do not place in or drop into water or other liquid.
ADVERTENCIA - Para reducir el riesgo de quemaduras, incendio, choqueeléctrico o lesiones a las personas:
• Se requiere una supervisión estricta cuando este artefacto es usado por o cercade niños, personas minusválidas o incapacitadas.
• Utilice este artefacto sólo para el uso para el cual está diseñado y como sedescribe en este manual. No use accesorios no recomendados por HoMedics,específicamente ningún accesorio no proporcionado con la unidad.
• Nunca haga funcionar este aparato si tiene el cordón, elenchufe, el cable o el armazón dañado. Si no está funcionandoadecuadamente, si se ha caído o dañado, envíelo al Centro deservicio de HoMedics para que sea examinado y reparado.
• Mantenga el cable alejado de superficies calientes.• Nunca lo deje caer ni inserte ningún objeto en ninguna abertura.• No lo haga funcionar donde se utilizan productos de rociado por
aerosol o donde se está administrando oxígeno.• No lleve este artefacto tomado del cable, ni use el cable como manija.
• Para desconectarlo, retire el enchufe del tomacorriente.• Este artefacto está diseñado para uso al interior exclusivamente.
Sólo el sensor remoto debe usarse en exteriores.• Coloque esta unidad sólo sobre superficies secas. No coloque
esta unidad sobre superficies mojadas con agua o solventespara limpieza.
GUARDE ESTAS INSTRUCCIONESPrecaución – Lea todas las instrucciones con atenciónantes de poner en funcionamiento.• Nunca deje el artefacto sin vigilancia, especialmente si hay niños
presentes.• Nunca cubra el artefacto mientras está en funcionamiento.• Esta unidad no debe ser usada por niños sin la supervisión
de un adulto.• Mantenga siempre el cordón alejado de temperaturas elevadas
y de llamas.• No levante, lleve, cuelgue ni tire de la unidad tomándola del
cable de corriente.• Si el adaptador se daña, debe suspender el uso de este aparato
de inmediato y contactar el Centro de servicio de HoMedics.(Ver la dirección de Homedics en la Sección de Garantía).
Precaución:Todo elservicio deeste productodebe serrealizadoúnicamentepor Personalde servicioautorizado deHoMedics.
2120
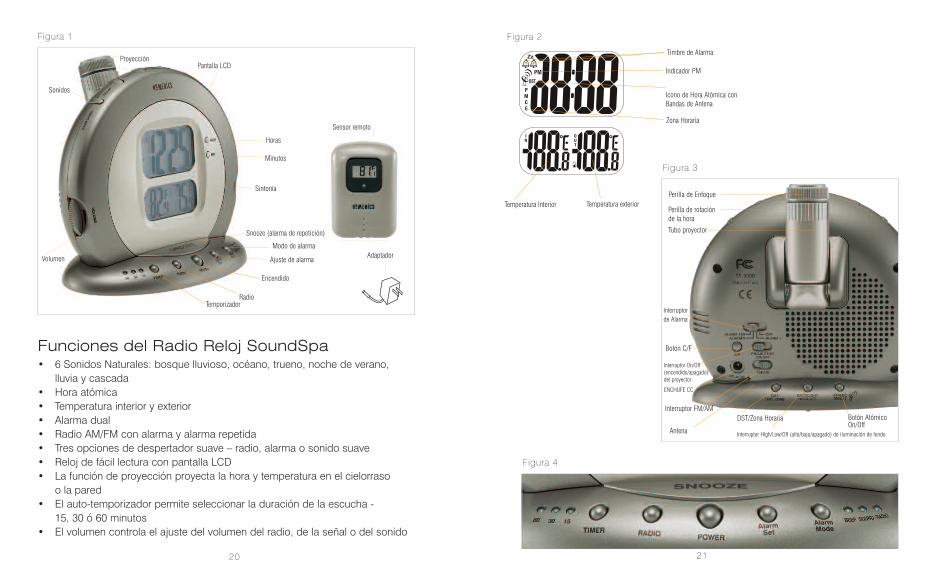
Funciones del Radio Reloj SoundSpa• 6 Sonidos Naturales: bosque lluvioso, océano, trueno, noche de verano,
lluvia y cascada• Hora atómica• Temperatura interior y exterior• Alarma dual• Radio AM/FM con alarma y alarma repetida• Tres opciones de despertador suave – radio, alarma o sonido suave• Reloj de fácil lectura con pantalla LCD• La función de proyección proyecta la hora y temperatura en el cielorraso
o la pared • El auto-temporizador permite seleccionar la duración de la escucha -
15, 30 ó 60 minutos • El volumen controla el ajuste del volumen del radio, de la señal o del sonido
Figura 1
Figura 3
Figura 4
Figura 2
Proyección
Ajuste de alarma
Modo de alarma
Temporizador
Icono de Hora Atómica conBandas de Antena
Zona Horaria
Indicador PM
Temperatura Interior Temperatura exterior
Timbre de Alarma
Sintonía
Snooze (alarma de repetición)
Pantalla LCD
Encendido
Radio
Sonidos
Volumen
Horas
Perilla de Enfoque
Perilla de rotaciónde la hora
Interruptor FM/AM
Antena
Botón C/F
Interruptor On/Off(encendido/apagado)del proyector
ENCHUFE CC
Minutos
Adaptador
Sensor remoto
Tubo proyector
Interruptor de Alarma
Interruptor High/Low/Off (alto/bajo/apagado) de iluminación de fondo
DST/Zona Horaria Botón Atómico On/Off

Selección de la zona horaria1. Presione el botón ATOMIC ON/OFF (Fig. 3) para apagar la función de hora
atómica. Para indicar que se encuentra en la posición OFF (apagado), el iconode la hora atómica desaparece de la pantalla.
2. Oprima alternativamente el botón DST/TIME ZONE (DST/Zona Horaria) (Fig. 3)hasta alcanzar la zona horaria deseada. (P – Hora estándar del Pacífico, M – Hora estándar de las Montañas Rocosas, C – Hora estándar del Centro, E - Hora estándar del Este)
3. Una vez seleccionada su zona horaria, presione el botón ATOMIC ON/OFFnuevamente para encender la función de hora atómica. Para indicar que seencuentra en la posición ON (encendido), el icono de la hora atómica reaparececon bandas de antena destellando. (Cuando las bandas de antena aparecendestellando, la unidad está buscando la señal de la hora atómica).
4. Si posteriormente el icono desaparece, se debe a que la señal de la horaatómica no está disponible en ese momento. Intente colocar la unidad en otrasubicaciones. Recuerde colocar la unidad lejos de fuentes de interferencia talescomo teléfonos celulares, artefactos, televisores, etc.
5. El icono de la hora atómica aparecerá en la pantalla si la recepción de la horaatómica es exitosa. (Las bandas de la antena dejarán de destellar cuando larecepción de la hora atómica es exitosa). El reloj controlado por radio tendráuna sincronización diaria, todos los días a la 01:00 a.m. Si los intentos derecepción anteriores fracasaron, el receptor doméstico intentará sincronizarcada hora, hasta tener éxito. Cada ciclo de recepción varía de 2 hasta10 minutos.
Ajuste Manual del Reloj1. Oprima el botón HOUR (hora) (Fig. 1) hasta alcanzar la hora correcta.2. Oprima el botón MIN (minutos) (Fig. 1) hasta alcanzar los minutos correctos.3. Oprima el botón BACKLIGHT HI/LOW/OFF (iluminación de fondo
alta/baja/apagada) (Fig. 3) para ajustar la intensidad de la iluminación de fondo.ATENCIÓN: Un indicador de PM aparece en la esquina superior izquierdade la pantalla LCD durante las horas PM. Asegúrese de ajustar la hora parael período de 12 horas correcto – AM (mañana) o PM (tarde).
22 23
Instrucciones de uso y montaje1. Desempaque el producto y asegúrese de que no falte nada (Fig. 1).2. Esta unidad se alimenta con un adaptador de CC.3. La corriente de la batería sirve sólo para proporcionar MEMORIA DE RESPALDO
para los ajustes del reloj y alarma. En el compartimiento para la batería sedeben colocar tres baterías “AAA” (no incluida), si se desea el respaldo de lamemoria (en el caso de un apagón de corriente o si se desenchufa la unidad).La hora queda iluminada en la pantalla del reloj, sin embargo, la iluminación defondo no queda encendida y todas las demás funciones de la unidad no sondisponibles. Apenas vuelva la corriente, la pantalla indica la hora correcta y lasfunciones quedan nuevamente disponibles.ATENCIÓN: Es necesario instalar la batería para hacer funcionar lamemoria de respaldo del reloj. En el caso de un apagón o desconexión,si la batería no ha sido instalada, cuando vuelva la corriente, será necesarioreajustar la hora y la alarma.
4. Para instalar la batería, retire la tapa del compartimiento. Inserte tres bateríasalcalinas “AAA” en el compartimiento en el fondo de la unidad, de acuerdo a ladirección indicada de la polaridad. Vuelva a colocar la tapa y presiónela en su lugar.
5. Conecte el adaptador de CC en el enchufe a la base de la unidad (Fig. 3) yenchufe el cordón a un tomacorriente doméstico de 120 voltios.
Cómo configurar la horaAcerca del reloj atómicoEl National Institute of Standard and Technology (NIST, Instituto Nacional deEstándares y Tecnología) en Fort Collins, Colorado, emite la señal horaria (una señalde radio AM, WWVB a 60kHz) con una precisión de 1 segundo por cada 3000 años.La señal cubre una distancia de hasta 2000 millas desde su fuente. Al igual que unatípica radio AM, su reloj atómico no será capaz de recibir la señal WWVB en lugaresrodeados de mucho hormigón o paneles de metal. La recepción de la señal horariapuede verse afectada por teléfonos celulares, televisores, artefactos eléctricos uotras interferencias electrónicas. Para obtener el mejor rendimiento del reloj atómico,sírvase instalar el receptor interior (Sound Spa Premier) cerca de una ventana y lejosde objetos metálicos grandes. Si la unidad no está funcionando correctamente,cambie la posición de la misma. Puede que en esa ubicación haya algunainterferencia. El Sound Spa Premier comienza a sincronizar el reloj a la hora delPacífico apenas la unidad queda enchufada.
24 25
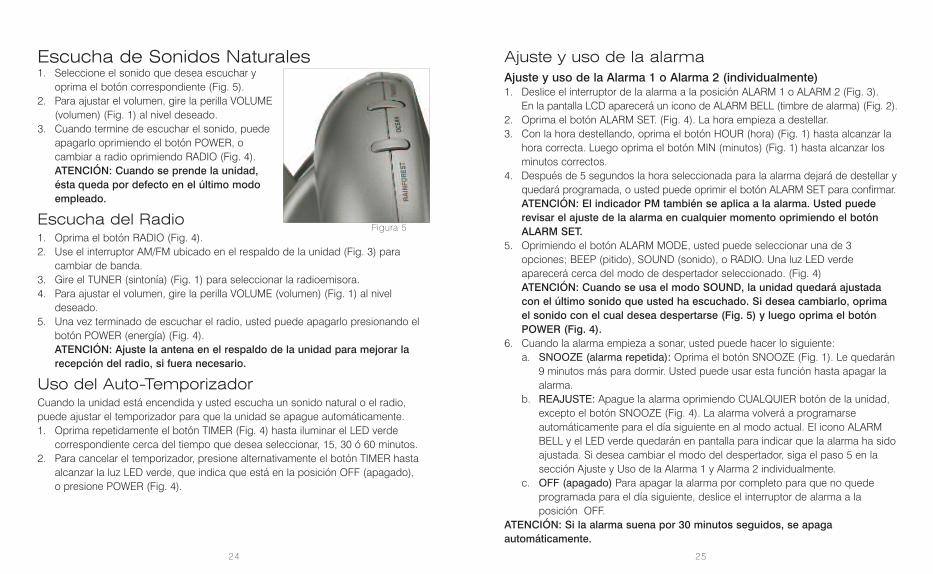
Escucha de Sonidos Naturales1. Seleccione el sonido que desea escuchar y
oprima el botón correspondiente (Fig. 5). 2. Para ajustar el volumen, gire la perilla VOLUME
(volumen) (Fig. 1) al nivel deseado.3. Cuando termine de escuchar el sonido, puede
apagarlo oprimiendo el botón POWER, ocambiar a radio oprimiendo RADIO (Fig. 4).ATENCIÓN: Cuando se prende la unidad,ésta queda por defecto en el último modoempleado.
Escucha del Radio1. Oprima el botón RADIO (Fig. 4).2. Use el interruptor AM/FM ubicado en el respaldo de la unidad (Fig. 3) para
cambiar de banda.3. Gire el TUNER (sintonía) (Fig. 1) para seleccionar la radioemisora.4. Para ajustar el volumen, gire la perilla VOLUME (volumen) (Fig. 1) al nivel
deseado.5. Una vez terminado de escuchar el radio, usted puede apagarlo presionando el
botón POWER (energía) (Fig. 4).ATENCIÓN: Ajuste la antena en el respaldo de la unidad para mejorar larecepción del radio, si fuera necesario.
Uso del Auto-TemporizadorCuando la unidad está encendida y usted escucha un sonido natural o el radio,puede ajustar el temporizador para que la unidad se apague automáticamente.1. Oprima repetidamente el botón TIMER (Fig. 4) hasta iluminar el LED verde
correspondiente cerca del tiempo que desea seleccionar, 15, 30 ó 60 minutos.2. Para cancelar el temporizador, presione alternativamente el botón TIMER hasta
alcanzar la luz LED verde, que indica que está en la posición OFF (apagado),o presione POWER (Fig. 4).
Ajuste y uso de la alarmaAjuste y uso de la Alarma 1 o Alarma 2 (individualmente)1. Deslice el interruptor de la alarma a la posición ALARM 1 o ALARM 2 (Fig. 3).
En la pantalla LCD aparecerá un icono de ALARM BELL (timbre de alarma) (Fig. 2).2. Oprima el botón ALARM SET. (Fig. 4). La hora empieza a destellar. 3. Con la hora destellando, oprima el botón HOUR (hora) (Fig. 1) hasta alcanzar la
hora correcta. Luego oprima el botón MIN (minutos) (Fig. 1) hasta alcanzar losminutos correctos.
4. Después de 5 segundos la hora seleccionada para la alarma dejará de destellar yquedará programada, o usted puede oprimir el botón ALARM SET para confirmar.ATENCIÓN: El indicador PM también se aplica a la alarma. Usted puederevisar el ajuste de la alarma en cualquier momento oprimiendo el botónALARM SET.
5. Oprimiendo el botón ALARM MODE, usted puede seleccionar una de 3opciones; BEEP (pitido), SOUND (sonido), o RADIO. Una luz LED verdeaparecerá cerca del modo de despertador seleccionado. (Fig. 4)ATENCIÓN: Cuando se usa el modo SOUND, la unidad quedará ajustadacon el último sonido que usted ha escuchado. Si desea cambiarlo, oprimael sonido con el cual desea despertarse (Fig. 5) y luego oprima el botónPOWER (Fig. 4).
6. Cuando la alarma empieza a sonar, usted puede hacer lo siguiente:a. SNOOZE (alarma repetida): Oprima el botón SNOOZE (Fig. 1). Le quedarán
9 minutos más para dormir. Usted puede usar esta función hasta apagar laalarma.
b. REAJUSTE: Apague la alarma oprimiendo CUALQUIER botón de la unidad,excepto el botón SNOOZE (Fig. 4). La alarma volverá a programarseautomáticamente para el día siguiente en al modo actual. El icono ALARMBELL y el LED verde quedarán en pantalla para indicar que la alarma ha sidoajustada. Si desea cambiar el modo del despertador, siga el paso 5 en lasección Ajuste y Uso de la Alarma 1 y Alarma 2 individualmente.
c. OFF (apagado) Para apagar la alarma por completo para que no quedeprogramada para el día siguiente, deslice el interruptor de alarma a laposición OFF.
ATENCIÓN: Si la alarma suena por 30 minutos seguidos, se apagaautomáticamente.
Figura 5
26 27
Ajuste y uso de la Alarma 1 o Alarma 2 (en conjunto)1. Deslice el interruptor de la alarma a la posición ALARM 1&2 (Fig. 3). En la
pantalla LCD aparecerán los dos iconos de ALARM BELL (timbre de alarma)(Fig. 2). ATENCIÓN: Usted no puede cambiar la hora de la alarma cuando ALARM1&2 está seleccionado. Si desea cambiar la hora de la alarma paracualquiera de las dos alarmas, siga el paso 1 en la sección Ajuste y Uso dela Alarma 1 o Alarma 2.
2. Oprimiendo el botón ALARM MODE, usted puede seleccionar una de3 opciones; BEEP (pitido), SOUND (sonido), o RADIO. Una luz LED verdeaparecerá cerca del modo de despertador seleccionado. (Fig. 4)ATENCIÓN: Cuando se usa el modo SOUND, la unidad quedará ajustadacon el último sonido que usted ha escuchado. Si desea cambiarlo, oprimael sonido con el cual desea despertarse (Fig. 5) y luego oprima el botónPOWER (Fig. 4).
3. Cuando la alarma empieza a sonar, usted puede hacer lo siguiente:a. SNOOZE (alarma repetida): Presione el botón SNOOZE (Alarma repetida)
(Fig. 1). Le quedarán 9 minutos más para dormir. Usted puede usar estafunción hasta apagar la alarma.
b. REAJUSTE: Apague la alarma oprimiendo CUALQUIER botón de la unidad,excepto el botón SNOOZE (Fig. 4). La alarma volverá a programarseautomáticamente para el día siguiente en al modo actual. Los iconosALARM BELL y el LED verde quedarán en pantalla para indicar que laalarma ha sido ajustada. Si desea cambiar el modo del despertador, sigael paso 2 en la sección Ajuste y Uso de la Alarma 1 y Alarma 2 en conjunto.
c. OFF (apagado) Para apagar la alarma por completo para que no quedeprogramada para el día siguiente, deslice el interruptor de alarma a laposición OFF.
ATENCIÓN: Si uno de los usuarios de la alarma todavía necesita su alarmaajustada, usted tiene que deslizar el interruptor de alarma en el respaldo de launidad a la alarma que corresponde a su hora de despertar.ATENCIÓN: Si la alarma suena por 30 minutos seguidos, se apagaautomáticamente.
Uso de la Función de Proyección1. Para encender la función de proyección, deslice el interruptor ON/OFF (Fig. 3) al
respaldo de la unidad en la posición ON (encendido). La hora y la temperaturaexterior se proyectan entonces en la pared o el cielorraso.ATENCIÓN: Si la función de proyección está apagada, usted puede oprimirel botón SNOOZE (alarma repetida) (Fig. 1) para activar la proyección por15 segundos.
2. El ángulo del proyector puede ajustarse para la proyección angular en elcielorraso moviendo el TUBO PROYECTOR hacia delante o atrás (Fig. 3).
3. Para cambiar el ángulo de visión de la hora y temperatura que aparece en lapared o el cielorraso, gire la PERILLA DE ROTACIÓN DE LA HORA hasta lograrel resultado deseado (Fig. 3).ATENCIÓN: La PERILLA DE ROTACIÓN DE LA HORA gira hasta350 grados.
4. Para enfocar la hora y la temperatura en la pared el cielorraso, gire la perilla delenfoque (FOCUS KNOB) (Fig. 3) hasta lograr el resultado deseado.
Uso de la Temperatura Interior La unidad empieza a leer la temperatura al interior cuando queda enchufada.Deje pasar unos minutos para que la lectura correcta de la temperatura quederegistrada en la pantalla LCD. (Fig. 2)
Uso de la Temperatura ExteriorAsegúrese de que el SoundSpa está enchufado antes de instalar la batería delsensor remoto.

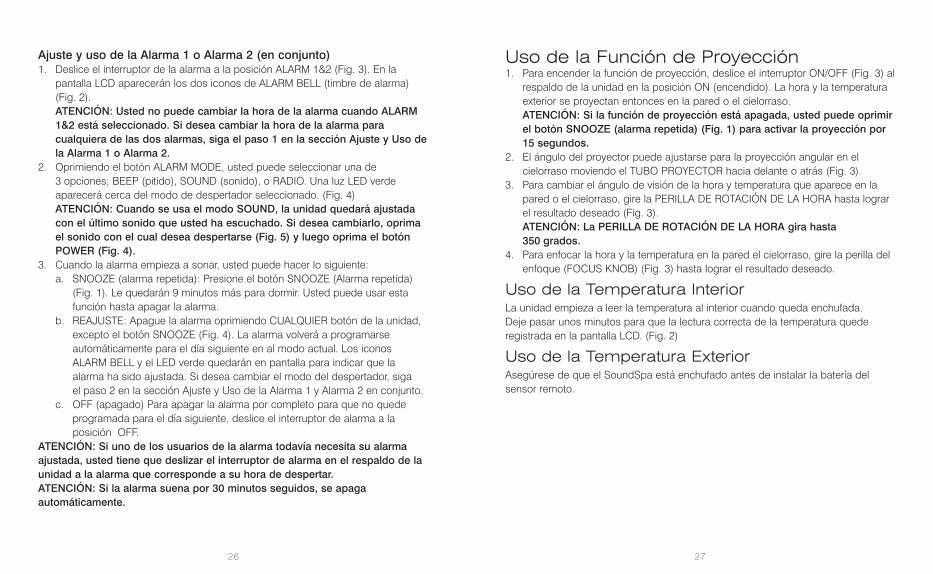
Instalación de la Batería del Sensor Remoto: 1. Con el destornillador pequeño (incluido), afloje los 4 tornillos que
sujetan la tapa de la batería y retírela. Introduzca 2 bateríasalcalinas AAA de acuerdo con la dirección de la polaridad que seindica.
2. Coloque el receptor doméstico (SoundSpa Premier) tan cercacomo sea posible al sensor remoto. Eso ayuda a sincronizar lasdos unidades.ATENCIÓN: Cuando esté listo para colocar el sensor remotoy el receptor doméstico, asegúrese de que la distancia entrelos dos no exceda el límite efectivo de transmisión (30 m – 100 pies). Algunos materiales de construcción yciertas ubicaciones del receptor doméstico y del sensorremoto pueden afectar la calidad y la distancia de latransmisión. Para los mejores resultados, ensaye variasubicaciones.
3. Oprima el botón C/F al interior del sensor remoto para cambiarentre Co y Fo. (El sensor remoto está preajustado en Fo).
4. Oprima el botón TX al interior del sensor remoto para verificar larecepción.
5. Vuelva a colocar la tapa y ajuste los 4 tornillos.ATENCIÓN: Se recomienda ensayar las unidades a cortadistancia entre ellas para asegurar que tanto el sensorremoto como el receptor doméstico estén propiamentesincronizados.
Instrucciones de Montaje del Sensor RemotoEl Sensor Remoto viene con un soporte de mesa o puede montarseen la pared.
Colocación en la mesa -Simplemente abra el soporte sujetado a la repisa de montaje.
Montaje de pared -Coloque un tornillo en el lugar deseado de la pared y monte launidad. Se incluyen un tornillo y un taco de pared por suconveniencia.
ATENCIÓN: Mantenga el sensor remoto fuera de la luz solar y lluvia directas.No monte la unidad sobre una superficie metálica.
Indicación de Batería Baja del Sensor RemotoLa indicación de batería baja está disponible en el sensor remoto. El icono “ ”de carga de batería aparece en el sensor remoto. Reemplace las baterías segúnsea necesario y siga el procedimiento de ajuste.
INSTRUCCIONES DE CUIDADO YMANTENIMIENTO• Para prevenir daños a las unidades, es importante evitar temperaturas extremas,
golpes o las áreas que presenten vibraciones anormales.• Limpie las unidades usando sólo un trapo suave y húmedo para limpiar. No use
solventes, abrasivos, detergentes u otros agentes limpiadores agresivos.Después de limpiar las superficies, séquelas con un paño seco.
• No sumerja la unidad en agua u otros líquidos.• No someta las unidades a temperaturas extremadamente severas -
NO COLOQUE LAS UNIDADES EN EL HORNO, EN EL CONGELADOR o en elHORNO DE MICROONDAS.ATENCIÓN: El abrir la caja (con exclusión del compartimiento para lasbaterías) del Sensor Remoto o deL Sound Spa anula la garantía. No tratede repara esta unidad – No hay partes que necesiten servicio por partedel usuario.
28 29

SOLUCIÓN DE PROBLEMASLas temperaturas interiores y exteriores no coinciden cuando se colo-can una junto a la otra – El sensor está fabricado para tener una tolerancia de +/-2 grados en la precisión,bajo condiciones normales. Así que es posible tener hasta dos grados de diferenciaen sensores de temperatura separados (uno podría tener “+2” grados y el otro “-2”grados). Además, la curva de calibración es diferente entre las dos unidades porqueel sensor de temperatura exterior tiene un rango de temperaturas más amplio.Los errores por lo general aparecen en los extremos de los rangos de temperatura.
La unidad SoundSpa no recibe transmisiones remotas – La unidad puede no estar sincronizada correctamente o puede ser necesariosustituir las baterías. Ver la sección “USO DE LA TEMPERATURA EXTERIOR” parainstrucciones detalladas. Trate de lograr la sincronización teniendo las dos unidadesa corta distancia entre ellas. Recuerde de colocar siempre el sensor remoto dentrode la distancia efectiva de transmisión y lejos de grandes superficies metálicas.
¿Cuál es el tipo de batería recomendada?Recomendamos usar sólo baterías alcalinas.
¿Adonde puedo montar el sensor remoto?Para lograr lecturas precisas y extender la vida útil del sensor, recomendamos elmontaje al abrigo de la luz solar directa y de la lluvia. La niebla y la bruma noafectan al sensor, pero grandes cantidades de lluvia intensa pueden afectarlo. Paraprotegerlo, recomendamos el montaje debajo del voladizo de su casa, del garajeo cualquier otro lugar adecuado que lo abrigue de la luz solar directa y de la lluvia.Las modificaciones no autorizadas por el fabricante pueden invalidar el derecho delusuario a operar este dispositivo.
La lectura de la temperatura exterior indica “- - ”Esto puede indicar una batería baja o fuera de la distancia efectiva de transmisión.
CARACTERÍSTICASRango de la medida de temperatura:Temperatura al interior: desde +32º F hasta +122º F (desde 0º C hasta + 50º C)Sensor Remoto: desde -4º F hasta +140º F (desde -20º C hasta +60º C)Transmisión: máx. 100 pies (30 m) en espacios abiertos, RF434 MHz
DESCARGO DE RESPONSABILIDAD de la FCCEste artefacto cumple con la sección 15 de las reglas de la FCC (Comisión Federalde Comunicaciones). El funcionamiento está sujeto a las siguientes doscondiciones:1. Este artefacto no puede causar interferencias nocivas; y2. Este artefacto debe aceptar cualquier interferencia que reciba, incluyendo la
interferencia que pueda causar un funcionamiento no deseado.Frec. 434 MHzNº de ID de la FCC: TG3SS-5000TX (Transmisor)Las modificaciones no autorizadas por el fabricante pueden invalidar el derecho delusuario a operar este dispositivo.
ATENCIÓN: Este equipo ha sido ensayado y probado y se ha comprobado quecumple con los límites de los dispositivos digitales de la Clase B, según laSección 15 de las Normas FCC. Estos límites han sido dispuestos paraproporcionar una protección razonable contra las interferencias dañinas en lasinstalaciones domésticas. Este equipo genera, usa y puede irradiar energía deradiofrecuencia y, si no se instala y usa según las recomendaciones, puedecausar interferencias dañinas a las comunicaciones radio. Sin embargo, no haygarantías de que dichas interferencias no se produzcan en una instalaciónparticular. Si este equipo causara interferencias dañinas a la recepción de radioo televisión, lo que puede determinarse encendiendo y apagando el equipo,se anima el usuario a que trate de corregir la interferencia con uno o más delos siguientes procedimientos:• Volver a orientar y ubicar la antena receptora.• Aumentar la distancia entre el equipo y el receptor.• Conectar el equipo a un tomacorriente eléctrico de un circuito diferente de aquel
donde está conectado el receptor.• Consultar con el representante o con un técnico experto de radio/TV para recibir
ayuda.AAtteenncciióónn:: EEll ffaabbrriiccaannttee nnoo eess rreessppoonnssaabbllee ppoorr nniinngguunnaa iinntteerrffeerreenncciiaa ddee
rraaddiioo oo TTVV ccaauussaaddaa ppoorr mmooddiiffiiccaacciioonneess nnoo aauuttoorriizzaaddaass ddee eesstteeeeqquuiippoo.. DDiicchhaass mmooddiiffiiccaacciioonneess ppuueeddeenn aannuullaarr eell ddeerreecchhoo ddeell uussuuaarriiooaall uussoo ddee eessttee eeqquuiippoo..
30 31