communicating with parents using...
TRANSCRIPT
090430.0821
Communicating with Parents Using HeadMaster
Communicating with Parents using HeadMaster - Page 2
Table of Contents
Setting up the School Calendar ................................................................................ 3 Creating Announcements .........................................................................................6 Creating Events ........................................................................................................ 8 Creating Correspondence ....................................................................................... 10 Uploading to HeadMaster Online .......................................................................... 15 HeadMaster Online for Parents ............................................................................. 18 HeadMaster Online for School Administration .................................................... 24
Communicating with Parents using HeadMaster - Page 3
Setting up the School Calendar
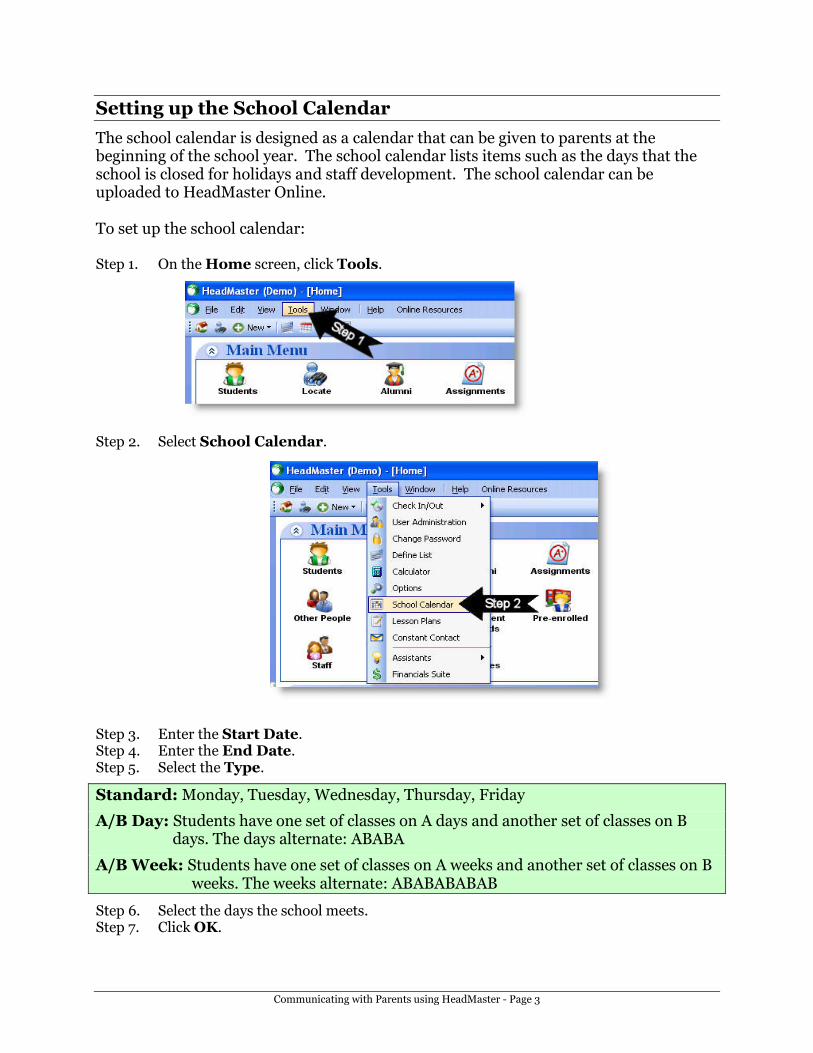
The school calendar is designed as a calendar that can be given to parents at the beginning of the school year. The school calendar lists items such as the days that the school is closed for holidays and staff development. The school calendar can be uploaded to HeadMaster Online. To set up the school calendar: Step 1. On the Home screen, click Tools.
Step 2. Select School Calendar.
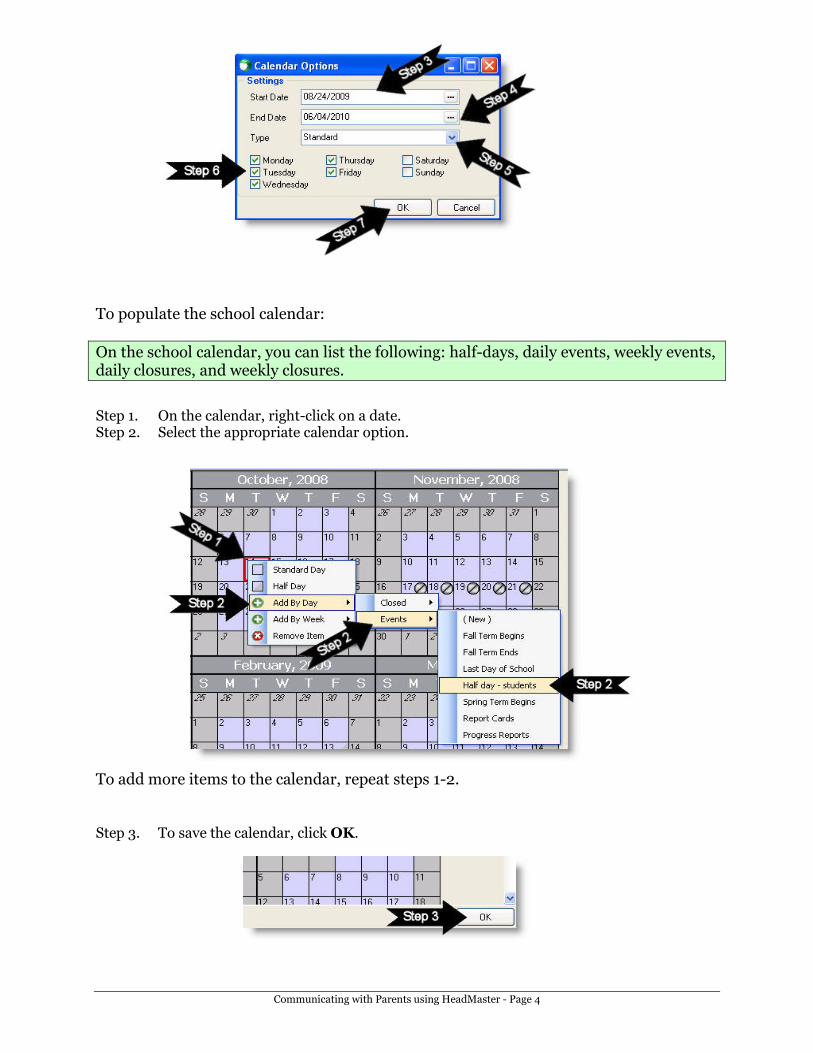
Step 3. Enter the Start Date. Step 4. Enter the End Date. Step 5. Select the Type.
Standard: Monday, Tuesday, Wednesday, Thursday, Friday
A/B Day: Students have one set of classes on A days and another set of classes on B days. The days alternate: ABABA
A/B Week: Students have one set of classes on A weeks and another set of classes on B weeks. The weeks alternate: ABABABABAB
Step 6. Select the days the school meets. Step 7. Click OK.
Communicating with Parents using HeadMaster - Page 4
To populate the school calendar:
On the school calendar, you can list the following: half-days, daily events, weekly events, daily closures, and weekly closures.
Step 1. On the calendar, right-click on a date. Step 2. Select the appropriate calendar option.
To add more items to the calendar, repeat steps 1-2. Step 3. To save the calendar, click OK.

Communicating with Parents using HeadMaster - Page 5
To print the calendar:
You have two options for printing:
1 - Calendar view: displays block calendars with the various activity symbols.
2 - Detail view: lists each month and activities that occur in that month
Step 1. On the calendar, click Print. Step 2. Select Calendar view or Detail view.
Calendar View:
Detail View:
Communicating with Parents using HeadMaster - Page 6
Creating Announcements
All levels of HeadMaster give you the option to create announcements. However, you must be using HeadMaster Online for your parents to view the announcements online. An announcement can be:
• School will be closed on Friday
• Half day of school on Monday
• Fund raising money due
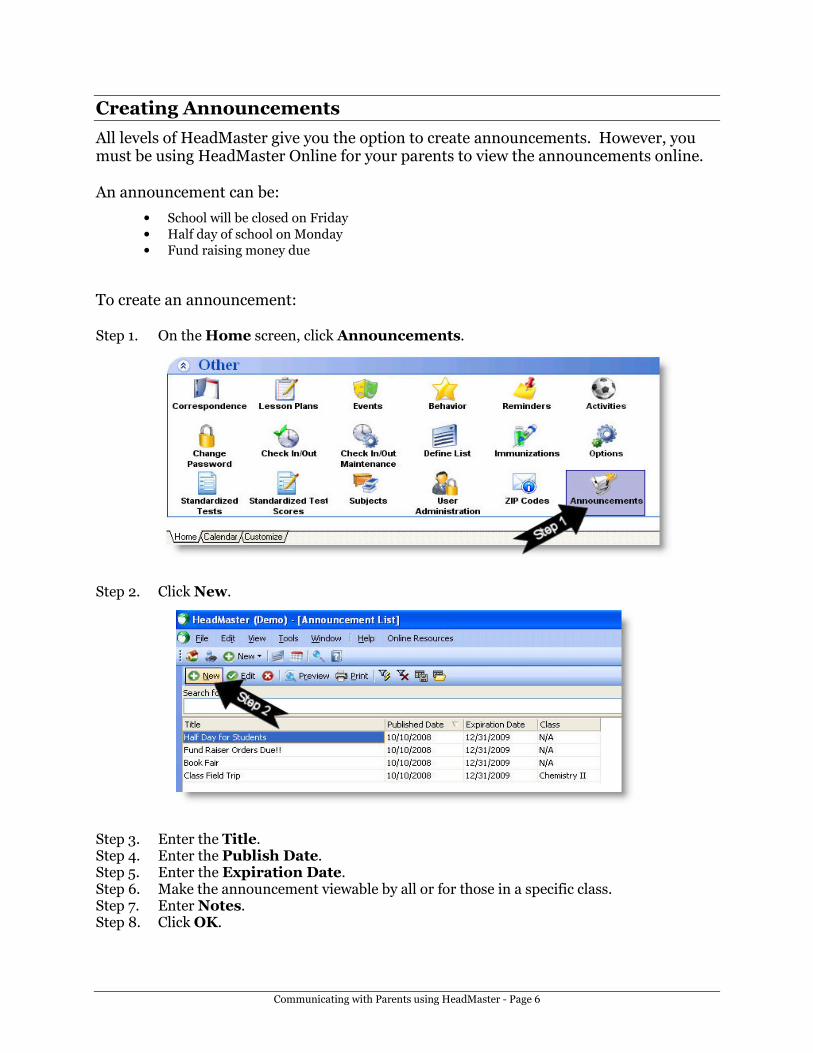
To create an announcement: Step 1. On the Home screen, click Announcements.
Step 2. Click New.
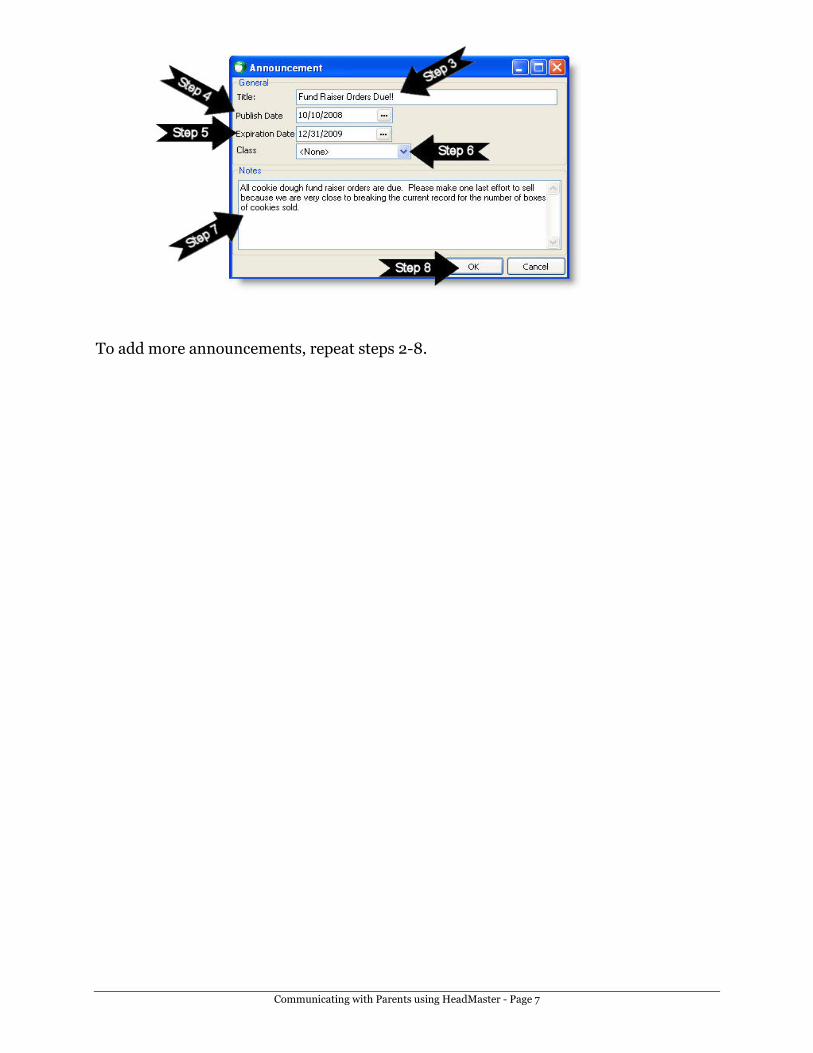
Step 3. Enter the Title. Step 4. Enter the Publish Date. Step 5. Enter the Expiration Date. Step 6. Make the announcement viewable by all or for those in a specific class. Step 7. Enter Notes. Step 8. Click OK.
Communicating with Parents using HeadMaster - Page 7
To add more announcements, repeat steps 2-8.
Communicating with Parents using HeadMaster - Page 8
Creating Events
You can create an unlimited number of events that will be uploaded to your HeadMaster Online calendar. Examples of events:
• Athletic games
• Concerts
• Field trips
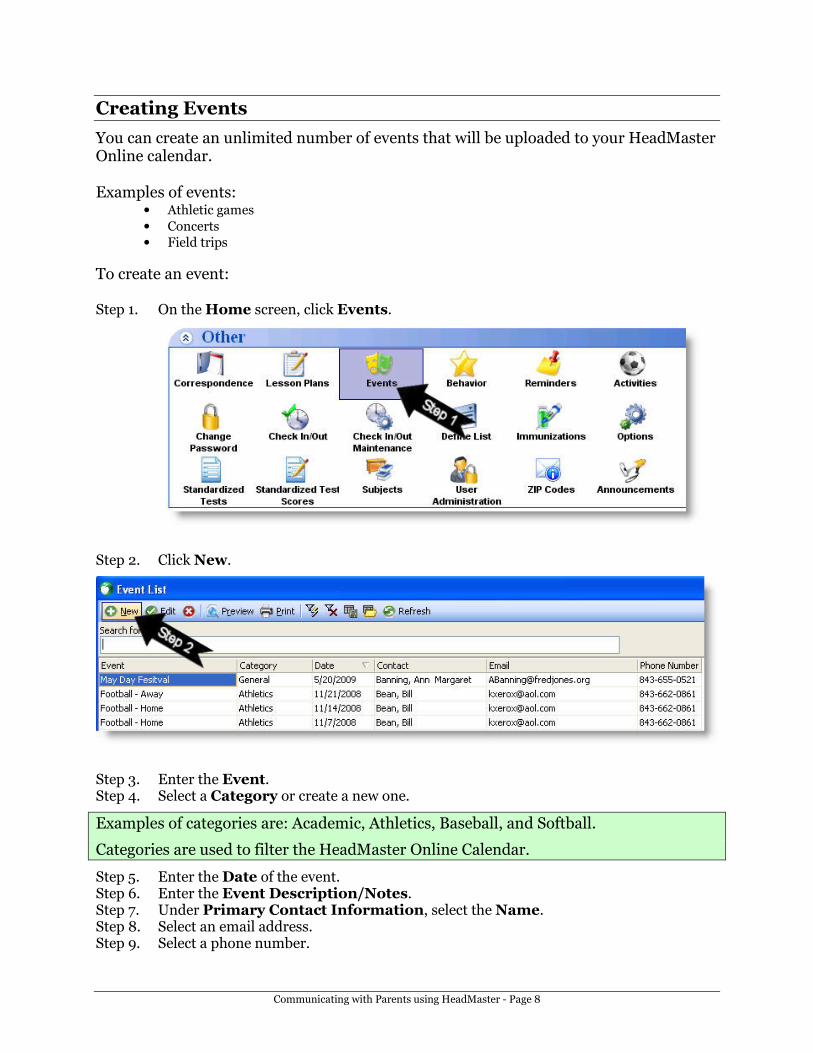
To create an event: Step 1. On the Home screen, click Events.
Step 2. Click New.
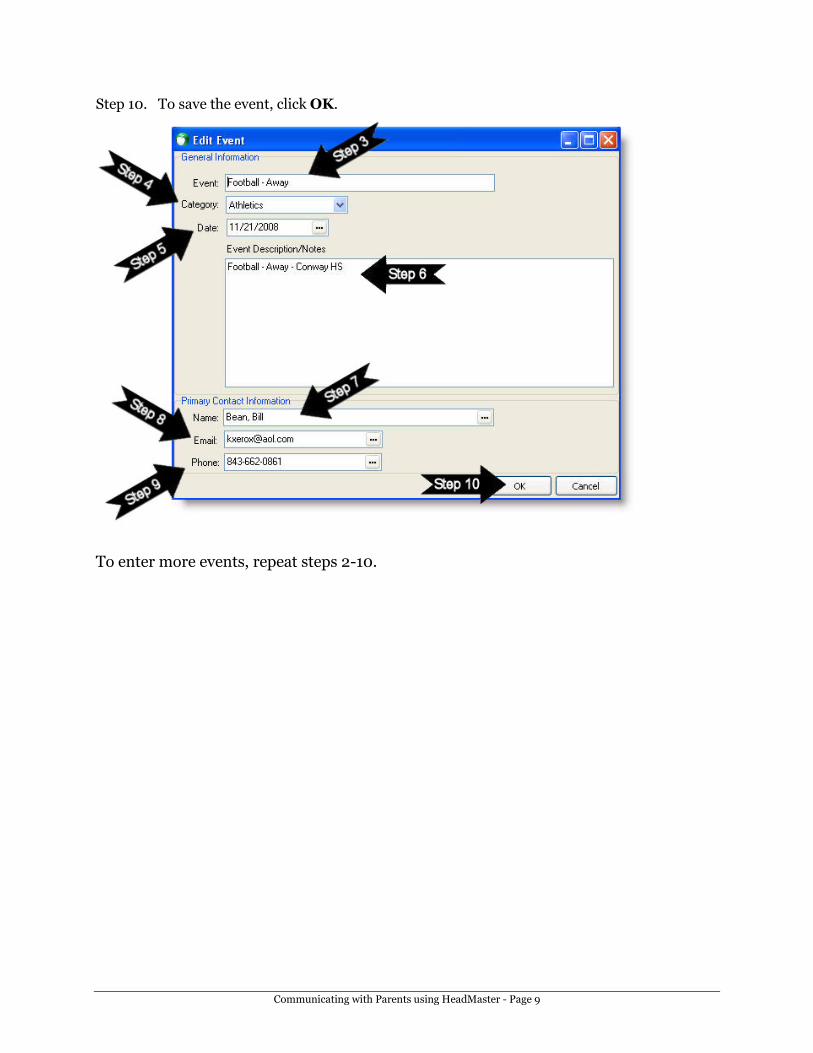
Step 3. Enter the Event. Step 4. Select a Category or create a new one.
Examples of categories are: Academic, Athletics, Baseball, and Softball.
Categories are used to filter the HeadMaster Online Calendar.
Step 5. Enter the Date of the event. Step 6. Enter the Event Description/Notes. Step 7. Under Primary Contact Information, select the Name. Step 8. Select an email address. Step 9. Select a phone number.
Communicating with Parents using HeadMaster - Page 9
Step 10. To save the event, click OK.
To enter more events, repeat steps 2-10.
Communicating with Parents using HeadMaster - Page 10
Creating Correspondence
With Correspondence, you can create form letters that display information directly from the HeadMaster database. Correspondence can be saved and edited for continued use from year to year.
You are able to print and/or mass e-mail correspondence.
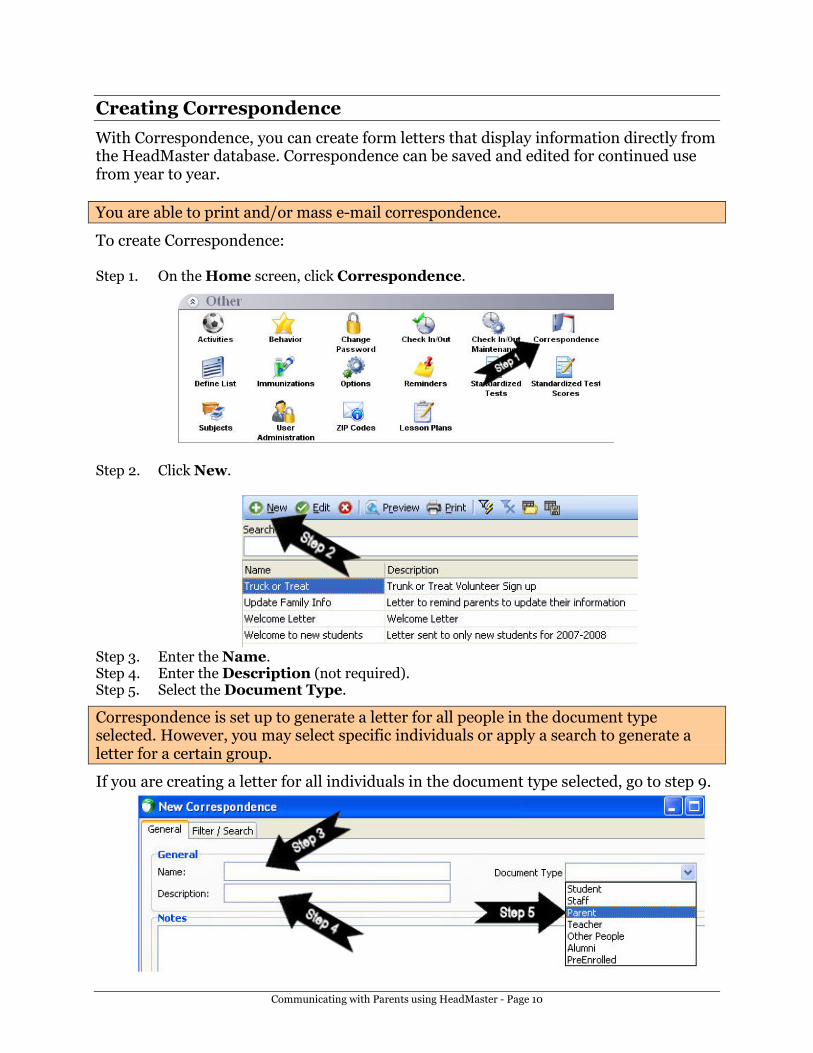
To create Correspondence: Step 1. On the Home screen, click Correspondence.
Step 2. Click New.
Step 3. Enter the Name. Step 4. Enter the Description (not required). Step 5. Select the Document Type.
Correspondence is set up to generate a letter for all people in the document type selected. However, you may select specific individuals or apply a search to generate a letter for a certain group.
If you are creating a letter for all individuals in the document type selected, go to step 9.
Communicating with Parents using HeadMaster - Page 11
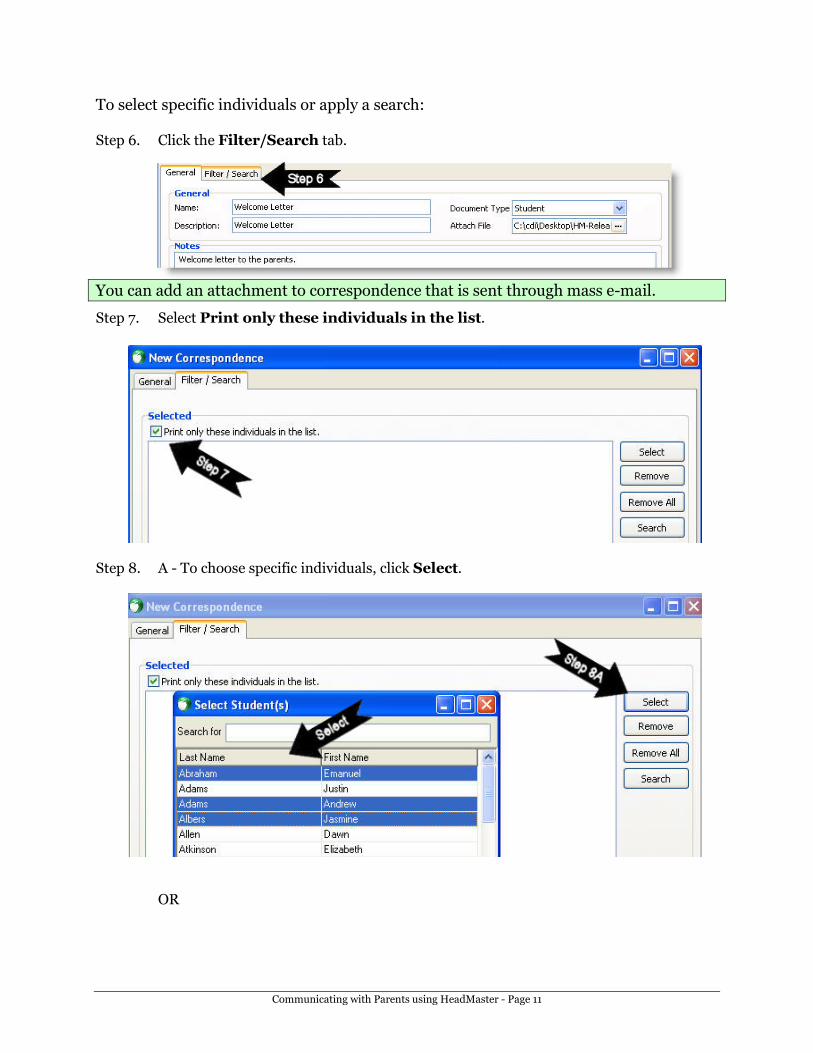
To select specific individuals or apply a search: Step 6. Click the Filter/Search tab.
You can add an attachment to correspondence that is sent through mass e-mail.
Step 7. Select Print only these individuals in the list.
Step 8. A - To choose specific individuals, click Select.
OR
Communicating with Parents using HeadMaster - Page 12
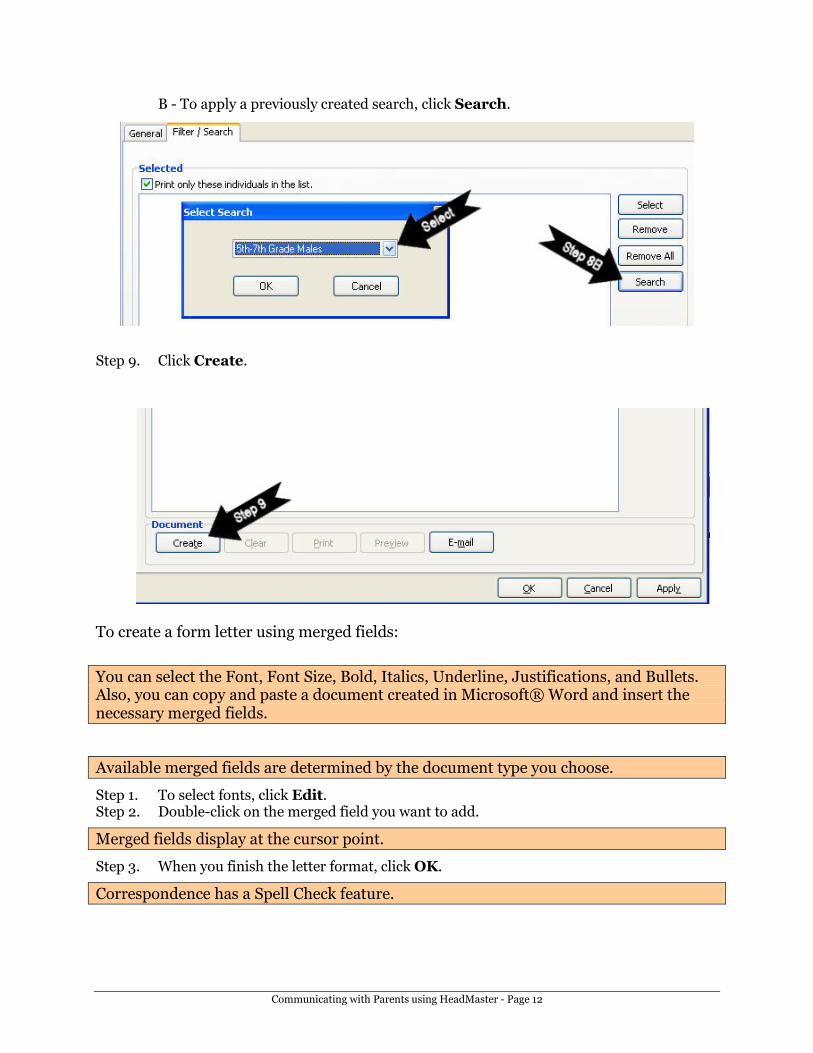
B - To apply a previously created search, click Search.
Step 9. Click Create.
To create a form letter using merged fields:
You can select the Font, Font Size, Bold, Italics, Underline, Justifications, and Bullets. Also, you can copy and paste a document created in Microsoft® Word and insert the necessary merged fields.
Available merged fields are determined by the document type you choose.
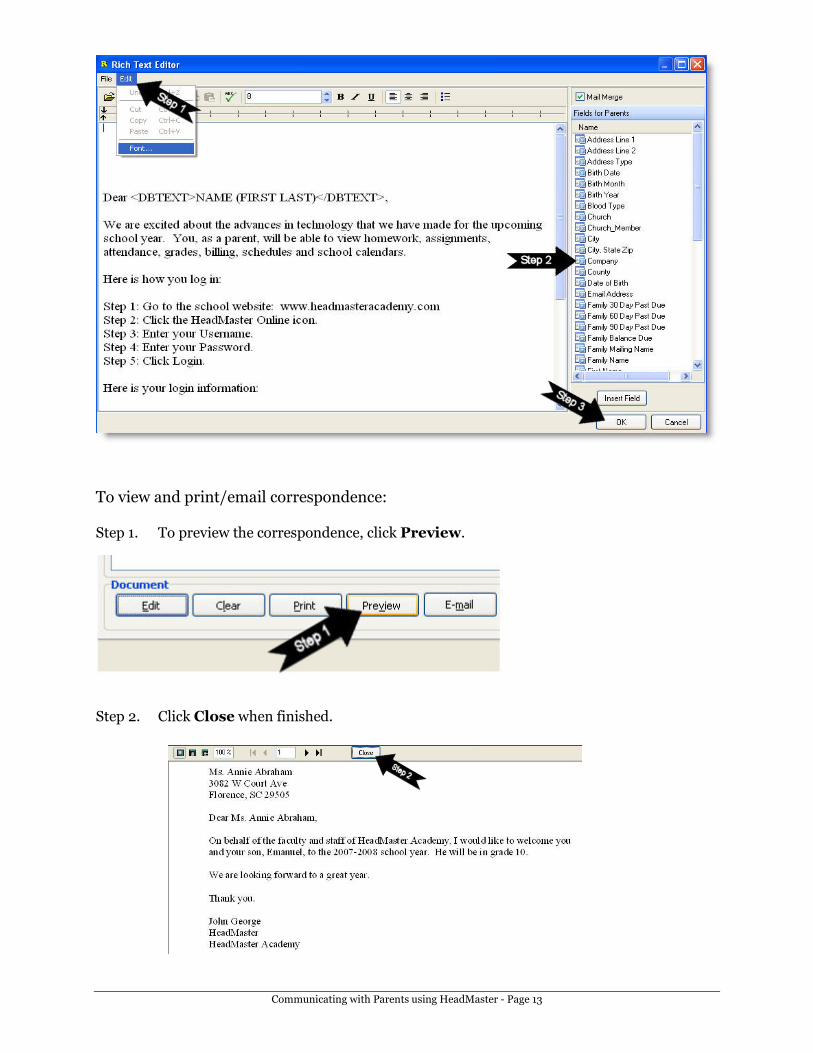
Step 1. To select fonts, click Edit. Step 2. Double-click on the merged field you want to add.
Merged fields display at the cursor point.
Step 3. When you finish the letter format, click OK.
Correspondence has a Spell Check feature.
Communicating with Parents using HeadMaster - Page 13
To view and print/email correspondence: Step 1. To preview the correspondence, click Preview.
Step 2. Click Close when finished.
Communicating with Parents using HeadMaster - Page 14
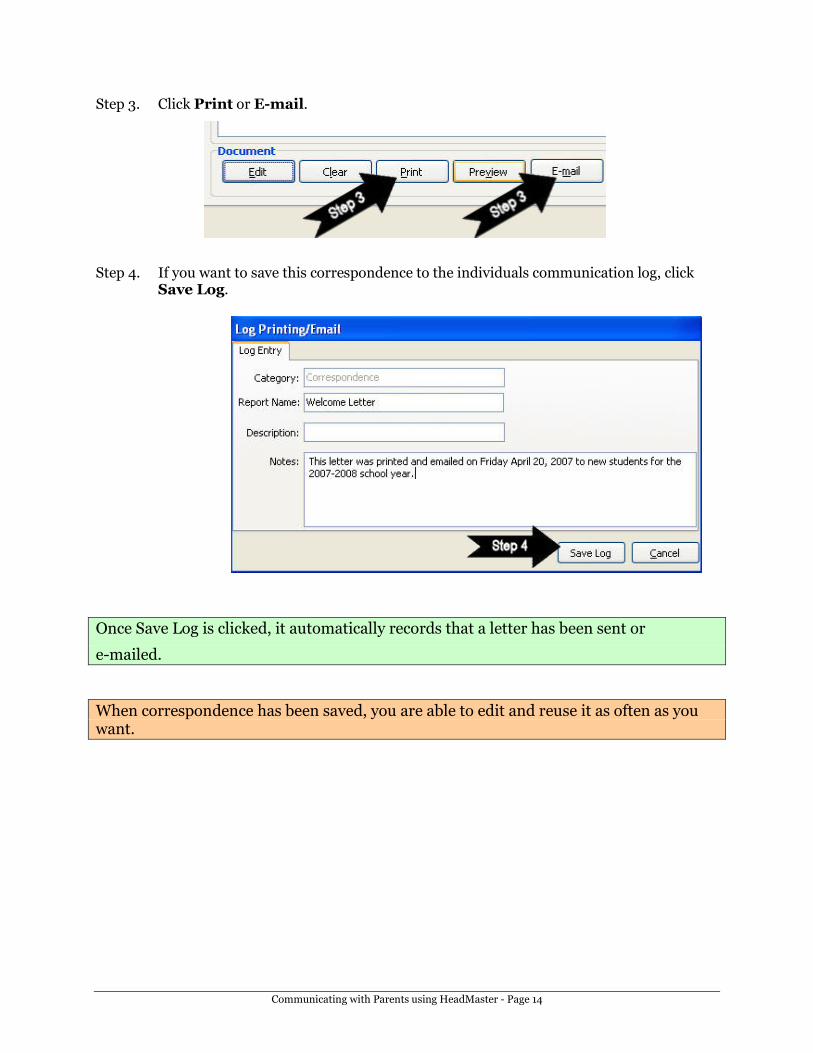
Step 3. Click Print or E-mail.
Step 4. If you want to save this correspondence to the individuals communication log, click Save Log.
Once Save Log is clicked, it automatically records that a letter has been sent or
e-mailed.
When correspondence has been saved, you are able to edit and reuse it as often as you want.
Communicating with Parents using HeadMaster - Page 15
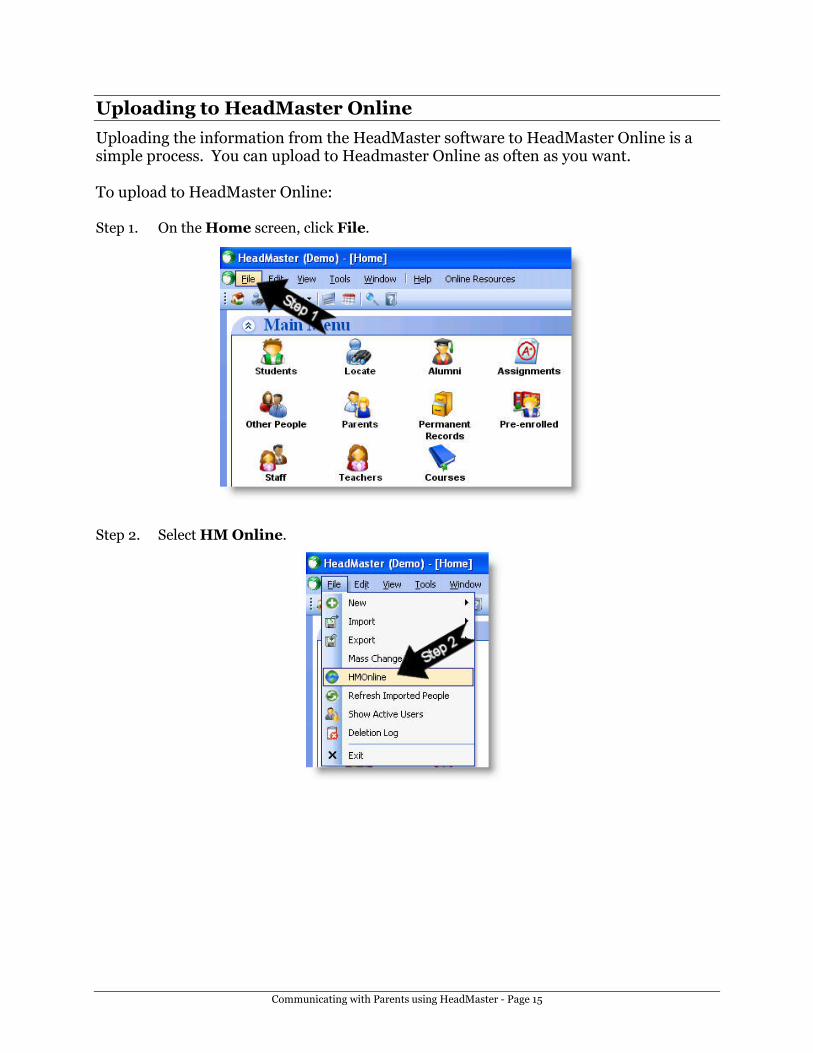
Uploading to HeadMaster Online
Uploading the information from the HeadMaster software to HeadMaster Online is a simple process. You can upload to Headmaster Online as often as you want. To upload to HeadMaster Online: Step 1. On the Home screen, click File.
Step 2. Select HM Online.
Communicating with Parents using HeadMaster - Page 16
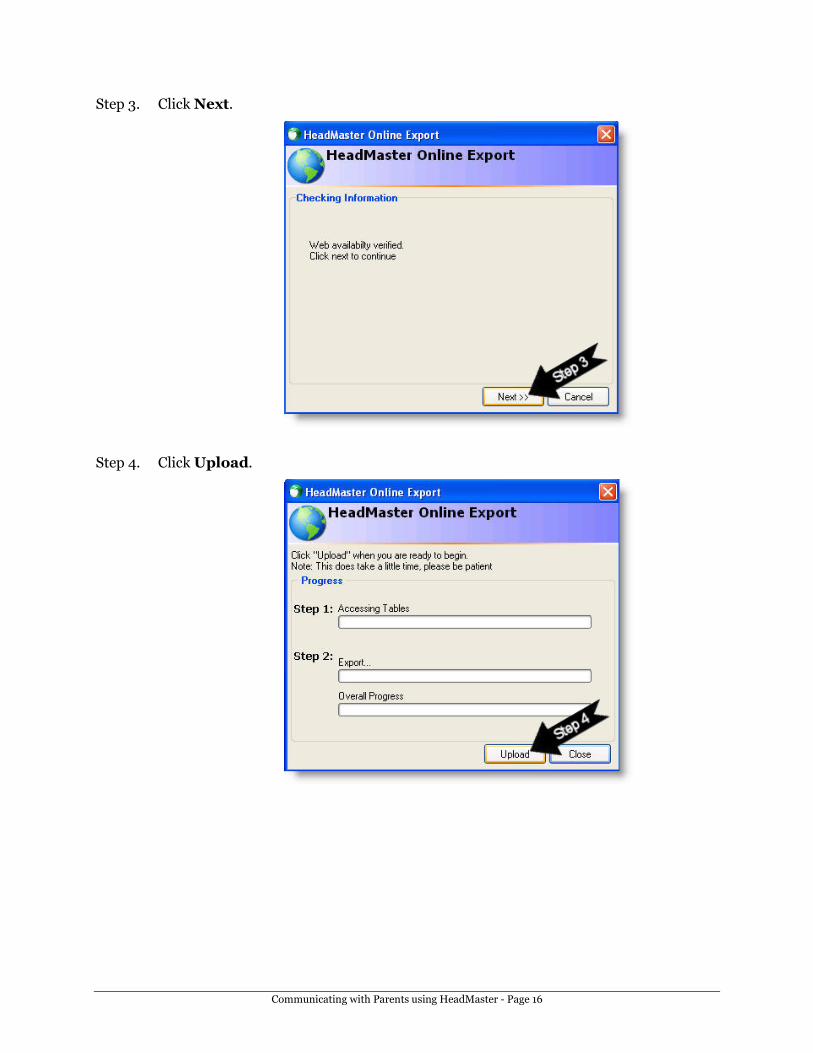
Step 3. Click Next.
Step 4. Click Upload.
Communicating with Parents using HeadMaster - Page 17
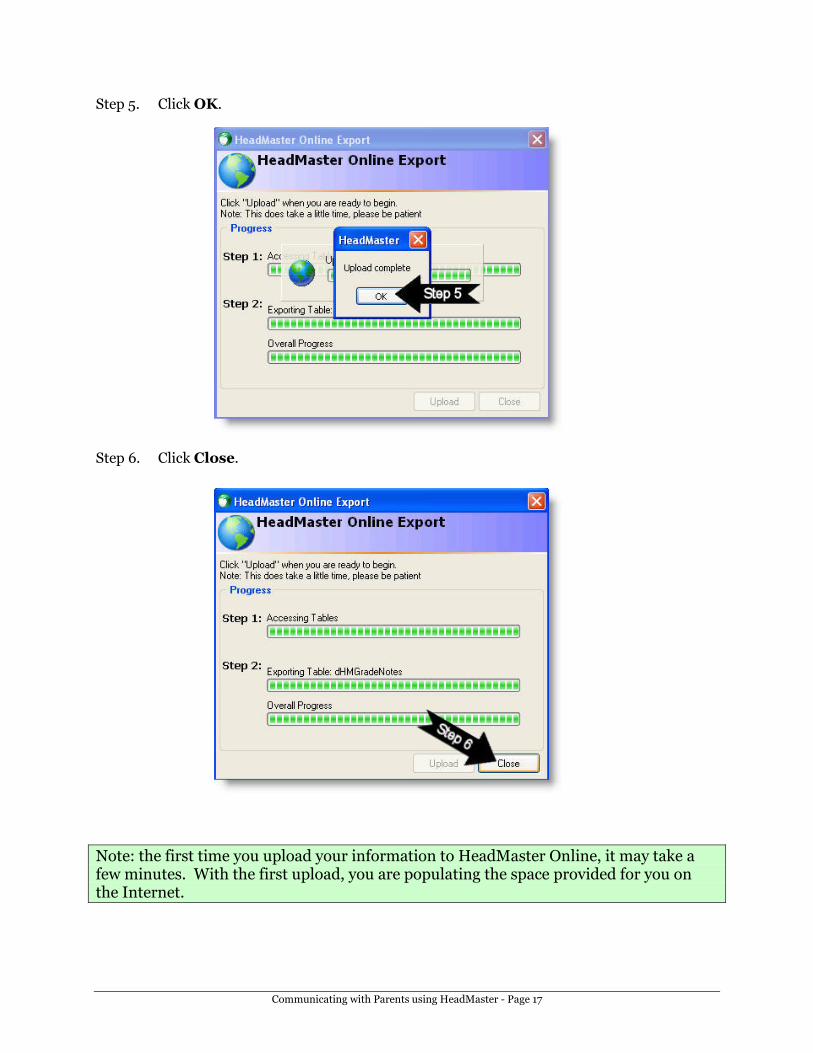
Step 5. Click OK.
Step 6. Click Close.
Note: the first time you upload your information to HeadMaster Online, it may take a few minutes. With the first upload, you are populating the space provided for you on the Internet.
Communicating with Parents using HeadMaster - Page 18
HeadMaster Online for Parents
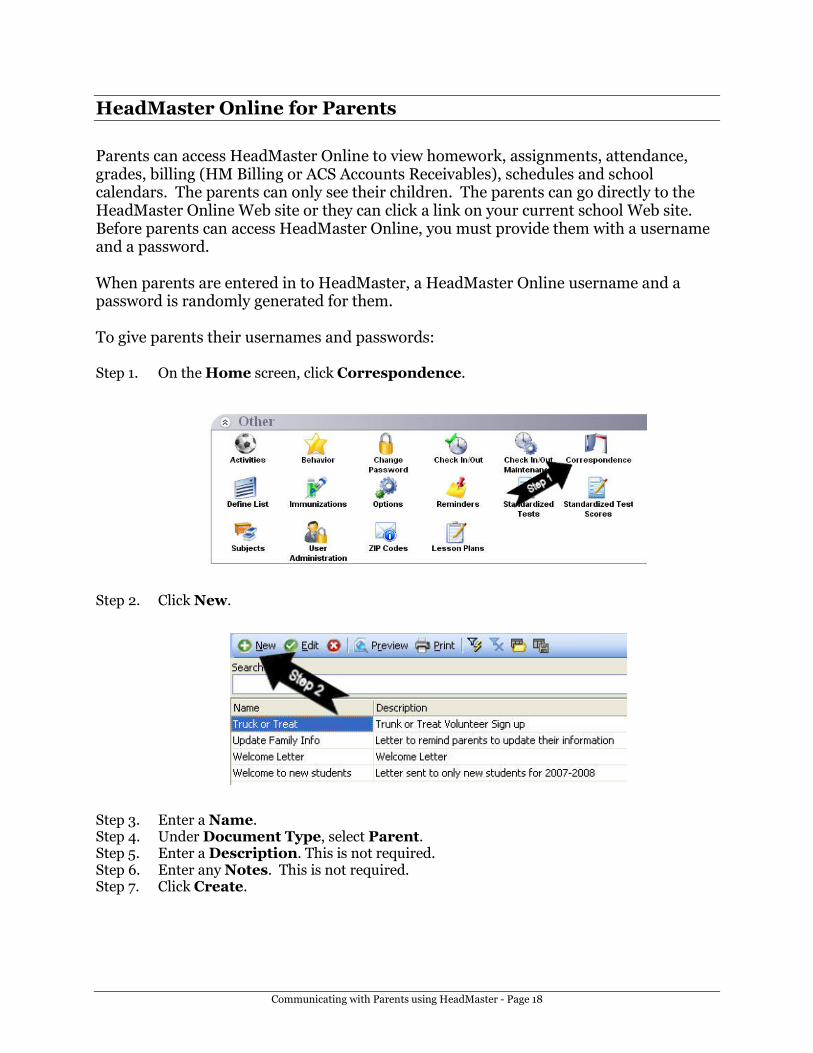
Parents can access HeadMaster Online to view homework, assignments, attendance, grades, billing (HM Billing or ACS Accounts Receivables), schedules and school calendars. The parents can only see their children. The parents can go directly to the HeadMaster Online Web site or they can click a link on your current school Web site. Before parents can access HeadMaster Online, you must provide them with a username and a password. When parents are entered in to HeadMaster, a HeadMaster Online username and a password is randomly generated for them. To give parents their usernames and passwords: Step 1. On the Home screen, click Correspondence.
Step 2. Click New.
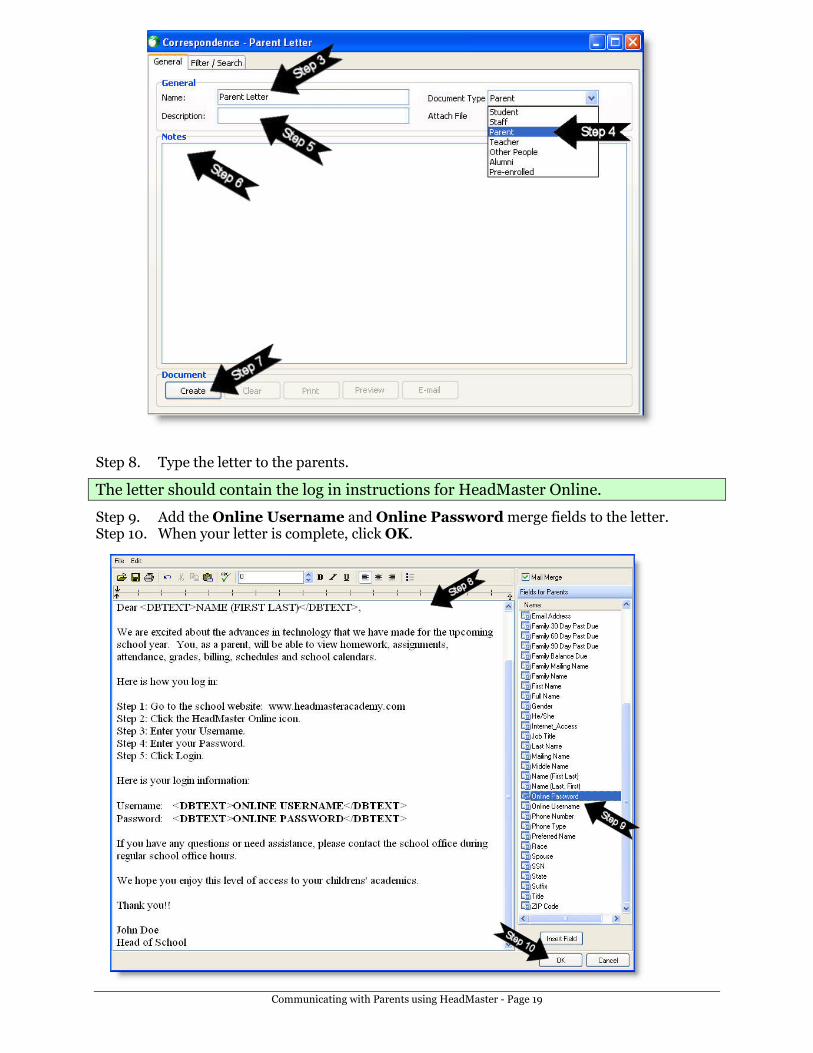
Step 3. Enter a Name. Step 4. Under Document Type, select Parent. Step 5. Enter a Description. This is not required. Step 6. Enter any Notes. This is not required. Step 7. Click Create.
Communicating with Parents using HeadMaster - Page 19
Step 8. Type the letter to the parents.
The letter should contain the log in instructions for HeadMaster Online.
Step 9. Add the Online Username and Online Password merge fields to the letter. Step 10. When your letter is complete, click OK.
Communicating with Parents using HeadMaster - Page 20
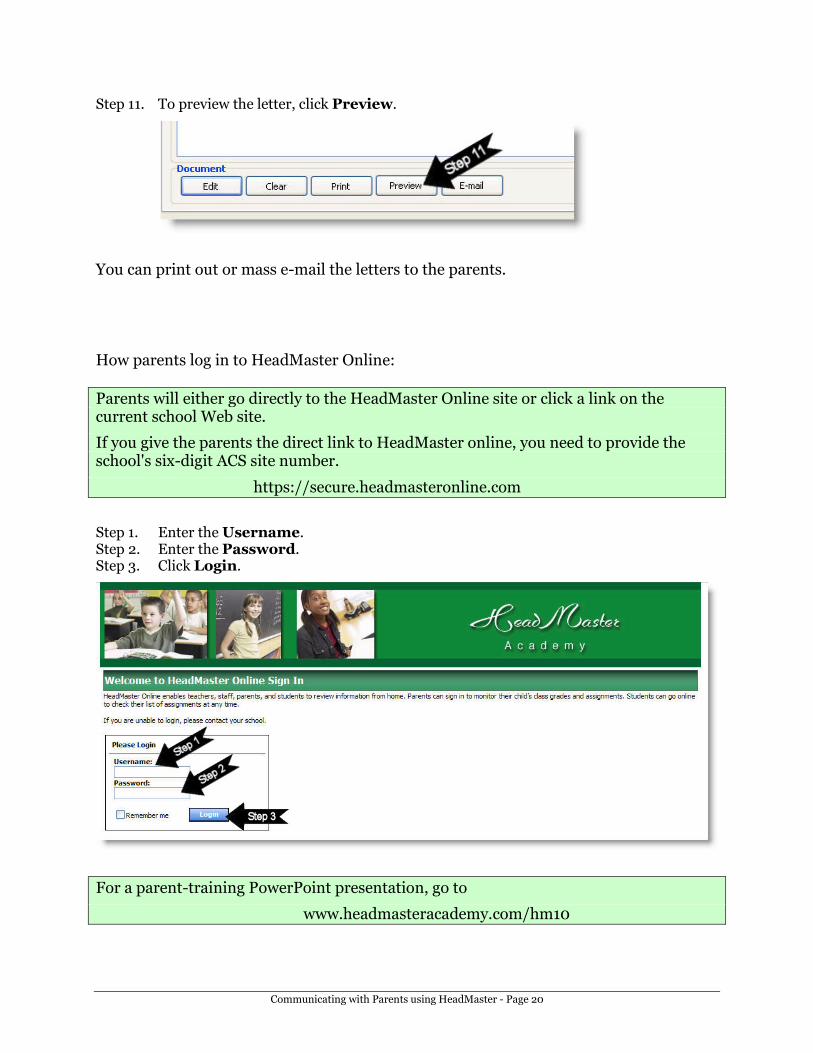
Step 11. To preview the letter, click Preview.
You can print out or mass e-mail the letters to the parents. How parents log in to HeadMaster Online:
Parents will either go directly to the HeadMaster Online site or click a link on the current school Web site.
If you give the parents the direct link to HeadMaster online, you need to provide the school's six-digit ACS site number.
https://secure.headmasteronline.com
Step 1. Enter the Username. Step 2. Enter the Password. Step 3. Click Login.
For a parent-training PowerPoint presentation, go to
www.headmasteracademy.com/hm10
Communicating with Parents using HeadMaster - Page 21
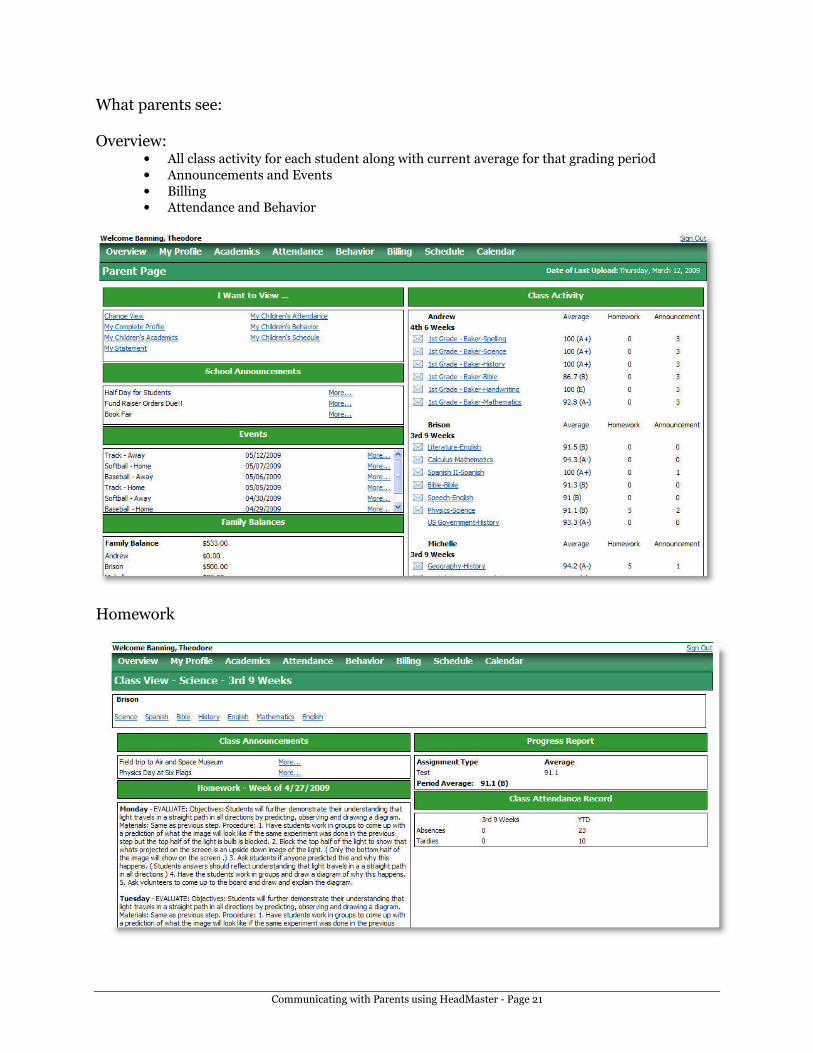
What parents see: Overview:
• All class activity for each student along with current average for that grading period
• Announcements and Events
• Billing
• Attendance and Behavior
Homework
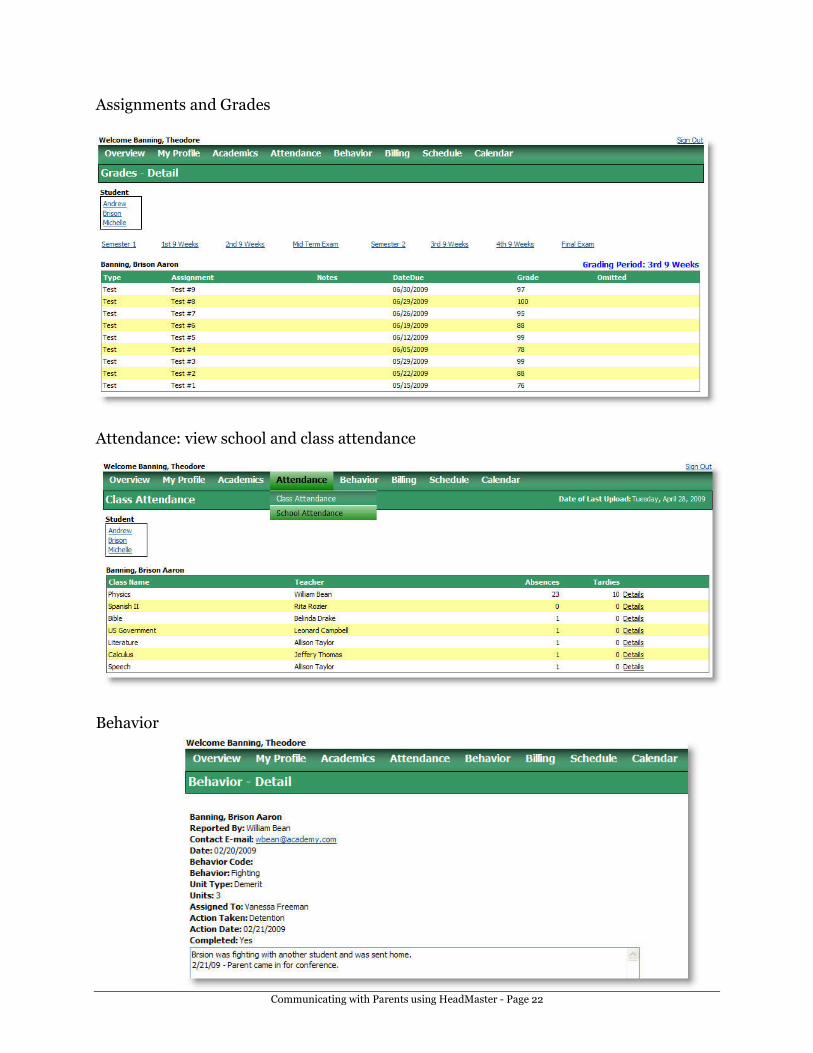
Communicating with Parents using HeadMaster - Page 22
Assignments and Grades
Attendance: view school and class attendance
Behavior
Communicating with Parents using HeadMaster - Page 23
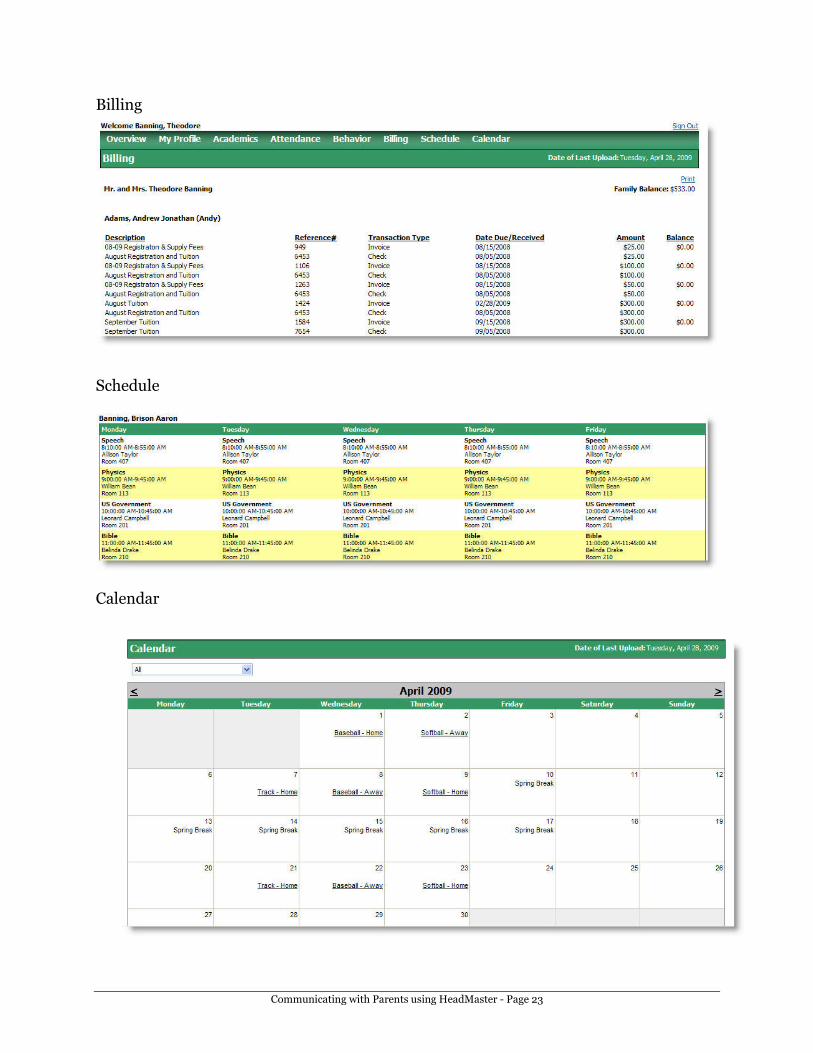
Billing
Schedule
Calendar
Communicating with Parents using HeadMaster - Page 24
HeadMaster Online for School Administration
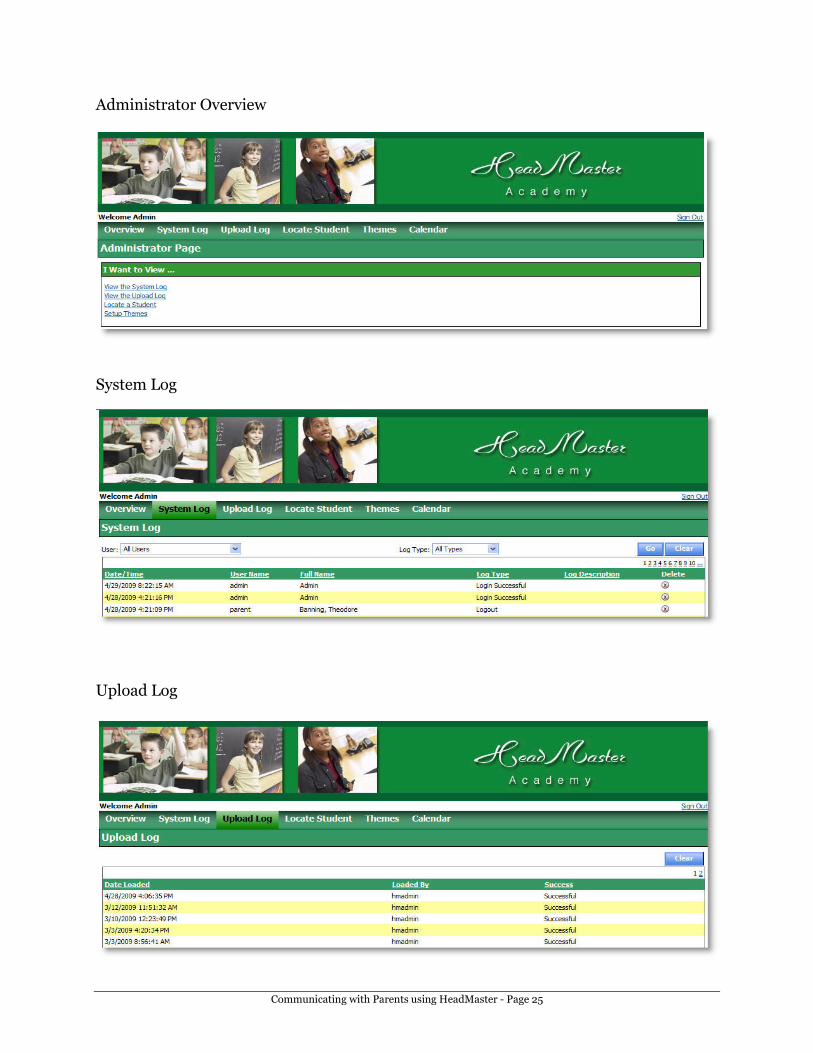
School administration can log in to HeadMaster online to do the following tasks: • View the System Log: view when individuals have logged in and out if their logins
were successful.
• View the Upload Log: view the dates and times of all uploads to HeadMaster Online.
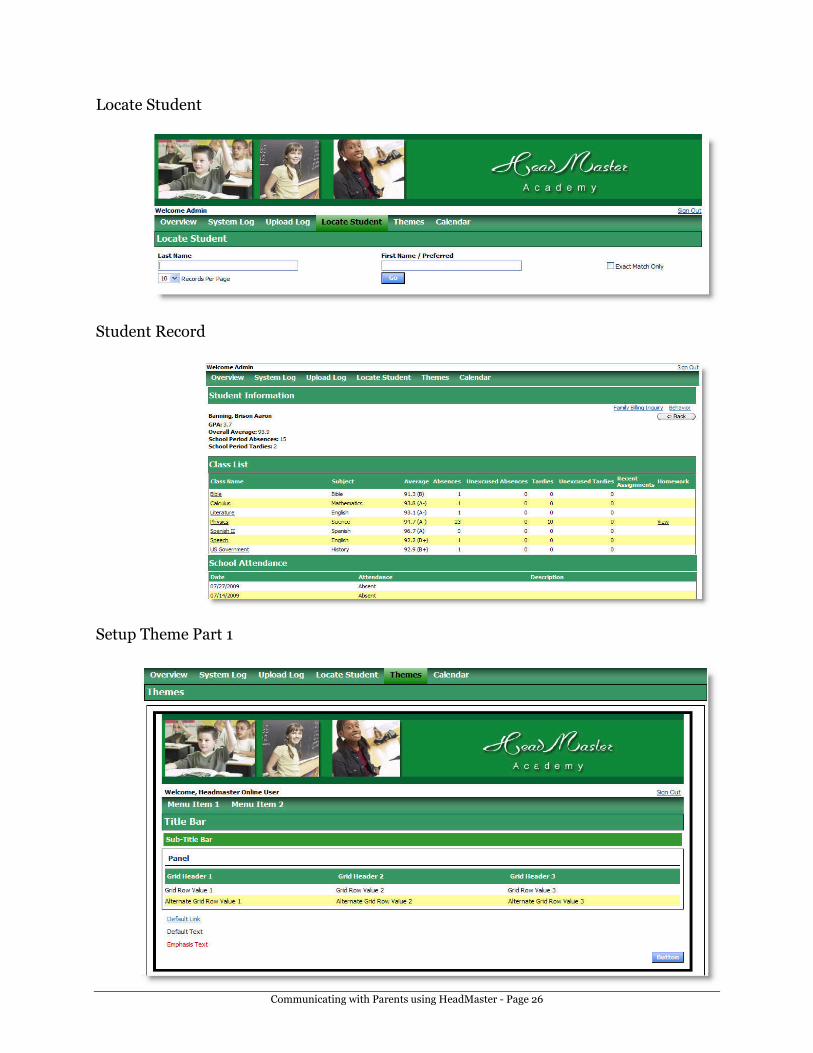
• Locate a Student: find a student quickly to view assignments, grades and attendance.
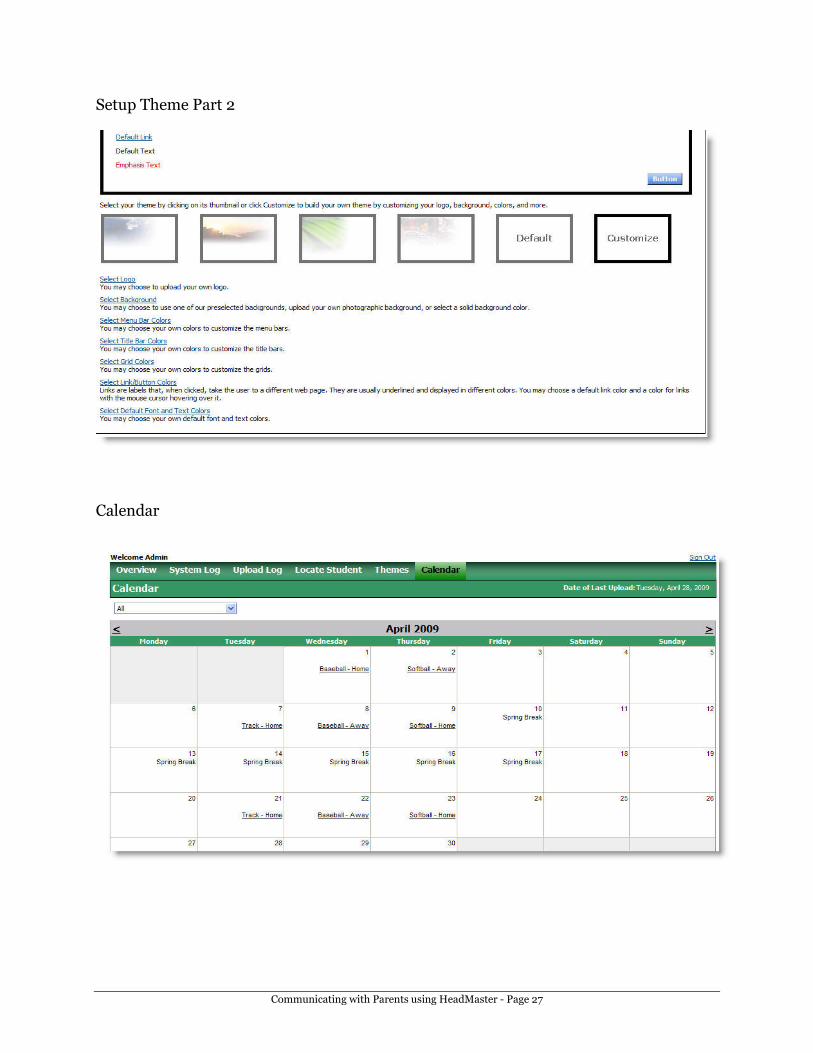
• Setup Themes: change the color scheme of HeadMaster Online to reflect your school colors and add your school logo.
To successfully upload your logo it must be in either JPG or GIF format and be no larger than 300 kilobytes. Its width dimension must be no more than 960 pixels. You may use a logo any height, however, we suggest limiting it to no more than 100 pixels.
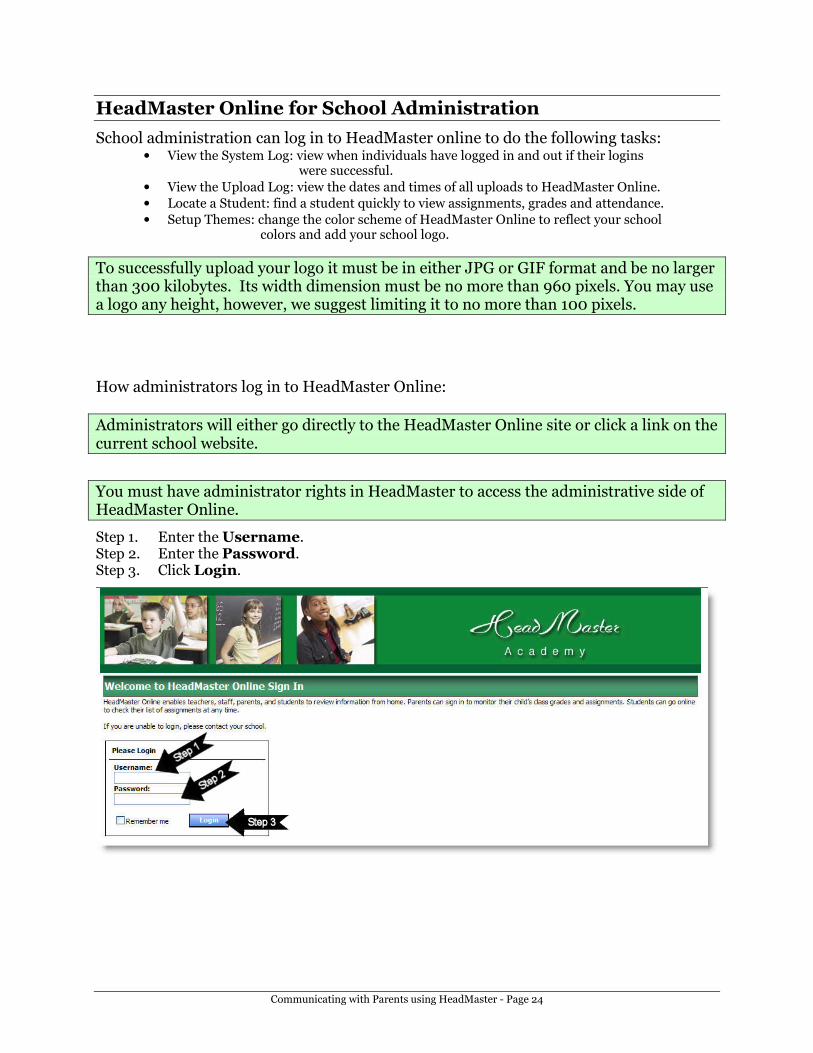
How administrators log in to HeadMaster Online:
Administrators will either go directly to the HeadMaster Online site or click a link on the current school website.
You must have administrator rights in HeadMaster to access the administrative side of HeadMaster Online.
Step 1. Enter the Username. Step 2. Enter the Password. Step 3. Click Login.
Communicating with Parents using HeadMaster - Page 25
Administrator Overview
System Log
Upload Log
Communicating with Parents using HeadMaster - Page 26
Locate Student
Student Record
Setup Theme Part 1
Communicating with Parents using HeadMaster - Page 27
Setup Theme Part 2
Calendar

Communicating with Parents using HeadMaster - Page 28
Communicating with Parents using HeadMaster - Page 29
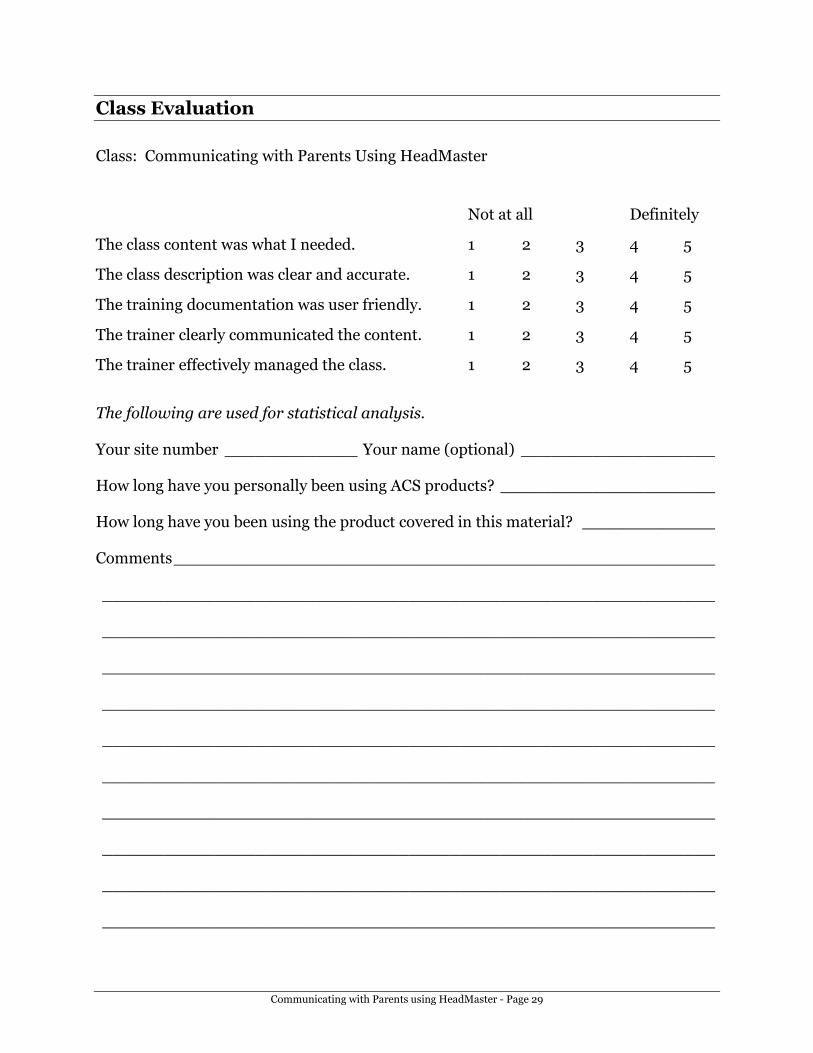
Class Evaluation
Class: Communicating with Parents Using HeadMaster
Not at all Definitely
The class content was what I needed. 1 2 3 4 5
The class description was clear and accurate. 1 2 3 4 5
The training documentation was user friendly. 1 2 3 4 5
The trainer clearly communicated the content. 1 2 3 4 5
The trainer effectively managed the class. 1 2 3 4 5
The following are used for statistical analysis. Your site number _____________ Your name (optional) ___________________ How long have you personally been using ACS products? _____________________ How long have you been using the product covered in this material? _____________ Comments _____________________________________________________ ____________________________________________________________ ____________________________________________________________ ____________________________________________________________ ____________________________________________________________ ____________________________________________________________ ____________________________________________________________ ____________________________________________________________ ____________________________________________________________ ____________________________________________________________ ____________________________________________________________