concrete driveways · 2017-02-21 · concrete. b) a 100 mmslump is adequate for placement. adding...
TRANSCRIPT

T E C H N I C A L S P E C I F I C A T I O N S
Concrete Driveways Parking Lots ● Patios ● Sidewalks
6 STEPS TO SUCCESS
A concrete driveway represents an investment that is designed to last a lifetime, provided proper procedures are followed.
The average homeowner will not normally be able to install a concrete driveway without expert assistance. It is strongly recommended that a qualified contractor be engaged to ensure a satisfactory job.
To provide a quality driveway, the following guidelines should be carefully observed.
(Concrete should be placed between April and September. If placed outside this time frame, additional precautions will be necessary.)
1 DETERMINE THE REQUIRED THICKNESS (MINIMUM)
a) For cars and pick-ups 100 mm
b) For light trucks 125 mm
c) For occasional heavier trucks 150 mm
(placed on competent subgrade)
2 SITE PREPARATION
Concrete can be placed directly on uniform subgrade after removing the topsoil, or on deteriorated asphalt pavement. Excavate or bring to grade as necessary using granular ‘A’ as leveling course (typically 100 mm).
a) Make sure subgrade is uniform, well compacted and contains no frozen material.
b) Slope away from buildings at 2%.
c) Install isolation joints using asphalt impregnated board strips (see Figure 1).
d) To form driveway, use stiff wood forms kept in position with stakes not more than 1 metre apart. Top of stakes should be flush with, or slightly below the top of form at finished grade [see screeding – section 4(e)].
e) Plan exact position of concrete joints [see part 6] before starting the project and mark the locations on the formwork prior to concrete placement.
FIGURE 1
DO NOT ALLOW power floats or trowels to be used. Overworking the fresh concrete causes scaling. This extra finishing is not required and will reduce the durability of the slab.

This publication is intended for general information purposes only. The Ready Mixed Concrete Association of Ontario disclaims any and all responsibility and liability for the accuracy and the application of the information contained in this publication to the full extent permitted by law. No part of this publication may be reproduced in any form, including photo-copying or other electronic means, without permission in writing from Ready Mixed Concrete Association of Ontario.
Technical information prepared by:
Ready Mixed Concrete Association of Ontario
#3 - 365 Brunel Road Mississauga, ON L4Z 1Z5
T: 905.507.1122 F: 905.890.8122
RMCAO.org © 2013 RMCAO
All rights reserved. 02/13
3 PLAN YOUR REQUIREMENTS FOR LABOUR AND MATERIAL
a) Concrete: Class C-2; 32 MPa; 0.45 w/cm ratio; 5% - 8% air entrainment; 100 mm slump (maximum), for all exterior slabs on grade as required by CAN/CSA-A23.1 & OBC using quality proven aggregate. 48 hours advance notice of delivery should be provided.
b) For coloured concrete, it is recommended that the colour be integrally mixed with the concrete at the time of batching. Air entrainment (5%-8%) must be measured after the colour has been mixed in.
c) Make sure adequate labour is on hand when concrete will be delivered – normally a minimum of 3 persons, but more for larger jobs or when placing on hot, dry days.
d) Check list of tools and materials needed:
large roll of plastic sheeting (protection from rain)
wheelbarrows and shovels
water supply for curing and wetting subgrade
long handled bull float about 120 mm wide minimum (preferably wood or magnesium for air entrained concrete)
straight rigid board for screeding
vapour retardant
concrete broom for texturing
curing materials (burlap and water or chemical curing compounds).
4 ORDER AND PLACE CONCRETE
a) Dampen the subgrade without leaving freestanding water. Place form release agent on the forms before placing concrete.
b) A 100 mm slump is adequate for placement. Adding water to increase the slump or workability has a very detrimental effect on both strength and durability of the concrete.
c) Distribute concrete using wheelbarrows (or directly from concrete mixer truck if possible); use shovels to bring to rough grade avoiding segregation.
d) Strike off the concrete to finish grade by using a straight board on edge between the forms – use “sawing” motion. Tap the forms to consolidate the concrete on the outside edges.
e) Screeding: Smooth the surface using the long handled bull float (use edging tool to finish edges) – DO NOT USE STEEL TROWELS.
f) For final non-slip finish use a concrete broom, burlap drag, magnesium float or impressed mat finish.
g) IF PLACING ON A HOT, DRY OR WINDY DAY, TAKE SPECIAL PRECAUTIONS
protect fresh concrete from rapid moisture loss by covering with plastic after screeding to keep surface moist, or use wind screens, fog nozzles, vapour retardants, etc.
be prepared for fast setting during warm weather
protect hardening concrete by curing concrete immediately after final finish
h) During cold weather longer time is required before performing final finish. Do not perform final finish while concrete is still bleeding.
NOTE: Improper procedures can result in a poor quality job.
This publication is intended for general information purposes only. The Ready Mixed Concrete Association of Ontario disclaims any and all responsibility and liability for the accuracy and the application of the information contained in this publication to the full extent permitted by law. No part of this publication may be reproduced in any form, including photo-copying or other electronic means, without permission in writing from Ready Mixed Concrete Association of Ontario.
Technical information prepared by:
Ready Mixed Concrete Association of Ontario
#3 - 365 Brunel Road Mississauga, ON L4Z 1Z5
T: 905.507.1122 F: 905.890.8122
RMCAO.org © 2013 RMCAO
All rights reserved. 02/13
5 CURING AND SEALING
a) For proper curing, moisture must be retained in the slab for an extended period. Curing must start immediately following final finish and is accomplished by using:
(i) curing membranes/compounds, which can be easily rolled or sprayed on as soon as the finishing operations are complete. MAKE SURE THAT THE MANUFACTURERS’ RECOM-MENDED DOSAGE AND COVERAGE IS OBSERVED.
OR
(ii) wet burlap, soaking hoses, waterproof paper or polyethylene film to keep the surface CONSTANTLY wet for 7 days.
Do not place hoses on the surface.
b) DO NOT APPLY DE-ICERS (e.g. SALT) UNTIL THE CONCRETE HAS GONE THROUGH ITS FIRST WINTER. DO NOT USE AMMONIUM BASED DE-ICERS AT ANY TIME.
c) If the concrete is placed in the late part of the year below 5°C, use polyethylene film or other cold weather curing methods. An air drying period of one month after the curing period is required before de-icing salts can be applied. A PENETRATING SEALER can be applied as caution against chloride penetration.
d) Under normal conditions the concrete may be sealed with a PENETRATING SEALER according to the recommendations of the manufacturer:
(i) after 30 days if a curing membrane has been used
(ii) after a period of air drying if water-cured.
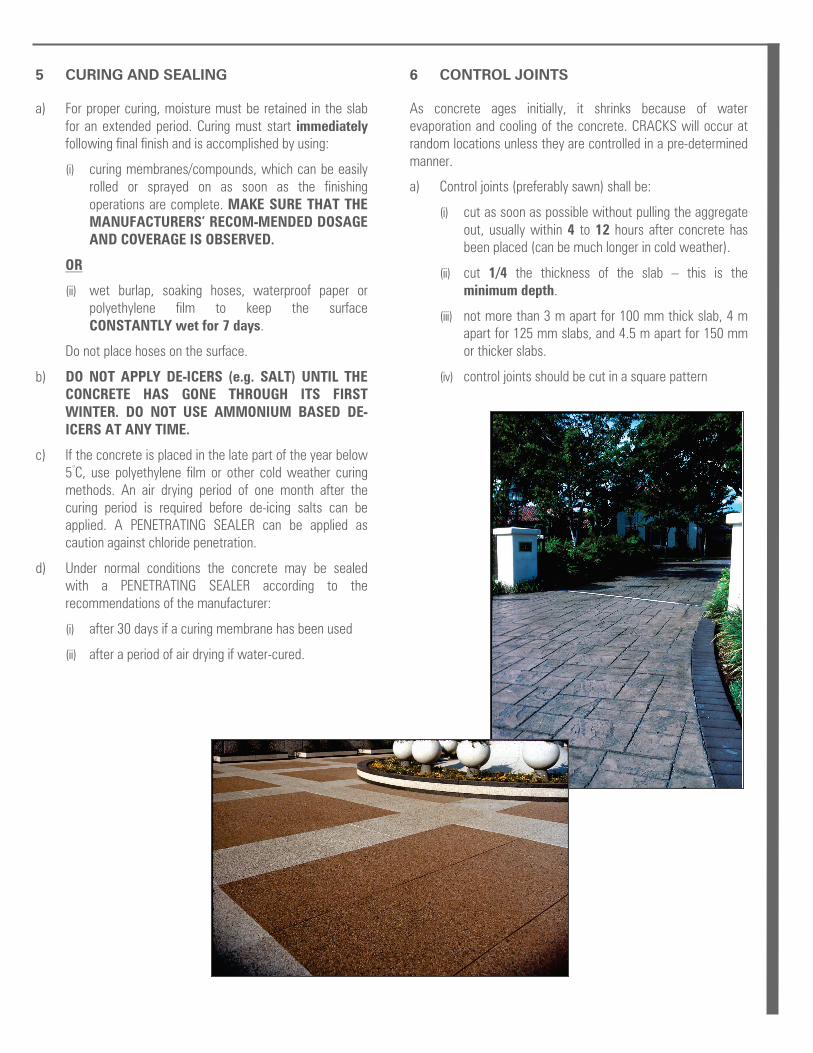
6 CONTROL JOINTS
As concrete ages initially, it shrinks because of water evaporation and cooling of the concrete. CRACKS will occur at random locations unless they are controlled in a pre-determined manner.
a) Control joints (preferably sawn) shall be:
(i) cut as soon as possible without pulling the aggregate out, usually within 4 to 12 hours after concrete has been placed (can be much longer in cold weather).
(ii) cut 1/4 the thickness of the slab – this is the minimum depth.
(iii) not more than 3 m apart for 100 mm thick slab, 4 m apart for 125 mm slabs, and 4.5 m apart for 150 mm or thicker slabs.
(iv) control joints should be cut in a square pattern

This publication is intended for general information purposes only. The Ready Mixed Concrete Association of Ontario disclaims any and all responsibility and liability for the accuracy and the application of the information contained in this publication to the full extent permitted by law. No part of this publication may be reproduced in any form, including photo-copying or other electronic means, without permission in writing from Ready Mixed Concrete Association of Ontario.
Technical information prepared by:
Ready Mixed Concrete Association of Ontario
#3 - 365 Brunel Road Mississauga, ON L4Z 1Z5
T: 905.507.1122 F: 905.890.8122
RMCAO.org © 2013 RMCAO
All rights reserved. 02/13
SUMMARY 1. SUBGRADE MUST BE UNIFORM AND
COMPACT.
2. CONCRETE:
CLASS C-2
32 MPa
0.45 W/CM RATIO
5%-8% AIR ENTRAINMENT
3. PLACE, SCREED, BULLFLOAT, EDGE AND PROTECT.
4. WAIT FOR SURFACE WATER TO EVAPORATE AND TEXTURE-BURLAP, BROOM, OR IMPRESSED.
5. CURE AND PROTECT.
6. SAW-CUT JOINTS.
IF YOU HAVE ANY QUESTIONS, CONTACT YOUR LOCAL MEMBER OF THE READY MIXED CONCRETE ASSOCIATION OF ONTARIO
CAUTION
Freshly mixed concrete may cause skin injury. Avoid contact with skin whenever possible and wash exposed skin areas promptly with water.