contents wt app systemuserguide.pdf · smart heater user manual en 2016-10-26 art. no.: 62013 vii...
TRANSCRIPT
Smart Heater user manual EN 2016-10-26 art. no.: 62013
i
Contents
INTRODUCTION .......................................................................... VI
PURPOSE .................................................................................... VI
KEY FUNCTIONS OF THE SYSTEM .................................................. VI
TERMS AND ABBREVIATIONS ...................................................... VII
SMART HEATER APPLICATION: ............................................................. X
iOS: ...................................................................................................... x
Android: .............................................................................................. x
Windows: ............................................................................................ x
PRIVACY POLICY .......................................................................... XI
ADAX WIFI HEATER USERS ..................................................................... XI
Will ADAX disclose the information collected to Third Parties? ...... xii
TROUBLESHOOTING .................................................................. XIII
I. IOS ........................................................................................ 1
LOGIN ......................................................................................... 1
THE FIRST TIME YOU LOGIN TO SMART HEATER SYSTEM ............................... 1
SIGN-OUT .............................................................................................. 3
KEY FUNCTIONS .............................................................................. 4
HOME (ZONE PREVIEW) WINDOW............................................................. 4
Smart Heater user manual EN 2016-10-26 art. no.: 62013
ii
MENU ................................................................................................... 6
ZONE .................................................................................................... 7
Creating a Zone ................................................................................... 7
Zone Editing ........................................................................................ 8
Deleting a Created Zone ................................................................... 10
HEATING MODE .................................................................................... 10
Creating a Heating Mode .................................................................. 10
Editing a Heating Mode .................................................................... 12
Deleting a Heating Mode .................................................................. 12
WEEKLY HEATING PROGRAM .................................................................. 13
Creating a Weekly Heating Program ................................................ 14
Editing a Weekly Heating Program ................................................... 15
Deleting a Weekly Heating Program ................................................ 18
CONTROL OF ELECTRIC HEATING DEVICES ................................................. 18
Adding an Electric Heating Device to the Zone ................................ 18
Editing an Electric Heating Device .................................................... 18
Deleting an Electric Heating Device from the System ...................... 20
AWAY MODE ....................................................................................... 20
Turning Away Mode On .................................................................... 20
Turning Away Mode Off ................................................................... 22
LINKING AN ELECTRIC HEATING DEVICE WITH THE SMART HEATER APP........ 23
HOW TO SUCCESSFULLY REGISTER THE EXISTING HEATER ............................. 23
Supported Wi-Fi connection types: .................................................. 25
II. ANDROID ............................................................................. 1
Smart Heater user manual EN 2016-10-26 art. no.: 62013
iii
LOGIN .......................................................................................... 1
THE FIRST TIME YOU LOGIN TO SMART HEATER SYSTEM ............................... 1
SIGN-OUT .............................................................................................. 3
KEY FUNCTIONS .............................................................................. 4
HOME (ZONE PREVIEW) WINDOW............................................................. 4
MENU ................................................................................................... 6
ZONE .................................................................................................... 7
Creating a Zone ................................................................................... 7
Zone Editing ........................................................................................ 8
Deleting a Created Zone ................................................................... 10
HEATING MODE .................................................................................... 10
Creating a Heating Mode .................................................................. 10
Editing a Heating Mode .................................................................... 12
Deleting a Heating Mode .................................................................. 12
WEEKLY HEATING PROGRAM .................................................................. 13
Creating a Weekly Heating Program ................................................ 14
Editing a Weekly Heating Program ................................................... 15
Deleting a Weekly Heating Program ................................................ 18
CONTROL OF ELECTRIC HEATING DEVICES ................................................. 18
Adding an Electric Heating Device to the Zone ................................ 18
Editing an Electric Heating Device .................................................... 18
Deleting an Electric Heating Device from the System ...................... 20
AWAY MODE ....................................................................................... 21
Turning Away Mode On .................................................................... 21
Turning Away Mode Off ................................................................... 23
Smart Heater user manual EN 2016-10-26 art. no.: 62013
iv
LINKING AN ELECTRIC HEATING DEVICE WITH THE SMART HEATER APP........ 24
HOW TO SUCCESSFULLY REGISTER THE EXISTING HEATER ............................. 24
Supported Wi-Fi connection types: .................................................. 27
III. WINDOWS .......................................................................... 1
LOGIN .......................................................................................... 1
THE FIRST TIME YOU LOGIN TO SMART HEATER SYSTEM ............................... 1
SIGN-OUT .............................................................................................. 3
KEY FUNCTIONS .............................................................................. 4
HOME (ZONE PREVIEW) WINDOW............................................................. 4
MENU ................................................................................................... 6
ZONE .................................................................................................... 7
Creating a Zone ................................................................................... 7
Zone Editing ........................................................................................ 8
Deleting a Created Zone ................................................................... 10
HEATING MODE .................................................................................... 10
Creating a Heating Mode .................................................................. 10
Editing a Heating Mode .................................................................... 12
Deleting a Heating Mode .................................................................. 13
WEEKLY HEATING PROGRAM .................................................................. 14
Creating a Weekly Heating Program ................................................ 15
Editing a Weekly Heating Program ................................................... 16
Deleting a Weekly Heating Program ................................................ 19
CONTROL OF ELECTRIC HEATING DEVICES ................................................. 19

Smart Heater user manual EN 2016-10-26 art. no.: 62013
v
Adding an Electric Heating Device to the Zone ................................ 19
Editing an Electric Heating Device .................................................... 19
Deleting an Electric Heating Device from the System ...................... 21
AWAY MODE ....................................................................................... 22
Turning Away Mode On .................................................................... 22
Turning Away Mode Off ................................................................... 24
LINKING AN ELECTRIC HEATING DEVICE WITH THE SMART HEATER APP........ 25
HOW TO SUCCESSFULLY REGISTER THE EXISTING HEATER ............................. 26
Supported Wi-Fi connection types: .................................................. 27
Smart Heater user manual EN 2016-10-26 art. no.: 62013
vi
INTRODUCTION
PURPOSE
Smart Heater System is designed to control the user’s existing electrical heating equipment in accordance with the user’s current location, directly from the mobile device.
The purpose of this document is to familiarise the user with an electric heater system, its functioning, methods of use and capabilities.
KEY FUNCTIONS OF THE SYSTEM
The user using the mobile app of the electric heater can:
Adjust heating directly;
Maintain heating according to the schedule of the weekly heating program;
At the push of a button, to stop operation of the set heating parameters by switching on Away mode;
Create the zone(s) corresponding to the user’s location;
Set the desired temperature to be maintained for each zone individually;
Create new weekly heating programs or edit the existing ones;
Create new heating modes or edit the existing ones.
Smart Heater user manual EN 2016-10-26 art. no.: 62013
vii
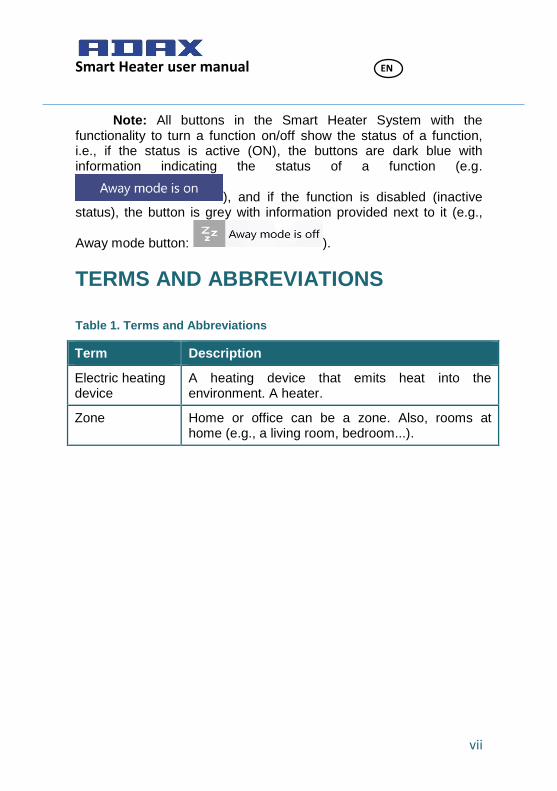
Note: All buttons in the Smart Heater System with the functionality to turn a function on/off show the status of a function, i.e., if the status is active (ON), the buttons are dark blue with information indicating the status of a function (e.g.
), and if the function is disabled (inactive status), the button is grey with information provided next to it (e.g.,
Away mode button: ).
TERMS AND ABBREVIATIONS
Table 1. Terms and Abbreviations
Term Description
Electric heating device
A heating device that emits heat into the environment. A heater.
Zone Home or office can be a zone. Also, rooms at home (e.g., a living room, bedroom...).

Smart Heater user manual EN 2016-10-26 art. no.: 62013
viii
Term Description
Heating mode Supported zone temperature form (e.g., comfort, reduced temperature...), which consists of the colour indication describing a heater mode. The heating mode does not have a temperature. The heating mode temperature is set separately for each zone in the settings window of each zone.
Programmatically created heating modes:
1. Comfort – programmatically set heating temperature is +20 °C. You can change the numerical value of the temperature and the assigned colour;
2. Reduced – programmatically set heating temperature is +15 °C. You can change the numerical value of the temperature and the assigned colour;
3. Antifrost – programmatically set heating temperature is +7 °C. You can change the numerical value of the temperature and the assigned colour;
4. Off – standby mode is maintained. Heating is turned off. The assigned colour can be changed. No numeric values of the temperature can be set.
Programmatically created heating modes cannot be removed (deleted) from the system.
Away mode The function, which suspends temporarily all set heating parameters, adjustable by turning it (Away mode) on or off.

Smart Heater user manual EN 2016-10-26 art. no.: 62013
ix
Term Description
Weekly heating program
A pre-set weekly heating schedule, which consists of heating modes selected according to the user's needs or programmatically set, with numeric temperature values of heating mode specific to each zone.
Programmatically created weekly heating programs:
1. “Home”. The acronym “HO”.
2. “Office”. The acronym “OF”.
3. “Anti-freeze”. The acronym “AF”.
4. “OFF”. The acronym “--“.
You can change the content of a weekly heating program, its long and short names, to erase a weekly heating program.
Wi-Fi A wireless technology, allowing the realization of data transmission networks using broadband radio communications.
SSID Service set identifier. Network name.
Smart Heater user manual EN 2016-10-26 art. no.: 62013
x
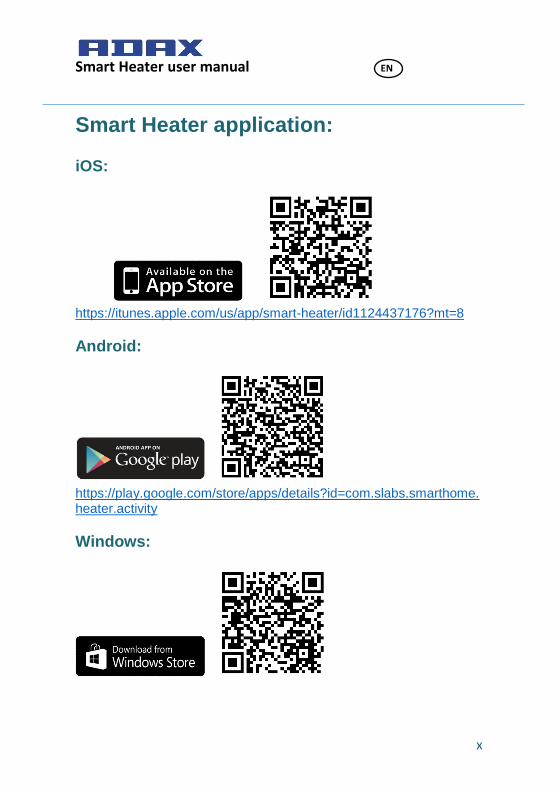
Smart Heater application:
iOS:
https://itunes.apple.com/us/app/smart-heater/id1124437176?mt=8
Android:
https://play.google.com/store/apps/details?id=com.slabs.smarthome.heater.activity
Windows:

Smart Heater user manual EN 2016-10-26 art. no.: 62013
xi
https://www.microsoft.com/en-us/store/p/smart-heater/9nblggh516mz
PRIVACY POLICY
ADAX is committed to protecting your privacy. That is why we have adopted this Privacy Policy. This Privacy Policy is intended to describe how your personal information is processed and used, and we will make every effort to ensure that our activities keep within the spirit of this Privacy Policy. Please note that by using ADAX products and Applications, visiting ADAX.no, or any other website owned and operated by ADAX, you are accepting the practices described in this Privacy Policy.
ADAX WiFi heater Users
If you buy an ADAX Heater and register your Heater, you will be able to remotely view and control your Heater from anywhere on the internet via a mobile application. To enable these remote functions, your Heater needs to transmit temperature and heater operational data to the web portal. These transmissions are fully encrypted. The temperature and heater operational data will be stored by the web portal to provide you with historical reports. In addition, we will keep information about how your house performs (for example how quickly it heats up or cools down) and how your heating and cooling system performs. We use this data to make more intelligent decisions about how to manage your heating. We may also anonymously aggregate your data with data from other homes in order to create reports, benchmarks and allow you (and others) to compare energy usage, on an anonymous basis, with similar homes. ADAX may also send you information regarding your Heater’s operations, software updates or promotions via the mobile Application. We will also request your e-mail address – this allows us to email you alerts and reminders and allows someone to contact you if you so request. If you wish to have specific communications with a member of the ADAX staff, you will be required to provide
Smart Heater user manual EN 2016-10-26 art. no.: 62013
xii
specific information that will be routed to the appropriate contact within ADAX We maintain a strict ‘No Spam or UCE’ policy that means we do not intend to sell, rent, or otherwise give your e-mail address to a third-party, without your consent.
Will ADAX disclose the information collected to Third
Parties?
ADAX will only disclose your personal information or any of its log file information when required by law or in the good-faith belief that such actions are necessary to:
Conform to the edicts of the law or comply with a legal process served on ADAX.
Protect and defend the rights or property of ADAX, or customers of ADAX.
Identify persons who may be violating the law, the legal notice, or the rights of third parties.
Cooperate with the investigations of purported unlawful activities.
ADAX uses reasonable precautions to keep the information disclosed to us secure. ADAX reserves the right to transfer information in connection with the sale of all or part of ADAX capital stock or assets to any third party. Furthermore, we are not responsible for any breach of security or for any actions of any third parties that receive the information. Any changes to this Privacy Policy will be posted on this page so that you are always aware of the information that we collect, how we use it, and under what circumstances we disclose it. Please send any notices or requests regarding this Privacy Policy by care of e-mail to: [email protected]
Smart Heater user manual EN 2016-10-26 art. no.: 62013
xiii
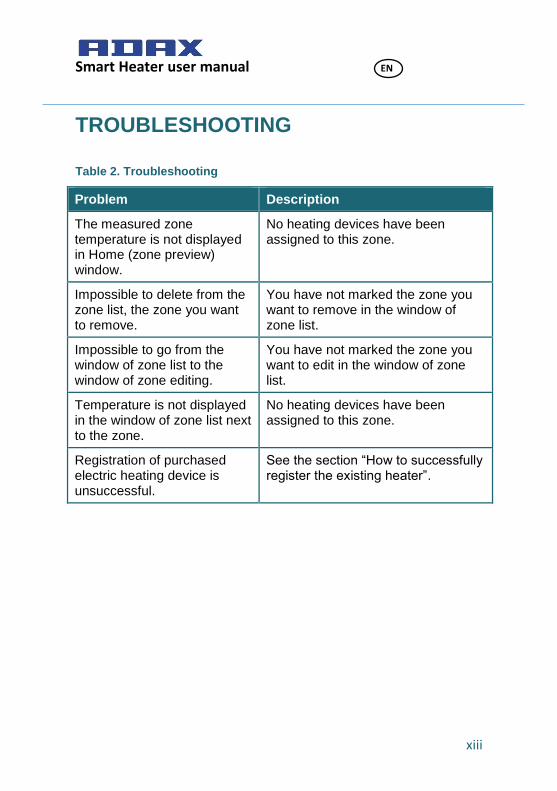
TROUBLESHOOTING
Table 2. Troubleshooting
Problem Description
The measured zone temperature is not displayed in Home (zone preview) window.
No heating devices have been assigned to this zone.
Impossible to delete from the zone list, the zone you want to remove.
You have not marked the zone you want to remove in the window of zone list.
Impossible to go from the window of zone list to the window of zone editing.
You have not marked the zone you want to edit in the window of zone list.
Temperature is not displayed in the window of zone list next to the zone.
No heating devices have been assigned to this zone.
Registration of purchased electric heating device is unsuccessful.
See the section “How to successfully register the existing heater”.
Smart Heater user manual EN 2016-10-26 art. no.: 62013
1
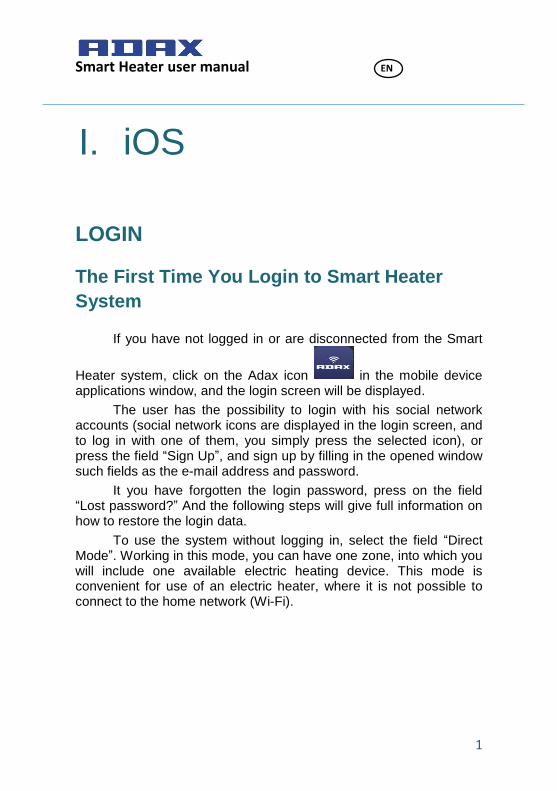
I. iOS
LOGIN
The First Time You Login to Smart Heater
System
If you have not logged in or are disconnected from the Smart
Heater system, click on the Adax icon in the mobile device applications window, and the login screen will be displayed.
The user has the possibility to login with his social network accounts (social network icons are displayed in the login screen, and to log in with one of them, you simply press the selected icon), or press the field “Sign Up”, and sign up by filling in the opened window such fields as the e-mail address and password.
It you have forgotten the login password, press on the field “Lost password?” And the following steps will give full information on how to restore the login data.
To use the system without logging in, select the field “Direct Mode”. Working in this mode, you can have one zone, into which you will include one available electric heating device. This mode is convenient for use of an electric heater, where it is not possible to connect to the home network (Wi-Fi).

Smart Heater user manual EN 2016-10-26 art. no.: 62013
2
Figure 1. Login screen

Smart Heater user manual EN 2016-10-26 art. no.: 62013
3
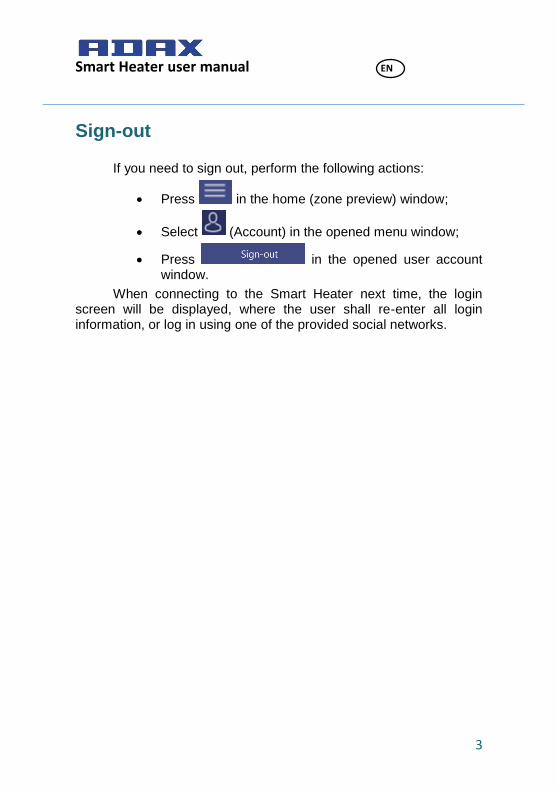
Sign-out
If you need to sign out, perform the following actions:
Press in the home (zone preview) window.
Select (Account) in the opened menu window.
Press in the opened user account window.
When connecting to the Smart Heater next time, the login screen will be displayed, where the user shall re-enter all login information, or log in using one of the provided social networks.
Smart Heater user manual EN 2016-10-26 art. no.: 62013
4
Key Functions
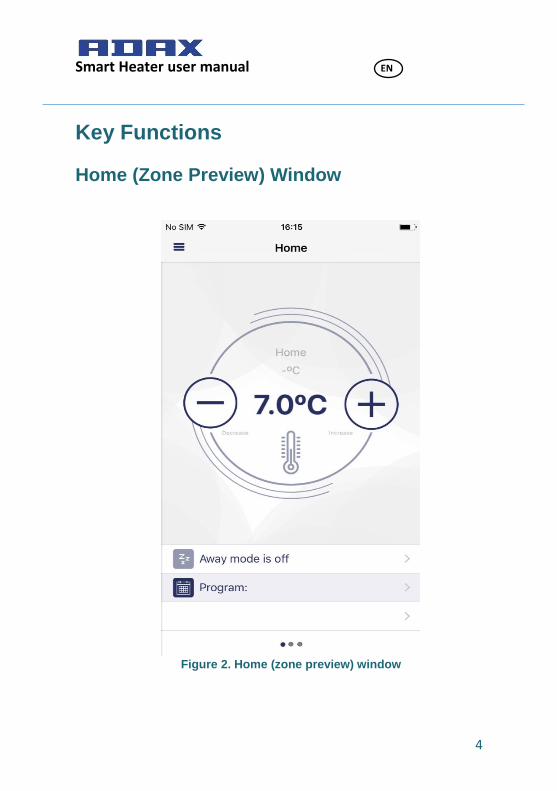
Home (Zone Preview) Window
Figure 2. Home (zone preview) window

Smart Heater user manual EN 2016-10-26 art. no.: 62013
5
Once you have logged in, this Home window will be displayed, which also is the zone preview window. Upon the first login, one programmatically created zone will be presented. If you create more zones, you will be able to see all of them, with their custom settings, sliding from one zone window to another (in this window, created zones “Living Room”, “Kitchen”, “Bedroom” are visible).
The functions available in the zone preview window:
Transition from one zone to another (if more than one zone has been created);
Increasing/decreasing the set temperature using the
buttons and ;
Activating Away mode by pressing the icon (currently this icon is inactive, indicating that Away mode is off);
Setting the weekly heating program by pressing the
icon ;
Pressing the icon opens the zone settings window.
Smart Heater user manual EN 2016-10-26 art. no.: 62013
6
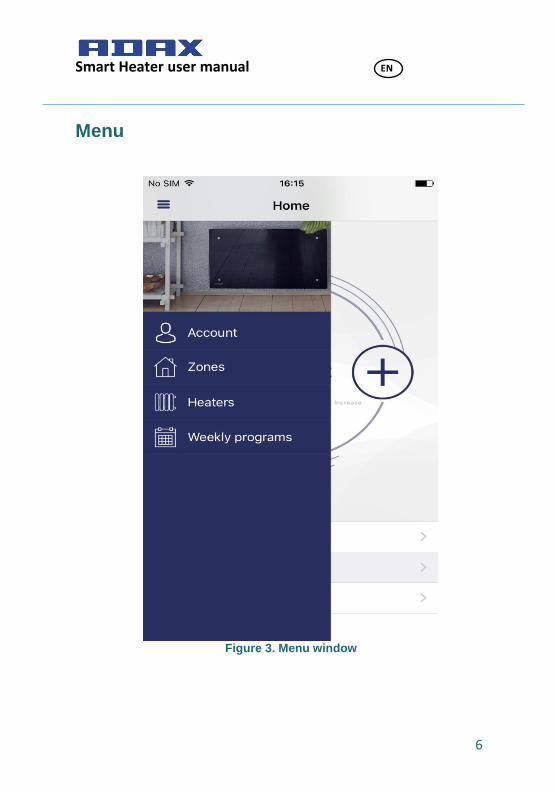
Menu
Figure 3. Menu window

Smart Heater user manual EN 2016-10-26 art. no.: 62013
7
This window is accessed by pressing the icon in the home (zone preview) window. All main functions of the system are accessible from this window:
“Account” – data of a logged in user;
“Zones” – list of the zones created by the user;
“Heaters” – list of the user’s heaters included in the system;
“Weekly program” – list of weekly heating programs.
Zone
Creating a Zone
A new zone is created in the following steps: → →
.
The newly created zone will include these programmable settings:
Zone name “New zone”;
Programmatically set zone temperature (+20 °C) is shown;
In the settings window of created zone, the list of all heating modes is presented, with the temperature, which was set recently in any zone.
Away mode is disabled;
Heating mode of Away mode is “Reduced”;
Direct heating of the zone is maintained, i.e., no weekly heating program has been set.

Smart Heater user manual EN 2016-10-26 art. no.: 62013
8
Zone Editing
Figure 4. Window of zone settings

Smart Heater user manual EN 2016-10-26 art. no.: 62013
9
In the window of zone settings, the list of heaters included into that zone is provided (there is one electric heating device in the zone of a sample window). The set heating temperature is provided next to each heater. In the window for setting of each zone, all created heating modes can be reviewed and the temperatures maintained by heating modes characteristic only to this zone can be set for these heating modes. In this window, also the mode is set, according to the numerical value of whose set temperature heating of that zone will be maintained, when you enable Away mode in home (zone preview) window.
In the provided window, editing of set zone parameters is carried out:
If needed, the zone name can be changed (if the field of the zone name is left empty by mistake, the system restores a previous name of the zone);
When the icon at the bottom of the window is pressed, the list of heaters available in the system is displayed, and if any heater from the heaters list is marked, it will be included into this zone;
To delete the heater included in the zone, mark the electric heating device you want to remove and press
;
Set the temperature for the heating modes in the list
using the buttons ;
Set the Away heating mode by pressing the button
(the list of created heating modes is displayed, and from it you can select the heating mode for setting the Away mode).
Smart Heater user manual EN 2016-10-26 art. no.: 62013
10
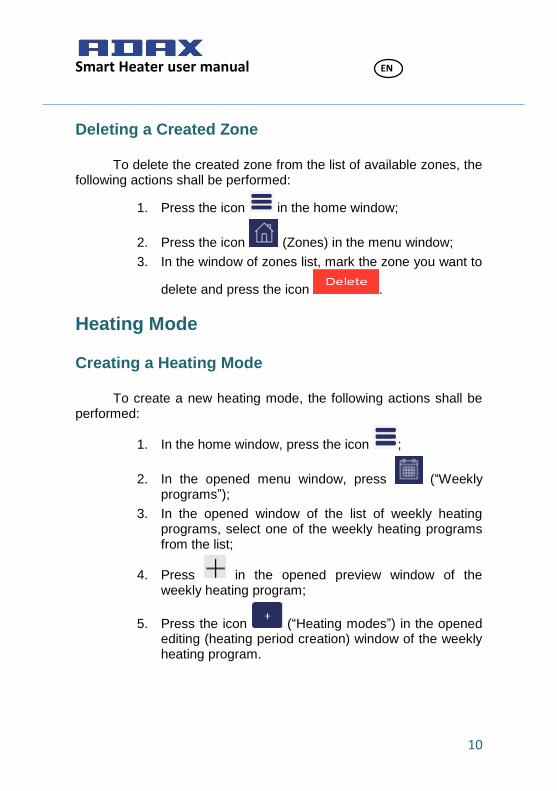
Deleting a Created Zone
To delete the created zone from the list of available zones, the following actions shall be performed:
1. Press the icon in the home window;
2. Press the icon (Zones) in the menu window;
3. In the window of zones list, mark the zone you want to
delete and press the icon .
Heating Mode
Creating a Heating Mode
To create a new heating mode, the following actions shall be performed:
1. In the home window, press the icon ;
2. In the opened menu window, press (“Weekly programs”);
3. In the opened window of the list of weekly heating programs, select one of the weekly heating programs from the list;
4. Press in the opened preview window of the weekly heating program;
5. Press the icon (“Heating modes”) in the opened editing (heating period creation) window of the weekly heating program.

Smart Heater user manual EN 2016-10-26 art. no.: 62013
11
The name “New heating mode” is automatically given to the newly created heating mode, which may be changed (renamed) in the same window, a desired numerical temperature value may be set and a colour indication may be assigned. As per colour assigned to the heating mode, in the window of the weekly heating program schedule you will see the time, at which the relevant heating mode will take place.
Figure 5. Window of heating mode creation

Smart Heater user manual EN 2016-10-26 art. no.: 62013
12
Editing a Heating Mode
The colour icon assigned to the heating mode is changed in
the following steps: → → select one of the provided weekly heating programs → select the heating mode you want to edit.
Note: start performing the provided list of actions from the home (zone preview) window. While these functions are performed, do not edit the numerical value of the heating mode temperature, as this function is performed individually for each zone. I.e., the same weekly heating program can be set for all zones, but operating according to the same schedule of heating modes, it can maintain different numerical values of the temperature of the same heating mode.
No heating temperature can be set for the programmatically created heating mode “OFF”.
Deleting a Heating Mode
To delete a heating mode, the following actions shall be
performed: → → select one of the provided weekly heating programs → mark the heating mode you want to delete and press
.
Note: start performing the provided list of actions from the home (zone preview) window. The programmatically created heating modes and those heating modes, which are used in one of the weekly heating programs in the system cannot be deleted.

Smart Heater user manual EN 2016-10-26 art. no.: 62013
13
Weekly Heating Program
Smart Heater user manual EN 2016-10-26 art. no.: 62013
14
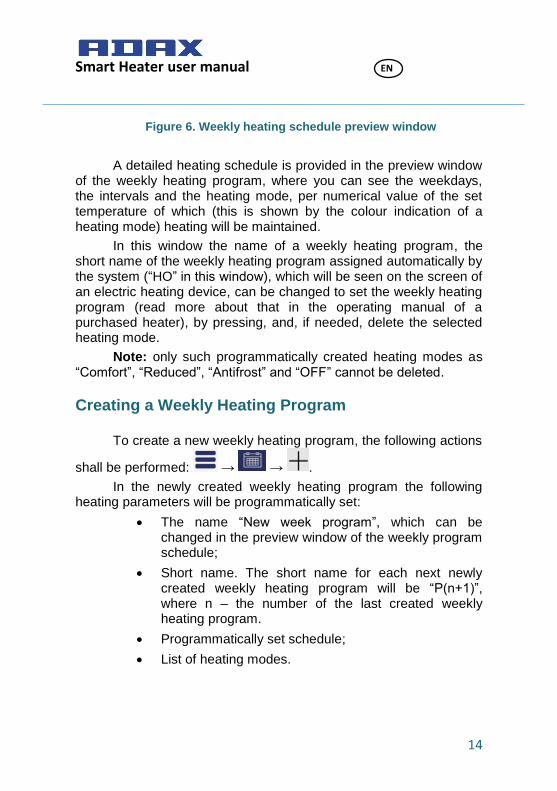
Figure 6. Weekly heating schedule preview window
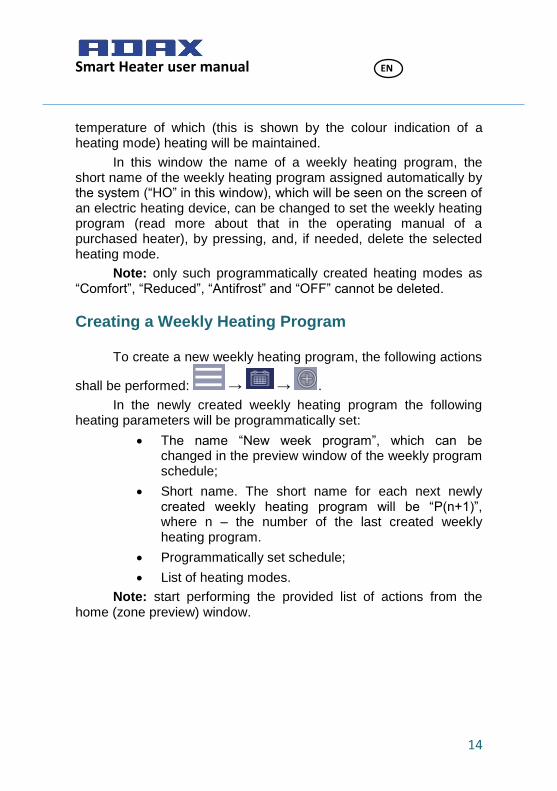
A detailed heating schedule is provided in the preview window of the weekly heating program, where you can see the weekdays, the intervals and the heating mode, per numerical value of the set temperature of which (this is shown by the colour indication of a heating mode) heating will be maintained.
In this window the name of a weekly heating program, the short name of the weekly heating program assigned automatically by the system (“HO” in this window), which will be seen on the screen of an electric heating device, can be changed to set the weekly heating program (read more about that in the operating manual of a purchased heater), by pressing, and, if needed, delete the selected heating mode.
Note: only such programmatically created heating modes as “Comfort”, “Reduced”, “Antifrost” and “OFF” cannot be deleted.
Creating a Weekly Heating Program
To create a new weekly heating program, the following actions
shall be performed: → → .
In the newly created weekly heating program the following heating parameters will be programmatically set:
The name “New week program”, which can be changed in the preview window of the weekly program schedule;
Short name. The short name for each next newly created weekly heating program will be “P(n+1)”, where n – the number of the last created weekly heating program.
Programmatically set schedule;
List of heating modes.

Smart Heater user manual EN 2016-10-26 art. no.: 62013
15
Note: start performing the provided list of actions from the home (zone preview) window.
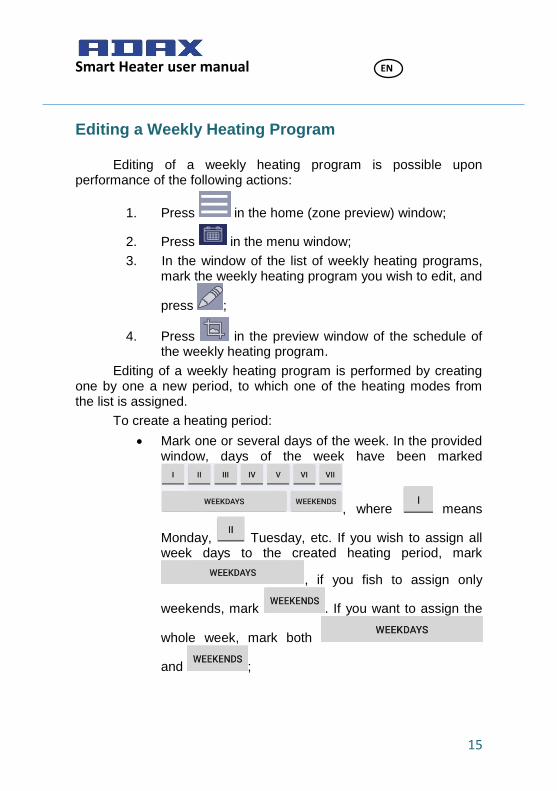
Editing a Weekly Heating Program
Editing of a weekly heating program is possible upon performance of the following actions:
1. Press in the home (zone preview) window;
2. Press in the menu window;
3. In the window of the list of weekly heating programs, mark the weekly heating program you wish to edit, and
press ;
4. Press in the preview window of the schedule of the weekly heating program.
Editing of a weekly heating program is performed by creating one by one a new period, to which one of the heating modes from the list is assigned.
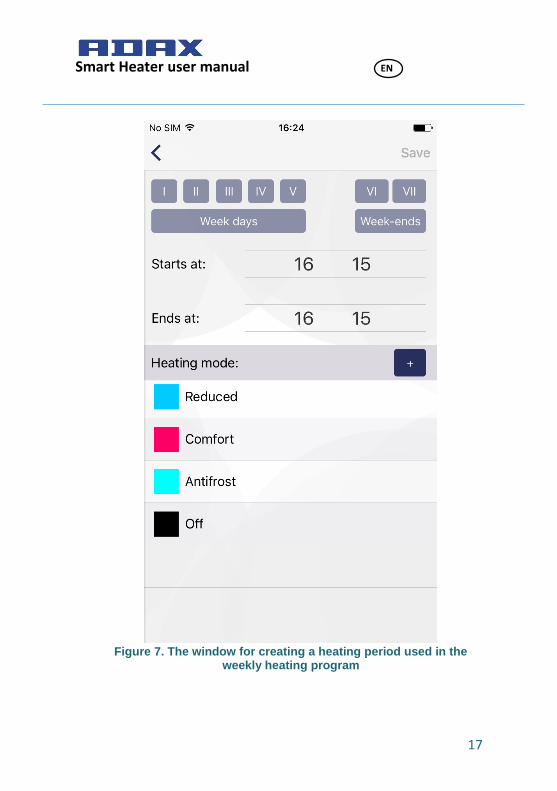
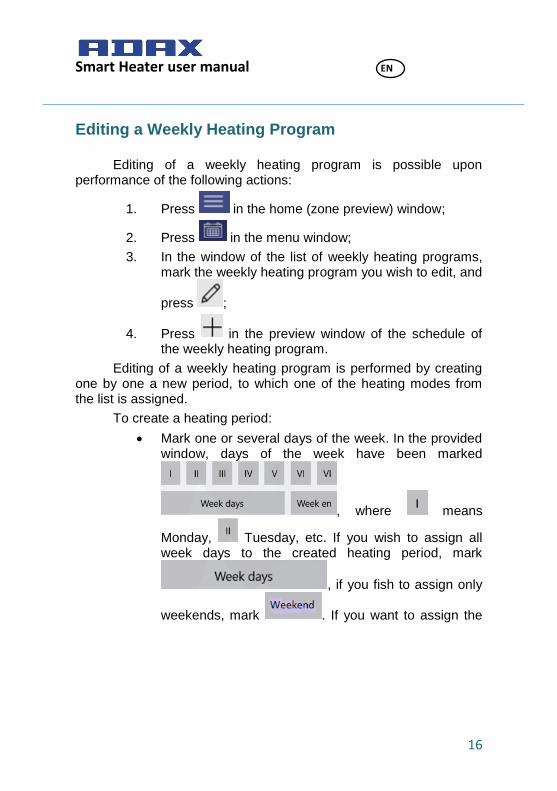
To create a heating period:
Mark one or several days of the week. In the provided window, days of the week have been marked
, where means
Monday, Tuesday, etc. If you wish to assign all week days to the created heating period, mark
, if you fish to assign only
weekends, mark . If you want to assign

Smart Heater user manual EN 2016-10-26 art. no.: 62013
16
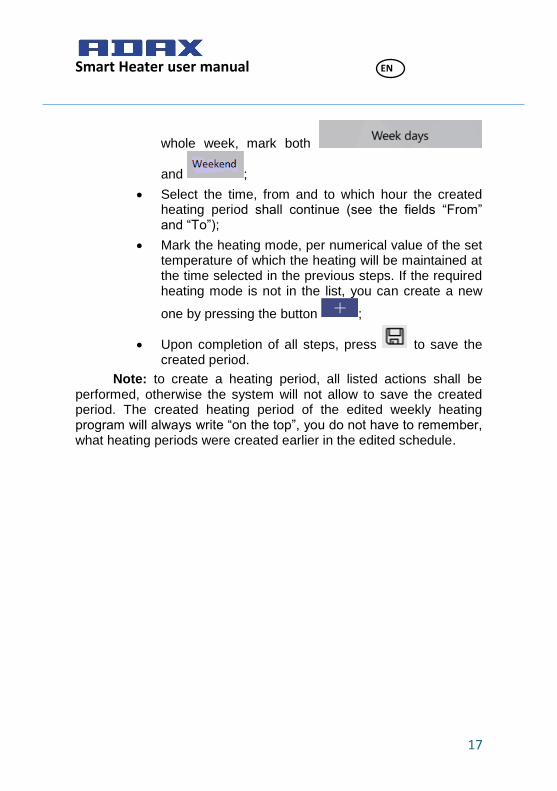
the whole week, mark both
and ;
Select the time, from and to which hour the created heating period shall continue (see the fields “From” and “To”);
Mark the heating mode, per numerical value of the set temperature of which the heating will be maintained at the time selected in the previous steps. If the required heating mode is not in the list, you can create a new
one by pressing the button ;
Upon completion of all steps, press to save the created period.
Note: to create a heating period, all listed actions shall be performed, otherwise the system will not allow to save the created period. The created heating period of the edited weekly heating program will always write “on the top”, you do not have to remember, what heating periods were created earlier in the edited schedule.
Smart Heater user manual EN 2016-10-26 art. no.: 62013
17
Figure 7. The window for creating a heating period used in the
weekly heating program
Smart Heater user manual EN 2016-10-26 art. no.: 62013
18
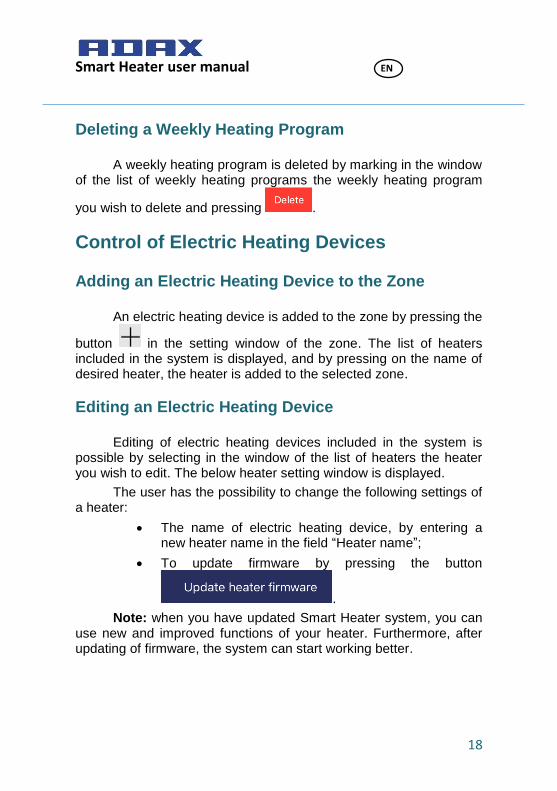
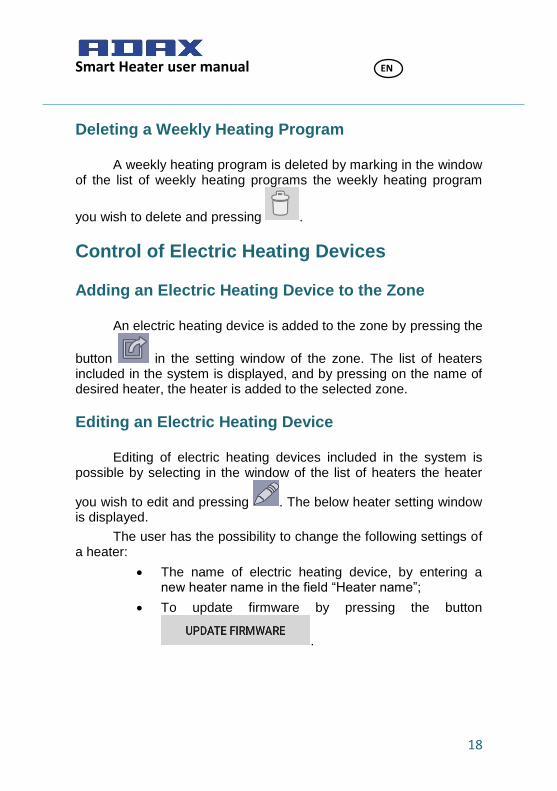
Deleting a Weekly Heating Program
A weekly heating program is deleted by marking in the window of the list of weekly heating programs the weekly heating program
you wish to delete and pressing .
Control of Electric Heating Devices
Adding an Electric Heating Device to the Zone
An electric heating device is added to the zone by pressing the
button in the setting window of the zone. The list of heaters included in the system is displayed, and by pressing on the name of desired heater, the heater is added to the selected zone.
Editing an Electric Heating Device
Editing of electric heating devices included in the system is possible by selecting in the window of the list of heaters the heater you wish to edit. The below heater setting window is displayed.
The user has the possibility to change the following settings of a heater:
The name of electric heating device, by entering a new heater name in the field “Heater name”;
To update firmware by pressing the button
.
Note: when you have updated Smart Heater system, you can use new and improved functions of your heater. Furthermore, after updating of firmware, the system can start working better.

Smart Heater user manual EN 2016-10-26 art. no.: 62013
19
Non-editable settings of a heater:
Provided numerical value of the heater’s temperature;
Current version of firmware;
The latest version of firmware.
Figure 8. Heater setting window
Smart Heater user manual EN 2016-10-26 art. no.: 62013
20
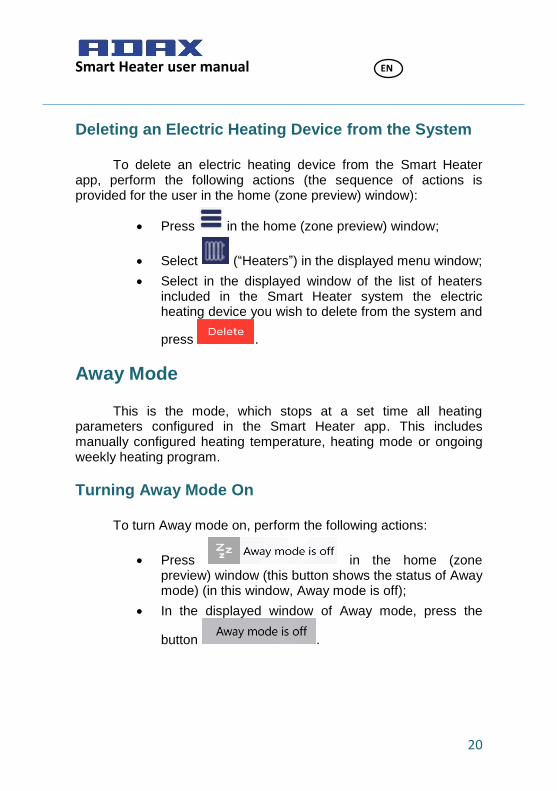
Deleting an Electric Heating Device from the System
To delete an electric heating device from the Smart Heater app, perform the following actions (the sequence of actions is provided for the user in the home (zone preview) window):
Press in the home (zone preview) window;
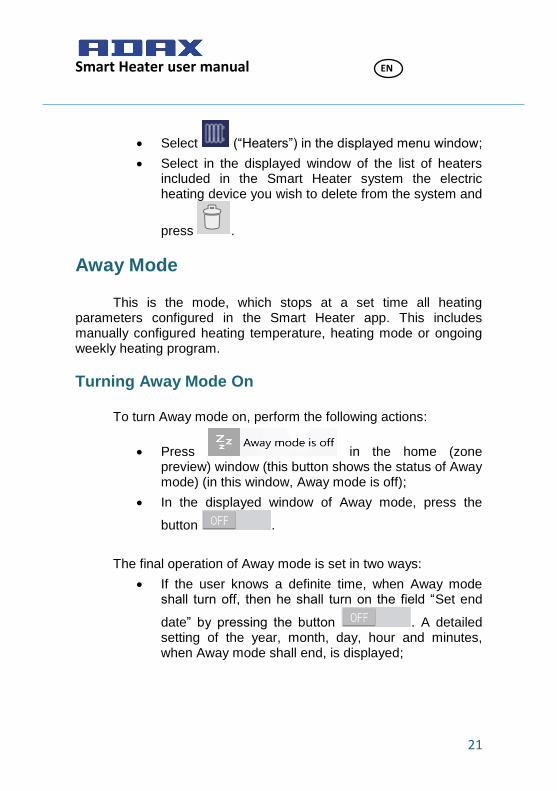
Select (“Heaters”) in the displayed menu window;
Select in the displayed window of the list of heaters included in the Smart Heater system the electric heating device you wish to delete from the system and
press .
Away Mode
This is the mode, which stops at a set time all heating parameters configured in the Smart Heater app. This includes manually configured heating temperature, heating mode or ongoing weekly heating program.
Turning Away Mode On
To turn Away mode on, perform the following actions:
Press in the home (zone preview) window (this button shows the status of Away mode) (in this window, Away mode is off);
In the displayed window of Away mode, press the
button .

Smart Heater user manual EN 2016-10-26 art. no.: 62013
21
The final operation of Away mode is set in two ways:
If the user knows a definite time, when Away mode
shall turn off, then pressing the button (“Keep away until stopped”) displays the next window, where the year, month, day, hour and minutes, when Away function shall end, can be set in detail;
If the user does not know a definite time, when Away
mode shall end, he shall leave the button ( ) in the status ON, and this mode will turn off, when the user turns off Away mode by pressing the button
(when Away mode is turned off, the button of OFF status is displayed
).
Note: when Away mode stops operating, all heating parameters of the zones previously set will be restored to the parameters, according to which the heater maintained the heating before the Away mode was turned on.

Smart Heater user manual EN 2016-10-26 art. no.: 62013
22
Figure 9. Window 1 of Away mode
Figure 10. Window 2 of Away mode
Turning Away Mode Off
To turn Away mode off, perform the following actions:
Press in the home window;
Press in the displayed window of Away mode (when Away mode is turned off in this
Smart Heater user manual EN 2016-10-26 art. no.: 62013
23
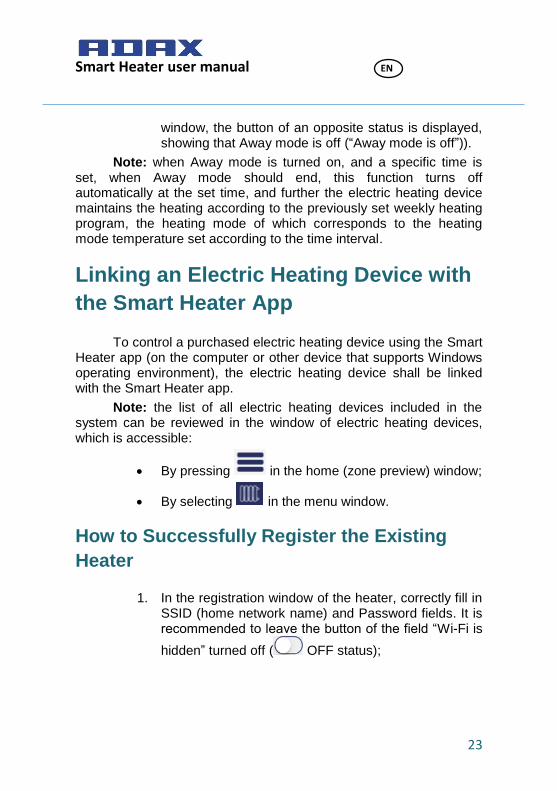
window, the button of an opposite status is displayed, showing that Away mode is off (“Away mode is off”)).
Note: when Away mode is turned on, and a specific time is set, when Away mode should end, this function turns off automatically at the set time, and further the electric heating device maintains the heating according to the previously set weekly heating program, the heating mode of which corresponds to the heating mode temperature set according to the time interval.
Linking an Electric Heating Device with
the Smart Heater App
To control a purchased electric heating device using the Smart Heater app (on the computer or other device that supports Windows operating environment), the electric heating device shall be linked with the Smart Heater app.
Note: the list of all electric heating devices included in the system can be reviewed in the window of electric heating devices, which is accessible:
By pressing in the home (zone preview) window;
By selecting in the menu window.
How to Successfully Register the Existing
Heater
1. In the registration window of the heater, correctly fill in SSID (home network name) and Password fields. It is recommended to leave the button of the field “Wi-Fi is
hidden” turned off ( OFF status);

Smart Heater user manual EN 2016-10-26 art. no.: 62013
24
2. Press the button ;
3. On the screen of the heater you wish to include in the system, press and hold the buttons “+” and “-” together, until the symbol SC (Smart Configuration) is displayed on the screen;
4. In the SmartHeater app, press on the found heater’s name in the search window of the heater (“Searching”), in the field “Heaters”;
5. Check, whether a red light is blinking on the screen of the heater you wish to link with the SmartHeater app;
6. Write the desired heater’s name in the SmartHeater app, in the search window of the heater, the field “Heater name”;
7. Press the button “Save” at the top of the window.
Note: It is recommended to perform the function of linking the existing heater with SmartHeater app separately for each existing heater.

Smart Heater user manual EN 2016-10-26 art. no.: 62013
25
Figure 11. Wi-Fi connecting window
Figure 12. Heater registration window
Supported Wi-Fi connection types:
1. WPA2 Personal;
2. WPA/WPA2 Personal Mixed.

Smart Heater user manual EN 2016-10-26 art. no.: 62013
26
Smart Heater user manual EN 2016-10-26 art. no.: 62013
1
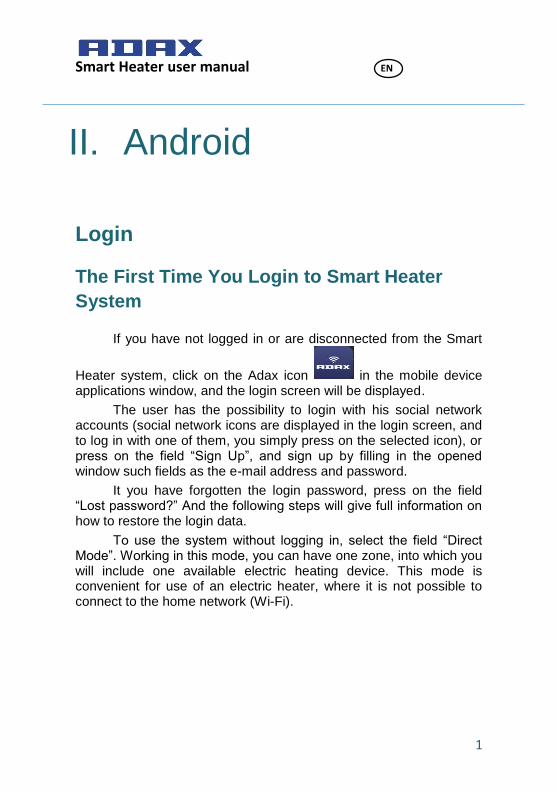
II. Android
Login
The First Time You Login to Smart Heater
System
If you have not logged in or are disconnected from the Smart
Heater system, click on the Adax icon in the mobile device applications window, and the login screen will be displayed.
The user has the possibility to login with his social network accounts (social network icons are displayed in the login screen, and to log in with one of them, you simply press on the selected icon), or press on the field “Sign Up”, and sign up by filling in the opened window such fields as the e-mail address and password.
It you have forgotten the login password, press on the field “Lost password?” And the following steps will give full information on how to restore the login data.
To use the system without logging in, select the field “Direct Mode”. Working in this mode, you can have one zone, into which you will include one available electric heating device. This mode is convenient for use of an electric heater, where it is not possible to connect to the home network (Wi-Fi).

Smart Heater user manual EN 2016-10-26 art. no.: 62013
2
Figure 13. Login screen

Smart Heater user manual EN 2016-10-26 art. no.: 62013
3
Sign-out
If you need to sign out, perform the following actions:
Press in the home (zone preview) window;
Select (Account) in the opened menu window;
Press in the opened user account window.
When connecting to the Smart Heater next time, the login screen will be displayed, where the user shall re-enter all login information, or log in using one of the provided social networks.

Smart Heater user manual EN 2016-10-26 art. no.: 62013
4
Key Functions
Home (Zone Preview) Window
Smart Heater user manual EN 2016-10-26 art. no.: 62013
5
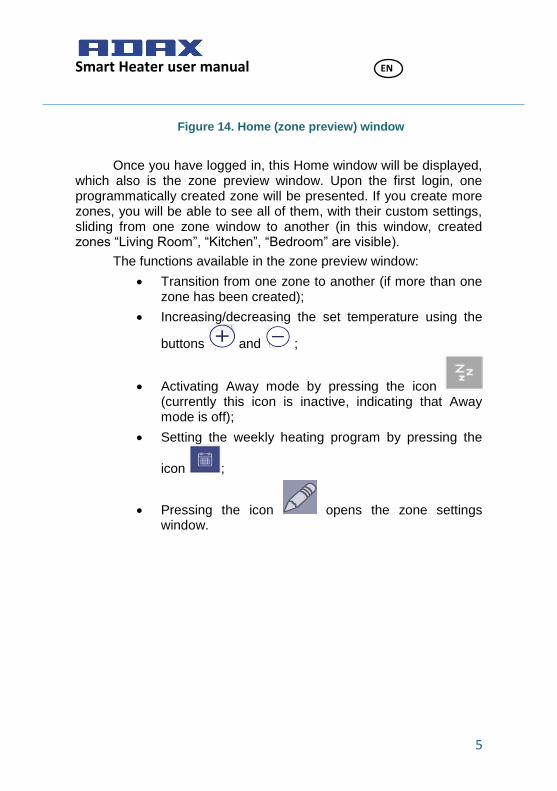
Figure 14. Home (zone preview) window
Once you have logged in, this Home window will be displayed, which also is the zone preview window. Upon the first login, one programmatically created zone will be presented. If you create more zones, you will be able to see all of them, with their custom settings, sliding from one zone window to another (in this window, created zones “Living Room”, “Kitchen”, “Bedroom” are visible).
The functions available in the zone preview window:
Transition from one zone to another (if more than one zone has been created);
Increasing/decreasing the set temperature using the
buttons and ;
Activating Away mode by pressing the icon (currently this icon is inactive, indicating that Away mode is off);
Setting the weekly heating program by pressing the
icon ;
Pressing the icon opens the zone settings window.
Smart Heater user manual EN 2016-10-26 art. no.: 62013
6
Menu
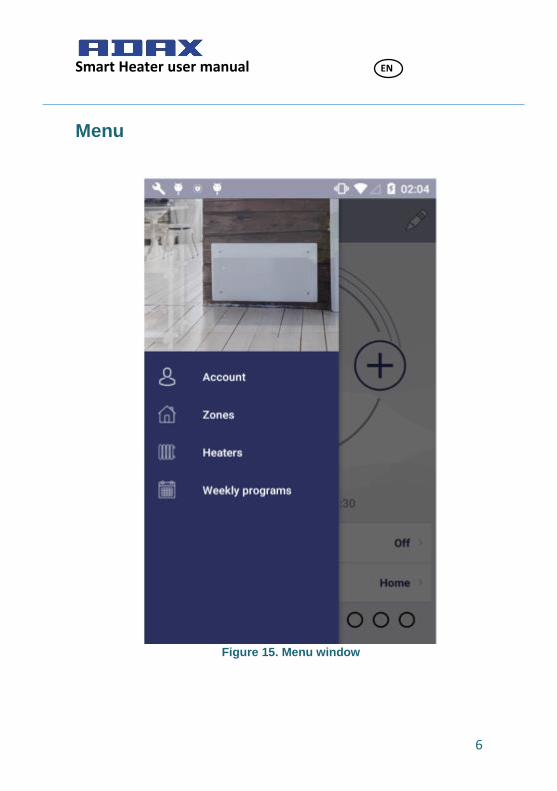
Figure 15. Menu window
Smart Heater user manual EN 2016-10-26 art. no.: 62013
7
This window is accessed by pressing the icon in the home (zone preview) window. All main functions of the system are accessible from this window:
“Account” – data of a logged in user;
“Zones” – list of the zones created by the user;
“Heaters” – list of the user’s heaters included in the system;
“Weekly program” – list of weekly heating programs.
Zone
Creating a Zone
A new zone is created in the following steps: → →
.
The newly created zone will include these programmable settings:
Zone name “New zone”;
Programmatically set zone temperature (+20 °C) is shown;
In the settings window of created zone, the list of all heating modes is presented, with the temperature, which was set recently in any zone.
Away mode is disabled;
Heating mode of Away mode is “Reduced”;
Direct heating of the zone is maintained, i.e., no weekly heating program has been set.
Smart Heater user manual EN 2016-10-26 art. no.: 62013
8
Zone Editing
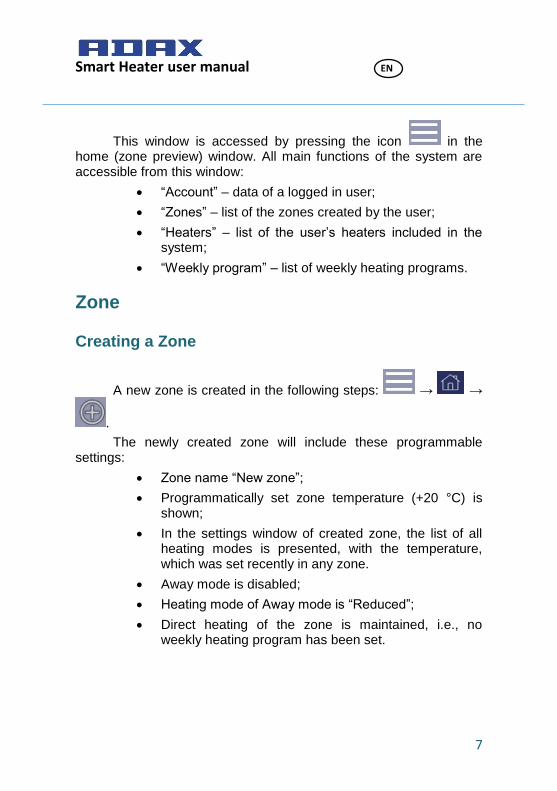
Figure 16. Window of zone settings

Smart Heater user manual EN 2016-10-26 art. no.: 62013
9
In the window of zone settings, the list of heaters included into that zone is provided (there is one electric heating device in the zone of a sample window). The set heating temperature is provided next to each heater. In the window for setting of each zone, all created heating modes can be reviewed and the temperatures maintained by heating modes characteristic only to this zone can be set for these heating modes. In this window, also the mode is set, according to the numerical value of whose set temperature heating of that zone will be maintained, when you enable Away mode in the home (zone preview) window.
In the provided window, editing of set zone parameters is carried out:
If needed, the zone name can be changed (if the field of the zone name is left empty by mistake, the system restores a previous name of the zone);
When the icon at the bottom of the window is pressed, the list of heaters available in the system is displayed, and if any heater from the heaters list is marked, it will be included into this zone;
To delete the heater included in the zone, mark the electric heating device you want to remove and press
;
Set the temperature for the heating modes in the list
using the buttons and ;
Set the Away heating mode by pressing the button
(the list of created heating modes is displayed, and from it you can select the heating mode for setting the Away mode).

Smart Heater user manual EN 2016-10-26 art. no.: 62013
10
Deleting a Created Zone
To delete the created zone from the list of available zones, the following actions shall be performed:
1. Press the icon in the home window;
2. Press the icon (Zones) in the menu window;
3. In the window of zones list, mark the zone you want to
delete and press the icon .
Heating Mode
Creating a Heating Mode
To create a new heating mode, the following actions shall be performed:
1. In the home window, press the icon ;
2. In the opened menu window, press (“Weekly programs”);
3. In the opened window of the list of weekly heating programs, select one of the weekly heating programs
from the list and press the icon ;
4. Press in the opened preview window of the weekly heating program.
The name “New mode 1” is automatically given to the newly created heating mode, which may be changed (renamed) in the
Smart Heater user manual EN 2016-10-26 art. no.: 62013
11
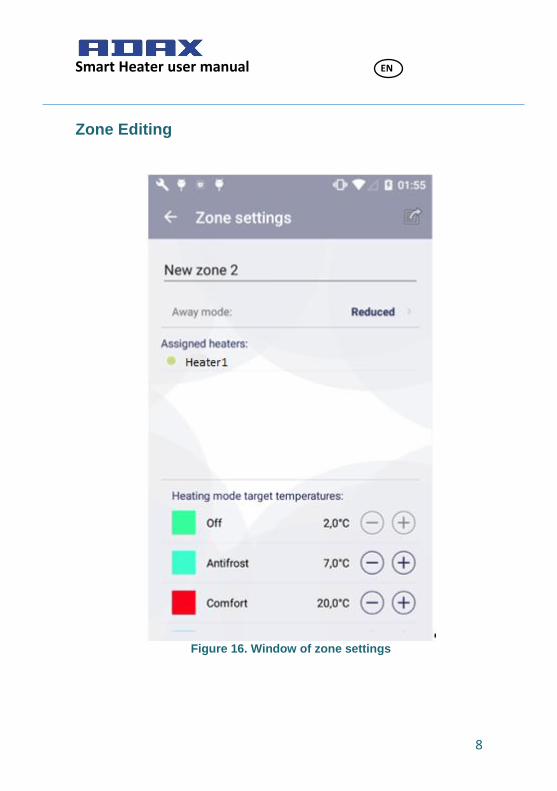
same window, and a colour indication may be assigned. As per colour assigned to the heating mode, in the window of the weekly heating program schedule you will see the time, at which the relevant heating mode will take place.
Figure 17. Window of heating mode creation

Smart Heater user manual EN 2016-10-26 art. no.: 62013
12
Editing a Heating Mode
The colour icon assigned to the heating mode is changed in
the following steps: → → mark one of the provided
weekly heating programs and press → mark the heating mode
you want to edit and press .
Note: start performing the provided list of actions from the home (zone preview) window. While these functions are performed, do not edit the numerical value of the heating mode temperature, as this function is performed individually for each zone. I.e., the same weekly heating program can be set for all zones, but operating according to the same schedule of heating modes, it can maintain different numerical values of the temperature of the same heating mode.
No heating temperature can be set for the programmatically created heating mode “OFF”.
Deleting a Heating Mode
To delete a heating mode, the following actions shall be
performed: → →mark one of the provided weekly heating
programs and press → mark the heating mode you want to
delete and press .
Note: start performing the provided list of actions from the home (zone preview) window. The programmatically created heating modes and those heating modes, which are used in one of the weekly heating programs in the system cannot be deleted.

Smart Heater user manual EN 2016-10-26 art. no.: 62013
13
Weekly Heating Program
Figure 18. Weekly heating schedule preview window
A detailed heating schedule is provided in the preview window of the weekly heating program, where you can see the weekdays, the intervals and the heating mode, per numerical value of the set
Smart Heater user manual EN 2016-10-26 art. no.: 62013
14
temperature of which (this is shown by the colour indication of a heating mode) heating will be maintained.
In this window the name of a weekly heating program, the short name of the weekly heating program assigned automatically by the system (“HO” in this window), which will be seen on the screen of an electric heating device, can be changed to set the weekly heating program (read more about that in the operating manual of a purchased heater), by pressing, and, if needed, delete the selected heating mode.
Note: only such programmatically created heating modes as “Comfort”, “Reduced”, “Antifrost” and “OFF” cannot be deleted.
Creating a Weekly Heating Program
To create a new weekly heating program, the following actions
shall be performed: → → .
In the newly created weekly heating program the following heating parameters will be programmatically set:
The name “New week program”, which can be changed in the preview window of the weekly program schedule;
Short name. The short name for each next newly created weekly heating program will be “P(n+1)”, where n – the number of the last created weekly heating program.
Programmatically set schedule;
List of heating modes.
Note: start performing the provided list of actions from the home (zone preview) window.
Smart Heater user manual EN 2016-10-26 art. no.: 62013
15
Editing a Weekly Heating Program
Editing of a weekly heating program is possible upon performance of the following actions:
1. Press in the home (zone preview) window;
2. Press in the menu window;
3. In the window of the list of weekly heating programs, mark the weekly heating program you wish to edit, and
press ;
4. Press in the preview window of the schedule of the weekly heating program.
Editing of a weekly heating program is performed by creating one by one a new period, to which one of the heating modes from the list is assigned.
To create a heating period:
Mark one or several days of the week. In the provided window, days of the week have been marked
, where means
Monday, Tuesday, etc. If you wish to assign all week days to the created heating period, mark
, if you fish to assign only
weekends, mark . If you want to assign the
whole week, mark both
and ;

Smart Heater user manual EN 2016-10-26 art. no.: 62013
16
Select the time, from and to which hour the created heating period shall continue (see the fields “From” and “To”);
Mark the heating mode, per numerical value of the set temperature of which the heating will be maintained at the time selected in the previous steps. If the required heating mode is not in the list, you can create a new
one by pressing the button ;
Upon completion of all steps, the created period is saved automatically.
Note: to create a heating period, all listed actions shall be performed, otherwise the system will not allow to save the created period. The created heating period of the edited weekly heating program will always write “on the top”, you do not have to remember, what heating periods were created earlier in the edited schedule.

Smart Heater user manual EN 2016-10-26 art. no.: 62013
17
Figure 19. The window for creating a heating period used in the
weekly heating program
Smart Heater user manual EN 2016-10-26 art. no.: 62013
18
Deleting a Weekly Heating Program
A weekly heating program is deleted by marking in the window of the list of weekly heating programs the weekly heating program
you wish to delete and pressing .
Control of Electric Heating Devices
Adding an Electric Heating Device to the Zone
An electric heating device is added to the zone by pressing the
button in the setting window of the zone. The list of heaters included in the system is displayed, and by pressing on the name of desired heater, the heater is added to the selected zone.
Editing an Electric Heating Device
Editing of electric heating devices included in the system is possible by selecting in the window of the list of heaters the heater
you wish to edit and pressing . The below heater setting window is displayed.
The user has the possibility to change the following settings of a heater:
The name of electric heating device, by entering a new heater name in the field “Heater name”;
To update firmware by pressing the button
.

Smart Heater user manual EN 2016-10-26 art. no.: 62013
19
Note: when you have updated Smart Heater system, you can use new and improved functions of your heater. Furthermore, after updating of firmware, the system can start working better.
Non-editable settings of a heater:
Provided numerical value of the heater’s temperature;
Current version of firmware;
The latest version of firmware.

Smart Heater user manual EN 2016-10-26 art. no.: 62013
20
Figure 20. Heater setting window
Deleting an Electric Heating Device from the System
To delete an electric heating device from the Smart Heater app, perform the following actions (the sequence of actions is provided for the user in the home (zone preview) window):
Press in the home (zone preview) window;
Smart Heater user manual EN 2016-10-26 art. no.: 62013
21
Select (“Heaters”) in the displayed menu window;
Select in the displayed window of the list of heaters included in the Smart Heater system the electric heating device you wish to delete from the system and
press .
Away Mode
This is the mode, which stops at a set time all heating parameters configured in the Smart Heater app. This includes manually configured heating temperature, heating mode or ongoing weekly heating program.
Turning Away Mode On
To turn Away mode on, perform the following actions:
Press in the home (zone preview) window (this button shows the status of Away mode) (in this window, Away mode is off);
In the displayed window of Away mode, press the
button .
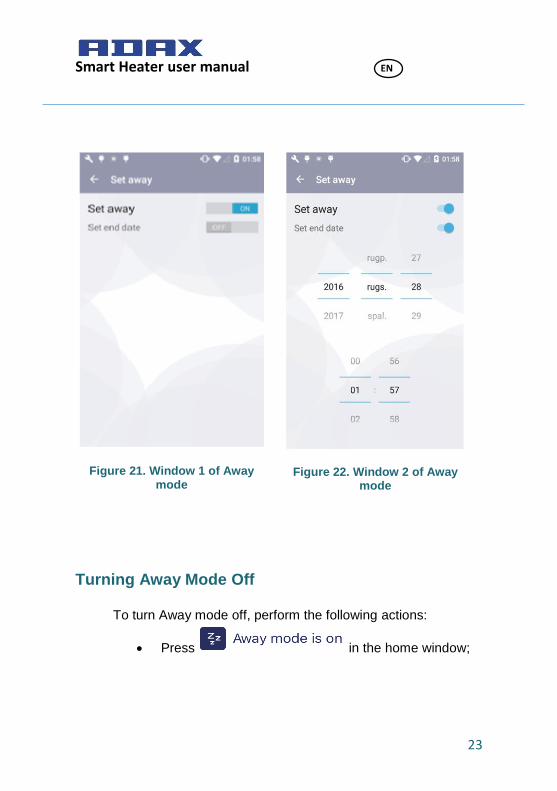
The final operation of Away mode is set in two ways:
If the user knows a definite time, when Away mode shall turn off, then he shall turn on the field “Set end
date” by pressing the button . A detailed setting of the year, month, day, hour and minutes, when Away mode shall end, is displayed;

Smart Heater user manual EN 2016-10-26 art. no.: 62013
22
If the user does not know a definite time, when Away mode shall end, he shall leave the “Set end date” field turned off (OFF) and this mode will turn off, when the user turns off Away mode by pressing the button
.
Note: when Away mode stops operating, all heating parameters of the zones previously set will be restored to the parameters, according to which the heater maintained the heating, before the Away mode was turned on.
Smart Heater user manual EN 2016-10-26 art. no.: 62013
23
Figure 21. Window 1 of Away mode
Figure 22. Window 2 of Away mode
Turning Away Mode Off
To turn Away mode off, perform the following actions:
Press in the home window;
Smart Heater user manual EN 2016-10-26 art. no.: 62013
24
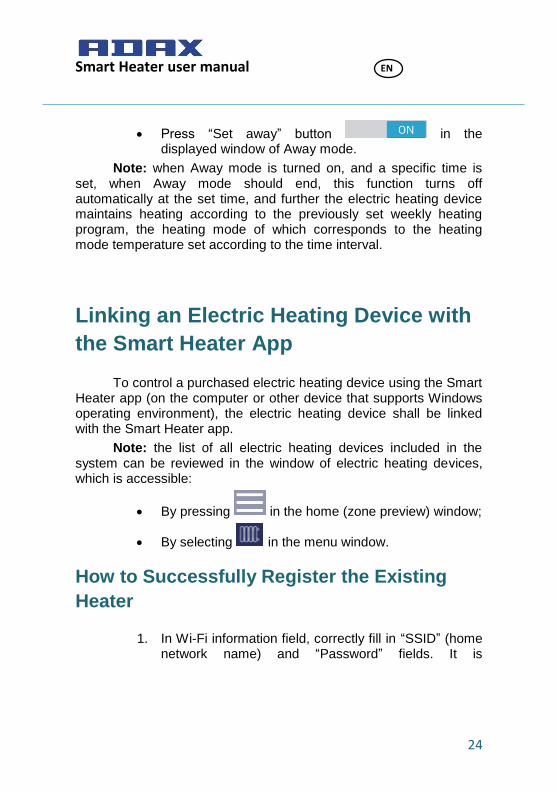
Press “Set away” button in the displayed window of Away mode.
Note: when Away mode is turned on, and a specific time is set, when Away mode should end, this function turns off automatically at the set time, and further the electric heating device maintains heating according to the previously set weekly heating program, the heating mode of which corresponds to the heating mode temperature set according to the time interval.
Linking an Electric Heating Device with
the Smart Heater App
To control a purchased electric heating device using the Smart Heater app (on the computer or other device that supports Windows operating environment), the electric heating device shall be linked with the Smart Heater app.
Note: the list of all electric heating devices included in the system can be reviewed in the window of electric heating devices, which is accessible:
By pressing in the home (zone preview) window;
By selecting in the menu window.
How to Successfully Register the Existing
Heater
1. In Wi-Fi information field, correctly fill in “SSID” (home network name) and “Password” fields. It is

Smart Heater user manual EN 2016-10-26 art. no.: 62013
25
recommended to leave the button of the field “Wi-Fi is
hidden” turned off ( OFF status);
2. Press the button ;
3. On the screen of the heater you wish to include in the system, press and hold the buttons “+” and “-” together, until the symbol SC (Smart Configuration) is displayed on the screen;
4. In the SmartHeater app, in the heater registration window (“Register heater”) the field “Found heaters”, press on the heater found;
5. In the opened confirmation window of the found heater, write the new heater’s name in the field “New Heater1”, and press the button “OK”, upon making sure that a red light is blinking in the heater’s screen, confirming that namely the hater, which we wish, will be included in the system.
Note: It is recommended to perform the function of linking the existing heater with SmartHeater app separately for each existing heater.

Smart Heater user manual EN 2016-10-26 art. no.: 62013
26
Figure 23. Wi-Fi connecting window
Figure 24. Heater registration window

Smart Heater user manual EN 2016-10-26 art. no.: 62013
27
Figure 25. Registered heater’s confirmation window
Supported Wi-Fi connection types:
1. WPA2 Personal;
2. WPA/WPA2 Personal Mixed.

Smart Heater user manual EN 2016-10-26 art. no.: 62013
28

Smart Heater user manual EN 2016-10-26 art. no.: 62013
1
III. Windows
Login
The First Time You Login to Smart Heater
System
If you have not logged in or are disconnected from the Smart
Heater system, click on the Adax icon in the mobile device applications window, and the login screen will be displayed.
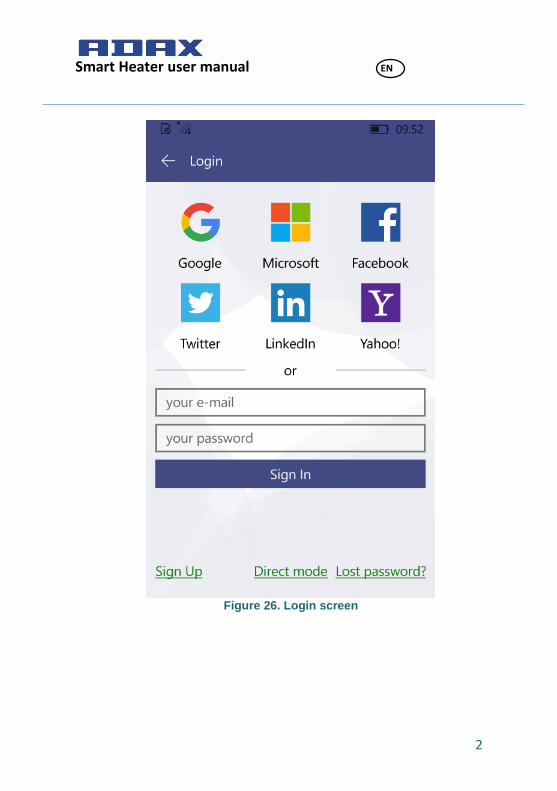
The user has the possibility to login with his social network accounts (social network icons are displayed in the login screen, and to log in with one of them, you simply press on the selected icon), or press on the field “Sign Up”, and sign up by filling in the opened window such fields as the e-mail address and password.
It you have forgotten the login password, press on the field “Lost password?” And the following steps will give full information on how to restore the login data.
To use the system without logging in, select the field “Direct Mode”. Working in this mode, you can have one zone, into which you will include one available electric heating device. This mode is convenient for use of an electric heater, where it is not possible to connect to the home network (Wi-Fi).
Smart Heater user manual EN 2016-10-26 art. no.: 62013
2
Figure 26. Login screen
Smart Heater user manual EN 2016-10-26 art. no.: 62013
3
Sign-out
If you need to sign out, perform the following actions:
Press in the home (zone preview) window;
Select (Account) in the opened menu window;
Press in the opened user account window.
When connecting to the Smart Heater next time, the login screen will be displayed, where the user shall re-enter all login information, or log in using one of the provided social networks.

Smart Heater user manual EN 2016-10-26 art. no.: 62013
4
Key Functions
Home (Zone Preview) Window
Figure 27. Home (zone preview) window
Smart Heater user manual EN 2016-10-26 art. no.: 62013
5
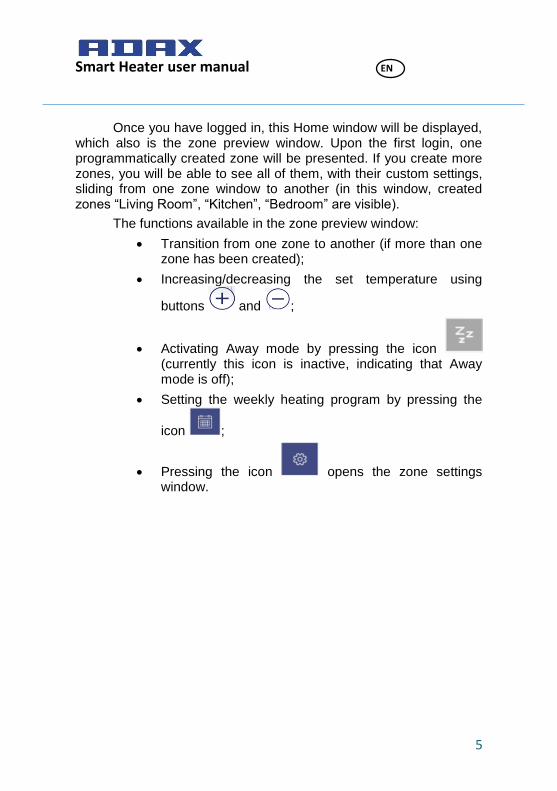
Once you have logged in, this Home window will be displayed, which also is the zone preview window. Upon the first login, one programmatically created zone will be presented. If you create more zones, you will be able to see all of them, with their custom settings, sliding from one zone window to another (in this window, created zones “Living Room”, “Kitchen”, “Bedroom” are visible).
The functions available in the zone preview window:
Transition from one zone to another (if more than one zone has been created);
Increasing/decreasing the set temperature using
buttons and ;
Activating Away mode by pressing the icon (currently this icon is inactive, indicating that Away mode is off);
Setting the weekly heating program by pressing the
icon ;
Pressing the icon opens the zone settings window.
Smart Heater user manual EN 2016-10-26 art. no.: 62013
6
Menu
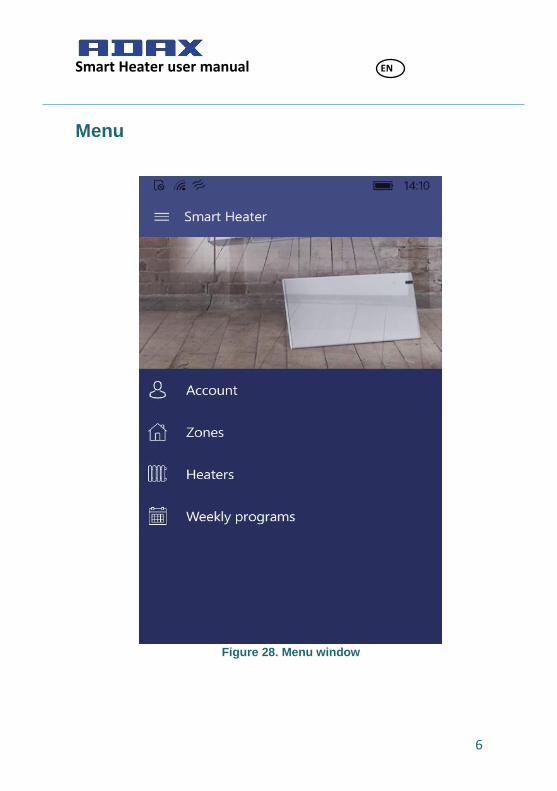
Figure 28. Menu window

Smart Heater user manual EN 2016-10-26 art. no.: 62013
7
This window is accessed by pressing the icon in the home (zone preview) window. All main functions of the system are accessible from this window:
“Account” – data of a logged in user;
“Zones” – list of the zones created by the user;
“Heaters” – list of the user’s heaters included in the system;
“Weekly program” – list of weekly heating programs.
Zone
Creating a Zone
A new zone is created in the following steps: → →
.
The newly created zone will include these programmable settings:
Zone name “New zone”;
Programmatically set zone temperature (+20 °C) is shown;
In the settings window of created zone, the list of all heating modes is presented, with the temperature, which was set recently in any zone.
Away mode is disabled;
Heating mode of Away mode is “Reduced”;
Direct heating of the zone is maintained, i.e., no weekly heating program has been set.

Smart Heater user manual EN 2016-10-26 art. no.: 62013
8
Zone Editing
Figure 29. Window of zone settings

Smart Heater user manual EN 2016-10-26 art. no.: 62013
9
In the window of zone settings, the list of heaters included into that zone is provided (there is one electric heating device in the zone of a sample window). The set heating temperature is provided next to each heater. In the window for setting of each zone, all created heating modes can be reviewed and the temperatures maintained by heating modes characteristic only to this zone can be set for these heating modes. In this window, also the mode is set, according to the numerical value of whose set temperature heating of that zone will be maintained, when you enable Away mode in the home (zone preview) window.
In the provided window, editing of set zone parameters is carried out:
If needed, the zone name can be changed (if the field of the zone name is left empty by mistake, the system restores a previous name of the zone);
When the icon at the bottom of the window is pressed, the list of heaters available in the system is displayed, and if any heater from the heaters list is marked, it will be included into this zone;
To delete the heater included in the zone, mark the electric heating device you want to remove and press
;
Set the temperature for the heating modes in the list
using the buttons and ;
• Set the Away heating mode by pressing the button
(the list of created heating modes is displayed, and from it you can select the heating mode for setting the Away mode).
Smart Heater user manual EN 2016-10-26 art. no.: 62013
10
Deleting a Created Zone
To delete the created zone from the list of available zones, the following actions shall be performed:
1. Press the icon in the home window;
2. Press the icon (Zones) in the menu window;
3. In the window of zones list, mark the zone you want to
delete and press the icon .
Heating Mode
Creating a Heating Mode
To create a new heating mode, the following actions shall be performed:
1. In the home window, press the icon ;
2. In the opened menu window, press (“Weekly programs”);
3. In the opened window of the list of weekly heating programs, select one of the weekly heating programs
from the list and press the icon ;
4. Press in the opened preview window of the weekly heating program;

Smart Heater user manual EN 2016-10-26 art. no.: 62013
11
5. Press the icon (“Heating modes”) in the opened editing (heating period creation) window of the weekly heating program.
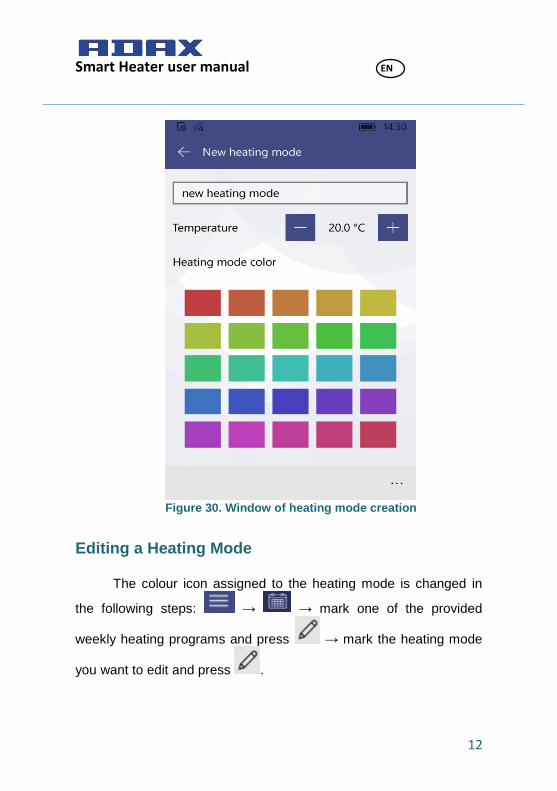
The name “New heating mode” is automatically given to the newly created heating mode, which may be changed (renamed) in the same window, a desired numerical temperature value may be set and a colour indication may be assigned. As per colour assigned to the heating mode, in the window of the weekly heating program schedule you will see the time, at which the relevant heating mode will take place.
Smart Heater user manual EN 2016-10-26 art. no.: 62013
12
Figure 30. Window of heating mode creation
Editing a Heating Mode
The colour icon assigned to the heating mode is changed in
the following steps: → → mark one of the provided
weekly heating programs and press → mark the heating mode
you want to edit and press .
Smart Heater user manual EN 2016-10-26 art. no.: 62013
13
Note: start performing the provided list of actions from the home (zone preview) window. While these functions are performed, do not edit the numerical value of the heating mode temperature, as this function is performed individually for each zone. I.e., the same weekly heating program can be set for all zones, but operating according to the same schedule of heating modes, it can maintain different numerical values of the temperature of the same heating mode.
No heating temperature can be set for the programmatically created heating mode “OFF”.
Deleting a Heating Mode
To delete a heating mode, the following actions shall be
performed: → → mark one of the provided weekly heating
programs and press → mark the heating mode you want to
delete and press .
Note: start performing the provided list of actions from the home (zone preview) window. The programmatically created heating modes and those heating modes, which are used in one of the weekly heating programs in the system cannot be deleted.

Smart Heater user manual EN 2016-10-26 art. no.: 62013
14
Weekly Heating Program
Figure 31. Weekly heating schedule preview window
A detailed heating schedule is provided in the preview window of the weekly heating program, where you can see the weekdays,
Smart Heater user manual EN 2016-10-26 art. no.: 62013
15
the intervals and the heating mode, per numerical value of the set temperature of which (this is shown by the colour indication of a heating mode) heating will be maintained.
In this window the name of a weekly heating program, the short name of the weekly heating program assigned automatically by the system (“HO” in this window), which will be seen on the screen of an electric heating device, can be changed to set the weekly heating program (read more about that in the operating manual of a purchased heater), by pressing, and, if needed, delete the selected heating mode.
Note: only such programmatically created heating modes as “Comfort”, “Reduced”, “Antifrost” and “OFF” cannot be deleted.
Creating a Weekly Heating Program
To create a new weekly heating program, the following actions
shall be performed: → → .
In the newly created weekly heating program the following heating parameters will be programmatically set:
The name “New week program”, which can be changed in the preview window of the weekly program schedule;
Short name. The short name for each next newly created weekly heating program will be “P(n+1)”, where n – the number of the last created weekly heating program.
Programmatically set schedule;
List of heating modes.
Note: start performing the provided list of actions from the home (zone preview) window.
Smart Heater user manual EN 2016-10-26 art. no.: 62013
16
Editing a Weekly Heating Program
Editing of a weekly heating program is possible upon performance of the following actions:
1. Press in the home (zone preview) window;
2. Press in the menu window;
3. In the window of the list of weekly heating programs, mark the weekly heating program you wish to edit, and
press ;
4. Press in the preview window of the schedule of the weekly heating program.
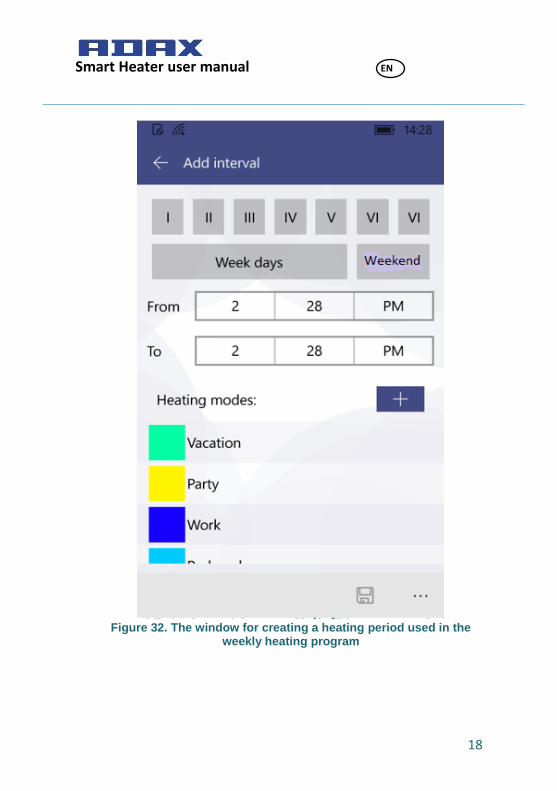
Editing of a weekly heating program is performed by creating one by one a new period, to which one of the heating modes from the list is assigned.
To create a heating period:
Mark one or several days of the week. In the provided window, days of the week have been marked
, where means
Monday, Tuesday, etc. If you wish to assign all week days to the created heating period, mark
, if you fish to assign only
weekends, mark . If you want to assign the
Smart Heater user manual EN 2016-10-26 art. no.: 62013
17
whole week, mark both
and ;
Select the time, from and to which hour the created heating period shall continue (see the fields “From” and “To”);
Mark the heating mode, per numerical value of the set temperature of which the heating will be maintained at the time selected in the previous steps. If the required heating mode is not in the list, you can create a new
one by pressing the button ;
Upon completion of all steps, press to save the created period.
Note: to create a heating period, all listed actions shall be performed, otherwise the system will not allow to save the created period. The created heating period of the edited weekly heating program will always write “on the top”, you do not have to remember, what heating periods were created earlier in the edited schedule.
Smart Heater user manual EN 2016-10-26 art. no.: 62013
18
Figure 32. The window for creating a heating period used in the
weekly heating program

Smart Heater user manual EN 2016-10-26 art. no.: 62013
19
Deleting a Weekly Heating Program
A weekly heating program is deleted by marking in the window of the list of weekly heating programs the weekly heating program
you wish to delete and pressing .
Control of Electric Heating Devices
Adding an Electric Heating Device to the Zone
An electric heating device is added to the zone by pressing the
button in the setting window of the zone. The list of heaters included in the system is displayed, and by pressing on the name of desired heater, the heater is added to the selected zone.
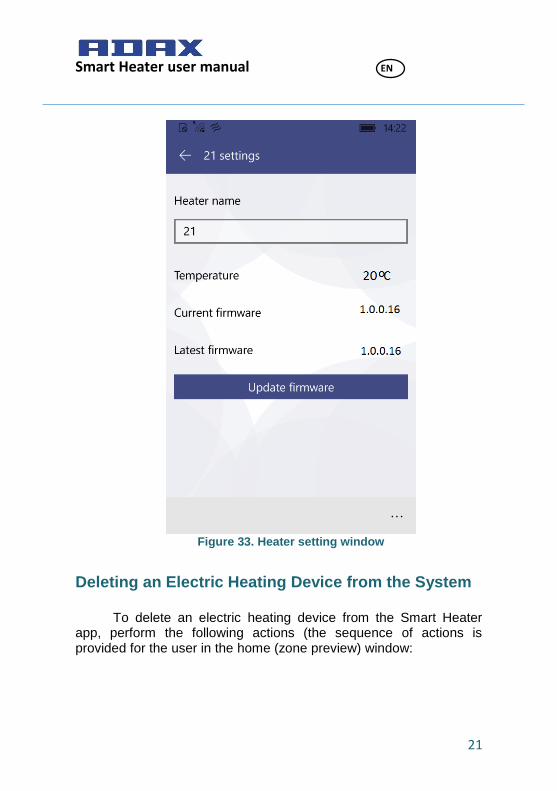
Editing an Electric Heating Device
Editing of electric heating devices included in the system is possible by selecting in the window of the list of heaters the heater
you wish to edit and pressing . The below heater setting window is displayed.
The user has the possibility to change the following settings of a heater:
The name of electric heating device, by entering a new heater name in the field “Heater name”;
To update firmware by pressing the button
.

Smart Heater user manual EN 2016-10-26 art. no.: 62013
20
Note: when you have updated Smart Heater system, you can use new and improved functions of your heater. Furthermore, after updating of firmware, the system can start working better.
Non-editable settings of a heater:
Provided numerical value of the heater’s temperature;
Current version of firmware;
The latest version of firmware.
Smart Heater user manual EN 2016-10-26 art. no.: 62013
21
Figure 33. Heater setting window
Deleting an Electric Heating Device from the System
To delete an electric heating device from the Smart Heater app, perform the following actions (the sequence of actions is provided for the user in the home (zone preview) window:

Smart Heater user manual EN 2016-10-26 art. no.: 62013
22
Press in the home (zone preview) window;
Select (“Heaters”) in the displayed menu window;
Select in the displayed window of the list of heaters included in the Smart Heater system the electric heating device you wish to delete from the system and
press .
Away Mode
This is the mode, which stops at a set time all heating parameters configured in the Smart Heater app. This includes manually configured heating temperature, heating mode or ongoing weekly heating program.
Turning Away Mode On
To turn Away mode on, perform the following actions:
Press (in the home (zone preview) window this button shows the status of Away mode) (in this window, Away mode is off);
In the displayed window of Away mode, press the
button .
The final operation of Away mode is set in two ways:
If the user knows a definite time, when Away mode
shall turn off, then marking the field (“Keep away until stopped”) displays the next window, where the
Smart Heater user manual EN 2016-10-26 art. no.: 62013
23
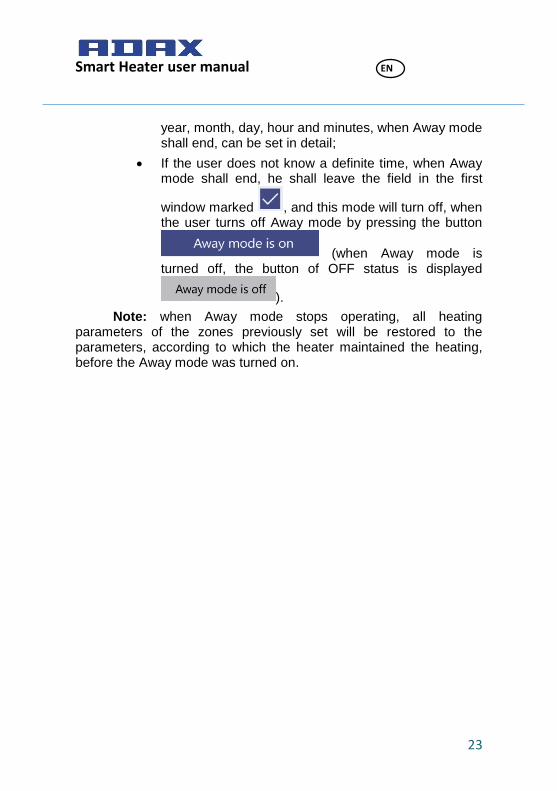
year, month, day, hour and minutes, when Away mode shall end, can be set in detail;
If the user does not know a definite time, when Away mode shall end, he shall leave the field in the first
window marked , and this mode will turn off, when the user turns off Away mode by pressing the button
(when Away mode is turned off, the button of OFF status is displayed
).
Note: when Away mode stops operating, all heating parameters of the zones previously set will be restored to the parameters, according to which the heater maintained the heating, before the Away mode was turned on.

Smart Heater user manual EN 2016-10-26 art. no.: 62013
24
Figure 34. Window 1 of Away mode
Figure 35. Window 2 of Away mode
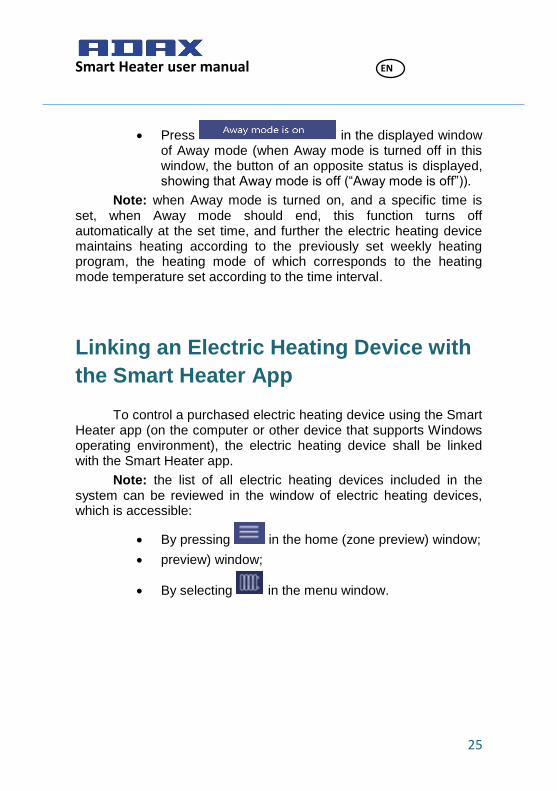
Turning Away Mode Off
To turn Away mode off, perform the following actions:
Press in the home window;
Smart Heater user manual EN 2016-10-26 art. no.: 62013
25
Press in the displayed window of Away mode (when Away mode is turned off in this window, the button of an opposite status is displayed, showing that Away mode is off (“Away mode is off”)).
Note: when Away mode is turned on, and a specific time is set, when Away mode should end, this function turns off automatically at the set time, and further the electric heating device maintains heating according to the previously set weekly heating program, the heating mode of which corresponds to the heating mode temperature set according to the time interval.
Linking an Electric Heating Device with
the Smart Heater App
To control a purchased electric heating device using the Smart Heater app (on the computer or other device that supports Windows operating environment), the electric heating device shall be linked with the Smart Heater app.
Note: the list of all electric heating devices included in the system can be reviewed in the window of electric heating devices, which is accessible:
By pressing in the home (zone preview) window;
preview) window;
By selecting in the menu window.

Smart Heater user manual EN 2016-10-26 art. no.: 62013
26
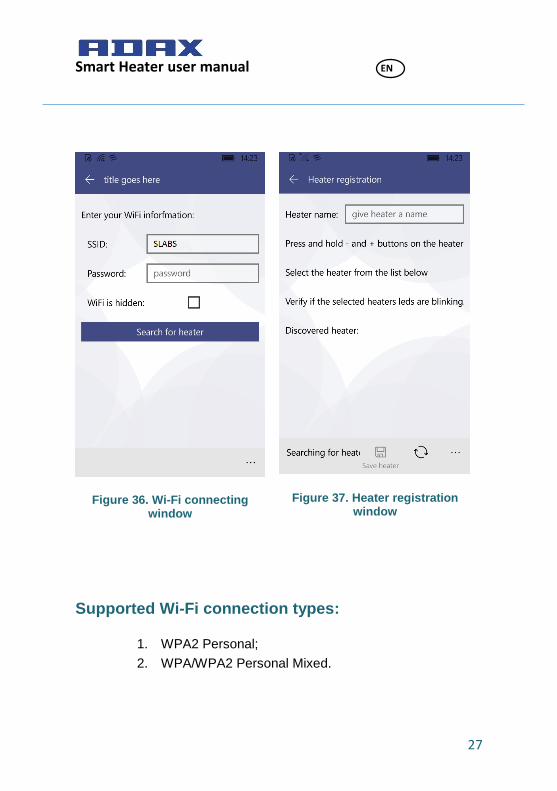
How to Successfully Register the Existing
Heater
1. In the home network (Wi-Fi) information field, correctly fill in the fields “SSID” (home network name) and “Password”. It is recommended to leave the field “Wi-
Fi is hidden” marked ( );
2. Press the button ;
3. On the screen of the heater you wish to include in the system, press and hold the buttons “+” and “-” together, until the symbol SC (Smart Configuration) is displayed on the screen;
4. In the SmartHeater app, press on the found heater’s name in the heater registration window (“Heater registration”), in the field “Discovered heater”;
5. Check, whether a red light is blinking on the screen of the heater you wish to link with the SmartHeater app;
6. Write the desired heater’s name in the SmartHeater app, in the field “Heater name” of the heater registration window;
7. Press the button at the bottom of the window.
Note: It is recommended to perform the function of linking the existing heater with SmartHeater app separately for each existing heater.
Smart Heater user manual EN 2016-10-26 art. no.: 62013
27
Figure 36. Wi-Fi connecting window
Figure 37. Heater registration window
Supported Wi-Fi connection types:
1. WPA2 Personal;
2. WPA/WPA2 Personal Mixed.