copyright and disclaimer · web viewgpo box 9839 canberra act 2601 email:...
TRANSCRIPT

Supporting:
LMFFL2302A: Install resilient
tiles using standard
installation practices
Resilient tiles
Learner guide
Developed in 2012-2013 for the WELL Program

Resilient tiles – Learner guide
Resilient tilesLearner guide
This unit is also available in an e-learning format, which contains additional photos, interactive exercises and a voice-over narration of the text. It can be viewed on CD-ROM, or live on the web at:
www.flooringtech.com.au
Developed by Workspace Training for the 2012-2013Workplace English Language and Literacy (WELL) Program
Flooring Technology resource development project
© Commonwealth of Australia 2013

Resilient tiles – Learner guide
Copyright and disclaimer ISBN: 978-1-925087-03-1
Funded under the Workplace English Language and Literacy Program by the Australian Government through the Department of Industry, Innovation, Climate Change, Science, Research and Tertiary Education
© Commonwealth of Australia 2013
CC BY-NC-SA
This work is copyright. Except where otherwise indicated, and save for the Commonwealth Coat of Arms, the Department has applied the Creative Commons Attribution-Noncommercial-Share Alike 3.0 Australia Licence to this work.
The Department of Industry, Innovation, Climate Change, Science, Research and Tertiary Education must be attributed as the author of the Department’s copyright material.
As far as practicable, material for which the copyright is owned by a third party has been clearly labelled. The Department has made all reasonable efforts to ensure that this material has been reproduced in the print-based resources and accompanying website with the full consent of the copyright owners.
Requests and enquiries concerning the Department’s copyright material should be addressed to:
The Legal Branch Department of Industry, Innovation, Climate Change, Science, Research and Tertiary EducationGPO Box 9839 Canberra ACT 2601 Email: [email protected]
Questions about the design and content of the resource itself should be addressed to the project manager:
David McElvennyWorkspace TrainingPO Box 1954 Strawberry Hills, NSW, 2012 Email: [email protected]
Disclaimer The content of this Learner guide is provided for educational purposes only. No claim is made as to the accuracy or authenticity of the content. The views expressed in this publication do not necessarily represent the view of the Minister for Tertiary Education, Skills, Science and Research or the Australian Government. The Australian Government does not give any warranty nor accept any liability in relation to the contents of this work.
© Commonwealth of Australia 2013

Resilient tiles – Learner guide
About this resource This Learner guide is part of a suite of resources developed for the Flooring Technology project, funded by the WELL Program. The resources support 19 competencies from the Certificate III in Flooring Technology (LMF31208). The project comprises a website and an accompanying set of Learner guides and work books.
The individual competencies are grouped into ‘Learning units’ as shown below. Each one is given a title describing the main theme of that set of integrated competencies.
Learning unit title Competencies covered
Safety at work MSAPMOHS200A: Work safelyLMFFL3002A: Establish and maintain a safe flooring technology work environment
Inspecting and testing subfloors LMFFL2004A: Moisture test timber and concrete floors
LMFFL3101A: Inspect sub-floors
Planning and costing LMFFL3001A: Plan and cost flooring technology work
Subfloor coatings and toppings LMFFL2102A: Prepare, select and apply smoothing and patching compounds
LMFFL2103A: Select and apply appropriate compounds and additivesLMFFL2105A: Select, prepare and apply moisture barriers and damp proof membranes to concrete sub-floors
Concrete grinding LMFFL2107A: Select, operate and maintain grinding equipment
Preparing floor coverings LMFFL2002A: Receive and prepare floor covering materials for installation
Lay flat vinyl LMFFL2301A: Install lay flat vinyl floor coverings
Resilient tiles LMFFL2302A: Install resilient tiles using standard installation practices
Commercial vinyl LMFFL3302A: Install commercial vinyl floor coveringsLMFFL3303A: Install resilient floor coverings using custom designs and decorative finishes
Linoleum LMFFL3301A: Install linoleum floor coverings
ESD floors LMFFL3308A: Install anti-static resilient floor coveringsLMFFL3309A: Install conductive resilient floor coverings
Making measurements MSAPMOPS101A: Make measurements
© Commonwealth of Australia 2013

Resilient tiles – Learner guide
Working sustainably MSAENV272B: Participate in environmentally sustainable work practices
The purpose of these resources is to help trainee floor layers acquire the background knowledge needed to satisfy the theoretical components of the competencies covered in this project. However, the resources are not designed to replace the practical training necessary to develop the hands-on skills required. Learners will still need to receive extensive on-the-job training and supervision before they will be ready to be formally assessed in the relevant competencies.
E-learning version
All of the content material contained in this Learner guide is also available in an e-learning format, which has additional photos, interactive exercises and a voice-over narration of the text. The e-learning version can be viewed on the web at: www.flooringtech.com.au
The web version can also be purchased on a CD at a cost-recovery price from the project developer:
Workspace TrainingPO Box 1954 Strawberry Hills, NSW, 2012Email: [email protected]
© Commonwealth of Australia 2013

Resilient tiles – Learner guide
AcknowledgementsProject team
Project manager: David McElvenny
Instructional designer: Kath Ware
Technical developer (website): Jim Vaughan
Assistant technical developer (and voice-over artist): Alex Vaughan
Quality assurance consultant: Giselle Mawer
Industry coordinator: Gary Dunshea (MSA Industry Skills Council)
Technical Advisory Group
Lead advisorsWilliam Tree – South West Sydney Institute of TAFE
Mark Willis – Council of Textile and Fashion Industries of Australia
Craig Bennett – Hunter Institute of TAFE
ReviewersIan Ciesla – Polytechnic West
Robert Cole – Furnishing Industry Association of Australia
Steven Dalton – Marleston TAFE
Shane Eales – SkillsTech Australia
David Hayward – Australian Timber Flooring Association
Bruce Ottens – Holmesglen TAFE
Chris Shaw – Skills Institute Tasmania
Warren West – Australian Resilient Floor Covering Association
Industry advisorsPeter Brack – Forbo Flooring Systems
Don Considine – IKW Consulting Group
Gary Eggers – Tarkett Flooring
Jim Hilston – Hilston Floors
Lionel Jacobs – Epoxy Solutions
Owen Jordian – Choices Flooring
Steven King – Armstrong Floors
Jarka Kluth – Pro Grind Australia
Haydn Reynolds – Floorex Products
Naomi Archer – All Preparation Equipment
Photographs
© Commonwealth of Australia 2013

Resilient tiles – Learner guide
Most of the photos in this suite of resource were taken by David McElvenny. Additional photos were provided by:
David Beeforth (ParexDavco)
Don Considine (IKW Consulting Group)
Craig Bennett (Hunter TAFE)
David Hayward (Australian Timber Flooring Association)
Gary Eggers (Tarkett)
Lionel Jacobs (Epoxy Solutions)
Jarka Kluth (Pro Grind Australia)
Haydn Reynolds (Floorex Products)
Naomi Archer (All Preparation Equipment)
We would like to thank the following organisations for allowing us to take on-site photos of their employees at work or students in class.
Choices Flooring – Sandgate, Bulleen, Thomastown and Mornington
Lidcombe College of TAFE
Lomac Commercial Flooring
Tarkett
Epoxy Solutions
Graphics
Graphics were drawn by Kath Ware. Many of these graphics are based on line drawings or photographs from installation manuals published by the following flooring manufacturers:
Armstrong: http://www.armstrong.com/flooring/guaranteed-installation-systems.html
Forbo: http://www.forbo-flooring.com.au/Commercial-flooring/Support-installation-and-maintenance/Installation/Installation-technique/
Tarkett: http://professionals.tarkett.com.au/commdocu?field_docu_type_value=Installation+guide
Financial contributions
This resource was funded by the Workplace English Language and Literacy Program by the Australian Government through the Department of Industry, Innovation, Climate Change, Science, Research and Tertiary Education. Additional financial assistance was provided by Manufacturing Skills Australia (Industry Skills Council).
© Commonwealth of Australia 2013

Resilient tiles – Learner guide
Table of contentsIntroduction...............................................................................................................1
Section 1 Tile basics.................................................................................................3
Overview..................................................................................................................5
Types of tiles...........................................................................................................6
Types of adhesives..................................................................................................8
Applying an adhesive............................................................................................10
Layouts and bonds................................................................................................12
Preparing the tiles..................................................................................................14
Assignment 1.........................................................................................................16
Section 2 Square layout techniques......................................................................17
Overview................................................................................................................19
Finding the starting point.......................................................................................20
Marking working lines............................................................................................23
Laying field tiles.....................................................................................................27
Laying border tiles.................................................................................................29
Assignment 2.........................................................................................................32
Section 3 Other layouts and techniques...............................................................33
Overview................................................................................................................35
Diagonal layouts....................................................................................................36
Corridors and columns..........................................................................................38
Common problems with tiles..................................................................................42
Finishing the job....................................................................................................45
Assignment 3.........................................................................................................48
© Commonwealth of Australia 2013

Resilient tiles – Learner guide
Practical demonstrations.......................................................................................49
© Commonwealth of Australia 2013

Resilient tiles – Learner guide 1
Introduction
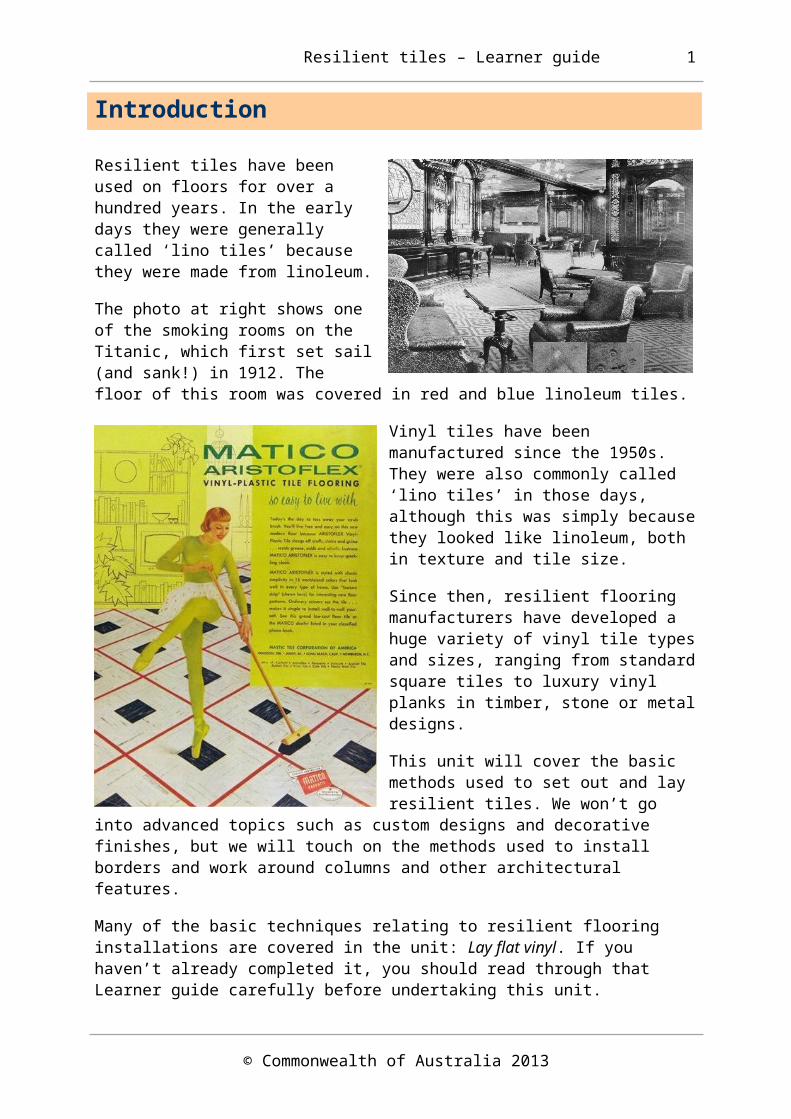
Resilient tiles have been used on floors for over a hundred years. In the early days they were generally called ‘lino tiles’ because they were made from linoleum.
The photo at right shows one of the smoking rooms on the Titanic, which first set sail (and sank!) in 1912. The floor of this room was covered in red and blue linoleum tiles.
Vinyl tiles have been manufactured since the 1950s. They were also commonly called ‘lino tiles’ in those days, although this was simply because they looked like linoleum, both in texture and tile size.
Since then, resilient flooring manufacturers have developed a huge variety of vinyl tile types and sizes, ranging from standard square tiles to luxury vinyl planks in timber, stone or metal designs.
This unit will cover the basic methods used to set out and lay resilient tiles. We won’t go into advanced topics such as custom designs and decorative finishes, but we will touch on the methods used to install borders and work around columns and other architectural features.
Many of the basic techniques relating to resilient flooring installations are covered in the unit: Lay flat vinyl. If you haven’t already completed it, you should read through that Learner guide carefully before undertaking this unit.
References
The methods described in this unit are based primarily on the information provided by Armstrong and Forbo in their installation guides. You can download the original PDF documents from their websites via the following links:
© Commonwealth of Australia 2013

Resilient tiles – Learner guide 2
Armstrong: http://www.armstrong.com/flooring/guaranteed-installation-systems.html
Forbo: http://www.forbo-flooring.com.au/Commercial-flooring/Support-installation-and-maintenance/Installation/Installation-technique/
We have also used a variety of photos provided by Tarkett Australia. You can see these photos in the original document at: http://viewer.zmags.com/publication/6612b1a9#/6612b1a9/22.
Working through this unit
There are three sections in this unit:
Tile basics
Square layout techniques
Other layouts and techniques.
Each section contains an Overview, an Assignment and Lessons which cover the content material.
Assignments
Your trainer may ask you to submit the assignments as part of your assessment evidence for the unit. You will find hard-copy templates for these assignments in the separate workbook.
Electronic ‘Word’ templates of the assignments are available on the website for this resource at: www.flooringtech.com.au
Learning activities
Each of the lessons has a learning activity at the end. The Workbook for this unit contains all of the learning activities together with spaces for written answers.
Again, you will find the learning activities on the website version, together with some interactive ‘Just for fun’ exercises.
Practical demonstrations
Your final assessment of competency in this unit will include various practical demonstrations. Their purpose is to assess your ability to install resilient tiles in a range of situations. To help you get ready for these hands-on assessment activities, see the sample checklist shown in the Practical demonstrations section at the back of this Learner guide.
© Commonwealth of Australia 2013

Resilient tiles – Learner guide 3
Section 1Tile basics
© Commonwealth of Australia 2013
Resilient tiles – Learner guide 4
© Commonwealth of Australia 2013

Resilient tiles – Learner guide 5
Overview
In this section, we’ll look at the different types of resilient tiles on the market and the adhesives used to stick them down. We’ll also talk about the methods used to prepare and condition the tiles and the most common patterns they are laid in.
There are other important topics relating on-site installation work that are not covered in this Learner guide. These are explained in detail in Lay flat vinyl under the following lessons:
‘Dealing with the client’
‘Health and safety’
‘Documentation’
‘Assessing the subfloor’
‘Tools and equipment’.
Note that these topics will also form part of your assessment of competency in LMFFL2302A: Install resilient tiles using standard installation practices, so you should make sure you have a good understanding of them before you go on to the next section of this unit.
Completing this section
The assignment for this section is designed to test your knowledge of different types of resilient tiles and the adhesives used to install them. Have a look at the Assignment on page 16 to see what you'll need to do to complete it.
There are five lessons in this section:
Types of tiles
Types of adhesives
Applying an adhesive
Layouts and bonds
Preparing the tiles.
These lessons will provide you with background information relevant to the assignment and practical demonstration requirements.
© Commonwealth of Australia 2013

Resilient tiles – Learner guide 6
Types of tiles
Resilient tiles come in a huge variety of product types and decorative surface finishes.
In terms of their composition, they can be grouped into four main types: vinyl composition, luxury vinyl, rubber and linoleum.
Vinyl composition tile (VCT)
Vinyl composition tiles are made from a ‘composition’ of fillers, colour pigments and a polyvinyl chloride (PVC) binder.
Most manufacturers put a polyurethane (PUR) treatment on the surface.
The traditional tile size is 300 x 300 mm, but other sizes are also available.
VCT is very durable and widely used in shopping centres, schools and other commercial buildings.
Luxury vinyl tile (LVT)
Luxury vinyl tiles have a layered structure, as opposed to VCT, which is solid. See below for more details on these two types of structure.
LVT products generally have a textured surface, with finishes that can look like stone, wood, metal and other building materials.
In addition to the square tile sizes, LVT is very popular in plank form, in sizes such as 915 x 152 mm (3 ft x 6 in) and 1220 x 152 (4 ft x 6 in).
© Commonwealth of Australia 2013

Resilient tiles – Learner guide 7
Rubber
Rubber is generally used in areas where a waterproof or non-slip surface is needed.
Although it’s more expensive than other products and requires specialist installation, it is the most appropriate resilient flooring for dance studios, gymnasiums and other floors that require high impact resistance.
Linoleum
Linoleum has made a comeback in popularity in recent years.
This is partly due to its properties as an ‘anti-static’ floor, partly due to its increased range of colours and designs, and also because it’s often considered more environmentally friendly than vinyl-based products.
Tile structure
The resilient tiles described above are either made of multiple layers or have a solid, uniform composition.
In technical terms, layered tiles are called heterogeneous in structure. Solid tiles are called homogeneous.
These terms are also used to describe resilient sheet products that are layered or solid.
Learning activity
Can you name one example of a VCT and one example of an LVT?
What are the brand names and who are the manufacturers?
Where are they designed to be installed – that is, what are their typical applications?
© Commonwealth of Australia 2013

Resilient tiles – Learner guide 8
Types of adhesives
Adhesive is used to stick tiles to the flooring substrate. Different types of adhesive are used for different tile compositions and subfloor materials.
The tile manufacturer will generally specify the most appropriate adhesive in their installation instructions.
There are two main types of adhesives used for tiles – acrylic and pressure sensitive. These are described below.
A third method of sticking down tiles is to use self-stick, or ‘peel and stick’ tiles. These tiles have a coating of adhesive on the back, protected by a peel-off layer.
They are aimed at the do-it-yourself market and are not designed to last as long or perform as well as tiles laid into an adhesive that’s been spread on the substrate with a trowel.
Acrylic
There are many acrylic adhesives on the market. Most are solvent based or water based, which means that the curing action occurs when the solvent or water evaporates after the adhesive is applied.
They can be one or two part adhesives and are classified as soft or semi-soft set, because they don’t set to a hard crystalline form like some other types of adhesive.
Pressure sensitive
Pressure sensitive adhesives form a bond when the floor covering material is pressed into the adhesive. They are classed as soft set.
These adhesives have the advantage of allowing individual tiles to be removed and replaced long after the floor has been laid.
© Commonwealth of Australia 2013

Resilient tiles – Learner guide 9
Learning activity
Choose one example each of an acrylic adhesive and a pressure sensitive adhesive.
Get the brochures and answer the following questions for each one:
What types of substrates are they designed for?
What types of resilient tiles are they most suitable for?
© Commonwealth of Australia 2013

Resilient tiles – Learner guide 10
Applying an adhesive
We covered the process of applying an adhesive in Lay flat vinyl, under the lesson ‘Full spread installation’. So below we will summarise the procedure in relation to tile installations.
Most adhesives are designed to be spread with a notched trowel. The purpose of the notches is to control the amount of adhesive that’s spread on the substrate.
Manufacturers specify different trowel notchings for particular products. It’s important to follow these specifications, because if you don’t, you’ll end up applying either too much or too little adhesive.
Applying too much adhesive can result in the ridges showing through the surface, or ‘bleeding’ at the tile joints. Applying too little will mean that there is less adhesive available for a firm bond, as well as a reduced ‘working time’ for placement.
Open time and working time
Once the adhesive has been spread, you need to wait until the open time has elapsed before placing the tiles in position. This is also called the tack up time, because the ridges in the adhesive start to ‘skin over’ and become tacky to the touch.
When the adhesive is ready for the tiles to be placed on top, the working time begins.
If you lay the tiles too late, they won’t bond properly to the subfloor, because the adhesive will have already ‘flashed off’, or completely skinned over. This means that there won’t be sufficient transfer of adhesive to the underside of the tile.
If you lay the tiles too early, that is, before the working time begins, the tile may slide sideways in the adhesive. But note that some resilient tiles are designed to be laid into adhesive that is much wetter than you’d normally use with sheet vinyl. This particularly applies to planks and linoleum tiles.
© Commonwealth of Australia 2013

Resilient tiles – Learner guide 11
Also remember that the open time and working time will vary depending on the temperature, humidity and porosity of the surface. High temperatures, low humidity and porous surfaces will all reduce these times.
Rollers
Once the tiles or planks have been placed in position and fitted, they need to be pushed firmly into the adhesive.
You should do this with a floor roller, running lengthwise and then across the floor.
In areas that can’t be reached with a floor roller, use a hand roller or rubber mallet.
Learning activity
The link below will take you to a video clip produced by Forbo Flooring called: ‘Marmoleum tile installation’.
http://www.youtube.com/watch?v=UfYMJBu4HI0
Watch the video and answer the following questions:
What happens to Marmoleum tiles if they are installed onto adhesive that has already ‘flashed off’?
When should you roll the tiles with a floor roller?
© Commonwealth of Australia 2013

Resilient tiles – Learner guide 12
Layouts and bonds
The term bond has two different meanings in resilient flooring. There is the ‘bond’ that refers to an adhesive’s ability to stick the floor covering to the substrate underneath.
But in tiles, there’s also the ‘bond’ that occurs as the joints between tiles form a particular pattern or layout on the floor.
In this lesson, we’ll talk about the joint layout type of bond. The main bonds are described below.
Square
This is also called a ‘normal bond’, because the tiles are simply laid in a straight line. A variation is the checkerboard pattern, where two colours are used alternately.
The appearance can also be varied by laying the grain of every second tile at right angles to those on either side.
Diagonal
Diagonally laid tiles use the same bond as a square layout, except that the angle is at 45 degrees to the walls.
Again, they can also be laid in a checkerboard pattern or with alternating grain.
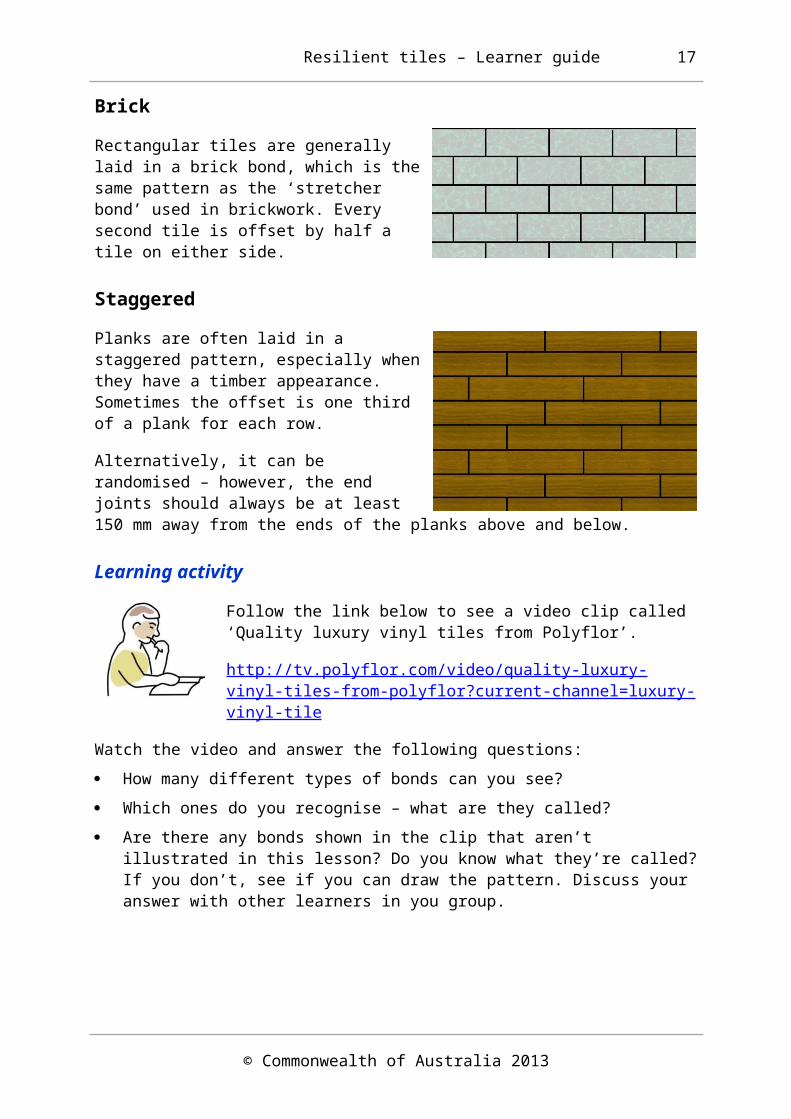
Brick
Rectangular tiles are generally laid in a brick bond, which is the same pattern as the ‘stretcher bond’ used in brickwork. Every second tile is offset by half a tile on either side.
© Commonwealth of Australia 2013

Resilient tiles – Learner guide 13
Staggered
Planks are often laid in a staggered pattern, especially when they have a timber appearance. Sometimes the offset is one third of a plank for each row.
Alternatively, it can be randomised – however, the end joints should always be at least 150 mm away from the ends of the planks above and below.
Learning activity
Follow the link below to see a video clip called ‘Quality luxury vinyl tiles from Polyflor’.
http://tv.polyflor.com/video/quality-luxury-vinyl-tiles-from-polyflor?current-channel=luxury-vinyl-tile
Watch the video and answer the following questions:
How many different types of bonds can you see?
Which ones do you recognise – what are they called?
Are there any bonds shown in the clip that aren’t illustrated in this lesson? Do you know what they’re called? If you don’t, see if you can draw the pattern. Discuss your answer with other learners in you group.
© Commonwealth of Australia 2013

Resilient tiles – Learner guide 14
Preparing the tiles
Before you begin an installation, you need to let the resilient tiles condition to the surrounding temperature and humidity in the room. This process is also called acclimatisation.
AS 1884-2012 says that all floor coverings should be conditioned for at least 24 hours, or until the product has achieved an ‘ambient room temperature’ range of between 15° and 28° C.
For more information on the conditioning process, including the procedures you should follow in buildings with air conditioners or heated floors, go to the lesson ‘Conditioning’ in the unit: Preparing floor coverings.
Labels and batch lots
Each box of tiles will have a label on it with details relating to the design, product type and batch number.
The batch number refers to the colour dyes used in that particular manufacturing run – often called the dye lot.
It’s best not to mix different batch numbers in the same room, because there may be slight differences in colour from one dye lot to another.
If it turns out that you do have boxes of tiles from different dye lots and they all have to go into the same room, compare the tiles to see if there are variations in colour, texture or gloss. Depending on the nature of the job, you may be able to ‘shuffle’ the tiles to mix the dye lots and create a random look, or put particular tiles in a separate area.
Note that AS 1884 says that if you're using more than one carton of VCT tiles they must all have the same batch number. The Standard also says that full boxes should be stored on-site in stacks that are no more than five boxes high for at least 24 hours.
© Commonwealth of Australia 2013

Resilient tiles – Learner guide 15
Learning activity
Manufacturers often specify the recommended temperature range and humidity levels for their products using abbreviations like this:
Temperature: 21° C + 5°
Relative humidity: 50% + 10%.
These ‘plus or minus tolerances’ show the range of measurements allowed by indicating the middle reading and specifying how much higher and lower it is allowed to go.
If the temperature range for a flooring product is listed as 21° C + 5°, what are the actual upper and lower readings?
If the relative humidity is listed as 50% + 10%, what are its upper and lower readings?
© Commonwealth of Australia 2013

Resilient tiles – Learner guide 16
Assignment 1
Go to the Workbook for this unit to write your answers to the questions shown below. If you prefer to answer the questions electronically, go to the website version and download the Word document template for this assignment.
___________________________________________________________________________
1. Choose one brand-name product for each of the following types of resilient tile and answer the questions listed below:
Vinyl composition tile
Luxury vinyl tile
Rubber
Linoleum
(a) What is the product name and who is the manufacturer?
(b) What types of end uses is it most suitable for?
(c) What are its main features – that is, what characteristics would clients be looking for when they choose this product?
(d) What advice is given by the manufacturer on how the product should be conditioned before installation?
(e) What brand of adhesive is recommended for the product, and what type of adhesive is it?
(f) How is the adhesive applied? If it requires a notched trowel, state the trowel notching size.
2. What on-site conditions can affect the duration of an adhesive’s open time and working time? Name three factors.
© Commonwealth of Australia 2013

Resilient tiles – Learner guide 17
Section 2Square
layout techniques
© Commonwealth of Australia 2013

Resilient tiles – Learner guide 18
© Commonwealth of Australia 2013

Resilient tiles – Learner guide 19
Overview
It takes time to set out properly for a tiled floor, but it’s crucial to get it right before you start.
Proper setting out will help you to avoid layout problems or awkward cuts when you get to the perimeter walls or architectural features in the room.
In this section, we’ll discuss ways to find the centre of the room and mark ‘working lines’ on the floor.
We’ll also cover the techniques used to lay tiles in a square design and scribe and fit the border tiles.
Completing this section
The assignment for this section is designed to check your understanding of the calculations and procedures involved in setting out the working lines for a simple tiled floor.
Have a look at the Assignment on page 32 to see what you'll need to do to complete it.
There are four lessons in this section:
Finding the starting point
Marking working lines
Laying field tiles
Laying border tiles.
These lessons will provide you with background information relevant to the assignment and practical demonstration requirements.
© Commonwealth of Australia 2013
Resilient tiles – Learner guide 20
Finding the starting point
The traditional place to start the set out is from the centre of the room or area to be tiled.
The first thing you need to do is find the centre point and draw two lines at right angles to each other. The marking gauge you use should be a reasonable length, so that there is minimal margin for error.
Some installers use a piece of flooring material about one metre long. Note that the material must be able to keep its shape and not stretch. In small areas you could use a bar scriber set to its full length.
If the room is a standard rectangular shape
1. Measure the length of two opposing walls and mark the centre point of each wall (A and B).
2. Strike a chalk line between A and B and find the centre point (C).
3. Put one end of the gauge on C and mark two points on the line the same distance apart (D and E). About 200 mm from C is a good distance.
4. Use the full length of the gauge and scribe intersecting arcs (F and G) from both D and E.
5. Strike a chalk line between F and G.
Note that if you had simply found the centre point of the other two walls and drawn a line between them, you wouldn’t be able to guarantee that the intersecting lines were at right angles, because the walls themselves may not be exactly the same length or parallel.
© Commonwealth of Australia 2013

Resilient tiles – Learner guide 21
This is why you must start with a baseline (AB) and create an intersecting line (FG) that’s at right angles to the baseline. If the room is perfectly symmetrical, FG will be parallel to both end walls – but if the room is slightly out of square, it won’t affect the squareness of your two centrelines.
If the room or area is an irregular shape
1. Strike a chalk line parallel to the wall that has the main entrance door, about 75 mm out from the wall. Find the centre point (A).
2. Mark two points (X and Y) an equal distance from A using the marking gauge.
3. Mark intersecting arcs from X and Y, making sure it is a reasonable distance out from A. The intersection will be point B.
4. Strike a chalk line from A to the opposite wall, passing through B.
5. Find the mid-point of the line (C).
6. Mark two points either side of C, the same distance apart (D and E).
7. Scribe intersecting arcs (F and G) from both D and E.
8. Strike a chalk line between F and G.
© Commonwealth of Australia 2013

Resilient tiles – Learner guide 22
If the room has recesses or projections in the side walls:
1. Strike ‘false’ wall lines to give the room a regular shape.
2. Follow all steps for either the standard rectangular shape or irregular shape listed above, using the false lines as reference marks for the side walls.
Using the 3, 4, 5 rule
Some installers use the ‘3, 4, 5 rule’ – also called ‘Pythagoras’s theorem’, to find a right angle to another line or wall.
For more details on this technique, and a fuller description of the principles of squareness and right angles, see ‘Angles’ in the unit: Making measurements.
Learning activity
Go to the Armstrong Floors instruction videos at:
http://www.armstrong-aust.com.au/commflrpac/aus/ep/au/vinyl_video_library.html#
Select the ‘Vinyl tile installation’ tab under the media player and then click on ‘Vinyl tile installation video Part 3’.
The first two minutes of this video clip shows the process of setting out the room using the standard technique we’ve described above.
You’ll notice the narrator says that the floor will fit 7 full tiles across the width and 11 full tiles along the length. However, he decides to change the set-out so that there’s only 6 full tiles widthwise and 10 full tiles lengthwise.
Why does he change the layout?
Keep this point in mind when you go to the next lesson and learn about the situations when it’s best to move the starting point away from the true centre point in a room.
© Commonwealth of Australia 2013

Resilient tiles – Learner guide 23
Marking working lines
Once you’ve marked out the two centrelines, you can look at the issue of where the tiles will fall, and how wide the border tiles will be against the walls.
The border tiles – also called ‘perimeter tiles’ – are the ones that go around the perimeter of the room.
They enclose the field tiles that form the main body of the floor.
© Commonwealth of Australia 2013

Resilient tiles – Learner guide 24
What you’re trying to avoid is a narrow strip of border tiles, which not only looks less pleasing to the eye, but also accentuates any taper that might occur if the opposing walls are not parallel.
You also need to set out where the tiles will fall in relation to any architectural features in the room, such as columns, recesses or projections.
If you can avoid awkward cuts or small fill-in pieces, the job will be easier to do and the final result will look more professional.
Some installers physically lay out the tiles along the centrelines towards the two adjacent walls.
This is called ‘dry laying’, and it lets you see exactly how wide the border tiles will be against the walls.
Alternatively, you can mark the tile widths (or multiples of the widths) along the centrelines to see where the last full tile will finish.
Another option is to simply do the sums in your head or on a calculator. Below is an example.
Say the tiles are 500 x 500 mm and the length of the line AC is 3250 mm.
The number of tiles along the line AC is:
3250 ÷ 500 = 6.5 (in other words, 6 ½) tiles
This means that the width of the last tile will be:
500 x 0.5 = 250 mm
Moving the starting point
© Commonwealth of Australia 2013

Resilient tiles – Learner guide 25
There are times when the last row of tiles might end up being a narrow strip. In these cases, you can move the starting point away from the true centre point so that you get a better result.
For example, let’s say that the length of the line CD is 2050.
If you used the true centre point C as your starting point, the number of rows would be:
2050 ÷ 500 = 4.1
Therefore, the width of the last tile would be:
500 x 0.1 = 50 mm
The same will occur on the other side, because CE is the same length.
However, if you move the starting point towards E by 250 mm, you would end up with 4 full tiles plus a border tile cut to:
50 + 250 (distance moved) = 300 mm
This means that the starting point will no longer be C – it will now be X.
Note that since XD is longer than the original line by 250 mm, XE will be shorter by the same amount. That is:
XE = 2050 – 250 = 1800
So the number of tiles along XE is:
1800 ÷ 500 = 3.6
And the width of the border tile is:
500 x 0.6 = 300 mm
© Commonwealth of Australia 2013

Resilient tiles – Learner guide 26
So the border tiles on both sides are still the same width, but we’ve managed to avoid a narrow strip against the walls.
You can prove to yourself that the total length of the tiles across the room are unchanged by doing the following sums:
Total number of tiles along centreline DE: 4100 ÷ 500 = 8.2 tiles
Number of tiles either side of C = 4.1 (along CD) + 4.1 (along CE)
= 8.2 tiles (made up of 8 full tiles + 2 border tiles cut to 50 mm each)
Number of tiles either side of X = 4.6 (along XD) + 3.6 (along XE)
= 8.2 tiles (made up of 7 full tiles + 2 border tiles cut to 300 mm each)
You can see that the centreline AB is no longer our ‘working line’, that is, the line that we lay the tiles along. The working line is now FG.
The drawing at right shows the room with the widths of all border tiles marked.
© Commonwealth of Australia 2013

Resilient tiles – Learner guide 27
Learning activity
Watch the first 2 minutes of the Armstrong ‘Vinyl tile installation’ video (Part 3) again, at:
http://www.armstrong-aust.com.au/commflrpac/aus/ep/au/vinyl_video_library.html#
Now draw a diagram like the last one shown in this lesson. Mark in the two working lines and show their lengths either side of the starting point. Also show the width of the cut piece at each perimeter.
You may put all this information on one drawing if you can fit it on clearly, or use one drawing to show the full floor plan and a second drawing to show the border tile measurements.
© Commonwealth of Australia 2013

Resilient tiles – Learner guide 28
Laying field tiles
Once you’ve marked out the working lines on the substrate, you can commence the laying process.
Before you start:
double-check that the floor is completely clean and free from any contaminants
re-mark the chalk lines with a pencil, if necessary
make sure that tiles of the same colour have a matching batch number if they’re being laid in the same room.
The field tiles should always be laid first, because the border tiles will need to be cut and fitted to the wall before you can lay them.
In practice, it’s easiest to leave the last two rows of tiles till last – that is, the last full tile and the border tile. This will let you use the full tile to trace and cut the border tile – we’ll discuss this process in the next lesson.
To lay the field tiles, working from the centre of the floor:
1. Spread the adhesive with a trowel, two tiles wide on one side of the long working line.
Start at the intersection of the two working lines.
Make sure you only spread as far as you can comfortably cover with tiles during the ‘open time’ – maybe 2-3 m2 at a time.
© Commonwealth of Australia 2013

Resilient tiles – Learner guide 29
2. Allow the adhesive to reach a slight tack, and then position the first tile at the starting point and check its alignment.
Add two more tiles in the direction of the end wall and carefully check their alignment against the working line.
Lay more tiles until you get to the end of the spread adhesive.
3. Spread more adhesive, this time in the direction of the side wall, two tiles wide. Lay two rows of tiles over the spread adhesive.
Continue to build up the floor in alternate directions, two rows at a time. At this stage, don’t lay the last full tile and part tile around the walls, or anywhere else where tiles will need to be cut.
4. Wipe off any excess adhesive with a damp cloth if it has oozed up between the tiles. Roll the installed tiles in both directions with a roller.
Learning activityPick up where you left off with the Armstrong ‘Vinyl tile installation’ video (Part 3) video at:
http://www.armstrong-aust.com.au/commflrpac/aus/ep/au/vinyl_video_library.html#
Watch the video from 2 min 10 secs to 3 min 10 secs. Then answer the following questions.
What size notches does the narrator say is best for spreading adhesive for VCT tiles?
How is the drying time for pressure sensitive adhesive different from drying time allowed for sheet vinyl products?
You’ll notice that the tiles are laid in a slightly different order from the procedure described in this lesson. The pattern being demonstrated is called a ‘pyramid’ layout. How is it different from the method described above?
© Commonwealth of Australia 2013

Resilient tiles – Learner guide 30
Laying border tiles
The method used to cut and scribe resilient tiles is much the same as for equivalent sheet products.
Use a utility knife and cut the tile in two passes – first with a straight or concave blade, and then with a hook blade.
With the first cut, keep the blade vertical so that it runs cleanly along the straightedge. Then use the hook blade to complete the cut.
With some types of tiles you can score or cut them part way through, and then snap the tile.
However, although this snapped edge will be clean enough to butt against a wall, you should always use the machine cut edge if you’re butting it against another tile.
Cutting border tiles to size
If the walls are straight you can use the trace cut method to cut border tiles.
1. Place a full tile in position (A) and another tile hard against the wall (B), overlapping the first one.
2. Cut tile A using the edge of tile B as a guide.
3. Remove the waste piece from tile A and put the full tile B in its place.
4. Put the border tile A in the remaining space with the cut edge against the wall.
If the walls are out of alignment or have an uneven surface, you’ll need to scribe each border tile with a bar scriber.
© Commonwealth of Australia 2013

Resilient tiles – Learner guide 31
Scribing with a bar scriber
Border tiles can be direct scribed in the same way as you would scribe sheet material.
Position the tile as described above for the trace cut method. Set the bar scriber to the full width of one tile and follow the contours of the wall.
Make sure you keep the scriber at right angles to the wall while you’re scribing.
Door jambs and architraves can be direct scribed either with a bar scriber or dividers.
Push the tile up against the object and set the scriber or dividers to the width of the overlap to the last full tile. Then scribe the tile.
To make the job of cutting the tile easier, heat the back of the tile first.
Templates
Templates can also be used in the same way as for sheet material. However, the following differences apply:
1. Before you remove the template from around the object, make sure you mark where the bond (or joint) occurs between two tiles that are already laid.
2. Lay out as many tiles as you’ll need to accommodate the area that the template covers, and tape the tiles together so they can’t move.
Then place the template on top and line up the bond mark with the actual joint between two tiles. Trace the outline onto the tiles and cut them to shape.
© Commonwealth of Australia 2013

Resilient tiles – Learner guide 32
Laying the border tiles
When you spread the adhesive for the last two rows, make sure all the tiles for that area have already been cut so you don’t get caught with any late placements. Also remember to observe the correct open time for the adhesive you’re using.
If you put the last two rows of tiles on top of the outside row of bonded tiles, they’ll be clear of the subfloor while you’re spreading the remaining adhesive, but still in close reach when you’re ready to lay them.
Once the tiles are laid in position on the adhesive, roll them out with a hand roller or tap them down with a mallet.
Learning activityNow watch the remainder of the Armstrong ‘Vinyl tile installation’ video (Part 3) video at:
http://www.armstrong-aust.com.au/commflrpac/aus/ep/au/vinyl_video_library.html#
Start at 3 min 10 sec and watch the video through to the end. Then answer the following questions:
The narrator uses another name for the trace cut method of measuring and cutting border tiles. What does he call this method?
What marking instrument does the installer use to draw the circle for the pipe cut-out?
How does he make the tile more ‘pliable’ – that is, softer and easier to cut?
The installer doesn’t use dividers or a bar scriber to mark out the lines for the architrave cut-out. How does he get the spacing right when he draws the lines with a pencil?
What sized floor roller does the narrator recommend for rolling out the tiles?
© Commonwealth of Australia 2013

Resilient tiles – Learner guide 33
Assignment 2
You may either use the Workbook for this unit to draw up your sketches for this assignment or use separate pieces of paper. Note that if you use separate paper, make sure you write your name on every page before handing it in for marking.
___________________________________________________________________________
Your trainer will give you a room to measure up for a resilient tile installation. You will also be given a specific tile size to work with. Your task is to produce the following two drawings.
1. Basic proportional sketch of the room, showing all measurements required to calculate and set out the working lines for the tiled floor.
2. Second sketch showing the following set-out details:
chalk lines required to find the centre point of the room
additional chalk lines required to move the starting point away from the centre point (if needed)
finished size of the cut border tiles against all four walls
lengths along the working lines between the walls and the starting point.
The sketches do not need to be drawn perfectly to scale. However, they should be well set out with straight lines and information that’s clearly marked and easy to read. You will probably need to produce a rough version first and then re-draw it when you have worked out the details.
If you would like more advice on how to produce a proportional sketch, go to Section 2 (‘Floor covering plans’) of the unit: Planning and costing.
© Commonwealth of Australia 2013

Resilient tiles – Learner guide 34
Section 3Other
layouts and techniques
© Commonwealth of Australia 2013

Resilient tiles – Learner guide 35
© Commonwealth of Australia 2013

Resilient tiles – Learner guide 36
Overview
So far we've covered the principles involved in setting out and laying a square pattern tiled floor. Now we’ll extend these techniques a little further and look at other layouts and room shapes.
We’ll also discuss ways of working around columns and other architectural features while still maintaining a consistent ‘bond’ throughout the floor.
To complete this basic coverage of resilient tile installations, we’ll talk about some common problems and how to overcome them, and describe the checks and initial maintenance procedures you should follow once the job is finished.
Completing this section
The assignment for this section will test your general knowlegde of common problems that can occur and ways of avoiding them, plus some basic installation and maintenance procedures.
Have a look at the Assignment on page 48 to see what you'll need to do to complete it.
There are four lessons in this section:
Diagonal layouts
Corridors and columns
Common problems
Finishing the job.
These lessons will provide you with background information relevant to the assignment and practical demonstration requirements.
© Commonwealth of Australia 2013

Resilient tiles – Learner guide 37
Diagonal layouts
The principles involved in laying tiles diagonally are basically the same as with a square layout.
The main difference is that your working lines will now be diagonal, rather than parallel to the walls.
Marking the working lines
1. Find the centre point (C) and mark the centre lines as shown in the Section 2 lesson ‘Finding the starting point’.
2. Using a marking gauge or bar scriber, mark the points 1, 2, 3 and 4.
3. Scribe intersecting arcs from 1 and 2 to find X.
Scribe intersecting arcs from 2 and 3 to find Y.
Use the same process to find Z and W.
4. Strike a chalk line to form the line XZ.
Do the same to form WY.
5. Check that the tile widths balance properly at the walls using the techniques described in the lesson ‘Marking working lines’.
Laying the tiles
© Commonwealth of Australia 2013

Resilient tiles – Learner guide 38
The field tiles can be laid in the same way as you would for a square layout.
Work from the centre of the room, starting at the intersection of the two diagonal working lines.
Leave the last full tile and cut tile around the walls until later.
To check that the field tiles are being laid accurately, you can draw reference lines at right angles to the original centre lines to make sure that the points of the tiles are lining up correctly.
To mark the cut for the border tiles, you can use a template cut from a piece of sheet material. See the video in the learning activity below for details on how to make the template.
Place the tile to be cut in the space where the last full tile will go and mark it accordingly. Then cut it and push it hard against the wall, with a full tile behind it to check that the cut is correct.
Learning activity
Go back to the Armstrong ‘Vinyl tile installation’ videos at:
http://www.armstrong-aust.com.au/commflrpac/aus/ep/au/vinyl_video_library.html#
This time, select Part 2 to see the diagonal layout techniques.
Watch the video and then answer the following questions:
How wide is the square piece of sheet material that’s cut to size to form a marking template?
What material does the installer use as a template for scribing corners and architraves?
What tools does the installer use to mark the guidelines for the corners and architraves on the template?
© Commonwealth of Australia 2013

Resilient tiles – Learner guide 39
Corridors and columns
The techniques we’ve discussed so far have all applied to rooms with a standard rectangular shape. Now let’s look at some more complex situations.
Keep in mind that whatever the design is, your objective should be to treat the whole area as a single overall unit.
This means that wherever possible, the tiles should flow through doorways and take account of internal features without losing the lines you have established for rows. That is, the tiles should stay ‘in bond’ throughout the area.
Corridors
The drawing at right shows two rooms with a common doorway and an outside corridor.
To set out this area out for a tiled floor:
1. Strike a line down the middle of the corridor (AB).
2. Find the closest midpoint marking the edge of a tile in each doorway (C and E).
You can do this by either measuring multiples of the tile width along the line AB or dry laying an exact number of tiles between these two points.
© Commonwealth of Australia 2013

Resilient tiles – Learner guide 40
3. Starting at C, strike a line at right angles to AB into the first room.
Mark a point along this line (D) that matches an exact number of tiles, and allows you to strike a new line through the doorway between the two rooms.
4. Starting at E, draw a line at right angles to AB into the second room.
Mark a point along this line (F) using the same process as for D.
In other words, the length of EF must be the same as CD.
5. Strike a line (GH) across the middle of the two rooms, passing through D and F.
Check that the distance between D and F is the same as between C and E (and again, an exact tile multiple)
6. Check the distances between the working lines and their corresponding walls to make sure the border tiles balance and there won’t be any narrow tile cuts. Make adjustments to the lines if required.
You can then use these lines for laying straight tiles, or for further set-out of diagonal layouts.
© Commonwealth of Australia 2013

Resilient tiles – Learner guide 41
Hollow squares
Hollow squares are areas that have an internal square-shaped space that will not be tiled. They include corridors around a quadrangle, the floor area around internal lifts, or a balcony that runs continuously around a building.
If the floor is to include a feature border or decorative pattern, the tiles must be laid ‘in bond’ for the floor to be properly balanced.
The first thing you need to check is that the corridors are at right angles to each other. If they’re not, you’ll have to use the technique shown below under ‘Corridors at an angle’.
Then strike a centreline down each corridor.
Measure the distance between points A and B and check that it is an exact multiple of the tile width.
If it isn’t, you may be able to move one of the centrelines AC or BD slightly to the left or right to achieve an exact multiple But remember, you still need to maintain an even border tile size around the walls of the internal square.
Alternatively, you can ‘lose’ a little bit of width in some of the tiles along the line AB to pull the last tile back to the centre mark. Do this by trimming a small amount, say 5 mm, from the last few rows of tiles. If the trimmed amount is small, it won’t be noticeable in the overall job.
Use the same process to set out the tile placement through the other corridors.
Corridors at an angle
If a corridor runs off at an angle, it won’t be possible to maintain the bond with the change in direction.
In this case, you should still strike centre lines along the corridors, but where they join the
© Commonwealth of Australia 2013

Resilient tiles – Learner guide 42
tiles will need to be cut on one side and butted to the last row of tiles running across-ways.
Where a different coloured border tile is used, some clients prefer to block in the whole junction area with that colour to hide the joining line.
Rounded edges and columns
To maintain the bond around a column or other internal object, you should mark out the area by striking lines between A to B, and C to D.
This will allow you to keep laying full tiles in bond, and come back later to scribe and cut the tiles in the blank space.
As always, make sure the lines are perfectly square and accurate in length, to avoid any problems with the rows not meeting up properly on the other side.
Learning activity
Click on the link below to go to a video produced by the American division of Armstrong Commercial Flooring.
http://www.youtube.com/watch?v=vGlFnUKDUkg&list=PL713C504C52DB1B16
This video demonstrates the installation of a plank and square tile floor. Watch the clip and then answer the following questions:
Why does the installer ‘back roll’ the adhesive on the subfloor after spreading it with a trowel?
Why does he take special care when positioning the first row of planks?
How long does he wait after laying the first two rows of planks before proceeding with the remainder of the planks? Why does he wait for this length of time?
© Commonwealth of Australia 2013

Resilient tiles – Learner guide 43
Common problems with tiles
Below are some of the problems you need to watch out for when you’re installing tiles. They are described in two main categories – adhesive problems and tiles running out of bond.
The first category applies generally to all resilient floor coverings that are stuck down with adhesives. The second category is specific to tiles, because it relates to the way rows of tiles line up over the whole area.
Adhesive problems
Tiles need to be laid into the adhesive at the correct time. If they’re laid too late, they won’t bond properly to the subfloor because the adhesive will have already skinned over.
This is called ‘late placement’. The best way to avoid it is to only spread as much adhesive as you can comfortably lay tiles on within the allowed ‘working time’.
You also need to check that the adhesive is spread right up to where the edge of the tile will go.
This particularly applies to areas alongside tiles that have been laid some time earlier. Make sure you remove any old adhesive that’s already set, and that fresh adhesive is spread to the edge you’re working to.
Once the tiles have been laid in the adhesive, you should roll them thoroughly with a 45 kg floor roller. Be extra careful at corners and with small pieces of tile – use a hand roller or rubber hammer if the large roller won’t reach. If you don’t roll the tiles properly, the adhesive may not transfer to the underside of the tiles, which could result in them bubbling or lifting at the edges.
You’ll recall that we discussed these issues in the lesson ‘Applying an adhesive’ in Section 1. The video clip in the learning activity below will help to reinforce these points.
© Commonwealth of Australia 2013

Resilient tiles – Learner guide 44
Tiles running out of bond
Tiles can creep out of bond for various reasons, especially in a large floor area.
One possible cause is surface undulations, or rises and falls in a wave-like pattern. This can sometimes make particular rows of tiles ‘gain’ on other rows where the floor is perfectly flat.
If this happens, you will need to strike a chalk line along the edge where the bond is starting to creep out and trim the tiles back to the new line with a straight edge.
Another possible cause is a slight variation in tile size. Tiles in different batch lots or different colours may have fractionally different sizes even though they are still within the tolerances allowed.
If it turns out that one lot of tiles, say in a particular batch lot or a certain colour, are all slightly undersized or slightly oversized, you should try to adjust your finger pressure to compensate. That is, when you butt them against the next tile, use either a tiny amount more or less pressure just on those tiles.
Differences in finger pressure can also be a problem when you’re working with another installer.
One way of reducing the problem is for you to both start from the same point and work away from each other in different directions.
Another way is for your offsider to lay a second row of tiles behind your first row, making sure that they stay in bond with yours.
© Commonwealth of Australia 2013

Resilient tiles – Learner guide 45
Learning activity
The link below will take you to a Forbo video on the correct use of adhesives and how to avoid common problems.
http://www.youtube.com/watch?v=mvmIm1bFOHs
The video is designed to provide specific advice on the installation of Marmoleum, the brand name of Forbo’s linoleum products. However, it also covers more general topics, including the difference between ‘open time’ and ‘working time’, and the variations in technique that apply to sticking down linoleum and vinyl products.
Watch the clip and then answer the following questions:
What conditions will affect the ‘open time’ and ‘working time’ of an adhesive?
What does ‘fully wet’ mean?
What does ‘semi-wet’ mean?
What does ‘flashed off’ mean?
At what stage of the drying process should you lay the product into the adhesive?
What is one of the most common causes of installation failure in Marmoleum?
© Commonwealth of Australia 2013

Resilient tiles – Learner guide 46
Finishing the job
Once you’ve completed the installation you should carefully check the finished floor to make sure everything looks right.
In particular, look for:
loose edges in the tiles
trapped air bubbles or buckles
adhesive on the surface or squeezed up between the joints.
Protecting the new floor
Depending on the type of worksite you’re at, you might need to put up signs or barriers to stop people from entering the area until the adhesive has fully cured.
In high traffic areas you can also put a protective covering over the floor to minimise the chance of damage.
If you do, make sure the covering doesn’t have a rubber or latex backing that might discolour the floor surface.
On projects where it’s your job to move heavy appliances back into position, use plywood panels or other board products as protection underneath the appliance.
Slide the first board under the object as you lift it off the floor one side at a time. Then put another board beside the first one and push the object over the boards. Don’t roll or drag the object directly across the new flooring material.
If you’re leaving the client to move the appliances themselves, give them instructions on how to do it properly so they don’t put a tear or buckle in the floor covering. Even objects on wheels or casters need to be pushed across wood panels, because if the adhesive isn’t fully cured they’ll leave grooves in the floor surface.
© Commonwealth of Australia 2013

Resilient tiles – Learner guide 47
Commercial floors should be protected from rolling loads for at least 72 hours after the installation is finished.
Housekeeping
Take all your rubbish and materials with you, except for left-over tiles that might be useful to the client for future repairs.
Be particularly careful with hazardous products that need to be disposed of in an approved way. You’ll find more details on this topic in the unit: Working sustainably.
Don’t put materials or rubbish in doorways or other access ways, because they’ll probably get knocked over and end up being a trip hazard. Keep everything well stacked and out of everyone’s way.
Maintenance
It’s important to give the floor a good clean once the job is completed. You need to make sure that there is no grit left behind that could scratch the floor and no marks or dirt that might look unsightly.
However, you must wait 72 hours before using a wet mop, to make sure the adhesive has had time to set. Also be careful not to over-wet the floor in its initial clean. The video clip below provides more details on the process of mopping, buffing and polishing the floor.
Learning activity
Go to the Armstrong Flooring videos page at the link shown below.
http://www.armstrong-aust.com.au/commflrpac/aus/ep/au/vinyl_video_library.html
Click on the ‘Vinyl tile installation’ tab and select: Part 6 (maintenance).
© Commonwealth of Australia 2013

Resilient tiles – Learner guide 48
Watch the video and then answer the following questions:
What colour pad should you use on the rotary machine after carrying out the first wet scrub and before applying polish?
What is the best type of broom to use to remove dust?
How would you ensure an even coverage of the polish when it’s applied with a mop?
What colour pad should you use for buffing the floor once the polish has dried?
© Commonwealth of Australia 2013

Resilient tiles – Learner guide 49
Assignment 3
Go to the Workbook for this unit to write your answers to the questions shown below. If you prefer to answer the questions electronically, go to the website version and download the Word document template for this assignment.
___________________________________________________________________________
1. Briefly describe how you would scribe tiles around a door jamb and architrave using the direct scribe method. You may use drawings if you wish. Also list the tools required for the job.
2. Briefly describe how you would scribe tiles around a toilet pedestal using a template. You may use drawings if you wish. Also list the tools required for the job.
3. Name two problems that could occur in a tiled floor as the result of adhesive failure. For each one, state what steps you could take during installation to make sure the problem didn’t arise.
4. Give two reasons why a tiled floor may creep out of bond during installation. For each one, state what steps you could take during installation to rectify or avoid the problem.
5. What advice would you give to the client about protecting and cleaning their new floor immediately after installation?
© Commonwealth of Australia 2013

Resilient tiles – Learner guide 50
Practical demonstrationsIn this Learner guide we have provided background material to cover the unit of competency: LMFFL2302A: Install resilient tiles using standard installation procedures.
Your trainer may ask you to keep a log book or diary of the work you do on-the-job that relates to the practical components of this unit. This will help them to determine when you’ve had sufficient hands-on practice in these tasks to undertake the assessment events.
When you’re ready to be assessed, your assessor will ask you to complete a range of practical demonstrations, including at least one example of each of the following:
homogeneous resilient tile installation using a single direction pattern
heterogeneous resilient tile installation using a single direction pattern.
In each case, you will need to install the appropriate trims and accessories as part of the demonstration. The subfloor surface will either be timber or concrete.
As part of the demonstrations, you will be asked to use of the following tools:
utility knife and napping shears
straight edge, square, chalk-line, tape measure
hammer, hacksaw
notched trowel.
Other tools may also include:
roller
airless spray gun
tile scrubber
knee kicker.
In addition to assessing your ability to physically install resilient tiles, your assessor will also be checking that you can:
follow all work, health and safety requirements and environmental care procedures
correctly interpret company documents and work instructions
complete work records
communicate and work effectively with customers and other workers
© Commonwealth of Australia 2013

Resilient tiles – Learner guide 51
prevent damage to goods, equipment and products
work productively and produce a high quality job
clean up, recycle and dispose of waste products correctly
modify activities and techniques used to suit different sites and working conditions.
Make sure you talk to your trainer or supervisor about any of the details you don’t understand, or aren’t ready to demonstrate, before the assessment events are organised. This will give you time to get the hang of the tasks you’ll need to perform, so that you’ll feel more confident when the time comes to be assessed.
© Commonwealth of Australia 2013