creating a ejb3 project with message driven beans (mdbs) step
TRANSCRIPT

© 2012 IBM Corporation
Creating a EJB3 project with Message Driven Beans (MDBs) Step by Step, Using Rational® Software Architect (RSA) 8 and Websphere 6.1
Customer Centre - Thomas Modeneis

© 2009 IBM Corporation November 27, 2012
Introduction
In this tutorial, I am going to introduce you with a EJB 3 Project with MDBs.
You will learn how to config, deploy and test the project on Websphere 6.1 (WAS)
We are going to use Rational Software Architect 8.0.x (RSA) to create the project, the MDBs and the necessary configurations.
Creating an Enterprise Application Project into RSA 8.0.x
I will assume that you have the RSA 8.0.x is installed and the Websphere AS 6.1 - EJB3 Feature Pack Installed.
After the RSA 8 and the Websphere AS 6.1 are installed, it is time to create the Enterprise Application Project (EAR).
Open the RSA 8.0.x and go to the Java EE Perspective. Now, open the menu File -> New -> Enterprise Application Project. On the first screen, put the EAR project, “TestJMS” and click on Next.
On the next screen, check in the Generate Deployment Descriptor and click on New Module button. Un-Check the Application Client module and Connector Module. We’re going to use only the EJB module and Web module for now.
Click on Finish button and the EAR project, as well as the EJB and Web module are going to be created.

© 2009 IBM Corporation November 27, 2012
IntroductionOpen the RSA 8.0.x and go to the Java EE Perspective. Now, open the menu File -> New -> Enterprise Application Project. On the first screen, put the EAR project, “TestJMS” and click on Next.
On the next screen, check in the Generate Deployment Descriptor and click on New Module button.
Un-Check the Application Client module and Connector Module. We’re going to use only the EJB module and Web module for now.
Click on Finish button and the EAR project, as well as the EJB and Web module are going to be created.

© 2009 IBM Corporation November 27, 2012
Creating the Message Driven Bean Component
RSA 8.0 brings a wizard to create the MDB, so let’s use it:– Right mouse click on the TestJMSEJB -> New -> Message-Driven Bean. On the screen that will
come up, fill up the Java Package, Class Name, Destination name, JMS and Destination type.– Click on Finish button and the Message Driven Bean will be created into jms package. – Implement the method onMessage() like below:– public void onMessage(Message message) {– if (message instanceof TextMessage) {– TextMessage text = (TextMessage) message;– try {– System.out.println();– System.out.println("Invoking MDB onMessage() now.");– System.out.println("Message Object is: " + message);– System.out.println("Text message is: " + text.getText());– System.out.println();
– } catch (JMSException e) {– e.printStackTrace();– }– } – }

© 2009 IBM Corporation November 27, 2012
Setting up the JMS Provider and the Destination
It’s time to setup the configuration from the server side. This setup is made only once and usually it is responsability from EJB Deployer.
Certainly, the most famous JMS Provider is the IBM MQ Series, however for this example, we’re going to use a simplest JMS Provider. Websphere Application Server 6.1 have his own JMS Provider, we will use it.
Creating the Service Integration BUS (SIB)– Run the Websphere Application Server (you can do
that through the Server Perspective, right click on WAS -> Start) and open its Administrative Console (right click on WAS -> Administration -> Run Administrative console). There, go to the MENU Service Integration and click on Buses.
– On the buses screen, click on New button– Next, insert the name MDBBus and then click Next
and Finish– Back to the Buses screen, click on Save link and then
the MDBus will be created and committed.

© 2009 IBM Corporation November 27, 2012
Setting up the JMS Provider and the Destination
– Now, click on MDBBus link to open a new screen.
– We’re going to use the three links on the right side. The first one is the Bus Member. Click on it.– On the next screen, click on Add button. Choose the first option Server.
– Click on Next– choose File store and Next again.

© 2009 IBM Corporation November 27, 2012
Setting up the JMS Provider and the Destination
– On third screen, change the values: Log size: 10, Minimum permanent store size: 20, Maximum permanent store size: 50,
– Click on Next button, Finish and Save link.

© 2009 IBM Corporation November 27, 2012
Setting up the JMS Provider and the Destination
– Now, let’s create the Destionations. Go back to the MDBBus screen and click on Destinations link.
– Click on New button– Select Queue and click on Next– Enter: MDBQueue as Identifier. Also, click on Next.– Click on Next again.– Finally, click on Finish.– The SIB (Service Integration Buses) is created.
– The next step is to create the JMS Provider. Let’s do it.– Go to the menu Resources -> JMS -> JMS Providers. On the center screen, click on Default
messaging provider.
© 2009 IBM Corporation November 27, 2012
Setting up the JMS Provider and the Destination
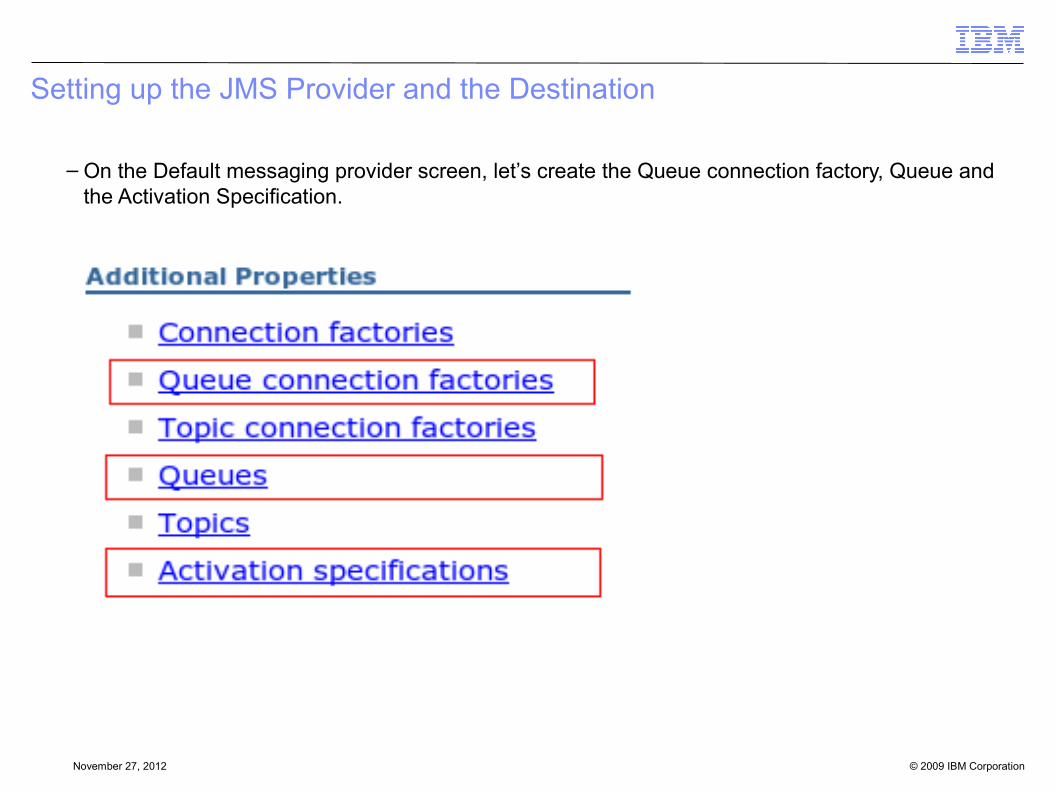
– On the Default messaging provider screen, let’s create the Queue connection factory, Queue and the Activation Specification.

© 2009 IBM Corporation November 27, 2012
Setting up the JMS Provider and the Destination
– Creating the Queue Connection factory– Click on Queue Connection factories link. On the new screen, click on New button.
– On the new screen, fill up the following fields:
– Name (MDBQueueCF)– JNDI name (jms/messageCF)– Bus name (MDBBus)
– Click on OK button – Save link.

© 2009 IBM Corporation November 27, 2012
Setting up the JMS Provider and the Destination
– Creating the Queue– Click on Queue link and then New button. On the new screen, fill up the following fields:
– Name (MDBQueue)– JNDI name (jms/messageQueue)– Bus name (MDBBus)– Queue name (MDBQueue)
– Click on OK button – Save link.

© 2009 IBM Corporation November 27, 2012
Setting up the JMS Provider and the Destination
– Creating the Activation specifications– Click on Activation specifications link – Click on New button.
– On the new screen, fill up the following fields.
– Name (MDBActivationSpec)– JNDI name (jms/activationSpec)– Destination type (Queue)– Destination JNDI name (jms/messageQueue)– Bus name (MDBBus)
– Click on OK button – Save link.
– Both SIB and the JMS Provider were setup. Make sure to restart the Websphere server before continue.

© 2009 IBM Corporation November 27, 2012
Setting up the Websphere Deployment Descriptor (on EJB Project).
– So far, we have created the Message Driven-Bean component, as well as the required configuration into Websphere Application Server. There is a simple setup yet. This setup will be made into Websphere Deployment Descriptor.
– Right click on EJB Module (TestJMSEJB) and go to the option Java EE -> Generate Websphere Bindings Deployment Descriptor.
After this operation, the file “ibm-ejb-jar-bnd.xml” will be created into ${ejb}/META-INF dir.

© 2009 IBM Corporation November 27, 2012
Setting up the Websphere Deployment Descriptor (on EJB Project).
– Double click on it to edit it. On the design section:
– Click on Add button– Select Message Driven– Insert the name ConsumerBean– Select Message Driven and click on Add button again– Select JCA Adapter– Insert jms/activationSpec into Activation Spec Binding Name– Insert jms/messageQueue into Destination Binding Name.

© 2009 IBM Corporation November 27, 2012
Creating the Web Module to be the JMS Client
– Now it is time to play around the Web Module we have created early.– Setup the Resources: – Double click on Deployment Descriptor.

© 2009 IBM Corporation November 27, 2012
Creating the Web Module to be the JMS Client
– On the new screen, go to the References tab. Click on Add button and follow the steps:
– Select Resource reference.– Name: jms/messageQueueCF Type: javax.jms.QueueConnectionFactory Authentication: Container
click on Ok button.– JNDI name: jms/messageCF.

© 2009 IBM Corporation November 27, 2012
Creating the Web Module to be the JMS Client
– Repeat the same process, but now using the following values:
– Select Resource reference.– Name: jms/messageQueue Type: javax.jms.Queue Authentication: Container click on Ok button.– JNDI name: jms/messageQueue.

© 2009 IBM Corporation November 27, 2012
Creating the Servlet
– Finally, let’s create the test servlet to send out the JMS message to the JMS Provider. Our Message Driven-Bean will consume this message and print out into the console.
– Lets See the servlet’s code below:public class JMSProducerServlet extends HttpServlet { private static final long serialVersionUID = 1L; @Resource(name="jms/messageQueueCF" ) private QueueConnectionFactory qcf; @Resource(name="jms/messageQueue" ) private Queue queue; protected void doGet(HttpServletRequest request, HttpServletResponse response) throws ServletException, IOException { try { QueueConnection connection = qcf.createQueueConnection(); QueueSession session = connection.createQueueSession(false, Session.AUTO_ACKNOWLEDGE); MessageProducer producer = session.createProducer(queue); TextMessage message = session.createTextMessage(); message.setText("#### JMS Example Running #####"); producer.send(message); session.close(); connection.close(); } catch (JMSException e) { e.printStackTrace(); } }}

© 2009 IBM Corporation November 27, 2012
Running the ServletTo run this code, right click on Servlet and go to Run As -> Run on Server. Select Websphere 6.1 and the code will be performed.
Look at the Console view, because when Message Driven Bean consume the message, it will prints out the result on the console, like image below.