creating kmz files - pbworksoache.pbworks.com/f/creating_kmz_files.pdf · the upper right section...
TRANSCRIPT
1
Instructional Technology Services of Central Ohio ● www.itsco.org ● 800-398-7675
Creating KMZ Files with Picasa and Google Earth
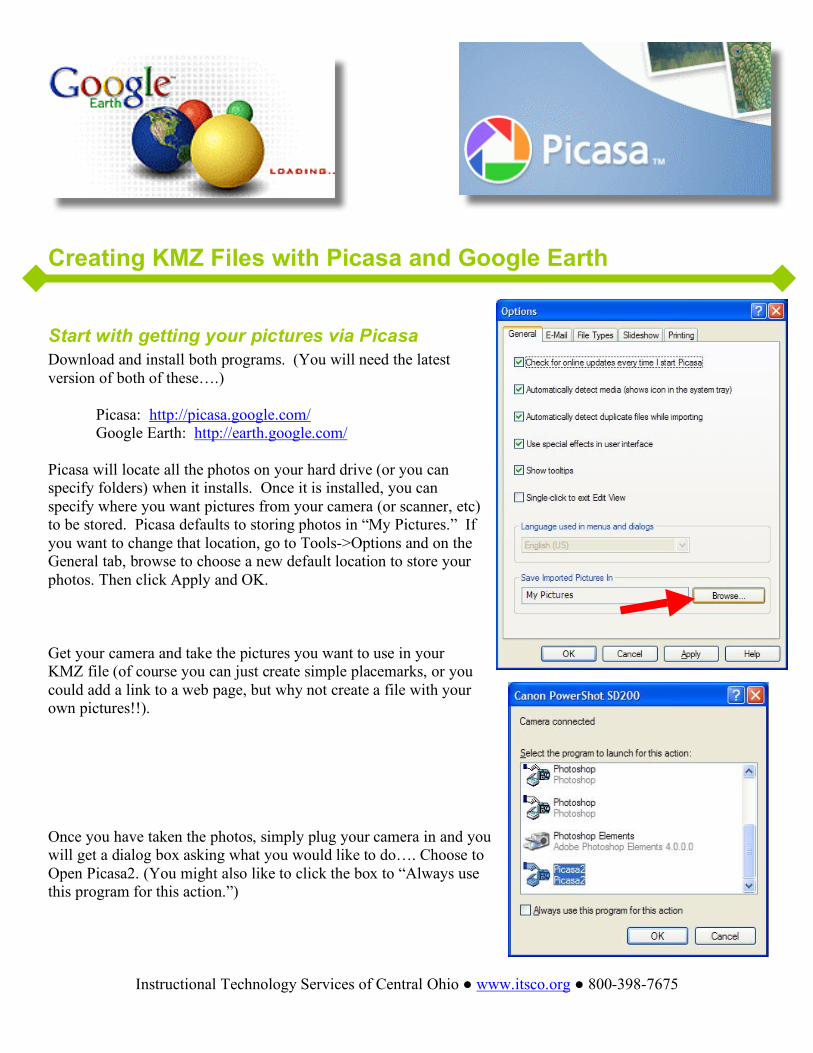
Start with getting your pictures via Picasa Download and install both programs. (You will need the latest version of both of these….) Picasa: http://picasa.google.com/ Google Earth: http://earth.google.com/ Picasa will locate all the photos on your hard drive (or you can specify folders) when it installs. Once it is installed, you can specify where you want pictures from your camera (or scanner, etc) to be stored. Picasa defaults to storing photos in “My Pictures.” If you want to change that location, go to Tools->Options and on the General tab, browse to choose a new default location to store your photos. Then click Apply and OK. Get your camera and take the pictures you want to use in your KMZ file (of course you can just create simple placemarks, or you could add a link to a web page, but why not create a file with your own pictures!!). Once you have taken the photos, simply plug your camera in and you will get a dialog box asking what you would like to do…. Choose to Open Picasa2. (You might also like to click the box to “Always use this program for this action.”)
2
Instructional Technology Services of Central Ohio ● www.itsco.org ● 800-398-7675
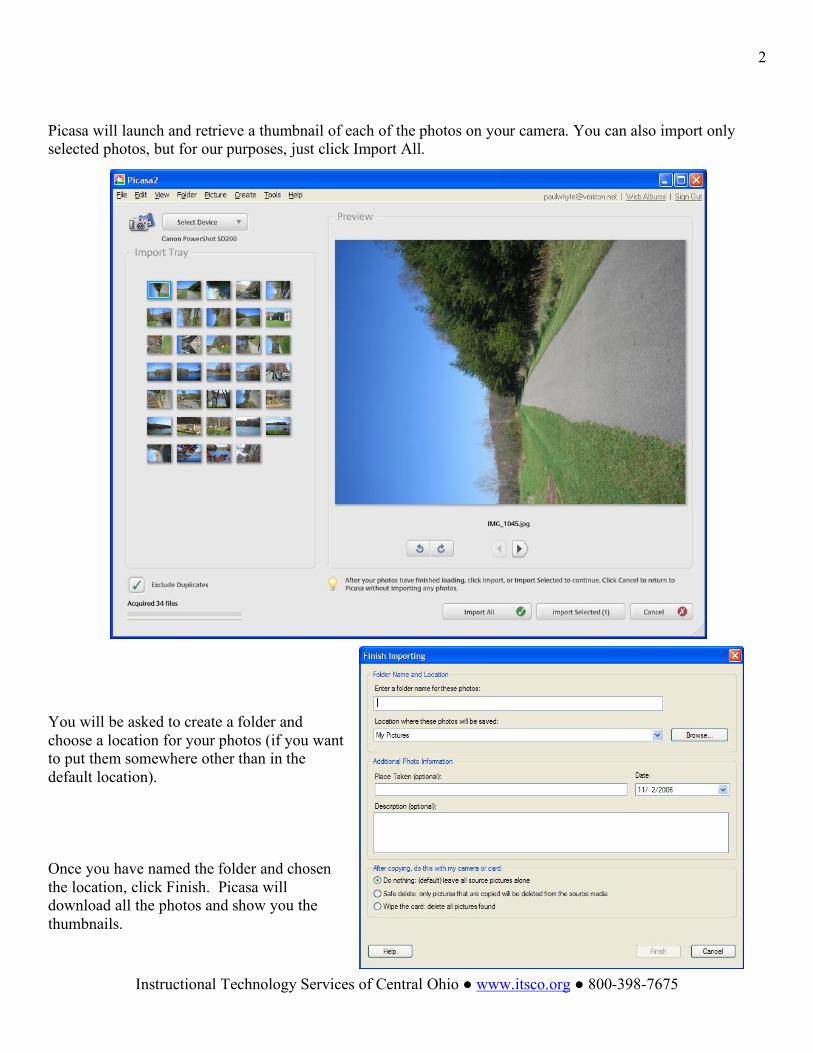
Picasa will launch and retrieve a thumbnail of each of the photos on your camera. You can also import only selected photos, but for our purposes, just click Import All.
You will be asked to create a folder and choose a location for your photos (if you want to put them somewhere other than in the default location). Once you have named the folder and chosen the location, click Finish. Picasa will download all the photos and show you the thumbnails.

3
Instructional Technology Services of Central Ohio ● www.itsco.org ● 800-398-7675
You may need to rotate some of them, just click on the thumbnail you want to rotate and click the “Rotate” button at the bottom of the screen.
Once you have rotated all the photos that need to be rotated, click at the top of the Folder to “Save Changes.”

4
Instructional Technology Services of Central Ohio ● www.itsco.org ● 800-398-7675
You might want to “autocorrect” each of the photos. The easiest way to do this is to double-click the first thumbnail in your folder and then click the button “I’m Feeling Lucky” on the left. You can move through each photo in the folder and when you are finished, click the button at top left to “Back to Library.” If you have made changes, you will need to click at the top of the Folder to “Save changes” again. If you want more information on photo editing with Picasa, you can check out the Picasa Support Pages at http://picasa.google.com/support/
Geotag your photos (via Picasa) with Google Earth You will want to decide which of your photos you want to use in your Google Earth project. If you want to use all the photos, you can just click on the folder containing your pictures on the left side of the screen. If you have a lot of photos and you want to pick and choose, you could click on the photo and then click the “Hold” button. Another way to select photos easily is to “Star” them. This would make your selection easy to select again at some point in the future by choosing “Select Starred” at the top of the folder. For our purposes, we will just “Hold” the photos we want to geotag in Google Earth. Choose your photos and once you have them all in the Photo Tray, go to Tools on the menu bar at the top of the screen and choose Geotag->Geotag with Google Earth. Google Earth will launch. At the upper left corner of the screen, type in the location you want to go to – or a place near where you took your pictures.

5
Instructional Technology Services of Central Ohio ● www.itsco.org ● 800-398-7675
You will have a dialog box from Picasa at the bottom right of your screen. It will show you which photo you are geotagging. (If you had several photos that were taken in one spot, you could click to “Geotag All,” but we are placing ours along a path.) You will need to zoom in or out as necessary, adjust the tilt with the tools in the upper right section of the screen, and drag the map behind the crosshair to get your location exact. Drag the map till the crosshair is centered over the location you want to set, and then click the “Geotag” button on the Picasa dialog box at the bottom right of your screen. It may seem backwards to adjust the map under the crosshair, but you can’t move the crosshair…. A small thumbnail of your photo will be placed on the map and you will see your new link in the Temporary Places palette. Now you are ready to adjust your map again and click to geotag the next photo. Continue in the same manner until you have geotagged your set of photos. Then click “Done.”
Customize your Placemarks in Google Earth When you click “Done,” Picasa will load all your pictures into Google Earth and small thumbnails of each photo will show on the map. On the left, in the Places palette, under Temporary Places, you will see a folder called My Picasa Pictures with all your placemarks inside a folder called something like “Picasa- Nov. 11, 2006.” The placemarks are named for the photo. Now we need to add information and do some renaming to make our file more professional before we export it as a KMZ file from Google Earth. Just to make sure you don’t lose anything, right-click on the folder that contains all your photo placemarks and choose “Save to my places.”
Zoom/Pan
Adjust Tilt

6
Instructional Technology Services of Central Ohio ● www.itsco.org ● 800-398-7675
Let’s name the folder of pictures first. In the image at right, the folder is called “Picasa – Nov. 11, 2006.” Your folder will have a similar name. Move your mouse over that folder and right-click. Choose “Properties.” The Folder Properties dialog box will appear. Change the name of the folder at the top of the dialog box to a meaningful name for the folder that holds your placemarks. In the description area, type a description of this set of placemarks.

7
Instructional Technology Services of Central Ohio ● www.itsco.org ● 800-398-7675
Then click on the tab for “View.” Adjust your view of the map by zooming, panning, adjusting the tilt, and then click the button to “Snapshot current view.” Google Earth will add the latitude, longitude, range heading and tilt for you. This will give your users of the KMZ file the correct starting point if they want to view the file as a “Tour.” (We will talk about “Google Touring” a little later.) Click on “OK” at the bottom of the dialog box. Next, follow the same steps (right click, choose properties, change the name, write a description, set the view, etc.) to edit the placemarks for each of your photos. You will notice that there is already some information in the description area of the photo placemarks. This is to display your photo and needs to stay in there, but you can click in front of it and press “Enter” a couple of times to give your self some room to type above the photo. You will have to use some basic XML (similar to HTML) formatting tags if you want to format the text. In the example at right, I have used the <BR> tags to separate my text into two paragraphs. Here are some other simple tags you might want to use:
<B>bold text</B> <U>underlined text</U> <I>italicized text</I>

8
Instructional Technology Services of Central Ohio ● www.itsco.org ● 800-398-7675
Once you have edited the properties of all your photo placemarks, you may want to test it out to see how it plays as a Google Tour. Click on the top level folder of your set of placemarks and then press the right arrow (“Play” button) at the bottom of the Places palette. This will set your tour in motion and you can see how it adjusts the map to the settings you set for each placemark under the “View” tab.
Saving your project as a KMZ file you can share Now you’re ready to save the KMZ file so you can share your project. There are two types of files that you can save from Google Earth: KML and KMZ. KML stands for Keyhole Markup Language which is based on XML (similar to HTML that is used for web pages). KMZ files are zipped and include a KML file along with photos, overlays, etc. that go with that KML file. We want to save our project as a KMZ file so that we have pictures and placemarks. Click on the folder that contains all of your placemarks in the My Places palette. Go to File->Save->Save Place as… Name your file something simple, with no spaces or special characters – if you want to use multiple words in the name, use an underscore instead of a space. (The reason for naming it this way is so that it will be easy to use on the web and with Google Maps.) Be sure to check where you are saving the file – I chose to save mine to the Desktop as shown at right. Under “Save as type” it should have “kmz.” Click Save.

9
Instructional Technology Services of Central Ohio ● www.itsco.org ● 800-398-7675
Sharing your KMZ file Now that you have your KMZ file created, how can you share it? One way is to e-mail it as an attachment. Another way is to post it on the web so that others can download it and open it in Google Earth. If you have a web site, you can post projects done by your students. Another way to easily share your file from the web is to open it in Google Maps in a web browser (Internet Explorer or Firefox). Once you post it to the internet (on your web site) the file will have a URL. The URL will look something like this (with your server’s info of course): http://www.itscoteam.org/~peggy/bike_path.kmz If you go to http://maps.google.com and type your URL in the Search box, then click to Search Maps, you will be able to see your KMZ file in Google Maps!
If you want to link directly to your KMZ file through Google Maps, at the top right pf your browser window you will see a link that says “Link to this page.” Click that link, and then if you copy the new location in the address field of your browser, you can link directly to your KMZ file in Google Maps. You will probably want to create some text on your web page that you want to be the link, because the link itself will be quite long…. It just doesn’t get any better than this, FREE software that is easy to use and so cool for the classroom! And Google products improve with every new release, so stay up-to-date at their Google for Educators Page http://www.google.com/educators/index.html For ideas for lessons, be sure to check out Juicy Geography! http://www.juicygeography.co.uk/googleearth.htm