cricut explore first projectcontent.cricut.com/b/pdfs/explore-manual2/09afirstproject.pdf ·...
TRANSCRIPT
Section 9AFirst Project
Section 9A Page 1
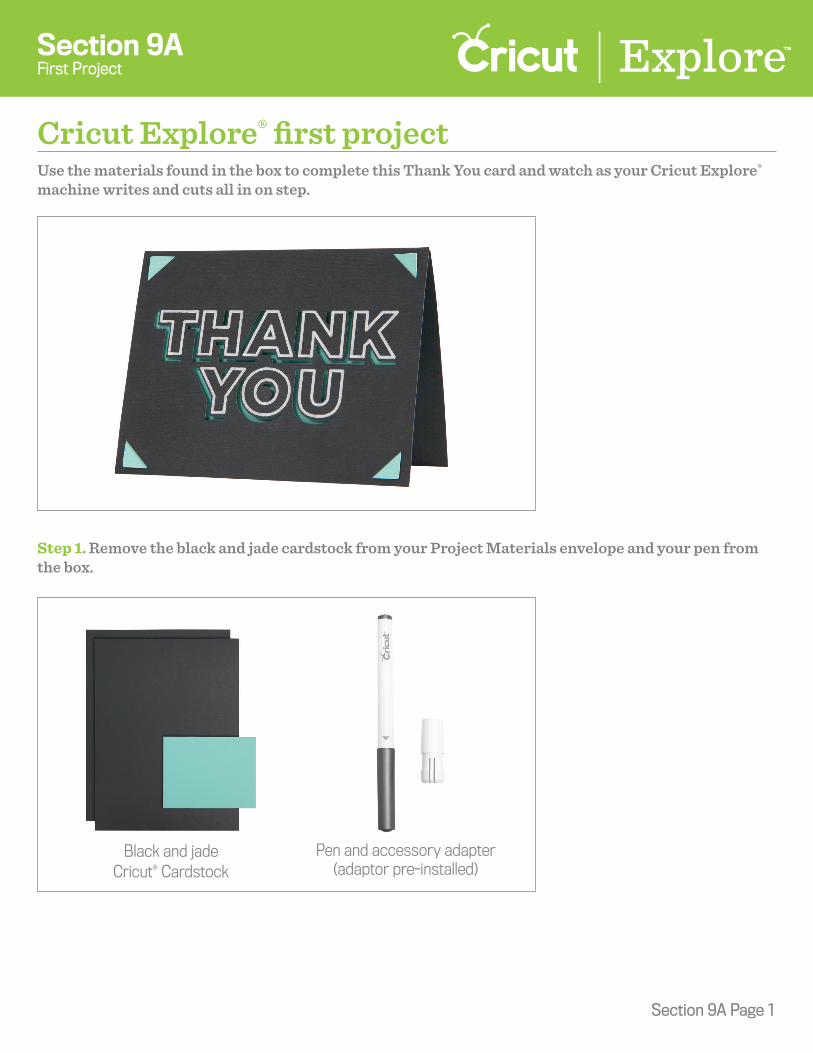
Cricut Explore® first projectUse the materials found in the box to complete this Thank You card and watch as your Cricut Explore® machine writes and cuts all in on step.
Step 1. Remove the black and jade cardstock from your Project Materials envelope and your pen from the box.
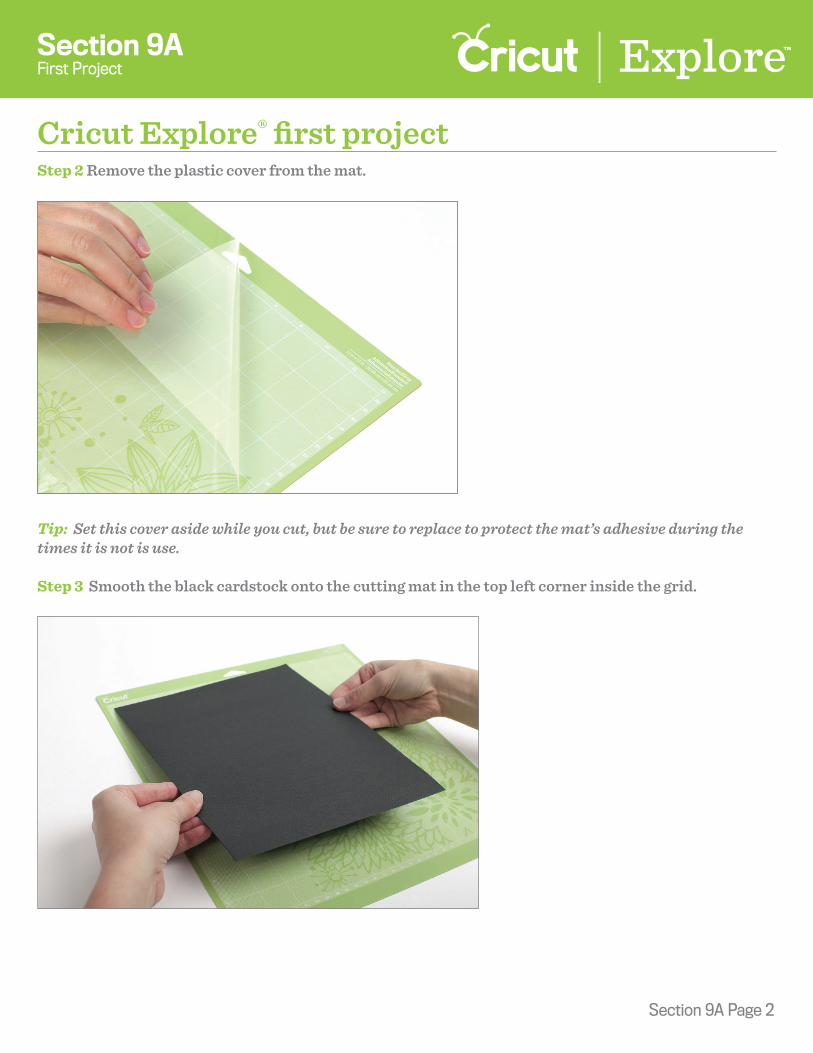
Step 2 Remove the plastic cover from the mat.
Tip: Set this cover aside while you cut, but be sure to replace to protect the mat’s adhesive during the times it is not is use.
Step 3 Smooth the black cardstock onto the cutting mat in the top left corner inside the grid.
Section 9A Page 2
Section 9AFirst Project
Cricut Explore® first project
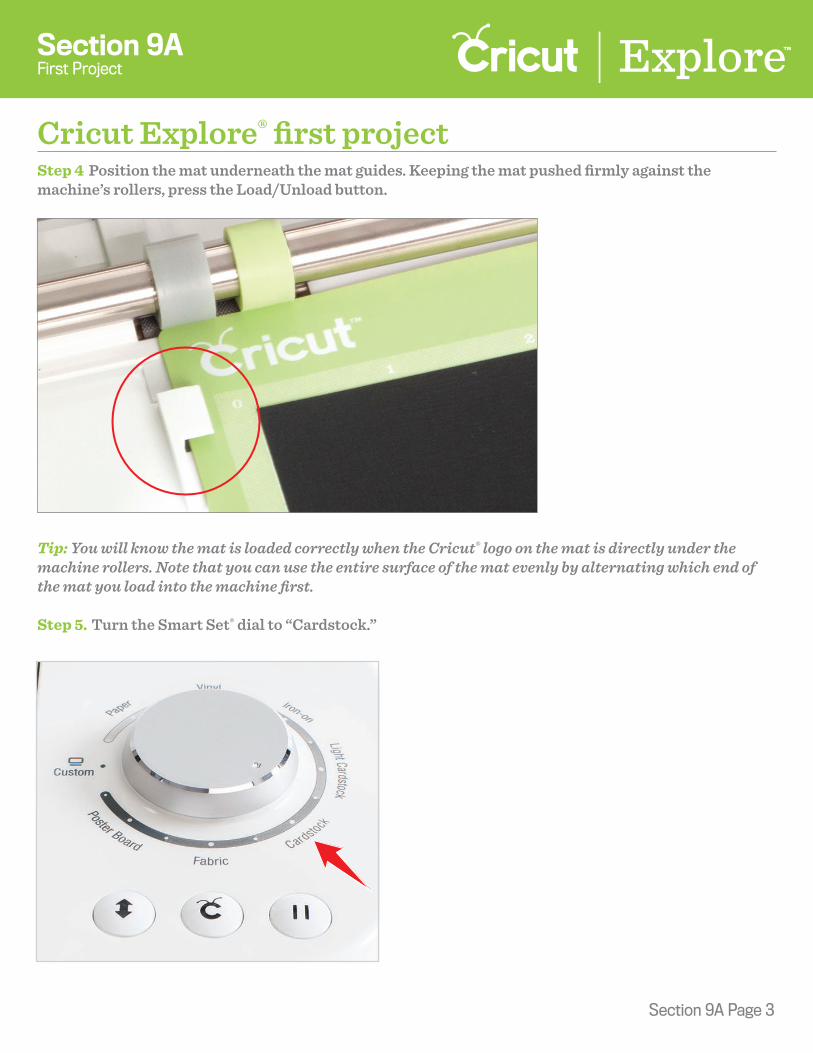
Step 4 Position the mat underneath the mat guides. Keeping the mat pushed firmly against the machine’s rollers, press the Load/Unload button.
Tip: You will know the mat is loaded correctly when the Cricut® logo on the mat is directly under the machine rollers. Note that you can use the entire surface of the mat evenly by alternating which end of the mat you load into the machine first.
Step 5. Turn the Smart Set® dial to “Cardstock.”
Section 9A Page 3
Section 9AFirst Project
Cricut Explore® first project

Step 6 To insert the pen, open accessory clamp A.
Step 7. Remove the cap from the pen.
Section 9A Page 4
Section 9AFirst Project
Cricut Explore® first project
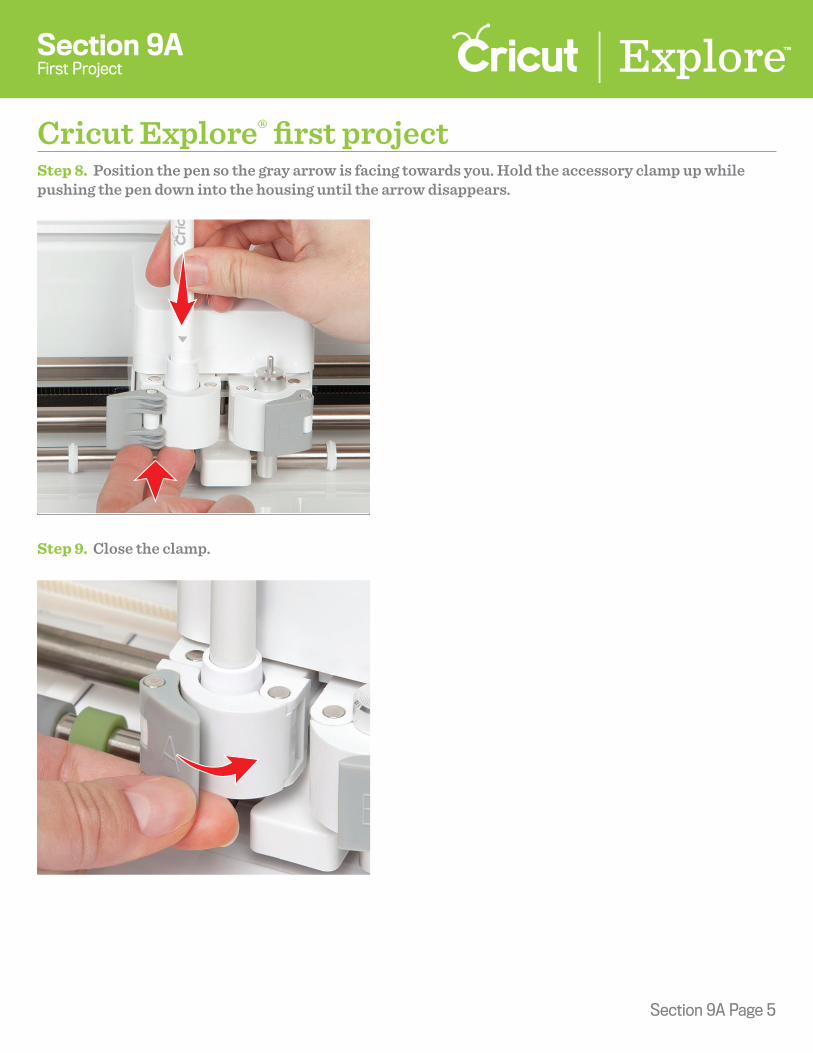
Step 8. Position the pen so the gray arrow is facing towards you. Hold the accessory clamp up while pushing the pen down into the housing until the arrow disappears.
Step 9. Close the clamp.
Section 9A Page 5
Section 9AFirst Project
Cricut Explore® first project

Step 10. Click “Go” on your computer or iPad to begin the cutting process.
Tip: The first project is also available as a Make It Now™ project so you can make it as many times as you want. To find the project, start at the project screen and select “Free” from the Categories menu. Scroll through the photos of the free projects until you locate the Thank You card. When you click on the image, you will be taken to the project details screen. Click “Make It Now” to start the cutting process.
Step 11. Follow the onscreen prompts to cut and write your Thank You card all in one step.
Section 9A Page 6
Section 9AFirst Project
Cricut Explore® first project
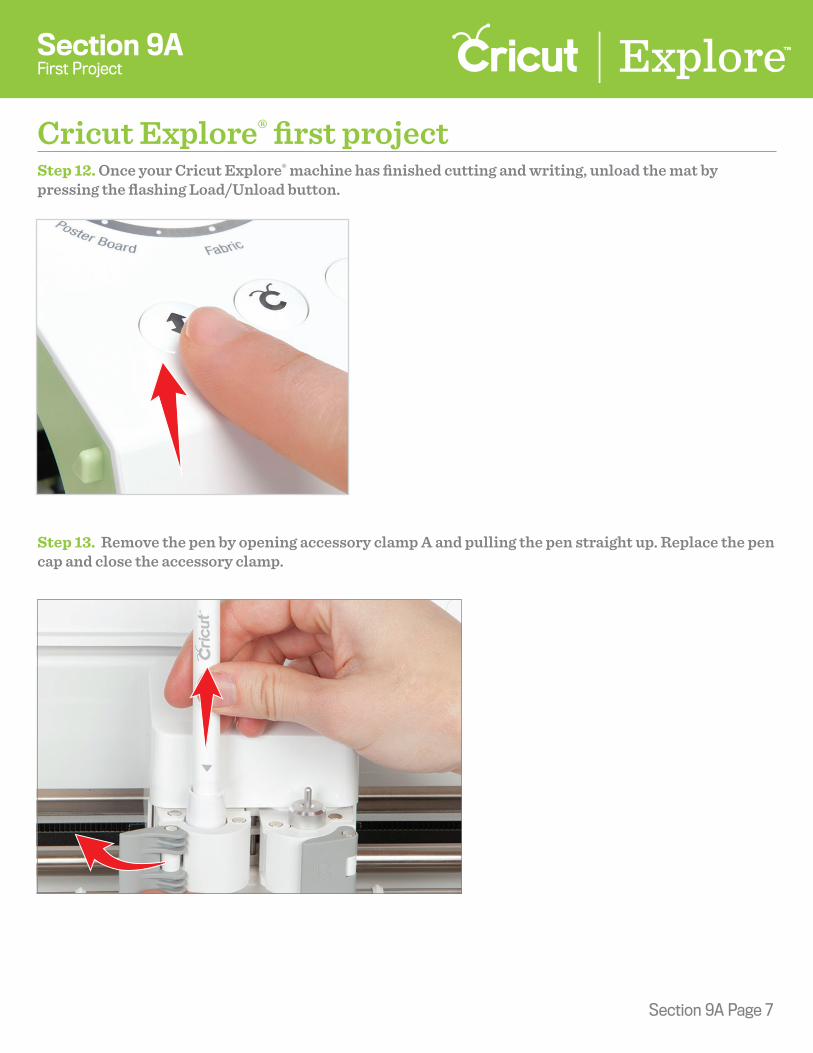
Step 12. Once your Cricut Explore® machine has finished cutting and writing, unload the mat by pressing the flashing Load/Unload button.
Step 13. Remove the pen by opening accessory clamp A and pulling the pen straight up. Replace the pen cap and close the accessory clamp.
Section 9A Page 7
Section 9AFirst Project
Cricut Explore® first project

Step 14. Remove your card by gently bending the mat until one edge of the card releases.
Step 15. Turn the mat over onto a flat surface and then slowly pull the mat away from your material until the card releases.
Tip: The Cricut® scraper can be used to easily remove excess material from the cutting mat.
Section 9A Page 8
Section 9AFirst Project
Cricut Explore® first project

Step 16. Line up the corners of the card and fold it in half horizontally.
Step 17. Insert the liner into the four slits on the card.
Section 9A Page 9
Section 9AFirst Project
Cricut Explore® first project

Step 18. Your project is complete!
Section 9A Page 10
Section 9AFirst Project
Cricut Explore® first project