cs 106a february 17, 2016 assignment...
TRANSCRIPT

Eric Roberts Handout #43 CS 106A February 17, 2016
Assignment #5—ImageShop The section on the histogram-equalization algorithm is adapted from an assignment created by Keith Schwarz.
YEAH hours: 7:00–8:30P.M., Monday, February 22, Cubberley Auditorium Due: Monday, February 29, 5:00P.M. (note change from original due date) Note: This assignment may be done in pairs
Most of you have probably had occasion to use some sort of image-editing software such as Adobe Photoshop™ or Adobe Illustrator™. In this assignment, you will have the chance to build a simple version of an image editor called ImageShop, which implements several simple operations on images along with a few more interesting ones. This handout walks you through the starter files for the assignment and describes what you need to do to complete the ImageShop application. The background you need on pixel arrays and images appears in section 11.7 of the text and in today’s lecture slides. Part 0—Understanding the starter project The starter project that you download from the course web site contains two source files: ImageShop.java, which you will need to modify, and ImageShopUI.java, which manages the user interface and which you can pretty much ignore. The two files implement a primitive version of the ImageShop application, as shown in Figure 1. In addition to the title bars, regions, and Flip Vertical button you see in Figure 1, there is also
Figure 1. Screenshot of the initial version of the ImageShop application

– 2 –
a File menu, which appears in the upper left corner of the application if you are running the assignment on Windows or at the top of the screen on the Macintosh. If you activate the File menu, you will see the following options:
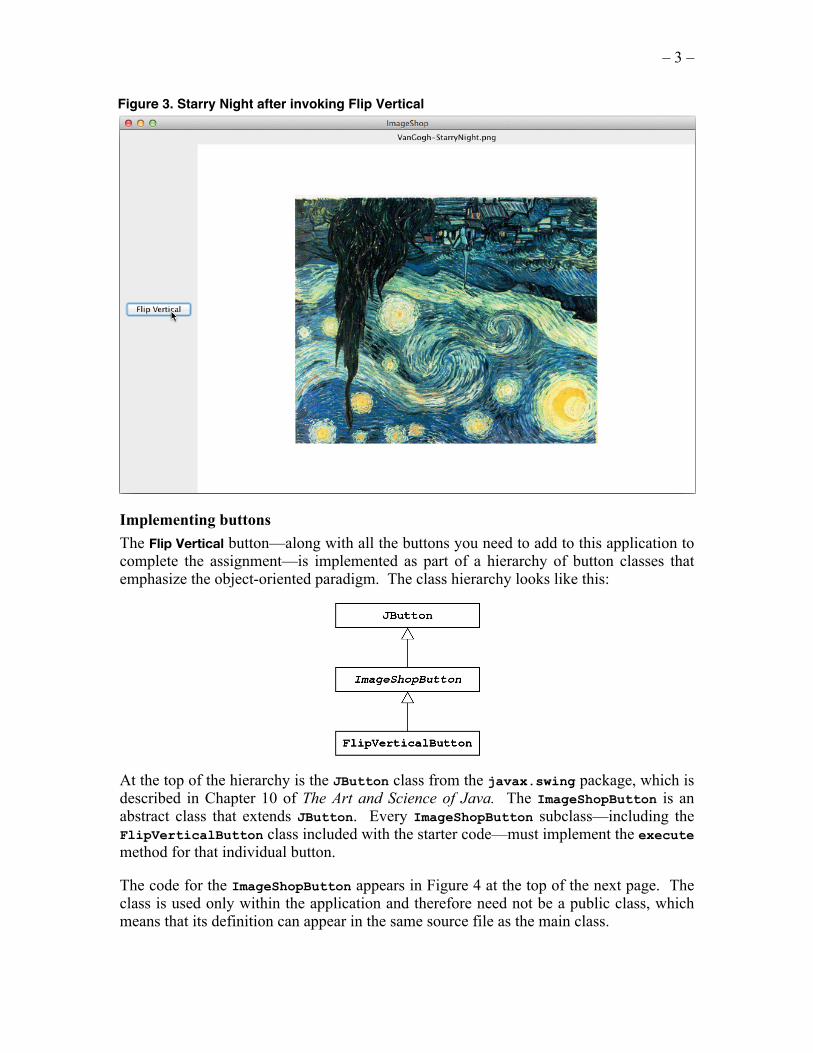
The Open File menu item opens a dialog box that allows you to select a file from the images subdirectory. We have put a number of images into that folder, but you can add any of your own images as well. Figure 2 shows the state of the application window after selecting the file VanGogh-StarryNights.png (you may recall that one of the runners-up in the Karel contest created this image by having Karel paint individual squares). The code supplied with the starter project creates a single button labeled Flip Vertical and installs it in the control region at the left side of the window. The effect of the Flip Vertical button is to replace the current image with a new one in which the pixels are flipped vertically, using the code from page 434 of The Art and Science of Java. For example, if you click Flip Vertical after reading in VanGogh-StarryNights.png, you get the screenshot shown in Figure 3 at the top of the next page. Clicking Flip Vertical a second time would restore the original image.
Figure 2. The ImageShop application after loading VanGogh-StarryNights.png
– 3 –
Implementing buttons The Flip Vertical button—along with all the buttons you need to add to this application to complete the assignment—is implemented as part of a hierarchy of button classes that emphasize the object-oriented paradigm. The class hierarchy looks like this:
At the top of the hierarchy is the JButton class from the javax.swing package, which is described in Chapter 10 of The Art and Science of Java. The ImageShopButton is an abstract class that extends JButton. Every ImageShopButton subclass—including the FlipVerticalButton class included with the starter code—must implement the execute method for that individual button. The code for the ImageShopButton appears in Figure 4 at the top of the next page. The class is used only within the application and therefore need not be a public class, which means that its definition can appear in the same source file as the main class.
Figure 3. Starry Night after invoking Flip Vertical

– 4 –
The comments in the ImageShopButton definition are considerably longer than the code. When you create your own buttons, all you need to do is follow the specifications in these comments and add new ImageShopButton subclasses that follow the structure of the FlipVerticalButton shown in Figure 5. Every time you implement a new button for the application, you need to define at least two methods. First, you need to define a constructor whose only purpose is to initialize the button name. You can do this by calling the constructor for its superclass (ImageShopButton), which in turn passes that name along to the JButton constructor. The constructor for FlipVerticalButton is therefore
public FlipVerticalButton() { super("Flip Vertical"); }
Figure 4. Code for the ImageShopButton class

– 5 –
The second method you have to write for every new button is execute, which has the following prototype:
public void execute(ImageShop app) As the prototype indicates, the execute method takes a reference to the ImageShop object, which makes it possible for the implementation to call methods in the application. Most implementations of execute will look very much like the one if Figure 5 and consist of the following steps: 1. Call getImage on the application to get the current image. 2. Check to see whether the image is null, which means that the user has not chosen a
file. In this case, the buttons that you are required to implement all do nothing, but some extensions might take some other action in this case.
3. Write the code to transform the image as required by the semantics of the particular button. In the case of FlipVerticalButton, this part of the function is simply the code from page 434, which flips an image vertically.
4. Call setImage to update the image on the screen.
Figure 5. Code for the FlipVerticalButton class

– 6 –
You won’t need to change the code for the actionPerformed method in ImageShop, but it is worth looking at the implementation:
public void actionPerformed(ActionEvent e) { ImageShopButton button = (ImageShopButton) e.getSource(); button.execute(this); }
This method begins by getting the source of the event, which is the object that triggered the action. The first line applies a type cast so that Java knows the source is an ImageShopButton. The second line calls the execute method for the button, passing in the current object, which is the ImageShop application. Note that this strategy means that the code never has to check the action command in the button to determine what operation is required. Instead, each button knows how to implement its own behavior. Part 1—Adding the simple operations Your job in this assignment is to add a new set of buttons to the ImageShop application that implement a variety of useful operations on images beyond Flip Vertical. Figure 6 shows the minimal set of buttons that you are required to implement for this assignment. Implementing the Flip Horizontal, Rotate Left, Rotate Right, and Grayscale buttons is straightforward once you have seen how to implement Flip Vertical. In fact, the algorithm you need for the Grayscale button is included on page 439 the text, along with the definition of a method called computeLuminosity, which will also come in handy later on. You will also have the opportunity to implement Rotate Left in section. The remaining buttons are discussed individually in the sections that follow.
Figure 6. The minimally complete set of buttons for the ImageShop application

– 7 –
Part 2—Implement the “green screen” operation The Green Screen button implements an operation that is used all the time in movies to merge actors into a background scene. The basic technique is called chroma keying, in which a particular range of colors is used to represent a background that can later be made transparent using a computational process. The most common colors used in chroma keying are green and blue (which give rise to the more specific names green screen and blue screen) because those colors are most easily differentiated from flesh tones. When studios use the green screen technique, for example, the actors are filmed in front of a green background. The digital images are then processed so that green pixels are made transparent, so that the background shows through when the partially transparent image is overlaid on top of the background image. To illustrate this process, suppose that you are making Star Wars: The Force Awakens and that you want to superimpose an image of Rey on top of the following shot of the interior of the Millennium Falcon:
You then shoot an image of Rey in front of a green screen like this:

– 8 –
If you convert the green pixels in the image of Rey into transparent pixels, you can then overlay the image of Rey onto the Millennium Falcon image to get the following composite picture:
The Green Screen button performs the part of this process that converts the green pixels in the image into pixels in which the first byte (usually denoted by the Greek letter α) has the value 0 indicating that the color is completely transparent. To overlay an image with transparency on top of a background image, you need to use the Overlay option in the File menu, which is already implemented for you. Thus, to create the composite picture of Rey in the Millennium Falcon from the images you are given with the starter project, you would need to perform the following steps: 1. Use the File menu to open the file ReyGreenScreen.png. 2. Click on the Green Screen button to convert green pixels to transparent ones. 3. Use the Save As option in the File menu to save the resulting image. 4. Use the File menu to open the file MillenniumFalcon.png. 5. Use the Overlay option in the File menu to add the image of Rey. When you implement the Green Screen button, you need to keep in mind that the green pixels in an image will rarely be precisely equal to Java’s Color.GREEN. Instead, they will have pixel values that lie in a range of colors that appear to be “mostly green.” For this part of the assignment, you should treat a pixel as green if its green component is at least twice as large as the maximum of its red and blue component. Part 3—Implement the histogram equalizer function Digital processing can do an amazing job of enhancing a photograph. Consider, for example, the countryside image at the left in Figure 7 at the top of the next page. Particularly when you compare it to the enhanced version on the right, the picture on the left seems hazy. The enhanced version is the result of applying an algorithm called histogram equalization, which spreads out the intensities shown in the picture to increase its effective contrast and make it easier to identify individual features.

– 9 –
As described in section 11.7, the individual pixels in an image are represented using four single-byte values, one for the transparency of the image (as described in the preceding section) and three representing the intensity of the red, green, and blue components of the color. The human eye perceives some colors as brighter than others, much in the same way that it perceives tones of certain frequencies as louder than others. The color green, for example, appears brighter than either red or blue. Luminosity The concept of brightness can be formalized using the idea of luminosity, as described on page 439 of The Art and Science of Java, along with a computeLuminosity method, which you presumably already used in the implementation of the Grayscale button. The value returned by computeLuminosity is an integer between 0 and 255, just as the intensity values for red, green, and blue are. A luminosity of 0 indicates black, a luminosity of 255 indicates white, and any other color falls somewhere in between. Since you are using computeLuminosity in the implementations of two different buttons, it makes sense to write the computeLuminosity method once and then call it from both ImageShopButton subclasses. A useful strategy is to make it a public static method in the ImageShop class. As a general rule, it is poor programming practice to copy code if you can avoid doing so. The histogram-equalization algorithm you need to write for this assignment uses luminosities rather than colors and therefore produces a grayscale image, much as you did when you implemented the Grayscale button. The process requires several steps, each of which is best coded as a helper method as described in the sections that follow. Calculating the image histogram
Given an image, there may be multiple different pixels that all have the same luminosity. An image histogramis a representation of the distribution of luminosity throughout that image. Specifically, the histogram is an array of 256 integers—one for each possible luminosity—where each entry in the array represents the number of pixels in the image with that luminosity. For example, the entry at index 0 of the array represents the number of pixels in the image with luminosity 0, the entry at index 1 represents the number of pixels in the image with luminosity 1, and so on.
Figure 7. Before-and-after images illustrating histogram equalization
Image source: http://en.wikipedia.org/wiki/File:Unequalized_Hawkes_Bay_NZ.jpg

– 10 –
Looking at an image’s histogram tells you a lot about the distribution of brightness throughout the image. The example at the top of Figure 8, for example, shows the original low-contrast picture of the countryside, along with its image histogram. The bottom row shows an image and histogram for a high-contrast picture. Images with low contrast tend to have histograms more tightly clustered around a small number of values, while images with higher contrast tend to have histograms that are more spread out throughout the full possible range of values. Related to the image histogram is the cumulative histogram, which shows not simply how many pixels have a particular luminosity but rather the sum of all values at this luminosity or below. Like the image histogram, the cumulative histogram is an array of 256 values—one for each possible value of the luminosity. The cumulative histogram is computed purely from the image histogram. Each entry in the cumulative histogram is the sum of all entries in the image histogram up to and including that index position. As an example, if the first six entries of the image histogram were
1, 3, 5, 7, 9, 11 the corresponding entries in the cumulative histogram would then be
1, 1 + 3, 1 + 3 + 5, 1 + 3 + 5 + 7, 1 + 3 + 5 + 7 + 9, 1 + 3 + 5 + 7 + 9 + 11
or
1, 4, 9, 16, 25, 36
Figure 8. Image histograms for a low-contrast and a high-contrast image
Image source: http://anseladams.com/wp-content/uploads/2012/03/1901006-2-412x300.jpg

– 11 –
Figure 9 shows the cumulative histograms for the two images from Figure 8. Notice how the low-contrast image has a sharp transition in its cumulative histogram, while the normal-contrast image tends to have a smoother increase over time The histogram-equalization algorithm The cumulative histogram provides just what you need for the histogram-equalization algorithm. To get a sense of how it works, it helps to start with an example. Suppose that you have a pixel in the original image whose luminosity is 106. Since the maximum possible luminosity for a pixel is 255, this means that the “relative” luminosity of this pixel is 106 / 255 ≈ 41.5 percent, which means that this pixel’s luminosity is roughly 41.5 percent of the maximum possible. If you assume that all intensities are distributed uniformly throughout the image, you would expect this pixel to have a brightness that is greater than 41.5 percent of the pixels in the image. Similarly, suppose that you find a pixel in the original image whose luminosity is 222. The relative luminosity of this pixel is 222 / 255 ≈ 87.1 percent, so we would expect that (in a uniform distribution of intensities) that this pixel would be brighter than 87.1 percent of the pixels in the image. The histogram equalization algorithm works by trying to change the intensities of the pixels in the original image as follows: if a pixel is supposed to be brighter than X percent of the total pixels in the image, then the algorithm maps it to a luminosity that will make it brighter than as close to X percent of the total pixels as possible. Making this process
Figure 9. Cumulative histograms for the images from Figure 8

– 12 –
work turns out to be much easier than it might seem, especially if you have the cumulative histogram for the image. Here’s the key idea behind the algorithm. Suppose that an original pixel in the image has luminosity L. If you look up the Lth entry in the cumulative histogram for the image, you will get back the total number of pixels in the image that have luminosity L or less. You can then convert this into a fraction of pixels in the image with luminosity L or less by dividing by the total number of pixels in the image. Once you have the fraction of pixels with intensities less than or equal to the current luminosity, you can scale this number (which is currently between 0 and 1) so that it is between 0 and 255, which produces a valid luminosity. The histogram equalization algorithm therefore consists of the following steps: 1. Compute the histogram for the original image. 2. Compute the cumulative histogram from the image histogram. 3. Replace each luminosity value in the original image using the formula
255 × cumulative histogram[L] new luminance = total number of pixels
Your task in this part of the assignment will be considerably easier if you decompose the problem into helper methods and test each method independently. Part 4—Implement the cropping function The last required part of the assignment is to implement a cropping facility. From the user’s perspective, cropping involves pressing the mouse down on one corner of the desired region and then dragging the mouse to the opposite corner, just as you did with the DrawRectangle program for Section #3. One minor difference is that the rectangle you’re creating as the crop box should be outlined in red rather than filled in black, but that is an easy change to make. The more substantive difference is that the bounds should not be allowed to move beyond the boundary of the image, even if you move the mouse outside the image boundary. Keeping the edges of the crop box inside the image will require code that is similar to what you used in Breakout to ensure that the paddle didn’t move through the side walls if you moved the mouse all the way to the edge. Figure 10 at the top of the next page shows the cropping tool in operation. The user has opened the file DaVinci-LastSupper.png and then dragged a rectangle across the screen to enclose the image of Jesus and the mysterious person that appears to the left of Jesus in the painting. Figure 11 at the bottom of the page shows what happens when the user uses the Crop button to isolate these two figures—just as Ian McKellen’s character did in the 2006 film of Dan Brown’s The Da Vinci Code. Note that the cropped figure replaces the original image and appears centered in the window, which happens automatically when your program calls the setImage method in the ImageShop class.

– 13 –
Figure 10. Selecting a region using the crop box
Figure 11. The cropped figure

– 14 –
The interesting part of implementing the crop functionality does not come in drawing the crop box on the screen or even in figuring out how to extract a rectangular section of the pixel array. The most important thing you have to figure out is how to communicate information about the crop box in the ImageShop class to the CropButton class. The ImageShop class is where you will need to respond to the mouse events and draw the crop box on the screen, but the CropButton class actually performs the cropping. Any information CropButton requires must come from the ImageShop application, which means that you will need to add public methods to the ImageShop class to provide that information. For example, you might want to define a getCropBox method in the ImageShop class so that CropButton can get that information. Similarly, once the cropping operation is complete, the crop box should disappear from the screen, which means that there has to be some way for buttons to tell the ImageShop application to make the crop box disappear. The design and implementation of those methods are your responsibility. Part 5—Extensions This assignment offers essentially unlimited possibilities for extensions. All you need to do is implement features from your favorite image editor. Here are a few ideas: • Implement an averaging filter. Page 441 of the text includes the code for a feature that
smoothes an image by replacing each pixel with a weighted average of its own luminosity and that of its nearest neighbors. You could add a button to your program that performed that operation.
• Implement a “posterize” button. Shepard Fairey’s iconic design of the campaign poster for President Obama’s 2008 campaign was widely adapted for other drawings. In this image, all pixels are converted to the closest equivalent chosen from a highly restricted set of colors. This image, for example, contains only red, an off-white ivory tone, and three shades of blue. Your application could, for example, replace all intermediate colors with the closest match in Java’s predefined color palette or use some other strategy that you find through searching the web or that you dream up on your own.
• Allow other buttons to use the crop box. In the basic version of the assignment, the crop box is used only for the Crop button even though it makes sense for several of the other operations as well. The Flip Vertical and Flip Horizontal buttons could flip only the rectangular region inside the crop box, if there was one.
• Add a touch-up tool. If you need to edit an image, it is particularly useful to have a pencil-like tool that allows you to drop a new color on any pixel in the image. (I used such a tool to eliminate light-colored boundary pixels in the ReyGreenScreen.png image because they ended up creating a fuzzy-looking border when overlaid on the Millennium Falcon.) The usual strategy is to allow the user to pick a color first (and you could look up the java.swing.JColorChooser class if you go down this path) and then change individual pixels to that color by clicking on them with the mouse.
• Whatever else you want. Go wild! We should get a few ++ scores on this assignment.