current biofuels - biogas current biofuels
TRANSCRIPT
www.bbsrc.ac.uk
Current Biofuels - Biogas
Page 10
www.bbsrc.ac.uk
KeywordsBioenergy, biofuel, biogas, sustainable, renewable, biomass, anaerobic, waste, bacteria, microbes, fermentation, methane.
Background
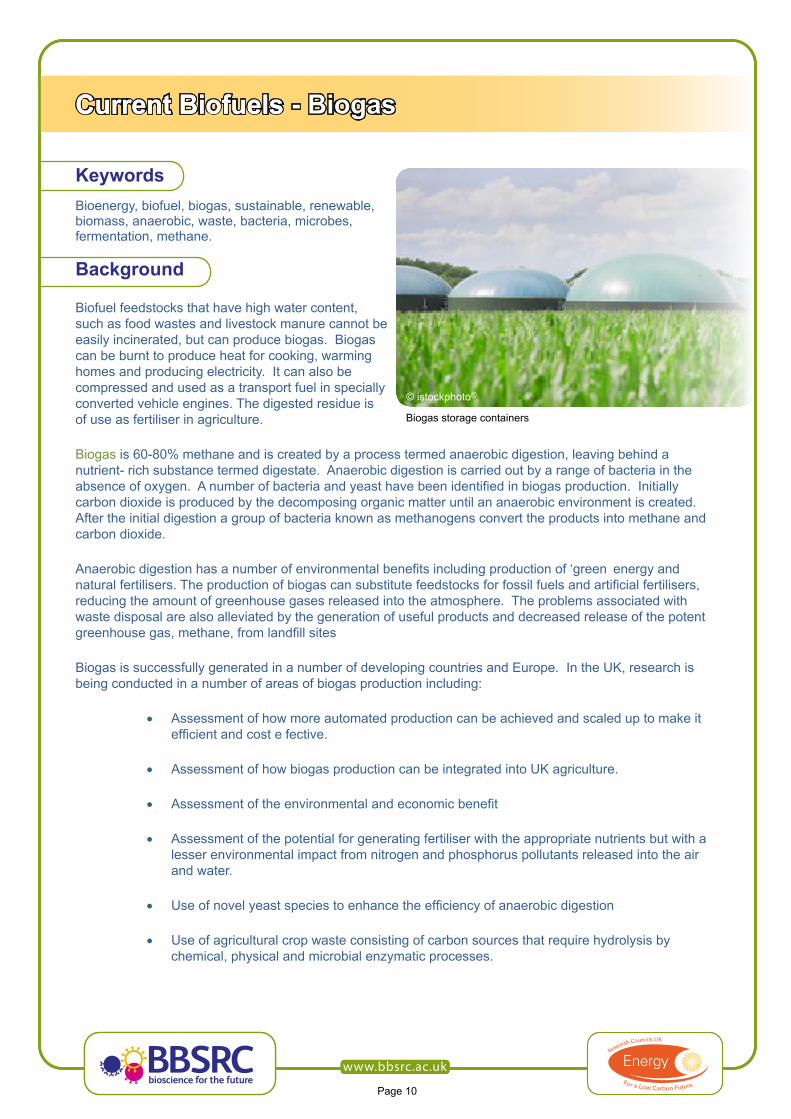
Biofuel feedstocks that have high water content, such as food wastes and livestock manure cannot be easily incinerated, but can produce biogas. Biogas can be burnt to produce heat for cooking, warming homes and producing electricity. It can also be compressed and used as a transport fuel in specially converted vehicle engines. The digested residue is of use as fertiliser in agriculture.
Biogas is 60-80% methane and is created by a process termed anaerobic digestion, leaving behind a nutrient- rich substance termed digestate. Anaerobic digestion is carried out by a range of bacteria in the absence of oxygen. A number of bacteria and yeast have been identified in biogas production. Initiallycarbon dioxide is produced by the decomposing organic matter until an anaerobic environment is created. After the initial digestion a group of bacteria known as methanogens convert the products into methane and carbon dioxide.
Anaerobic digestion has a number of environmental benefits including production of ‘green energy and natural fertilisers. The production of biogas can substitute feedstocks for fossil fuels and artificial fertilisers,reducing the amount of greenhouse gases released into the atmosphere. The problems associated with waste disposal are also alleviated by the generation of useful products and decreased release of the potent greenhouse gas, methane, from landfill sites
Biogas is successfully generated in a number of developing countries and Europe. In the UK, research is being conducted in a number of areas of biogas production including:
• Assessment of how more automated production can be achieved and scaled up to make it efficient and cost e fective.
• Assessment of how biogas production can be integrated into UK agriculture.
• Assessment of the environmental and economic benefit
• Assessment of the potential for generating fertiliser with the appropriate nutrients but with a lesser environmental impact from nitrogen and phosphorus pollutants released into the air and water.
• Use of novel yeast species to enhance the efficiency of anaerobic digestion
• Use of agricultural crop waste consisting of carbon sources that require hydrolysis by chemical, physical and microbial enzymatic processes.
© istockphoto®
Current Biofuels
Biogas storage containers
Current Biofuels - Biogas
Page 11
Activity 1A - Biogas generatorLearning outcomes: By the end of the session students will be able to:
• Describe the features of a biogas generator.
• Evaluate the pros and cons of biogas feedstocks.
• Create a safe biogas generator.
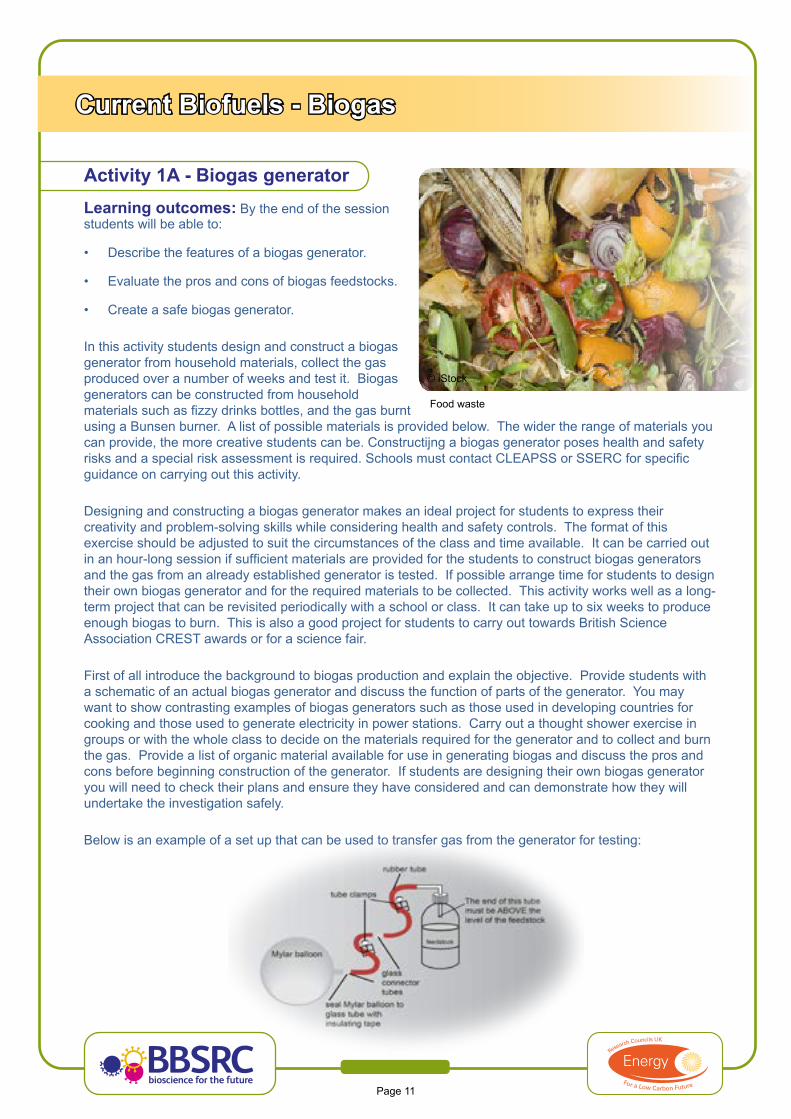
In this activity students design and construct a biogas generator from household materials, collect the gas produced over a number of weeks and test it. Biogas generators can be constructed from household materials such as fizzy drinks bottles, and the gas burntusing a Bunsen burner. A list of possible materials is provided below. The wider the range of materials you can provide, the more creative students can be. Constructijng a biogas generator poses health and safety risks and a special risk assessment is required. Schools must contact CLEAPSS or SSERC for specificguidance on carrying out this activity.
Designing and constructing a biogas generator makes an ideal project for students to express their creativity and problem-solving skills while considering health and safety controls. The format of this exercise should be adjusted to suit the circumstances of the class and time available. It can be carried out in an hour-long session if sufficient materials are provided for the students to construct biogas generatorsand the gas from an already established generator is tested. If possible arrange time for students to design their own biogas generator and for the required materials to be collected. This activity works well as a long-term project that can be revisited periodically with a school or class. It can take up to six weeks to produce enough biogas to burn. This is also a good project for students to carry out towards British Science Association CREST awards or for a science fair.
First of all introduce the background to biogas production and explain the objective. Provide students with a schematic of an actual biogas generator and discuss the function of parts of the generator. You may want to show contrasting examples of biogas generators such as those used in developing countries for cooking and those used to generate electricity in power stations. Carry out a thought shower exercise in groups or with the whole class to decide on the materials required for the generator and to collect and burn the gas. Provide a list of organic material available for use in generating biogas and discuss the pros and cons before beginning construction of the generator. If students are designing their own biogas generator you will need to check their plans and ensure they have considered and can demonstrate how they will undertake the investigation safely.
Below is an example of a set up that can be used to transfer gas from the generator for testing:
© iStock
Food waste

www.bbsrc.ac.uk
Current Biofuels - Biogas
Page 12
This activity is based on ones developed by the Department for Trade and Industry, It’s Only Natural: Science programme 2005 and the Gatsby Science Enhancement Programme (SEP): Biofuels. 2009. www.sep.org.uk
Age Range: This activity is suitable for all secondary and post-16 students.
Duration: 20 minutes or longer depending on time and resources available.
Suggested prior knowledge: This activity does not require any specific prior knowledge but it isrecommended that you elicit the existing student knowledge of fuels, microbes, properties of gases and health and safety.
What you will need
• Water cooler bottle or fizzy drinks bottle
• Rubber tubing
• Clamps
• Bung or bottle top
• Measuring cylinder
• Tape
• Plastic tubes (a biro can be used so long as the hole in the tube is covered with tape)
• Mylar/foil balloon (rubber balloons are porous and allow the gas to escape)
• A variety of organic matter such as grass clippings, leaves, waste fruit and vegetables, tea bags
• Bunsen burner and heatproof mat
• Plasticine or blue-tack
• Disposable nitrile gloves
• Cotton wool plugs or fermentation lock
• Microbial filter
Current Biofuels - Biogas
Health and Safety
Choose a suitable location to store and carry out the gas generation, bearing in mind the fire hazard.
CLEAPSS® Recipe book RB99 (Testing for gases).
Glass bottles should not be used to collect biogas due to the risk of explosion of a glass container.
The organic matter should be chosen bearing in mind microbial contamination, do not use any animal or human waste. Students should wear disposable gloves when handling organic matter and wash their hands at the end of the activity. Goggles and an apron are also recommended.
The following factors should be considered when planning to carry out any investigations involving microorganisms: nature of the organism used, source of the organism, temperature of incubation, culture medium used, type of investigation and the facilities available, chance of contamination, expertise of people involved. If necessary change the conditions or limit the involvement of students perhaps by carrying out the experiment as a demonstration. It is recommended that incubation is not carried out above 30°C to avoid the growth of potential human pathogens. The contents of the biogas generator and materials used must be sterilised afterwards. 1% VirKon is a suitable disinfectant for general surface cleaning and sterilisation as well as for discard pots (follow manufacturer’s instructions). Further details are provided in the following documents.
CLEAPSS® laboratory handbook – Section 14.9 Fermenters (Safety, Practical considerations) page 1443-1451, section 15.2 Microbiology (COSHH, good practice and safety precautions, levels of practical work, using microorganisms in practical work, equipment and materials, sterilisation and disinfection) page 1505
CLEAPSS® Guidance PS 04 (COSHH: risk assessments in situations where microorganisms might be involved), PS 15 (Ventilation and levels of Carbon dioxide and other gases in the laboratory & prep room).
CLEAPSS® guides R101 (Steam sterilisation: Autoclaves & pressure cookers)
CLEAPSS® Model risk assessment 3.026 (Microorganisms used in food production).
Further advice can also be sought from the Society for General Microbiolog and the Microbiology in Schools Advisory Committee.
Extension activity
The amount of biogas produced by different feedstocks can be compared by the students. In order to do this, students will need to investigate and design a way of measuring the gas output of a biogas generator and compare the amount of gas produced by different feedstocks. Alternatively the same feedstock can be used and the effect of changing climatic conditions simulated by placing generators in different locations such as in front of a window, outside or in a dark room with relatively constant temperature.
The gas generated can be tested for the presence of saturated or unsaturated hydrocarbons by bubbling through bromine or iodine water.
Suppliers
Standard laboratory equipment suitable for school use, including clamps, can be obtained through suppliers such as Rapid Severalls Lane, Colchester, Essex, C04 5JS tel: 01206 751166 fax: 01206 751188, Philip Harris Education, Hyde Buildings, Hyde, Cheshire, SK14 4SH, tel: 0845120 4520 fax: 0800 138 8881 and Timstar Laboratory Suppliers Ltd, Timstar House, Marshfield Bank, Crewe, Cheshire, CW2 8UY, tel: 01270 250459, fax:01270 250601.
Mylar/foil balloons can be obtained from party shops as well as gift and card shops.
www.bbsrc.ac.uk
Page 13
www.bbsrc.ac.uk
Current Biofuels - Biogas
Page 14
Further reading and links
Prochnow A, Heiermann M, Plochl M, Linke B, Idler C, Amon T, and Hobbs P J , 2009. “Bioenergy from permanent grassland--a review: 1. Biogas,” Bioresource Technology 100: 4931-4944
Prakashama R.S. , Sathisha T, Brahmaiaha P, Subba Raoa Ch, Sreenivas Rao Ch, Hobbs P J. Biohydrogen production from renewable agri-waste blend: Optimization using mixer design Int. Journal of Hydrogen energy, 34, 6143-6148.
Ravella SR, James SA, Bond CJ, Roberts IN, Cross K, Retter A, Hobbs PJ, 2010. Cryptococcus shivajii sp nov.: A Novel Basidiomycetous Yeast Isolated from Biogas Reactor. Current Microbiology 60:12-16
Burdass, D., Grainger, J.M. and Hurst, J.(editors 2006, Basic Practical Microbiology – A Manual and Grainger, J. M. and Hurst, J. (editors 2007, Practical Microbiology for Secondary Schools. available free from the Society for General Microbiology (SGM)
Gatsby Science Enhancement Programme (SEP): Biofuels. 2009. www.sep.org.uk
Vicky Wong. Food Waste Recycling - Power from Potato Peelings, Catalyst: GCSE Science Review 2011, Volume 22, Issue 1
Biogas learning activities are also available from The PACE Virtual Explorer for Secondary Science www. tusk.org/pace-biogas-project.asp
Video animation of a biogas plant in operation
The Royal Society (January 2008). Sustainable biofuels: prospects and challenges, ISBN 978 0 85403 662 2.
Nuffield Council on Bioethics (April 20 1), Biofuels: ethical issues
Research groupsDr Phil Hobbs, Principal Research Scientist and Dr Sreenivas Rao Ravella, Fermentation Scientist, Bioenergy Group, Rothamsted Research, North Wyke

Current Biofuels - Oil and Biodiesel
Page 15
KeywordsBioenergy, biofuel, biodiesel, sustainable, renewable, biomass, oil, yield, food security, catalyst, methanol, glycerol, maize, oilseed rape, soya, potassium hydroxide, centrifuge.
BackgroundOil can be extracted from a variety of plants and converted into biodiesel. Most biodiesel is produced from soya, oilseed rape, maize (corn) and palm oils, though almost any vegetable oil can be used. The oil is concentrated in seeds, nuts or germ of the plant. In order to extract the oil the raw material is pressed and then a combination of solvents and steam distillation used to improve the quality of the finalproduct. Biodiesel can replace diesel or be further processed to produce synthetic kerosene suitable for use in aviation fuel. Normal vehicles can function with fuel containing up to 10% biofuels without modification. Higher proportions of bioethanol require modified engines but many diesel engines can run on 100%biodiesel with only minor changes.
In the UK between 2012 and 2013, 39% of renewable biofuel was supplied as biodiesel and 55% as bioethanol. The major biodiesel feedstocks are soy (35%), oilseed rape (12%), palm (6%), tallow (9%) and used cooking oil (33%). Soy comes from the USA, Argentina and Brazil. Tallow comes from the USA and the UK, while used cooking oil comes from the UK.
Oilseed rape and sunflower seeds fromGermany and the UK are used in European biodiesel production. Oilseed rape (Brassica napus) is the third most important crop in the UK after wheat and barley. In 2010 in the UK more than 600,000 hectares (around 6% of the country’s arable land) was devoted to growing oilseed rape which is used in a variety of vegetable and industrial oils and as a constituent of biofuel. Research is being carried out to improve the yields of oilseed rape by reducing the losses from seed pod shattering, and gaining a better understanding of the genome of the plant, as well as developing mathematical models to forecast pests in order to improve food security. It is therefore essential that there is appropriate development of technologies and policies to manage the conflicting demands of food security and bioenerg .
Palm oil comes from Malaysia and Indonesia. Oil palms are more productive than other oil crops but increasing demand for palm oil has resulted in deforestation and destruction of peatland and other ecosystems for plantations. This has caused the loss of habitat and impacts on biodiversity while the carbon release associated with these activities may outweigh any advantage as a renewable energy. There is also concern about the effects on the indigenous peoples of Malaysia and Indonesia and the treatment of workers on palm plantations.
Future sources of oil for biodiesel production may come from crops such as Jatropha curcas, which is a drought tolerant crop that grows on non-arable marginal land and produces inedible oil with a yield of up to 40% oil content. Alternatively, research into algal feedstocks may result in the production of sufficientquantities of oil to replace fossil fuel sources and meet demand for biodiesel.
© istockphoto®
Field of Oilseed rape
Page 16
Activity 1B - Oil extractionLearning outcomes: By the end of the session students will be able to:
• Describe the techniques used to extract oil from plantmaterial.
• Carry out oil extraction from plant material.
• Discuss the ethical, economic and environmentalissues associated with producing biofuels from plantmaterial.
Keywords Bioenergy, biofuel, biodiesel, renewable,feedstock, yield, biomass, maize, oilseed rape, extraction, phase separation.
Background
Oil can be extracted by grinding vegetable matter in a mortar and pestle and separating out with water (phase separation). Suitable fruits, nuts or seeds include sweetcorn (where possible fresh) or sunflowerseeds, though any plant matter can be used. Sweetcorn and sunflower seeds are recommended as they areeasy to obtain, safe and are familiar to students. It should be explained to students that maize (Zea mays) is commonly known as corn, and includes popcorn and sweetcorn, as some may not be aware of this. Maize oil is produced in large quantities and is the primary feedstock for biodiesel in the USA. This activity provides opportunity for discussion about the issues raised regarding current biofuels conflicting with food securit . The difference in difficulty of grinding the sunflower seeds and sweetcorn can be discussed in relation tenergy usage and efficienc . Yield can be compared between sweetcorn and sunflower seeds and theissues involved in choosing suitable feedstocks discussed. Sunflower oil costs are not competitive enoughin comparison to palm, coconut or soya oil for it to be a viable alternative. It is recommended that where possible feedstocks used to produce biofuels are used, though it should be noted some feedstocks such as rapeseed prove too difficult to grind
This is a ‘make and take’ activity that can be used at public events and provides an ongoing experiment that young people can take away and then observe the separation of the oil over the coming days. Ensure that the oil is separated in a properly sealed Falcon tube (use tape or Parafilm to form a watertight seal)
This activity is based on one developed by the Gatsby Science Enhancement Programme (SEP): Biofuels. 2009. www.sep.org.uk
Age Range: This activity is suitable for primary and secondary students.
Duration: 10-20 minutes.
Suggested prior knowledge: This activity does not require any specific prior knowledge but it irecommended that you elicit the existing student knowledge of fuels, properties of liquids - especially oil - and crops.
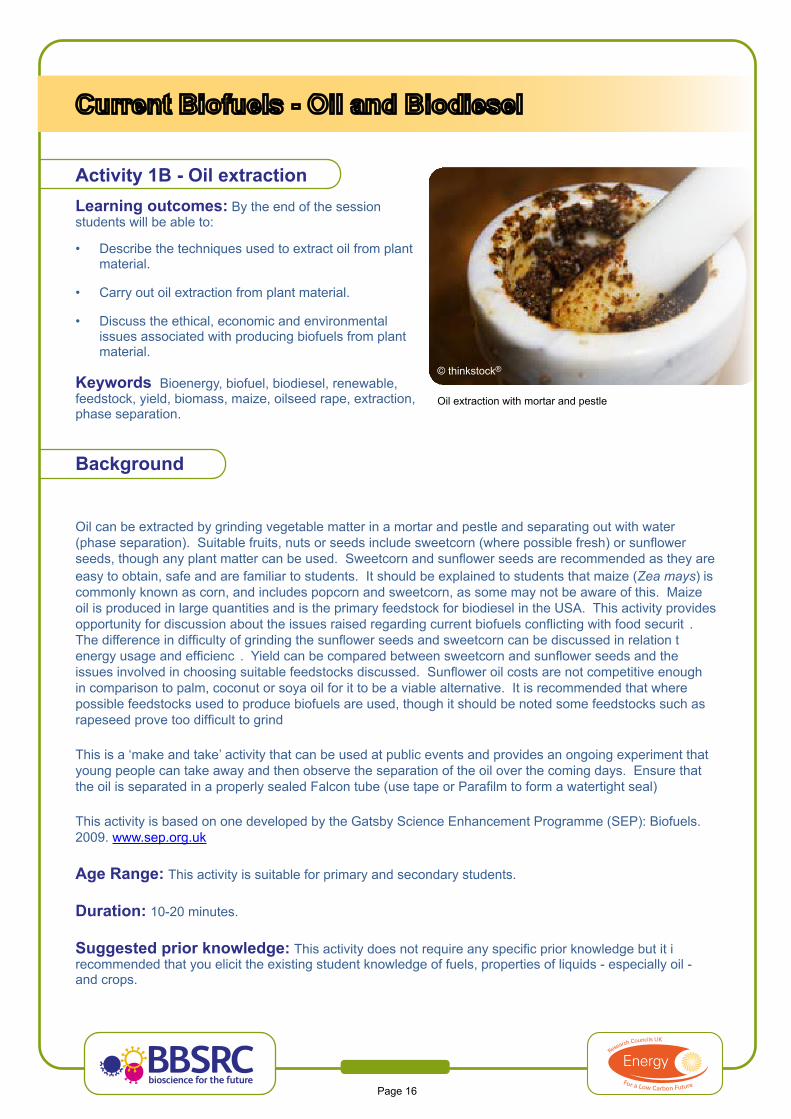
© thinkstock®
Oil extraction with mortar and pestle
Current Biofuels - Oil and Biodiesel
Page 17
What you will need• Mortars and pestles• Spoons or spatulas• Water wash bottles or disposable plastic pipettes• Boiling tubes or skirted Falcon tubes• Boiling tube rack or polystyrene tube holder• Funnel• Fruits, nuts or seed (preferably sweetcorn or sunflower seeds
Optional
• Centrifuge or hand centrifuge• Disposable pipettes• Balance
Health and Safety
CAUTION: Be aware that some students may have allergies to foodstuffs and ascertain these prior to the activity. Afterwards ensure there are no traces of any possible allergens in the room.
Ensure that the centrifuge tubes are balanced and that the tubes used for centrifugation are sealed.
Follow CLEAPSS® guidance leaflet PS 67-03 and section 13.7 of the laboratory handbook.
Method
1. Add a small spoonful of vegetable matter to the mortar (if calculating yield accurately, weigh thevegetable matter).
2. Grind the vegetable matter, adding a small amount of water if required.
3. Once completely ground, add more water using a wash bottle (about 20 ml).
4. Transfer the water and ground vegetable matter to a boiling tube or Falcon tube using a spatula orspoon (a funnel may be helpful if the vegetable matter is finely ground)
5. Wash the mortar and pestle to remove any remaining oils and add the extra water to the tube.Ensure it is about 2/3rds full.
6. Replace the lid, seal, label and place in a rack on a flat surface for 30 minutes to 2 days to observthe oil separation.
7. Alternatively the oil can be separated using a centrifuge.
Extension activities
The weight of the feedstock and oil could be measured and the yield calculated. Weigh the vegetable matter prior to the extraction. While the oil is separating weigh a disposable pipette. Once the aqueous and oil layers are completely separated, the upper oil layer can be carefully removed with the disposable pipette and weighed once more. Calculate the yield: (weight of oil ÷ weight of vegetable matter) x 100 = % yield.
Current Biofuels - Oil and Biodiesel
Biodiesel can be made from the vegetable oil extracted – see activity 1D Biodiesel production. The oil can be extracted with a disposable pipette from the surface and used to make biodiesel if there is a sufficientquantity of oil, and providing particulate matter is removed.
Tests for saturated or unsaturated oils can be carried out by GCSE or post-16 students. For further details see CLEAPSS® Guidance PS 67-01 (Testing for unsaturation), ‘Unsaturation in fats and oils’ from Practical Chemistry or SEP Biofuels activity A5: Saturation of fuels.
If a large volume of oil can be produced prior to the lesson or in preparation for the next lesson, viscosity of the oil produced can be tested – see activity 1C Oil viscosity.
The resulting oil, biodiesel from activity 1D, sugar from activity 1E and ethanol from activity 1G can be collected and tested for their combustion energy – see Gatsby SEP:Biofuels activity A7 ‘How much energy is released when a fuel burns?’ or ‘Energy values of food’ from Practical chemistry
Oilseed rape (Brassica napus) is a member of the Brassicaceae family and rapid-cycling Brassicas are especially amenable to experimentation. Rapid-cycling Brassicas are used as a model plant for a wide range of studies and can produce seeds in as little as 40 days. This makes the growth of rapid-cycling Brassicas ideal as a preparatory or follow-up activity with students.
Suppliers
Sweetcorn, sunflower seeds and other plant material can be obtained from a local supermarket.
Mortars, pestles, test tubes and racks are standard equipment available in secondary school science laboratories otherwise they can be obtained from educational suppliers such as Philip Harris Education, Hyde Buildings, Hyde, Cheshire, SK14 4SH, tel: 0845120 4520 fax: 0800 138 8881. and Rapid Severalls Lane, Colchester, Essex, C04 5JS tel: 01206 751166 fax: 01206 751188.
Rapid-cycling Brassica kits and seeds are available from Philip Harris Education or Blades Biological Limited www.blades-bio.co.uk Cowden, Edenbridge, Kent, TN8 7DX, tel:01342 850 242, fax: 01342 850 924.
Further reading and links
Gatsby Science Enhancement Programme (SEP): Biofuels. 2009. www.sep.org.uk
National Non-Food Crops Council (NNFCC), 2007, Biorefineries: definitions, examples of current activities and suggestions for UK development. National Non-Food Crops Council position paper.
Exploring knowledge of gene function to combat pod shatter in oilseed rape
Information on the use of the rapid-cycling Brassica kits is available from Science and Plants for Schools (SAPS) www.saps.org.uk/secondary/teaching-resources/126-rapid-cycling-brassica-kits-
Fast plants is a site dedicated to the educational use of rapid-cycling Brassicas
Tompkins, S.P.and Williams, P.H., 1990, Fast plants for finer science – an introduction to the biology of rapid-cycling Brassica campestris (rapa) L., Journal of Biological Education, 24 (4), 239-250.
www.bbsrc.ac.uk
Page 18
Current Biofuels - Oil and Biodiesel
Page 19
Dissecting the genomes of crop plants to improve breeding potential
Dissecting the genome of the polyploid crop oilseed rape by transcriptome sequencing
Evans, N., Welham, S.J.. Antoniw, J.F., Fitt, B.D.L., 2006. Development and Uptake of a Scheme for Predicting Risk of Severe Light Leaf Spot on Oilseed Rape. Outlooks on Pest Management,17(6), pp. 243-245(3).
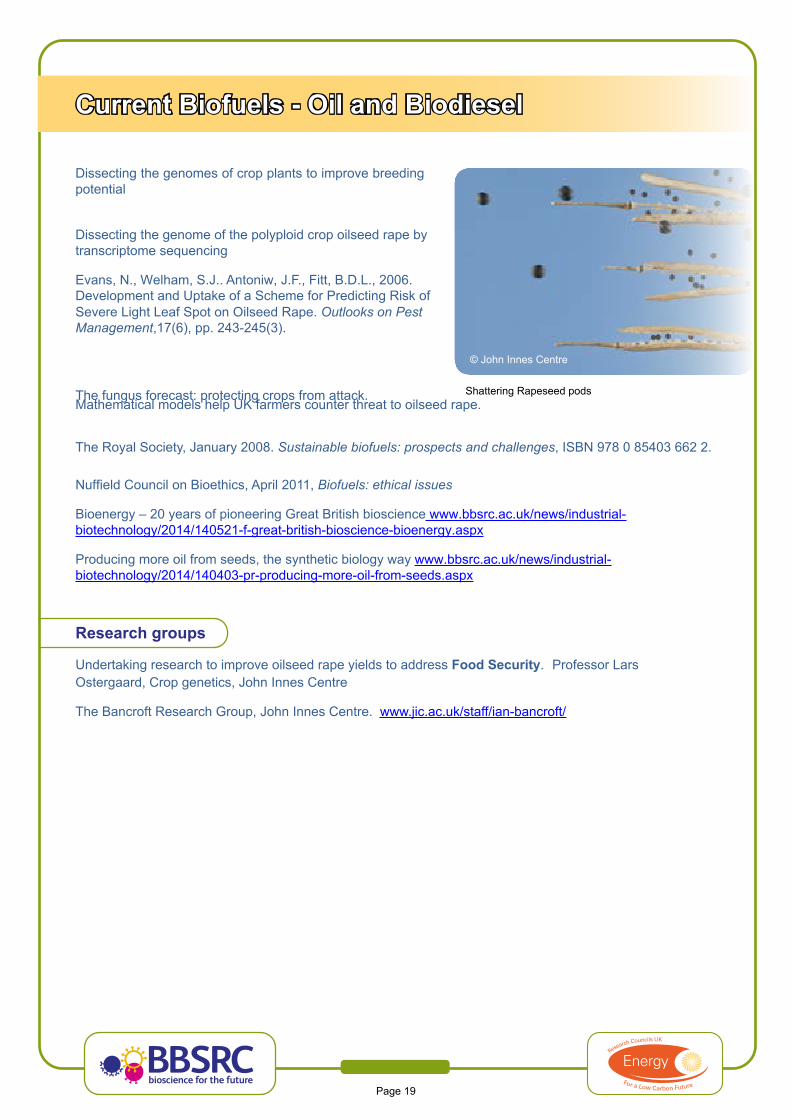
The fungus forecast: protecting crops from attack. Shattering Rapeseed podsMathematical models help UK farmers counter threat to oilseed rape.
The Royal Society, January 2008. Sustainable biofuels: prospects and challenges, ISBN 978 0 85403 662 2.
Nuffield Council on Bioethics, April 2011, Biofuels: ethical issues
Bioenergy – 20 years of pioneering Great British bioscience www.bbsrc.ac.uk/news/industrial-biotechnology/2014/140521-f-great-british-bioscience-bioenergy.aspx
Producing more oil from seeds, the synthetic biology way www.bbsrc.ac.uk/news/industrial-biotechnology/2014/140403-pr-producing-more-oil-from-seeds.aspx
Research groups
Undertaking research to improve oilseed rape yields to address Food Security. Professor Lars Ostergaard, Crop genetics, John Innes Centre
The Bancroft Research Group, John Innes Centre. www.jic.ac.uk/staff/ian-bancroft/
© John Innes Centre
Page 20
Activity 1C - Oil viscosityLearning outcomes: By the end of the session students will be able to:
• Explain the importance of identifying fuel viscosity.
• Carry out viscosity tests on a variety of different fuels.
• Evaluate the pros and cons of different transport fuels.
Keywords Bioenergy, biofuel, biodiesel, renewable, viscosity, waste, saturation, oil, density, saturation,unsaturated, double bond, Van der Waals.
BackgroundThe viscosity of fuels affects their melting points, ignition temperature, heat of combustion, the rate at which they burn, density, energy density and lubricity. The amount of energy stored in a defined volume of fuel(energy density) is important for identifying the best fuels. The higher the energy density the further a vehicle will be able to travel on the same volume of fuel and thus the smaller the fuel tank needs to be. The energy density of common fuels are listed in descending order: diesel, petrol, paraffin, biodiesel, ethanol, methane,natural gas.
Vegetable oils are appealing alternatives to petrol due to their greater density, safety and lower exhaust emissions. However, the viscosity of vegetable oils also affects the ease with which they can be converted to biodiesel and the engines they are suitable for. More viscous fuels leave more deposits in car engines and can cause problems with engine pressures and injection systems. The storage and ‘shelf-life’ of oil-based fuels is more limited due to the oxidation of polyunsaturated hydrocarbons.
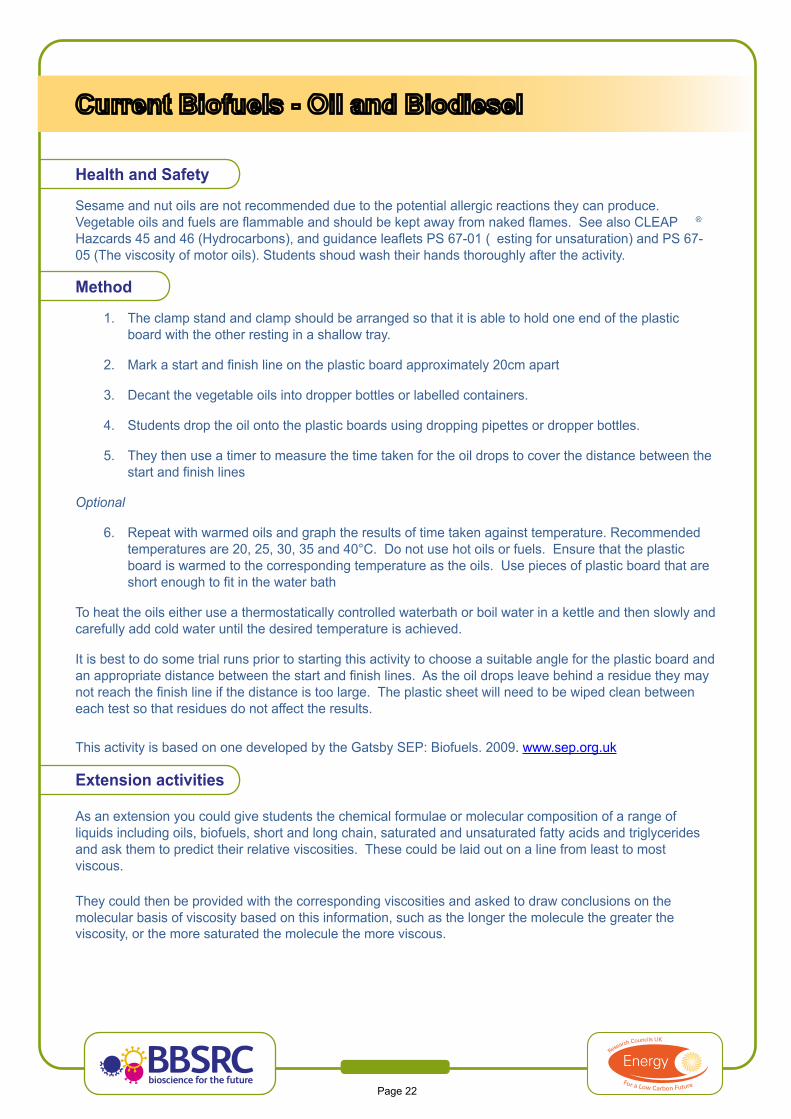
Viscosity is influenced by the molecular properties of liquids such as vegetable oils. There is a direct relationship between the chain length and degree of saturation of the fatty acids that form triaclyglycerols. Generally speaking saturated oils are more viscous than unsaturated oils. Unsaturated oils have double bonds in the hydrocarbon chains, whereas saturated oils feature more single bonds and attached hydrogen atoms. The linear “zigzag” structure of saturated fatty acid hydrocarbon chains enables the molecules to line up and form intermolecular Van der Waals interactions, reducing their viscosity. Unsaturated hydrocarbon chains have double bonds that produce “kinks” in the molecule. These “kinks” prevent the molecules getting as close to each other and forming as many Van der Waals interactions, thus increasing the viscosity of the oil.
© istockphoto®
Oil
Molecules (Jmol: an open-source Java viewer for chemical structures in 3D www.jmol.org/, CPK spacefill 50% vanderwaals
Current Biofuels - Oil and Biodiesel
Page 21
This activity involves testing the viscosities of a variety of vegetable oils based on the time a drop of oil takes to run down a sheet of plastic. This can be done using dropping pipettes or dropper bottles, alternatively you could also use a falling ball or cup viscometer.
Students can be introduced to the concept of differing viscosities by providing them with a selection of oils in sealed centrifuge or test tubes and asking them to arrange them in order according to how runny they are. The reason for these differences can be discussed and predictions made about the viscosity of the oils.
The experiment can be extended by repeating the investigations after warming the oils in warm water or a water bath. This will enable pupils to produce line graphs comparing the viscosity of the oils at different temperatures and establish if there is a linear relationship between viscosity and temperature.
The use of the falling ball or cup viscometer enables quantitative measurements to be made. Viscosity is measured in Pascal seconds (Pa.s) and dynamic viscosity can be calculated using the following equation:
η = 2(Δp)ga2
9v
η = dynamic viscositydelta p (Δp) = difference in density between the sphere and liquidg = acceleration of gravitya = radius of spherev = velocity
Age Range: Measuring oil viscosity is suitable for secondary students and calculating viscosity is suitablefor post-16 students.
Duration: 30-60 minutes.
Suggested prior knowledge: Secondary students should have a good understanding of theproperties of liquids and how to carry out a fair test. Knowledge of molecules and the way their size or shape can affect their properties including the forces between molecules and the difference between saturated and unsaturated molecules will enable GCSE and post-16 students to form a better understanding of the results and evaluation of fuels.
What you will need
• A selection of vegetable oils – sunflowe , maize, olive, rapeseed• A selection of fuels – ethanol (available from activity 1G), biodiesel (available from activity 1D),
synthetic crude oil (CLEAPSS® recipe Book 32)• Dropping pipettes or dropper bottles• Plastic beakers• Clamp stand, bosshead and clamp• Timer or stopwatches• Clean smooth polycarbonate (chemically resistant) plastic boards• Shallow trays• Cleaning materials especially blue roll
Optional
• Falling ball or cup viscometer• Water bath or warm water and thermometer
Page 22
Health and Safety
Sesame and nut oils are not recommended due to the potential allergic reactions they can produce. Vegetable oils and fuels are flammable and should be kept away from naked flames. See also CLEAP ® Hazcards 45 and 46 (Hydrocarbons), and guidance leaflets PS 67-01 ( esting for unsaturation) and PS 67-05 (The viscosity of motor oils). Students shoud wash their hands thoroughly after the activity.
Method
1. The clamp stand and clamp should be arranged so that it is able to hold one end of the plasticboard with the other resting in a shallow tray.
2. Mark a start and finish line on the plastic board approximately 20cm apart
3. Decant the vegetable oils into dropper bottles or labelled containers.
4. Students drop the oil onto the plastic boards using dropping pipettes or dropper bottles.
5. They then use a timer to measure the time taken for the oil drops to cover the distance between thestart and finish lines
Optional
6. Repeat with warmed oils and graph the results of time taken against temperature. Recommendedtemperatures are 20, 25, 30, 35 and 40°C. Do not use hot oils or fuels. Ensure that the plasticboard is warmed to the corresponding temperature as the oils. Use pieces of plastic board that areshort enough to fit in the water bath
To heat the oils either use a thermostatically controlled waterbath or boil water in a kettle and then slowly and carefully add cold water until the desired temperature is achieved.
It is best to do some trial runs prior to starting this activity to choose a suitable angle for the plastic board and an appropriate distance between the start and finish lines. As the oil drops leave behind a residue they may not reach the finish line if the distance is too large. The plastic sheet will need to be wiped clean between each test so that residues do not affect the results.
This activity is based on one developed by the Gatsby SEP: Biofuels. 2009. www.sep.org.uk
Extension activities
As an extension you could give students the chemical formulae or molecular composition of a range of liquids including oils, biofuels, short and long chain, saturated and unsaturated fatty acids and triglycerides and ask them to predict their relative viscosities. These could be laid out on a line from least to most viscous.
They could then be provided with the corresponding viscosities and asked to draw conclusions on the molecular basis of viscosity based on this information, such as the longer the molecule the greater the viscosity, or the more saturated the molecule the more viscous.
Current Biofuels - Oil and Biodiesel
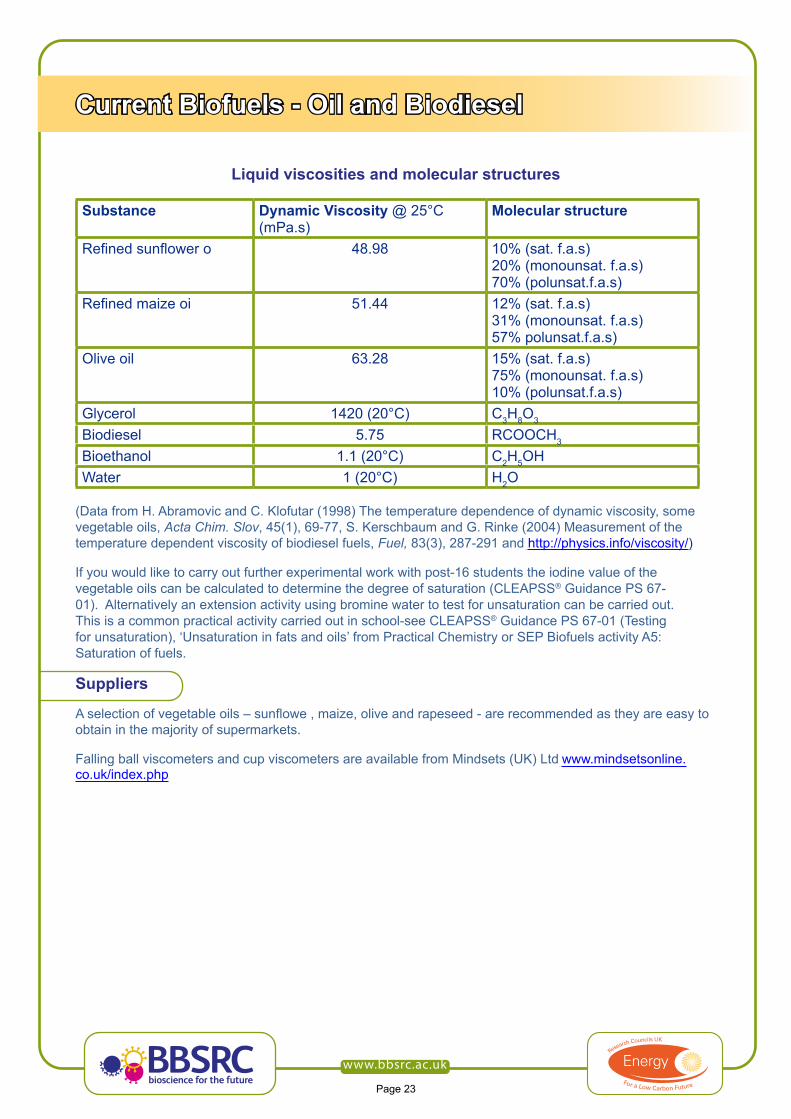
Liquid viscosities and molecular structures
Substance Dynamic Viscosity @ 25°C (mPa.s)
Molecular structure
Refined sunflower o 48.98 10% (sat. f.a.s) 20% (monounsat. f.a.s) 70% (polunsat.f.a.s)
Refined maize oi 51.44 12% (sat. f.a.s) 31% (monounsat. f.a.s) 57% polunsat.f.a.s)
Olive oil 63.28 15% (sat. f.a.s) 75% (monounsat. f.a.s) 10% (polunsat.f.a.s)
Glycerol 1420 (20°C) C3H8O3
Biodiesel 5.75 RCOOCH3
Bioethanol 1.1 (20°C) C2H5OHWater 1 (20°C) H2O
(Data from H. Abramovic and C. Klofutar (1998) The temperature dependence of dynamic viscosity, some vegetable oils, Acta Chim. Slov, 45(1), 69-77, S. Kerschbaum and G. Rinke (2004) Measurement of the temperature dependent viscosity of biodiesel fuels, Fuel, 83(3), 287-291 and http://physics.info/viscosity/)
If you would like to carry out further experimental work with post-16 students the iodine value of the vegetable oils can be calculated to determine the degree of saturation (CLEAPSS® Guidance PS 67-01). Alternatively an extension activity using bromine water to test for unsaturation can be carried out. This is a common practical activity carried out in school-see CLEAPSS® Guidance PS 67-01 (Testing for unsaturation), ‘Unsaturation in fats and oils’ from Practical Chemistry or SEP Biofuels activity A5: Saturation of fuels.
Suppliers
A selection of vegetable oils – sunflowe , maize, olive and rapeseed - are recommended as they are easy to obtain in the majority of supermarkets.
Falling ball viscometers and cup viscometers are available from Mindsets (UK) Ltd www.mindsetsonline. co.uk/index.php
www.bbsrc.ac.uk
Page 23
Page 24
Further reading and links
Abramovic, H. and Klofutar, C. 1998. The temperature dependence of dynamic viscosity for some vegetable oils, Acta Chim. Slov, 45(1), 69-77.
Kerschbaum, S. and Rinke, G. 2004. Measurement of the temperature dependent viscosity of biodiesel fuels, Fuel, 83(3), 287-291.
Anand,K. Ranjan, A. and Mehta, P.S. 2010. Estimating the Viscosity of Vegetable Oil and Biodiesel Fuels, Energy Fuels, 24, 664–672.
Unsaturation in fats and oils, Practical Chemistry
CLEAPSS® Guidance PS 67-01 (Testing for unsaturation) Gatsby Science Enhancement Programme (SEP): Biofuels. 2009. www.sep.org.uk
The Royal Society, January 2008. Sustainable biofuels: prospects and challenges, ISBN 978 0 85403 662 2.
Nuffield Council on Bioethics, April 2011, Biofuels: ethical issues www.nuffieldbioethics.org/biofuels-0
Research groupsProfessor Jonathan Napier, Rothamsted Centre for Crop Genetic Improvement
Dr Peter Eastmond, Plant Lipid Metabolism Group, University of Warwick
Current Biofuels - Oil and Biodiesel
Page 25
Activity 1D – Biodiesel production
Learning outcomes: By the end of the session students will be able to:
• Describe the techniques used to produce biodiesel.
• Carry out the conversion of vegetable oil to biodiesel.
• Discuss the efficiency of biodiesel production and the uses of the by-products
Keywords Bioenergy, biofuel, biodiesel, sustainable, renewable, biomass, yield, catalyst, methanol,glycerol, maize, oilseed rape, soya, potassium hydroxide, centrifuge, transesterification
Background
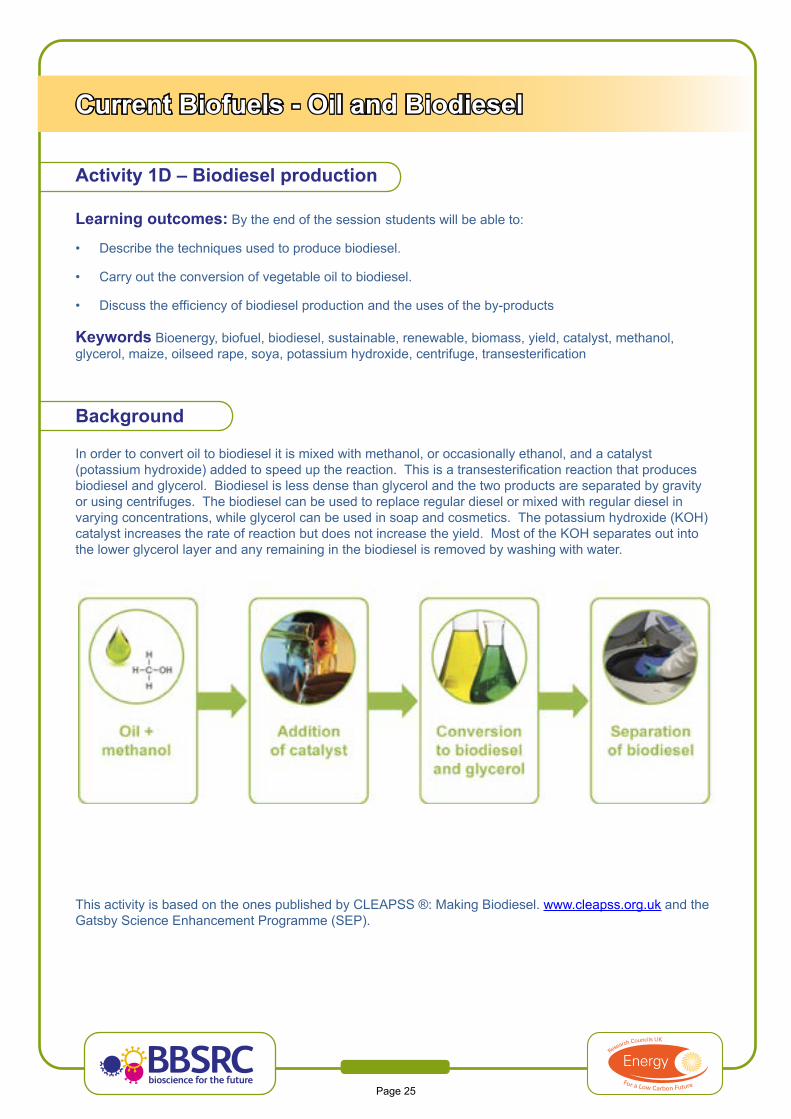
In order to convert oil to biodiesel it is mixed with methanol, or occasionally ethanol, and a catalyst (potassium hydroxide) added to speed up the reaction. This is a transesterification reaction that producesbiodiesel and glycerol. Biodiesel is less dense than glycerol and the two products are separated by gravity or using centrifuges. The biodiesel can be used to replace regular diesel or mixed with regular diesel in varying concentrations, while glycerol can be used in soap and cosmetics. The potassium hydroxide (KOH) catalyst increases the rate of reaction but does not increase the yield. Most of the KOH separates out into the lower glycerol layer and any remaining in the biodiesel is removed by washing with water.
This activity is based on the ones published by CLEAPSS ®: Making Biodiesel. www.cleapss.org.uk and the Gatsby Science Enhancement Programme (SEP).
Page 26
Age Range: This activity is suitable for GCSE and A-level students.
Duration: 60 minutes.
Suggested prior knowledge: It is recommended that you elicit the existing student knowledge offuels, properties of gases and liquids, catalysts and health and safety.
What you will need
• Test tubes and stoppers or 15 ml centrifuge tubes• Test tube racks• Centrifuge (a hand centrifuge can be used effectively)• Cooking oil or oil extracted and filtered from an oil extraction activity 1B)• Methanol (VERY TOXIC and EXTREMELY FLAMMABLE)• Potassium hydroxide (CORROSIVE)• 5% w/w potassium hydroxide solution in methanol (5 g potassium hydroxide per 50 ml of methanol)• Access to a fume cupboard• Magnetic stirrer and stirring flea• Conical flask, 250 m• Conical flask, 100 m• Measuring cylinders 100 ml• Disposable nitrile gloves• Safety goggles
Optional
• Balance• Separating funnel• Dropping pipettes• Distilled water
Health and Safety
It is essential that eye protection is worn, preferably goggles rather than safety spectacles. Nitrile gloves should be worn.
NOTE: when preparing the catalyst a fume cupboard is required in addition to goggles.
This experiment involves Methanol (VERY TOXIC and EXTREMELY FLAMMABLE) and potassium hydroxide (CORROSIVE). Methanol is the most effective solvent for use in this experiment but extra care needs to be taken to ensure that students wear Personal Protection Equipment (PPE) and act sensibly during this procedure. CLEAPSS® do not recommend using sodium hydroxide instead of potassium hydroxide because it has a lower solubility in ethanol. Consult technicians at a school prior to carrying out this activity as it is far safer to have the KOH methanol mixture made up in school in small aliquots already prepared in stoppered test tubes for students. If the reagents are taken into school or used at an event ensure that the correct risk assessments have been completed, the hosts have been informed of the planned activity and that the correct regulations concerning transport of chemicals are adhered to. The guide - Transporting chemicals for lecture demonstrations & similar purposes, Royal Society of Chemistry (RSC), January 2008-suggests that small volumes can be transported safely if clearly labelled with LQ (limited quantity) notices.
Current Biofuels - Oil and Biodiesel
Page 27
NOTE: Provide clear instructions to the students NOT to shake the test tubes as the methanol may squirt out.
Any contact of the methanol solution or biodiesel mixtures with the skin should be washed off under a tap straight away.
The volume of methanol used in the preparation of the catalyst and the activity pose a low risk of exposure by vaporisation. Methanol and biodiesel mixtures are highly flammable and should be kept away from nakedflame
For further information read the CLEAPSS® Guidance PS 67-10 (Making bio-diesel), Recipe book RB71 (Potassium hydroxide), RB102 (Testing for organic functional groups) and Hazcards 40B (Methanol), 40C (Carbohydrates), 45 and 46 (Hydrocarbons).
If using a centrifuge ensure that the centrifuge tubes are balanced and that the tubes used for centrifugation are sealed.
Method
NOTE: Steps 1 and 2 should be carried out by a properly qualified adult in a fume cupboard. See the Healthand Safety instructions for further information.
1. Prepare the catalyst. A 5% w/v potassium hydroxide (KOH) solution should be prepared withmethanol by adding 5 g of KOH to 100 ml of methanol in a conical flask or beaker on a stirre .Wait until all the potassium hydroxide has dissolved.
2. 1 ml or 1.5 g of the methanol KOH solution should be aliquoted into test tubes or centrifuge tubesand sealed prior to the activity. If any of the solution remains it should be stored in an airtightborosilicate glass bottle and clearly labelled, adding the hazard symbols CORROSIVE, TOXICand EXTREMELY FLAMMABLE.
3. Students can add 10 ml or 10 g of vegetable oil to a test tube or 15 ml centrifuge tube.
4. Add the contents of the tube containing the methanol / potassium hydroxide catalyst to the tubecontaining the vegetable oil and ensure the tube is properly sealed.
5. In order to carry out the conversion reaction the tubes should be carefully and slowly invertedover 30 times to ensure adequate mixing.
6. Students should carefully observe the contents of the test tube. The biodiesel separates out inthe top layer while a lower layer of glycerol gradually forms.
7. Students should label the tubes with the contents and their names.
Students will be able to observe a reaction almost immediately on mixing the oil and catalyst. The oil will quickly become less viscous. However, it is better to prepare biodiesel in one lesson, store it in labelled test tubes to allow the layers to separate fully, and perform any follow-up tests in the next lesson. If the products of the reaction are to be tested it is best to wait at least 24 hours for full separation or centrifuge the solutions.
Disposable pipettes can be used to separate the two products of the reaction by siphoning off the top biodiesel layer and transferring it to another test tube or centrifuge tube. Alternatively a separating funnel can be used to run out the lower layer of glycerol, leaving the layer of biodiesel behind. If a centrifuge is used to separate the products it is recommended that the mixture is transferred to microcentrifuge tubes using disposable pipettes and a small bench top centrifuge is used. Ensure that the centrifuge is balanced. Care is then needed to separate the two layers and a fine-tipped disposable pipette is recommended
Page 28
Extension activities
Improve the quality of the biodiesel by carrying out a further washing step to meet the standards required for use in vehicle engines. Impurities in biodiesel cause problems in modern and high-end car engines and it is important to ‘wash’ the biodiesel prior to use. This can be carried out by the students by adding an equal volume of distilled water to the biodiesel, mixing the solution and repeating the separation procedure.
Calculate the yield of biodiesel. Have students weigh the oil, methanol and resultant biodiesel. Weigh the test or centrifuge tube prior to adding the oil, after adding the oil and after adding the methanol. Once the biodiesel and glycerol layers are completely separated the upper biodiesel layer can be carefully removed with a disposable pipette and added to a weighed container. Calculate the yield: (weight of biodiesel ÷ weight of oil and methanol) x 100 = % yield.
Compare the burning qualities of the biodiesel and vegetable oil. The biodiesel, oil from activity 1B, sugar from activity 1E and ethanol from activity 1G can be collected and tested for their combustion energy – see Gatsby SEP: Biofuels activity A7 ‘How much energy is released when a fuel burns?’ or ‘Energy values of food’ from Practical Chemistry. These activities should be carried out in a fume cupboard.
Compare the viscosity of the biodiesel and vegetable oil. See activity 1C Oil viscosity.
Test the biodiesel for saturation. For further details see CLEAPSS® Guidance PS 67-01 (Testing for unsaturation), ‘Unsaturation in fats and oils’ from Practical Chemistry or SEP Biofuels activity A5: Saturation of fuels.
Discussion activities about the practicalities of the technique used on an industrial scale, the sources of feedstocks and economic viability of producing biodiesel to replace fossil fuels.
Suppliers
Vegetable cooking oils can be obtained from supermarkets or local shops.
The laboratory equipment should be available in most secondary schools science departments. A small benchtop centrifuge can be used with smaller volumes.
A microcentrifuge suitable for school use can be obtained from National Centre for Biotechnology Education (NCBE) www.ncbe.reading.ac.uk/menu.html University of Reading, 2 Earley Gate, Whiteknights Road, Reading, RG6 6AU tel: 0118 9873743 fax: 01189 750140
Hand centrifuges can be obtained from Rapid Severalls Lane, Colchester, Essex, C04 5JS tel: 01206 751166 fax: 01206 751188
A ‘Green chemistry: production of biodiesel’ kit containing the oil, alcohol and catalyst for this activity is available from Rapid (see above).
Current Biofuels - Oil and Biodiesel
Page 29
Further reading and links
CLEAPSS® Guidance PS 67-10 (Making bio-diesel).
Gatsby Science Enhancement Programme (SEP): Biofuels. 2009. www.sep.org.uk
Making Biodiesel pre-16, Royal Society of Chemistry http://media.rsc.org/Learning%20about%20materials/Materials%20Biodiesel%20Part%201.pdf
Making Biodiesel post-16, Royal Society of Chemistry http://media.rsc.org/Learning%20about%20materials/Materials%20Biodiesel%20Part%202.pdf
The Royal Society, January 2008. Sustainable biofuels: prospects and challenges, ISBN 978 0 85403 662 2.
Nuffield Council on Bioethics, April 2011, Biofuels: ethical issues www.nuffieldbioethics.org/biofuels-0
Turning the leaf into a biodiesel factory [Reference/webpage no longer available – January 2017]
Research groups
Professor Gillian Stephens, University of Nottingham, Process Intensification for Acceleration of Bio & Chemo Catalysis in Biorefinin www.nottingham.ac.uk/engineering/departments/chemenv/people/gill.stephens
Dr Sohail Ali, Plymouth Marine Laboratory, Integrated approach to cost effective production of biodiesel from photosynthetic microbes www.pml.ac.uk/about_us/pml_people/sohail_ali.aspx
Professor Antoni Slabas, Durham University, An integrated approach to the cost effective production of biodiesel from photosynthetic microbes www.dur.ac.uk/biosciences/about/schoolstaff/academicstaff/?id=40
Dr Sean Murphy, CAB International, Impacts of tropical land use conversion to jatropha and oil palm on rural livelihoods and ecosystem services in India and Mexico www.cabi.org/default.aspx?site=170&page=1019&sid=1426
Professor Johnathan Napier, Rothamsted Research, Rational metabolic engineering of oilseed fatty acid composition
Dr Kerrie Farrar, Aberystwyth University, Understanding and exploiting the diversity of form in Miscanthus
Dr James Murray, Imperial College London, Investigation of Water Oxidizing Catalysis for Renewable Energy
Page 30
KeywordsBioenergy, biofuel, bioethanol, sustainable, renewable, biomass, anaerobic, waste, bacteria, microbes, fermentation, yeast, methane, sugar beet, sugar cane, maize, wheat, yield, sucrose, glucose, polysaccharide, pentose.
Background
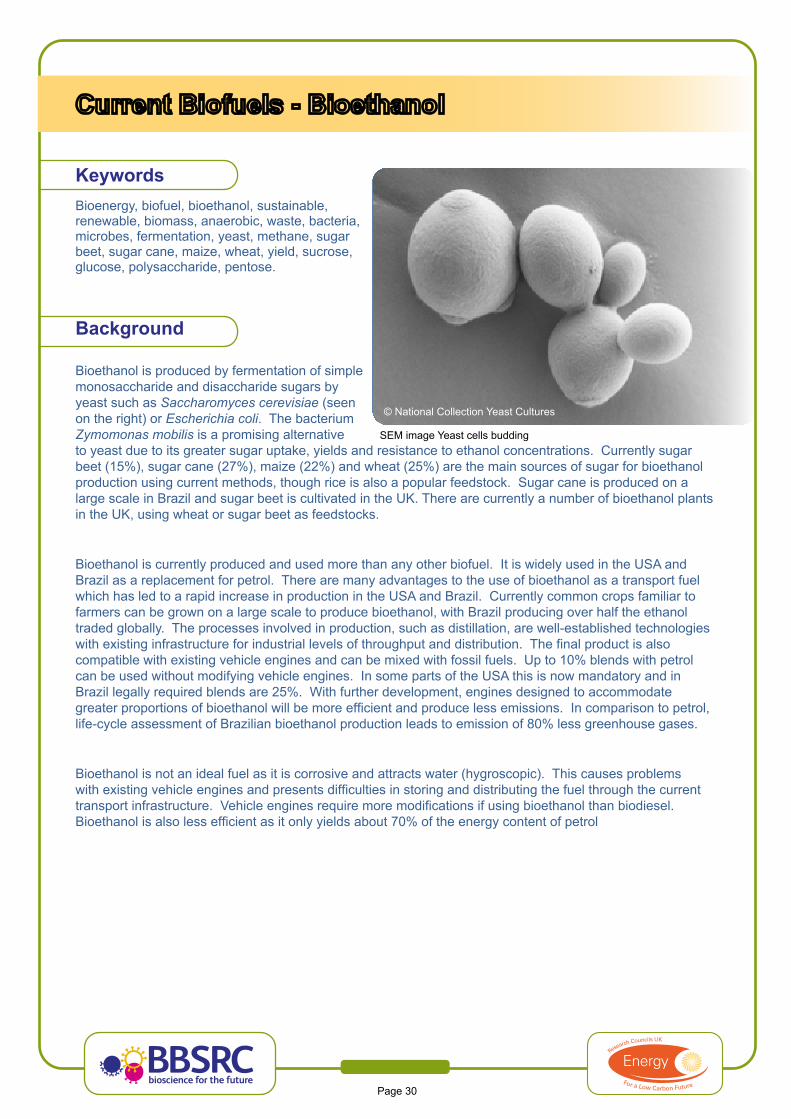
Bioethanol is produced by fermentation of simple monosaccharide and disaccharide sugars by yeast such as Saccharomyces cerevisiae (seen on the right) or Escherichia coli. The bacterium Zymomonas mobilis is a promising alternative to yeast due to its greater sugar uptake, yields and resistance to ethanol concentrations. Currently sugar beet (15%), sugar cane (27%), maize (22%) and wheat (25%) are the main sources of sugar for bioethanol production using current methods, though rice is also a popular feedstock. Sugar cane is produced on a large scale in Brazil and sugar beet is cultivated in the UK. There are currently a number of bioethanol plants in the UK, using wheat or sugar beet as feedstocks.
Bioethanol is currently produced and used more than any other biofuel. It is widely used in the USA and Brazil as a replacement for petrol. There are many advantages to the use of bioethanol as a transport fuel which has led to a rapid increase in production in the USA and Brazil. Currently common crops familiar to farmers can be grown on a large scale to produce bioethanol, with Brazil producing over half the ethanol traded globally. The processes involved in production, such as distillation, are well-established technologies with existing infrastructure for industrial levels of throughput and distribution. The final product is alsocompatible with existing vehicle engines and can be mixed with fossil fuels. Up to 10% blends with petrol can be used without modifying vehicle engines. In some parts of the USA this is now mandatory and in Brazil legally required blends are 25%. With further development, engines designed to accommodate greater proportions of bioethanol will be more efficient and produce less emissions. In comparison to petrol,life-cycle assessment of Brazilian bioethanol production leads to emission of 80% less greenhouse gases.
Bioethanol is not an ideal fuel as it is corrosive and attracts water (hygroscopic). This causes problems with existing vehicle engines and presents difficulties in storing and distributing the fuel through the currenttransport infrastructure. Vehicle engines require more modifications if using bioethanol than biodiesel. Bioethanol is also less efficient as it only yields about 70% of the energy content of petrol
© National Collection Yeast Cultures
SEM image Yeast cells budding
Page 31
Activity 1E - Extracting sugar from sugar beetLearning outcomes: By the end of the session students will be able to:
• Describe the process of extracting sugar from sugar beet.
• Calculate the yield of sugar from sugar beet.
• Suggest ways of improving the process for more efficient extraction of sugar and commercialisation
BackgroundSugar (in the form of sucrose) is the main feedstock used to produce bioethanol in Brazil. In countries that produce sufficient quantities of sugar cane it is an economically viable alternative to biodiesel production. Incolder climates the majority of this sugar is obtained from sugar beet. This activity involves the extraction of sugar from sugar beet. The sugar is extracted from the beet by heating in water and then evaporating off the excess water. It is best to conduct this activity in the autumn term when the supply of sugar beet is most plentiful.
Age range: This activity is suitable for GCSE and A-level students.
Duration: 10-20 minutes.
Suggested prior knowledge: It is recommended that you elicit the existing student knowledge ofproperties of compounds, methods of separation, states of matter and a basic understanding of the anatomy of plants.
What you will need
• Sugar beet• Peelers• Knives• Chopping board• Beakers• Bunsen burner• Heatproof mat• Tripod• Gauze• Evaporating basin• Balance• Water• Timer• Eye protection
Health and Safety
Eye protection must be worn.
CLEAPSS® laboratory handbook – section 15.5 Plants and seeds (choosing suitable plant material, growing and cultivating plants, sources and suppliers of plants)
CLEAPSS® Hazcards 40C (Carbohydrates)
Method
1. Clean, peel and slice sugar beet into strips about half a centimetre wide and weighed. Alternatively itmay be obtained in the form of pellets.
2. Simmer the sugar beet in water for 15 minutes with occasional stirring and then leave to cool. It issafer for teachers or technicians to do this prior to the lesson. Note: add enough water to cover thesugar beet but do not fill the beaker over half way to avoid boiling ove .
3. Students should weigh an evaporating basin on a balance that is accurate to at least two decimalpoints before adding any of the beet extract and make a note of the weight.
4. Boiled sugar beet liquid should be carefully added to half fill the evaporating basin
5. Heat the evaporating basin gently over a beaker of boiling water to evaporate the water.
6. Leave the solution to cool then check for crystals.
7. Add more beet extract solution to the evaporating basin and repeat steps 5-6.
8. Once you have evaporated all the water from the beet extract weigh the evaporating basincontaining the sugar crystals.
9. Obtain the weight of sugar beet used to produce the total liquid that was added to the evaporatingbasin.
You can then calculate the actual yield of sugar produced using the equation below.
Yield = weight of sugar extracted/weight of sugar beet
Mass of sugar beet gMass of evaporating basin gMass of evaporating basin and sugar crystals
g
Actual yield of sugar %
Make a flow chart of your extraction procedure. Use words and diagrams to show each step.
Extension activities
Test the extract for the presence of sugars, see activity 1F Carbohydrate testing.
Calculate the relative concentrations of sucrose and glucose extracted from the sugar beet. A refractometer can be used to measure sugar content and glucose test strips or blood glucose monitors used to measure the glucose solutions.
Discuss the requirements of sugar beet plants and how farmers increase yields while coping with drought, pests, disease and climate change.
The sugar together with oil from activity 1B, biodiesel from activity 1D, and ethanol from activity 1G can be collected and tested for their combustion energy – see Gatsby SEP: Biofuels activity A7 ‘How much energy is released when a fuel burns?’ or ‘Energy values of food’ from Practical Chemistry. These activities should be carried out in a fume cupboard.
www.bbsrc.ac.uk
Page 32
Suppliers
Sugar beet can be grown from seed or obtained as complete beets during the harvesting season September to Christmas (contact Ian Pettitt at Brooms Barn Research Centre).
Further reading and links
Jaggard, K. W. Qi, A. and Armstrong, M. J. 2009. A meta-analysis of sugarbeet yield responses to nitrogen fertilizer measured in England since 1980. Journal of Agricultural Science, 147 287-301
Jaggard, K. W. Qi, A. and Ober, E. S. 2009. Capture and use of solar radiation, water, and nitrogen by sugar beet (Beta vulgaris L.). Journal of Experimental Botany, 60 (7) 1919-1925
Broom’s Barn Model Farm project has been set up in a field at Broom’s Barn designed so that it is managed in exactly the same way as the rest of the farm, using commercial methods and machinery. This will ensure that the plots will be representative of commercially grown crops and the production of sugar beet from year to year can be monitored.
Norbert Rillieux and the sugar industry, Royal Society of Chemistry, Chemists in a social and historical context http://media.rsc.org/Chemists%20in%20a%20social%20&%20historical%20context/CSHC-sugar.pdf
Renewable Fuels Association (2010) Climate of opportunity: 2010 ethanol industry outlook.
The Royal Society, January 2008. Sustainable biofuels: prospects and challenges, ISBN 978 0 85403 662 2.
Nuffield Council on Bioethics, April 2011, Biofuels: ethical issues www.nuffieldbioethics.org/biofuels-0
Research groups
Broom’s Barn is the UK’s national centre for sugar beet research, located 20 miles east of Cambridge. Research spans a range of crops and scientific disciplines and includes liaison/extension work with growers and the industry.
Page 33
Page 34
Activity 1F - Carbohydrate testing
Learning outcomes: By the end of the session students will be able to:
• Use a variety of chemical tests to identify carbohydrates in plant material.
• Evaluate the merits of the sugar content of different biofuel feedstocks.
• Suggest suitable crops for bioethanol production.
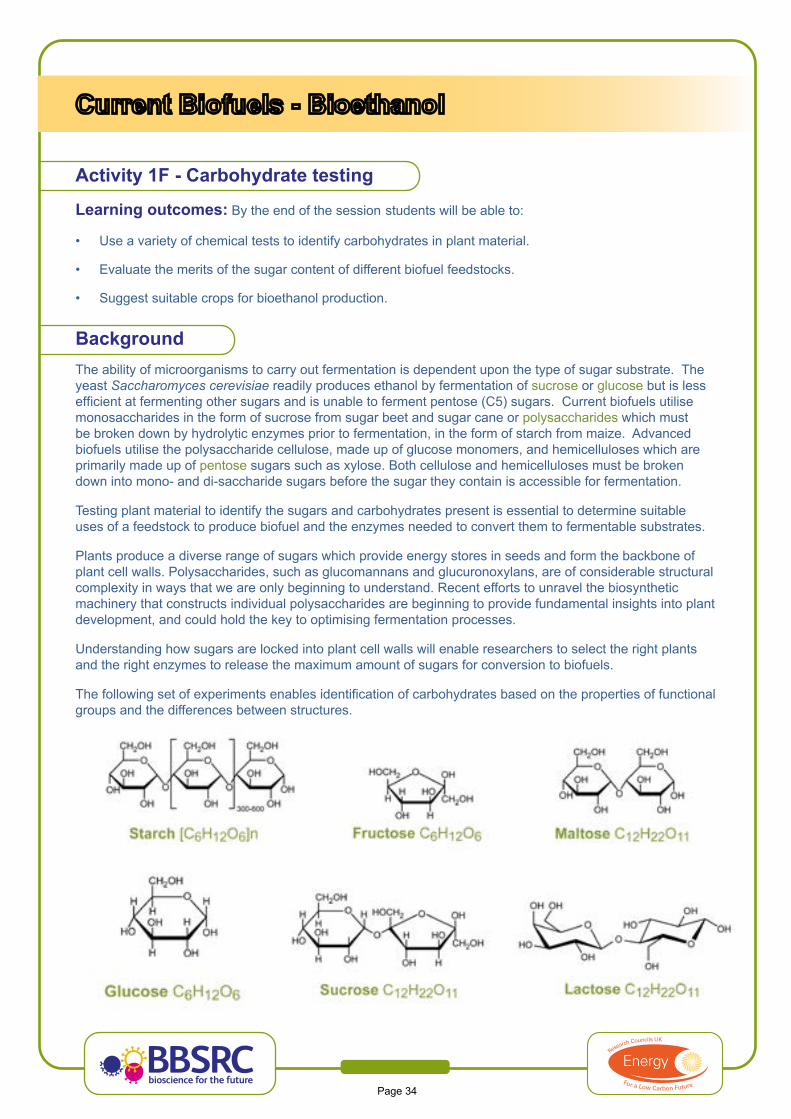
BackgroundThe ability of microorganisms to carry out fermentation is dependent upon the type of sugar substrate. The yeast Saccharomyces cerevisiae readily produces ethanol by fermentation of sucrose or glucose but is less efficient at fermenting other sugars and is unable to ferment pentose (C5) sugars. Current biofuels utilisemonosaccharides in the form of sucrose from sugar beet and sugar cane or polysaccharides which must be broken down by hydrolytic enzymes prior to fermentation, in the form of starch from maize. Advanced biofuels utilise the polysaccharide cellulose, made up of glucose monomers, and hemicelluloses which are primarily made up of pentose sugars such as xylose. Both cellulose and hemicelluloses must be broken down into mono- and di-saccharide sugars before the sugar they contain is accessible for fermentation.
Testing plant material to identify the sugars and carbohydrates present is essential to determine suitable uses of a feedstock to produce biofuel and the enzymes needed to convert them to fermentable substrates.
Plants produce a diverse range of sugars which provide energy stores in seeds and form the backbone of plant cell walls. Polysaccharides, such as glucomannans and glucuronoxylans, are of considerable structural complexity in ways that we are only beginning to understand. Recent efforts to unravel the biosynthetic machinery that constructs individual polysaccharides are beginning to provide fundamental insights into plant development, and could hold the key to optimising fermentation processes.
Understanding how sugars are locked into plant cell walls will enable researchers to select the right plants and the right enzymes to release the maximum amount of sugars for conversion to biofuels.
The following set of experiments enables identification of carbohydrates based on the properties of functionalgroups and the differences between structures.
Page 35
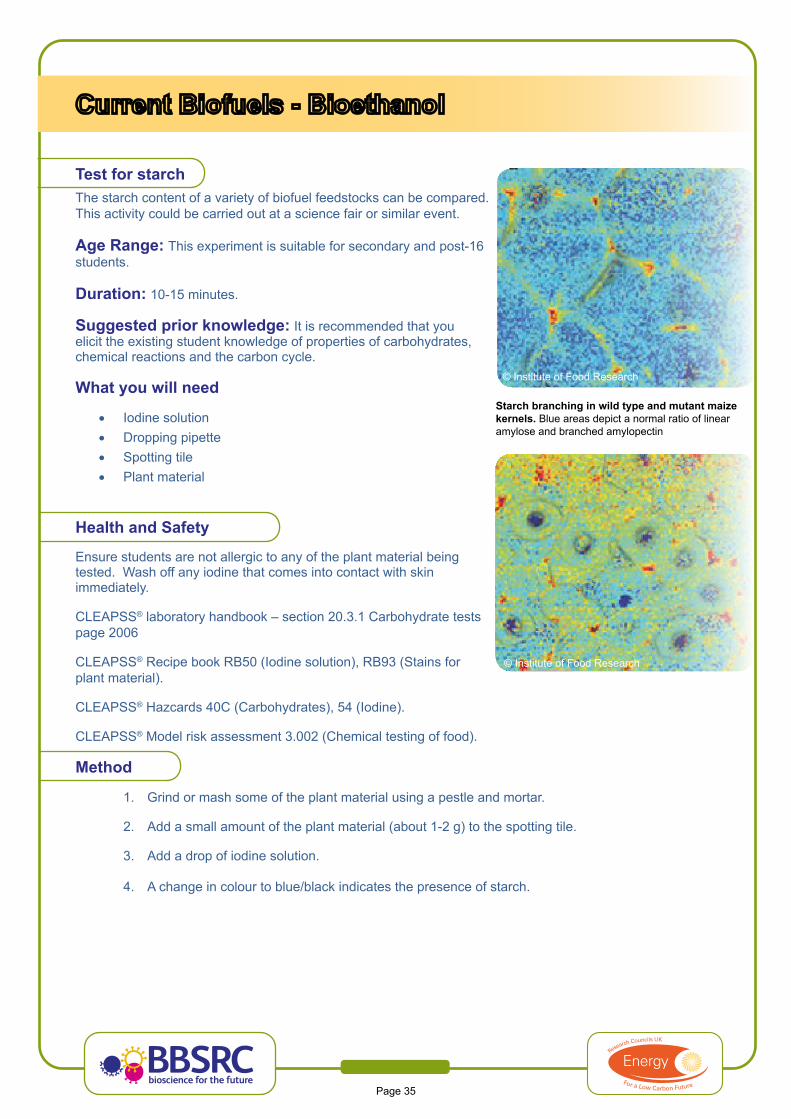
Test for starchThe starch content of a variety of biofuel feedstocks can be compared. This activity could be carried out at a science fair or similar event.
Age Range: This experiment is suitable for secondary and post-16students.
Duration: 10-15 minutes.
Suggested prior knowledge: It is recommended that youelicit the existing student knowledge of properties of carbohydrates, chemical reactions and the carbon cycle.
What you will need
• Iodine solution• Dropping pipette• Spotting tile• Plant material
Health and Safety
Ensure students are not allergic to any of the plant material being tested. Wash off any iodine that comes into contact with skin immediately.
CLEAPSS® laboratory handbook – section 20.3.1 Carbohydrate tests page 2006
CLEAPSS® Recipe book RB50 (Iodine solution), RB93 (Stains for plant material).
CLEAPSS® Hazcards 40C (Carbohydrates), 54 (Iodine).
CLEAPSS® Model risk assessment 3.002 (Chemical testing of food).
Method
1. Grind or mash some of the plant material using a pestle and mortar.
2. Add a small amount of the plant material (about 1-2 g) to the spotting tile.
3. Add a drop of iodine solution.
4. A change in colour to blue/black indicates the presence of starch.
Starch branching in wild type and mutant maize kernels. Blue areas depict a normal ratio of linear amylose and branched amylopectin
© Institute of Food Research
© Institute of Food Research
Page 36
Test for reducing sugars including glucoseReducing sugars include the monosaccharides as well as the disaccharides maltose and lactose. They are able to carry out the reduction of copper ions.
Benedict’s reagent is a blue solution of copper sulphate containing copper(II) ions (Cu2+), that produces an insoluble red-brown precipitate of copper(I) oxide on reaction with reducing sugars. The copper II ions are reduced to copper I ions by the aldehyde group that is formed on isomerisation of the cyclic to linear form of the sugar.
Non-reducing disaccharides such as sucrose can be broken down to monosaccharides by heating in an acidic solution. This hydrolysis reaction breaks the bond between the two sugars. The resulting monosaccharides will then be able to reduce the blue Benedict’s reagent to produce a colour change.Sucrose is the only common example of a non-reducing sugar, and starch is a poor reducing agent with only the end of the carbohydrate chains having aldehyde groups.This activity requires a science laboratory.An alternative method for testing for reducing sugars can be carried out with Fehling’s solution. Fehling’s solution does work faster but it is more corrosive and must be stored as two separate solutions and made up fresh.
Age Range: This experiment is suitable for GCSE and post-16 students.Duration: 50-60 minutes.
Suggested prior knowledge: It is recommended that you elicit the existing student knowledge ofproperties of carbohydrates, chemical reactions and the carbon cycle.
What you will need• Bunsen burner• Heatproof mat• Tripod• Gauze• Pestle and mortar• Boiling tubes• Boiling tube rack• Glass beaker• Graduated pipette or syringe• Spatula• Funnel• Test tube holder• Dropping pipette• Benedict’s solution (1.73 g of copper(II) sulfate pentahydrate, 10 g of anhydrous sodium carbonate
and 17.3 g of sodium citrate made up to 100 ml)• Selection of plant material or sugar beet extract from activity 1E• Glucose solution• Timer• Eye protection
Optional• A variety of known carbohydrate solutions including starch, fructose, sucrose, maltose and lactose

Page 37
Health and Safety
Eye protection must be worn. Ensure that a heatproof mat is used. Fill the beaker a third to half full with water to avoid boiling over and splashing hot water. Take care with hot liquids and glassware. Place the test tube in the water bath and remove it after heating using the test tube holder. Do not overheat the solution or heat the boiling tube directly with the Bunsen burner as this may lead to the ejection of hot liquids. Use Benedict’s solution rather than Fehling’s solution.
CLEAPSS® Laboratory handbook – section 20.3.1 Carbohydrate tests page 2006.
CLEAPSS® Recipe book, RB11 (Benedict’s qualitative reagent), RB12 (Benedict’s quantitative reagent).
CLEAPSS® Hazcards 27C (Copper salts), 40C (Carbohydrates), 95C (Sodium and Potassium salts).
CLEAPSS® Model risk assessment 3.002 (Chemical testing of food).
Method
1. Grind or mash some of the plant material using a pestle and mortar.
2. Add a small volume of distilled water (approx. 5 ml) and continue to grind the plant material foranother couple of minutes.
3. Transfer approximately 5 g of the extract from the plant material into a boiling tube.
4. Carry out the following steps with a positive glucose control solution in addition to the testsamples.
5. Add 10 drops or 3 ml of Benedict’s reagent using a pipette or syringe.
6. Boil some water in a kettle and then transfer to a beaker and add the boiling tube. This shouldbe sufficient to obtain a colour change. In order to get complete reaction with the sugar heathe beaker until the water boils and maintain the heat for 8-10 minutes. This must be wellsupervised.
7. Carefully remove the boiling tube from the beaker using a test tube holder and transfer to aboiling tube rack.
8. The presence of glucose is indicated by a change in colour from blue to green, yellow, orangeand brick-red colours depending on the amount of reducing sugar present.
Page 38
Extension activity: Testing glucose concentrations using Benedict’s reagent
What you will need
• Bunsen burner• Heatproof mat• Gauze• Tripod• Boiling tubes• Boiling tube rack• Glass beaker• Graduated pipette or syringe• Spatula• Test tube holder• Dropping pipette• Benedict’s solution (1.73 g of copper(II) sulfate pentahydrate, 10 g of anhydrous sodium carbonate
and 17.3 g of sodium citrate made up to 100 ml)• 10% glucose solution• Selection of solutions prepared for glucose testing (ensure the same volume of distilled water is
added to each sample)• Distilled water• Timer• Eye protection
Method
1. Make up a dilution series using the 10% glucose solution and the following dilutions1 ml of 10% glucose + 9 ml of water = 1%1 ml of 1% glucose + 9 ml of water = 0.1%1 ml of 0.1% glucose + 9 ml of water = 0.01%
2. Test each dilution by adding ten drops of Benedict’s reagent to 1 ml of the glucose solution.
3. Place the boiling tube into a beaker of warm water.
4. Heat the beaker until the water boils and maintain the heat for 8-10 minutes.This must be wellsupervised.
5. Carefully remove the boiling tube from the beaker using a test tube holder and transfer to aboiling tube rack.
6. The colour of the solutions from blue to green, yellow, orange and brick-red colours indicates theconcentration of glucose present.
Repeat steps 2-5 with the test samples and compare with the colour of the standards to determine the concentration.

Page 39
Alternative Method: Testing glucose concentrations using potassium permanganateThis technique uses an acidified solution of potassium permanganate as the indicato . The purple pink solution of potassium permanganate (KMnO4-) is reduced to a colourless solution of manganese ions (Mn2+) by glucose.
MnO4- + 8H+ + 5e- Mn2+ + 4H2O
The concentration of glucose can be determined by the time taken for the colour change. Using a standard solution of potassium permanganate and a set of standard glucose solutions, the rate of glucose oxidation can be calculated and compared to unknowns. The rate of reaction is directly related to the glucose concentration.
To ensure accurate results, concentrations and measurements need to be carefully made and clean glassware used. The concentrations of glucose standards and stock solution may need to be adjusted if you do not get sufficient sensitivt . Follow suppliers guidance on safe use of potassium permanganate.
See the Science and Plants for Schools (SAPS) Glucose concentration protocol: Estimating glucose concentration in solution.
Age Range: This experiment is suitable for GCSE and post-16 students.
Duration: 50-60 minutes
Suggested prior knowledge: It is recommended that you elicit the existing student knowledge ofproperties of carbohydrates, chemical reactions and the carbon cycle.
What you will need• Glass beakers
• Boiling tubes
• Boiling tube rack
• Graduated pipette or syringe
• Dropping pipette
• 1M sulfuric acid
• Potassium permanganate solution (0.4 g in 1 litre)
• 12% glucose solution
• Selection of solutions prepared for glucose testing (ensure the same volume of distilled water isadded to each sample)
• Distilled water
• Timer
• Glass rod
• Eye protection
• Gloves
Page 40
Health and Safety
Eye protection must be worn and gloves are recommended. Potassium permanganate is harmful and oxidising, avoid contact with the skin. In the case of contact with skin wash off immediately. Potassium permanganate solution presents a low hazard but stains hands and clothing. Prepare the potassium permanganate and sulphuric acid solutions for the students and avoid contact of the solid with concentrated sulphuric acid.
CLEAPSS® Student Safety sheet 48, Recipe book RB73 and Hazcard 81 Potassium manganate(VII)
CLEAPSS® Hazcards 40C (Carbohydrates) and 98a (Sulfuric(VI) acid)
CLEAPSS® Laboratory handbook – section 20.3.1 Carbohydrate tests page 2006
CLEAPSS® Model risk assessment 3.002 (Chemical testing of food).
Method
1. Label the beakers and pipettes to avoid cross contamination of potassium permanganate, sulphuricacid and glucose.
2. Make up a series of glucose solutions (2%, 4%, 6%, 8%, 10%, and make up a 12% stock solution ofglucose).10 ml of 12% glucose + 2 ml of water = 10%10 ml of 12% glucose + 5 ml of water = 8%7.5 ml of 12% glucose + 7.5 ml of water = 6%5 ml of 12% glucose + 10 ml of water = 4%2.5 ml of 12% glucose + 12.5 ml of water = 2%
3. Make up a fresh stock indicator solution of equal volumes of sulphuric acid and potassiumpermanganate.
4. In the following order place 10 ml of the first glucose solution, 5 ml of sulphuric acid then 2 ml opotassium permanganate into the boiling tube.
5. Start the timer.
6. Stir with a stirring rod and stop the timer as soon as the pink colour disappears.
7. Record the time and the glucose solution used.
8. Rinse the pipette used for the glucose solution.
9. Repeat using the other glucose solutions of known concentration.
10. Plot a standard curve of glucose solution against time taken for complete colour change.
11. Repeat for a solution of unknown concentration and record the time.
12. Use the standard curve to estimate the concentration of the unknown solution.
Page 41
Testing for non-reducing sugars including sucrose
Age Range: This experiment is suitable for secondary and post-16 students.
Duration: 50-60 minutes.
Suggested prior knowledge: It is recommended that you elicit the existing student knowledge ofproperties of carbohydrates, chemical reactions and the carbon cycle.
What you will need
• Bunsen burner• Heatproof mat• Tripod• Gauze• Pestle and mortar• Boiling tube• Boiling tube rack• Beaker• Spatula• Test tube holder• Graduated pipette or syringe• Dilute hydrochloric acid (1 mol per dm3)• Sodium hydrogen carbonate solution• Benedict’s solution (1.73 g of copper(II) sulfate pentahydrate, 10 g of anhydrous sodium carbonate
and 17.3 g of sodium citrate made up to 100 ml)• Selection of plant material or sugar beet extract from activity 1E• Glucose solution• Sucrose solution• Eye protection
Health and Safety
Eye protection must be worn. Ensure that a heatproof mat is used. Fill the beaker a third to half full with water to avoid boiling over and splashing hot water. Take care with hot liquids and glassware. Place the test tube in the water bath and remove it after heating using the test tube holder. Do not overheat the solution or heat the boiling tube directly with the Bunsen burner as this may lead to the ejection of hot liquids. Use Benedict’s solution rather than Fehling’s solution.
CLEAPSS® Student Safety sheet 48, Recipe book RB73 and Hazcard 81 Potassium manganate(VII).
CLEAPSS® Hazcards 40C (Carbohydrates) and 98a (Sulfuric(VI) acid).
CLEAPSS® Laboratory handbook – section 20.3.1 Carbohydrate tests page 2006.
CLEAPSS® Model risk assessment 3.002 (Chemical testing of food).
Page 42
Method
1. Grind or mash some of the plant material using a pestle and mortar.
2. Add a small volume of distilled water (approx. 5 ml) and continue to grind the plant material foranother couple of minutes.
3. Transfer the extract from the plant material into a boiling tube.
4. Carry out the following steps with a positive sucrose control solution and a negative glucosecontrol solution in addition to the test samples.
5. Add about 2 ml of dilute hydrochloric acid using a pipette or syringe.
6. Place the boiling tube into a beaker of warm water.
7. Heat the beaker until the water boils and maintain the heat for 10 minutes.
8. Carefully remove the boiling tube from the beaker using a test tube holder and transfer to aboiling tube rack. Place the boiling tube rack in a tray to catch any spillages or frothing over.
9. Allow the boiling tube to cool for 5 minutes before adding 2 ml of sodium hydrogen carbonatesolution or slowly adding small amounts of solid sodium hydrogen carbonate until the fizzinstops.
10. Then follow steps 5–7 from the reducing sugar test.
Extension activity
How could you investigate whether a solution contains both sucrose and glucose?
Suppliers
Glucose, sucrose, as granulated sugar, and fructose can be obtained from most supermarkets. Maltose and lactose can be obtained from brewery suppliers.
Further reading and links
Benedict, S. R. (1 December 1908). “A Reagent For the Detection of Reducing Sugars”. J. Biol. Chem. 5 (6): 485–487.
Goubet F., Barton C.J., Mortimer J.C., Yu X., Zhang Z., Miles G.P., Richens J., Liepman A.H., Seffen K., Dupree P. (2009) Cell wall glucomannan in Arabidopsis is synthesised by CSLA glycosyltransferases, and influences the progression of embryogenesis. Plant J.60(3):527-38.
Mortimer J.C., Miles G.P., Brown D.M., Zhang Z., Segura M.P., Weimar T., Yu X., Seffen K.A., Stephens E., Turner S.R., Dupree P. (2010) Absence of branches from xylan in Arabidopsis gux mutants reveals potential for simplification of lignocellulosic biomass. PNAS. Oct 5;107(40):17409-14.
Plant sugars provide clues to sustainable bioenergy production
Page 43
Current Biofuels - Bioethanol
Detecting starch in food, Practical chemistry
Science and Plants for Schools (SAPS) Estimating glucose concentration in solution
Novel imaging technique looks inside starch granules
The Royal Society, January 2008. Sustainable biofuels: prospects and challenges, ISBN 978 0 85403 662 2.
Nuffield Council on Bioethics, April 2011, Biofuels: ethical issues www.nuffieldbioethics.org/biofuels-0
Research groupsProf. Paul Dupree, BSBEC Cell Wall Sugars Programme, Department of Biochemistry, University of Cambridge
Page 44
Activity 1G - Yeast fermentationLearning outcomes: By the end of the session students will be able to:
• Describe the production of ethanol from renewable sources.
• Describe the process of fermentation.
• Carry out fermentation to produce ethanol.
• Analyse the rate of fermentation of different sugars.
• Evaluate the use and economic advantages of producing liquid biofuels (gasohol) from sugar.
Keywords Bioenergy, biofuel, sustainable, renewable, biomass, yield, bioethanol, microbes, yeast,enzyme, fermentation, varieties, sugar.
BackgroundBioethanol is produced by fermentation of sugars by yeast or Escherichia coli. The bacterium Zymomonas mobilis is a promising alternative to yeast due to its greater sugar uptake, yields and resistance to ethanol concentrations. Currently sugar beet and sugar cane are the main sources of sugar for bioethanol. Starches from maize or grain feedstocks are hydrolysed with amylase enzymes (saccharification) to produce sugarthat can be fermented by yeast. Yeast have been used for centuries in brewing alcoholic drinks. The yeast Saccharomyces cerevisiae produces ethanol by fermentation of sucrose or glucose but, like Zymomonas mobilis, is unable to ferment pentose (C5) sugars. Saccharomyces diastaticus is able to utilise starch for fermentation. The National Collection of Yeast Cultures (NCYC) recommends certain strains for the production of bioethanol, such as Pachysolen tannophilus, Candida succiphilia, Candida tenuis and Pichia stipitis, due to their ability to degrade cellulose or ferment xylose.
In this activity students can compare the fermentation rates of yeast (Saccharomyces cerevisiae) under a variety of conditions. In order to calculate the rate of fermentation the amount of carbon dioxide produced can be measured over time. This can be done in a number of ways including the use of bubble counters, collection of carbon dioxide (CO2) in inverted water-filled easuring cylinders or with balloons attached to the neck of the conical flask or boiling tubes. Choose the safest and most appropriate method according to theequipment and time available for the experiment. The volume of carbon dioxide produced can be calculated by multiplying the number of bubbles recorded by a bubble counter and the volume of one bubble. If using balloons, the volume can be measured by carefully tying off the balloon used to collect the gas produced, immersing it in a large measuring cylinder and measuring the displaced volume or by weighing the balloon, as the carbon dioxide is relatively dense. This experiment is suitable for public demonstrations and science fairs, providing appropriate risk assessment is carried out.
Students can investigate a number of variables that affect the rate of fermentation. It is suggested students are split into groups to assess the effects of different variables and report their results back to the rest of the class. The following variables can be easily compared-type of yeast e.g. fresh, dried, fast-acting, glucose concentration, temperature, pH and agitation. Research on the abilities of yeast to ferment different feedstocks and sugars is essential to the development of industrial bioethanol production. Students should investigate the ability of baker’s yeast to ferment common sugars such as sucrose, glucose, fructose and maltose. The recovery and reuse of resources is important in making biofuel production economic and environmentally friendly and students could investigate the rate of fermentation with and without immobilising yeast in sodium alginate balls.
Page 45
Age Range: This experiment is suitable for secondary and post-16 students.
Duration: Approximately two sessions of 30-50 minutes. Test the experimental conditions prior to theactivity to establish a suitable fermentation set-up that will produce measurable levels of carbon dioxide to be produced. The experiment can be set up and run in one day for a science fair or exhibition with adjustment of the fermentation conditions.
Suggested prior knowledge: It is recommended that you elicit the existing student knowledge ofmicrobes, fermentation, alcohols, fuels and the properties of gases.
What you will need
• Boiling tubes• Boiling tube rack• 8% (w/v) sugar solutions (Glucose, Sucrose, Fructose, Lactose, Maltose)• 0.1M phosphate (V) buffer pH 7• Brewer’s or baker’s yeast (Saccharomyces cerevisiae)• Deionised or distilled water• Balloons or bubble counters• Measuring cylinder (10 ml)• Thermometer• Timers• Beaker of disinfectant• Eye protection
Optional
• Water bath• Sodium alginate• Syringe• 1.5% (w/v) calcium chloride (CaCl) solution• Buffer solutions at varying pH• Strainer• Fermentation locks• Universal indicator solution• Cotton wool• Magnetic stirrer and flea• Alternative yeast strains
Health and SafetyThe following factors should be considered when planning to carry out any investigations involving microorganisms; nature of the organism used, source of the organism, temperature of incubation, culture medium used, type of investigation and the facilities available, chance of contamination, expertise of people involved. It is recommended that incubation is not carried out above 30°C to avoid the growth of potential human pathogens. If necessary change the conditions or limit the involvement of students perhaps by carrying out the experiment as a demonstration. CLEAPSS® handbook - “perfectly safe if the organisms studied are known to be non-pathogenic, such as brewer’s and baker’s yeast, the bacteria in yoghurt or edible mushrooms”. Fermenters and their contents should be sterilised at 121°C for 15 minutes prior to disposal.
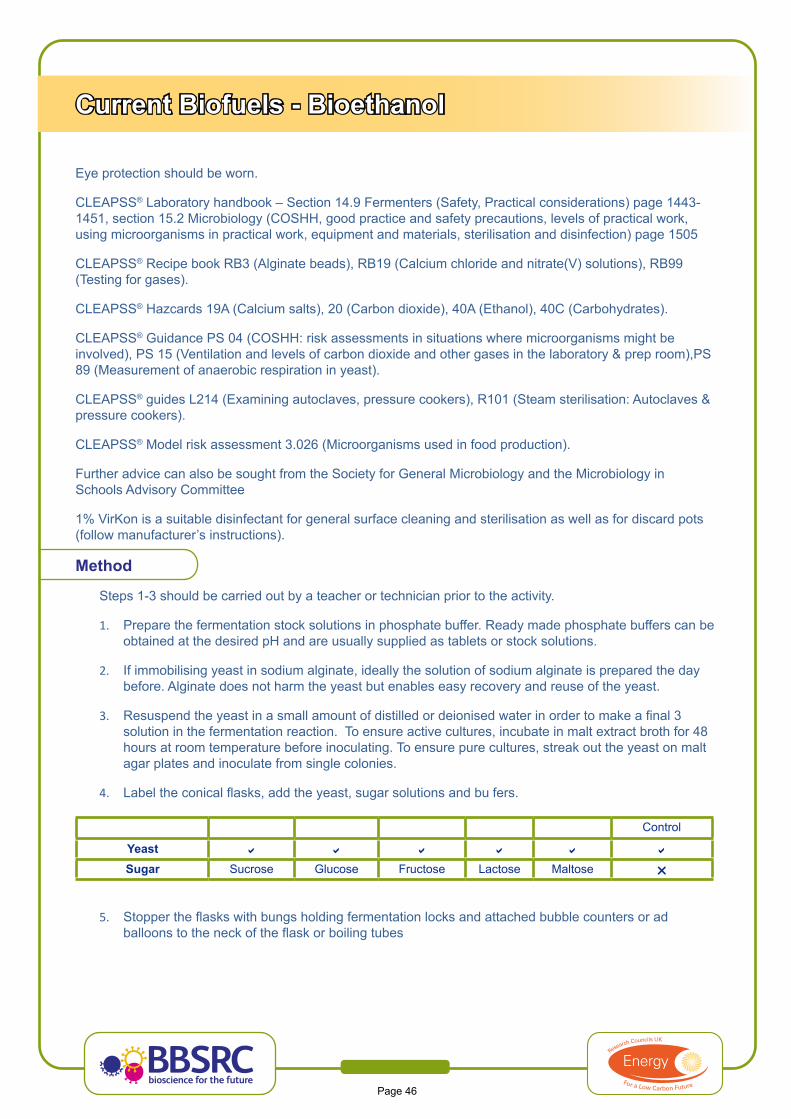
Page 46
Current Biofuels - Bioethanol
Eye protection should be worn.
CLEAPSS® Laboratory handbook – Section 14.9 Fermenters (Safety, Practical considerations) page 1443-1451, section 15.2 Microbiology (COSHH, good practice and safety precautions, levels of practical work, using microorganisms in practical work, equipment and materials, sterilisation and disinfection) page 1505
CLEAPSS® Recipe book RB3 (Alginate beads), RB19 (Calcium chloride and nitrate(V) solutions), RB99 (Testing for gases).
CLEAPSS® Hazcards 19A (Calcium salts), 20 (Carbon dioxide), 40A (Ethanol), 40C (Carbohydrates).
CLEAPSS® Guidance PS 04 (COSHH: risk assessments in situations where microorganisms might be involved), PS 15 (Ventilation and levels of carbon dioxide and other gases in the laboratory & prep room),PS 89 (Measurement of anaerobic respiration in yeast).
CLEAPSS® guides L214 (Examining autoclaves, pressure cookers), R101 (Steam sterilisation: Autoclaves & pressure cookers).
CLEAPSS® Model risk assessment 3.026 (Microorganisms used in food production).
Further advice can also be sought from the Society for General Microbiology and the Microbiology in Schools Advisory Committee
1% VirKon is a suitable disinfectant for general surface cleaning and sterilisation as well as for discard pots (follow manufacturer’s instructions).
Method
Steps 1-3 should be carried out by a teacher or technician prior to the activity.
1. Prepare the fermentation stock solutions in phosphate buffer. Ready made phosphate buffers can beobtained at the desired pH and are usually supplied as tablets or stock solutions.
2. If immobilising yeast in sodium alginate, ideally the solution of sodium alginate is prepared the daybefore. Alginate does not harm the yeast but enables easy recovery and reuse of the yeast.
3. Resuspend the yeast in a small amount of distilled or deionised water in order to make a final 3solution in the fermentation reaction. To ensure active cultures, incubate in malt extract broth for 48hours at room temperature before inoculating. To ensure pure cultures, streak out the yeast on maltagar plates and inoculate from single colonies.
4. Label the conical flasks, add the yeast, sugar solutions and bu fers.
Control
Yeast
Sugar Sucrose Glucose Fructose Lactose Maltose
5. Stopper the flasks with bungs holding fermentation locks and attached bubble counters or adballoons to the neck of the flask or boiling tubes
Preparing immobilised yeast
1. Prepare a 2% sodium alginate solution with warm distilled or deionised water, mix thoroughlyand leave overnight in a fridge. The initial mixture can be very lumpy but will become smoothovernight.
2. Resuspend the yeast in a small amount of distilled or deionised water so that the final solution oimmobilised yeast-alginate is not too runny.
3. Add the resuspended yeast solution to the sodium alginate solution and mix thoroughly.
4. Prepare a 1.5% calcium chloride solution with calcium chloride dihydrate (CaCl2.2H2O). Thecalcium ions cause the sodium alginate to set and hence using distilled or deionised water for thealginate and yeast solutions is important as is avoiding contact of the syringe with the calciumchloride solution.
5. Draw the yeast-alginate solution up into a syringe.
6. Add the yeast-alginate solution into a 1.5% CaCl2 solution drop by drop. Carefully observe theshape of the drops. If the drops take on a ‘comet’ shaped appearance add a small amount ofdistilled or deionised water to the yeast-alginate solution, mix and retry.
7. Allow the yeast-alginate beads to set for at least 10 minutes.
8. Carefully strain the beads and rinse with distilled or deionised water.
Extension activities
This activity can be carried out using immobilised yeast or different varieties of yeast.
The fermentation reaction may also be set up as a bioreactor with recording of pH and temperature with data logging software.
Students can test the gas produced during fermentation for the presence of carbon dioxide (CO2) using lime water. The gas can be poured into a test tube with lime water as CO2 is denser than air.
If a suitable location, time and equipment are available, the ethanol produced in the fermentation can be distilled. See the Gatsby SEP: Biofuels activity A3:Using fermentation to make ethanol.
The ethanol, oil from activity 1B, biodiesel from activity 1D, and sugar from activity 1E can be collected and tested for their combustion energy – see Gatsby SEP: Biofuels activity A7 ‘How much energy is released when a fuel burns?’ or ‘Energy values of food’ from Practical Chemistry. These activities should be carried out in a fume cupboard.
SuppliersBioreactors, bubble counters and enzymes can be obtained from National Centre for Biotechnology Education (NCBE) www.ncbe.reading.ac.uk/menu.html University of Reading, 2 Earley Gate, Whiteknights Road, Reading, RG6 6AU tel: 0118 9873743 fax: 01189 750140
Brewer’s or baker’s yeast can be obtained from local supermarkets, brewery stores, or bakeries.
Dried yeast can also be obtained from Blades Biological Limited www.blades-bio.co.uk Cowden, Edenbridge, Kent, TN8 7DX tel:01342 850 242 fax: 01342 850 924.
Sucrose, glucose and fructose can be obtained from local supermarkets, maltose can be obtained from brewery suppliers.
Sodium alginate and universal indicator can be obtained from Philip Harris Education, Hyde Buildings, Hyde, Cheshire, SK14 4SH tel: 0845120 4520 fax: 0800 138 8881.
www.bbsrc.ac.uk
Page 47
Page 48
Further reading and links
James S. A., Cadet G. M., Carvajal E. J. C., Barahona P. P., Cross K., Bond C. J., Roberts I. N. 2011 Saturnispora quitensis sp. nov., a yeast species isolated from the Maquipucuna cloud forest reserve in Ecuador International Journal of Systematic and Evolutionary Microbiology
Ravella S. R., James S. A., Bond C. J., Roberts I. N., Cross K., Retter A., Hobbs P. J. 2009 Cryptococcus shivajii sp. nov.: a novel basidiomycetous yeast isolated from biogas reactor, Current Microbiology E-pub.
Roberts, I.N. and Oliver, S 2011. The yin and yang of yeast: biodiversity research and systems biology as complementary forces driving innovation in biotechnology, Biotechnology Letters, 33 (3), 477-487.Yeast fermentation and distillation instructions from Practical Chemistry
Practical Fermentation – A guide for Schools and Colleges. 1999. National Centre for Biotechnology Education (NCBE) and Society of General Microbiology (SGM). [Reference/webpage no longer available – October 2016]
Burdass, D., Grainger, J.M. and Hurst, J. (editors) 2006, Basic Practical Microbiology – A Manual and Grainger, J.M. and Hurst, J. (editors) 2007, Practical Microbiology for Secondary schools-available free from the Society for General Microbiology (SGM)
Immobilised yeast- Immobilisation of yeast in calcium alginate beads, Dean Madden, 2007.
The Royal Society, January 2008. Sustainable biofuels: prospects and challenges, ISBN 978 0 85403 662 2.
Nuffield Council on Bioethics, April 2011, Biofuels: ethical issues www.nuffieldbioethics.org/biofuels-0
More than bread and beer: the National Collection of Yeast Cultures - VIDEO [Reference/webpage no longer available – January 2017]
Research groups
National Collection of Yeast Cultures (NCYC) www.ncyc.co.uk/ The NCYC collects and preserves a wide variety of yeast cultures with applications in industry and academia; research at NCYC has shed new light on yeast evolution and genetic interrelationships and resulted in novel tools for identifying and characterising yeasts. Research associated with the Collection aims to improve techniques to identify and classify yeasts. The NCYC is involved in the following research projects:
• EEDA “Biomass to Bioalcohol Innovation in the East of England” (2009-2010).
• DEFRA-LINK “Production of BioAlcohols from Lignocellulosic waste materials in the Agri-Food chain”(2008-2012).