cutting, threading, and bending instructions for … · cutting, threading, and bending...
TRANSCRIPT
Cutting, Threading, and Bending Instructions for Stainless Rigid Conduit
Phone: 800.945.4316 Fax: 724.838.1544 E-mail: [email protected] Web: www.gibsonstainless.com 2
Cutting, Threading, and Bending Instructions for Stainless Rigid Conduit
To ensure rigid conduit performs as expected, it is important to install it in accordance with all relevant National Electric Code (NEC) guidelines, as well as the operating and safety instructions provided with any equipment being used. Care must also be taken when performing pre-installation alterations such as cutting, threading, and bending; failure to properly handle and process the conduit during these alterations can make installation more difficult, time consuming, or costly and may even impact the life of the conduit system.
Below is a guide to reference when cutting, threading, or bending rigid conduit in the field. The same general principles apply to stainless steel rigid conduit as conventional rigid conduit, though you will find some best practices noted throughout that are specific to the processing of stainless rigid conduit.
When cutting, threading, and bending stainless steel conduit, all equipment that comes into contact with the conduit, including bending shoes and vises, should be new or used exclusively on stainless steel. Using equipment that has processed ferrous material will impregnate stainless steel with free iron, leading to rust and corrosion.
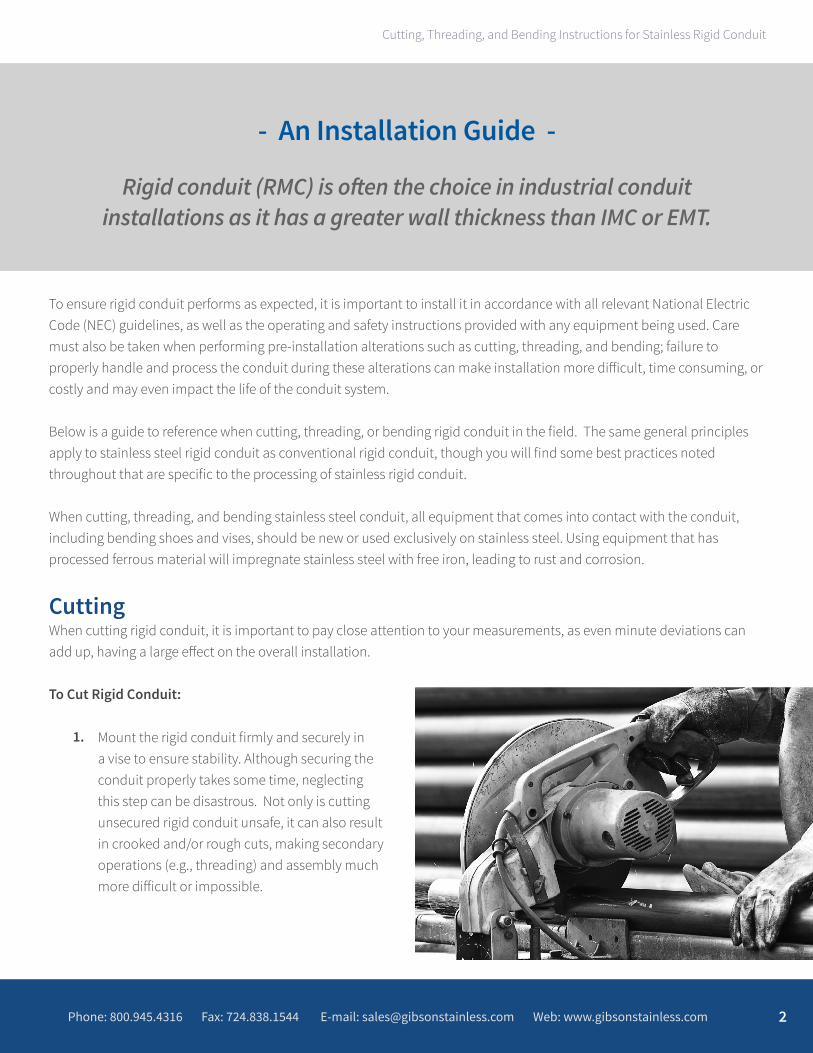
CuttingWhen cutting rigid conduit, it is important to pay close attention to your measurements, as even minute deviations can add up, having a large effect on the overall installation.
To Cut Rigid Conduit:
1.
- An Installation Guide -
Rigid conduit (RMC) is often the choice in industrial conduit installations as it has a greater wall thickness than IMC or EMT.
Mount the rigid conduit firmly and securely in a vise to ensure stability. Although securing the conduit properly takes some time, neglecting this step can be disastrous. Not only is cutting unsecured rigid conduit unsafe, it can also result in crooked and/or rough cuts, making secondary operations (e.g., threading) and assembly much more difficult or impossible.

Phone: 800.945.4316 Fax: 724.838.1544 E-mail: [email protected] Web: www.gibsonstainless.com 3
Cutting, Threading, and Bending Instructions for Stainless Rigid Conduit
ThreadingIf using threaded fittings, the conduit must be properly threaded to ensure that secure connections can be made. Standard threaders can be used on stainless steel rigid conduit, but note that using standard dies does increase the rate of wear on the die — particularly for larger conduit sizes (e.g., 2-½”, 3”, 4”). Be sure to monitor the dies closely and replace if worn. When threading stainless conduit, if standard dies are used, best practice is to use a new die set; dies previously used to thread non-stainless pipe can cause material transfer, resulting in later corrosion.
Rigid conduit can be threaded using manual or powered tooling. Manual tooling is limited to the smaller trade sizes of pipe (½” – 2”). Powered tooling comes in various models / styles and can be selected to accommodate the size and quantity of pipe to be threaded.
To Thread Rigid Conduit:
Most threading equipment comes with manuals containing detailed information on pipe threading and equipment capabilities, so it is helpful to keep those on hand and reference them throughout the process.
Use standard ¾-inch-per-foot tapered National Pipe Thread (NPT) dies. Choose the dies based on the trade size pipe you are threading. For example, for ¾” trade size pipe, choose the standard 14-pitch (i.e., 14 threads per inch) NPT die. Ensure the dies and die head are clean as clearances between the two are tight, and cleanliness will provide for easier assembly and prevent binding. Assemble and position the dies into the die head according to the threader’s instructions. This will help ensure proper alignment. (A die will not self-correct; if it starts out crooked, the end result will also be crooked.)
Cut the conduit with a saw or a roll cutter, taking time to ensure a straight cut. If a cut is not straight, fittings may not properly thread onto the conduit. If using a roll cutter, be sure to execute complete 360° revolutions around the conduit. Do not perform a partial revolution and attempt to break the remaining conduit wall as this could distort or damage the pipe, making threading more difficult.
Ream the cut end of the conduit. The cutting process, especially when using a roll cutter, leaves sharp burrs that can impede threading or damage wiring, therefore it is important to ream the interior and smooth the exterior of the cut. A cylindrical rotary reamer is often used for the interior.
2.
1.
3.

Phone: 800.945.4316 Fax: 724.838.1544 E-mail: [email protected] Web: www.gibsonstainless.com 4
Cutting, Threading, and Bending Instructions for Stainless Rigid Conduit
Once the die head is assembled and the dies are inspected, you can begin threading the conduit. For best results, thread a piece of scrap conduit to test your set-up. Ragged, rough, shallow, or torn threads are indications that the die is worn or that there is a problem with the set-up (e.g., misalignment). If a die shows signs of wear, replace it. Press the dies firmly against the end of the conduit, and turn the die head. While threading, the die head will require the application of pressure along the axial direction of the pipe until it engages for a thread or two, at which point it will be able to feed along on its own.
As soon as the die head engages the piece of conduit, it is important to ensure that cutting oil is supplied to the cutting interface for the remainder of thread cutting. Some threading machines supply this automatically and will start pumping fluid onto the interface even before the cut begins. If using a manual process, where it is necessary to pause to apply cutting oil, do so frequently during the process. Make sure to oil both the threads and the dies.
Frequent oiling of the threads and dies safeguards the quality of the threads by keeping all of the material lubricated. This lubrication reduces friction, heat, and the occurrence of rough or ragged threads.
Stop the threading process one thread short on the die. This is generally considered best practice, as it allows for rigid conduit to be coupled securely without conduit-on-conduit butting. When tightened with a wrench, the coupling will effectively cover all of the conduit threads.
Note: Most field threading tools turn the die head (by hand or electric motor) while the conduit remains stationary, but it is possible to have a machine that will rotate the conduit in a stationary die head to achieve the same thread cutting action. Similar principles (e.g., importance of cleanliness, alignment and thread cutting lubricant) apply regardless of the threader type.
Carefully remove the die head; threads can be damaged by an uncontrolled die. Clean the threads thoroughly removing all chips and burrs.
Inspect the threads. Use an L1 ring gauge to verify thread size and make further passes if necessary.
Note that an L1 ring gauge for pipe thread may thread onto the conduit somewhere between one thread short of flush and one thread past flush; this is normal and within accepted thread-length tolerance limits.
2.
3.
4.
5.
6.
BendingManufacturers often offer factory bent elbows; however, due to the different configurations of conduit installations, a number of bends may need to be made in the field. An experienced and properly equipped installer will be able to fabricate various bend shapes quickly and efficiently on site. The NEC allows for as much as 360° between pulling points, but every degree of bend makes it harder to pull wires and increases the strain the wires experience. Best practice is to make as few bends as possible, and make no single bend greater than 90°.
To Bend Rigid Conduit:
Most bending equipment comes with manuals containing detailed information on conduit bending and equipment capabilities, so it is helpful to keep those on hand and reference them throughout the process.
Phone: 800.945.4316 Fax: 724.838.1544 E-mail: [email protected] Web: www.gibsonstainless.com 5
Cutting, Threading, and Bending Instructions for Stainless Rigid Conduit
When making field alterations for unique installation challenges, it is always best practice to review NFPA 70 (National Electric Code) and consult local experts including your AHJ (Authority Having Jurisdiction) to ensure a safe, effective, and long-lasting conduit system.
Gibson Stainless & Specialty offers rigid (heavywall) conduit, nipples, and 90° elbows as well as additional fittings needed to construct a complete stainless steel conduit system.
The above is presented as an educational and informational tool. Conduit systems should be installed by professionals and in accordance with the NEC. For further information and/or for specific installation questions, please contact Gibson Stainless.
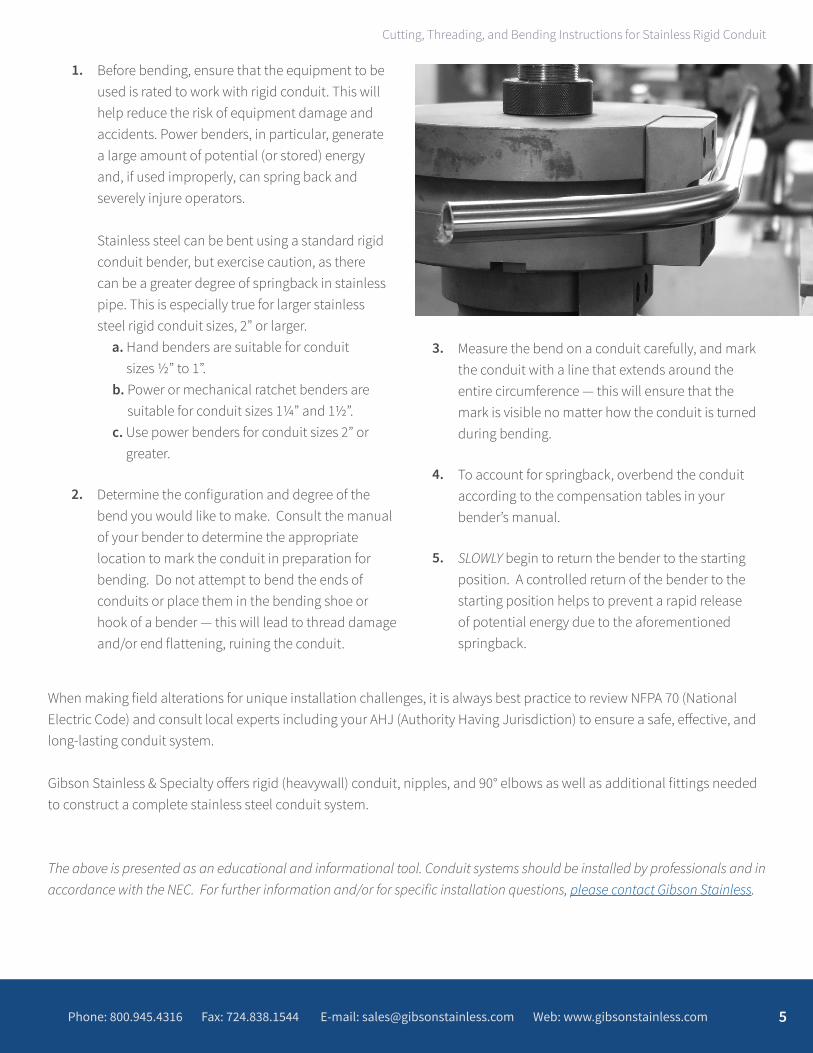
Before bending, ensure that the equipment to be used is rated to work with rigid conduit. This will help reduce the risk of equipment damage and accidents. Power benders, in particular, generate a large amount of potential (or stored) energy and, if used improperly, can spring back and severely injure operators.
Stainless steel can be bent using a standard rigid conduit bender, but exercise caution, as there can be a greater degree of springback in stainless pipe. This is especially true for larger stainless steel rigid conduit sizes, 2” or larger. a. Hand benders are suitable for conduit
sizes ½” to 1”. b. Power or mechanical ratchet benders are
suitable for conduit sizes 1¼” and 1½”. c. Use power benders for conduit sizes 2” or
greater.
Determine the configuration and degree of the bend you would like to make. Consult the manual of your bender to determine the appropriate location to mark the conduit in preparation for bending. Do not attempt to bend the ends of conduits or place them in the bending shoe or hook of a bender — this will lead to thread damage and/or end flattening, ruining the conduit.
Measure the bend on a conduit carefully, and mark the conduit with a line that extends around the entire circumference — this will ensure that the mark is visible no matter how the conduit is turned during bending.
To account for springback, overbend the conduit according to the compensation tables in your bender’s manual.
SLOWLY begin to return the bender to the starting position. A controlled return of the bender to the starting position helps to prevent a rapid release of potential energy due to the aforementioned springback.
1.
2.
3.
4.
5.

Phone: 800.945.4316 Fax: 724.838.1544 E-mail: [email protected] Web: www.gibsonstainless.com 6
Cutting, Threading, and Bending Instructions for Stainless Rigid Conduit
When Gibson Stainless & Specialty Inc. was founded in 1995, Type 316 SS electrical fittings were very hard to find. Zinc plated, galvanized, and carbon steel fittings were the norm in the industry because they were lower in price. Reinstallation of zinc plated, galvanized, and carbon steels, however, became very expensive, and the demand began to increase for products that would withstand corrosive elements and harsh conditions, enabling the conduit system to last longer. Gibson Stainless started with a product line that consisted solely of products used as support fittings. The company had nine total products, which spanned only two product categories. As demand grew, a few strut accessories and other various support accessories were added. As time passed, the conduit, conduit bodies, device boxes, hubs, etc. were added to offer a conduit system entirely in Type 316 SS.
“Our approach at Gibson may be a little different than most. Quality is our number one priority throughout all of the processing steps and is one thing we are never willing to sacrifice. Every product we offer is polished to achieve a bright finish. Each individual part is inspected at various stages of production and assembly and then again during packaging. All items are packaged and labeled individually. All of our conduit is shipped securely in custom-built, wooden crates.
Just as important to the quality of the product we offer is the quality of the customer service we provide. We strive to give our customers fast and accurate responses. While all Gibson Stainless items are stock items, we do occasionally have less in stock than required by the customer. When this happens, we give our customers realistic and reliable lead times. We hope that doing business with Gibson Stainless is enjoyable and that we are perceived as offering a true quality package made up of both the product and our service.”
GIBSON STAINLESS & SPECIALTY INC. Toll Free: 800.945.4316 • Phone: 724.838.8320 • Fax: 724.838.1544Email: [email protected] Website: www.gibsonstainless.com
Contact Gibson Stainless View Resource Library