daily inspections (di) - dsgc.co.uk · • rigging faults or omissions ... how to carry out a di...
TRANSCRIPT

DAILY INSPECTIONS (DI)
Theory training session
1

WHY HAVE A DI1. TO ENSURE THE AIRCRAFT IS SERVICABLE
2. TO IDENTIFY DEFECTS
3. PART OF MAINTENANCE SCHEDULE
4. REQUIREMENTS of EASA (See BGA Laws and Rules)
2

EASA requirements.• All EASA gliders and motor gliders are required to have an EASA
CofA with a valid Airworthiness Review Certificate (ARC)
• Pilot/Owner maintenance including daily inspection (DI) must be
carried out and certified in accordance with EU regulation
2042/2003 as amended.
3

A valid pilot's licence (or equivalent) is required for the purposes
of pilot/owner maintenance, including DI as appropriate for the
class of aircraft:
• Gliders & Self Sustaining Sailplanes – BGA Bronze Badge.
• Powered aircraft including SLMG & TMG - PPL or NPPL.
Who can undertake a DI?
4

Which DSGC aircraft can I DI?• Upon completion of your DI training you will be qualified to
complete a DI on any DSGC glider, providing that you have signed
the DSGC glider flight manual for that Glider as proof that you
have read and understood the schedule of daily checks that are
required on that aircraft.
• You must also comply with the clubs own operating rules and
procedures.5

Can I DI a privately owned glider• Your DI training is generic training to complete a DI on gliders
• It is the responsibility of the person carrying out the DI to ensure
that they have read and understood the schedule of daily checks
listed for that particular glider.
6
Duplicate Checks• A duplicate check must be completed by another person
each time the glider is rigged.
• It is the responsibility of the person doing the DI to ensure
that the person carrying out is authorised to do so.
7

DSGC responsibility.• DSGC maintains a register of pilots who are authorised to
perform pilot/owner maintenance tasks on club aircraft.
• DSGC will assess the competence of persons carrying out
pilot/owner maintenance on club aircraft and maintain a
training record including a record of refresher training.
8

Daily Inspections.• It is important that we only ever fly a glider that is considered
safe to fly.
• The purpose of the DI is to ensure that no defect has occurred
that might render the aircraft unsafe.
• Remember you are responsible for the safety of others who will
use the glider during the day.
9

Defects: What constitutes a defect?
• Actual failure: cracked, broken or deformed materials
e.g. glass/carbon fibre, plywood, wood, plastic or metal)
• Deterioration (e.g. rotten wood, brittle fabric, rusty steel)
• Excessive wear, looseness or lack of lubrication
• Incorrect assembly, wrong adjustment or actual loss of a
particular part
• Presence of foreign bodies10

How do defects occur?• General wear and tear
• Rigging faults or omissions
• Maladjustment
• Careless ground handling
• Heavy landings
• Exceeding flight loads
11

The DI book• The BGA strongly recommend that details of work done and
defects found should be recorded in the aircrafts DI book.
• On completion of a Daily Inspection, the person carrying out the
inspection will complete and sign the (DI) book, signifying that
the task has been completely and correctly carried out and the
aircraft is ‘Serviceable’ (S) or ‘Unserviceable’ (U/S)
12

• If a defect or condition is found that has rendered the glider
not fit for flight then an ‘Unserviceable’ (U/S) entry must be
recorded in the Daily Inspection (DI) Book.
A note to the same effect should be placed in the cockpit.
• A glider that has been signed unserviceable can only be signed
serviceable (S) by a BGA rated inspector.
The DI book (cont.)
13

The DI book (cont.)• On completion of the Duplicate Check, the person carrying out
this particular check will initial for it in the Daily Inspection (DI)
book, thus signifying that the task has been completely and
correctly carried out.
• Any pilot may (and must) enter any minor defects or render the
aircraft unserviceable.
14

How to carry out a DI• Ensure you have read, understood and signed the DSGC copy of
the flight manual for that glider.
• Always follow a methodical order – be systematic in your
approach. Do not get distracted – If you do, start that section
again.
15

• Never rush a DI – regardless of local pressures.
• Do not carry out a DI in poor light e.g. in a dark hanger
• If anything looks out of place, damaged, out of alignment,
worn or corroded or if you are uncertain about any aspect of
the Inspection then get it checked by a BGA Inspector or
Duty Instructor.
How to carry out a DI (cont.)
16

The Inspection1. Cockpit/s: - Instruments, controls, straps, canopy, weights etc.
2. The Fuselage & Undercarriage: - structure, surface, tyres etc.
3. Wings and control surfaces: - ailerons, flaps, air brakes/spoilers etc.
4. Tail and control surfaces: - rudder, elevator, trim, weights etc.
5. Positive checks: - ailerons, airbrake, elevator, rudder, flaps etc.
17
18
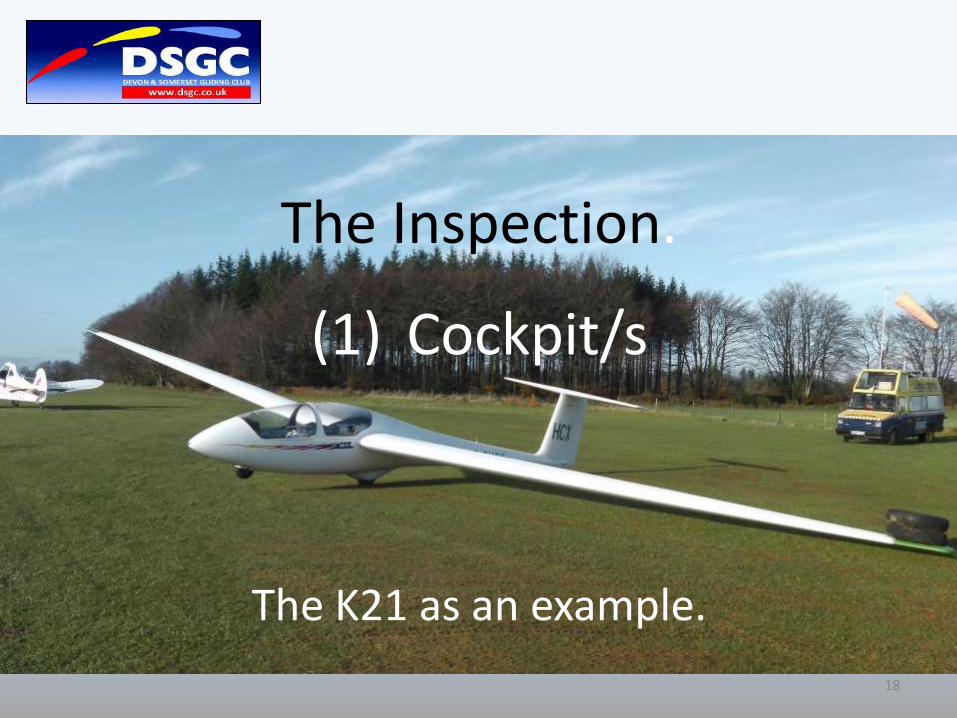
(1) Cockpit/s
The K21 as an example.
The Inspection.

• Check the DI book for previous notes or comments.• Insert, secure and connect batteries. • Check all instruments for zero setting, correct
operation and any damage. • Check radio is working correctly and set for the local
frequency (DSGC 129.90).• Check instrument panel is secure.• Check rudder pedal mounts to fuselage and hinges for
wear. Are all lock nuts or safety pins in place?• Check rudder fixings, ferrules and sleeves for wear and
ensure free running and correct operation.• Check pedal length adjustment, ensure position lock is
working correctly.
• Check cable release mechanism, ferrules and sleeves for wear and ensure free running and correct operation.
19
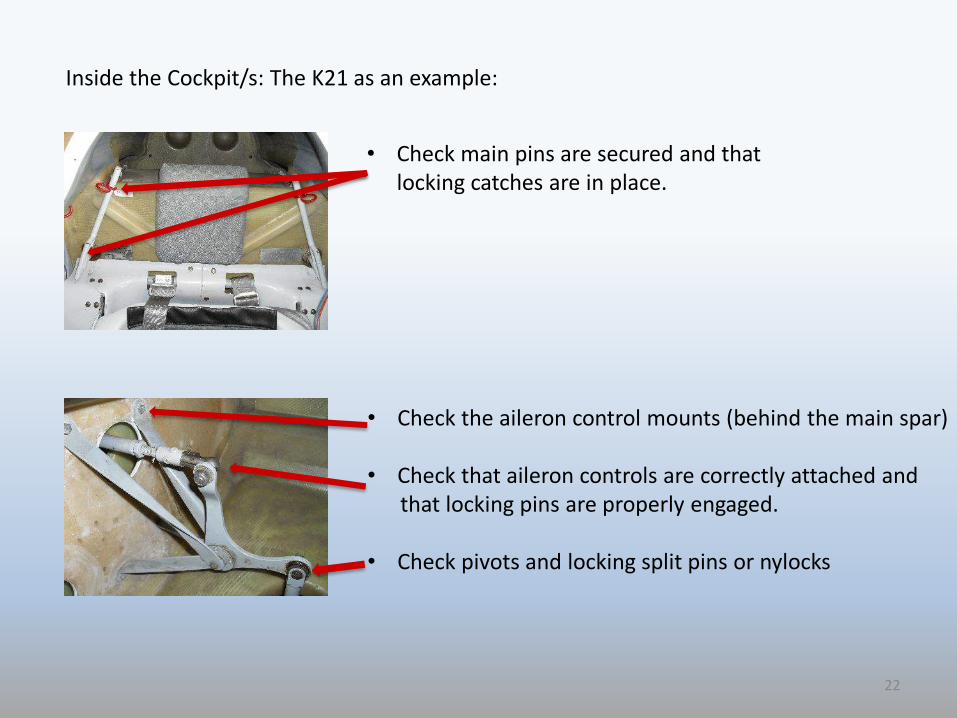
Inside the Cockpit/s: The K21 as an example:

• Check strap mounts for security and wear.• Check that the straps are not damaged or frayed.• Check the strap adjustment buckles work correctly
and are the buckle springs in place?• Does the quick release mechanism work correctly
and do all the straps lock in place and release when required?
20
• Check for full & free movement of the control column and the trim lever, are they both working in the correct sense? Are the mounts secure?
• Are there any loose or foreign objects? Check under the seat cushions.
• Are all the fixings of the seat pan in place? - If not where are they?
• Check that there are impact cushions of the correct material available for both seats.
Inside the Cockpit/s: The K21 as an example:

21
• Check canopy mounts and hinges.• Check canopy for fit.• Is there any damage?• Ensure canopy/s locks work correctly.• Ensure canopy/s are clean and polish if required.
Inside the Cockpit/s: The K21 as an example:
• Ensure that there are no additional ballast weights fixed in the cockpit/s
• Check that there are no loose objects anywhere.
• Visually check emergency release mechanism and ensure locking wire is in place (the locking wire must be made of copper).
• Is the clear view panel operating correctly?
22
• Check main pins are secured and that locking catches are in place.
Inside the Cockpit/s: The K21 as an example:
• Check the aileron control mounts (behind the main spar)
• Check that aileron controls are correctly attached and that locking pins are properly engaged.
• Check pivots and locking split pins or nylocks

23
• The control linkages for the airbrakes on the DSGCK21’s are behind the removable panel above the portwing, these need to be visually and manually checkedto ensure that the mountings are secure, the controlsare correctly attached and that locking pins areproperly engaged.
• The inspection panel should be replaced and taped in position after inspection.
The K21 as an example:

24
(2) The Fuselage & Undercarriage
The K21 as an example.
The Inspection.

The Fuselage & undercarriage: The K21 as an example:
25
Walk around the fuselage to gain an overall impression.• Are there any tell-tale signs of damage; surface
distortions, impact marks or dents, ripples or cracks?• Could mud on the under surface be hiding a problem?
• Check aero tow & winch cable release mechanisms and ensure correct operation. (winch release mechanism low on the external fuselage between the front and rear seats).
• Is the front pitot tube clear?
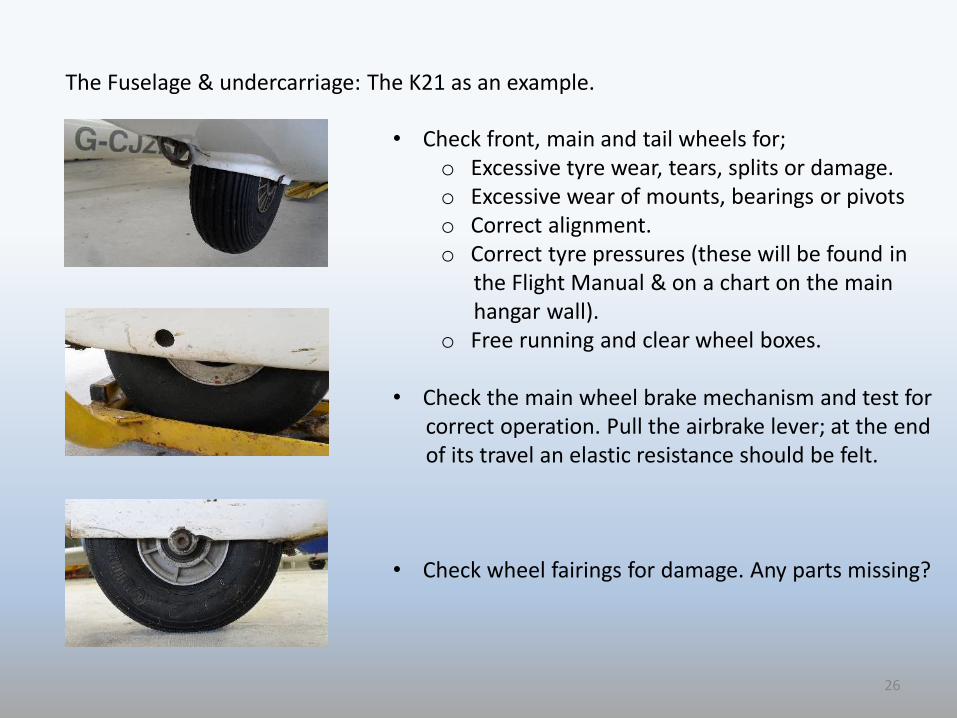
The Fuselage & undercarriage: The K21 as an example.
26
• Check front, main and tail wheels for;o Excessive tyre wear, tears, splits or damage.o Excessive wear of mounts, bearings or pivotso Correct alignment.o Correct tyre pressures (these will be found in
the Flight Manual & on a chart on the main hangar wall).
o Free running and clear wheel boxes.
• Check the main wheel brake mechanism and test for correct operation. Pull the airbrake lever; at the end of its travel an elastic resistance should be felt.
• Check wheel fairings for damage. Any parts missing?

27
(3) Wings & Control Surfaces
The K21 as an example.
The Inspection.

Wings & Control Surfaces: The K21 as an example.
28
• From the wing tip, look along the wing on the top and lowers surfaces. Catch the surface in the light to gain an overall impression. Are there any tell-tale signs of damage; surface distortions, impact marksor dents, ripples or cracks?
• From the tip, move the wing backwards and forwards as well as up and down, can any play be felt?
• Check along leading and trailing edges of the wingand control surfaces for signs of damage. Also check the top and lower surfaces.
• Check the aileron hinges and linkages for excessivewear or play.
• The wing drag pins can be visually checked through the clear view panel (marked in red) to ensure the locking pins are in place.
29
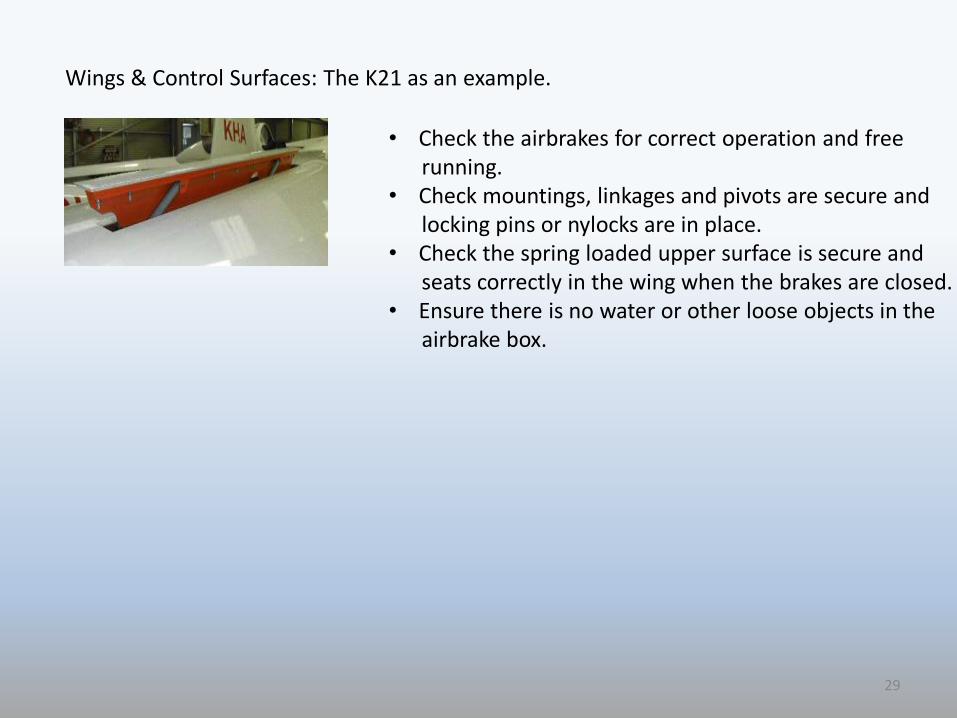
Wings & Control Surfaces: The K21 as an example.
• Check the airbrakes for correct operation and free running.
• Check mountings, linkages and pivots are secure andlocking pins or nylocks are in place.
• Check the spring loaded upper surface is secure andseats correctly in the wing when the brakes are closed.
• Ensure there is no water or other loose objects in the airbrake box.

30
(4) Tail & Control Surfaces
The K21 as an example.
The Inspection.

31
Tail & Control Surfaces: The K21 as an example.
• Take an overall critical look at the tail plane and fin. look along the surfaces in the light to gain an overall impression. Are there any tell-tale signs of damage; surface distortions, impact marks or dents, ripples or cracks? Does anything look out of place?
• Weights/water ballast: is it present? should it be?
• Check tail plane mounts, and ensure all locking and safety pins are in place.
• Check the elevator connections, ensuring all mountsare secure, all bearings correctly aligned and all locking pins are in place.
• Establish that the elevator hinges have the correct movement without excessive play.

32
Tail & Control Surfaces: The K21 as an example.
• Check for any signs of damage, particularly at the junction between the fin and fuselage, looking for cracks or distortions that may have resulted from a heavy landing.
• Check the rudder hinges and mounts for correct movement without excessive play.
• Check cable connections for:o Secure mounts.o Connections and locking pins correctly in place.o Excessive wear on pins or cable loops.o Security of crimped cable end.

33
(5) Positive Checks
The K21 as an example.
The Inspection.
34
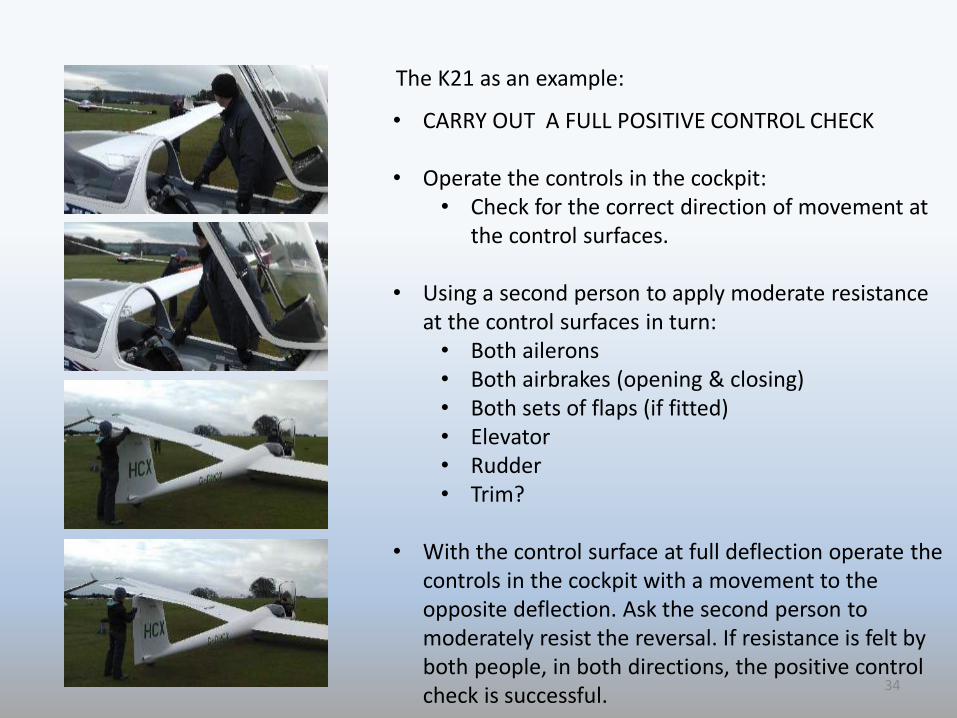
• CARRY OUT A FULL POSITIVE CONTROL CHECK
• Operate the controls in the cockpit:• Check for the correct direction of movement at
the control surfaces.
• Using a second person to apply moderate resistance at the control surfaces in turn:• Both ailerons• Both airbrakes (opening & closing)• Both sets of flaps (if fitted)• Elevator • Rudder• Trim?
• With the control surface at full deflection operate the controls in the cockpit with a movement to the opposite deflection. Ask the second person to moderately resist the reversal. If resistance is felt by both people, in both directions, the positive control check is successful.
The K21 as an example:

35
• You have now completed the Daily Inspection (DI)
• If you are not satisfied that the glider is safe to fly then date & sign the DI book and indicate that the glider is U/S (Unserviceable) in the appropriate column and complete the other columns.
• If you are satisfied that the glider is safe to fly then you should:• Date the DI book.• Indicate any work done (i.e. Rig and/or DI).• Indicate any minor defects that may be evident.• Provide a reason why if the glider is
unserviceable.• Indicate with an S (Serviceable) in the correct
column.• Sign & initial in the appropriate column.• Return the Di Book to a secure pocket within
the cockpit.
Completing the Inspection: The DI Book

Daily Inspection: Supplements for DSGC Aircraft.
• ASK 13• SZD Junior• DG 505
36

37
DI supplements for DSGC Aircraft: ASK 13
Unlike the other GRP gliders of the DSGC the ASK 13 is of a wood, metal and fabric designand was manufactured 40 -50 years ago. A good quality and robust aircraft, the ASK 13 isretained by the club due to its high quality training characteristics.
All Daily Inspections need to be meticulous, the inspection of the ASK 13 particularly so, due to its age and construction methods. There is considerably more structure, mechanisms and linkages that are visible and require inspection. The majority of the inspection has been covered in the previous sections, the next few pages will highlight some additional point that are appropriate to these aircraft.
if you are uncertain about any aspect of the inspection then get it checked by a BGA Inspector or Duty Instructor.

38
DI supplements for DSGC Aircraft: ASK 13
• The trim tab on the starboard elevator needs to be inspected as with other control surfaces, check:o For the security of mounts & hinges and that all
safety pins or ‘nylocks’ are in place.o That linkages are secure, cable sleeves are
undamaged and that cables are free running, not damaged or worn.
o Careful full deflection positive controls.
• The trim lever is mounted on the right cockpit side. check the mount, friction joint, cables, sleeves and correct operation in both front & rear cockpits.
• Check that the tail plane is locked in place with athreaded bolt and that the safety locking pin securesthe bolt.

39
DI supplements for DSGC Aircraft: ASK 13
• The elevator and airbrake control linkages are found behind the rear seat, check: the mountings for security, that the linkages are correctly attached and that locking pins are engaged and locked.
• Behind the rear cockpit seat; check the main wingpins are correctly in place and locked with a wire pinthrough a castellated nut for each wing pin.
• While looking behind the rear seat take a critical lookat the internal fuselage structure for signs of damage,distortion or wear.
• Also check the wing drag pins are securely fastened.
Main pins from cockpit. Rear view with safety pins

40
DI supplements for DSGC Aircraft: ASK 13
• Aileron linkages can be checked on the underside ofthe wing via an inspection hatch, remember to close after inspection.
• Very carefully check that the rib connections to the trailing edge are secure.
• Check the airbrakes above and below the wing and give careful scrutiny to the integrity of the airbrakebox (particularly the corners) on both surfaces.

41
DI supplements for DSGC Aircraft: SZD Junior
• Tailplane locking and safety pins.
• Ensure the elevator linkage is correctly alignedand that the spring loaded safety pin is in the correct position (do a positive check).

42
DI supplements for DSGC Aircraft: DG 505
• Check for weights left in the cockpit. These are storedunder the carpet to either side of the instrument panel.
• Ensure the seat back retainers are in good conditionand attached correctly.