dancing nine patch nine patch.pdf · it’s a heart swelling realization of how families ... add...
TRANSCRIPT

1
Dancing Nine Patch!
© Bonnie K Hunter & Quiltville.com 2013
Block Size: 11”
Finished Quilt: 54” X 54”
I know you’ve waited so patiently for this…I really needed the quilts to be FINISHED before I
could post the pattern. It’s just the way things work around here, if it is not a finished quilt, the
pattern will wait until I’ve gone through everything so I can write the instructions in the way that
I made the quilt.
And these quilts have been a long time in coming, as they started as Leader/Ender Nine Patches
that really didn’t have a destination plan!
Often when I don’t KNOW what quilt I want to make as a Leader/Ender I just stockpile PARTS.
Four Patches & Nine Patches are one of those things that I can always use…I can vary the size, I
can vary the coloring, and they will always go SOMEWHERE.
These 9 patches were made with 2” squares cut from recycled plaids, stripes and prints and sewn
together with no attention paid to what was light or dark, just sewn randomly in between the
lines of working on other projects. I pinned them into groups of 10 so I could keep track of how
many I needed.
When I needed two baby quilts to be done AT THE SAME TIME, it was these 9 patches just
waiting for a project to give them life that called to me.

2
And those of you who have followed along will remember that it was a kismet moment – these 9
patches include fabrics from my grandfather’s shirts. The baby quilts are for his great-grandsons.
It’s a heart swelling realization of how families continue to grow. We are connected!
So let’s start!
You can use ANY fabrics for this quilt – don’t limit yourself just because I used plaids. Go
Brights! Go Batiks! Go novelties!
Nine Patches:
I made my 9 patches as Leaders & Enders from 2” squares, but you can easily strip piece the 9
patches as shown:
Sew random scraps into sets of 3!
How many strip sets? It depends on how long your strips are. What matters to me more is how
many sections I need from my strip sets. For this quilt you need 68 9 patches, each with 3
sections for a total of 204 sections. Just Sew and Sew – and come sew some more if you need to!
Here’s the kicker…You may want to cut and press CENTER sections first, pressing center seams
toward the center square ---cut 68 sections that will be your centers. The remaining 136 sections
will be sewn to either side of the 9 patch center…press these sections with the seams going
outward toward the two end squares as shown. This way all seams in your 9 patches will nest.
Be sure to test your 1/4” seam! These 9 patches will measure 5” square and finish at 4.5” in the
quilt. Make 68 patches. 64 will go in the quilt center, 4 will be border corners.

3
64 rectangles 1.5” X 5”
64 rectangles 1.5” X 6”.
Sew the shorter rectangle to the right side of each 9 patch, and press seams toward the rectangle
just added.
*HINT* if these rectangles are too long for your block….your seam allowance was too wide
when sewing your 9 patch units! FIX IT!!
Rotate the block and join the longer rectangles as shown to make 32 block quarters. Press.
Rotate the block quarters Make 16 blocks! Press!
Blocks will measure 11.5” and finish at 11” in the quilt.

4
Full Quilt Layout!
Lay out the blocks as shown…there is no rotating of blocks, they are set side by side by side all
facing the same direction.
Inner Border
Cut 5 1” strips across the width of the fabric from selvage to selvage. Join the 5 border strips end
to end with diagonal seams to make a strip approximately 200” long. Trim excess 1/4” from
seams and press seams open.
Lay the quilt center out on the floor, smoothing it gently. Do not tug or pull. Measure the quilt
through the center from top to bottom. Cut two inner side borders this length. Sew the inner side
borders to the quilt sides with right sides together, pinning to match centers and ends. Ease where
necessary to fit. Press seams toward the borders.
Repeat for top and bottom inner borders, measuring across the quilt center, including the borders
just added in the measurement. Cut top and bottom inner borders this length. Stitch the top and
bottom inner borders to the quilt center, pinning to match centers and ends, easing where
necessary to fit. Press seams toward borders.
5
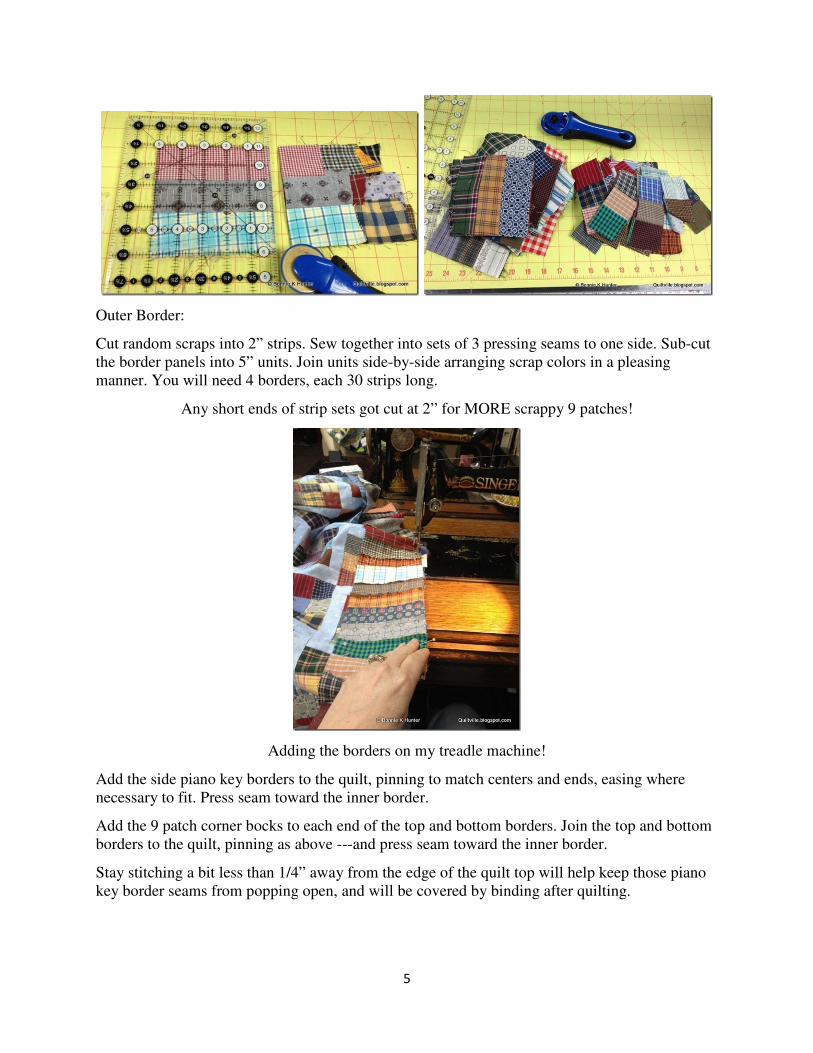
Outer Border:
Cut random scraps into 2” strips. Sew together into sets of 3 pressing seams to one side. Sub-cut
the border panels into 5” units. Join units side-by-side arranging scrap colors in a pleasing
manner. You will need 4 borders, each 30 strips long.
Any short ends of strip sets got cut at 2” for MORE scrappy 9 patches!
Adding the borders on my treadle machine!
Add the side piano key borders to the quilt, pinning to match centers and ends, easing where
necessary to fit. Press seam toward the inner border.
Add the 9 patch corner bocks to each end of the top and bottom borders. Join the top and bottom
borders to the quilt, pinning as above ---and press seam toward the inner border.
Stay stitching a bit less than 1/4” away from the edge of the quilt top will help keep those piano
key border seams from popping open, and will be covered by binding after quilting.

6
Dancing nines were quilted in an antique gold colored thread with an edge to edge design called
Deb’s Swirls by Deb Giessler!
A blue check binding finishes off the edge – PERFECT!
These quilts will soon be sent off to my two new nephews…as soon as I find out what their
names will be so I can add that to the label! The sooner they tell me, the sooner they get their
quilt….deal!