danger - alto-shaam · service, or maintenance could result in severe injury, death, or cause...
TRANSCRIPT

MN-36455 • REV. 2 • 02/14
W164 N9221 Water Street • P.O. Box 450 • Menomonee Falls, Wisconsin 53052-0450 • U.S.A. PHONE: 262.251.3800 800.558.8744 U.S.A./CANADA FAX: 262.251.7067 800.329.8744 U.S.A. ONLY
www.alto-shaam.comD U E T O O N G O I N G P R O D U C T I M P R O V E M E N T , S P E C I F I C A T I O N S A R E S U B J E C T T O C H A N G E W I T H O U T N O T I C E .P R I N T E D I N U . S . A .
step-by-step procedures
CTC6-10E, CTC6-10GCTC10-10E, CTC10-10GCTC7-20E, CTC7-20GCTC10-20E, CTC10-20GCTC20-10E, CTC20-10GCTC20-20E, CTC20-20G
Consult instructions for installation and use.
DANGERimproper instaLLation, aLteration, adJUstment, serVice, or maintenance coULd resULt in seVere inJUrY, death, or caUse propertY damage.
read the instaLLation, operating and maintenance instrUctions thoroUghLY before instaLLing or serVicing this eQUipment.
DANGERdo not store or use gasoline or other fl ammable vapors or liquids in the vicinity of this or any other appliance.

i
INTRODUCTION . . . . . . . . . . . . . . . . . . . . . . . 1SAFETY PRECAUTIONS . . . . . . . . . . . . . . . . 2
CT CLASSIC CONTROL INSTRUCTIONSControl Panel Identification . . . . . . . . . . . . . . . . . 4Oven Cool Down Process . . . . . . . . . . . . . . . . . . . 4Fahrenheit or Celsius Format . . . . . . . . . . . . . . . . 4Operating Instructions . . . . . . . . . . . . . . . . . . . . . 6
RECIPESBakery Recipes . . . . . . . . . . . . . . . . . . . . . . . . . . . . 9Convenience Product Recipes . . . . . . . . . . . . . . 10Fish & Seafood Recipes . . . . . . . . . . . . . . . . . . . . 11Meat Recipes . . . . . . . . . . . . . . . . . . . . . . . . . . . . 12Miscellaneous Recipes . . . . . . . . . . . . . . . . . . . . 13Poultry Recipes . . . . . . . . . . . . . . . . . . . . . . . . . . 14Vegetable Recipes . . . . . . . . . . . . . . . . . . . . . . . . 15
CLEANING & MAINTENANCECleaning Agents . . . . . . . . . . . . . . . . . . . . . . . . . 16Precautions . . . . . . . . . . . . . . . . . . . . . . . . . . . . . . 16First Aid . . . . . . . . . . . . . . . . . . . . . . . . . . . . . . . . 16Preventive Maintenance . . . . . . . . . . . . . . . . . . . 17Protecting Stainless Steel Surfaces . . . . . . . . . . . 18Daily Gasket Cleaning . . . . . . . . . . . . . . . . . . . . 19Probe Usage and Cleaning . . . . . . . . . . . . . . . . . 19Daily Oven Cleaning . . . . . . . . . . . . . . . . . . . . . . 19Monthly Cleaning . . . . . . . . . . . . . . . . . . . . . . . . 19Combihood PLUS™ Filters . . . . . . . . . . . . . . . . 20CombiClean® . . . . . . . . . . . . . . . . . . . . . . . . . . . 21
TROUBLE SHOOTINGError Codes . . . . . . . . . . . . . . . . . . . . . . . . . . . . . 22
WARRANTY & TRANSPORTATIONOriginal Equipment Limited Warranty . . . . . . . 29Transportation Damage & Claims . . . . . . . . . . . 30
DANGERBEFORE STARTING THE APPLIANCE, MAKE CERTAIN YOU DO NOT DETECT THE ODOR OF GAS.IF THE ODOR OF GAS IS DETECTED:• do not attempt to light any appliance.• do not touch any electrical switches.• Extinguish any open fl ame.• Use a telephone oUtside the
propertY & immediateLY contact your gas supplier.
• If unable to contact your gas supplier, contact the fi re department.
Please post the following instructions in a prominent location in the event the user smells gas.

COMBITHERM CT CLASSIC SERIES • STEP-BY-STEP PROCEDURES • MN-36455 • 1.
I n t r o d u c t I o nEcosmart® tEchnology
The Alto-Shaam Combitherm combination oven/steamer employs Ecosmart operating efficiencies in the design and application of all operating and programming functions . Ecosmart operational
characteristics include the use of a water barrier to close the oven compartment to the outside air . While maintaining a non-pressurized atmosphere, the primary purpose of the Ecosmart system is to prevent the steam and heat generated within the oven compartment from freely escaping to the outside .
The Ecosmart design displaces the air within the cooking compartment and achieves a higher level of steam saturation that offers quick-steaming at temperatures above 212°F (100°C) .
This guide is provided as an operational aid with step-by-step instructions of the basic functions of the Combitherm oven, along with the many other additional features of the control .
classic control
The CT Classic features a simple, push button control that commands all the oven functions . Whether you cook by time, or cook using the optional product probe, rest assured you will be able to bake, roast, steam, poach, grill, broil, proof, braise and oven fry with confidence .
LED display - Easy to read display indicates temperature settings, time remaining, and various instructions .
stEam modE
combination modE
convEction modE
160°F
00:00
160°F
00:00
160°F
00:00
COMBITHERM CT CLASSIC SERIES • STEP-BY-STEP PROCEDURES • MN-36455 • 2.
CAUTIONUsed to indicate the presence of a hazard that can or will cause minor personal injury, property damage, or a potential unsafe practice if the warning included with this symbol is ignored.
CAUTIONUsed to indicate the presence of a hazard that can or will cause minor or moderate personal injury or property damage if the warning included with this symbol is ignored.
DANGERUsed to indicate the presence of a hazard that WiLL cause severe personal injury, death, or substantial property damage if the warning included with this symbol is ignored.
WARNINGUsed to indicate the presence of a hazard that can cause personal injury, possible death, or major property damage if the warning included with this symbol is ignored.
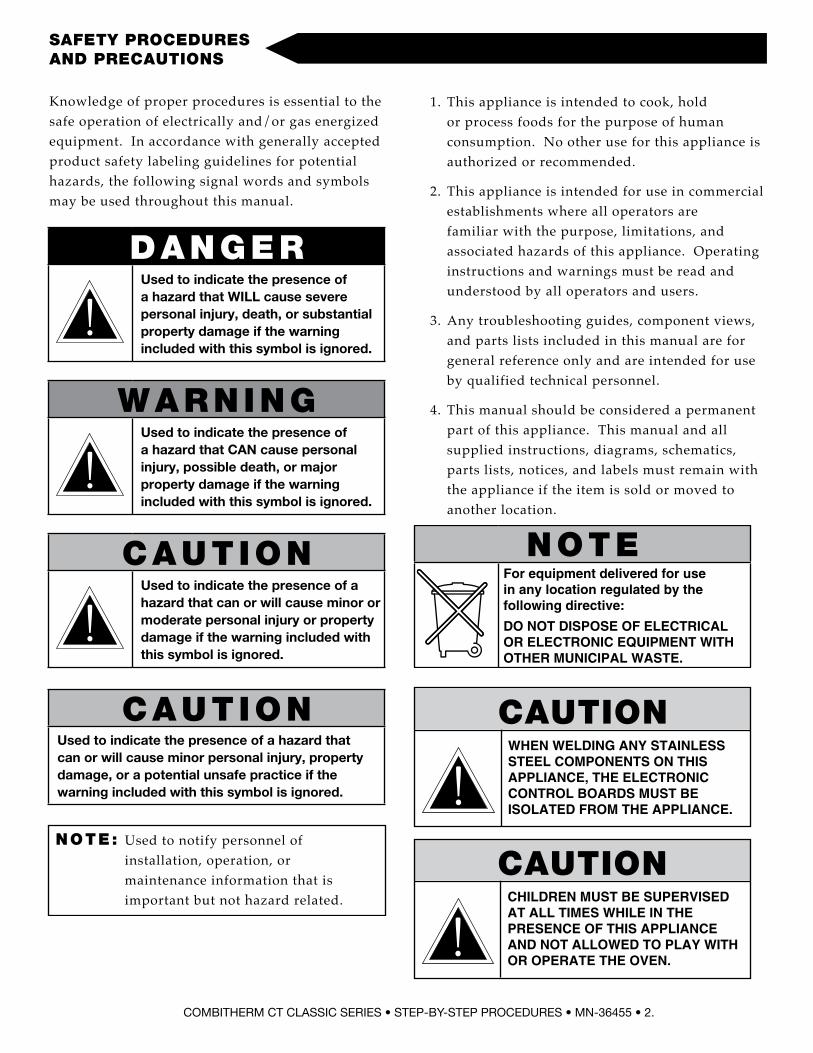
1. This appliance is intended to cook, hold or process foods for the purpose of human consumption. No other use for this appliance is authorized or recommended.
2. This appliance is intended for use in commercial establishments where all operators are familiar with the purpose, limitations, and associated hazards of this appliance. Operating instructions and warnings must be read and understood by all operators and users.
3. Any troubleshooting guides, component views, and parts lists included in this manual are for general reference only and are intended for use by qualified technical personnel.
4. This manual should be considered a permanent part of this appliance. This manual and all supplied instructions, diagrams, schematics, parts lists, notices, and labels must remain with the appliance if the item is sold or moved to another location.
NOTE: Used to notify personnel of installation, operation, or maintenance information that is important but not hazard related.
SAFETY PROCEDURESAND PRECAUTIONS
Knowledge of proper procedures is essential to the safe operation of electrically and/or gas energized equipment. In accordance with generally accepted product safety labeling guidelines for potential hazards, the following signal words and symbols may be used throughout this manual.
CAUTIONWHEN WELDING ANY STAINLESS STEEL COMPONENTS ON THIS APPLIANCE, THE ELECTRONIC CONTROL BOARDS MUST BE ISOLATED FROM THE APPLIANCE.
NOTEFor equipment delivered for use in any location regulated by the following directive:
DO NOT DISPOSE OF ELECTRICAL OR ELECTRONIC EQUIPMENT WITH OTHER MUNICIPAL WASTE.
CAUTIONCHILDREN MUST BE SUPERVISED AT ALL TIMES WHILE IN THE PRESENCE OF THIS APPLIANCE AND NOT ALLOWED TO PLAY WITH OR OPERATE THE OVEN.

COMBITHERM CT CLASSIC SERIES • STEP-BY-STEP PROCEDURES • MN-36455 • 3.
notE: Automatic steam venting is a standard safety feature built into all Combitherm oven models. This feature vents all steam from the oven compartment immediately before cooking time expires or set probe temperature is reached. Automatic steam venting does not function if the oven door is opened before time expires or when the oven has been set to continuous operation.
notE: Use authorized Combitherm oven cleaner only. Unauthorized cleaning agents may discolor or harm interior surfaces of the oven. Read and understand label and material safety data sheet before using the oven cleaner.
for opErator safEtynotE and obsErvE all safEty prEcautions locatEd throughout this guidE
important safEty prEcautions
CAUTIONmetaL parts of this eQUipment become eXtremeLY hot When in operation. to aVoid bUrns, aLWaYs Use hand protection When operating this appLiance.
DANGERat no time shoULd the interior or eXterior be steam cLeaned, hosed doWn, or fLooded With Water or LiQUid soLUtion of anY kind. do not Use Water Jet to cLean.
SEVERE DAMAGE OR ELECTRICAL HAZARD
COULD RESULT. WarrantY becomes Void if
appLiance is fLooded
hot stEam causEs burnsrotatE thE door handlE to rElEasE thE door latch. Wait until thE stEam is vEntEd bEforE fully opEning thE door.
do not HANDLE PANS CONTAINING LIQUID OR SEMILIQUID PRODUCTS POSITIONED ABOVE THE EYE LEVEL OF THE OPERATOR. SUCH PRODUCTS CAN SCALD AND CAUSE SERIOUS INJURY.
do not USE THE ATTACHED HAND-HELD HOSE TO SPRAY ANYTHING OTHER THAN THE INTERIOR OF THE COMBITHERM OVEN COMPARTMENT.
do not USE THE SPRAY HOSE ON THE SURFACE OF A HOT COOKING COMPARTMENT. ALLOW THE OVEN TO COOL TO A MINIMUM OF 150°F (66°C).
LA-22026
I n t r o d u c t I o n
LA-22026
CAUTIONMAKE CERTAIN THE AREA AROUND THE APPLIANCE IS KEPT CLEAR OF COMBUSTIBLE ITEMS.
CAUTIONto prevent malfunction or cause negative back draft, do not obstruct exhaust fl ues or attach any fl ue extension that will impede proper burner operation.

CT CLassiC operaTing insTruCTions
COMBITHERM CT CLASSIC SERIES • STEP-BY-STEP PROCEDURES • MN-36455 • 4.
control panEl idEntification
The Steam mode provides the operator with the ability to steam, poach, blanch, or sous vide . This mode will automatically steam at the boiling point of water; quick-steam above the boiling point for faster cooking results; or low temperature steam, below the boiling point, for more delicate products such as pâté, mousse, seafood, or custard .
The Combination mode will prove to be the most versatile and widely used mode the Combitherm oven has to offer . It will produce the best possible results on the widest variety of products — all within the shortest period of time . The unique control function of this mode enables the operator to roast or bake with a combination of steam and convection heat . In addition to shorter cooking times, this combination of steam and heat offers less product shrinkage and more moisture retention than obtained in a standard convection oven .
The Convection mode operates with hot circulated air within a temperature range of 85°F to 575°F (29°C to 300°C) . For many applications, better results may be achieved with the Combination mode; therefore, the operator may want to consider using the Convection mode on a more limited basis .
Oven Cool Down Process:• Cooking process must be inactive• Press "Cool Down" button until LED lights (LED
remains ON while in Cool Down mode)• Press "Decrease Value" or "Increase Value" to adjust
cool down temperature• Cook temperature display area is used to display cool
down temperature• Display will show last valid cool down temperature• Cool down temperature range is 85°F - 575°F
(30°C - 300°C)• Press "Start/Stop" until LED lights to accept cool
down temperature and initiate cool down process• Door must be open to start cool down process;
Cook time display area will display "door" if door is not open
• Cook temperature display area will display set cool down temperature
• Cook time display area will display current cool down temperature
Fahrenheit or Celsius Function - choose temperature format:• Unit is not in a cooking or cleaning process• Press "Set Cooking Temperature", "Decrease Value"
and "Increase Value" buttons simultaneously for 1 second
• Cooking temperature display area will display last value "C" or "F"; Display will alternate between "C" and "F" every 2 seconds
• Press "Start/Stop" key when the display is showing the desired value ("C" or "F")
160°F
00:00
Down Arrow key
Cooking Mode Keys
Power Key
Up Arrow key
Cleaning key Fan Speed key
Temperature key
Time key
Cool down key
Probe keyStart/Stop key
LED display
notE: In the event of a power failure, the oven will not operate .

CT ClassiC operaTing insTruCTions
COMBITHERM CT CLASSIC SERIES • STEP-BY-STEP PROCEDURES • MN-36455 • 5.
Turn on and preheat the ovenAlto-Shaam recommends preheating the Combitherm® before cooking.
• Press the Power key.
• Choose a Mode.
• Press Oven Temperature key; adjust temperature with arrow keys.
• Press Cook Time Key; adjust time with arrow keys.
• Press the Start/Stop key.
• Preheat oven before loading food.
To cook by probe
• Choose a Mode.
• Press the Oven Temperature key; adjust temperature with arrow keys.
• Press the Probe Temperature key; adjust probe temperature with arrow keys.
• Press Fan Speed key to set to High or Low.
• Load food into oven and insert probe into food.
• Press the Start/Stop key.
To cook by time
• Choose a Mode.
• Press the Oven Temperature key; adjust temperature with arrow keys.
• Press the Cook Time key; adjust time with arrow keys.
• Press Fan Speed key to set to High or Low.
• Load food into oven.
• Press the Start/Stop key.
160°F
00:00
Steam
160°F
00:00
Combi
160°F
00:00
Convection
160°F
00:00160°F
00:00
160°F
00:00
160°F
00:00
160°F
00:00160°F
00:00
160°F
00:00
160°F
00:00
Steam
160°F
00:00
Combi
160°F
00:00
Convection
160°F
00:00
160°F
00:00
160°F
00:00
160°F
00:00160°F
00:00
160°F
00:00
160°F
00:00
160°F
00:00
Steam
160°F
00:00
Combi
160°F
00:00
Convection
160°F
00:00160°F
00:00
160°F
00:00
160°F
00:00
160°F
00:00
160°F
00:00
160°F
00:00
160°F
00:00
160°F
00:00
160°F
00:00
In the event of a prolonged power failure during the cooking process, it is strongly recommended that you ensure the food is safe for consumption according to local health regulations.
CAUTION HOTUSE CAUTION WHEN OPENING THE OVEN DOOR WHEN THE COOKING CHAMBER IS HOT TO AVOID POSSIBLE BURNS.

OPERATING INSTRUCTIONS
COMBITHERM CT CLASSIC SERIES • STEP-BY-STEP PROCEDURES • MN-36455 • 6.
stEam modE chEf opErating tips
This mode will steam a full or partial load of a single product, or multiple products without transfer of flavors . When steaming multiple products, however, individual product cooking times must be taken into consideration .
The non-pressurized atmosphere of the Combitherm also provides the ability to open the door during the steam mode in order to monitor products more closely throughout the steaming process .
stEamPerforated, 2-1/2" deep pans (65mm) are particularly suitable for use in this program mode . These pans will provide a shorter cooking time and will prevent product over-cooking at the bottom of the pan .
Separate ice-encrusted vegetables before steaming to ensure even cooking .
A variety of products can be steamed at the same time but attention must be paid to the different cooking times required for each food product .
When cooking by probe, the probe must be inserted so that the tip is positioned in the center of the food mass . For liquid or semi-liquid foods, suspend the probe in the center of the product and secure the probe wire to the edge of the container .
high tEmp stEamHigh temperature steaming is suitable for hearty, root-type vegetables such as potatoes, turnips, carrots, and cabbage .
High temperature steaming provides a cooking time which is approximately 10-percent shorter than the regular steam mode temperature of 212°F (100°C) .
loW tEmp stEamThe low temperature steam mode will function whenever the oven compartment temperature is below 212°F (100°C) .
It will take longer to steam products using the low temperature steam mode .
Steaming sausages in low temperature steam prevents cracked or peeling skins .
Use low temperature steam for delicate foods such as shrimp, fish, seafood, crème caramel, and sous vide .
For best results, low temperature steam all delicate food items at a temperature of 210°F (99°C) or below .

OPERATING INSTRUCTIONS
COMBITHERM CT CLASSIC SERIES • STEP-BY-STEP PROCEDURES • MN-36455 • 7.
combination modE chEf opErating tips
The Combination mode injects the optimum amount of steam automatically . There is no need to select humidity levels . Foods do not dry out . Flavors are retained with no transfer of flavors when mixing product loads .
Due to automatic steam adjustment, the door can be opened at any time during a cooking operation . Be certain to observe the safety warning when opening the oven door .
The Combination mode is particularly efficient when used for baking, broiling, grilling, stewing, braising, and roasting .
When using the Combination mode, cooking temperatures can be reduced 10- to 20-percent below the temperatures used for conventional cooking methods .
Cooking time will be reduced approximately 40-percent when cooking at the same temperature used for convection oven cooking and up to 50- to 60-percent less time when cooking at the same temperature used for a conventional oven .
Food browning in the Combitherm begins at a cooking temperature of approximately 250°F (120°C) .
A higher cooking temperature results in heavier browning but also results in greater product weight loss .
The Combination mode provides even browning without the necessity to turn the pans .
For more even cooking, do not cook in pans deeper than 4" (100mm) .
When cooking by probe, the probe must be inserted so that the tip is positioned in the center of the food mass . For liquid or semi-liquid foods, suspend the probe in the center of the product and secure the probe wire to the edge of the container .

OPERATING INSTRUCTIONS
COMBITHERM CT CLASSIC SERIES • STEP-BY-STEP PROCEDURES • MN-36455 • 8.
convEction modE chEf opErating tips
The Convection Mode can be used to roast or bake products needing very short cooking times or for high moisture products such as muffins, cakes, and cookies, or for browning the surface of the food .
The Convection mode works best with low moisture foods or for very moist food which require a dryer finished product .
For baking, preheat the Combitherm at a temperature of 325°F to 375°F (163°C to 191°C) . Once preheated, reset the temperature as required .
A higher cooking temperature results in heavier browning but also results in greater product weight loss .
When cooking by probe, the probe must be inserted so that the tip is positioned in the center of the food mass . For liquid or semi-liquid foods, suspend the probe in the center of the product and secure the probe wire to the edge of the container .

recipe guidel ines
COMBITHERM CT CLASSIC SERIES • STEP-BY-STEP PROCEDURES • MN-36455 • 9.
Note: Times & temperatures shown are for 50% - 80% of oven capacity.
bakEry itEms
recipepreheat
tempcooking
modecooktemp
time /probe
fanspeed
Bakery (retherm)275°F
(135°C)Combi
275°F(135°C)
4 minutes
100%
Brownies325°F
(163°C)Convection
325°F(163°C)
25 minutes
100%
Cinnamon Rolls350°F
(177°C)Combi
350°F(177°C)
8 minutes
100%
Cookies325°F
(163°C)Convection
325°F(163°C)
12 minutes
100%
Croissants340°F
(171°C)Combi
340°F(171°C)
9 minutes
100%
Danish Pastry340°F
(171°C)Combi
340°F(171°C)
11 minutes
100%
Dinner Rolls350°F
(177°C)Combi
350°F(177°C)
10 minutes
100%
French Bread385°F
(196°C)
Combi385°F
(196°C)1
minute100%
Convection385°F
(196°C)15
minutes
Fruit Pie340°F
(171°C)Convection
340°F (171°C)
60 minutes
100%
Muffins340°F
(171°C)Convection
340°F (171°C)
20 minutes
50%
Par-baked Bread - Frozen
350°F(177°C)
Combi350°F
(196°C)1
minute50%
Convection350°F
(177°C)9
minutes
Par-baked Rolls350°F
(177°C)Combi
350°F(177°C)
13 minutes
100%
Proofing — Steam90°F
(32°C)30
minutes100%
Puff Pastry375°F
(191°C)
Combi375°F
(191°C)1
minute100%
Convection375°F
(191°C)16
minutes
Sheet Cake340°F
(171°C)Convection
325°F(163°C)
20 minutes
100%

recipe guidel ines
COMBITHERM CT CLASSIC SERIES • STEP-BY-STEP PROCEDURES • MN-36455 • 10.
Note: Times & temperatures shown are for 50% - 80% of oven capacity.
recipepreheat
tempcooking
modecooktemp
time /probe
fanspeed
Chicken Wings425°F
(218°C)Combi
400°F(204°C)
10 minutes
100%
Corn Dogs - Thawed300°F
(149°C)Combi
300°F(149°C)
10 minutes
100%
Egg Rolls400°F
(204°C)Combi
375°F(191°C)
15 minutes
100%
Entrée(4 lb frozen)
350°F(177°C)
Combi350°F
(177°C)140-160 minutes
50%
French Fries - Full Load
475°F(246°C)
Combi375°F
(191°C)1
minute100%
Convection375°F
(191°C)10
minutes
Hamburger Patties - Frozen
375°F(191°C)
Combi350°F
(177°C)12
minutes100%
Hamburger Patties - Thawed
375°F(191°C)
Combi350°F
(177°C)5
minutes100%
Mini Pizza5"
350°F(177°C)
Combi350°F
(177°C)10
minutes100%
Pizza - Fresh350°F
(177°C)Combi
350°F(177°C)
11 minutes
50%
Spring Rolls - Fresh or Frozen
350°F(177°C)
Combi350°F
(177°C)1
minute100%
Convection350°F
(177°C)14
minutes
Tater Tots425°F
(218°C)Combi
375°F(191°C)
10minutes
100%
convEniEncE product itEms
recipe guidel ines
COMBITHERM CT CLASSIC SERIES • STEP-BY-STEP PROCEDURES • MN-36455 • 11.
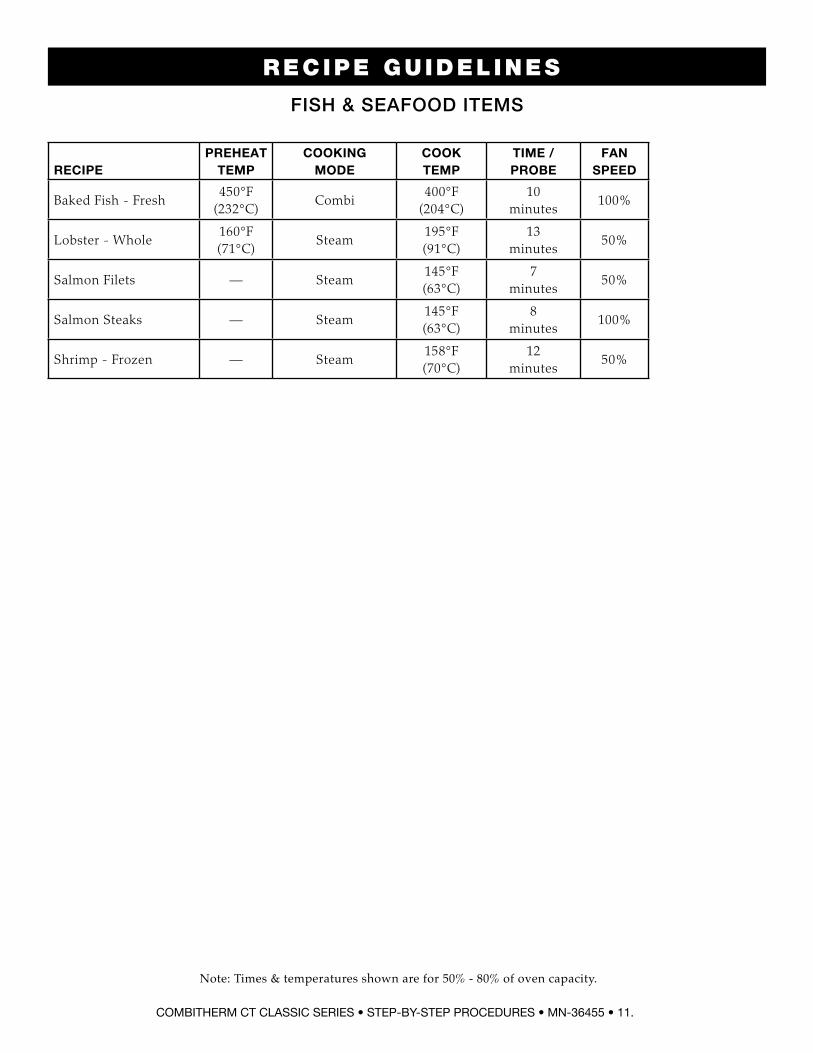
Note: Times & temperatures shown are for 50% - 80% of oven capacity.
recipepreheat
tempcooking
modecooktemp
time /probe
fanspeed
Baked Fish - Fresh450°F
(232°C)Combi
400°F(204°C)
10 minutes
100%
Lobster - Whole160°F(71°C)
Steam195°F(91°C)
13 minutes
50%
Salmon Filets — Steam145°F(63°C)
7 minutes
50%
Salmon Steaks — Steam145°F(63°C)
8 minutes
100%
Shrimp - Frozen — Steam158°F(70°C)
12 minutes
50%
fish & sEafood itEms

recipe guidel ines
COMBITHERM CT CLASSIC SERIES • STEP-BY-STEP PROCEDURES • MN-36455 • 12.
Note: Times & temperatures shown are for 50% - 80% of oven capacity.
mEat rEcipEs
recipepreheat
tempcooking
modecooktemp
time /probe
fanspeed
Bacon318°F
(159°C)
Combi318°F
(159°C)1
minute100%
Convection318°F
(159°C)15
minutes
Beef - Tenderloin250°F
(121°C)Combi
250°F(121°C)
Probe option 125°F (52°C)
50%
Beef - Tri Tips250°F
(121°C)Combi
250°F (121°C)
Probe option 125°F (52°C)
50%
Beef Rounds - Using Probe
250°F(121°C)
Combi250°F
(121°C)Probe option125°F (52°C)
50%
Breakfast Sausage Links
350°F(177°C)
Combi350°F
(177°C)8
minutes100%
Burgers (School) - Precooked and Grilled
350°F(177°C)
Combi350°F
(177°C)
Frozen - 8 minutes
Thawed - 4 minutes
100%
Hamburger Patties - Frozen
375°F(191°C)
Combi350°F
(177°C)1
minute100%
Meat Loaf by Core Temp
325°F(163°C)
Combi275°F
(135°C)Probe option 155°F (68°C)
100%
Pork - Back Ribs - Raw
250°F(121°C)
Combi250°F
(121°C)1 hour 15 minutes
100%
Pork - Loin - by Core Temp
325°F(163°C)
Combi300°F
(149°C)Probe option150°F (66°C)
100%
Pork Ribs Reheat400°F
(204°C)Combi
400°F(204°C)
7 minutes
100%
Sausage - Fresh Low Temp Steam160°F(71°C)
15 minutes
50%

recipe guidel ines
COMBITHERM CT CLASSIC SERIES • STEP-BY-STEP PROCEDURES • MN-36455 • 13.
Note: Times & temperatures shown are for 50% - 80% of oven capacity.
recipepreheat
tempcooking
modecooktemp
time /probe
fanspeed
Custard Creme Brûlée Steam190°F (88°C)
55minutes
50%
Eggs - Hardboiled212°F
(100°C)Steam
212°F(100°C)
12 minutes
100%
Eggs - Poaching Pan212°F
(100°C)Steam
212°F (100°C)
3minutes
50%
Eggs - Poaching Pan (Low Steam)
— Steam170°F (77°C)
12 minutes
—
Eggs - Scrambled in bag: shake at 18 minutes
212°F (100°C)
Steam212°F
(100°C)25
minutes100%
Eggs - Scrambled in pan
212°F (100°C)
Steam212°F
(100°C)15
minutes100%
Eggs - Sous Vide — Steam148°F(64°C)
60 minutes
50%
Pasta - Linguine or Spaghetti
212°F (100°C)
Steam212°F
(100°C)20
minutes100%
Rice212°F
(100°C)Steam
212°F(100°C)
30 minutes
100%
Tamales212°F
(100°C)Steam
212°F(100°C)
30 minutes
100%
miscEllanEous rEcipEs

recipe guidel ines
COMBITHERM CT CLASSIC SERIES • STEP-BY-STEP PROCEDURES • MN-36455 • 14.
Note: Times & temperatures shown are for 50% - 80% of oven capacity.
poultry rEcipEs
recipepreheat
tempcooking
modecooktemp
time /probe
fanspeed
Chicken - Oven Fried Pieces
450°F(232°C)
Combi450°F
(232°C)2
minutes100%
Convection450°F
(232°C)16
minutes
Chicken - Pre-Cooked Pieces - Frozen
350°F(177°C)
Combi350°F
(177°C)35
minutes 100%
Chicken - Pre-Cooked Pieces - Refrigerated
350°F(177°C)
Combi350°F
(177°C)15
minutes 100%
Chicken - Thawed Whole
350°F(177°C)
Combi350°F
(177°C)35
minutes 100%
Chicken - 8 Piece Cut Up
375°F(191°C)
Combi375°F
(191°C)30
minutes 100%
Grilled Chicken Breasts
550°F(288°C)
Combi460°F
(238°C)6
minutes 100%

recipe guidel ines
COMBITHERM CT CLASSIC SERIES • STEP-BY-STEP PROCEDURES • MN-36455 • 15.
Note: Times & temperatures shown are for 50% - 80% of oven capacity.
recipepreheat
tempcooking
modecooktemp
time /probe
fanspeed
Asparagus - Fresh — Steam190°F(88°C)
3 minutes
50%
Broccoli, Cauliflower, Squash, Zucchini - Fresh
212°F(100°C)
Steam212°F
(100°C)3 - 6
minutes100%
Cabbage, Green Beans - Fresh
212°F(100°C)
Steam212°F
(100°C)8 -10
minutes100%
Carrots - Fresh225°F
(107°C)Steam
225°F(107°C)
10 minutes
100%
Corn-on-the-Cob - Fresh
212°F(100°C)
Steam212°F
(100°C)14
minutes100%
Frozen Vegetables212°F
(100°C)Steam
212°F(100°C)
8minutes
100%
Potatoes, for mashed, Full Loaded
212°F(100°C)
Steam212°F
(100°C)30
minutes100%
Potatoes, for mashed, Small Loaded
212°F(100°C)
Steam212°F
(100°C)30
minutes100%
Potatoes, Red or Salad212°F
(100°C)Steam
212°F(100°C)
30 minutes
100%
Potatoes, Roasted400°F
(204°C)Combi
400°F(204°C)
18 minutes
100%
vEgEtablE rEcipEs

cleaning & Maintenance
COMBITHERM CT CLASSIC SERIES • STEP-BY-STEP PROCEDURES • MN-36455 • 16.
MOBILE EQUIPMENT RESTRAINT FOR GAS MODELS
The gas Combitherm must use a connector that complies with The Standard for Connectors for Movable Gas Appliances, ANSI Z21.69 CSA 6.16 and addenda Z21.69a-1989. A quick disconnect device must be installed to comply with The Standard for Quick Disconnect Devices for Use with Gas Fuel, ANSI Z21 CSA 6.9. and European Standard EN203.
Adequate means must be provided to limit the movement of this appliance. Limitation of movement must be made without depending on the connector, the quick disconnect device, nor the associated piping designed to limit appliance movement. If it becomes necessary to disconnect the restraint, it must be reconnected immediately following the return of the appliance to its original position.
1. Install a manual gas shut-off valve along with an approved disconnect device.
2. Install an A.G.A. certified, heavy-duty connector that complies with ANSI Z 21.69 or CAN 1-6.10m88 along with a quick-disconnect device in compliance with ANSI Z21.41 or CAN 1-6.9m70. Connectors must be installed with a cable restraint to prevent excessive tension from being placed on the connector.
WARNINGRISK OF ELECTRIC SHOCK.
appliance must be secured
to building structure.
CAUTIONthis section is proVided for the assistance
of QUaLified serVice technicians onLY and
is not intended for Use bY Untrained or
UnaUthoriZed serVice personneL.
MOBILE EQUIPMENT RESTRAINT FOR ELECTRIC MODELS
Any appliance that is not furnished with a power supply cord but includes a set of casters must be installed with a tether. Adequate means must be provided to limit the movement of this appliance without depending on or transmitting stress to the electrical conduit. The following requirements apply:
1. Casters must be a maximum height of 6" (152mm).
2. Two of the casters must be the locking type.
3. Such mobile appliances or appliances on mobile stands must be installed with the use of a flexible connector secured to the building structure.
A mounting connector for a restraining device is located on the lower back flange of the appliance chassis or on an oven stand, approximately 18" (457mm) from the floor. A flexible connector is not supplied by nor is it available from the factory.

cleaning & Maintenance
COMBITHERM CT CLASSIC SERIES • STEP-BY-STEP PROCEDURES • MN-36455 • 17.
CombiClean clEaning agEnts
notE: Use authorized Combitherm cleaner only.
Unauthorized cleaning agents may discolor or harm interior surfaces of the oven . Read and understand label and material safety data sheet before using the oven cleaner .
caution: Causes eye, skin, and respiratory tract irritation. keep out of reach of children.
prEcautions:
- Do not take internally .
- Avoid contact with eyes and skin .
- Use rubber gloves when using this product .
- Wash hands thoroughly after handling .
- Avoid mixing with strong, concentrated acids .
first aid:
Skin: Flush with water . Remove contaminated clothing and do not re-wear until washed . If irritation persists see a physician .
Eyes: Flush with water for 15 minutes . See a physician immediately .
Inhalation: If difficulty in breathing occurs, leave area immediately and do not return until dust is settled . If irritation persists, see a physician .
Ingestion: Drink large quantities of milk or water . DO NOT INDUCE VOMITING . See a physician immediately .
protEctivE packaging of tablEts Will bEgin to dissolvE onto skin if handlEd With damp or WEt hands.
d a n g E rRUBBER GLOVES MUST BE WORN WHEN USING
COMBICLEAN TABLETS OR SPRAY OVEN CLEANER.
d a n g E rPROTECTIVE EYE WEAR MUST BE WORN
WHEN USING SPRAY OVEN CLEANER.
Part Number CE-36354 Water Soluble Packets, 1 ounce each
Warnings:• Unauthorized cleaning agents may discolor or harm interior surfaces of the oven.• Read and understand label and material safety data sheet before using the oven cleaner.• Always wear rubber gloves when handling.• Protective packaging will begin to dissolve onto skin if handled with damp or wet hands.• Cleaning agent causes burns to eyes, skin and mucous membranes.• Do not get in eyes, on skin, or on clothing.• Harmful if swallowed.• Keep out of reach of children.• Do not mix with anything but water.
Instructions:• Remove all food scraps and residue from the oven drain.• Remove the smoker tray, if applicable.• Ensure that the water is turned on for the oven.• Allow oven to cool below 150°F (66°C).• Wearing rubber gloves, remove oven interior drain screen at bottom of oven.• Using the oven control, choose the cleaning level you would like to run.• Insert the appropriate number of cleaning tablets into the oven cavity drain as directed by the cleaning program you have chosen.• Replace drain screen and close oven door.• Press the Start key or the Yes key, depending upon the oven model you have.• Oven will begin the cleaning cycle and will beep when the cleaning cycle is completed.• Leave door slightly ajar when cleaning is finished.
Precautions:Do not take internally. Avoid contact with eyes and skin. Use rubber gloves when using this product. Wash skin thoroughly after handling. Avoid mixing with strong, concentrated acids.First Aid:Skin: Flush skin with water. Remove contaminated clothing and do not wear again until washed. If irritation persists, see a physician.Eyes: Flush eyes with water for 15 minutes. See a physician immediately.Inhalation: If difficulty in breathing occurs, leave area immediately and do not return until dust is settled. If irritation persists, see a physician.Ingestion: Drink large quantities of milk or water. DO NOT INDUCE VOMITING. See a physician immediately.Keep out of reach of children.Danger: CORROSIVE. May cause severe burns to eyes and skin.
W164 N9221 Water Street • Menomonee Falls, WI 53052(800)558-8744 (262)251-3800 Ext 6709 Fax: (262)251-7067

cleaning & Maintenance
COMBITHERM CT CLASSIC SERIES • STEP-BY-STEP PROCEDURES • MN-36455 • 18.
prEvEntativE maintEnancEIn addition to the routine cleaning and maintenance procedures, there are several additional steps to be taken for both sanitation and to keep the oven running efficiently . These additional safeguards will help prevent down time and costly repairs .
DO NOT DISPOSE OF GREASE, FAT, WOOD CHIPS OR SOLID WASTE DOWN THE OVEN DRAIN. Fats and solids will eventually coagulate in the drain system, causing blockage . Consequently, water will back-up into the condenser and interior oven compartment, resulting in an oven that is inoperable .
MAKE CERTAIN THE DRAIN SCREEN IS ALWAYS IN PLACE. REMOVE ANY SOLID WASTE MATERIAL FROM THE DRAIN SCREEN BEFORE IT ENTERS THE DRAIN SYSTEM. The routine removal of solids from the drain screen will help prevent blockage .
USE THE AUTHORIZED COMBITHERM OVEN CLEANER ONLY. The use of unauthorized cleaning agents may discolor or harm the interior surfaces of the oven .
TO PROLONG THE LIFE OF THE DOOR GASKET, CLEAN THIS ITEM DAILY. The acids and related compounds found in fat, particularly chicken fat, will weaken the composition of the gasket unless cleaned on a daily basis . Wipe with a hot, soapy cloth .
TO ADDITIONALLY PROTECT GASKET LIFE, ALLOW OVEN DOOR TO REMAIN SLIGHTLY OPEN AT THE END OF THE PRODUCTION DAY. An open door will relieve the pressure on the door gasket .
ROUTINELY CLEAN DOOR HINGES. Open oven door to relieve tension . Clean all parts of the hinge .
DANGERat no time shoULd the interior or eXterior be steam cLeaned, hosed doWn, or fLooded With Water or LiQUid soLUtion of anY kind. do not Use Water Jet to cLean.
SEVERE DAMAGE OR ELECTRICAL HAZARD
COULD RESULT. WarrantY becomes Void if
appLiance is fLooded
When smoking is completed, remove smoker box from oven . Dispose of wood chips in a fire proof waste receptacle .
cleaning & Maintenance
COMBITHERM CT CLASSIC SERIES • STEP-BY-STEP PROCEDURES • MN-36455 • 19.
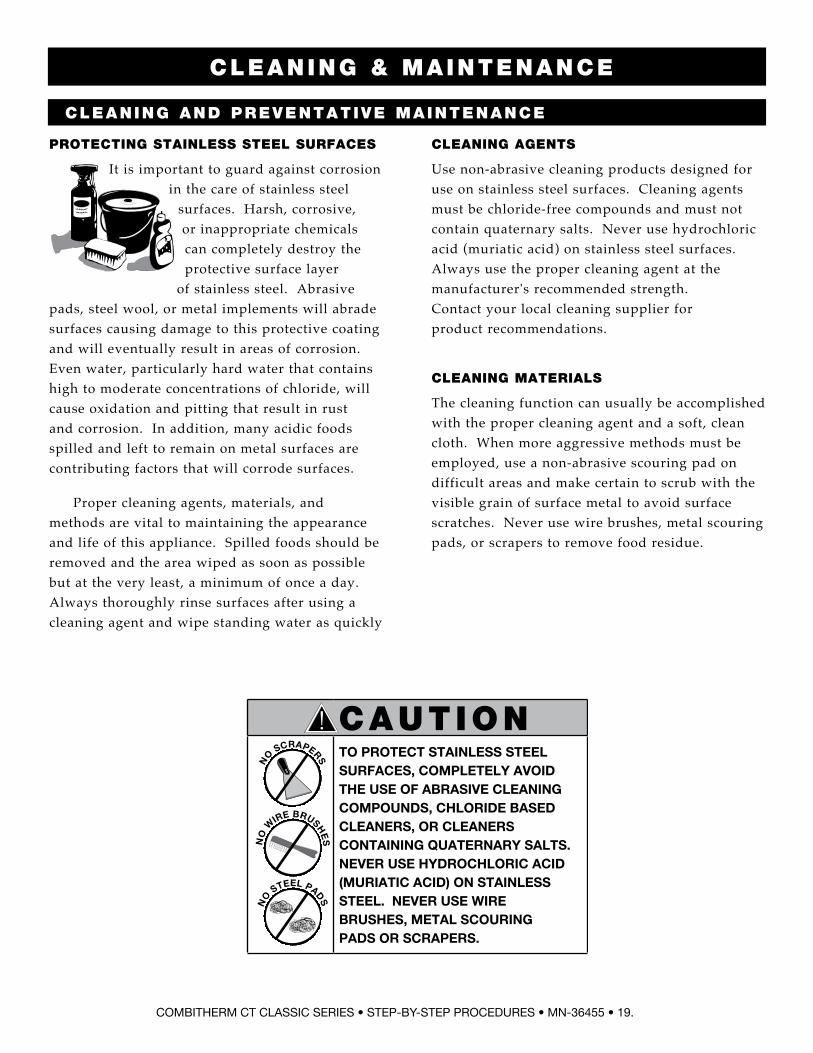
PROTECTING STAINLESS STEEL SURFACES
It is important to guard against corrosion in the care of stainless steel
surfaces. Harsh, corrosive, or inappropriate chemicals can completely destroy the protective surface layer
of stainless steel. Abrasive pads, steel wool, or metal implements will abrade surfaces causing damage to this protective coating and will eventually result in areas of corrosion. Even water, particularly hard water that contains high to moderate concentrations of chloride, will cause oxidation and pitting that result in rust and corrosion. In addition, many acidic foods spilled and left to remain on metal surfaces are contributing factors that will corrode surfaces.
Proper cleaning agents, materials, and methods are vital to maintaining the appearance and life of this appliance. Spilled foods should be removed and the area wiped as soon as possible but at the very least, a minimum of once a day. Always thoroughly rinse surfaces after using a cleaning agent and wipe standing water as quickly as possible after rinsing.
CLEANING AGENTS
Use non-abrasive cleaning products designed for use on stainless steel surfaces. Cleaning agents must be chloride-free compounds and must not contain quaternary salts. Never use hydrochloric acid (muriatic acid) on stainless steel surfaces. Always use the proper cleaning agent at the manufacturer's recommended strength. Contact your local cleaning supplier for product recommendations.
CLEANING MATERIALS
The cleaning function can usually be accomplished with the proper cleaning agent and a soft, clean cloth. When more aggressive methods must be employed, use a non-abrasive scouring pad on difficult areas and make certain to scrub with the visible grain of surface metal to avoid surface scratches. Never use wire brushes, metal scouring pads, or scrapers to remove food residue.
CLEANING AND PREVENTATIVE MAINTENANCE
CAUTIONto protect stainLess steeL sUrfaces, compLeteLY aVoid the Use of abrasiVe cLeaning compoUnds, chLoride based cLeaners, or cLeaners containing QUaternarY saLts. neVer Use hYdrochLoric acid (mUriatic acid) on stainLess steeL. neVer Use Wire brUshes, metaL scoUring pads or scrapers.
no
Wire brUsh
es
no
steeL pads
no scrapers

cleaning & Maintenance
COMBITHERM CT CLASSIC SERIES • STEP-BY-STEP PROCEDURES • MN-36455 • 20.
CLEANING SCHEDULEDAILY GASKET CLEANING It is important to prolong the life of the oven gasket by cleaning on a daily basis . Routine cleaning will help protect the gasket from deterioration caused by acidic foods .
1 . Allow the oven to cool, then wipe the gasket and crevices with clean cloth soaked in warm detergent solution .
2 . Wipe the gasket and crevices with a cloth and clean rinse water .
Do not attempt to remove gasket or place in the dishwasher .
PROBE USAGE AND CLEANING After each use of the corE tEmp mode, wipe the probe tip with a clean paper towel to remove food debris . Follow by wiping the probe with a disposable alcohol pad . Return the probe to the proper door bracket position .
probe and probe prong cleaning procedures
1 . Remove all food debris from probe between loads and at the end of each production shift . Wipe the entire probe, probe cable assembly, probe prongs, and probe holding bracket with a clean cloth and warm detergent solution .
2 . Remove detergent by wiping the probe, cable, probe prongs, and bracket with a cloth and clean rinse water .
3 . Wipe probe and probe bracket with disposable alcohol pad or sanitizing solution recommended for food contact surfaces .
4 . Allow probe, probe prongs, and cable to air dry in the probe holding bracket .
5 . Wipe the probe with a disposable alcohol pad prior to inserting into a new food product .
DAILY OVEN CLEANING To be performed at the end of the production day or between production shifts .
ROLL-IN CART/FOOD TROLLEY CLEANING (ON EQUIPPED MODELS)
1 . Remove food trolley to a cart wash area . Trolleys may be cleaned using any mild cleaning detergent and warm water .
2 . Hand wipe all framing, slides, drip pan, and base . Thoroughly clean debris from the casters . A spray hose can be used for easier cart cleaning .
3 . Remove detergent solution with warm water .
4 . Wipe or spray with a sanitizing solution designed for use on metal and vinyl food contact surfaces .
5 . Allow trolley to air dry .
As an alternative, trolleys can be cleaned while inside the oven . Allow the trolley to remain in the oven through the normal cleaning cycle, followed by steps 2 through 5 .
MONTHLY CLEANING
1 . Spray Head
2 . Water Intake Filters
3 . Drain Pipe
DANGERat no time shoULd the interior or eXterior be steam cLeaned, hosed doWn, or fLooded With Water or LiQUid soLUtion of anY kind. do not Use Water Jet to cLean.
SEVERE DAMAGE OR ELECTRICAL HAZARD
COULD RESULT. WarrantY becomes Void if
appLiance is fLooded
UNTREATED WATER
TREATED WATER
WATER DRAIN

cleaning & Maintenance
COMBITHERM CT CLASSIC SERIES • STEP-BY-STEP PROCEDURES • MN-36455 • 21.
�
� Grease Filter(FI-25867):Cleaning frequency should be based on oven usage with a maximum of two weeks between cleaning if the oven is used for non-grease laden products or steam applications only. Grease laden products require cleaning frequency of at least once a week.
Remove the grease filter by pulling it straight out of the housing. Place the filter in the dishwasher or wash separately by placing in hot, soapy water until all grease and particles have been removed. Rinse thoroughly. Allow the filter to air dry before reinstalling.
To replace the grease filter, the air flow arrow on the filter casing should be pointing toward the hood fan.
� Charcoal Filter (Class I - FI-36620; Class II - FI-25866): The charcoal filter should be inspected for contaminant's on a regular basis. Replacement must be made at a minimum of three month intervals — more often if heavy contaminant's are visible or if the filter no longer controls odors.
To remove the filter, pull and slide out while holding the bottom housing. When replacing the filter, make certain the air flow arrow(s) point toward the hood fan, and that the filter is replaced in the three-sided metal frame provided with the hood.
COMBIHOOD PLUS™ VENTLESS HOOD OPTION
�
NOTE:
A pressure switch is used to detect when the airflow through the charcoal filter is reduced by 25% - indicating a possible blockage. This will generate an E101 error message on the oven control display. The filters will need to cleaned or replaced.
If the filters are not seated properly, an error code E102 will appear on the oven control display.

cleaning & Maintenance
COMBITHERM CT CLASSIC SERIES • STEP-BY-STEP PROCEDURES • MN-36455 • 22.
One (1) heavy-duty cleaning cycle (2 hours 5 minutes) is offered . CombiClean® CombiTabs™ CE-36354, 1 ounce packets or Combitherm Spray Cleaning Liquid CE-24750 may be used . Side racks and shelves may remain inside oven during cleaning . Remove solid wastes from the bottom of the oven and the drain screen to prevent blockage .
Note: If a power outage were to occur during any portion of the cleaning cycle, the oven will begin a six (6) minute forced-rinse cycle. Cook temperature display area will display “RIN”. Cook time display area will display “-.--”
TO CLEAN THE OVEN
• Press the Cleaning key.
• Insert appropriate number of CombiClean® tabs as directed by the LED Screen (CLn4 appears). The “4” refers to the number of cleaning tablets that are to be inserted in the cavity drain. User may add one additional tablet for particularly dirty ovens.
• Close the oven door and press the Start/Stop key.
• If oven is too hot to proceed, dOOr will display on the LED screen. Open the oven door to allow the oven to cool to below 150°F (66°C). When the oven is finished cooling, begin the cleaning procedure again.
• Oven beeps when it is done cleaning. Leave door slightly ajar when cleaning is finished.
160°F
00:00
160°F
00:00
160°F
00:00
Power Key
Cleaning key
Start/Stop key
LED display

COMBITHERM CT CLASSIC SERIES • STEP-BY-STEP PROCEDURES • MN-36455 • 23.
INSTALLATION
This section is provided for the assistance of qualified technicians only and is not intended for use by untrained or unauthorized service personnel. If your Alto-Shaam® unit is not operating properly, check the following before calling your Authorized Alto-Shaam Service Agent:� Check that unit is receiving power. Circuit breaker turned on? Do not attempt to repair or service the oven beyond this point. Contact Alto-Shaam for the nearest
authorized service agent. Repairs made by any other service agents without prior authorization by Alto-Shaam will void the warranty on the unit.
When the oven malfunctions, an error code will appear in the display.
PRESS THE START ICON TO ACKNOWLEDGE THE ERROR.
When the oven error notification has been acknowledged, the Combitherm will attempt to return to normal operation.
Error Code
Error Call Out in Display Description of Error Possible Cause
E01 low Water boiler upper water level probe b1 is not satisfi ed within 5 minutes, after water solenoid valve y1 is activated.
— Water supply is shut off.— low water pressure.— boiler drain cap is missing.— boiler drain pump is defective.— drain pump elbow leaking.— Water level probe has calcium build up.— double water solenoid valve is defective (y1).— relay board, high voltage is defective.
E02 control temperature high low voltage relay board temperature higher than 176°f (80°c).
— check wiring to all components listed below.— cooling fan on relay board assembly is
defective.— cooling fan on display board assembly is
defective.— main cooling fan is defective.— cooling fan on motor drive is defective.
E03 fan motor Error fan motor does not spin after 60 seconds, detected by the hall sensor.Error 03 does not appear if error E53 is detected fi rst.
— check wiring to all components listed below.— if lEd on motor control fl ashes, see error codes
for motor control.— motor or fan wheel locked.— hall sensor does not detect motor rotation.— motor thermo temperature protection.— fan wheel damaged.
E04 lower fan motor Error lower fan motor does not spin after 60 seconds, detected by the hall sensor.Error 04 does not appear if error E54 is detected fi rst.
— check wiring to all components mentioned below.
— if lEd on motor control fl ashes, see error codes for motor control.
— motor or fan wheel locked.— hall sensor does not detect motor rotation.— motor thermo temperature protection.— fan wheel damaged.
E05 vfd comm failure When vfd does not respond to a query on the can interface.
— loss of power to vfd.— vfd malfunction.— can cable disconnected.— can address not correct on vfd.
E06 lower vfd comm failure When vfd does not respond to a query on the can interface.
— loss of power to vfd.— vfd malfunction.— can cable disconnected.— can address not correct on vfd.
ERROR CODES
continued on next page

COMBITHERM CT CLASSIC SERIES • STEP-BY-STEP PROCEDURES • MN-36455 • 24.
INSTALLATION
Error Code
Error Call Out in Display Description of Error Possible Cause
E07 Error received from vfd When vfd is fl ashing the green light
— refer to vfd error code list and match to number of blinks on the green lEd of vfd.
E08 Error received from lower vfd
When vfd is fl ashing the green light
— refer to vfd error code list and match to number of blinks on the green lEd of vfd.
E11 convection temperature high
in combination program, cavity temperature n6 is measuring in excess of 572ºf (300ºc) for a minimum of 25 seconds
in convection program, cavity temperature n6 is measuring in excess of 572ºf (300ºc) for a minimum of 25 seconds
— check wiring to all components mentioned below.— steam element contactor locked/on.— n6 oven cavity temperature probe is defective.— n6 oven cavity temperature probe wires connected backwards— relay board, high voltage, defective.
E13 boiler temperature high boiler temperature is more than 248ºf (120ºc) for more than 25 seconds, detected by b4 probe
— calcium build up in boiler— check wiring to all components mentioned
below.— steam element contactor locked/on.— b4 boiler temperature probe is defective.— b4 probe wires connected backwards— Water level probe has calcium build up.
E15 condensor temperature high
condensor water temperature is more than 212ºf (100ºc) for more than 180 seconds, detected by b3 probe
— Water supply is shut off.— check wiring to all components mentioned
below.— b3 condensor temperature probe is defective.— b3 condensor probe wires connected backwards— single water solenoid valve defective (y2).— relay board, high voltage, defective.
E20 b11 core temperature probe
single point fault
single point core temperature probe defective or disconnected
— clean probe receptacle pins with sand paper.— b11 single point core temperature probe with
quick connect defective.— b11 single point core temperature probe wires
with quick connect disconnected.— b11 single point core temperature probe
receptacle defective.— b11 single point core temperature probe
receptacle wires disconnected.
E21 n6 cavity probe fault cavity temperature probe defective or disconnected
— n6 oven cavity temperature probe defective.— n6 oven cavity temperature probe wires.
E22 b10 core temperature probe
multi-point fault
multipoint core temperature probe defective or disconnected
— b10 multipoint core temperature probe defective.— b10 multipoint core temperature probe wires
disconnected.
ERROR CODES
continued on next page

COMBITHERM CT CLASSIC SERIES • STEP-BY-STEP PROCEDURES • MN-36455 • 25.
INSTALLATION
ERROR CODES
Error Code
Error Call Out in Display Description of Error Possible Cause
E23 b4 boiler probe fault boiler temperature probe defective or disconnected
— b4 boiler temperature probe defective.— b4 probe wires connected backwards.
E24 b5 bypass probe fault bypass steam temperature probe defective or disconnected
— b5 bypass steam temperature probe defective.— b5 bypass steam temperature probe wires
connected backwards.
E25 b3 condensor probe fault condensor water temperature probe defective or disconnected.
— b3 condensor temperature probe defective.— b3 condensor probe wires connected
backwards.
E26 n8 boiler safety temperature probe fault
boiler heating element protection probe defective or disconnected.
— n8 boiler temperature probe defective.— n8 probe wires connected backwards.
E27 boiler Element temperature high
boiler protection heat element temperature is more than 266°f (130°c) for more than 25 seconds, detected by n8 probe.
— calcium build up in boiler.— check wiring to all components mentioned
below.— steam element contactor locked/on.— n8 boiler temperature probe defective.— n8 probe wires connected backwards.— Water level probe has calcium buildup.
E34 steam generator drain pump fault
if water level does not drop below lower water level probe after three minutes when steam generator drain pump is activated in cleaning program.
— calcium build up in steam generator drain pump.— boiler drain pump defective.— relay board, high voltage, defective.— Water level probe defective.
E36 steam temperature high in steam program, cavity temperature n6 is measuring in excess of 395ºf (200ºc) for more than 60 seconds.
in combination program, cavity temperature n6 is measuring in excess of 520ºf (270ºc), for more than 60 seconds.
in retherm program, cavity temperature n6 is measuring in excess of 395ºf (200ºc), for more than 60 seconds.
in cleaning program, cavity temperature n6 is measuring in excess of 395ºf (200ºc), for more than 60 seconds.
— Water supply is shut off.— low water pressure.— Water injection pipe, calcium build up.— Water fl ow valve defect or calcium build up.— double water solenoid valve defective (y1).— relay board, high voltage, defective.
E40 b3 fault b3 probe shorted to ground — defective or miswired probe.
E41 b4 fault b4 probe shorted to ground — defective or miswired probe.
E42 b5 fault b5 probe shorted to ground — defective or miswired probe.
E43 n6 fault n6 probe shorted to ground — defective or miswired probe.
E44 n8 fault n8 probe shorted to ground — defective or miswired probe.
E45 b10 fault b10 probe shorted to ground — defective or miswired probe.
continued on next page

COMBITHERM CT CLASSIC SERIES • STEP-BY-STEP PROCEDURES • MN-36455 • 26.
INSTALLATION
ERROR CODES
Error Code
Error Call Out in Display Description of Error Possible Cause
E51 no Water in boiler lower water level probe b2 is not satisfi ed within 5 minutes, after water solenoid valve y1 is activated
— Water supply is shut off.— low water pressure.— boiler drain cap missing.— boiler drain pump defective.— drain pump elbow leaking.— Water level probe has calcium build up.— double water solenoid valve defective (y1).— relay board, high voltage, defective.
E53 fan motor high temperatures
fan motor does not spin, result in over-heating, detected by motor coil safety thermo element. temperature more than 320°f (160°c).
— motor high limit open or wired incorrectly.— if lEd on motor control fl ashes, see error codes
for motor control.— motor or fan wheel locked.— fan wheel damaged.
E54 lower fan motor hightemperature
lower fan motor does not spin, result in over-heating, detected by motor coil safety thermo element. temperature more than 320°f (160°c).
— motor high limit open or wired incorrectly.— if lEd on motor control fl ashes, see error codes
for motor control.— motor or fan wheel locked.— fan wheel damaged.
E55 vent not open 60 seconds after the venting motor is activated the vent motor safety switch did not open.
— alignment issue between motor cam and vent motor safety switch (micro switch).
— faulty vent valve (motor).— faulty vent valve safety switch (micro switch).
E56 vent 2 not open 60 seconds after the venting motor is activated the vent motor safety switch did not open.
— alignment issue between motor cam and vent motor safety switch (micro switch).
— faulty vent valve (motor).— faulty vent valve safety switch (micro switch).
E57 no rinse Water flow switch for solenoid valve y4 does not detect any water fl ow for a minimum of 60 seconds.
— Water supply is shut off.— low water pressure.— flow switch is dirty or defective.— double water solenoid valve defective (y3).— relay board, high voltage, defective.
E88 lower gas ignition failure reset output from ignition module is on
— hot surface ignitor not functioning.— no gas supply.— flame sensor not functioning.— faulty ignition control.
E89 upper gas ignition failure reset output from ignition module is on
— hot surface ignitor not functioning.— no gas supply.— flame sensor not functioning.— faulty ignition control.
E90 lower gas combustion blower not at speed
speed is too slow. — power supply cable is not connected to blower motor.
— speed control cable is not connected to blower motor.
— blower motor is blocked, rotation is impeded, or motor is faulty.
— faulty control board.
continued on next page

COMBITHERM CT CLASSIC SERIES • STEP-BY-STEP PROCEDURES • MN-36455 • 27.
INSTALLATION
ERROR CODES
Error Code
Error Call Out in Display Description of Error Possible Cause
E91 upper gas blower not at speed
speed is to slow. — power supply cable is not connected to blower motor
— speed control cable is not connected to blower motor
— blower motor is blocked, rotation is impeded, or motor is faulty
— faulty control board
E92 communication Errorcb does not properly respond
twelve (12) instances of no-response from the relay board (cb) to the display board (ib).
— check can cable connections mentioned below.
— can cable defective.— relay board, low voltage, connector defective.— display board connector defective.
E94 communication Error,to interface board
no signal transfer for more than 5 seconds between the interface board (ib) and the control board (cb).
— check can cable connections mentioned below.
— can cable defective.— relay board, low voltage, connector defective.— display board connector defective.
E100 one or more maintenance reminder has timed out.
When any maintenance reminder has expired without action having been taken by the operator.
— Enter maintenance reminder screen and address the item that has timed out and reset
E101 ventless hood fault - no pressure
if the power switch or pressure switch is not closed.
— check power switch is on.— check vent motor is turning in the proper
direction.— pressure switch is mis-wired or defective.— filter(s) require cleaning or replacement
E102 ventless hood fault — filters not present
if the air fi lter switches are not closed.
— check fi lters are installed and properly seated.— check fi lter switches are not damaged,
defective or dislodged.
E103 option board doesn’t send switch setting
ob not communicating its switch settings to the cb.
— check can cable connection between ob and cb.
— Ensure cb dip switch is set to see an ob.— incompatible ob and cb software (update
software).— ob defective.— cb defective.
E104 option board not communicating
option board is not communicating with cb.
— check option board can connection at cb and ob.
— defective ob.— defective cb.
E105 no or low Water pressure Water pressure switch not activated.
— Water supply not connected.— Water supply is shut off.— Water supply to unit blocked or obstructed— faulty or miswired pressure switch
E106 boiler drain pump fault hall effect or rotational sensor is not sending a signal to the relay board
— drain pump motor not running or defective.— hall effect sensor broken or incorrectly wired.— motor improperly wired.
continued on next page

COMBITHERM CT CLASSIC SERIES • STEP-BY-STEP PROCEDURES • MN-36455 • 28.
see motor control error chart on next page
INSTALLATION
ERROR CODES
Error Code
Error Call Out in Display Description of Error Possible Cause
E108 cooling fan failure if the temperature on the control board (relay board) is greater than 140ºf (60ºc) and less than 176ºf (80ºc). (see error code E02)
— cooling fan damaged.— cooling fan blocked or blades have been kept
from rotating.— incoming air temperature exceeds 100°f (38°c).— air inlet has become blocked.
E109 high limit switch the high limit switch input to the cb (n7) is “open”
— unit has experienced an over heat condition.— convection element contactors stuck closed.— failed y1 solenoid.— obstruction between y1 solenoid and injection
pipe.— improperly connected drain.— condensate pan clean out not closed.— improperly wired high limit switch at the switch
or at the cb.— defective high limit switch.

COMBITHERM CT CLASSIC SERIES • STEP-BY-STEP PROCEDURES • MN-36455 • 29.
INSTALLATION
Type of Error Indication Release of Error
Undervoltage LED fl ashing sequence, with 1 fl ash per period. Voltage of intermediate circuit is less than 250V
Overvoltage LED fl ashing sequence, with 2 fl ashes per period. Voltage of intermediate circuit exceeds 445V
Excess Temperature
LED fl ashing sequence, with 3 fl ashes per period.Temperature sensor in the power unit is more than 199°F (93°C)
Current Peak LED fl ashing sequence, with 4 fl ashes per period.Blocked motor, detected by current peak monitoring from 900 rpm rotating fi eld
Overcurrent LED fl ashing sequence, with 5 fl ashes per period. Intermediate circuit current exceeds 4.0 A
Short-circuit LED fl ashing sequence, with 6 fl ashes per period.Release of interrupt at intermediate circuit current larger than 53 A
Power on LED fl ashing sequence, with 7 fl ashes per period.Effective mains voltage does not correspond to jumper setting 115V/230V
Watchdog LED fl ashing sequence, with 8 fl ashes per period.Watchdog of the microcontroller released, program crash
TOUCH MOTOR CONTROL ERROR CODES

COMBITHERM CT CLASSIC SERIES • STEP-BY-STEP PROCEDURES • MN-36455 • 30.
ORIGINAL EQUIPMENT LIMITED WARRANTY
Alto-Shaam, Inc. warrants to the original purchaser that any original part that is found to be defective in Alto-Shaam, Inc. warrants to the original purchaser that any original part that is found to be defective in material or workmanship will, at Alto-Shaam’s option, subject to provisions hereinafter stated, be replaced with a new or rebuilt part.
The labor warranty remains in effect one (1) year from installation or fifteen (15) months from the shipping date, whichever occurs first. Alto-Shaam will bear normal labor charges performed by an authorized Alto-Shaam service agent during standard business hours, excluding overtime, holiday rates or any additional fees.
The parts warranty remains in effect for one (1) year from installation or fifteen (15) months from the shipping date, whichever occurs first. An optional extended warranty is available but must be purchased with the original equipment order. Please consult the factory for net pricing options and details.
THIS WARRANTY DOES NOT APPLY TO:
1. Replacement of wear parts, including light bulbs, door gaskets, and/or the replacement of glass due to damage of any kind.
2. Equipment damage caused by accident, shipping and handling, improper installation or alteration of any kind.
3. Equipment chassis or component/system damage as a result of inadequate routine maintenance and cleaning. Required maintenance and cleaning of steam generating equipment is the responsibility of the owner/operator.
4. Equipment used under conditions of abuse, neglect, misuse, carelessness or abnormal conditions including, but not limited to, equipment subjected to non-approved or inappropriate chemicals including, but not limited to, compounds containing chlorine, chlorides or quaternary salts, or equipment with missing or altered serial numbers. Damage caused by use of any cleaning agent other than Alto-Shaam’s Combitherm® Oven Cleaner including, but not limited to, damage due to chlorine, bleach, quaternary salts, souring powders or other harmful chemicals. Use of Alto-Shaam’s Combitherm® Cleaner on Combitherm ovens is highly recommended.
5. It is the sole responsibility of the owner/operator/purchaser of this equipment to verify that the incoming water supply is comprehensively tested and if required, a means of “water treatment” provided that would meet compliance requirements with the published water quality standards published at right. Non-compliance with these minimum standards will potentially damage this equipment and/or components and VOID the original equipment manufacturer’s warranty. Alto-Shaam recommends using OptiPure® products to properly treat your water.
6. Any losses or damage resulting from malfunction, including loss of product or consequential or incidental damages of any kind.
7. Equipment damage resulting from modification in any manner from original model, substitution of parts other than factory authorized parts, removal of any parts including legs, or addition of any parts.
THIS WARRANTY IS EXCLUSIVE AND IS IN LIEU OF ALL OTHER WARRANTIES, EXPRESSED OR IMPLIED, INCLUDING THE IMPLIED WARRANTIES OF MERCHANTABILITY AND FITNESS FOR A PARTICULAR PURPOSE. IN NO EVENT SHALL ALTO-SHAAM BE LIABLE FOR LOSS OF USE, LOSS OF REVENUE OR PROFIT, OR LOSS OF PRODUCT, OR FOR ANY INDIRECT, INCIDENTAL OR CONSEQUENTIAL DAMAGES.
No person except an officer of Alto-Shaam, Inc. is authorized to modify this warranty or to incur on behalf of Alto-Shaam any other obligation or liability in connection with Alto-Shaam equipment.
W A R R A N T Y E F F E C T I V E January 1, 2014
COMBITHERM WATER QUALITY MINIMUM STANDARDS
CONTAMINANT INLET WATER REQUIREMENTS
Free Chlorine Less than 0.1 ppm (mg\L)
Hardness 30-70 ppm
Chloride Less than 30 ppm (mg\L)
pH 7.0 to 8.5
Silica Less than 12 ppm (mg\L)
Total Dissolved Solids (tds) 50-125 ppm

COMBITHERM CT CLASSIC SERIES • STEP-BY-STEP PROCEDURES • MN-36455 • 31.
W164 N9221 Water Street • P.O. Box 450 • Menomonee Falls , Wisconsin 53052-0450 • U.S.A.PHONE:262.251.3800•800.558-8744USA/CANADA FAX:262.251.7067•800.329.8744U.S.A.ONLY
www .alto-shaam .com
All Alto-Shaam equipment is sold F.O.B. shipping point, and when accepted by the carrier, such shipments become the property of the consignee.
Should damage occur in shipment, it is a matter between the carrier and the consignee. In such cases, the carrier is assumed to be responsible for the safe delivery of the merchandise, unless negligence can be established on the part of the shipper.
1. Make an immediate inspection while the equipment is still in the truck or immediately after it is moved to the receiving area. Do not wait until after the material is moved to a storage area.
2. Do not sign a delivery receipt or a freight bill until you have made a proper count and inspection of all merchandise received.
3. Note all damage to packages directly on the carrier’s delivery receipt.
4. Make certain the driver signs this receipt. If he refuses to sign, make a notation of this refusal on the receipt.
5. If the driver refuses to allow inspection, write the following on the delivery receipt:
Driver refuses to allow inspection of containers for visible damage.
6. Telephone the carrier’s office immediately upon finding damage, and request an inspection. Mail a written confirmation of the time, date, and the person called.
7. Save any packages and packing material for further inspection by the carrier.
8. Promptly file a written claim with the carrier and attach copies of all supporting paperwork.
We will continue our policy of assisting our customers in collecting claims which have been properly filed and actively pursued. We cannot, however, file any damage claims for you, assume the responsibility of any claims, or accept deductions in payment for such claims.
RECORD THE MODEL AND SERIAL NUMBER OF THE APPLIANCE FOR EASY REFERENCE. ALWAYS REFER TO BOTH MODEL AND SERIAL NUMBER
IN ANY CONTACT WITH ALTO-SHAAM REGARDING THIS APPLIANCE.
Model: ___________________________________________________
Serial Number: _____________________________________________
Date Installed: _____________________________________________
Voltage: __________________________________________________
Purchased From: ___________________________________________
___________________________________________________
___________________________________________________
Alto-Shaam has established a twenty-four hour emergency service call center to offer immediate customer access to a local authorized service agency outside of standard business hours. The emergency service access is provided exclusively for Alto-Shaam equipment and is available throughout the United States through the use of Alto-Shaam’s toll-free number. Emergency service access is available seven days a week including holidays.
TRANSPORTATION DAMAGE AND CLAIMS