data reporting and validation system (drvs) reporting and validation system (drvs) ... before...
TRANSCRIPT

Labor Exchange
Data Reporting and Validation System
(DRVS)
User Guide for DRVS 7.2.2
Addendum 1
June 2011

I. WINDOWS 7 INSTALLATION
2
This addendum to the DRVS LX Handbook provides installation instructions
to allow DRVS to be installed on a computer or laptop that is using any
version of the Windows 7 operating system after installation of the Windows
Virtual PC and Windows XP Mode for the Virtual PC.
Step 1—Minimum System Requirements
The target computer must be running any 32 bit or 64 bit version of Windows
7, preferably with support pack 1 installed. The target computer must meet
the minimum requirements for Windows 7 as specified by Microsoft, not the
minimum requirements listed for DRVS listed below.
We strongly recommend that qualified technical staff be called upon to install
the Virtual Machine and Windows XP mode to insure proper configuration.
Prior to starting the installation, confirm that you are logged into the target
computer as an Administrator. If you are not logged in as an Administrator,
you will be unable to complete the installation
Step 2—Software Download, Installation and Configuration
After starting the Windows 7 computer and verifying Internet connectivity,
click the following link to go to the Windows Virtual PC download page,
http://www.microsoft.com/windows/virtual-pc/download.aspx. You may
have to open a browser window and paste the URL into the address bar of the
browser.
Select the version of Windows 7 running on the target computer and the
language. When the page reloads, follow the instructions to download the
needed Windows XP file.
After download of the XP Mode file, run the executable to install the Virtual
PC and XP mode.
Once you have installed Windows XP Mode, click the Windows 7 Start
button , then select All Programs > Windows Virtual PC > Windows XP

I. WINDOWS 7 INSTALLATION
3
Mode to begin the setup. We recommend that 2048 GB of RAM be allocated
to XP mode for DRVS operation.
Before installing MSDE or MS SQL Server 2000 and DRVS on the Windows
XP virtual machine, insure that all service packs for Windows XP have been
installed and configured.
Once configuration is complete, start the Windows XP mode and follow the
normal DRVS installation instructions in Section II.

II. INSTALLATION
This chapter provides the DRVS system requirements and installation instructions.
Step 1—Minimum System Requirements
Following are the minimum system requirements for installing DRVS.
Recommendations for greater than minimum requirements are indicated in
parentheses where applicable.
Item Requirement
Processor Pentium 4 CPU 1.80GHZ (more is
recommended)
Operating System Windows 2000 or Windows XP
Memory 1GB (more is recommended)
Application Hard Disk
Space
350 MB (more is recommended)
Database Hard Disk
Space
Varies by state.
Database Varies by state. States that exceed MSDE
maximum per database must install SQL
Server.
Display 1024x768 or higher-resolution display with
256 colors
Other MSDE or SQL Server must be installed prior
to installing the DRVS.
Latest Windows service packs and critical
updates should also be installed.

II. INSTALLATION
Hard disk requirements will vary depending on the state‘s database size. For
example, some states may exceed the current MSDE 2000 2 GB per database size
limit. If any database exceeds the MSDE limit, users will need to license, install,
and set up Microsoft SQL Server to run the DRVS. Any licensed version of SQL
Server should allow the user to install and run the DRVS. SQL Express (MSDE
2005) has not been tested for compatibility with the DRVS. The DRVS will install
all required .Net and Crystal Reports components.
DRVS installation requires Read/Write access to the system registry, Program
Files folder, Windows\System32 folder and the Global Assembly Cache. Registry
entries are made in HKEY_LOCAL_MACHINE\SOFTWARE\DRVS and in
HKEY_LOCAL_MACHINE\SOFTWARE\Microsoft uninstall areas. DRVS users
will need Read access to the registry and Read/Write access to the Program File
folders, as well as Read/Write/Delete access to the SQL database.
Step 2—Create Backup Databases
If users want to use their databases in the upgrade version of DRVS, they should
always create backup databases prior to uninstalling the current version and
installing the upgrade version. Users that have Enterprise Manager should contact
their Database Administrator to backup databases. For users that do not have
Enterprise Manager, the instructions for creating backup databases of LXDB and
LXTempDB are below:
1. Create a folder C:\DRVSbackups
2. Go to Start>>Run and type in cmd
3. At C:\> prompt, connect to your instance by typing osql -E
4. At the 1> prompt, to backup the LXDB, type BACKUP DATABASE
LXDB TO DISK = ‘C:\DRVSbackups\LXDB.bak’ 5. At the 2> prompt, type Go
6. Repeat 3 and 4 to backup LXTempDB (both LXDB and LXTempDB should
be backed up)
To backup databases with other names, follow the same instructions and replace
LXDB with other names. For example, if a user names its database as

II. INSTALLATION
6
LXDEVPY05, then step 4 above will be: type BACKUP DATABASE
LXDEVPY05 TO DISK = ‘C:\DRVSbackups\LXDEVPY05DB.bak’
Step 3—Uninstalling Prior Versions
Users should uninstall previous versions of the software before installing the
DRVS 7.2. Following are instructions for uninstalling prior versions of the DRVS
on a Windows 2000 or Windows XP machine. Procedures for uninstalling may
differ slightly on different machines, but are generally self-explanatory.
Users should be sure to uninstall through the Control Panel rather than by deleting
the installation directory for the prior version; uninstalling by deleting the
installation directory may cause problems with the subsequent installation.
Click the Start button, then select Settings, Control Panel.
Click on Add/Remove Programs.
Click on the LX or DRVS icon to uninstall any prior version.
Click on the Change/Remove button.
On the Select Uninstall Method screen, select Automatic and then click
on Next.
On the Perform Rollback screen, click on No and then click on Next.
On the Perform Uninstall screen click on Finish.
If a Remove Shared Component message displays, click on Yes to All.
Close the Add/Remove Programs window.
Users may need to contact their system administrator to uninstall the application.
Step 4—Download from the Internet
To download the DRVS from the Internet:
1. Open the Internet browser and go to
www.doleta.gov/performance/reporting/tools_datavalidation.cfm.

II. INSTALLATION
7
2. Click on the DRVS 7.2 link from the "In this section" side bar.
3. If a file download message displays, click on Save.
4. Select the location where to store the installation file. Suggestion:
C:\Temp. Click on Save.
5. A dialog box will chart the progress of the download of the installation
file. When the ―Download Complete‖ message box appears, click on
Open. (If ―close this dialog box when download completes‖ is checked,
the user will need to go to the location where the installation file was
stored [e.g. C:\Temp in step 4] to open the file.)
6. A ―WinZip Wizard – Unsupported Archive Type‖ message box may
display. Choose ―Open the archive using the classic interface‖ and then
click on OK.
7. Click on the DRVS.exe file and then click on Extract from the tool bar
at the top of the WinZip application screen.
8. Select a location for the extraction of the zip file. C:\Temp is the default.
9. Click on the Extract button.
10. If a Confirm File Overwrite message displays, click Yes.
11. Close the WinZip window.
Step 5—Application Installation
Based on the size of the state‘s DRVS import file, either Microsoft SQL Server
2000 Desktop Engine (MSDE) or Microsoft SQL Server 2000 must be installed
prior to installing the DRVS. MSDE is a free version of SQL Server that can be
used with client applications. (When installing MSDE, users must set a ―strong‖

II. INSTALLATION
8
password.) Users should go to http://www.microsoft.com/sql/msde/default.mspx
for more information about MSDE and to download MSDE. SQL Express (MSDE
2005) is not compatible with the DRVS.
If the user‘s estimated database size exceeds the MSDE limit, then Microsoft SQL
Server will need to be installed prior to installing the DRVS. Users can find more
information about SQL Server at http://www.microsoft.com/sql/default.mspx.
Users may need to contact their system administrator to install MSDE or SQL
Server. Installation procedures may differ slightly on different machines, but are
generally self-explanatory.
Users who prefer a client/server setup should review (Appendix F: Client Server
Setup) in conjunction with the instructions in this section. Only users with full
SQL Server with Enterprise Manager should use a client/server setup.
Before starting installation of the DRVS, close all applications and programs that
are open.
1. Open Windows Explorer and go to C:\Temp (or wherever you stored the
application files).
2. Double click on DRVS.exe.

II. INSTALLATION
3. At the Welcome to the DRVS Installation Wizard window click on Next. If
you are installing the DRVS for the first time, you may be prompted to reboot
prior to beginning the installation routine.

II. INSTALLATION
4. Read the License Agreement and, if you accept, click on the ―I accept the
license agreement‖ button and click on Next. If this option is not selected, the
installation will end and users cannot continue reporting and validation.
5. On the User Information screen, make any necessary modifications to the user
information. Then click on Next.
6. On the Destination Folder screen, the destination location will default to
C:\Program Files\DRVS.
7. If you prefer a different destination location, click on Browse on the
Destination Folder screen to navigate to a different location. Click on Next.

II. INSTALLATION
11
8. In the ―SQL Server Connection‖ window, enter your server name in the SQL
Server Name box. If you did not name your database instance, your server
name is ―(local)‖. If you do not know the name of your database, contact your
system administrator.

II. INSTALLATION
9. For Database Authentication, click on Windows NT Authentication. If the user
can not use Windows Authentication (e.g. Win 98 or ME users), click on SQL
Authentication and complete the SQL User Name and SQL Password boxes.
Click on Next.
If the DRVS Installation Wizard does not progress beyond this point, the user
must determine if an incorrect or inactive server name has been entered in the
SQL Server Name field. If a name that does not match any of the state‘s
servers is entered, there will be a delay or a failure to progress to the next
screen.
If a name is entered that matches one of the servers, but the server is inactive,
the Installation Wizard may also stop at this point. To find out if the server is
II. INSTALLATION
active go to Start/Settings/Control Panel/Administrative Tools/Services.
Microsoft SQL Server should be on the list of services and the task/service
should be started. If it is on the list but not started, start it and reboot. If it is
not on the list, SQL Server was not installed. There should also be a SQL
Service icon on the bottom part of your screen, on the desk tray as a little box
with a green arrow or red square. The green arrow indicates the service is
started and the red square indicates it is not. Right click on the icon to open the
SQL Service manager, then start the service.
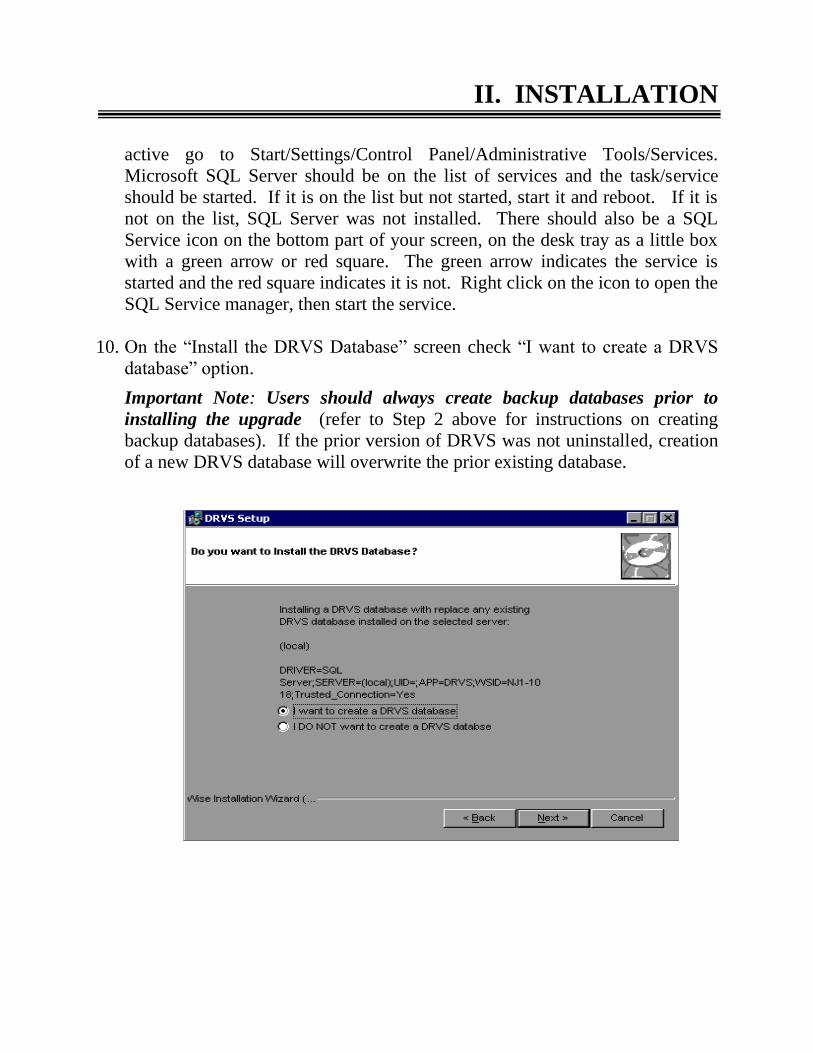
10. On the ―Install the DRVS Database‖ screen check ―I want to create a DRVS
database‖ option.
Important Note: Users should always create backup databases prior to
installing the upgrade (refer to Step 2 above for instructions on creating
backup databases). If the prior version of DRVS was not uninstalled, creation
of a new DRVS database will overwrite the prior existing database.

II. INSTALLATION
11. Click on Next on the ―Ready to Install the Application‖ screen. This screen
also allows you to exit the installation wizard or, if necessary, to return to the
previous screen to change server connection information.
12. The ―Updating System‖ screen will display, showing installation progress.
However, this screen may display for several minutes with no indication of
progress.
13. Click on Finish on the ―DRVS has been successfully installed.‖ screen to exit
the DRVS Installation Wizard.

15
14. Reboot your computer after completing the DRVS installation. You may
delete the DRVS.exe used to install the application once the installation
process is successfully completed.
Step 6 – Restore Backup Databases
For users who create backup databases from prior versions of the software for use
in DRVS 7.2, after DRVS 7.2 is installed, users should restore their backup
databases. Users that have Enterprise Manager should contact their Database
Administrator to backup databases. For users that do not have Enterprise Manager,
the instructions for restoring backup databases of LXDB and LXTempDB are
below:
1. Go to Start>>Run and type in cmd
2. At C:\> prompt, connect to your instance by typing osql -E
3. At the 1> prompt, type RESTORE DATABASE LXDB FROM DISK
='C:\DRVSbackups\LXDB.bak'
4. At the 2> prompt, type Go
5. Repeat 3 and 4 to restore LXTempDB (both LXDB and LXTempDB must
be restored).
To restore backup databases with other names, follow the same instructions and
replace LXDB with other names. For example, if a user names its database as
LXDEVPY05, then step 3 above will be: type RESTORE DATABASE
LXDEVPY05 FROM DISK ='C:\DRVSbackups\LXDEVPY05.bak'
Step 7 – Client/Server Setup
To create a client server setup please refer to instructions in Appendix F: Client
Server Setup of this Handbook.

APPENDIX E. CLIENT SERVER SETUP
16
This appendix provides client server setup instructions. Section A provides server
side setup instructions and Section B provides client side setup instruction. It is
recommended that the state‘s Database Administrator (DBA) perform all of the
client server setups tasks. Client server setups are only recommended for those
users who have full SQL Server with Enterprise Manager.
A. Server Side Setup
1. Install the DRVS. The DBA must have administrative rights to SQL
Server databases.
2. After install is completed, open Enterprise Manager and find the instance
where databases were installed. Click on Databases directory and find the
master database. In the master database, right-click on Users and select
New Database User. Give client(s) log-on capability by adding each
client login name and giving them public permission database role. Click
OK after each client is added.

APPENDIX E. CLIENT SERVER SETUP
17
3. Create a shared folder on the server (i.e. C:\Temp) giving full control
security permissions to clients.
4. Copy and paste the FormatFiles folder, which is located in the application
directory (default location - C:\Program Files\DRVS), to the shared folder
(i.e C:\Temp\FormatFiles).

APPENDIX E. CLIENT SERVER SETUP
18
5. Before beginning DRVS installation on client side, the installer must know
the IP address of the server. This will be needed to connect clients to the
server.
APPENDIX E. CLIENT SERVER SETUP
19
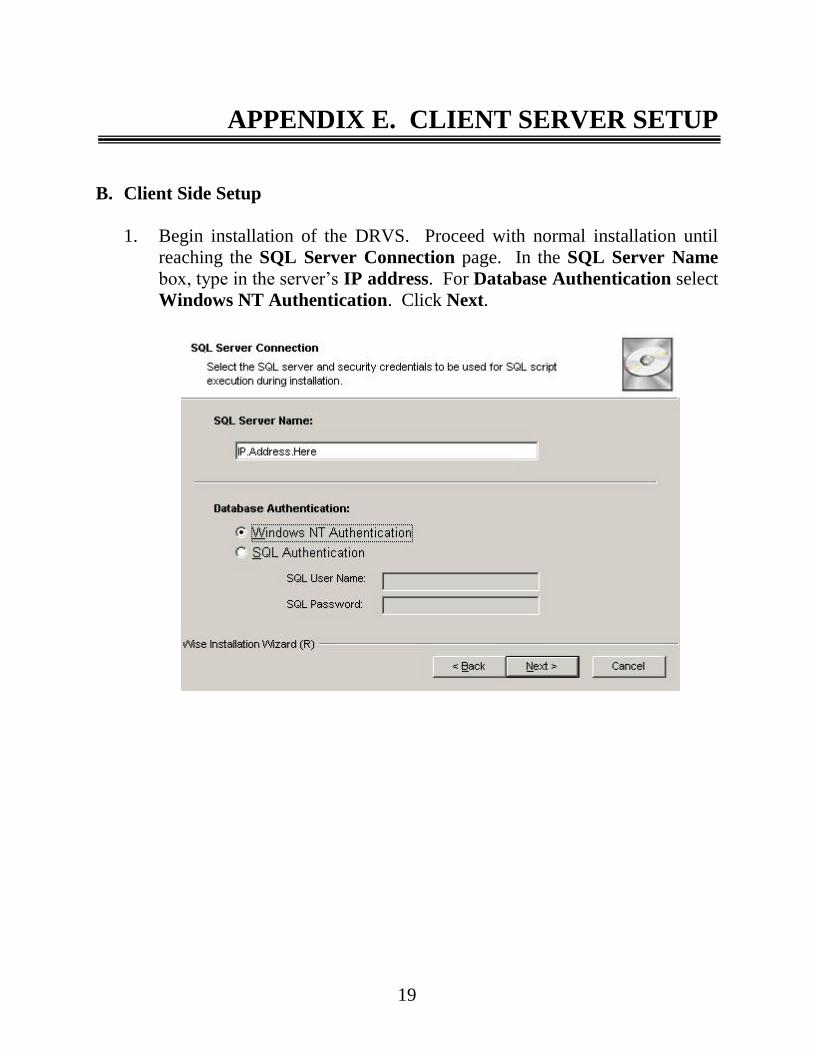
B. Client Side Setup
1. Begin installation of the DRVS. Proceed with normal installation until
reaching the SQL Server Connection page. In the SQL Server Name
box, type in the server‘s IP address. For Database Authentication select
Windows NT Authentication. Click Next.

APPENDIX E. CLIENT SERVER SETUP
20
2. After clicking Next, in the ―Do you want to install the DRVS Database?‖
page, select ―I want to create a DRVS database.‖ Click Next.
3. The rest of the installation should proceed normally. You might receive
an error saying that the login failed for the user (the user is expressed in
the error as the computer name of the user). Click OK on the error and
continue. This will not affect the installation on the client side.

APPENDIX E. CLIENT SERVER SETUP
21
4. After installation is complete, you must map a network drive from the
client to the shared folder on the server. To do this, open Explorer and
click Tools>>Map Network Drive. Select the name of your drive in the
Drive box and then click Browse to find the servername\folder that is
shared. This is how the file on the client side is copied and loaded onto
the server database. Click Finish once the folder is found.
5. Go to the install directory and find the WIAnLXApplication.config file
(the default location is C:\Program Files\DRVS\WIAnLX\bin\Config).
Right-click on the file and remove the Read-Only attribute in Properties.
6. In the config file, the DestinationDir, FileUploadPath, and FormatFilePath
must be changed to the server‘s paths. The DestinationDir path is changed
to the mapped drive path to the server. For example, if the shared
directory on the server is C:\Temp and that was mapped on the client as
the F: drive, the DestinationDir would look like this in the config file—
<DestinationDir>F:\</DestinationDir>—with F: being the mapped drive
to server C:\Temp directory. The FileUploadPath is the name of the server
shared directory.

APPENDIX E. CLIENT SERVER SETUP
22
In our example it would look like this –
<FileUploadPath>C:\Temp\</FileUploadPath>.
The FormatFilePath would be the directory on the server where the
FormatFiles folder is located. In our example that folder is located in
C:\Temp so that would look like this in the config file:
<FormatFilePath>C:\Temp\FormatFiles\</FormatFilePath>.
After each path is changed, save the file. Below is an example of the
config file after making the changes.
Please note that the path name must always end with a slash.
7. After each step is complete for each client, the users are ready to load their
files.

APPENDIX F. TROUBLESHOOTING
23
This chapter provides solutions for common problems that may occur while
using the DRVS. Section A provides solutions for problems that may occur
while signing in and Section B for problems that may occur while importing
records.
A. Signing In
Following are solutions for three problems that may occur at sign in:
1. If the default User ID and Password are properly entered, but the DRVS
generates a critical error with the message: ―Object reference not set to an
instance of an object‖, then the user may have entered the wrong server
name in the SQL Server Connection screen/SQL Server Name box
during the installation. The Installation Wizard would have finished if
any one of the state‘s correct server names was entered in that field.
However, if the appropriate server name for the DRVS installation was
not entered, the problem would appear at log in. To correct the problem,
uninstall the DRVS and then repeat the installation, ensuring that the
correct server name is entered. The ―Object reference not set to an
instance of an object‖ error may also appear if the user does not have
read/write access to the DRVS installation folder. The user must have
these rights to log in to the DRVS.
2. If the default User ID and Password are properly entered, but the DRVS
generates the message: ―Event Log is Full‖ and quits, the user needs to
clear the event logs in the following way:
Click on Start - Settings - Control Panel.
Double click Administrative Tools, then Event Viewer.
On the left side of the Event Viewer window, you will see three
logs listed.

APPENDIX F. TROUBLESHOOTING
24
Right click on each of these logs separately and click on ―Clear all
events.‖
As you clear these logs, the system may ask if you want to save
them. Click ―No.‖
3. If the default User ID and Password are properly entered, but the DRVS
generates the message: ―Login failed for user ‗DRVS User.‘ Reason:
not associated with a trusted SQL Server connection,‖ then the user needs
to update the registry setting. The error message will appear in red on the
Login screen.
APPENDIX F. TROUBLESHOOTING
25
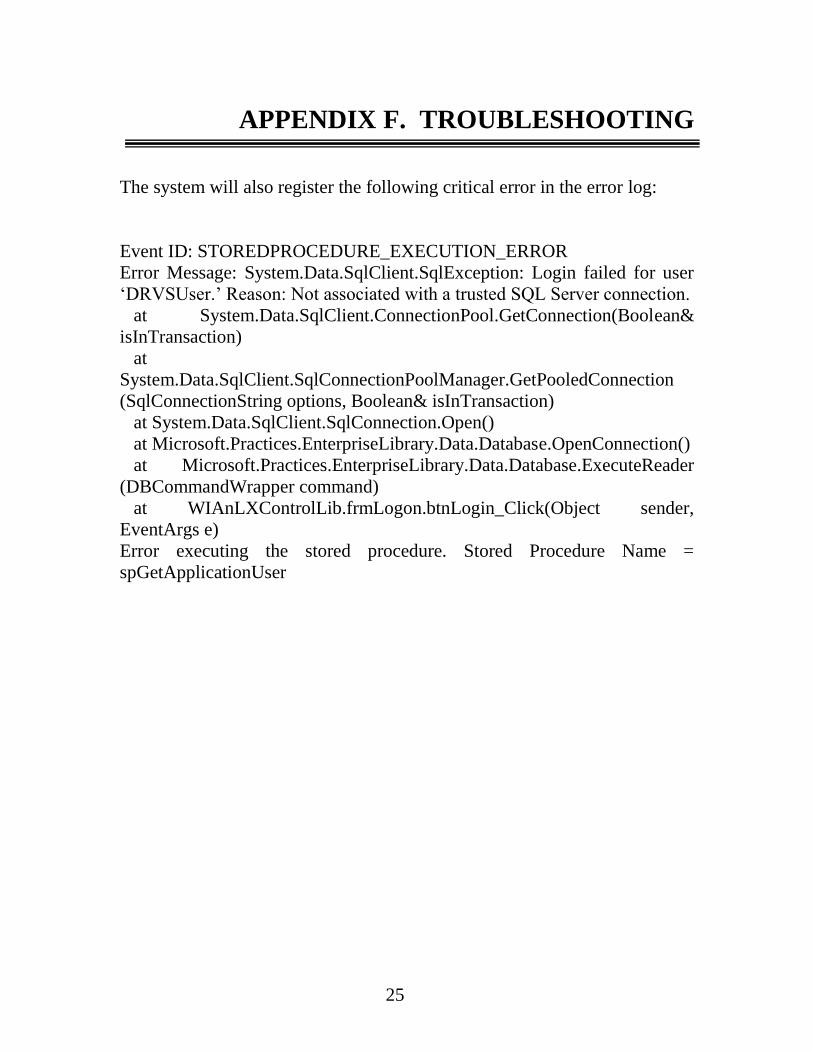
The system will also register the following critical error in the error log:
Event ID: STOREDPROCEDURE_EXECUTION_ERROR
Error Message: System.Data.SqlClient.SqlException: Login failed for user
‗DRVSUser.‘ Reason: Not associated with a trusted SQL Server connection.
at System.Data.SqlClient.ConnectionPool.GetConnection(Boolean&
isInTransaction)
at
System.Data.SqlClient.SqlConnectionPoolManager.GetPooledConnection
(SqlConnectionString options, Boolean& isInTransaction)
at System.Data.SqlClient.SqlConnection.Open()
at Microsoft.Practices.EnterpriseLibrary.Data.Database.OpenConnection()
at Microsoft.Practices.EnterpriseLibrary.Data.Database.ExecuteReader
(DBCommandWrapper command)
at WIAnLXControlLib.frmLogon.btnLogin_Click(Object sender,
EventArgs e)
Error executing the stored procedure. Stored Procedure Name =
spGetApplicationUser

APPENDIX F. TROUBLESHOOTING
26
MSDE users must update the registry setting as follows:
Select Start, Run, and in the Open box in the Run window type ―regedit.‖
Click OK. This opens the Registry Editor. Drill down to the following
folder:
HKEY_LOCAL_MACHINE/SOFTWARE/Microsoft/MSSQLServer/
MSSQLServer
Double click on the LoginMode file. This opens the Edit DWORD Value
box. In the Value data box change the value from 1 to 2. Confirm that
Hexadecimal is selected in the Base box. Then click OK.
Reboot the PC and then reopen the DRVS. If the Login fails again, then the
user does not have the proper administrative rights to run the DRVS.

APPENDIX F. TROUBLESHOOTING
27
SQL Server users must update the registry setting as follows:
Open SQL Server Enterprise Manager and drill down to the SQL Server
Group, then right click the server name entered in step 8 of the installation.
Choose Properties from the menu displayed. This will open the SQL
Server Properties (Configure) window for the selected server. Click on the
Security tab. Under Authentication, select SQL Server and Windows. Click
OK.
You may be asked to restart SQL Server Service. Click Yes. Reboot the PC
and then reopen the DRVS. If the Login fails again, then the user does not
have the proper administrative rights to run the DRVS.