dell inspiron 1521 central processing unit (cpu) …...dell inspiron 1521 central processing unit...
TRANSCRIPT
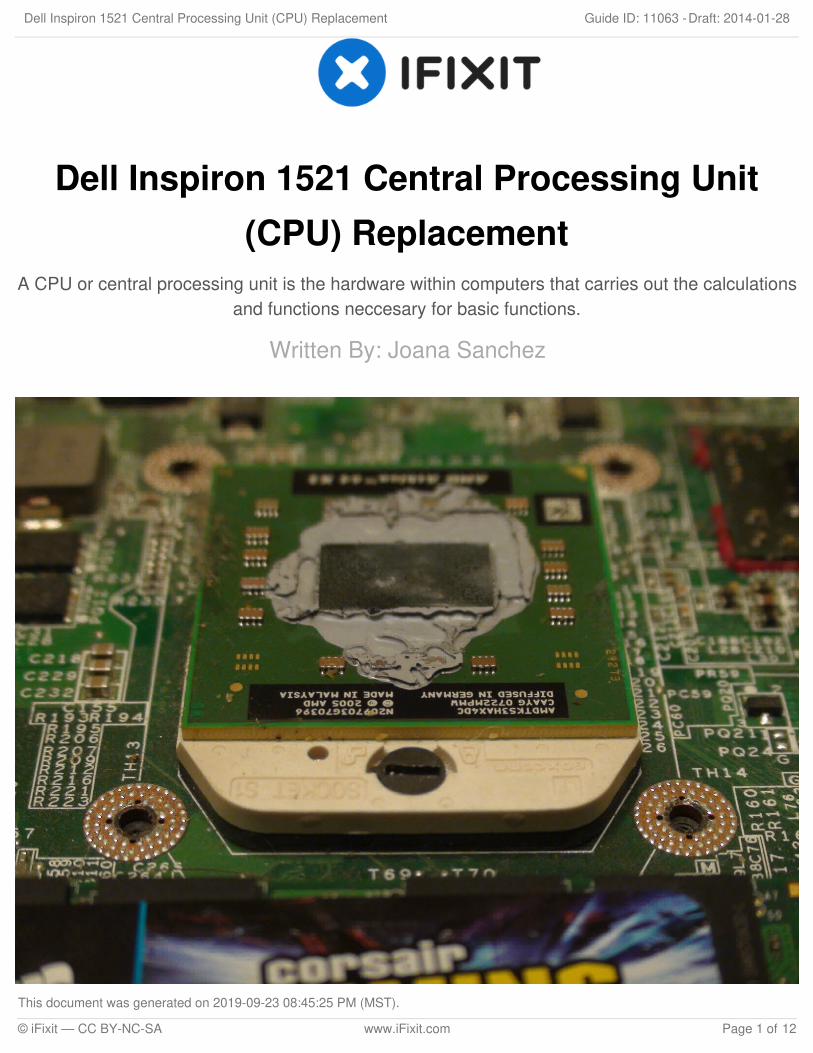
Dell Inspiron 1521 Central Processing Unit(CPU) Replacement
A CPU or central processing unit is the hardware within computers that carries out the calculationsand functions neccesary for basic functions.
Written By: Joana Sanchez
Dell Inspiron 1521 Central Processing Unit (CPU) Replacement Draft: 2014-01-28Guide ID: 11063 -
This document was generated on 2019-09-23 08:45:25 PM (MST).
© iFixit — CC BY-NC-SA www.iFixit.com Page 1 of 12

INTRODUCTION
This guide will show you how to remove a few components of your laptop in order to gain access tothe CPU.
TOOLS:Phillips #1 Screwdriver (1)iFixit Opening Tools (1)Flathead 3/32" or 2.5 mm Screwdriver (1)
Dell Inspiron 1521 Central Processing Unit (CPU) Replacement Draft: 2014-01-28Guide ID: 11063 -
This document was generated on 2019-09-23 08:45:25 PM (MST).
© iFixit — CC BY-NC-SA www.iFixit.com Page 2 of 12
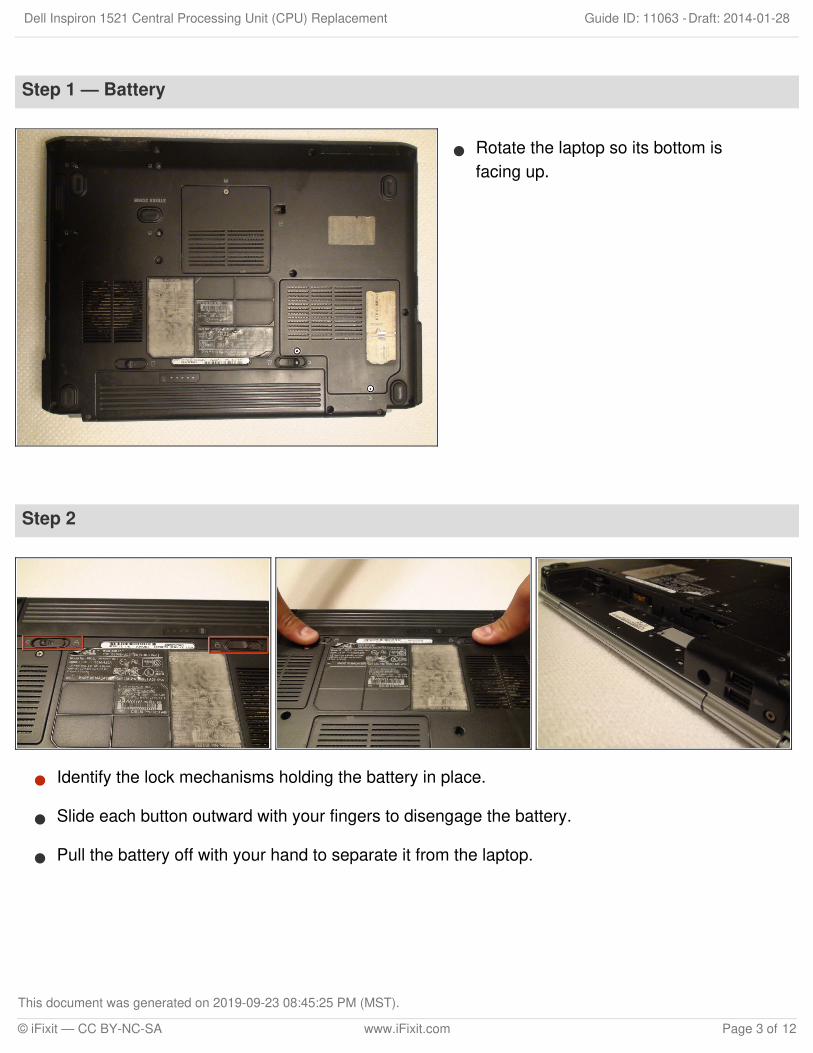
Step 1 — Battery
Rotate the laptop so its bottom isfacing up.
Step 2
Identify the lock mechanisms holding the battery in place.
Slide each button outward with your fingers to disengage the battery.
Pull the battery off with your hand to separate it from the laptop.
Dell Inspiron 1521 Central Processing Unit (CPU) Replacement Draft: 2014-01-28Guide ID: 11063 -
This document was generated on 2019-09-23 08:45:25 PM (MST).
© iFixit — CC BY-NC-SA www.iFixit.com Page 3 of 12
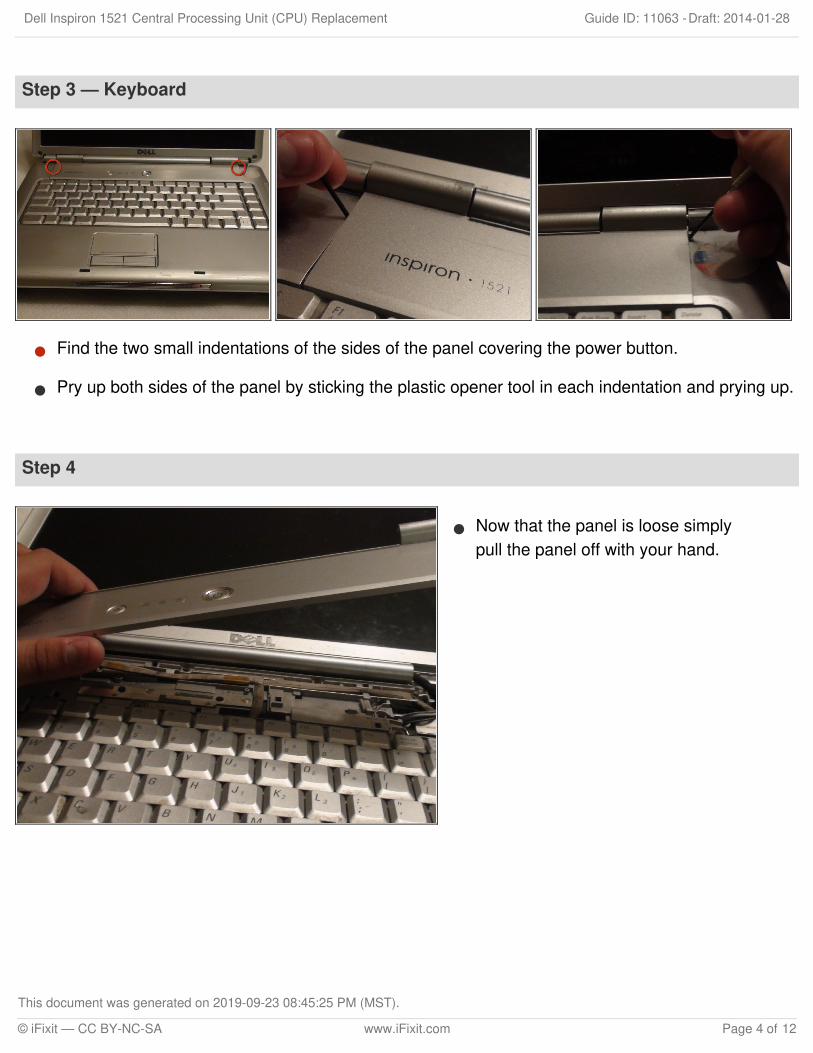
Step 3 — Keyboard
Find the two small indentations of the sides of the panel covering the power button.
Pry up both sides of the panel by sticking the plastic opener tool in each indentation and prying up.
Step 4
Now that the panel is loose simplypull the panel off with your hand.
Dell Inspiron 1521 Central Processing Unit (CPU) Replacement Draft: 2014-01-28Guide ID: 11063 -
This document was generated on 2019-09-23 08:45:25 PM (MST).
© iFixit — CC BY-NC-SA www.iFixit.com Page 4 of 12
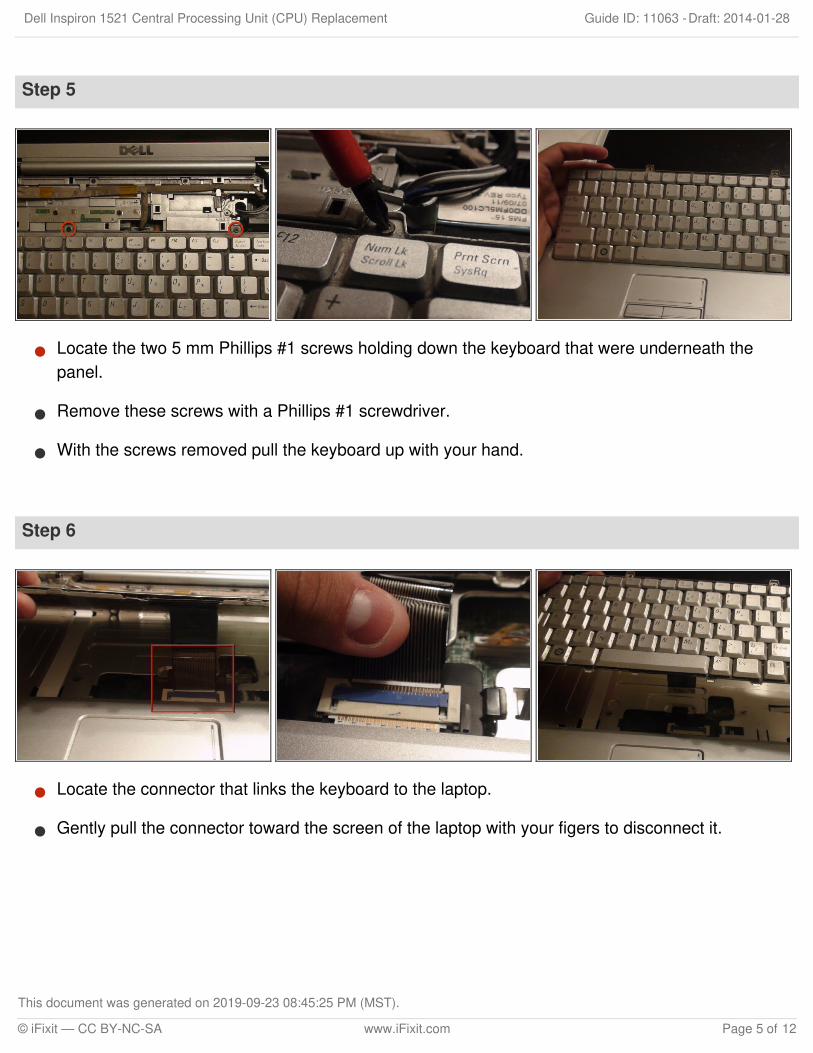
Step 5
Locate the two 5 mm Phillips #1 screws holding down the keyboard that were underneath thepanel.
Remove these screws with a Phillips #1 screwdriver.
With the screws removed pull the keyboard up with your hand.
Step 6
Locate the connector that links the keyboard to the laptop.
Gently pull the connector toward the screen of the laptop with your figers to disconnect it.
Dell Inspiron 1521 Central Processing Unit (CPU) Replacement Draft: 2014-01-28Guide ID: 11063 -
This document was generated on 2019-09-23 08:45:25 PM (MST).
© iFixit — CC BY-NC-SA www.iFixit.com Page 5 of 12
Step 7 — Display Assembly
Locate the two Phillips #1 screws holding the Wireless Local Area Network (WLAN) panel in place.
Remove these two screws with a Phillips #1 screwdriver.
Remove the WLAN panel by pulling it up with your hand.
Step 8
Disconnect the black and white wires attached to the WLAN card by pulling up on the connectorswith your fingers.
During reassembly, the black and white wires reconnect to the WLAN card near the black andwhite triangles, respectively.
Remove the remaining wires from their protective sleeve by hand.
The wires in the sleeve are only used in other Dell laptop models. During reassembly they do notconnect to anything so just place them back into the sleeve.
Dell Inspiron 1521 Central Processing Unit (CPU) Replacement Draft: 2014-01-28Guide ID: 11063 -
This document was generated on 2019-09-23 08:45:25 PM (MST).
© iFixit — CC BY-NC-SA www.iFixit.com Page 6 of 12
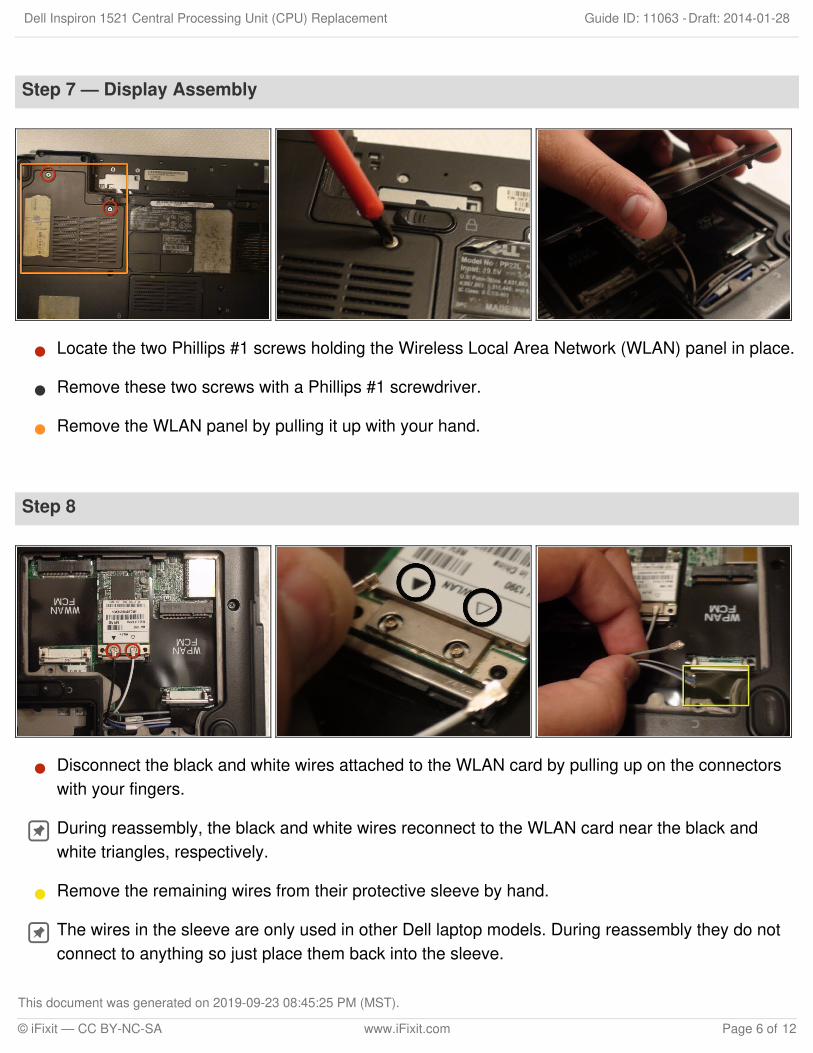
Step 9
Pull the wires that you disconnected in the previous step through the hole in the top of the laptop.
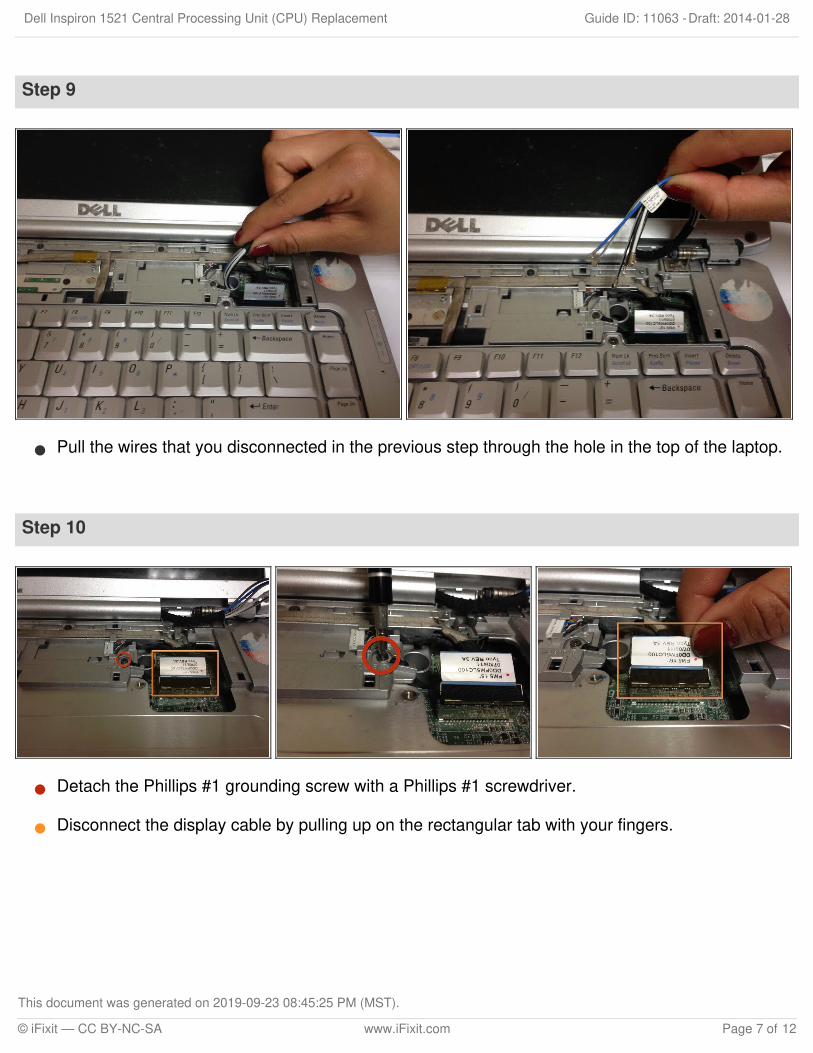
Step 10
Detach the Phillips #1 grounding screw with a Phillips #1 screwdriver.
Disconnect the display cable by pulling up on the rectangular tab with your fingers.
Dell Inspiron 1521 Central Processing Unit (CPU) Replacement Draft: 2014-01-28Guide ID: 11063 -
This document was generated on 2019-09-23 08:45:25 PM (MST).
© iFixit — CC BY-NC-SA www.iFixit.com Page 7 of 12
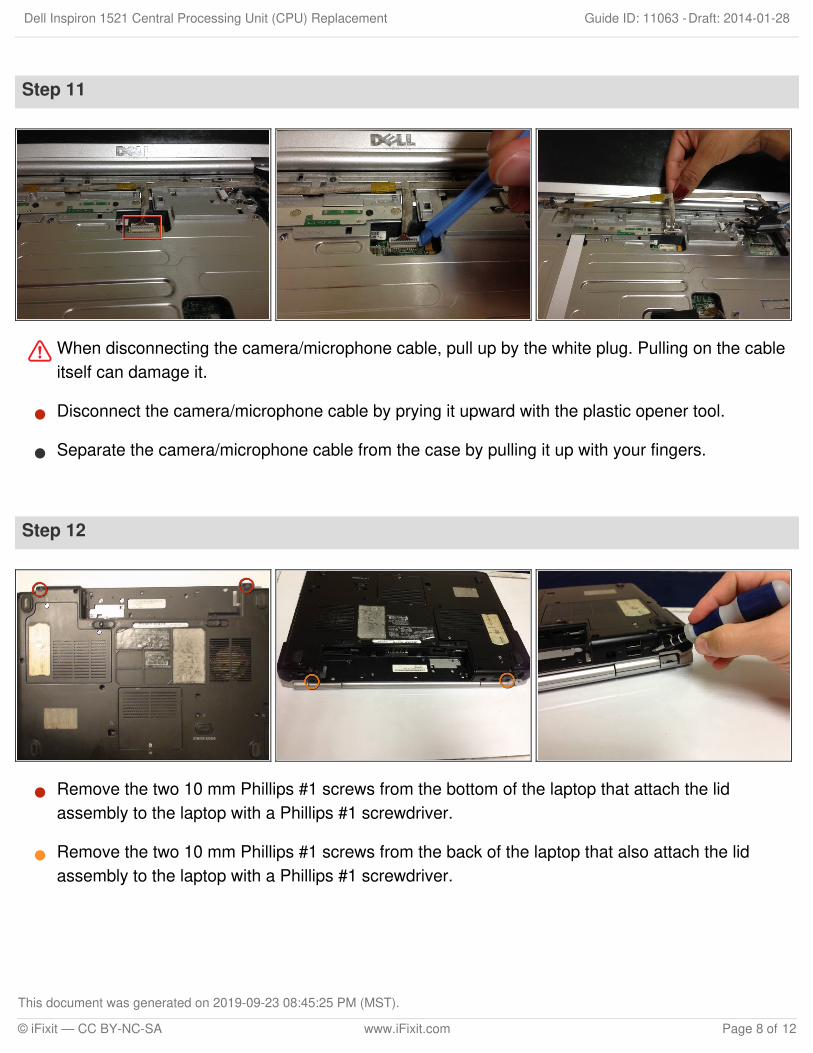
Step 11
When disconnecting the camera/microphone cable, pull up by the white plug. Pulling on the cableitself can damage it.
Disconnect the camera/microphone cable by prying it upward with the plastic opener tool.
Separate the camera/microphone cable from the case by pulling it up with your fingers.
Step 12
Remove the two 10 mm Phillips #1 screws from the bottom of the laptop that attach the lidassembly to the laptop with a Phillips #1 screwdriver.
Remove the two 10 mm Phillips #1 screws from the back of the laptop that also attach the lidassembly to the laptop with a Phillips #1 screwdriver.
Dell Inspiron 1521 Central Processing Unit (CPU) Replacement Draft: 2014-01-28Guide ID: 11063 -
This document was generated on 2019-09-23 08:45:25 PM (MST).
© iFixit — CC BY-NC-SA www.iFixit.com Page 8 of 12
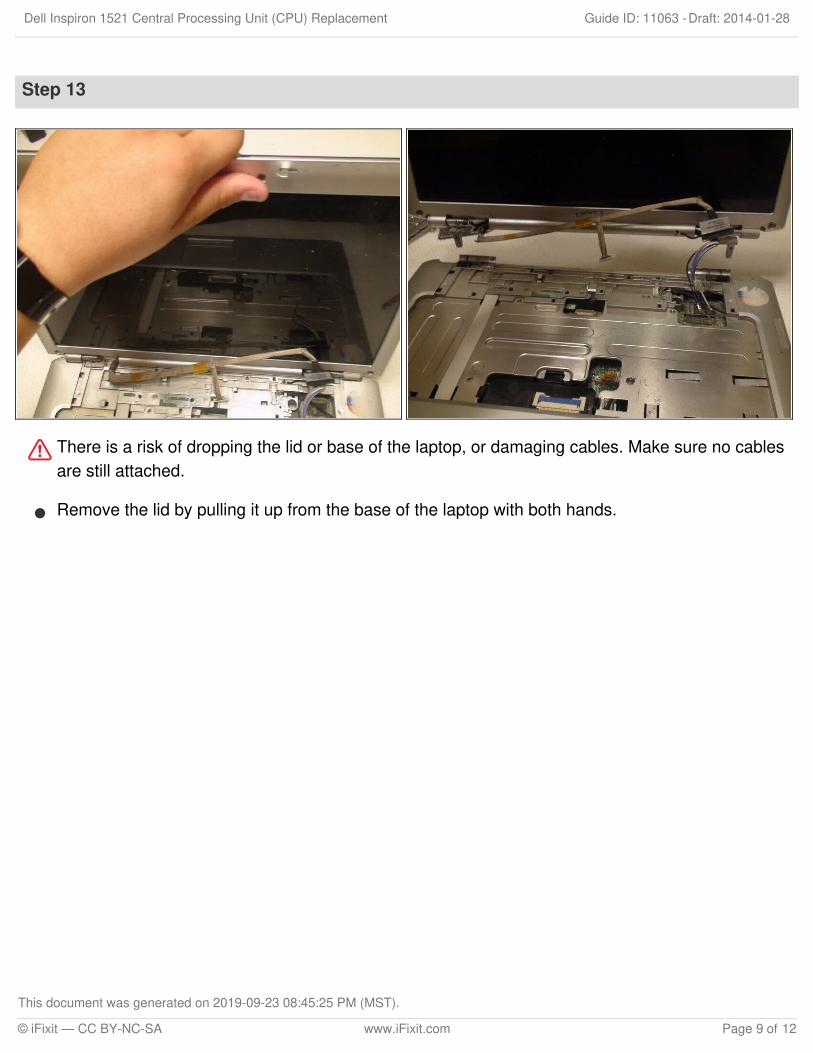
Step 13
There is a risk of dropping the lid or base of the laptop, or damaging cables. Make sure no cablesare still attached.
Remove the lid by pulling it up from the base of the laptop with both hands.
Dell Inspiron 1521 Central Processing Unit (CPU) Replacement Draft: 2014-01-28Guide ID: 11063 -
This document was generated on 2019-09-23 08:45:25 PM (MST).
© iFixit — CC BY-NC-SA www.iFixit.com Page 9 of 12
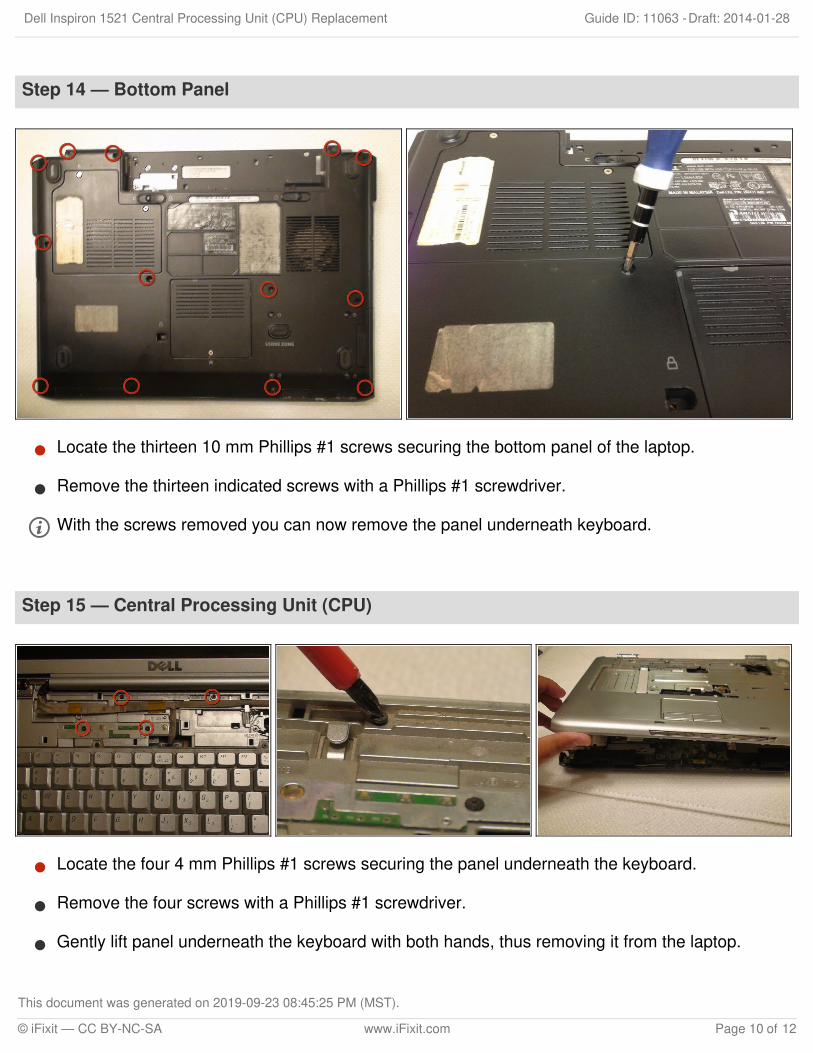
Step 14 — Bottom Panel
Locate the thirteen 10 mm Phillips #1 screws securing the bottom panel of the laptop.
Remove the thirteen indicated screws with a Phillips #1 screwdriver.
With the screws removed you can now remove the panel underneath keyboard.
Step 15 — Central Processing Unit (CPU)
Locate the four 4 mm Phillips #1 screws securing the panel underneath the keyboard.
Remove the four screws with a Phillips #1 screwdriver.
Gently lift panel underneath the keyboard with both hands, thus removing it from the laptop.
Dell Inspiron 1521 Central Processing Unit (CPU) Replacement Draft: 2014-01-28Guide ID: 11063 -
This document was generated on 2019-09-23 08:45:25 PM (MST).
© iFixit — CC BY-NC-SA www.iFixit.com Page 10 of 12
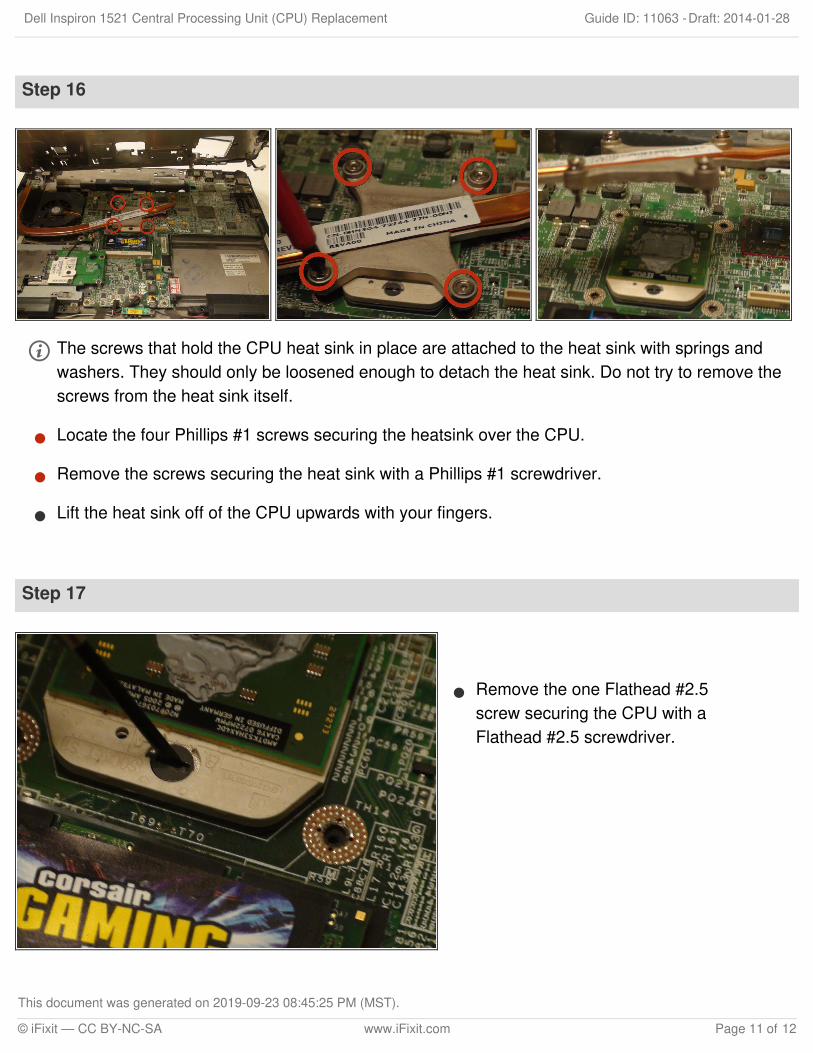
Step 16
The screws that hold the CPU heat sink in place are attached to the heat sink with springs andwashers. They should only be loosened enough to detach the heat sink. Do not try to remove thescrews from the heat sink itself.
Locate the four Phillips #1 screws securing the heatsink over the CPU.
Remove the screws securing the heat sink with a Phillips #1 screwdriver.
Lift the heat sink off of the CPU upwards with your fingers.
Step 17
Remove the one Flathead #2.5screw securing the CPU with aFlathead #2.5 screwdriver.
Dell Inspiron 1521 Central Processing Unit (CPU) Replacement Draft: 2014-01-28Guide ID: 11063 -
This document was generated on 2019-09-23 08:45:25 PM (MST).
© iFixit — CC BY-NC-SA www.iFixit.com Page 11 of 12
To reassemble your device, follow these instructions in reverse order.
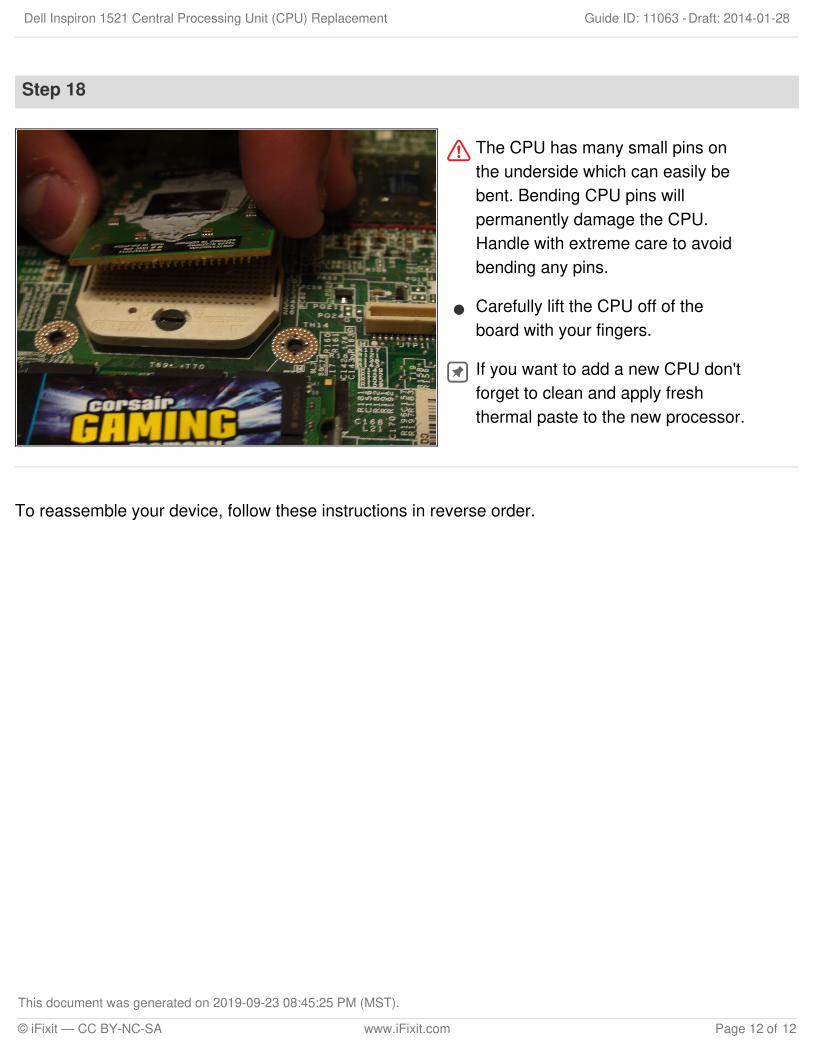
Step 18
The CPU has many small pins onthe underside which can easily bebent. Bending CPU pins willpermanently damage the CPU.Handle with extreme care to avoidbending any pins.
Carefully lift the CPU off of theboard with your fingers.
If you want to add a new CPU don'tforget to clean and apply freshthermal paste to the new processor.
Dell Inspiron 1521 Central Processing Unit (CPU) Replacement Draft: 2014-01-28Guide ID: 11063 -
This document was generated on 2019-09-23 08:45:25 PM (MST).
© iFixit — CC BY-NC-SA www.iFixit.com Page 12 of 12