deploying peoplesoft enterprise applications with f5
TRANSCRIPT

DEPLOYMENT GUIDE
DEPLOYING F5 WITH PEOPLESOFT ENTERPRISE APPLICATIONS

Table of Contents
F5 Deployment Guide i
Table of Contents
Configuring the BIG-IP LTM system for use with PeopleSoft ApplicationsPrerequisites and configuration notes ..............................................................................1-1Configuration example .........................................................................................................1-2
Configuring the BIG-IP LTM system for PeopleSoft Enterprise Portal ..............................1-3Prerequisites and configuration notes ..............................................................................1-3Connecting to the BIG-IP LTM system .............................................................................1-4Creating the TCP health monitor ......................................................................................1-4Creating a pool .......................................................................................................................1-5Creating profiles .....................................................................................................................1-7Creating the virtual server ............................................................................................... 1-11
Configuring the BIG-IP LTM system for the PeopleSoft HCM component ................... 1-14Creating the TCP health monitor ................................................................................... 1-14Creating the pool ................................................................................................................ 1-15Creating the profiles .......................................................................................................... 1-15Creating the virtual server ............................................................................................... 1-19Creating a default SNAT ................................................................................................... 1-20
Configuring the BIG-IP LTM for offloading SSL from the PeopleSoft Web tier ........... 1-21Configuring PeopleSoft for SSL offload .......................................................................... 1-21Connecting to the BIG-IP LTM system .......................................................................... 1-23Using SSL certificates and keys ........................................................................................ 1-23Creating additional profiles .............................................................................................. 1-24Creating the Redirect iRule .............................................................................................. 1-26Creating an HTTPS virtual server ................................................................................... 1-27Modifying the PeopleSoft HTTP virtual server ............................................................ 1-28Synchronizing the BIG-IP configuration if using a redundant system ...................... 1-29
Appendix A: Backing up and restoring the BIG-IP system configuration ........................ 1-30Saving and restoring the BIG-IP configuration ............................................................. 1-30
Configuring the BIG-IP WebAccelerator for accelerating PeopleSoft applicationsPrerequisites and configuration notes ..............................................................................2-1Configuration example .........................................................................................................2-1Configuring the WebAccelerator module .......................................................................2-2Creating an HTTP Class profile .........................................................................................2-2Modifying the Virtual Server to use the Class profile ...................................................2-3Creating an Application ........................................................................................................2-4
Deploying the FirePass controller with PeopleSoft applications Prerequisites and configuration notes ..............................................................................3-1Configuration scenario .........................................................................................................3-1Configuring the FirePass controller for deployment with PeopleSoft ......................3-2Connecting to the FirePass controller ..............................................................................3-2Creating groups on the FirePass controller ....................................................................3-2Limiting access for the Partner group ...............................................................................3-7Configuring Endpoint security ............................................................................................3-8Conclusion ............................................................................................................................ 3-14

1
Configuring the BIG-IP LTM System with Oracle|PeopleSoft Applications
• Configuring F5 for use with PeopleSoft Enterprise Applications
• Configuring the BIG-IP LTM system for PeopleSoft Enterprise Portal
• Configuring the BIG-IP LTM system for the PeopleSoft HCM component
• Configuring the BIG-IP LTM system for offloading SSL from the PeopleSoft Web tier

Configuring F5 for use with PeopleSoft Enterprise Applications
Welcome to the PeopleSoft/F5 Deployment Guide. This guide contains step-by-step procedures on configuring the BIG-IP Local Traffic Manager (LTM), WebAccelerator, and FirePass controller for use with Oracle®|PeopleSoft® Enterprise applications.
Oracle's PeopleSoft Enterprise applications are designed to address the most complex business requirements. They provide comprehensive business and industry solutions, enabling organizations to significantly improve performance. PeopleSoft Enterprise applications offer web services integration to fit seamlessly into a heterogeneous applications environment and a broad choice of technology infrastructure. Simple configuration ensures that the most unique customer requirements can be met.
For more information on PeopleSoft Enterprise, see http://www.oracle.com/applications/peoplesoft-enterprise.html
For more information on F5 products, see http://www.f5.com/products/
This Deployment Guide contains procedures for configuring the BIG-IP LTM system, the BIG-IP LTM system with SSL, the F5 WebAccelerator module, and the FirePass controller. While we recommend using all of these products together with PeopleSoft applications, it is not required. Simply use the sections for the products you have. This guide is broken up into the following chapters:
◆ Configuring the BIG-IP LTM system for PeopleSoft Enterprise Portal, on page 1-3
◆ Configuring the BIG-IP WebAccelerator module for accelerating PeopleSoft applications, on page 2-1
◆ Deploying the FirePass controller with PeopleSoft applications, on page 3-1
Prerequisites and configuration notesThe following are general prerequisites for this deployment; each section contains specific prerequisites:
◆ You must have an existing PeopleSoft deployment. For information on how to configure PeopleSoft devices, see the PeopleSoft documentation.
◆ You must have administrative access to the F5 devices, and PeopleSoft Applications (if you are using the BIG-IP LTM for offloading SSL).
◆ Briefly review the basic configuration tasks and the few pieces of information, such as IP addresses, that you should gather in preparation for completing the F5 device configuration.
1 - 1

Configuring the BIG-IP LTM System with Oracle|PeopleSoft Applications
Configuration exampleIn this Deployment Guide, the BIG-IP LTM provides intelligent traffic management and high availability for the Web tier of PeopleSoft deployments. Also included in this guide is the ability to use the BIG-IP LTM system to offload SSL processing from the Web tier of the PeopleSoft deployment.
Figure 1.1 F5 - PeopleSoft logical configuration example
PeopleSoft Web Servers
Database
BIG-IP Local Traffic Manager
Application Tier
Web Tier
PeopleSoft ApplicationServers
Internet
Database Tier
FirePass
DMZ
WebAccelerator
F5 Deployment Guide 1 - 2

Configuring the BIG-IP LTM system for PeopleSoft Enterprise Portal
This section describes how to configure the BIG-IP LTM system to direct traffic to the PeopleSoft Enterprise Portal. If you are using the BIG-IP LTM system to offload SSL transactions from the Enterprise Portal devices, be sure to see Configuring the BIG-IP LTM system for offloading SSL from the PeopleSoft Web tier after completing the following procedures.
Note
Because PeopleSoft applications can be running on a variety of web servers, be sure to use the appropriate port for your application server in the following procedures. For example, the default port for Oracle web servers is 7777, for BEA WebLogic it is 8000, for IBM WebSphere it is 80, and so on. Refer to the web server documentation for more information.
Use the following procedures to configure the BIG-IP LTM for PeopleSoft Portal:
• Creating the HTTP health monitor
• Creating a pool
• Creating profiles
• Creating the virtual server
Tip
We recommend you save your existing BIG-IP configuration before you begin the procedures in this Deployment Guide. To save your BIG-IP configuration, see Appendix A: Backing up and restoring the BIG-IP system configuration, on page 1-30.
Prerequisites and configuration notesThe following are prerequisites and configuration notes for the BIG-IP LTM configuration:
• The BIG-IP LTM device must be running version 9.4 or later. We recommend using the latest version of the BIG-IP LTM software.
• Some of the Parent Profiles in this Deployment Guide are only available in LTM version 9.4. If you are using a version prior to 9.4, the Configuration Guide for BIG-IP Local Traffic Management lists the differences between these new optimized profiles and the base profiles found in previous versions. You can find the BIG-IP LTM manuals on AskF5.
1 - 3

Configuring the BIG-IP LTM System with Oracle|PeopleSoft Applications
• If you are using the BIG-IP LTM system to offload SSL traffic from the PeopleSoft deployment, be sure to follow the procedures in Configuring the BIG-IP LTM system for offloading SSL from the PeopleSoft Web tier, on page 1-21. This section also contains PeopleSoft configuration procedures.
• PeopleSoft applications may be running on a variety of different web servers. The BIG-IP LTM system requires you know the ports used by your web server for configuring specific BIG-IP objects. Consult your web server administrator or the manuals for more information.
• PeopleSoft should be running PeopleTools version 8.48 or higher.
• You should be familiar with both the BIG-IP LTM system and PeopleSoft Enterprise applications. Consult the appropriate documentation for more information, including installation and initial configuration procedures.
Connecting to the BIG-IP LTM systemUse the following procedure to access the BIG-IP Configuration utility using a web browser.
To connect to the BIG-IP system using the Configuration utility
1. In a browser, type the following URL:https://<administrative IP address of the BIG-IP device>A Security Alert dialog box appears, click Yes.The authentication dialog box appears.
2. Type your user name and password, and click OK. The Welcome screen opens.
Once you are logged onto the BIG-IP LTM system, the Welcome screen of the new Configuration utility opens. From the Configuration utility, you configure and access information on monitoring the BIG-IP system.
Creating the HTTP health monitorThe next step is to set up a health monitor for the PeopleSoft Portal application. For this configuration, we create a simple HTTP health monitor. Although the monitor in the following example is quite simple, you can configure optional settings such as Send and Receive Strings to make the monitor much more specific. You can also use one of the other types of monitors available on the BIG-IP LTM system; see the online help or manuals for more information on monitors.
To configure the HTTP health monitor
1. On the Main tab, expand Local Traffic, and then click Monitors.The Monitors screen opens.
F5 Deployment Guide 1 - 4

2. Click the Create button.The New Monitor screen opens.
3. In the Name box, type a name for the Monitor.In our example, we type pps_http.
4. From the Type list, select HTTP.The HTTP Monitor configuration options appear.
5. In the Configuration section, in the Interval and Timeout boxes, type an Interval and Timeout. We recommend at least a 1:3 +1 ratio between the interval and the timeout. In our example, we use an Interval of 30 and a Timeout of 91.
6. In the Send String and Receive Rule sections, you can add an optional Send String and Receive Rule specific to the device being checked.
7. Click the Finished button (see Figure 1.2).The new monitor is added to the Monitor list.
Figure 1.2 Creating the TCP Monitor
Creating a poolThe next step is to create a pool for the PeopleSoft Portal servers on the BIG-IP LTM device.
To create a pool
1. On the Main tab, expand Local Traffic, and then click Pools.The Pool screen opens.
1 - 5

Configuring the BIG-IP LTM System with Oracle|PeopleSoft Applications
2. Click the Create button. The New Pool screen opens.
3. In the Name box, type a name. In our example, we type pps_portal.
4. In the Health Monitor section, from the Available list, select the name of the monitor you created in the Creating the HTTP health monitor section, and click the Add (<<) button to move it to the Active box. In our example, we select pps_tcp.
5. From the Load Balancing list, select a load balancing method appropriate for your configuration. For information on the different load balancing methods, see the Online Help or the BIG-IP manual. In our example, we select Least Connections (Node).
6. In the New Members section, in the Address box, type the address of the Portal server. In our example, we type 10.133.26.10.
7. In the Service Port box, type the appropriate port for your configuration. In our example, we type 80. This may be different in your deployment, depending on your application server.
8. Click the Add button.
9. Repeat steps 6-8 for each PeopleSoft Portal device.
10. Click the Finished button.
Figure 1.3 Creating the pool for the PeopleSoft Portal servers
F5 Deployment Guide 1 - 6

Creating profilesA profile is an object that contains user-configurable settings, with default values, for controlling the behavior of a particular type of network traffic, such as HTTP connections. Using profiles enhances your control over managing network traffic, and makes traffic-management tasks easier and more efficient.
Although it is possible to use the default profiles, we strongly recommend you create new profiles based on the default parent profiles. Creating new profiles allows you to easily modify the profile settings specific to this deployment, and ensures you do not accidentally overwrite the default profile.
Note
In the following procedures, we use new, optimized parent profiles only available on the BIG-IP LTM version 9.4 and later. If you are using a previous version, the Configuration Guide for BIG-IP Local Traffic Management lists the differences between these new optimized profiles and the base profiles found in previous versions. You can find the BIG-IP LTM manuals on AskF5.
Creating an HTTP profileThe first profile we create is an HTTP profile. For implementations where the majority of users accessing the PeopleSoft Portal are connecting across a WAN, F5 recommends enabling compression and caching on the BIG-IP LTM by using a profile introduced in BIG-IP version 9.4 called http-wan-optimized-compression-caching. This profile uses specific compression and caching (among other) settings to optimize traffic over the WAN. Note that to properly use this profile, you need to have compression and caching licensed on the BIG-IP LTM. For more information on licensing, contact your sales representative.
In our example, we configure the HTTP profile to encrypt the BIG-IP LTM cookie. You can optionally configure the BIG-IP LTM to encrypt the PeopleSoft cookie, if applicable to your deployment. Cookie encryption helps prevent cookie tampering attacks by denying malicious users from modifying the cookie to gain unauthorized access. Although encrypting cookie is optional, we recommend it. In BIG-IP LTM version 9.4, you simply click a check box for cookie encryption. In versions prior to 9.4, you need to configure an iRule to perform the encryption. See the following post on DevCentral for more information: http://devcentral.f5.com/weblogs/Joe/archive/2005/11/09/1541.aspx
To create a new HTTP profile
1. On the Main tab, expand Local Traffic, and then click Profiles.The HTTP Profiles screen opens.
2. In the upper right portion of the screen, click the Create button. The New HTTP Profile screen opens.
1 - 7

Configuring the BIG-IP LTM System with Oracle|PeopleSoft Applications
3. In the Name box, type a name for this profile. In our example, we type pps_http-opt.
4. From the Parent Profile list, select http-wan-optimized-compression-caching. The profile settings appear.
5. Optional: In the Encrypt Cookies row, click a check in the Custom box. Type the name of the cookies you want to encrypt, with a space between each cookie. In our example, we type the name of the BIG-IP cookie (BIGipServer<Name_of_Pool> by default, so in our example, BIGipServerpps_portal). You can also add the PeopleSoft cookie, if applicable to your deployment.
You can either modify the Cookie Passphrase or leave it at the default. In our example, we leave it at the default level.
6. In the Compression section, check the Custom box for Content Compression, and leave Content List selected.
7. In the Content List section, add the following items to the existing entries in the Content Type box one at a time, each followed by clicking Include:
• application/pdf
• application/vnd.ms-powerpoint
• application/vnd.ms-excel
• application/msword
• application/vnd.ms-publisher
We add these MIME types to ensure these highly compressible document types are compressed.
Figure 1.4 Configuring additional MIME types for compression
8. Modify any of the other settings as applicable for your network. In our example, we leave the settings at their default levels.
9. Click the Finished button.
F5 Deployment Guide 1 - 8

Creating the TCP profiles
The next profiles we create are the TCP profiles. If most of the PeopleSoft users are accessing the portal via a Local Area Network, we recommend using the tcp-lan-optimized (for server-side TCP connections) parent profile. If the majority of the users are accessing the system from remote or home offices, we recommend using an additional TCP profile, called tcp-wan-optimized (for client side TCP connections). In our example, we leave these profiles at their default levels; you can configure any of the options as applicable for your network.
Creating the LAN optimized TCP profile
First we configure the LAN optimized profile. If you are not using version 9.4 or do not want to use this optimized profile, you can choose the default TCP parent profile.
To create a new TCP profile
1. On the Main tab, expand Local Traffic, and then click Profiles.The HTTP Profiles screen opens.
2. On the Menu bar, from the Protocol menu, click tcp.
3. In the upper right portion of the screen, click the Create button. The New TCP Profile screen opens.
4. In the Name box, type a name for this profile. In our example, we type pps_tcp_lan.
5. From the Parent Profile list, select tcp-lan-optimized if you are using BIG-IP LTM version 9.4 or later; otherwise select tcp.
6. Modify any of the settings as applicable for your network. In our example, we leave the settings at their default levels.
7. Click the Finished button.
Creating the WAN optimized TCP profile
Now we configure the WAN optimized profile. Remember, if most of the users are accessing the system over the LAN or other low latency links, you should use the LAN based profile, and do not need to create this profile.
To create a new TCP WAN optimized profile
1. On the Main tab, expand Local Traffic, and then click Profiles.The HTTP Profiles screen opens.
2. On the Menu bar, from the Protocol menu, click tcp.
3. In the upper right portion of the screen, click the Create button. The New TCP Profile screen opens.
4. In the Name box, type a name for this profile. In our example, we type pps_tcp_wan.
5. From the Parent Profile list, select tcp-wan-optimized.
1 - 9

Configuring the BIG-IP LTM System with Oracle|PeopleSoft Applications
6. Modify any of the settings as applicable for your network. In our example, we leave the settings at their default levels.
7. Click the Finished button.
Creating a OneConnect profile
The next profile we create is a OneConnect profile. With OneConnect enabled, client requests can utilize existing, server-side connections, thus reducing the number of server-side connections that a server must open to service those requests. This can provide significant performance improvements for PeopleSoft implementations. For more information on OneConnect, see the BIG-IP LTM documentation.
In our example, we leave all the options at their default settings. You can configure these options as appropriate for your network.
To create a new OneConnect profile
1. On the Main tab, expand Local Traffic, and then click Profiles.The HTTP Profiles screen opens.
2. On the Menu bar, from the Other menu, click OneConnect.The Persistence Profiles screen opens.
3. In the upper right portion of the screen, click the Create button. The New HTTP Profile screen opens.
4. In the Name box, type a name for this profile. In our example, we type pps_oneconnect.
5. From the Parent Profile list, ensure that oneconnect is selected.
6. Modify any of the other settings as applicable for your network. In our example, we leave the settings at their default levels.
7. Click the Finished button.
Creating a persistence profile
The next profile we create is a persistence profile. In our example, we create a cookie persistence profile, using the HTTP Cookie Insert method.
To create a new cookie persistence profile
1. On the Main tab, expand Local Traffic.
2. Click Profiles.The HTTP Profiles screen opens.
3. On the Menu bar, click Persistence.The Persistence Profiles screen opens.
4. In the upper right portion of the screen, click the Create button. The New Persistence Profile screen opens.
F5 Deployment Guide 1 - 10

5. In the Name box, type a name for this profile. In our example, we type pps_cookie.
6. From the Persistence Type list, select Cookie.The configuration options for cookie persistence appear.
7. Modify any of the settings as applicable for your network. In our example, we leave the options at the default levels.
8. Click the Finished button.
Figure 1.5 Creating the cookie persistence profile
Creating the virtual serverThe next step in this configuration is to create a virtual server on the BIG-IP LTM device that uses the profiles and pool you just created.
To define the virtual server using the Configuration utility
1. On the Main tab, expand Local Traffic, and then click Virtual Servers. The Virtual Server screen opens.
2. In the upper right portion of the screen, click the Create button. The New Virtual Server screen opens.
3. In the Name box, type a name for this virtual server. In our example, we type pps_portal_http.
4. In the Destination section, select the Host option button.
5. In the Address box, type the IP address of this virtual server. In our example, we type 10.133.27.101.
6. In the Service Port box, type 80 or select HTTP from the list.
1 - 11

Configuring the BIG-IP LTM System with Oracle|PeopleSoft Applications
Figure 1.6 Creating the HTTP virtual server
7. From the Configuration list, select Advanced.The Advanced configuration options appear.
8. Leave the Type and Protocol lists at their default settings: Standard and TCP.
9. From the Protocol Profile (Client) list select the name of the profile you created in the Creating the WAN optimized TCP profile section. If you did not create a WAN optimized profile, select the LAN optimized profile as in the following Step. In our example, we select pps_tcp_wan.
10. From the Protocol Profile (Server) list, select the name of the profile you created in the Creating the LAN optimized TCP profile section. In our example, we select pps_tcp_lan.
11. From the OneConnect Profile list, select the name of the profile you created in Creating a OneConnect profile. In our example, we select pps_oneconnect.
12. From the HTTP Profile list, select the name of the profile you created in the Creating an HTTP profile section. In our example, we select pps_http-opt.
Figure 1.7 Configuration section of the virtual server
F5 Deployment Guide 1 - 12

13. From the Default Pool list, select the name of the pool you created in the Creating a pool section. In our example, we select pps_portal.
14. From the Default Persistence Profile list, select the persistence profile you created in the Creating a persistence profile section. In our example, we select pps_cookie
15. Click the Finished button.
Figure 1.8 Configuring the virtual server resources
The configuration for the PeopleSoft Enterprise Portal over HTTP is now complete. If you are using the BIG-IP LTM system for offloading SSL, be sure to continue to Configuring the BIG-IP LTM system for offloading SSL from the PeopleSoft Web tier, on page 1-21, after configuring any other PeopleSoft applications as described in the following section.
1 - 13

Configuring the BIG-IP LTM System with Oracle|PeopleSoft Applications
Configuring the BIG-IP LTM system for the PeopleSoft HCM component
In this section, we configure the BIG-IP LTM system for directing traffic to one of the PeopleSoft applications called Human Capital Management (HCM). There are a large number of PeopleSoft applications available. This Deployment Guide covers the PeopleSoft HCM application as an example; if you are using other PeopleSoft applications, repeat this entire section for each one, replacing names, IP addresses and ports as applicable. In this Deployment Guide, we are configuring high availability for internal services accessed over the Local Area Network.
Creating the HTTP health monitorFor PeopleSoft HCM, we create a simple HTTP health monitor. Although the monitor in the following example is quite simple, you can configure optional settings such as Send and Receive Strings to make the monitor much more specific. You can also use one of the other types of monitors available on the BIG-IP LTM system.
To configure a HTTP health monitor
1. On the Main tab, expand Local Traffic, and then click Monitors.The Monitors screen opens.
2. Click the Create button.The New Monitor screen opens.
3. In the Name box, type a name for the Monitor.In our example, we type pps_hcm_http.
4. From the Type list, select HTTP.The HTTP Monitor configuration options appear.
5. In the Configuration section, in the Interval and Timeout boxes, type an Interval and Timeout. We recommend at least a 1:3 +1 ratio between the interval and the timeout. In our example, we use an Interval of 30 and a Timeout of 91.
6. In the Send String and Receive Rule sections, you can add an optional Send String and Receive Rule specific to the device being checked.
7. Click the Finished button.The new monitor is added to the Monitor list.
Remember that if you configure a Send String and Receive String specific to one of the application components, you should create a new monitor for the other components.
F5 Deployment Guide 1 - 14

Creating the poolThe next step is to create a pool on the BIG-IP LTM system for the HCM servers. Make sure that you configure the appropriate IP address and port.
To create the PeopleSoft HR pool
1. On the Main tab, expand Local Traffic, and then click Pools.The Pool screen opens.
2. In the upper right portion of the screen, click the Create button. The New Pool screen opens.Note: For more (optional) pool configuration settings, from the Configuration list, select Advanced. Configure these settings as applicable for your network.
3. In the Name box, enter a name for your pool. In our example, we use pps_hcm.
4. In the Health Monitors section, select the name of the monitor you created in the Creating the HTTP health monitor section, and click the Add (<<) button. In our example, we select pps_hcm_http.
5. From the Load Balancing Method list, choose your preferred load balancing method (different load balancing methods may yield optimal results for a particular network).In our example, we select Least Connections (node).
6. In the New Members section, make sure the New Address option button is selected.
7. In the Address box, add the first server to the pool. In our example, we type 10.133.20.1.
8. In the Service Port box, the appropriate port for your application server. In our example, we type 80. Note that this may be different depending on the application server you are using.
9. Click the Add button to add the member to the list.
10. Repeat steps 9-11 for each server you want to add to the pool. In our example, we repeat these steps once for 10.133.20.2 and 10.133.20.3.
11. Click the Finished button.
Creating the profilesThe next task is to create the profiles for the HCM application. Although you can use the same profiles you created for the Enterprise Portal, we recommend creating new profiles as described in the following procedures.
1 - 15

Configuring the BIG-IP LTM System with Oracle|PeopleSoft Applications
Creating an HTTP profile
Similar to the Portal HTTP profile, for implementations where the majority of users accessing the PeopleSoft Portal are connecting across a WAN, F5 recommends enabling compression and caching on the BIG-IP LTM by using the http-wan-optimized-compression-caching profile. We also configure the profile to encrypt the BIG-IP LTM cookie (for more information on encrypting the cookie, see Creating an HTTP profile, on page 1-7).
To create a new HTTP profile
1. On the Main tab, expand Local Traffic, and then click Profiles.The HTTP Profiles screen opens.
2. In the upper right portion of the screen, click the Create button. The New HTTP Profile screen opens.
3. In the Name box, type a name for this profile. In our example, we type pps_hcm_http.
4. From the Parent Profile list, select http-wan-optimized-compression-caching. The profile settings appear.
5. Optional: In the Encrypt Cookies row, click a check in the Custom box. Type the name of the cookies you want to encrypt, with a space between each cookie. In our example, we type the name of the BIG-IP cookie (BIGipServer<Name_of_Pool> by default, so in our example, BIGipServerpps_hcm). You can also add the PeopleSoft cookie, if applicable to your deployment.
You can either modify the Cookie Passphrase or leave it at the default. In our example, we leave it at the default level.
6. In the Compression section, check the Custom box for Content Compression, and leave Content List selected.
7. In the Content List section, add the following items to the existing entries in the Content Type box one at a time, each followed by clicking Include:
• application/pdf
• application/vnd.ms-powerpoint
• application/vnd.ms-excel
• application/msword
• application/vnd.ms-publisher
We add these MIME types to ensure these highly compressible document types are compressed.
8. Modify any of the other settings as applicable for your network. In our example, we leave the settings at their default levels.
9. Click the Finished button.
F5 Deployment Guide 1 - 16

Creating the TCP profiles
The next profiles we create are the TCP profiles. Again, if most of the PeopleSoft users are accessing the portal via a Local Area Network, we recommend using the tcp-lan-optimized (for server-side TCP connections) parent profile. If the majority of the users are accessing the system from remote or home offices, we recommend using an additional TCP profile, called tcp-wan-optimized (for client side TCP connections). In our example, we leave these profiles at their default levels; you can configure any of the options as applicable for your network.
Creating the LAN optimized TCP profile
First we configure the LAN optimized profile. If you are not using version 9.4 or do not want to use this optimized profile, you can choose the default TCP parent profile.
To create a new TCP profile
1. On the Main tab, expand Local Traffic, and then click Profiles.The HTTP Profiles screen opens.
2. On the Menu bar, from the Protocol menu, click tcp.
3. In the upper right portion of the screen, click the Create button. The New TCP Profile screen opens.
4. In the Name box, type a name for this profile. In our example, we type pps-hcm_tcp_lan.
5. From the Parent Profile list, select tcp-lan-optimized if you are using BIG-IP LTM version 9.4 or later; otherwise select tcp.
6. Modify any of the settings as applicable for your network. In our example, we leave the settings at their default levels.
7. Click the Finished button.
Creating the WAN optimized TCP profile
Now we configure the WAN optimized profile. Remember, if most users are accessing the portal via the LAN, you do not need to create this profile.
To create a new TCP WAN optimized profile
1. On the Main tab, expand Local Traffic, and then click Profiles.The HTTP Profiles screen opens.
2. On the Menu bar, from the Protocol menu, click tcp.
3. In the upper right portion of the screen, click the Create button. The New TCP Profile screen opens.
4. In the Name box, type a name for this profile. In our example, we type pps-hcm_tcp_wan.
5. From the Parent Profile list, select tcp-wan-optimized.
1 - 17

Configuring the BIG-IP LTM System with Oracle|PeopleSoft Applications
6. Modify any of the settings as applicable for your network. In our example, we leave the settings at their default levels.
7. Click the Finished button.
Creating a OneConnect profile
The next profile we create is a OneConnect profile. With OneConnect enabled, client requests can utilize existing, server-side connections, thus reducing the number of server-side connections that a server must open to service those requests. This can provide significant performance improvements for PeopleSoft implementations. For more information on OneConnect, see the BIG-IP LTM documentation.
In our example, we leave all the options at their default settings. You can configure these options as appropriate for your network.
To create a new OneConnect profile
1. On the Main tab, expand Local Traffic, and then click Profiles.The HTTP Profiles screen opens.
2. On the Menu bar, from the Other menu, click OneConnect.The Persistence Profiles screen opens.
3. In the upper right portion of the screen, click the Create button. The New HTTP Profile screen opens.
4. In the Name box, type a name for this profile. In our example, we type pps-hcm_oneconnect.
5. From the Parent Profile list, ensure that oneconnect is selected.
6. Modify any of the other settings as applicable for your network. In our example, we leave the settings at their default levels.
7. Click the Finished button.
Creating a persistence profile
The next profile we create is a persistence profile. In our example, we create a cookie persistence profile.
To create a new cookie persistence profile
1. On the Main tab, expand Local Traffic.
2. Click Profiles.The HTTP Profiles screen opens.
3. On the Menu bar, click Persistence.The Persistence Profiles screen opens.
4. In the upper right portion of the screen, click the Create button. The New Persistence Profile screen opens.
F5 Deployment Guide 1 - 18
5. In the Name box, type a name for this profile. In our example, we type pps-hcm_cookie.
6. From the Persistence Type list, select Cookie.The configuration options for cookie persistence appear.
7. Modify any of the settings as applicable for your network. In our example, we leave the options at the default levels.
8. Click the Finished button.
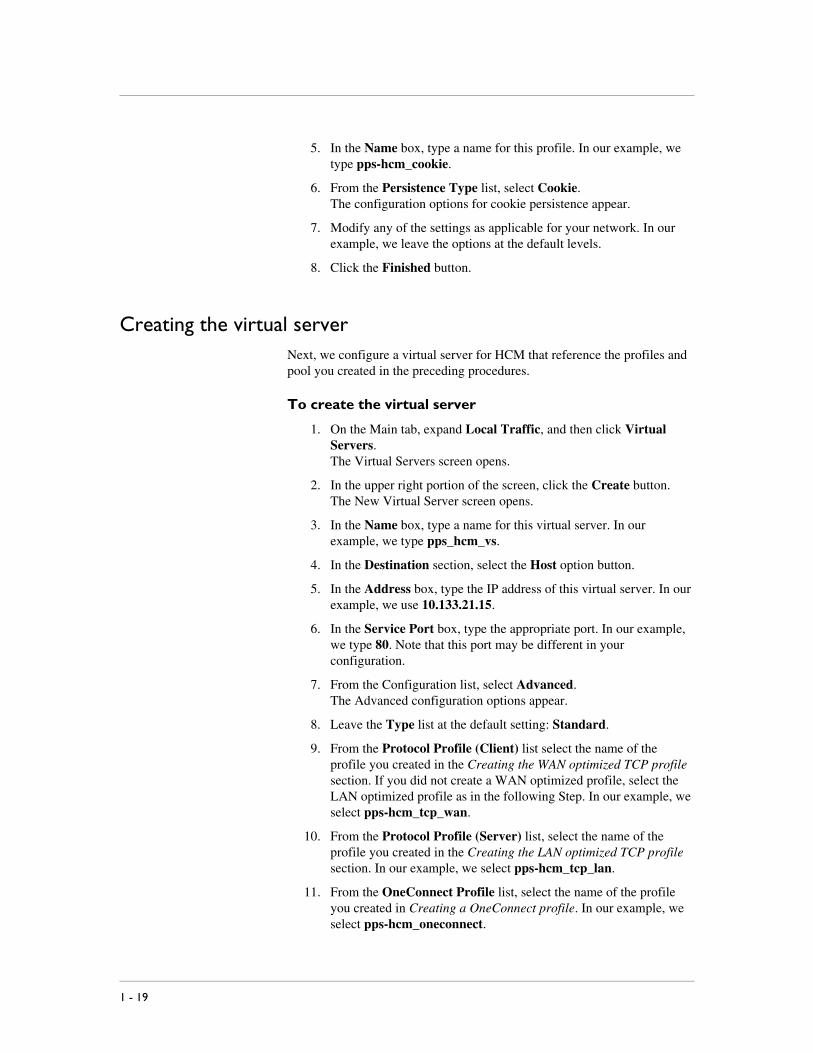
Creating the virtual serverNext, we configure a virtual server for HCM that reference the profiles and pool you created in the preceding procedures.
To create the virtual server
1. On the Main tab, expand Local Traffic, and then click Virtual Servers.The Virtual Servers screen opens.
2. In the upper right portion of the screen, click the Create button. The New Virtual Server screen opens.
3. In the Name box, type a name for this virtual server. In our example, we type pps_hcm_vs.
4. In the Destination section, select the Host option button.
5. In the Address box, type the IP address of this virtual server. In our example, we use 10.133.21.15.
6. In the Service Port box, type the appropriate port. In our example, we type 80. Note that this port may be different in your configuration.
7. From the Configuration list, select Advanced.The Advanced configuration options appear.
8. Leave the Type list at the default setting: Standard.
9. From the Protocol Profile (Client) list select the name of the profile you created in the Creating the WAN optimized TCP profile section. If you did not create a WAN optimized profile, select the LAN optimized profile as in the following Step. In our example, we select pps-hcm_tcp_wan.
10. From the Protocol Profile (Server) list, select the name of the profile you created in the Creating the LAN optimized TCP profile section. In our example, we select pps-hcm_tcp_lan.
11. From the OneConnect Profile list, select the name of the profile you created in Creating a OneConnect profile. In our example, we select pps-hcm_oneconnect.
1 - 19

Configuring the BIG-IP LTM System with Oracle|PeopleSoft Applications
12. From the HTTP Profile list, select the name of the profile you created in the Creating an HTTP profile section. In our example, we select pps_hcm_http.
13. In the Resources section, from the Default Pool list, select the pool you created in the Creating the pool section. In our example, we select pps_hcm.
14. From the Default Persistence Profile list, select the profile you created in the Creating a persistence profile section. In our example, we select pps-hcm_cookie.
15. Click the Finished button.
Creating a default SNAT If you are using a one arm configuration, or if your network topology requires it, the final procedure is to create a default SNAT (secure network translation). For more information on SNATs, see the BIG-IP LTM documentation.
To create a default SNAT
1. On the Main tab, expand Local Traffic, and then click SNATs.The SNATs screen opens.
2. In the upper right portion of the screen, click the Create button. The New SNAT screen opens.
3. In the Name box, type a name for this SNAT. In our example, we type ppsSNAT.
4. In the Translation list, select Automap. With Automap, the BIG-IP LTM system maps one or more client IP addresses using all system self IP addresses as the translation addresses. For more information on SNAT or SNAT Automap, see the BIG-IP LTM manuals.
5. Optional: If you to disable (or enable) the default SNAT for specific VLANs, from the VLAN Traffic list, select either Enabled on or Disabled on from the list. From the Available list, select the appropriate VLAN and click the Add (<<) button to move it to the Selected list.
6. Click the Finished button.
The configuration for the PeopleSoft HCM is now complete. Repeat this section for any additional PeopleSoft applications you may be using.
F5 Deployment Guide 1 - 20

Configuring the BIG-IP LTM system for offloading SSL from the PeopleSoft Web tier
The BIG-IP LTM device can be configured as an SSL proxy, offloading the SSL duties from the PeopleSoft deployment. The configuration procedures in this section require that you have already completed the previous sections for non-SSL traffic.
This section is optional, and only necessary if you are using the BIG-IP LTM system for offloading SSL.
WARNING
This configuration currently only covers offloading SSL from the PeopleSoft Web tier. You should continue to configure your PeopleSoft Application Tier to natively support SSL according to the default instructions listed in the PeopleSoft PeopleTools Installation guide.
Configuring PeopleSoft for SSL offloadThe following procedure contains information on how to configure your PeopleSoft deployment to allow the BIG-IP LTM system to offload SSL processing. For more information about configuring PeopleSoft, see the appropriate documentation.
To configure PeopleSoft to allow SSL offload
1. Log onto the PeopleSoft Application as an administrator. In our example, we log onto the PeopleSoft Enterprise Portal.
2. From the left navigation pane, expand PeopleTools, and then click Web Profile.
3. Click Web Profile Configuration.
4. Find and open the appropriate Web Profile using the search.
1 - 21

Configuring the BIG-IP LTM System with Oracle|PeopleSoft Applications
5. Click the Security tab.
Figure 1.9 The PeopleSoft Web Profile
6. Click a check in the PIA use HTTP Same Server box.
Figure 1.10 Selecting PIA use HTTP Same Server
7. Click the Virtual Addressing tab.
8. In the Protocol box, type https.
F5 Deployment Guide 1 - 22

9. In the Name box, type the name that your DNS resolves to the IP address of the BIG-IP LTM Virtual Server. Make sure this field is consistent with the Authentication Domain configured in the PeopleTools-Web Profile General page.
10. In the Port box, type 443, and then click the Save button.
Figure 1.11 Configuring the Virtual Addressing
Connecting to the BIG-IP LTM systemUse the following procedure to access the BIG-IP Configuration utility using a web browser.
To connect to the BIG-IP system
1. In a browser, type the following URL:https://<administrative IP address of the BIG-IP device>A Security Alert dialog box appears, click Yes.The authentication dialog box appears.
2. Type your user name and password, and click OK. The Welcome screen opens.
Using SSL certificates and keysBefore you can enable the BIG-IP system to act as an SSL proxy, you must install a SSL certificate on the virtual server that you wish to use for PeopleSoft connections on the BIG-IP device. For this Deployment Guide, we assume that you already have obtained an SSL certificate, but it is not yet installed on the BIG-IP system. For information on generating certificates, or using the BIG-IP system to generate a request for a new certificate and key from a certificate authority, see the Managing SSL Traffic chapter in the Configuration Guide for Local Traffic Management.
1 - 23

Configuring the BIG-IP LTM System with Oracle|PeopleSoft Applications
Importing keys and certificates
Once you have obtained a certificate, you can import this certificate into the BIG-IP system using the Configuration utility. By importing a certificate or archive into the Configuration utility, you ease the task of managing that certificate or archive. You can use the Import SSL Certificates and Keys screen only when the certificate you are importing is in Privacy Enhanced Mail (PEM) format.
To import a key or certificate
1. On the Main tab, expand Local Traffic.
2. Click SSL Certificates.This displays the list of existing certificates.
3. In the upper right corner of the screen, click Import.
4. From the Import list, select the type of import (Key or Certificate).
5. Select the import method (text or file).
6. Type the name of the key or certificate.
7. Click Import.
If you imported the certificate in the preceding procedure, repeat the entire procedure for the key.
Creating additional profilesWhen using the BIG-IP LTM system to offload SSL traffic, you need to create two additional profiles. The first is a new Client SSL profile, and the second is a slightly modified HTTP profile that instructs the PeopleSoft devices to respond with the appropriate content, and directs the BIG-IP LTM system to rewrite the URI in all HTTP redirect responses.
In the examples below, we configure the BIG-IP LTM system for offloading SSL from the PeopleSoft Enterprise Portal devices. You can repeat the procedures for other PeopleSoft applications.
Creating a Client SSL profile
The first new profile we create is the SSL profile. This profile contains the SSL certificate and Key information for offloading the SSL traffic.
To create a new Client SSL profile
1. On the Main tab, expand Local Traffic.
2. Click Profiles.The HTTP Profiles screen opens.
3. On the Menu bar, from the SSL menu, select Client.The Client SSL Profiles screen opens.
F5 Deployment Guide 1 - 24

4. In the upper right portion of the screen, click the Create button. The New Client SSL Profile screen opens.
5. In the Name box, type a name for this profile. In our example, we type pps_portal_clientssl.
6. In the Configuration section, click a check in the Certificate and Key Custom boxes.
7. From the Certificate list, select the name of the Certificate you imported in the Importing keys and certificates section.
8. From the Key list, select the key you imported in the Importing keys and certificates section.
9. Click the Finished button.
For more information on creating or modifying profiles, or SSL Certificates, see the BIG-IP documentation.
Creating the new HTTP profile
The next profile is a new HTTP profile that contains the necessary client header, along with a rewrite/redirect setting to ensure users are properly redirected to HTTPS. If you are offloading SSL from other PeopleSoft applications, you must have an HTTP profile with the settings in the following procedure for each PeopleSoft virtual server that will be offloading SSL.
If you have already created an HTTP profile as described earlier in this guide, you can either create a new profile, or modify the existing profile with the modifications found in the following procedure.
To create a new HTTP profile for SSL
1. On the Main tab, expand Local Traffic, and then click Profiles.The HTTP Profiles screen opens.
2. In the upper right portion of the screen, click the Create button. The New HTTP Profile screen opens.
3. In the Name box, type a name for this profile. In our example, we type pps_ssl.
4. From the Parent Profile list, ensure that HTTP is selected.
5. In the Redirect Rewrite row, click a check in the Custom box. From the list, select Matching.
6. Optional: In the Encrypt Cookies row, click a check in the Custom box. Type the name of the cookies you want to encrypt, with a space between each cookie. In our example, we type the name of the BIG-IP cookie (BIGipServer<Name_of_Pool> by default, so in our example, BIGipServerpps_portal). You can also add the PeopleSoft cookie, if applicable to your deployment.
1 - 25

Configuring the BIG-IP LTM System with Oracle|PeopleSoft Applications
You can either modify the Cookie Passphrase or leave it at the default. In our example, we leave it at the default level.
7. Modify any of the other settings as applicable for your network. In our example, we leave the settings at their default levels.
8. Click the Finished button.
For more information on creating or modifying profiles, or applying profiles in general, see the BIG-IP documentation.
Creating the Redirect iRule The next step is to create an iRule that redirects all traffic to same host name (stripping port if it exists), same URI over HTTPS. This iRule is essentially a safety net; it catches the traffic that incorrectly comes in on HTTP and redirects it to HTTPS. This ensures that SSL traffic remains on the virtual server that supports the traffic. The iRule will be applied to the HTTP virtual server where required.
To create the redirect iRule
1. On the Main tab, expand Local Traffic, and then click iRules.
2. In the upper right portion of the screen, click the Create button. The New iRule screen opens.
3. In the Name box, enter a name for your iRule. In our example, we use pps_httptohttps.
4. In the Definition section, copy and paste the following iRule:
when HTTP_REQUEST {
HTTP::redirect https://[getfield [HTTP::host] ":" 1][HTTP::uri]
}
5. Click the Finished button.
Figure 1.12 Creating the redirect iRule
F5 Deployment Guide 1 - 26

The iRule is now complete. You use this iRule when you modify the existing PeopleSoft HTTP virtual server in Modifying the PeopleSoft HTTP virtual server, on page 1-28.
Creating an HTTPS virtual serverThe next step is to create a virtual server for the SSL offload that will use the Client SSL profile you just created. The example virtual server is for PeopleSoft Enterprise Portal.
To create a new HTTPS virtual server
1. On the Main tab, expand Local Traffic, and then click Virtual Servers.The Virtual Servers screen opens.
2. In the upper right portion of the screen, click the Create button. The New Virtual Server screen opens.
3. In the Name box, type a name for this virtual server. In our example, we type pps_portal_ssl.
4. In the Destination section, select the Host option button.
5. In the Address box, type the IP address of this virtual server. In our example, we use 10.133.21.15.
6. In the Service Port box, type 443, or select HTTPS from the list.
7. From the Configuration list, select Advanced.The Advanced configuration options appear.
8. From the Protocol Profile (Client) list select the name of the profile you created in the Creating the WAN optimized TCP profile section. In our example, we select pps_tcp_wan.
9. From the Protocol Profile (Server) list, select the name of the profile you created in the Creating the LAN optimized TCP profile section. In our example, we select pps_tcp_lan.
10. From the OneConnect Profile list, select the name of the profile you created in Creating a OneConnect profile. In our example, we select pps_oneconnect.
11. From the HTTP Profile list, select the name of the profile you created in the Creating the new HTTP profile section. In our example, we select pps_ssl.
12. From SSL Profile (Client) list, select the name of the profile you created in the Creating a Client SSL profile section. In our example we select pps_portal_clientssl.
13. In the Resources section, from the Default Pool list, select the pool you created for your PeopleSoft Enterprise Portal nodes in the Creating a pool section. In our example, we select pps_portal.
1 - 27

Configuring the BIG-IP LTM System with Oracle|PeopleSoft Applications
14. From the Default Persistence Profile list, select the persistence profile you created in the Creating a persistence profile section. In our example, we select pps_cookie.
15. Click the Finished button.
Modifying the PeopleSoft HTTP virtual serverIn this procedure, we modify the PeopleSoft HTTP virtual server to use the iRule instead of the pool (in our example, the Enterprise Portal virtual server created in Creating the virtual server, on page 1-11). This iRule is in place to ensure that any accidental requests to port 80 are redirected to the SSL virtual server.
To modify the Enterprise Portal virtual server to use the iRule
1. On the Main tab, expand Local Traffic, and then click Virtual Servers. The Virtual Servers screen opens.
2. From the list, click the virtual server you created in Creating the virtual server, on page 1-11. In our example, we click pps_portal_http. The Virtual Server properties page opens.
3. On the Menu bar, click Resources.
4. In the iRules section, click the Manage button.The iRules Resource Management screen opens.
5. From the Available list, select the iRule you created in the Creating the Redirect iRule section, and click the Add (<<) button. In our example, we select pps_httptohttps.
6. Click the Finished button.You return to the Resources page.
7. From the Default Pool list, select None.
8. Click the Update button.
Figure 1.13 Modifying the virtual server to use the iRule and not the pool.
F5 Deployment Guide 1 - 28

This concludes the steps necessary to use the BIG-IP LTM system to offload SSL traffic.
Synchronizing the BIG-IP configuration if using a redundant systemIf you are using a redundant BIG-IP configuration, the final step is to synchronize the configuration to the peer BIG-IP device.
To synchronize the configuration using the Configuration utility
1. On the Main tab, expand System.
2. Click High Availability.The Redundancy screen opens.
3. On the Menu bar, click ConfigSync.
4. Click the Self --> Peer button.The configuration synchronizes with its peer.
1 - 29

Configuring the BIG-IP LTM System with Oracle|PeopleSoft Applications
Appendix A: Backing up and restoring the BIG-IP system configuration
We recommend saving your BIG-IP configuration before you begin this configuration. When you save the BIG-IP configuration, it collects the following critical data and compress it into a single User Configuration Set (UCS) file:
• BIG-IP configuration files
• BIG-IP license and passwords
• SSL certificates
• SSH keys
Saving and restoring the BIG-IP configuration The Configuration Management screen allows you to save and restore all configuration files that you may edit to configure a BIG-IP system. These configuration files are called a User Configuration Set (UCS). The Configuration Management screen contains sections for saving and restoring a configuration. The list boxes in these sections display only files in the /usr/local/ucs directory. If you want to save or restore files from another directory, you must type the full path in the box.
To save the BIG-IP configuration using the Configuration utility
1. In the navigation pane, click System Admin.The User Administration screen displays.
2. Click the Configuration Management tab.The Configuration Management screen displays.
3. In the Save Current Configuration section, type the path where you want your configuration file saved or choose a path from the list box. If no path is specified, the BIG-IP saves files to /usr/local/ucs. The BIG-IP appends the extension.ucs to file names without it. In our example, we type pre_pps_backup.ucs.
4. Click the Save button to save the configuration file.
To restore a BIG-IP configuration
1. In the navigation pane, click System Admin.The User Administration screen displays.
2. Click the Configuration Management tab.The Configuration Management screen displays.
F5 Deployment Guide 1 - 30

3. In the Restore a Configuration section, choose the configuration file you want to restore from the list box, or type the path where your configuration files were saved.
4. Click the Restore button. To check the status of the restoration, click the View Log button. You should wait a few moments for the log file to start generating before you click View Log. Repeated clicking of this button will update your screen with the most current log file information until the restoration is complete.
1 - 31

2
Configuring the BIG-IP WebAccelerator module for accelerating PeopleSoft
• Configuring the WebAccelerator module
• Creating an HTTP Class profile
• Modifying the Virtual Server to use the Class profile
• Creating an Application

Configuring the BIG-IP WebAccelerator module for accelerating PeopleSoft applications
Important
The following procedures are optional, and only applicable if you have purchased and licensed the WebAccelerator module on the BIG-IP LTM system.
F5 WebAccelerator module is an advanced web application delivery solution that provides a series of intelligent technologies designed to overcome problems with browsers, web application platforms and WAN latency issues which impact user performance.
To configure the WebAccelerator module, you must create an HTTP Class profile, modify the virtual server to use this profile, and create an Application on the WebAccelerator module.
Prerequisites and configuration notesThe following are prerequisites for this section:
◆ We assume that you have already configured the BIG-IP LTM system for directing traffic to the PeopleSoft devices as described in Chapter 1 of this Deployment Guide.
◆ You must have purchased and licensed the WebAccelerator module on the BIG-IP LTM system, version 9.4 or later.
◆ If you are using the BIG-IP LTM version 9.4.2 or later, you must have created an HTTP profile on the BIG-IP LTM system that has RAM Cache enabled. In our example (Creating an HTTP profile, on page 1-7) we use a parent profile that includes RAM Cache. If you did not create an HTTP profile with RAM Cache enabled, you must create a new HTTP profile, based on a parent profile that uses RAM Cache (we recommend HTTP Acceleration) and associate it with the virtual server. This is only required for BIG-IP LTM version 9.4.2 and later.
◆ This document is written with the assumption that you are familiar with the BIG-IP LTM system, WebAccelerator and PeopleSoft applications. Consult the appropriate documentation for detailed information.
Configuration exampleUsing the configuration in this section, the BIG-IP LTM system with WebAccelerator module is optimally configured to accelerate traffic to PeopleSoft devices. The BIG-IP LTM with WebAccelerator module both increases end user performance as well as offloads the servers from serving repetitive and duplicate content.
2 - 1

Configuring the BIG-IP WebAccelerator module for accelerating PeopleSoft
In this configuration, a remote client with WAN latency accesses PeopleSoft via the WebAccelerator. The user’s request is accelerated on repeat visits by the WebAccelerator instructing the browser to use the dynamic or static object that is stored in its local cache. Additionally, dynamic and static objects are cached at the WebAccelerator so that they can be served quickly without requiring the server to re-serve the same objects.
For a visual representation, see Figure 1.1 on page 1-2.
Configuring the WebAccelerator moduleConfiguring the WebAccelerator module requires creating an HTTP class profile, creating an Application, and modifying the BIG-IP LTM virtual server to use the HTTP class. The WebAccelerator device has a large number of other features and options for fine tuning performance gains, see the WebAccelerator Administrator Guide for more information.
Creating an HTTP Class profileThe first procedure is to create an HTTP class profile. When incoming HTTP traffic matches the criteria you specify in the WebAccelerator class, the system diverts the traffic through this class. In the following example, we create a new HTTP class profile, based on the default profile.
To create a new HTTP class profile
1. On the Main tab, expand WebAccelerator, and then click Classes.The HTTP Class Profiles screen opens.
2. In the upper right portion of the screen, click the Create button. The New HTTP Class Profile screen opens.
3. In the Name box, type a name for this Class. In our example, we type peoplesoft-class.
4. From the Parent Profile list, make sure httpclass is selected.If you are using BIG-IP LTM 9.4.2 or later, you must select
5. In the Configuration section, from the WebAccelerator row, make sure Enabled is selected.
6. In the Hosts row, from the list select Match Only. The Host List options appear.
a) In the Host box, type the domain name (FQDN) of your PeopleSoft virtual server. In our example, we type peoplesoftportal.f5net.com (see Figure 2.1). Note: This is not the name of the BIG-IP LTM virtual server, but the name that resolves to the virtual server in DNS.
b) Leave the Entry Type at Pattern String.
c) Click the Add button.
F5 Deployment Guide 2 - 2

d) Repeat these sub-steps to add other host names if applicable.
7. The rest of the settings are optional, configure them as applicable for your deployment.
8. Click the Finished button. The new HTTP class is added to the list.
Figure 2.1 Creating a new HTTP Class profile
Modifying the Virtual Server to use the Class profileThe next step is to modify the virtual server on the BIG-IP LTM system to use the HTTP Class profile you just created.
To modify the Virtual Server to use the Class profile
1. On the Main tab, expand Local Traffic, and then click Virtual Servers. The Virtual Servers screen opens.
2. From the Virtual Server list, click the name of the virtual server you created for the PeopleSoft Portal in Creating the virtual server, on page 1-11. In our example, we click pps_portal_http.The General Properties screen for the Virtual Server opens.
2 - 3

Configuring the BIG-IP WebAccelerator module for accelerating PeopleSoft
3. On the Menu bar, click Resources.The Resources screen for the Virtual Server opens.
4. In the HTTP Class Profiles section, click the Manage button.
5. From the Available list, select the name of the HTTP Class Profile you created in the preceding procedure, and click the Add (<<) button to move it to the Enabled box. In our example, we select peoplesoft-class (see Figure 2.2).
6. Click the Finished button. The HTTP Class Profile is now associated with the Virtual Server.
Figure 2.2 Adding the HTTP Class Profile to the Virtual Server
Important
If you are using the BIG-IP LTM version 9.4.2 or later, you must have created an HTTP profile on the BIG-IP LTM system that has RAM Cache enabled. In our example (Creating an HTTP profile, on page 1-7) we use a parent profile that includes RAM Cache. If you did not create an HTTP profile with RAM Cache enabled, you must create a new HTTP profile, based on a parent profile that uses RAM Cache (such as HTTP Acceleration), and modify the virtual server to use this new profile. This is only required for BIG-IP LTM version 9.4.2 and later.
To create the HTTP profile, use Creating an HTTP profile, on page 1-7, selecting the HTTP Acceleration parent profile. You must leave RAM Cache enabled; all other settings are optional. To modify the virtual server, follow Steps 1 and 2 from the preceding procedure to access the virtual server, and then from the HTTP Profile list, select the name of the new profile you just created and click Update.
Creating an ApplicationThe next procedure is to create a WebAccelerator Application. The Application provides key information to the WebAccelerator so that it can handle requests to your application appropriately.
F5 Deployment Guide 2 - 4

To create a new Application
1. On the Main tab, expand WebAccelerator, and then click Applications.The Application screen of the WebAccelerator UI opens in a new window.
2. Click the New Application button.
3. In the Application Name box, type a name for your application. In our example, we type PeopleSoft portal.
4. In the Description box, you can optionally type a description for this application.
5. From the Local Policies list, select Oracle PeopleSoft. This is a pre-defined policy created specifically for PeopleSoft devices.
6. In the Requested Host box, type the domain name (FQDN) of your Oracle Portal virtual server. In our example, we type peoplesoftportal.f5net.com. This should be the same host name you used in Step 6a in the Creating an HTTP Class profile procedure.
7. If you have any additional Hosts, click the Add Host button and enter the domain name in the Requested Host box.
8. Click the Save button.
Figure 2.3 Configuring an Application on the WebAccelerator
The rest of the configuration options on the WebAccelerator are optional, configure these as applicable for your network. With this base configuration, your end users will notice an marked improvement in performance after their first visit.
2 - 5

3
Deploying the FirePass controller with PeopleSoft Applications
• Configuring the FirePass controller for deployment with PeopleSoft
• Creating groups on the FirePass controller
• Limiting access for the Partner group
• Configuring Endpoint security

Deploying the FirePass controller with PeopleSoft applications
This section of the Deployment Guide shows you how to configure F5’s FirePass controller for secure remote access to PeopleSoft deployments.
F5’s FirePass® controller is the industry leading SSL VPN solution that enables organizations of any size to provide ubiquitous secure access for employees, partners and customers to applications such as PeopleSoft Portal, while significantly lowering support costs associated with legacy client-based VPN solutions.
For more information on the FirePass controller, see http://www.f5.com/products/FirePass/.
Prerequisites and configuration notesThe following are prerequisites for this deployment:
◆ The FirePass controller should be running version 6.0 or later.
◆ The PeopleSoft deployment should be running PeopleSoft 8 or 9.
◆ This deployment was tested with PeopleSoft load balanced by a BIG-IP LTM system as described in this Deployment Guide.
◆ This configuration uses previously defined Oracle Internet Directory (OID) accounts. For information on how to configure OID, consult the Oracle documentation.
◆ This Deployment Guide contains procedures for using LDAP (OID) authentication only. There are other authentication methods you can use with the FirePass controller; choose the one most applicable to your configuration.
◆ This Deployment Guide is written with the assumption that PeopleSoft has delegated authentication to an external directory. Otherwise, the FirePass can only allow Network Access. For more information about Network Access, see the FirePass documentation or the online help.
◆ This Deployment Guide is written to the scenario outlined in the following section. It is meant to be a template; modify the configuration as necessary for your deployment.
Configuration scenarioFor the scenario used in this Deployment Guide, the PeopleSoft deployment, along with an OID instance, resides behind a BIG-IP LTM system. There is a requirement to allow employees remote access to all internal resources using the FirePass device. There is also a requirement for trusted partners to access the PeopleSoft deployment, although only to a limited subset of the portal, with no other access.
3 - 1

Deploying the FirePass controller with PeopleSoft Applications
This Deployment Guide describes how to configure the FirePass controller to allow secure remote access to the PeopleSoft device(s), using OID for authentication, and how to configure the FirePass to give one group of users full access, and restrict users in the partner group to a certain directory. This guide also contains procedures on configuring some endpoint security features, including antivirus checks. For a visual representation of the deployment, see Figure 1.1 on page 1-2.
Configuring the FirePass controller for deployment with PeopleSoft
To configure the FirePass controller for allowing secure remote access to the PeopleSoft deployment, you need to complete the following procedures:
• Connecting to the FirePass controller
• Creating groups on the FirePass controller
• Limiting access for the Partner group
• Configuring Endpoint security
Connecting to the FirePass controllerTo perform the procedures in this Deployment Guide you must have administrative access to the FirePass controller.
To access the Administrative console, in a browser, type the URL of the FirePass controller followed by /admin/, and log in with the administrator’s user name and password.
Once you are logged on as an administrator, the Device Management screen of the Configuration utility opens. From here, you can configure and monitor the FirePass controller.
Creating groups on the FirePass controllerIn this configuration, we configure two types of groups on the FirePass controller, Resource and Master groups. Master groups contain user information, including details about authentication methods. Resource groups contain information about applications (resources) that are available to FirePass controller users.
Creating the Resource groups
Resource groups allow you to preconfigure specific applications and access by group, and assign the group to a master group or an individual user. For this configuration, we create two resource groups, one for employees and one for partners, in order to create different access levels to the PeopleSoft servers.
F5 Deployment Guide 3 - 2

To configure a resource group
1. From the navigation pane, click Users, expand Groups, and then click Resource Groups.
2. Click the Create new group button.The Group Management - Create New Group screen opens.
3. In the New group name box, type a name for your group and click the Create button. In our example we type employees-peoplesoft. The new group appears on the Resource Groups table.
4. From the Resource Groups table, find the row with the name of the group you just created. In this row, from the Portal access column, click Edit (see Figure 3.1). The Web Applications section of the Resource Group page opens.
Figure 3.1 The Resource groups table
5. Under Web Application Favorites, click Add New Favorite. The Favorite options display.
6. Type a name for the Favorite. In our example, we type PeopleSoft Portal - Employee. This Favorite link only displays for members of the Employee group.
7. In the URL box, type the URL used to access the appropriate PeopleSoft Server (such as Portal). If you are using a BIG-IP LTM system in front of the PeopleSoft deployment, this URL should resolve to the PeopleSoft virtual server address in DNS. In our example, we type https://portal.ps.tc.f5net.com/psp/ps/EMPLOYEE/EMPL/h/?tab=DEFAULT.
8. Click the Add to allow list link to the right of the URL box. This adds the URL to the list of URLs the users are allowed to access.
9. Configure the rest of the settings as applicable to your deployment.
10. Click the Add New button. The new Favorite is added to the list (see Figure 3.2).
3 - 3

Deploying the FirePass controller with PeopleSoft Applications
Figure 3.2 Adding a Web Application Favorite to the Employee group
11. Repeat this entire procedure for the Partner resource group, typing appropriate names for the group and the Favorite. In our example, we type partners-peoplesoft for the Resource Group name, and PeopleSoft Portal - Partners for the Favorite name.
In Step 7, type the path to the appropriate section of the PeopleSoft deployment that Partners are entitled to access. For example, the employee Favorite might point to
https://portal.ps.tc.f5net.com/psp/ps/EMPLOYEE/EMPL/h/?tab=DEFAULT
while the partner Favorite would point to
https://portal.ps.tc.f5net.com/psp/ps/EMPLOYEE/EMPL/h/?tab=PAPP_GUEST.
Creating the Master groups
FirePass controller master groups are composed of users, authentication methods, and security and policy information. The next task is to create Master groups that will use the resource groups we just created.
To create a new Master Group
1. From the navigation pane, click Users, and expand Groups.The Master Groups list screen opens.
F5 Deployment Guide 3 - 4
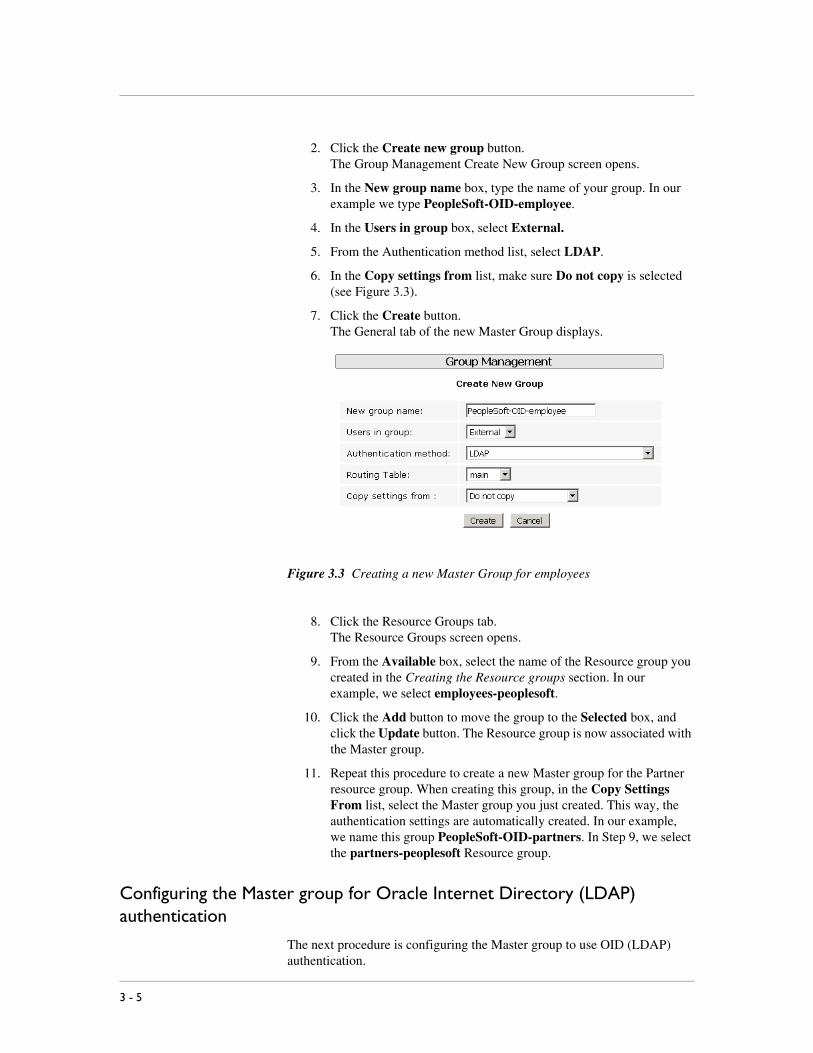
2. Click the Create new group button.The Group Management Create New Group screen opens.
3. In the New group name box, type the name of your group. In our example we type PeopleSoft-OID-employee.
4. In the Users in group box, select External.
5. From the Authentication method list, select LDAP.
6. In the Copy settings from list, make sure Do not copy is selected (see Figure 3.3).
7. Click the Create button.The General tab of the new Master Group displays.
Figure 3.3 Creating a new Master Group for employees
8. Click the Resource Groups tab.The Resource Groups screen opens.
9. From the Available box, select the name of the Resource group you created in the Creating the Resource groups section. In our example, we select employees-peoplesoft.
10. Click the Add button to move the group to the Selected box, and click the Update button. The Resource group is now associated with the Master group.
11. Repeat this procedure to create a new Master group for the Partner resource group. When creating this group, in the Copy Settings From list, select the Master group you just created. This way, the authentication settings are automatically created. In our example, we name this group PeopleSoft-OID-partners. In Step 9, we select the partners-peoplesoft Resource group.
Configuring the Master group for Oracle Internet Directory (LDAP) authentication
The next procedure is configuring the Master group to use OID (LDAP) authentication.
3 - 5

Deploying the FirePass controller with PeopleSoft Applications
To configure the FirePass Master group to use LDAP authentication
1. From the navigation pane, click Users, expand Groups, and then click Master Groups.
2. Click the name of the Master group you created in the Creating the Master groups section. In our example, we select PeopleSoft-OID-employee.
3. Click the Authentication tab.The LDAP Authentication tab opens.
4. In the Host box, type the host name of your Oracle OID server. In our example, we type oid.ps.tc.f5net.com.
5. In the Port box, type the port for the Oracle OID server. In our example we type 636.
6. Check the Use SSL connection box. If you are not using SSL, the port in the preceding Step may be 389.
7. In the User DN using template box, type the user DN template. In our example, we type:
cn=%logon%,cn=users,dc=oraclearn,dc=tc,dc=f5net,dc=com
8. You can optionally click Test to test the OID authentication.
9. Click the Save Settings button (see Figure 3.4).
10. Repeat this procedure for the peoplesoft-OID-partners group.
F5 Deployment Guide 3 - 6

Figure 3.4 Configuring the Authentication settings
Limiting access for the Partner groupThe FirePass controller allows you to limit access for specific groups on a very granular level. In this scenario, we limit access for the Partner group to only the Favorite we configured earlier, as well as restricting the areas of PeopleSoft deployment they can access by URL.
To limit access for the Partner group
1. From the navigation pane, click Portal Access.
2. Under Web Applications, click Master Group Settings.
3. From the Master Group list at the top of the page, select the Master Group you created in the Creating the Master groups section. In our example, we select PeopleSoft-OID-partners.The configuration settings for the Master group open.
4. In the Access limitation section, make sure there is a check in the Show administrator-defined favorites only box.
3 - 7

Deploying the FirePass controller with PeopleSoft Applications
5. In the Access Control Lists section, configure URL pattern matches to allow and deny based on your deployment. In our example, we type the following (separated by commas) in the Allow box to restrict the Partner group to these areas of our PeopleSoft deployment:
https://portal.ps.tc.f5net.com/psp/ps/EMPLOYEE/EMPL/h/?tab=PAPP_GUEST
https://portal.ps.tc.f5net.com/psp/ps/EMPLOYEE/EMPL/h/?tab=PAPP_GUEST
http://login.ps.tc.f5net.com/*
https://login.ps.tc.f5net.com/*
6. We leave the Deny box blank, which allows access to all URLs that pass the allow test (see Figure 3.5). The FirePass checks the deny list, then looks for matches in the allow list, then takes the default action. For more information on configuring the Access Control section, see the online help.
7. Click the Update button. The new settings take effect after any users currently logged onto the FirePass controller log out.
Figure 3.5 Restricting access to the PeopleSoft deployment
Configuring Endpoint securityOne of the strong security features of the FirePass controller is the ability to set endpoint security on a extremely granular level.
F5 Deployment Guide 3 - 8

In the following procedures, we configure a pre-logon check for anti-virus software on Windows machines. The FirePass controller uses this information to deny PeopleSoft access for members of the Partner Resource group if they do not have the appropriate software. In this configuration example, the FirePass device also denies access to any client that is determined to have a virus.
For more information on endpoint security, see the online help.
Creating a pre-logon sequence
The pre-logon sequence allows administrators to create one or more sequences of inspections for items such as installed antivirus programs or OS patch levels.
To configure a pre-logon sequence
1. From the navigation pane, click Users, expand Endpoint Security, and click Pre-Logon Sequence.
2. In the New Sequence section at the bottom of the page, type a name for the sequence in the Create New Sequence box. In our example, we type PeopleSoftBasic.
3. From the Based on list, select template: Collect information with no pre-logon actions.
4. Click the Create button.The new sequence appears in the Select Sequence to Use table.
5. In the row of the sequence you just created, click the Edit button.Warning - Do not click the radio button next to the sequence yet. If you click the radio button, the Edit link will be replaced with the View link, and you are not able to edit the sequence.
The Pre-Logon Sequence Editor opens.
6. Move the curser between Sequence Start and the box. A small add [+] link appears on the arrow (see the circle marked 1 in Figure 3.6). Click Add.The Change Sequence panel appears on the right.
7. Click the Check for Antiviruses option button, and click the Apply Changes button.The Edit Action panel opens.
Note: The Check for Antiviruses is an optional feature on the FirePass controller. If your device does not have this license, you will not see this option.
8. Under Inspectors, click Windows Antivirus Checker.The Endpoint Inspector Details page opens in a new window.
9. Configure these options as applicable for your deployment. For more information, click Help.
10. Click the Update button.
3 - 9

Deploying the FirePass controller with PeopleSoft Applications
11. In the Sequence pane, find AV installed, and click the associated Logon Denied Page link (see the circle marked 2 in Figure 3.6).The End Page Properties pane appears on the right.
12. From the Type box, select Logon Allowed Page. This allows a user to logon if they have an antivirus checker installed. You can optionally type a message for failed logons.
13. Repeat steps 11 and 12 for the Fallback option.
14. Optional: You can click the Logon Allowed Page or Logon Denied Page links for the other options to produce a custom message when a user is denied access. You can also change the actions taken as a result of the virus checker’s findings. For example, you might still want to allow a user to login if there is virus checking software installed, but not currently running.
In our example, we click Logon Denied Page next to Virus Detected, and type a message informing the user there is a virus on their computer.
15. When you are finished, click Back to Console in the upper right corner of the screen (see the circle marked 3 in the following figure).You return to the Pre-Logon Sequence main page.
Figure 3.6 The Pre-Logon Sequence Editor
16. From the Select Sequence to Use section, click the option button next to the sequence you just created. In our example, we click PeopleSoftBasic.
17. Click the Apply button.
3
1
2
F5 Deployment Guide 3 - 10

Protected Configurations
Protected Configurations allow administrators to specify the criteria the endpoint systems must meet to enable access to the various resources. In this procedure, we create a protected configuration for the partner group in order make additional security requirements for that group.
To configure Protected Configurations
1. From the navigation pane, click Users, expand Endpoint Security, and click Protected Configurations.
2. Click New Protection Configuration.
3. In the Protected configuration ID box, type a name for this configuration. In our example, we type Partner_config. You can optionally type a description.
4. Leave the Mode list at the default setting, Check endpoint protection, grant access if check passed (see Figure 3.7).
Figure 3.7 The General tab of the Protected Endpoint Configuration screen
5. Click the Protected Criteria tab.
6. On the menu bar, click Information Leaks.
3 - 11

Deploying the FirePass controller with PeopleSoft Applications
7. From the Required safety measures or checks list, select Cache Cleaner and click the Add button. This will remove content from the cache when a user logs off.
Figure 3.8 The Protection Criteria tab of the Protected Endpoint Configuration screen
Important: The Cache Cleaner feature is currently Windows only. It does not work with Apple Macintosh or Linux systems.
8. On the menu bar, click Virus Attack
9. From the list, select Antivirus and click the Add button.
10. Click the I icon next to Antivirus to configure the antivirus properties (see Figure 3.9). The Select trusted anti-viruses screen opens. Configure these properties as applicable for your configuration, and click the Save button.
You return to the Protection Criteria tab of the Protected Endpoint Configuration page.
11. Click the Save button.
Figure 3.9 The Edit button for Antivirus properties
F5 Deployment Guide 3 - 12

Protecting the Resources
The next step is to associate the protected configuration you just created with a resource.
To protect the resources
1. From the navigation pane, click Users, expand Endpoint Security, and click Protect Resources.
2. From the Resource Table, expand Web Applications.
3. Find the Partners resource group (in our example, partners-peoplesoft), and click the Select link next to the Favorite you configured.
4. From the Configuration to protect selected resources list, select the name of the configuration you created in the preceding procedure. In our example, we select Partner_config.
5. From the Protected Configuration list, select the name of the configuration you created in the preceding procedure. In our example, we type Partner_config.
6. Click the Select button. A shield image appears in the row.
Figure 3.10 Adding the Protected Configuration to the Resource
Configuring post-logon actions
The final step is to configure a post-logon action in which the FirePass device injects an Active X control or plug-in to clean the client browser’s web cache.
To configure the post-logon action
1. From the navigation pane, click Users, expand Endpoint Security, and click Post-Logon Actions.
2. Click a check in the Inject ActiveX/Plugin to clean-up client browser web cache box. A list of options displays.
3. Configure these options as applicable for your deployment. In our example, we leave these options at their default settings.
3 - 13

Deploying the FirePass controller with PeopleSoft Applications
ConclusionThe FirePass controller is now configured to allow secure remote access to the PeopleSoft deployments. Remember that the procedures in this Deployment Guide are specific to the scenario described in Configuration scenario, on page 3-1. Use this guide as a template, and modify the configuration as applicable to your deployment.
F5 Deployment Guide 3 - 14