design of a proper set-up for low current measurements of insulation
TRANSCRIPT

Universität Stuttgart
Institut für Energieübertragung und Hochspannungstechnik
Design of a proper set-up for
low current measurements of
insulation systems
Master thesis
Jordi Rovira Buhigas
Beginning of thesis: 14.10.2013
End of thesis: 29.04.2014
Supervisor: M.Sc. Farzaneh Vahidi

2

3
1. Motivation and scope of work ............................................................................................ 9
2. Methodologies for low current measurements ................................................................ 10
2.1. Shunt ammeter .......................................................................................................... 11
2.2. Shunt Ammeter with buffer amplifier ....................................................................... 12
2.3. Feedback Ammeter ................................................................................................... 13
2.4. Differences between shunt and feedback................................................................. 14
3. Test set-up ......................................................................................................................... 14
3.1. Definitions of technical words designing a low current measurement circuit ......... 14
3.2. Isolating material ....................................................................................................... 15
3.3. Arduino UNO ............................................................................................................. 17
3.3.1. Power pins .......................................................................................................... 18
3.3.2. Input and Output ................................................................................................ 19
3.3.3. Communication .................................................................................................. 20
3.3.4. Programming ...................................................................................................... 20
3.3.5. Physical Characteristics ...................................................................................... 21
3.3.6. ATmega328 ......................................................................................................... 21
3.4. Programming the software ....................................................................................... 23
3.4.1. Arduino’s software ............................................................................................. 23
3.4.2. Storage of the data: “Processing 2” Software .................................................... 27
3.5. Testing Arduino.......................................................................................................... 30
3.5.1. Comparison of accuracy between Arduino, multimeter and Electrometer. ..... 30
3.5.2. Experiment changing the reference value of Arduino. ...................................... 34
4. Description of the circuits ................................................................................................. 37
4.1. First design ................................................................................................................. 37
4.1.1. Variation of output depending on the isolating system’s resistance ................ 39
4.1.2. Operational amplifiers ....................................................................................... 41
4.1.3. Power supply ...................................................................................................... 46

4
4.2. Modified designs ....................................................................................................... 47
4.2.1. Update 1: Three ranges and multimeter option ................................................ 48
4.2.2. Update 2: Use of another Amplifier ................................................................... 55
4.2.3. Update 3: Adapting for negative values ............................................................. 64
4.2.4. Update 4: Design to fit into a shielding box ....................................................... 67
5. Eagle design ....................................................................................................................... 71
6. Components and costs estimation.................................................................................... 76
7. Resolution ......................................................................................................................... 77
8. Accuracy of the results with constant resistances ............................................................ 78
8.1. Positive-Negative Error .............................................................................................. 83
9. Accuracy of the results with insulating liquid ................................................................... 86
10. Summary and outlook ....................................................................................................... 89
11. References ......................................................................................................................... 91
A Appendix ........................................................................................................................... 92

5
Declaration
I hereby declare that I prepared this thesis independently and without outside help or
unauthorized aids, nor used other than the stated sources and aids and the sources points
extracted have been marked as such.
Stuttgart, October 22, 2013
Signature: .

6

7
Acknowledgements
I want to thank my tutor M. Sc. Farzaneh Vahidi for letting me do this thesis under her
supervision and all the help and guidance she has given me throughout the length of the
thesis. Also Dipl.-Ing. Mark Jovalekic, who never had no as an answer to any question or
doubt that I came to him with.
I want to also thank my girlfriend, Kristin N. Osborn, who gave me all her support and
motivation and helped with checking the correctness of the English language.
I want to thank Sophia, Laura and Daniel, with whom I shared the lab most of the days. I
thank them for their support in the days in the lab as colleagues and friends.
I also want to thank IEH and the University of Stuttgart for the opportunity to develop my
thesis in their department and enjoy the great experience surrounded by great people and
professional workers.
Finally, I thank my parents and my sister for giving me the opportunity to go on the
ERASMUS program, as well as their support through all the days.

8

9
1. Motivation and scope of work
Low-level measurements are an important part of electrical studies. Due to the small values
of current and voltage used, the precision of the values becomes very important. For
example, a change of 1 nA or 1 nV can make a huge difference.
For that reason, measuring those values requires special study and therefore, special
attention, procedures, equipment and designs.
In this thesis, different ways to measure low current, values of pA and nA, will be analyzed
and compared. Currently in the market, devices capable of doing this task do exist, but for a
very expensive price. The purpose of this study will be to design an economically affordable
device capable of producing acceptable results.
The steps outlined in the following pages will focus on measuring polarization current
through an isolating system applying a voltage up to 20 kV.
Different processes of measuring will be evaluated. In the end, one will be chosen to take
the measurements and show them over a multimeter device while simultaneously logging
the values in a computer.

10
2. Methodologies for low current measurements
This section will outline and describe the basic circuits on which the ammeters and
electrometer are based as well as the basics of the operational amplifiers.
An operational amplifier is a device which can have a varying amount of pins. The standard
ones are non-inverting input (V+), inverting input (V-), output (Vout) and positive and
negative voltage supply inputs (Vs+,Vs-). In addition to those, there can be pins for offset
cancelling, clock synchronizing, and many others.
Image 1 External and internal representation [1]
The main equation for the operational amplifier is:
(2.1)
The amplifier amplifies the difference of voltage between both inputs multiplied by the open
loop gain A. The gain is different at every operational amplifier and cannot be modified.
The range of the gain will typically be approximately 10.000 to 100.000. As it is so big, a very
small difference between the inputs creates a big output, usually at the level of the power
supply (saturation). Due to this big gain, it is really difficult to control the behavior in an
open loop. The most usual way to operate using amplifiers is using a feedback loop. It
usually connects the inverting input to a portion of the output.

11
Image 2 Example of feedback connection [1]
By using 2 resistances the gain is highly reduced. The transfer function applied in this
situation is:
(2.2)
The 2 resistances work as a voltage divider. It is acceptable to make the assumption that V+ =
V- For that reason, the voltage between both resistors will have to be the same as the Vin,
therefore, the relation between the resistors will give the new gain.
For example, if both resistors have the same value, and Vin = 5 V, the output will be 10 volts.
That is because the node between the resistors connected to the inverting input has to also
be 5 V, so the output has to be 10 V. It proves the equation:
(2.3)
(2.4)
with X as the value of the resistors.
2.1. Shunt ammeter
RS
RA
RB
IbiasIinA
+
_
Vout
Image 3 Shunt ammeter schematic

12
The shunt ammeter works by measuring the voltage created over a resistance (RS), through
which the current desired to measure circulates. Knowing the values of the shunt resistance
(RS) and RA and RB, the current can be calculated from the voltage of the output with the
following equation:
(2.5)
The shunt resistance should be as small as possible, for reasons such as: better stability with
time and temperature, reduced input constant time and reduced voltage burden. However,
if it is too small, it could lead to degrading of the signal-to-noise ratio and introducing some
noise and zero drift.
2.2. Shunt Ammeter with buffer amplifier
This case is similar to the shunt ammeter but with a buffer amplifier between the shunt
resistance and the operational amplifier. This case is used when the current measured is
really low and the input bias current can be around the same range of the desired measured
values. For that reason, a special ultralow input bias current operational amplifier is used. It
is mounted in a follower configuration, without adding gain but providing stability. The
buffer has ideal infinite input impedance and zero output impedance which allows to
transfer voltage from first to second part of the circuit.
A voltage follower configuration is where the output is connected with the inverting input
with a unity gain, giving the following transfer function:
(2.6)
Image 4 Voltage follower with ultralow input bias current

13
Currently exists ultralow input bias current as low as 40fA like AD549L
Image 5 Shunt ammeter schematic with buffer amplifier
2.3. Feedback Ammeter
In the feedback ammeter, there is a resistor connected between the output and the negative
input. The positive input is connected to the ground. The equation is:
(2.7)
Image 6 Feedback Ammeter schematic

14
The input current flows through the feedback resistor. It is suitable that the operational
amplifier has a low input bias current, so the full current flows through the feedback resistor
and not inside the operational amplifier. That way, the measurement won’t be affected by
the own operational amplifier and will be as accurate as possible so the measurement is as
accurate as possible.
The commercial picoammeter is an example of hardware using the Feedback ammeter
situation.
2.4. Differences between shunt and feedback
Shunt measurement is the most common type of measuring for the wide range they can
achieve. Feedback ammeters are better in cases of really low current measurements [2].
However, as long as the shunt resistor is significantly smaller than the resistance of the DUT
and the currents to be measured are not very small (not much lower than microamp level
[10 –6 µA]), shunt ammeters work fine. [2]
In shunt ammeter, the voltage drop is created between the output and the input of the high
gain amplifier instead of between the inputs like the shunt. The main characteristic for the
voltage feedback ammeter is the low voltage burden, which makes it more appropriate for
low level measurements. The input voltage is equal to the output voltage divided by the op-
amp gain (typically 100,000), so the voltage burden has now typically been reduced to micro
volts. [2].
3. Test set-up
3.1. Definitions of technical words designing a low current
measurement circuit
Before starting to describe the different parts and elements of the circuits, it is important to
get familiar with the technical words that are going to be used frequently throughout the
study and the differences between them.

15
Accuracy
The definition of accuracy is the closeness of agreement between the measurement
and its true value [3]. It is often specified as ± (% of reading + count) or ± (ppm of
reading + ppm of range). The percentage of reading is more significant when the
reading is close to full scale and the percent of range is most significant when the
reading is a small fraction of full scale [3].
Error
The deviation of a measurement from its true value. It can be expressed as the
difference or as a ratio [3].
Resolution
The smallest portion of the signal that can be observed [3]. This means the number of
counts that can be displayed, based on the number of digits. An example is: ±(0,05%
+ 1 count) reading 10.000V equals a total error of ±(5mV + 1 mV) out of 10V. Usually,
the higher resolution, higher accuracy.
Sensitivity
The smallest change in the signal that can be detected [3]. That means that a change
bellow the sensitivity value won’t be reflected on the reading. The sensitivity will
depend on the display resolution and the measurement range.
3.2. Isolating material
The isolating system consists of a metal plate test cell device with a surface of 300 mm, with
3 electrodes (High, Low and Guard) inside containing an oil or paper between them. The
distance between the 2 electrodes can be changed between 1 and 5 mm.
On the system a voltage between 5 kV and 20 kV will be applied.

16
The resistance of the isolating system depends on the temperature and the strength of the
electrical field applied. It can have a range between 100 MΩ and 100GΩ depending on the
conditions.
Image 7 Closed test cell Image 8 Opened test cell
Image 7 and 8 show the test cell used for current measurement. The insulation system goes
placed inside, either oil or paper.

17
3.3. Arduino UNO
Arduino UNO is the device that will be used to read the values and send them to the
computer to be logged. It will take some time and processes to adjust and program the
device so the results are the expected ones.
Arduino is a prototype board, easy to use and without the need to add significant hardware.
It can perform many different operations. All the components are mounted on a board, with
the input and output connections defined.
The platform can also communicate with other devices through digital IN/OUT pins or
through the USB. In this case it will be communicating with a computer that will receive and
log the data coming from it through a USB.
The Arduino operations are made through the Arduino development environment. It is
based on C computer language and will be later discussed and explained.
Referring to specifications, the Arduino Uno is a microcontroller board based on the
ATmega328. It has 14 digital input/output pins, 6 analog inputs, a 16 MHz ceramic resonator,
a USB connection, a power jack, an ICSP header, and a reset button. It contains everything
needed to support the microcontroller.
The most common specifications are:
Table 1 Arduino specifications [4]
Operating Voltage 5V
Input Voltage (recommended) 7-12V
Input Voltage (limits) 6-20V
Digital I/O Pins 14
Analog Input Pins 6
DC Current per I/O Pin 40 mA
Flash Memory 32 KB
SRAM 2 KB
EEPROM 1 KB
Clock Speed 16 MHz

18
3.3.1. Power pins
The Arduino Uno can be powered via the USB connection or with an external power supply.
External (non-USB) power can come from either an AC-to-DC adapter or a battery. The
adapter can be connected by plugging a 2.1mm center-positive plug into the board's power
jack. Lead from a battery can be inserted in the GND and Vin pin headers of the POWER
connector. By default it is provided 5V from the USB. As a computer will be used to show the
results, in this case power will be powered via the USB connection.
The board can operate on an external supply of 6 to 20 volts. If supplied with less than 7V,
however, the 5V pin may supply less than five volts and the board may be unstable. If using
more than 12V, the voltage regulator may overheat and damage the board. The
recommended range is 7 to 12 volts.
The power pins are as follows:
VIN. The input voltage to the Arduino board when it's using an external power source
(as opposed to 5 volts from the USB connection or other regulated power source).
You can supply voltage through this pin, or, if supplying voltage via the power jack,
access it through this pin.
5V. This pin outputs a regulated 5V from the regulator on the board. The board can
be supplied with power either from the DC power jack (7 - 12V), the USB connector
(5V), or the VIN pin of the board (7-12V).
3V3. A 3.3 volt supply generated by the on-board regulator. Maximum current draw
is 50 mA.
GND. Ground pins.

19
Image 9 Arduino board with the components
3.3.2. Input and Output
Each of the 14 digital pins on the Uno can be used as an input or output, using pinMode(),
digitalWrite(), and digitalRead() functions. They operate at 5 volts. Each pin can provide or
receive a maximum of 40 mA and have an internal pull-up resistor (disconnected by default)
of 20-50 kOhms. In addition, some pins have specialized functions:
Serial: 0 (RX) and 1 (TX). Used to receive (RX) and transmit (TX) TTL serial data. These
pins are connected to the corresponding pins of the ATmega8U2 USB-to-TTL Serial
chip.
External Interrupts: 2 and 3. These pins can be configured to trigger an interrupt on a
low value, a rising or falling edge, or a change in value. See the attachInterrupt()
function for details.
PWM: 3, 5, 6, 9, 10, and 11. Provide 8-bit PWM output with the analogWrite()
function.
SPI: 10 (SS), 11 (MOSI), 12 (MISO), 13 (SCK). These pins support SPI communication
using the SPI library.

20
LED: 13. There is a built-in LED connected to digital pin 13. When the pin is HIGH
value, the LED is on, when the pin is LOW, it's off.
The Uno has 6 analog inputs, labeled A0 through A5, each of which provide 10 bits of
resolution (i.e. 1024 different values). By default they measure from ground to 5 volts,
though is it possible to change the upper end of their range using the AREF pin and the
analogReference() function.
There are a couple of other pins on the board:
AREF. Reference voltage for the analog inputs. Used with analogReference().
Reset. Bring this line LOW to reset the microcontroller. Typically used to add a reset
button to shields which block the one on the board.
3.3.3. Communication
The Arduino Uno has a number of facilities for communicating with a computer, another
Arduino, or other microcontrollers. The ATmega328 provides UART TTL (5V) serial
communication, which is available on digital pins 0 (RX) and 1 (TX). The Arduino software
includes a serial monitor which allows simple textual data to be sent to and from the
Arduino board. The RX and TX LEDs on the board will flash when data is being transmitted
via the USB-to-serial chip and USB connection to the computer.
3.3.4. Programming
The Arduino Uno can be programmed with the Arduino software. This software can be
downloaded for free from the Arduino webpage. The ATmega328 on the Arduino Uno comes
pre-burned with a bootloader that allows you to upload new code to it without the use of an
external hardware programmer.

21
3.3.5. Physical Characteristics
The maximum length and width of the Uno PCB are 68.58 mm and 53.34 respectively, with
the USB connector and power jack extending beyond the former dimension. Four screw
holes allow the board to be attached to a surface or case. Note that the distance between
digital pins 7 and 8 is 160 mil (4,064 mm), not an even multiple of the 100 mil (2,54mm)
spacing of the other pins.
Image 10 Arduino front and back sides
3.3.6. ATmega328
The microcontroller ATmega328 is the main part of the Arduino board. It has 32 pins and a
CPU of 8 bits. The main characteristics are the following:
Table 2 ATmega328 Specifications [5]
Flash (kbytes) 32 Kbytes
Pin Count: 32
Max. Operating Frequency: 20 MHz
ADC channels 8
ADC Resolution 10 bits
ADC Speed 15 ksps
EEPROM 1024 Bytes
RAM 2 KBytes
Operating Voltage (Vcc) 1,8 to 5,5
Inside the ATmega328, an important part is the Analog-to-Digital converter.

22
The ADC is connected to an 8-channel Analog Multiplexer which allows eight single-ended
voltage inputs constructed from the pins of Port A. The ADC converts an analog input voltage
to a 10-bit digital value through successive approximation. The minimum value represents
GND and the maximum value represents the voltage on the AREF or USB supply.
A simple ended conversion is:
(3.1)
Where VIN is the voltage at the input pin and VREF is the voltage selected as a reference.
For example, if VREF is 5V, an example of conversion would be:
Table 3 Example of conversion values of ADC
Vin (V) Conversion value Digital Value
0 0.0000 0
0.001 0.2048 0
0.002 0.4096 0
0.003 0.6144 0
0.004 0.8192 0
0.005 1.0240 1
0.01 2.0480 2
0.02 4.0960 4
0.05 10.24 10
0.1 20.48 20
0.2 40.96 40
0.5 102.40 102
1 204.80 204
2 409.60 409
4 819.20 819
5 1024.00 1024

23
3.4. Programming the software
The process to program the Arduino consists of 2 parts. First of all the process of making
Arduino read the values and show them on the screen and second part, to log the values
appropriately for representing them after.
3.4.1. Arduino’s software
The first step when attempting to work with Arduino is to program it so it can do the needed
functions. Arduino is based in C/C++ programing. It has its own library of functions, which
allows many actions to be made. The library and other tutorials found on the internet can be
consulted.
The complete code used is the following:
#define NUM_SAMPLES 30 //set a number of samples constant #include<stdlib.h> // import de library containing the function “dtostrf()” int sum = 0; //create and initialize variables unsigned char sample_count = 0; float voltage = 0.000; float current = 0.000; float correction = 0.000; void setup() Serial.begin(9600); //start the communication with the computer void loop() // add all the reads until the samples number while (sample_count < NUM_SAMPLES) sum += analogRead(A3) ; //read pin A3 but could be any other pin sample_count++; delay(10); //make a read every 10 ms voltage = ((float)sum / (float)NUM_SAMPLES * 5.06) / 1024.000; //make the average of the samples,
and reference voltage and divide by the arduino number of values
Current = voltage*10000/400; //multiply or divide the result value by the internal resistance Correction = Current + (current * -0,0085 + 5,25); //applies the correction depending on the range Serial.print(Current); //Show the result throught the serial port Serial.println(correction); sample_count = 0; //restarts the variables sum = 0; Serial.print("#S|PROVAPRI1|["); //Command for making the program “getwingo” record the values Serial.print(dtostrf(total,6,4,buffer)); Serial.println("]#"); //end of the program

24
This algorithm has to be implemented through the Arduino software and uploaded to the
board through the USB.
This program starts defining a constant value, NUM_SAMPLES, which will be used later to
make the average of the values read from the input pin. This is used to eliminate single
interferences by grouping them together.
Following that, it is important to include any library of which a function is going to be used.
In this case, the function dtostrf() is included in the library stdlib.h. The way to include the
library to the logarithm is #include.
There are going to be some variables needed, which have to be declared and initialized. Sum
and sample_count are going to be used for making the average of numbers, total and
voltage will represent real values of voltages. Buffer is going to make space in the buffer for
the subaction dtostrf()
.
With the function Serial.beggin(9600) the Arduino begins to communicate with the
computer. 9600 sets the speed. It has to be the same in both the computer and the Arduino
board.
The main program is found in the void loop (). First, with a while and the condition of “until
the number of reads is equal as the expected number of samples, keep reading”, the program
reads the value on the analog pin number 3 (A3) with the function analogRead(A3).
Delay(10) indicates that every 10 ms Arduino will repeat the loop.
int sum = 0; //create and initialize variables
unsigned char sample_count = 0;
float voltage = 0.000;
char buffer[8];
float total = 0.000;
#define NUM_SAMPLES 30 //set a number of samples constant
#include<stdlib.h> // import de library containing the function
“dtostrf()”
25
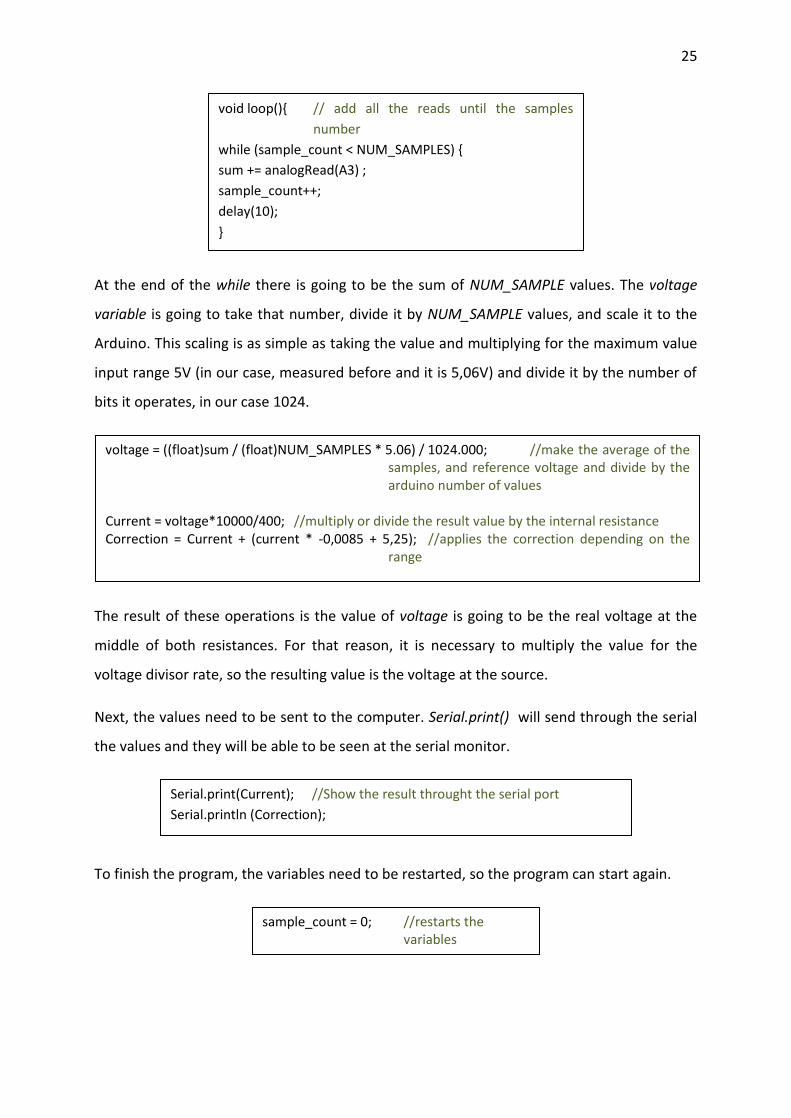
At the end of the while there is going to be the sum of NUM_SAMPLE values. The voltage
variable is going to take that number, divide it by NUM_SAMPLE values, and scale it to the
Arduino. This scaling is as simple as taking the value and multiplying for the maximum value
input range 5V (in our case, measured before and it is 5,06V) and divide it by the number of
bits it operates, in our case 1024.
The result of these operations is the value of voltage is going to be the real voltage at the
middle of both resistances. For that reason, it is necessary to multiply the value for the
voltage divisor rate, so the resulting value is the voltage at the source.
Next, the values need to be sent to the computer. Serial.print() will send through the serial
the values and they will be able to be seen at the serial monitor.
To finish the program, the variables need to be restarted, so the program can start again.
voltage = ((float)sum / (float)NUM_SAMPLES * 5.06) / 1024.000; //make the average of the samples, and reference voltage and divide by the arduino number of values
Current = voltage*10000/400; //multiply or divide the result value by the internal resistance Correction = Current + (current * -0,0085 + 5,25); //applies the correction depending on the
range
void loop() // add all the reads until the samples
number
while (sample_count < NUM_SAMPLES)
sum += analogRead(A3) ;
sample_count++;
delay(10);
Serial.print(Current); //Show the result throught the serial port
Serial.println (Correction);
sample_count = 0; //restarts the variables
sum = 0;

26
In this case, it would be convenient to log those values into a text file so afterwards they can
be later analyzed. To accomplish the logging operation, there are many different options.
The one used here is the program “Gobetwino” which works in tandem with the Arduino
program.
Gobetwino function of logging the data requires a special kind of data. The values sent have
to be string type as the program doesn’t accept float numbers. For this reason, it is
necessary to use the function dtostrf (VALUE; PRECICION; DECIMAL; BUFFER). This function
will transform the float number to string with the parameters precicion, decimal, buffer.
These values have to be big enough so they don’t differ from the float values.
To make “getwingo” record the values, it needs to be sent through
serial.print(“#S|name_function_getwingo|[values_to_be_recorded]#”).
Once we close the program “getwingo”, the values will be recorded in a .txt document with
or without the date and time.
To finish the entire program, we just need to use the closing sign
On the Arduino software, there is a button to check for error prior to uploading the program
onto the board.
Serial.print("#S|PROVAPRI1|["); //Command for making the program “getwingo”
record the values
Serial.print(dtostrf(total,6,4,buffer));
Serial.println("]#");
//end of the program

27
3.4.2. Storage of the data: “Processing 2” Software
Once the Arduino sends the measured value over the serial port, and it is shown on the
screen, it is important to be able to save those values. There are many ways to do it, but in
this situation what is wanted is that the values get logged in .CSV type, so they can be easily
uploaded to Matlab or Excel to represent the values.
The software Processing 2, based on the Arduino’s programming language, can perform this
task.
To make Arduino software and Processing 2 software work with each other, there has to be
some modifications to the original design.
On the Arduino code, it is very simple, just so the variables printed on the serial port will
have to be show the following way:
The variables being measured in this case are var1, var2 and var3. They are float numbers
with 4 decimal values. The important part of this procedure is the printing of the comma
between the variables and the Serial.println at the end. This command makes a new line, so
the three variables go on the same line separated by commas and the next time the code
makes the loop, it will be stored on the following line.
The part of the Processing 2 will have to be edited from the beginning. The language is
similar to Arduinos, but some functions and commands are special for Processing 2.
Serial.print(var1,4);
Serial.print (" , ");
Serial.print(var2,4);
Serial.print (" , ");
Serial.println(var3,4);

28
The code to be written on the Processing page is:
There are some special functions that require a little bit of attention:
Printwriter() allows to print a text-output stream. It requires the function createWriter() to
generate the file and ideally it should be flushed and closed with flush() and close().
import processing.serial.*; //import the library
Serial myPort; //create a variable of the type “Serial”
PrintWriter output; //creates “printwriter” type variable
int lf = 10; // created and assigns 10 as a integrer value
void setup()
size(500,500); //opens the window
println(Serial.list()); //shows on screen the ports available
myPort = new Serial( this, Serial.list()[1], 9600 ); //chose port [1] at 9600 of speed
(same one as arduino)
output = createWriter( "measure.csv" ); //creates a “.CSV” file
void draw()
if (myPort.available() > 0 ) //as long as there is serial port data:
String value = myPort.readStringUntil(lf); // read until a change of line
if ( value != null ) //if the value read is not null
output.println( value ); //save the value the value
println(value); //show the value on the screen
void keyPressed() //when pressing any key:
output.flush(); //writes the remaining data
output.close(); //closes the file and save it
exit(); //quit the program

29
When using the function newSerial(this,Serial.list[],9600), it is important that the speed of
the serial is the same in Arduino and processing 2. In this case, it is 9600. This value can be
another one, but it must be the same in both Arduino and Processing 2.
Notice the use of the integrer “lf” which has a value of 10. This is because in ASCII, 10 equals
to “new line”. Therefore, when the program is using the function readStringUntil(), it will
read until the a new line is made, which was set at the Arduino program with the
serial.println(). By doing these commands, the results are just as wanted: a certain number
of values on the same line for each iteration of the program and separated by commas.
The function createWriter() can create either a .CSV file to open with a datasheet program or
a .txt.
The steps to set are: first connect Arduino to the computer, upload the code and run it. The
serial monitor has to be closed because the program just allows one connection. Then, open
the processing 2 software, and run the code. Once the program is closed, there will be in the
same folder of the specified one, the document with the values saved and ready to open
with excel or text editor.

30
3.5. Testing Arduino
The first step before taking any measurements is to check the accuracy of the measuring
device. In this case, the Arduino will have to be checked and evaluated, so that the values,
specifications and operation are as expected.
The following experiments will check the response from the Arduino known values, checking
for accuracy and evaluating for efficiency.
3.5.1. Comparison of accuracy between Arduino, Multimeter and
Electrometer.
For this experiment, the circuit made consists of a voltage source, from 0 to 25V, a
resistance of 2MΩ, and a resistance of 300kΩ.
The measuring equipment is the Arduino, a standard multimeter and the Keithley
electrometer.
The Arduino will measure the voltage drop over the 300kΩ resistance and then calculating
what it should be at the voltage source. The multimeter and electrometer will measure
directly over the voltage source. In addition, there will be an ammeter measuring the current
going through the circuit. Knowing the current and the total resistance (2,3MΩ), it is easy to
calculate the voltage drop at the source.
Image 11 Circuit to test Arduino's measuring abilities

31
Table 4 Table of measured values with different devices
(1) (2) (3) (4) (5) (6) (7) (8) (9) (10)
25,000 24,942 0,232 25,070 -0,280 24,957 0,172 10,634 24,458 2,167
22,000 21,880 0,545 22,030 -0,136 21,924 0,345 9,341 21,484 2,344
18,500 18,422 0,422 18,560 -0,324 18,470 0,162 7,868 18,096 2,182
16,200 16,208 -0,049 16,320 -0,741 16,249 -0,302 6,922 15,921 1,725
13,800 13,703 0,703 13,830 -0,217 13,766 0,246 5,864 13,487 2,267
11,500 11,519 -0,165 11,650 -1,304 11,596 -0,835 4,939 11,360 1,220
8,150 8,066 1,031 8,180 -0,368 8,138 0,147 3,465 7,970 2,215
6,500 6,399 1,554 6,510 -0,154 6,481 0,292 2,758 6,343 2,409
4,700 4,576 2,638 4,690 0,213 4,673 0,570 1,988 4,572 2,715
2,800 2,637 5,821 2,763 1,321 2,750 1,786 1,169 2,689 3,975
1,900 1,823 4,053 1,941 -2,158 1,930 -1,579 0,819 1,883 0,878
1,180 1,080 8,475 1,172 0,678 1,168 1,017 0,496 1,141 3,322
0,640 0,543 15,156 0,642 -0,313 0,637 0,547 0,270 0,621 2,969
0,330 0,233 29,394 0,327 1,061 0,325 1,576 0,137 0,316 4,219
0,250 0,155 38,000 0,254 -1,680 0,253 -1,144 0,107 0,246 1,744
0,140 0,039 72,143 0,135 3,857 0,134 4,593 0,056 0,129 8,131
0,120 0,003 97,500 0,119 1,167 0,118 1,917 0,049 0,113 5,777
0,020 0,000 100,000 0,018 10,000 0,017 13,450 0,006 0,015 26,400
0,015 0,000 100,000 0,016 -6,667 0,015 -3,067 0,006 0,013 12,600
S=8,224 S=3,104 S=3,387 S= S5,943
(1): Ideal value (V)
(2) Arduino measured values (V)
(3) Relative error or Arduino (%)
(4) Multimeter measured values (V)
(5) Relative error Multimeter values (%)
(6) Electrometer measured values (V)
(7) Relative error electrometer (%)
(8) Current measured with pico ammeter (µA)
(9) Voltage calculated from the pico ammeter and resistance (2,3MΩ) (V)
(10) Relative error for pico ammeter (%)
Notice that the last column is the ideal voltage calculated by the current measured by the
pico ammeter and the resistance values (2,3 MΩ).

32
(3.2)
The last row shows the standard deviation, for each of the individual errors.
The standard deviation has been calculated as:
The electrometer and the multimeter show the smallest ones. Arduino is bigger, because at
low voltages it is not able to read appropriately, therefore, it shows a big error, which affects
the deviation. The calculated voltage from the current, it has a certain error due the value of
the resistors are not exact 2,3 MΩ.
Image 12 Comparison of measurements between Arduino, Electrometer, Multimeter and Ammeter
02468
10121416182022242628
1 2 3 4 5 6 7 8 9 10 11 12 13 14 15 16 17 18 19
Voltage at the source (V)
Experiments
Arduino V
Multimeter V
Keithley V
Voltatge calculated by current* 2,3 V

33
Image 13 Zoon in between 2 and 0V for Image 12
Image 12 shows the evolution of the voltage from 25V to 0V. The only small difference seen
appears around the values of 25 V. The “calculated values” line is the one that shows
difference from the other 3 lines. The reason for this change is that the calculated
measurement is measured from the current and multiplied, not using any voltage
measurement. In this study, there won’t be a need to measure such elevated values,
therefore it can be considered not of importance.
Either on Image 12 and Image 13, the X axes are “experiments”. Basically it go at a certain
value and measure with the different devices, not giving important to the real value
measured, just looked at the differences between them.
Image 13 is a magnification of the first graph, in the range between 2 and 0 V. There, it can
be seen that at low voltages, Arduino presents “bad results”, starting at 2V and being very
significant from 0,6V to 0V. Those values are the source values, which are not the same as
the voltage applied on the Arduino. To know the ones applied on the input of the Arduino, it
needs to be converted with the following formula:
00.10.20.30.40.50.60.70.80.9
11.11.21.31.41.51.61.71.81.9
2
1 2 3 4 5 6 7 8 9
Voltage at the source (V)
Experiments
Multimeter V
Keithley V
Arduino V
Voltatge calculated by current *2,3 V

34
(3.3)
According to this formula, 2V is actually 0,25V and 0,6V is 0,08V. That means that from now
on, it should not be considered accurate the values below that point.
3.5.2. Experiment changing the reference value of Arduino.
Arduino has 5V as the default max reference value for analog input. That means Arduino
divides the 5V into the 1024 bit.
But this is not the only option that Arduino can do. Arduino can be set up at other reference
values using the function analogreference(type), depending on the need of each
measurement. There are different options:
DEFAULT: the default analog reference of 5 volts
INTERNAL: an built-in reference, equal to 1,1 volts on the ATmega328
EXTERNAL: the voltage applied to the AREF pin (0 to 5V only) is used as the reference.
In this experiment, the value used will be the 1,1 volts. It will be set with the function
analogreference(INTERNAL).
The circuit used in this experiment will be exactly the same as what was used before in
section 3.4.1.
Table 5 Measures with different devices with 1.1V reference
Arduino (V) Multimeter (V) Keithley (V) Keithley (µA) Voltatge calculated by
current * 2,3 (V)
8,43 10,06 10,0137 4,2675 9,81525
6,25 6,03 6,0078 2,5595 5,88685
5,2 5,03 5,0072 2,1328 4,90544
3,102 3,021 3,0057 1,2805 2,94515
2,053 2,016 2,0053 0,85397 1,964131
1,529 1,513 1,50515 0,64066 1,473518
1,001 1,008 1,00254 0,42646 0,980858

35
0,687 0,705 0,701 0,29788 0,685124
0,478 0,503 0,50014 0,2122 0,48806
0,27 0,304 0,30263 0,12804 0,294492
0,165 0,2021 0,20088 0,08465 0,194695
0,06 0,1011 0,10031 0,0418 0,09614
0,008 0,0504 0,04996 0,02032 0,046736
0 0,0438 0,04321 0,01745 0,040135
0 0,0056 0,00515 0,00123 0,002829
Image 14 Voltage measurement using 1,1V instead of 5V as reference
Image 14 shows the representation of the same measurements as before. Notice that now
the limit for the Arduino input analog is 1,1V.
In other words, if the limit for the Arduino is 1,1V at the input pin, through the conversion it
will be:
(3.4)
That means that at more than 8,43 volts on the power source, the Arduino will not be able
to measure. This is the example of the first value shown on the graph and in the data. The
other devices show a value of approximately 10 V, but instead, Arduino shows 8,43V which
0
1
2
3
4
5
6
7
8
9
10
11
0 1 2 3 4 5 6 7 8 9 10 11 12 13 14 15 16
Source Voltage (V)
Experiments
Arduino V
Multimeter V
Keithley V
Voltatge calculated by current * 2,3 V

36
is the limit of the Arduino, the 1,1V. Obviously, this should not be considered in any
calculation but should help to understand the idea of the reference value.
Image 15 Zoom in of Image 14
Following the idea of the previous graph, image 15 is a magnification of image 14. It goes
from approximately 1 to 0 volts.
This graph is very important as it shows the difference in the deviation of the measurement.
It follows the expected values until 0,3V where it differs from it. Following the formula
shown before, that corresponds to a voltage of 0,039 V.
That change increases the accuracy of those measured, as it was expected, making the
Arduino reliable until values of 0,05V as opposite of the 0,08V of the 5V reference.
0
0.2
0.4
0.6
0.8
1
0 1 2 3 4 5 6 7 8 9 10
Source Voltage
Experiments
Arduino V
Multimeter V
Keithley V
Voltatge calculated bycurrent * 2,3 V

37
4. Description of the circuits
4.1. First design
This section will explain the steps that have been taken to make the final circuit.
The first schematic about the circuit is simple using the idea a shunt ammeter. This means
measuring the voltage created by a resistor and knowing the current flowing through it.
Image 16 Voltage measuring with only 1 operational amplifier with unity feedback
It only requires an operational amplifier and the shunt resistance. The output of the
operational amplifier should show the voltage between the common point of R1 and R2 and
the ground, making the current flow though the shunt resistance and not damaging Arduino.
Knowing the shunt resistance value, it is easy to know the current.
First, on the left side of the image there is a power source (V1) and a resistor (R1). These are
the power source and the isolating system. As a starting value, 100 GB will be taken as the
value of the isolating system and 10.000V in the power source. As a reminder, the voltage
will be in a range of 5 to 20 kV and the resistance between 100GB and 1TB.
From now on, the isolated system will be also referred as R1.

38
The current that is being measured is the current that goes thought R1. On the end not
connected to the voltage source of R1, there will be a resistance (R2) connected and
grounded to the floor. The functionality of this resistance is to create a voltage drop so it can
be later measured. The value of this resistance has to be big enough so that the voltage
created is big enough for the operation amplifier to read it, while at the same time not too
big so it doesn’t interfere with the measurement. The proposed value will be 500 kΩ.
The voltage obtained at the output is around 50 mV, which is too small for the Arduino to
measure properly.
For that reason, the amplifier needs a gain, which will be created using 2 resistors. The ideal
values for Arduino should be an output between 0,8 and 5 V, as that is the range values that
Arduino can read with more accuracy.
The operational amplifier will be set in the non-inverting configuration.
(4.1)
A good value for Arduino to be measured would be around 3 V at the output. Therefore, a
value of 50 mV is assumed as Vin, the relation between R2 and R1 have to be of 59. Then,
one option could be 100Ω for R1 and 5900Ω for R2
Finally, the formula to know the value of the current thought the voltage will be:

39
(4.2)
Image 17 Voltage measuring with amplifying
4.1.1. Variation of output depending on the isolating system’s resistance
Along with the design, it is important to know what situations could be expected, and know
if those values will meet the specifications. In other words, we have to make sure that the
Arduino doesn’t get over tension and, at the same time, the Arduino will be able to read all
the values.
For that reason, there is a theoretical approximation of the expected output depending on
the value that the isolating system takes.
R1 is the Isolating system’s resistance and the “Simulated Output” is the voltage expected at
the output of the operational amplifier. R2 will have a constant value of 500kΩ and R3/R4
will be 59. The voltage source is 10kV.

40
Table 6 Variation of the output depending on the resistance value
The table above shows an increase of R1 from 100 GΩ to 280GΩ. What maintains constant is
the relation R3/R4, the value of R2, and the voltage source. The result is the value that the
output of the operation amplifier will have at every situation.
As a result of this table, it proves that even as the resistance value changes, the whole range
of numbers is completely functional for the Arduino (between 1 and 5 Volts).
The formula used to calculate it is:
(4.3)
R1 (Ω) Calculated Output (V)
1,0E+11 2,999
1,1E+11 2,727
1,2E+11 2,499
1,3E+11 2,307
1,4E+11 2,142
1,5E+11 1,999
1,6E+11 1,874
1,7E+11 1,764
1,8E+11 1,666
1,9E+11 1,578
2,0E+11 1,499
2,1E+11 1,428
2,2E+11 1,363
2,3E+11 1,304
2,4E+11 1,249
2,5E+11 1,199
2,6E+11 1,153
2,7E+11 1,111
2,8E+11 1,071

41
4.1.2. Operational amplifiers
In the design 2 chips will be used. The LTC1050 and LT1013. The LT1013 will be used to
create the virtual ground and the power supply. The LTC1050 will be used to amplifying and
acquiring the main measuring signal.
4.1.2.1. LTC1050
The LTC is a precision zero-drift operational amplifier with internal capacitors. The main
features of it, important in this thesis are:
Table 7 Specifications of the LTC1050 [6]
Input offset voltage 0,5 µV
Input offset current 20 pA
Input bias current 10 pA
Slew Rate 4 V/µS
Total Supply voltage ±18 (-V to +V) V
The operational amplifier is mounted on a SO-8 package.
Image 18 LTC1050 Pin configuration
Outside of the specifications of the chip, it is important to see the actual response of the
operational amplifier.
Response of the operational amplifier LTC1050
It is important to know the performance of the operational amplifier beside the datasheet
specifications. In the following graphs, it can be seen the response of the operational
amplifier when the input is a step signal at different frequencies. It is important to check the

42
frequency response of the amplifier, thus it could affect the results and is the most
important part of the circuit.
Image 19 Response at 30 kHz
Image 20 Response at 160 kHz
0
0.2
0.4
0.6
0.8
1
1.2
0 0.2 0.4 0.6 0.8 1 1.2 1.4 1.6 1.8 2
Voltage (V)
Time (µS)
INPUT OUTPUT
-0.2
0
0.2
0.4
0.6
0.8
1
1.2
0.0 0.4 0.8 1.2 1.6 2.0 2.4 2.8 3.2 3.6 4.0
Voltage (V)
Time (µS)
INPUT OUTPUT

43
Image 21 Response at 425 kHz
Image 22 Response at 1 MHz
From these graphs, the different responses at every frequency can be seen. The response is
the same in all cases, with the same space between peaks and rising time. The problem
occurs when the frequency is higher than 425 kHz, in which case the step is too short for the
-0.4
-0.2
0
0.2
0.4
0.6
0.8
1
1.2
0 0.4 0.8 1.2 1.6 2 2.4 2.8 3.2 3.6 4 4.4 4.8
Voltage (V)
Time (µS)
INPUT OUTPUT
-0.2
0
0.2
0.4
0.6
0.8
1
1.2
0 0.3 0.6 0.9 1.2 1.5 1.8 2.1 2.4 2.7 3
Voltage (V)
Time (µS)
INPUT OUTPUT

44
signal to reach the final value. In that case, as shown in Image 34 the output can’t follow the
input signal and turns into a signal not dependent of the input.
For our set-up, we never get to reach those frequencies at any moment, so the response of
the amplifier is not a variable likely to give errors on the results.
4.1.2.2. LT1013
The LT1013 is a dual precision operational amplifier, but only one of them will be used in the
circuit. The main features are:
Table 8 LT1013 specifications [7]
Input offset voltage 60 µV
Input offset current 0,2 nA
Input bias current 15 nA
Slew rate 0,4 V/µS
Total supply voltage ±22 V
Drift 2 µV/C°
It also comes in a SO-8 configuration with the following distribution:
Image 23 LT1013 pin configuration

45
Response of the operational amplifier LT1013
Image 24 Response at 30 kHz
Image 25 Response at 150 kHz
In the case of this operational amplifier, it reaches the value perfectly at 30 kHz but, as seen
on image 24, at a range of 150kHz it reaches its limit not being able to reach the expected
value for higher frequencies. It is not really important because this chip is connected to the
0
0.1
0.2
0.3
0.4
0.5
0.6
0.7
0.8
0.9
0 1 2 3 4 5 6 7 8 9 10 11 12 13 14
Voltage (V)
Time (µS)
INPUT OUTPUT
0
0.1
0.2
0.3
0.4
0.5
0.6
0.7
0.8
0.9
0 1 2 3 4 5 6 7 8 9 10 11 12 13 14
Voltage (V)
Time (µS)
INPUT OUTPUT

46
voltage source, which has really small variations and the output is not required to be very
exact.
As well as the LTC1050, the response of the amplifier doesn’t affect the system and can be
considered fast enough at all time.
4.1.3. Power supply
The power supply of the device depends only on the operational amplifiers used. There is
the option of using single batteries, as low as 3 volts, or using an external power source of
any value. In this study, a power supply will be used connected to the electrical line, 230 V
(Europe), and transformed to 12V outside the board. In this thesis, the one used will be a
power source with a floating voltage of 12V.
Image 26 Schematic of the voltage supply circuit
This is the schematic of the supply circuit. It starts with the external floating supply of 12
volts. The aim of this part is to provide, on one part, a virtual ground, and on the other part,
a power supply for the main operational amplifier, as a positive and negative supply.
The operational amplifier is configured as a follower, with a feedback between the output
and the inverted input.

47
The pins represented on image 26 are:
Table 9 Explanation of the pins
Pin 1 Output
Pin 2 Inverting input
Pin 3 Non-inverting input
Pin 4 Negative supply input
Pin 8 Positive supply input
Remember that the transfer function of an operational amplifier as:
(4.3)
(4.4)
Then: = 0
(4.5)
On the other hand, both resistances have to guarantee that the voltage drop over one is the
same as the voltage drop over the other, as they both have the same value.
If the center of both resistances is connected to VIN+ and it has to be 0, and the voltage drop
on each resistance has to be the same, this means that the initial 12 volts will be +6 and -6.
By this method, now the board is supplied with a constant V+=6V, V-= -6V and a virtual
ground VGND of 0V.
It has also included a capacitor to stabilize and a resistor of 100Ω at the output as a
protection.
4.2. Modified designs
From the idea of the first design, diverse updates can be done to make the circuit more
complex and adapt better to the difference expectations. Each update includes one or
different new parts to add functionality to the first ideal design.

48
4.2.1. Update 1: Three ranges and multimeter option
The problem with the first design was that with only 1 resistance, the range of values was
very specific.
In the first design, the shunt resistor was of 500kΩ, a voltage applied of 10.000V and 100GΩ
of starting resistance of the insulator capacity and an amplification of 60 times to get the
results with an output of 3V for the Arduino. That means the ideal current flowing was
100nA.
Table 9 shows with the standard parameters, what would be the output depending on the
input.
Table 10 Input current and output voltage
Current nA Output (V)
10 0,3
15 0,45
20 0,6
25 0,75
30 0,9
50 1,5
70 2,1
90 2,7
100 3
125 3,75
150 4,5
166 5
175 5,25
The device would actually be working on a range between 20nA and 166nA approximately.
Obviously that is a huge limitation that doesn’t match with the expected range of values.
So in the first update, the idea is to have 3 different resistances that can focus in 3
measuring ranges: micro amps, nano amps and pico amps. The transition between the
resistors will be made through a rotatory switch.

49
The basic idea of the circuit is the following:
Image 27 Representation of the idea of the 3 switchable resistances.
Based on Ohm law, the voltage drops created will be the following:
Table 11 Relation between the voltage drop created and the current applied
Resistance Current Voltage drop created
10 Ω 1 µA 0,01 mV
1000 µA 10 mV
10 kΩ 1nA 0,01 mV
1000 nA 10 mV
10 MΩ 1 pA 0,01 mV
1000 pA 10 mV
The reason for using these values is to allow, by just switching the resistance, to use all of
the other components in the board without having to change any other part. This is very
practical, especially at the moment of optimizing the amount of components on the board.
At the same time, the amplification of the resistors will be change to 100x instead of 60x.
The reason to do that is to adapt to the 10, 10K and 10M, and their voltage drop created,
0,01mV to 10mV, multiply it 100 times to ranges of 1mV to 1000mV, where can be used a
voltmeter on their if wanted. The voltmeter will read from 1 mV to 1000 mV for 1 µ/n/p A to
1000 µ/n/p A.

50
4.2.1.1. Resistor and switch
The switch is a very important part of the circuit. It is responsible for selecting what range
will be used at any moment and connects to the operational amplifier. Many different
switches can be used, but the one used at least needs to have 3 poles and 3 ways. Standard
rotatory switches usually come as 4 poles 3 ways or 3 ways 4 poles.
Image 28 Representation of the inside of 2 different switches
The function is the same: At the same time, each pole will be connected to one of the ways.
For example, in the 3 Pole 4 Way switch, Pole A can be only connected to way 1, 2, 3 or 4 as
well as Pole B can be only connected to 5, 6, 7 or 8 at a time. As it rotates, all the
connections will rotate at the same time in 30°, for example, the configurations A-1, B-5, C-9
or A-3, B-7, C-11.
The resistors used will be all 0,1%, so they are as accurate as possible. The switch will be the
CK1027 with 4 pole and 3 way, even 1 pole will not be used.

51
Image 29 Schematic of the switching circuit
Among different configurations, this picture shows how the connections are made. PAD1
and PAD2 are the jacks where the current will flow, input and output. PAD5 and PAD6 are
the connections of the external power supply. This switch has 4 poles and 3 ways.
The switch is situated in positions: D1-C1-B1-A1. The current will flow through the 10MΩ
resistance, making a voltage drop, which will be connected through D1 and C1 to the
resistance of 100Ω used as a protection before the non-inverting input of the operational
amplifier. If the values measured were micro or nanoamps, the same procedure would exist
with D1-C1 and D2-C2.
At the same time, on pole A, the LED system will be connected. It will indicate what mode is
selected at any time by illuminating one of the three LEDs. The LEDs will be connected
between +V and –V of the power supply though a resistance of 2kΩ to limit the current.
4.2.1.2. Adapting the measuring circuit and functionality for a multimeter.
This part of the circuit is where the value is measured and amplified to millivolt output
range. It consists of an operational amplifier with a feedback.

52
It is intended to have an amplification of 100 times. That means:
If ; (4.6)
; (4.7)
(4.8)
Within an infinite amount of combinations, one solution could be:
As a resistor of 99kΩ is difficult to find, the conversion will be made with 2 resistors in series
of 24kΩ and 75kΩ.
With this amplification, the values on the output will have a range from 1mV to 1000mV.
Image 30 Schematic of the measuring part

53
The voltage drop created over the resistors comes through R2 (100Ω) into the non-inverting
pin. That pin has the feedback with the resistors and is also connected to the virtual ground
through the 1kΩ.
The +V and –V come from the power supply and 2 capacitors of 100nF are added on both
positive and negative inputs and the ground for stabilization. The output is protected with a
100Ω resistor.
Between the virtual ground and the end of the resistor is where the voltage will be
measured with a multimeter or connected to another amplifier to increase the amplifier to
make it suitable for the Arduino or other measuring device.
The resistors used are all 0,1%. That is because there is a need to have the most accurate
value at any time. If instead of 75k, the resistor was 76k, the final result wouldn’t be the
same, as the whole board has many steps and resistances, the error created would sum up,
making a considerable error at the end. For that reason, the most exact the resistances are,
the better will be to have the expected value at the end.

54
Image 31 Second design board, front and back
Image 32 Complete schematic of second design

55
4.2.2. Update 2: Use of another Amplifier
At the output of the previous device, the values will be shown in mV, from 0 to 1000
corresponding to each of the selected values before, µA, nA or pA. That is appropriate if it is
going to be read on a standard multimeter of 3,5 digits. Any other device able to read
millivolts is also appropriate for the measuring, always being aware of the accuracy and
resolution of it.
In this project, there is not just the intention to read the values, but also to log them. For
that reason, Arduino will be used to read the values and transfer them through the serial
port to a computer or a suitable recording device. As seen before Arduino doesn’t have a
high accuracy at low values, between the 0 at 500 mV approximately. That is obviously a
burden and will not record the real values. From 500 mV to 5V it will be considered as an
ideal function, even though additional corrections could be made later.
Because of this, the input voltage at the Arduino has to previously be amplified. What is
looked for with the amplification is that instead of going from 0 to 1 volt on the output, it
goes from 0 to 5. That requires an amplification of 5 times. With it, the amount of values
under the 500mV will be reduced, making the range of readable values bigger.
For example: Without amplification only 50% (500 mV of the 1000mV) were able to be read
properly (over 500mV). That means a 50% of acceptable range. With the amplification, the
output of 500mV will correspond to 100mV at the input ( .
That means only 100 mV out of the 1000 will be not be in the acceptable range. That
corresponds to the 90% of the values.
So it is clear that by using this amplification, it can be measured up to the 90% of the values
in the range.

56
Image 33 Amplification 4 and 5 times
Image 33 shows how the output point of 500mV is at the 50% without amplification and at
10% and 12% with 4 and 5 times amplification
But still, there are 10% of the values that will be lost in each range. This is a problem that has
to be solved. One way to solve that problem is to overlap measuring values.
Another solution is to add other resistors between the 10MΩ and the 10KΩ, as could be
1MΩ or 100KΩ. Also, instead of amplifying 5 times, if amplified 4 times, the range of values
overlaps within the different resistors.
The following table and graph shows the ranges in pico ampes that will be able to be read by
each resistor. For example, 1MΩ should ideally to read from 10 pA to 12500 pA (12,5 nA).
Table 12 Table of ranges for each resistor
Resistor Ideal Min. Value Real Min. Value Maximum Value
10MΩ 1 pA 10 pA 1250 pA (1,2 nA)
1MΩ 10 pA 100 pA 12500 pA (12,5 nA)
10kΩ 1nA 10 nA 1250 nA
0
1
2
3
4
5
6
0 0.1 0.2 0.3 0.4 0.5 0.6 0.7 0.8 0.9 1
Output voltage (V)
Input voltage (V)
Without amplification 4 times amplification 5 times amplification

57
Image 34 Logarithmic graph of the different ranges
Image 34 represents the values of “table 6”. The blue part represents the values that cannot
be read by Arduino. The red range is the range that can actually be properly read.
For example, in the new configuration, if it is desired to measure 2 nA, ideally it should be
measured over the 10kΩ resistance, creating 0,02mV of voltage drop, then amplified 100
times to 2mV. With the next amplification of 4 times, it would go up to 8mV. That value is
still in the 10% of values not able to be read by Arduino.
If it is measured over the 1MΩ resistor, it creates 2mV of voltage drop. Then amplified 100
times to 200mV. To finish, 4 times amplified to a final value of 800mV, where it can be
completely read by Arduino.
The method to amplify will be to use an operation amplifier, selecting the appropriate values
for the resistances.
1.00E+00 1.00E+01 1.00E+02 1.00E+03 1.00E+04 1.00E+05 1.00E+06
10MΩ
1MΩ
10kΩ
Current Measurable (pA) Different Shunt
resistors
10-1250 pA
100 pA-1,25 nA
10-1250 nA
0-10 pA
1-10nA -
10 nA
1-10nA
10 nA
10-100 pA

58
Image 35 Operational amplifier with amplifying configuration
It’s important to remember how this circuit works. The transfer function will be:
(4.9)
In that case, the relation between resistors has to be 4, independent of the value of the
resistances.
The operational amplifier used for the amplification will be the same one used previously,
the LTC1050 with low offset and zero drift. A different one could be used as long as the pin
connections were the same once the board is made.
Image 36 Schematic of the amplifying circuit

59
Image 37 Representation of the amplifying circuit
In this figure, it a 3kΩ and 1kΩ has been used. The power supply is the same for the whole
board and it is connected through pins 7 and 4. There is a resistance of 100Ω at the
entrance of the op-amp for protection. Pad 7 and 8 are where the Arduino will be
connected. Pad 8 is just the ground, so it can be situated anywhere on the board.
4.2.2.1. Correction of the amplifier
Even with the best of the amplifiers being used, there will be some error within it. Also it is
important to remember the accuracy of the Arduino reading and the change of an offset.
For that reason, before starting the measurements, it is important to check the values
transferred.
For this experiment, the same output value will be measured with the Arduino and the
Keithley electrometer for a range between 0 and 5 volts.

60
Table 13 Table with Arduino and Electrometer measures
Table 13 shows the values of the Arduino, the electrometer, the difference between both of
them (K-A) in Volts and the relative variation between them as (K-A)/K*100.
It is clear that the Arduino doesn’t give the same values as the electrometer (ideal ones)
throughout. As said previously, the values near to 0 are not readable for Arduino, making an
error or around 10% until 0.5 Volts. On the other side, at high values, Arduino reads slightly
higher values than the reals ones, inverting the previous situation.
Avoiding the first 2 measures,, the 0,01 and 0,02 V, the following graphs show the results:
Keithley
(V)
Arduino
(V)
K-A (V) (K-A)/K
(%)
Keithley
(V)
Arduino (V) K-A (V) (K-A)/K
(%)
0.01 0 0.01 100.00 1.4 1.388 0.012 0.857
0.02 0 0.02 100.00 1.5 1.49 0.01 0.666
0.05 0.015 0.035 70.000 1.7 1.692 0.008 0.470
0.07 0.035 0.035 50.000 2 1.999 0.001 0.050
0.1 0.068 0.032 32.000 2.2 2.202 -0.002 -0.091
0.15 0.119 0.031 20.667 2.4 2.405 -0.005 -0.208
0.2 0.168 0.032 16.000 2.6 2.608 -0.008 -0.307
0.25 0.22 0.03 12.000 2.8 2.811 -0.011 -0.392
0.3 0.271 0.029 9.6666 2.9 2.913 -0.013 -0.448
0.35 0.321 0.029 8.2857 3 3.014 -0.014 -0.466
0.4 0.371 0.029 7.2500 3.2 3.22 -0.02 -0.625
0.45 0.419 0.031 6.8888 3.4 3.424 -0.024 -0.705
0.5 0.47 0.03 6.0000 3.6 3.628 -0.028 -0.777
0.6 0.572 0.028 4.6666 3.8 3.829 -0.029 -0.763
0.7 0.673 0.027 3.8571 4 4.033 -0.033 -0.825
0.8 0.777 0.023 2.8750 4.2 4.237 -0.037 -0.880
0.9 0.877 0.023 2.5555 4.4 4.443 -0.043 -0.977
1 0.98 0.02 2.0000 4.6 4.646 -0.046 -1.000
1.2 1.185 0.015 1.2500 4.8 4.845 -0.045 -0.937
1.3 1.287 0.013 1.0000 5 5.051 -0.051 -1.020
1.4 1.388 0.012 0.8571 5.01 5.06 -0.05 -0.998

61
Image 38 Absolute error (K-A)
Image 39 Relative error (K-A)/K*100
Image 48 shows how the difference between Arduino and the electrometer measures, (K-A),
in absolute values in volts. It reaches the common point at 2 Volts. It has also the regression
line, and its equation.
Image 39 shows the relative error, as . It is very clear that at the small values, the
error is much bigger.
y = -0.0171x + 0.0357 R² = 0.9972
-0.06
-0.05
-0.04
-0.03
-0.02
-0.01
0
0.01
0.02
0.03
0.04
0 0.5 1 1.5 2 2.5 3 3.5 4 4.5 5
K-A
Voltage drop output ammeter
-10
0
10
20
30
40
50
60
70
80
0 0.5 1 1.5 2 2.5 3 3.5 4 4.5 5 5.5
(K-A)/K
Voltage at output of ammeter

62
The solution to solve this problem is correcting the values. The mechanism will be to add the
difference value according to the regression line showed at image 34. This way, the resulting
value will be the first one plus the difference of what it should be.
The regression formula is:
(4.10)
with x for the measured values and y showing the difference between the
electrometer and Arduino.
Therefore, if the correcting formula calculates the difference to the ideal value, to get the
corrected one the formula is:
(4.11)
Once applied the correction, the difference between the ideal value and the value measured
with the Arduino is reduced to almost zero.
Image 40 Difference between Electrometer and corrected values1
1 Values attached at appendix A.b
y = 3E-06x + 3E-05 R² = 7E-06
-0.004
-0.003
-0.002
-0.001
0
0.001
0.002
0.003
0.004
0 0.5 1 1.5 2 2.5 3 3.5 4 4.5 5
K-(A+y)
Volts

63
This graph shows the difference between the ideal values and the corrected ones. Notice
that the values reach a maximum difference of 0.0027 Volts to the ideal one instead of 0.035
without the correction. The regression line in this case is almost Y=0, which means that there
is no further adjustment possible.
Image 41 Relative error between the ideal value and the correction values1
At the percentage image, there is clearly one value higher than the rest, with a 2.5%
difference but the rest stay within 0 and 0.5%. It is good to notice that the peak value
corresponds to 100mV, said in another way, in the range of values that were considered not
appropriate for Arduino. It reduces from a 32% error to a 2.5%.
This correction depends on the resistance being used, that means that for each range and
each isolating system it will have to be adjusted for its values.
-3
-2.5
-2
-1.5
-1
-0.5
0
0.5
1
0 0.5 1 1.5 2 2.5 3 3.5 4 4.5 5
(K-(A+y))/K (%)
Voltage

64
4.2.3. Update 3: Adapting for negative values
Arduino can only read positive values. That makes it an inconvenience and for that reason it
would be suitable to have some kind of additional circuit to convert the negative values to
positive ones.
The best solution is to have an operational amplifier in the inverting configuration.
Image 42 Operational amplifier in inverting configuration
The intention of using this configuration is to have the following statement:
(4.12)
For this purpose, Rin must be equal to Rf. The current will flow though both resistances from
VIN to VOUT. As the non-inverting pin is connected to ground the inverting one will try to have
0 V. If both resistors are equal, it means that the voltage drop on both will be the same, with
0V as the middle point. Therefore, if the Vin = -1, Vout = 1.
The operational amplifier should also have a low input bias, so the values are as exact as
possible and the lowest current possible is lost in the inverting process.
The following step is to design how will be how to implement the circuit that will let to
choose between positive and negative values. The circuit will consist of a switch of 2
positions, one for positive currents and one for negative. If the chosen one is the positive,

65
the output will go directly to the amplifier. If the negative one is chosen, the output will go
to the inverter circuit and then to the amplifier.
Image 43 Inverter circuit with the switch
In addition to that, there will also be 2 LEDs added to indicate in which situation the switch is
positioned. A green LED will indicate positive values. Red LED will indicate negative values. It
will also be commanded by the same switch.
The LED is connected with a 2kΩ resistor between the +V and –V of the power supply.
Image 44 LEDs circuit

66
Image 45 Image of the third design front and back
Image 46 Schematic of the third design with parts labelled
Image 46 shows the schematic of the design. It includes the main parts such as the resistor
and LED switch, the voltage supply and ground generator, the Inverter Op-Amp and LEDs
with the other switch and the second amplifier with the output for the Arduino.

67
4.2.4. Update 4: Design to fit into a shielding box
The fourth update is the last one made. Even though update 3 was working properly, this
one is designed with the idea of putting the board inside of a metal box in order to protect
the components and also for isolating.
It was also made with a ground layout on the top and the bottom of the board, as a shielding
protection.
It also includes one capacitor for each positive and negative supply pin of each operational
amplifier, situated as closely as possible to the pins.
Electrostatic Interference and Shielding
Electrostatic coupling appears when an electrically charged object approaches the input
circuit under test. This happens at high resistance materials because they don’t allow the
charge to dissipate quickly, and might result in bad measurements. It can be an AC or DC
electrostatic field, so shielding will help minimize the effects of those fields.
In the case of DC fields, effects can be detected when there is movement around the
experiment, for example a person, and the results will fluctuate. If the simple fact of moving
around the device creates the measures to change considerably, there is not enough
shielding.
AD fields are caused by power lines and RF fields. The way to know if they exist is looking at
the signal through an oscilloscope. They can be created by transmitters, contactors or even
cellular phones.
The shielding can be built to enclose the circuit by making metal box surrounding the device.
It should be enough to protect against most electrostatic AC interferences.
The shield has to be connected to the low point, in this case the ground. The cabling
between the HI terminal of the meter and the device under test should also be shielded,
especially when measuring under 1 nA.

68
Image 47 Shielding with a metal box
The main difference between shielding and guarding is that shielding implies the use of a
metallic enclosure to prevent electrostatic interference. Guarding implies use of an added
low impedance conductor at the same potential as the high impedance with the purpose to
intercept any voltage or current.
Image 48 Circuit inside the shielding box with and without cover
4.2.4.1. Comparison between grounded board with shielding and without shielding
In the fourth update, it was important to take care of the shielding as well as the leakage
currents inside the board, due to the parasite capacitances and junctions between them.
First of all, the board was design making both top and bottom of the board to be at a ground
potential.

69
Image 49 Layout with zoom on the signal system
To see how the new box and printing system works, the same measure will be taken with
the board without (update 3) and this board (update 4). Additionally, it will also be
measured with the electrometer.
What will be measured is 5 volts over a resistance of 16GB, and making no movement
around the board while measuring.
Image 50 Comparison between with shield, without and electrometer
260
265
270
275
280
285
290
295
300
0 2 4 6 8 10 12 14 16 18 20 22 24
Current (pA)
Time (s)
With shield Without shield Electrometer

70
In image 50 it can be seen how it affects the internal leakage current. Update 3 has a loose
of 15pA on average respect the board number 4. Electrometer is considered the ideal one
and it has 10 pA over the board with shielding. Also important to consider that to measure
with the electrometer, a low noise cable has been used and with the board, standard cables
are the ones being used.
Image 51 Experiment to prove the influend of the shield while movement around
In this case, the same experiment was made, with the same variables, but this time, there
was movement around the measures. The movement consisted walking in and out around it
and move a hand without touching anything. The measures were taken one after another,
but trying to repeat the same movements in both.
What can be seen is that with the shield, the noises because of the interference and external
fields are highly reduced, proving the convenient and adequate use of a shield.
0
100
200
300
400
500
600
700
0 2 4 6 8 10 12 14 16 18 20 22 24 26 28 30 32 34
Current (pA)
Time
With shield Without shield

71
5. Eagle design
Eagle is the software used to implement the design of the layout. The first step is to draw
the full schematic, with all the pieces from the components library. It is important to choose
the correct components, because they will define the size of the components and the space
between its pins.
Image 52 Schematic of the final design on eagle software

72
Image 52 shows the final schematic of the circuit. Each single part has been described
previously separately.
This picture also shows how the connections between the board and the outside are made.
PAD 1 and 2 are the input and output of the current desired to be measured. Pad 3 and 4 are
jack connections for a multimeter. In case there is no option of having a computer and
Arduino available in that moment, these connections will give the results without
amplification, inverted or not inverted so they can be read in a multimeter in mV. 1 µA, nA
or pA will be equivalent to 1mV.
The power circuit has 4 input pads. X1-1 and X1-2 are the connections for the supply
converter used in this experiment. In addition, there are PAD5 and PAD6 as banana jack
connections, in case there is the need to use a different voltage supply.
X2-1 and X2-2 will be the connections to the Arduino. They are simple cable connections and
also fit in the Arduino slots.
Once the schematic is completed, all the components need to be set up on the board.
Initially, the components are lined by lines, showing which parts are connected with the
other parts.
Image 53 Components before being placed on the board

73
Once the pieces are placed in the desired locations the connections between points can be
changed, making the shortest possible distances.
Image 54 Circuit before optimizing the connections and positions
Image 55 Circuit after optimizing the connections and position

74
Once the connecting points are the optimal ones, the function “AutoRoute” defines the
circuit lines on the board. The color red means on top of the board and blue is on the
bottom.
At this point, it is advisable to manually modify the lines a little bit, making it easier to weld
and mount it. For example, leaving some space between parallel lines or the connections to
the chips chassis not too close.
Image 56 Circuit configuration
Image 56 shows exactly how the components are placed in the layout. The size of the layout
is 100x80mm.

75
The final thing to be done is adding a layout with the ground on top and bottom of the
board. That is a way to create some guarding over the board. Basically consist in making the
part of the board which has no lines to be the ground.
Image 57 Forth design with the ground layover on top and bottom
Image 58 Complete Schematic diagram

76
6. Components and costs estimation
The components used in all of the boards can be easily bought through the internet at an
affordable prize. The following table shows the components needed for the last design made
and their prices.
Table 14 Components cost
Component Amount Unity price € Total price €
Supply 230/12 V 1 8,83 8,83
10 MΩ 1% 1 0,06 0,06
1 MΩ 0,1% 1 0,24 0,24
10 kΩ 0,1% 3 0,98 2,94
10 Ω 0,1% 1 5,18 5,18
1 kΩ 0,1% 2 0,68 1,36
2 kΩ 1% 2 0,22 0,44
3 k Ω 0,1% 1 0,94 0,94
24 kΩ 0,1% 1 0,71 0,71
75 kΩ 0,1% 1 0,28 0,28
100 Ω 0,1% 5 0,86 4,30
200 kΩ 1% 2 0,04 0,08
100nF Capacitor 9 0,20 1,8
220nF Capacitor 1 0,53 0,53
LT1013 1 1,84 1,84
LTC1050 3 5,15 15,45
Green LED 4 0,15 0,6
Red LED 1 0,09 0,09
Rotary Switch CK-1027 1 1,86 1,86
2 Positions switch APEM - 5646A9 2 6,39 12,78
Xip chassis 4 0, 53 2,12
Screw Connector 2 0,7 1,4
4mm Red Banana Jack 3 2,76 8,28
4mm Black Banana Jack 3 2,76 8,28
Metal box 1 11,71 11,71
Board manufacturing 1
TOTAL 56 92,07 €

77
7. Resolution
It is important to know the resolution of the whole measurement device, because it will
determine how precise can the ammeter measure.
First of all, the resolution will be determined by the Arduino board, specially the ADC
converter inside the chip ATMega328. It has a resolution of 10 bits.
10 bits resolution = 210 bits = 1024 bits
It is also known that the Arduino goes from 0 to 5 volts (5,02 on this board). That means that
it can be calculated what the smallest change on the input in volts is needed to increase 1 bit
of the converter:
So for every 4,902mV increased at the input of the Arduino board, the output will show one
bit more.
Then it is important to remember that the hardware device has 2 amplifiers, one with 4
times amplification and one with 100 times amplification. It can be known the voltage
previous the amplifications that result in the 4,902mV:
So a voltage variation on the shunt resistance of 0,012255 mV will lead to a change of bit at
the output of the Arduino board.
To look exactly what current will make that change on each resistance, this voltage has to be
divided by each of the shunt resistances.
10MΩ
1MΩ
10 kΩ

78
8. Accuracy of the results with constant resistances
Measure the accuracy on constant value is relatively easy, because the time is not a variable,
therefore what matters is the constant final value and what it should be compared to the
ideal one.
The most critical range is the pico range, with the shunt resistor of 10MΩ. It is the one where
there will be need more correction
To reproduce this experiments, a standard resistance of 16GΩ (16,82Ω) will be used, and the
voltage applied to it is the one that will be changed, reaching values from 0 to 1250 pico
amps.
Image 58 shows the values of the Arduino are the ones directly obtained from it, without
applying any correction using the 10MΩ shunt resistance (pico range).
Image 58 Measured values for 17,84, 23,78, 41,62 and 59,45 pA
To these values it is needed to apply the correction formula, which will take out the error
made by the device, as explained in chapter 4.2.2.1. The formula for the pico range is:
0
10
20
30
40
50
60
0 1 2 3 4 5 6 7 8 9 10 11 12 13 14 15
Current before correction (pA)
Time (S)
17.84 pAMeasured
23.78 pAMeasured
41.62 pAMeasured
59.45 pAMeasured

79
Image 59 After correction values
Table 15 Values for image 58 and 59
Ideal value
(pA)
Average measured value
without correction (pA)
Average value after
correction (pA)
Ideal-Real
(pA)
Ideal-
Corrected (pA)
17,84 4,63 19,48 13,13 -0,57
23,78 10,77 25,58 12,97 -0,67
41,62 28,31 42,96 13,16 -0,30
59,45 45,86 60,35 13,52 0,24
Table 15 shows the numeric values for image 58 and 59. It shows the average values with
and without correction and what should be the ideal value. It also includes the difference
between the ideal and the measured values and the ideal and corrected values.
It is important to see that as said before, the Arduino doesn’t work properly for low values.
Once the correction is applied, those values don’t correspond with the ideal ones, because
the correction is optimized for the values that the Arduino can actually read. For example, if
the measure is 0 pA, the correction shows 14,906. Therefore, those values should be
considered not appropriate though can be estimated.
0
10
20
30
40
50
60
70
80
0 1 2 3 4 5 6 7 8 9 10 11 12 13 14 15
Current after correction (pA)
Time (s)
17.84 pACorrected
23.78 pACorrected
41.62 pACorrected
59.45 pACorrected

80
Image 60 Values for 297,27 pA and 594,53 pA
In image 60 and 61 it is shown the same as image 59, in this case for 297,27 and 594,53 pA.
It compares before and after the correction. Image 61 shows it for 1189,06 pA.
Image 61 Values for 1189,06 pA
200
250
300
350
400
450
500
550
600
650
0 1 2 3 4 5 6 7 8 9 10 11 12 13 14 15 16 17 18 19
Current (pA)
Time (s)
297.27 pA Measured
594.53 pA measurd
297.27pA Corrected
594.53 pA Corrected
1100
1110
1120
1130
1140
1150
1160
1170
1180
1190
1200
0 1 2 3 4 5 6 7 8 9 10 11 12 13 14 15 16 17 18 19
Current (pA)
Time (s)
1189.06 pAmeasured
1189.06 pACorrected

81
Table 16 Values for pico range with 10M resistor
Ideal value
(pA)
Average measured value
without correction (pA)
Average value after
correction (pA)
Ideal-Real
(pA)
Ideal- Corrected
(pA)
297,27 286,28 298,59 11,40 0,23
594,53 584,27 593,88 10,46 0,65
1189,06 1179,72 1183,89 9,34 6,31
Table 16 shows the values for 297,27, 594,53 and 1189,06 pA. It shows the measured values,
the corrected ones and the ideal ones. It also shows the difference between the ideal and
real values and Ideal and corrected values.
Now it is easy to see how the correction really works and deletes the error created by the
device. Image 62 proves how the difference of values between measured and corrected
compared to the ideal ones changes. In the corrected ones, the difference is reduced
significantly.
For the nano range, with the shunt resistor of 10kΩ, another correcting formula will be used.
It is:
In this case the experiments are done with a variable voltage over 10kΩ resistance,
measuring values from 27nA to 1103nA.
Image 62 Measured and corrected value for nA range
020406080
100120140160180200
0 1 2 3 4 5 6 7 8 9 10 11 12
Current (nA)
Time (s)
27.57 nA Measured
64.34 nA Measured
182.82 nA Measured
27.57 nA Corrected
64.34 nA Corrected
182.82 nA Corrected

82
Image 63 Measured and corrected value for nA range
In this case, the error made is not that big, also because there is no need to go for really
small values, as the small ones will be covered by the 1MΩ resistor. Therefore, it can be
calculated from 30 nA, which is big enough.
Still the values are similar, a little correction adjust the values, decreasing the difference
between Ideal ones and measured.
Table 17 Values for the nano-range with 10k resistor
Ideal value (nA) Average without correction (nA)
Average with correction (nA) Ideal-real (nA) Ideal -corrected (nA)
27.57 22.36 27.95 5.209 -0.384
64.34 59.07 64.41 5.265 -0.071
182.82 179.18 183.68 3.637 -0.859
459.59 456.84 459.39 2.751 0.199
735.31 734.41 735.01 0.904 0.295
919.12 920.2 919.51 -1.083 -0.391
1102.94 1105.42 1103.43 -2.478 -0.490
900
950
1000
1050
1100
1150
0 1 2 3 4 5 6 7 8 9 10 11 12
919.12 nA Measured
1102.94 nA Measured
919.12 nA Corrected
1102.94 nA Corrected

83
Image 64 Error in values before and after the correction (nA)
Image 64 shows how the error is deleted with the correction, from a range of 5 nA to slightly
less than 1 nA error.
The range of 1MOhm is supposed to covert he space between the 2 previous ones, so
between 1 and 10 nA. That range is very small and centered in the possible ranges, so it
basically doesn’t need correction.
Table 18 Values for 1MOhm shunt resistance
Measured (nA) 1.06 1.96 3.17 5.78 5.25 9.54 7.36 10.54
Ideal (nA) 1.09 1.93 3.17 5.8 5.29 9.66 7.41 10.58
Difference (nA) -0.028 0.031 0.000 -0.022 -0.044 -0.116 -0.046 -0.044
8.1. Positive-Negative Error
Another important part to look at the accuracy is to look at the response when the board is
working with negative values. To look at this, the same current is going to be measured with
positive values and negative ones.
-3
-2
-1
0
1
2
3
4
5
6
0 100 200 300 400 500 600 700 800 900 1000 1100
Absolute Error (nA)
Current measured (nA)
Ideal-real (nA) Ideal corrected (nA)

84
Image 65 Comparison between Positive and Negative measurement for 1V input over 16GΩ
Image 66 Comparison between Positive and Negative measurements for 5V input over 16GΩ previous to the correction.
Image 65 and 66 show the comparison of measuring positive and negative values. On the
board that means changing the switches and using another operational amplifier. The
0
10
20
30
40
50
60
70
0 1 2 3 4 5 6 7 8 9 10 11 12 13 14 15
Current Measured (pA)
Time (s)
1V -positive 1V-negative
270
275
280
285
290
295
300
305
0 1 2 3 4 5 6 7 8 9 10 11 12 13 14 15 16 17
Current measured (pA)
Time (s)
5V -positive 5V- negative 5V- Electrometer positive

85
negatives values are always higher than the positives. That can be because the board is using
another operational amplifier, it includes more offset to the final value.
The average values are:
Table 19 Average value for image 63 and 64
Positive (current pA) Negative (current pA) Difference (pA)
1V input 46,86 57,5 10,65
5V input 284,28 293,95 9,67
For that reason, it is important to know that there is a difference around 10 pA between
reading positive and negative values, therefore, a different correction will be need when
measuring either way. The error between positive and negative doesn’t depend on the
current measured. The inverter circuit can add some leakage current, offset and error, as
well as reduce the accuracy. All this factors can be seen as the difference between positive
and negative comparison.

86
9. Accuracy of the results with insulating liquid
The device is designed to measure the current over the insulating system, which can be oil.
The oil goes inside the plate’s electrodes and the current measured is the one flowing
between both plates.
It is not intended in this thesis to study the behavior of the oil, but it is important to compare
the results to another device, in this case the electrometer measures.
For this reason, the experiments made will be with 1kV over a 2mm gap applied between
the 2 electrodes.
Image 67 is the results of measuring over the 10MΩ, the pico range. It can be clearly seen
how the current value goes over the 1250pA, the reading stops at that value. That is because
the 1250pA is equal to the 5V on the input of the Arduino, which is high limit value.
Therefore, it will show 1250pA until it the value decreases again.
The values shown are values without and correction, just showing directly as they are read
form the Arduino. For correction process, refer to chapter 4.
Image 67 Measures of 1kV with 2mm gap on the insulating liquid with pico range (10MΩ)
0
200
400
600
800
1000
1200
1400
0.2 6.2 12.2 18.2 24.2 30.2 36.2 42.2 48.2 54.2 60.2 66.2 72.2 78.2 84.2
Current measured (pA)
Time (s)

87
Image 68 is the same experiment, with the same oil and temperature conditions but in this
case measured with the electrometer. The electrometer doesn’t have a limit value,
therefore in this case it can be seen what value it reaches. It is 10.000 pA (10nA) before
going down as expected.
Image 68 Full range with Electrometer
Image 69 has the same values as image 68, but in this case the limit of the graph has been
set at 1250 pA, so it matches with the experiment made with the shunt resistance. This way,
the graphs can be compared easier.
Image 69 Range limited (1250pA) with electrometer
0
1000
2000
3000
4000
5000
6000
7000
8000
9000
10000
0.0 2.5 3.3 3.7 4.1 4.4 5.1 5.4 5.7 6.0 6.4 6.9 7.2 7.5 7.9 8.2 8.5
Current measured (pA)
Time (s)
0
150
300
450
600
750
900
1050
1200
0.0 7.1 11.0 14.6 18.8 22.5 26.3 29.9 34.0 38.0 41.9 46.0 49.7 53.7 57.9
Current measured (pA)
Time (s)

88
Between the electrometer and the shunt resistance system, there is one main difference. It
is the falling time between 1250pA and the end. Electrometer is faster decreasing the values
and the Arduino takes a little bit longer, but after some seconds they reach the expected
values.
Image 70 Arduino and Electrometer for 2kV and 2mm
Image 70 shows another experiment, this time with 2 kV/mm and 2mm gap between the
electrodes. In this case the end values are 552 pA for Arduino and 543,66 pA for
Electrometer. The difference between them is completely acceptable considering how much
variation there are in the measures.
0 10 20 30 40 50 60 70 80 901
10
100
1.000
Time[s]
Cu
rren
t [p
A]
Electrometer
Arduino

89
10. Summary and outlook
The summary will review all of the goals and objectives that were expected and set in place
at the beginning of the project and how many and what was accomplished at the end.
The main goal was to build an ammeter that would be able to measure low level currents
over an insulting system. This was successfully completed and the result has been the
creation of a device capable of measuring that current.
One of the most important parts to consider when designing the device was that the device
would need to be able to log the values and work with the data afterwards. This
requirement was significant because it was necessary to keep this in consideration as with a
multimeter the values would only be seen on screen. The final device is able to read and log
a large amount of values, even more than one at a time, and stored in the .CSV file they are
already showing the final values. In addition to storing values, the device also has also the
output pins for a multimeter in the voltimeter function. The results can be seen on the
screen of the multimeter at the same time, as for example, 100 pA = 100mV.
Another important part of this thesis was to design hardware that would be easy to repair or
replace. The components used have been standard-size components. The welding and the
process of designing and printing the board had also been done completely by hand.
Welding by hand requires leaving enough space for the potential error created by human
hands, and considering that mistakes could be made. This means that the spaces between
components, as well as the separation between holes, lines and ground points is bigger than
what it would be if the components had been placed by a machine.
Being inside a box protects the device from electric fields, distortions, and from external
causes that could result in it being broken or malfunctioning.
In addition to the previous goals and requirements, the cost of all the components had to
remain low. The total cost is approximately 125€, including the Arduino board. This cost
doesn’t include the manufacturing time or cost.
Simplicity of use was also something important to consider through the development of the
device. The whole process of measuring with the device consists of 3 switches to select the

90
measuring range, 2 switches for positive or negative values, and the software. It is really
intuitive and easy to use, with the LED showing the switches and the software already
prepared for each measurement. The only thing to do is run the test and measure the
values.
In addition to the main goal of designing the device, it was also important that the device
was able to measure a certain range of values. The micro amps range was discarded, as
those values were too high for what the device was supposed to measure. Therefore, the
special range of values was the pico and nano range.
The device has a resolution of 1,2pA between 10 and 1200 pA (10MOhm shunt resistor),
12,2 pA between 100 and 12,5 nA (1MOhm shunt resistor) and 1,2 nA between 10 and 1200
nA (10kOhm shunt resistor). These resolutions surpass the expected ones, as they are so
small. A smaller resolution would have worked for the purpose of the device.
The accuracy of the results was more difficult and created a bit of trouble, but by the end of
the project reached an acceptable result. . There was an error that couldn’t be avoided due
to the handmade board and components. To account for this error, correction formulas have
been created to minimize that error for each range and approximate to the ideal values.
For future improvements, it would be good to consider installing automatic switches instead
of manual ones. The benefit would be that automatic switches could be controlled by the
computer and the Arduino, with the serial port and digital in/out pins. Another
improvement would be to include the Arduino inside the metal box, if desired, for
protection.
Finally, it would be good to consider installing a display on the metal box. This would
substitute the function of the multimeter and show the current on the screen. There would
be no need for a computer if the values were only wanted to be seen in real time.

91
11. References
[1] “Wikipedia,” 23 March 2014. [Online]. Available: http://en.wikipedia.org/wiki/Operational_amplifier.
[2] Keithley, "Technical information: Low current/High resistance measures," 2013. [Online]. Available: http://www.keithley.com/support/keidoc_searchresult?keyword=low+current&item_type=All. [Accessed 6 February 2013].
[3] Keithley, "Low level DC Measuring Instruments," in Low Level Measurements Handbook, p. Section 1.
[4] Arduino. [Online]. Available: www.Arduino.cc.
[5] Atmel, "Datasheet AT328Mega," [Online]. Available: http://www.atmel.com/Images/Atmel-8271-8-bit-AVR-Microcontroller-ATmega48A-48PA-88A-88PA-168A-168PA-328-328P_datasheet.pdf.
[6] Linear Technology, “Datasheet LTC1050,” [Online]. Available: http://cds.linear.com/docs/en/datasheet/1050fb.pdf.
[7] L. Technology, "Datasheet LT1013," [Online]. Available: http://cds.linear.com/docs/en/datasheet/10134fd.pdf.
[8] Keithley, "Voltage Measurements from High Resistance Sources," in Low level measurement Handbook, p. Section 2.2.
[9] Keithley, "Low Current Measurements," in Low level measurement Handbook, p. Chapter 2.3.
[10] Keithley, "Low current measurements applications notes 1671," [Online]. Available: www.keithley.de/data?asset=6169.
[11] Horowitz and Hill, The Art of Electronics 2, Cambridge: Cambridge University press, 1989.

92
A Appendix
a. Correction arduino
Keithley Arduino A+y K-(A+y) (K-(A+y))/K (%)
0.01 0 0.0357 -0.0257 -257
0.02 0 0.0357 -0.0157 -78.5
0.05 0.015 0.0504435 -0.0004435 -0.887
0.07 0.035 0.0701015 -0.0001015 -0.145
0.1 0.068 0.1025372 -0.0025372 -2.5372
0.15 0.119 0.1526651 -0.0026651 -1.776733333
0.2 0.168 0.2008272 -0.0008272 -0.4136
0.25 0.22 0.251938 -0.001938 -0.7752
0.3 0.271 0.3020659 -0.0020659 -0.688633333
0.35 0.321 0.3512109 -0.0012109 -0.345971429
0.4 0.371 0.4003559 -0.0003559 -0.088975
0.45 0.419 0.4475351 0.0024649 0.547755556
0.5 0.47 0.497663 0.002337 0.4674
0.6 0.572 0.5979188 0.0020812 0.346866667
0.7 0.673 0.6971917 0.0028083 0.401185714
0.8 0.777 0.7994133 0.0005867 0.0733375
0.9 0.877 0.8977033 0.0022967 0.255188889
1 0.98 0.998942 0.001058 0.1058
1.2 1.185 1.2004365 -0.0004365 -0.036375
1.3 1.287 1.3006923 -0.0006923 -0.053253846
1.4 1.388 1.3999652 3.48E-05 0.002485714
1.5 1.49 1.500221 -0.000221 -0.014733333
1.7 1.692 1.6987668 0.0012332 0.072541176
2 1.999 2.0005171 -0.0005171 -0.025855
2.2 2.202 2.2000458 -4.58E-05 -0.002081818
2.4 2.405 2.3995745 0.0004255 0.017729167
2.6 2.608 2.5991032 0.0008968 0.034492308
2.8 2.811 2.7986319 0.0013681 0.048860714
2.9 2.913 2.8988877 0.0011123 0.038355172
3 3.014 2.9981606 0.0018394 0.061313333
3.2 3.22 3.200638 -0.000638 -0.0199375
3.4 3.424 3.4011496 -0.0011496 -0.033811765
3.6 3.628 3.6016612 -0.0016612 -0.046144444
3.8 3.829 3.7992241 0.0007759 0.020418421
4 4.033 3.9997357 0.0002643 0.0066075
4.2 4.237 4.2002473 -0.0002473 -0.005888095
4.4 4.443 4.4027247 -0.0027247 -0.061925
4.6 4.646 4.6022534 -0.0022534 -0.048986957

93
4.8 4.845 4.7978505 0.0021495 0.04478125
5 5.051 5.0003279 -0.0003279 -0.006558
5.01 5.06 5.009174 0.000826 0.016487026
b. Values for electrometer when testing the insulating system with 1kV and
2mm
Current
(pA)
Time
(s)
0 0.0
0.0417 2.3
2.6142 2.5
9311.1 2.6
6173.3 3.3
2601.4 3.6
1116.7 3.7
953.37 4.0
508.53 4.1
383.22 4.3
244.92 4.4
48.125 4.5
55.621 5.1
60.677 5.3
67.14 5.4
68.077 5.6
68.064 5.7
72.536 5.8
73.438 6.0
75.799 6.1
85.181 6.4
78.342 6.7
72.758 6.9
72.491 7.1
70.773 7.2
71.846 7.4
77.97 7.5
78.165 7.6
76.102 7.9
77.483 0.8
75.05 8.2
74.848 8.3
77.217 8.5
75.982 8.6
73.343 8.7
77.438 8.9
74.619 9.2
75.973 9.4
73.257 9.7
73.351 9.9
73.637 10.0
74.433 10.2
72.091 10.3
77.812 10.4
78.39 10.6
85.031 10.7
81.979 11.0
80.395 11.1
80.726 11.3
77.802 11.4
77.131 11.5
76.147 11.7
76.734 11.8
78.484 11.9
76.826 12.1
78.613 12.2
79.025 12.7
76.804 12.8
77.585 12.9
74.164 13.1
79.446 13.2
77.661 13.3
79.096 13.5
82.876 13.6
82.815 13.8
80.471 13.9
78.475 14.1
78.822 14.3
83.877 14.5
79.984 14.6
77.375 14.8
78.524 14.9
77.784 15.1
77.44 15.2
73.642 15.6
70.841 15.7
77.248 16.0
77.802 16.2
74.989 16.3
76.399 16.4
77.968 16.6
75.214 16.8
75.61 17.0
72.029 17.1
71.241 17.3
75.591 17.4
81.69 17.6
78.284 17.7
74.196 17.8
74.184 18.0
73.439 18.4
71.209 18.7
73.641 18.8
73.282 19.0
70.815 19.1
69.355 19.2
74.275 19.4
74.451 19.5
72.905 19.7
71.536 19.9
74.878 20.1
72.516 20.2
72.187 20.4
73.653 20.5
73.36 20.6
77.572 20.8
77.428 20.9
81.973 21.1
76.145 21.4
71.727 21.7
72.546 21.8
75.851 21.9
73.924 22.1
70.81 22.2
75.735 22.3
74.95 22.5
72.324 22.6
78.606 22.7
77.84 22.9
76.681 23.0
77.658 23.2
80.912 23.5
79.304 23.6
75.329 23.7
74.951 23.9
74.586 24.0
76.083 24.4
73.659 24.6
80.433 24.7
78.368 24.8
74.263 25.0
76.504 25.1
74.573 25.3
74.945 25.4
76.304 25.6
73.556 25.7
70.97 26.0
70.058 26.1
69.481 26.3
67.821 26.4
68.102 26.6
66.658 26.7
72.093 26.8

94
73.076 27.0
79.213 27.1
78.197 27.5
76.601 27.7
76.483 28.0
74.838 28.1
76.752 28.2
80.723 28.4
79.821 28.5
76.625 28.7
73.126 28.8
81.985 28.9
80.359 29.1
76.421 29.2
74.646 29.4
73.688 29.6
70.316 29.7
67.567 29.8
71.626 29.9
73.263 30.4
72.872 30.5
73.309 30.6
69.149 30.9
68.546 31.1
74.861 31.2
73.785 31.3
74.321 31.5
75.61 31.6
72.356 31.8
73.764 31.9
74.235 32.1
75.836 32.2
72.258 32.3
70.089 32.5
70.489 32.6
67.77 32.8
75.513 33.1
77.573 33.3
75.432 33.5
71.987 33.8
72.136 33.9
75.796 34.0
76.557 34.2
82.805 34.3
81.573 34.5
78.965 34.6
74.981 34.9
77.875 35.1
73.575 35.3
70.89 35.5
70.938 35.6
83.307 35.8
80.93 35.9
78.154 36.0
72.429 36.5
71.97 36.6
70.416 36.7
70.886 36.9
72.963 37.0
80.122 37.1
73.47 37.4
74.28 37.6
75.489 37.7
78.227 37.8
75.912 38.0
74.05 38.1
73.53 38.3
79.893 38.4
83.303 38.6
75.138 38.8
72.828 39.0
73.665 39.5
75.221 39.7
71.704 39.8
70.848 40.0
71.484 40.1
71.832 40.2
76.734 40.4
76.258 40.5
72.344 40.8
70.204 40.9
69.038 41.1
74.552 41.2
73.426 41.3
73.69 41.5
74.05 41.6
78.252 41.8
76.373 41.9
74.932 42.2
74.79 42.5
73.343 42.6
70.563 42.9
68.337 43.0
72.613 43.2
72.98 43.3
77.753 43.4
76.342 43.6
75.055 43.9
74.569 44.0
72.085 44.1
69.738 44.3
70.12 44.4
70.701 44.6
74.007 44.7
72.073 44.8
76.178 45.0
73.322 45.3
73.403 45.5
70.325 45.7
67.842 45.8
77.468 46.0
75.888 46.1
72.486 46.2
73.575 46.4
75.716 46.7
72.212 46.8
69.048 46.9
69.092 47.1
67.417 47.2
75.74 47.4
72.415 4.7
73.222 47.6
75.832 47.8
75.048 48.1
74.528 48.3
76.306 48.5
74.354 48.6
71.108 48.9
73.086 49.0
79.069 49.2
76.489 49.3
72.857 49.5
71.051 49.6
78.331 49.7
74.665 49.9
72.034 50.2
71.098 50.3
69.808 50.4
77.439 50.6
73.938 50.7
71.438 50.9
71.643 51.0
76.019 51.4
76.494 51.6
78.381 51.7
77.428 52.0
77.039 52.1
74.305 52.3
72.029 52.4
69.446 52.5
68.635 52.7
73.981 52.8
72.724 53.0
77.234 53.1
75.313 53.2
72.288 53.5
69.614 53.7
73.053 53.8
74.85 53.9
67.808 54.4
74.409 54.5
70.937 54.6
69.627 54.8
71.647 54.9
70.281 55.1
72.617 55.2
73.006 55.3
71.523 55.6
73.609 55.8
73.397 55.9
70.232 56.0
68.867 56.2
71.408 56.3
71.16 56.5
69.998 56.6
70.569 56.9
75.077 57.4
78.017 57.6
77.768 57.7
74.465 57.9

95
c. Values for Arduino when testing the insitulating system with 1kV and 2mm
0.00 0
0.00 0.2
0.00 0.4
0.00 0.6
0.00 0.8
0.00 1
0.00 1.2
0.00 1.4
0.00 1.6
860.73 1.8
1253.77 2
1253.77 2.2
1253.77 2.4
1253.77 2.6
1253.77 2.8
1253.77 3
1253.77 3.2
1253.77 3.4
1253.77 3.6
1253.77 3.8
1253.77 4
1253.77 4.2
1253.77 4.4
1253.77 4.6
1253.77 4.8
1253.77 5
1253.77 5.2
1253.77 5.4
1253.77 5.6
1253.77 5.8
1253.77 6
1253.77 6.2
1253.77 6.4
1253.77 6.6
1218.66 6.8
1122.64 7
1035.07 7.2
954.12 7.4
880.09 7.6
811.95 7.8
749.81 8
693.68 8.2
640.12 8.4
594.47 8.6
551.02 8.8
514.32 9
476.88 9.2
444.64 9.4
413.64 9.6
385.51 9.8
361.36 10
343.59 10.2
315.40 10.4
296.59 10.6
278.21 10.8
262.58 11
246.83 11.2
233.84 11.4
220.05 11.6
207.06 11.8
199.04 12
188.43 12.2
180.71 12.4
171.70 12.6
164.41 12.8
157.30 13
149.77 13.2
144.13 13.4
135.67 13.6
133.53 13.8
127.09 14
126.48 14.2
121.76 14.4
119.13 14.6
116.74 14.8
114.10 15
110.49 15.2
108.53 15.4
105.09 15.6
103.01 15.8
105.28 16
102.28 16.2
99.64 16.4
98.54 16.6
101.11 16.8
98.66 17
96.51 17.2
94.74 17.4
92.41 17.6
92.23 17.8
91.31 18
89.28 18.2
87.38 18.4
84.26 18.6
85.97 18.8
84.20 19
82.67 19.2
81.26 19.4
81.50 19.6
79.85 19.8
78.99 20
80.64 20.2
80.64 20.4
78.74 20.6
79.66 20.8
79.42 21
78.74 21.2
78.44 21.4
77.09 21.6
75.62 21.8
73.84 22
76.11 22.2
77.89 22.4
77.21 22.6
76.29 22.8
76.29 23
76.42 23.2
76.66 23.4
75.93 23.6
75.19 23.8
72.62 24
75.50 24.2
73.84 24.4
73.84 24.6
71.88 24.8
72.43 25
74.52 25.2
75.80 25.4
74.39 25.6
73.23 25.8
73.90 26
73.04 26.2
74.21 26.4
72.37 26.6
72.55 26.8
71.02 27
69.49 27.2
67.16 27.4
69.55 27.6
70.10 27.8
71.94 28
71.33 28.2
71.45 28.4
72.55 28.6
72.37 28.8
71.21 29
70.96 29.2
69.92 29.4
68.39 29.6
66.61 29.8
68.14 30
69.92 30.2
69.98 30.4
68.63 30.6
69.31 30.8
69.80 31
70.16 31.2
69.18 31.4
69.00 31.6
68.33 31.8
67.65 32
66.92 32.2
67.90 32.4
69.00 32.6
66.67 32.8
66.12 33
66.92 33.2
66.79 33.4
67.65 33.6
66.86 33.8
66.86 34
66.18 34.2
65.57 34.4
64.04 34.6
64.53 34.8

96
66.49 35
66.92 35.2
65.57 35.4
67.47 35.6
66.30 35.8
67.71 36
66.18 36.2
65.14 36.4
65.02 36.6
66.00 36.8
66.06 37
66.18 37.2
67.41 37.4
66.79 37.6
65.94 37.8
66.37 38
67.10 38.2
66.92 38.4
67.16 38.6
65.81 38.8
63.61 39
62.20 39.2
60.54 39.4
64.53 39.6
63.30 39.8
63.12 40
62.08 40.2
62.75 40.4
63.73 40.6
62.87 40.8
63.06 41
60.18 41.2
61.28 41.4
61.40 41.6
60.85 41.8
60.91 42
61.40 42.2
60.48 42.4
61.03 42.6
60.54 42.8
60.18 43
60.24 43.2
59.50 43.4
59.13 43.6
58.22 43.8
56.81 44
57.85 44.2
57.42 44.4
56.99 44.6
56.56 44.8
55.52 45
55.76 45.2
56.68 45.4
57.48 45.6
60.61 45.8
60.24 46
59.01 46.2
59.81 46.4
59.69 46.6
59.13 46.8
58.58 47
58.28 47.2
57.60 47.4
57.23 47.6
58.28 47.8
59.26 48
59.26 48.2
57.11 48.4
57.30 48.6
56.74 48.8
56.25 49
56.38 49.2
55.89 49.4
54.60 49.6
54.84 49.8
55.15 50
56.62 50.2
55.70 50.4
56.25 50.6
56.44 50.8
55.95 51
55.64 51.2
56.25 51.4
55.52 51.6
55.21 51.8
54.42 52
52.33 52.2
51.78 52.4
52.58 52.6
52.70 52.8
52.64 53
52.15 53.2
52.33 53.4
52.03 53.6
50.92 53.8
54.60 54
54.60 54.2
55.09 54.4
56.01 54.6
56.68 54.8
56.74 55
56.62 55.2
56.32 55.4
55.95 55.6
54.84 55.8
53.50 56
56.01 56.2
56.87 56.4
56.25 56.6
55.95 56.8
58.03 57
58.22 57.2
57.48 57.4
59.38 57.6
59.01 57.8
58.28 58
56.44 58.2
53.93 58.4
53.37 58.6
53.93 58.8
57.17 59
57.30 59.2
57.79 59.4
58.15 59.6
58.95 59.8
58.89 60
59.26 60.2
59.99 60.4
59.75 60.6
57.85 60.8
56.13 61
55.52 61.2
55.34 61.4
55.40 61.6
57.36 61.8
58.83 62
59.62 62.2
58.28 62.4
56.93 62.6
56.01 62.8
57.54 63
57.11 63.2
57.05 63.4
56.01 63.6
55.34 63.8
53.56 64
53.86 64.2
55.27 64.4
55.09 64.6
55.21 64.8
54.11 65
55.15 65.2
56.19 65.4
56.01 65.6
56.68 65.8
56.25 66
56.13 66.2
56.19 66.4
56.13 66.6
56.13 66.8
55.52 67
55.21 67.2
57.54 67.4
57.66 67.6
54.72 67.8
55.15 68
56.50 68.2
56.32 68.4
55.70 68.6
55.46 68.8
55.21 69
55.52 69.2
55.27 69.4
55.09 69.6
54.60 69.8
53.86 70
54.17 70.2
55.52 70.4
55.58 70.6
55.46 70.8
55.15 71
54.72 71.2
54.66 71.4
54.48 71.6
54.29 71.8

97
53.86 72
54.42 72.2
56.99 72.4
56.07 72.6
55.27 72.8
55.03 73
56.81 73.2
54.23 73.4
54.05 73.6
54.23 73.8
53.80 74
53.19 74.2
53.13 74.4
52.95 74.6
56.38 74.8
58.09 75
57.73 75.2
58.03 75.4
57.30 75.6
57.05 75.8
56.50 76
54.84 76.2
56.25 76.4
56.32 76.6
55.40 76.8
55.34 77
54.23 77.2
53.19 77.4
52.33 77.6
55.83 77.8
56.07 78
55.34 78.2
55.46 78.4
55.76 78.6
55.70 78.8
55.34 79
55.09 79.2
54.29 79.4
55.58 79.6
54.97 79.8
52.82 80
53.25 80.2
54.60 80.4
57.05 80.6
57.60 80.8
56.87 81
56.93 81.2
57.60 81.4
56.93 81.6
57.17 81.8
55.89 82
54.29 82.2
54.05 82.4
53.62 82.6
53.25 82.8
51.84 83
54.17 83.2
55.03 83.4
55.15 83.6
54.66 83.8
54.97 84
55.15 84.2
54.84 84.4
53.99 84.6
53.50 84.8
53.44 85
52.39 85.2
51.29 85.4
51.84 85.6
53.80 85.8
56.32 86
56.38 86.2
57.23 86.4
56.62 86.6