digicore australia’s australia’s ctrack online quick start guide. digicore australia – 936a...
TRANSCRIPT

DigiCore Australia – 936a Glen Huntly Rd, Caulfield South, Vic 3162 Phone: 03 9945-2240
Email: [email protected]
DigiCore Australia’s
Ctrack Online Quick Start
Guide.

DigiCore Australia – 936a Glen Huntly Rd, Caulfield South, Vic 3162 Phone: 03 9945-2240
Email: [email protected]
1. Logging In
2. Changing Your Password
3. Vehicle Replays
Process 1
Process 2
Process 3
4. Points of Interest (POI)
Polygonal POI
Rectangular POI
5. Geo Zones
6. Driver Tags
7. Reports
Vehicle Trip Summary
Vehicle Trip Report
Movement Report
8. Alarm Icons

DigiCore Australia – 936a Glen Huntly Rd, Caulfield South, Vic 3162 Phone: 03 9945-2240
Email: [email protected]
1. Logging In
Go to http:// http://o2.digicore-australia.com.au/Online/login.aspx
Login in using your provided username and password

DigiCore Australia – 936a Glen Huntly Rd, Caulfield South, Vic 3162 Phone: 03 9945-2240
Email: [email protected]
2. Changing Your Password
To change your password, move your mouse curse over security and click change password
Enter you current password and new password twice and click change password

DigiCore Australia – 936a Glen Huntly Rd, Caulfield South, Vic 3162 Phone: 03 9945-2240
Email: [email protected]
3. Vehicle Replays
A vehicle replay is used for when you want a ‘quick’ condensed version of a Vehicle Trip Summary. The only
details you will see are Start/Stop time, Max Speed, Distance and Location. This will show you three (3) ways to
run a replay on a vehicle.
Running a replay on a vehicle (Process 1)
Left click on the vehicle running field (not directly on the vehicle name), which will highlight the
vehicle, then click on the replay button
A calendar will appear on the right hand side of the screen. Select the date that you wish to display the
trips for the vehicle selected. The trips will appear below the calendar. You can only select 1 day at a
time.

DigiCore Australia – 936a Glen Huntly Rd, Caulfield South, Vic 3162 Phone: 03 9945-2240
Email: [email protected]
Clicking on a trip will show the trip on the map. If you hold down the CTRL button on the keyboard you
can select multiple trips.

DigiCore Australia – 936a Glen Huntly Rd, Caulfield South, Vic 3162 Phone: 03 9945-2240
Email: [email protected]
To clear the map of any trips that have been shown click the clear overlay button.

DigiCore Australia – 936a Glen Huntly Rd, Caulfield South, Vic 3162 Phone: 03 9945-2240
Email: [email protected]
Running a replay on a vehicle (Process 2)
Left click on the vehicle running field (not directly on the vehicle name), right click and select replay.
Refer to steps 2-4 on ‘Running a replay on a vehicle (Process 1)’

DigiCore Australia – 936a Glen Huntly Rd, Caulfield South, Vic 3162 Phone: 03 9945-2240
Email: [email protected]
Running a replay on a vehicle (Process 3)
Left click on the Vehicle name.
A pop-up window will appear that gives you 4 options for viewing trips – Today, Yesterday, Last 7 Days, Last 30
Days. Double click on the trip to have it populate on the map.

DigiCore Australia – 936a Glen Huntly Rd, Caulfield South, Vic 3162 Phone: 03 9945-2240
Email: [email protected]
4. Points of Interest (POI)
Points of Interest are map point references that will display when running a report. The report will notify that
a vehicle is X km away from a POI, rather than stating just its longitude and latitude. There are a few different
ways of inserting POI however this manual will only cover 2.
Creating a Polygonal Point of Interest (Process 1)
To create a POI click on the Points of Interest tab and click Add Polygonal Poi

DigiCore Australia – 936a Glen Huntly Rd, Caulfield South, Vic 3162 Phone: 03 9945-2240
Email: [email protected]
A small pop-up window will appear. Click OK.
Place a number of points on the map surrounding the area you want to mark as you POI. Once you
have finished getting the shape you want click in the middle of the shape and select save.
In the new box that appears, you will need to enter information in that is relevant to the POI.
Description, Type, Category are mandatory fields. Once you have finished click save.

DigiCore Australia – 936a Glen Huntly Rd, Caulfield South, Vic 3162 Phone: 03 9945-2240
Email: [email protected]
Creating a Rectangular Point of Interest (Process 2)
To create a POI click on the Points of Interest tab and click Add Rectangular Poi
A small pop-up window will appear. Click OK. Left click on the screen where you want the rectangle to sit. A
small box will appear with circular buttons on opposite corners. Drag either circle to resize the rectangle to the
desired size. Click in the shape and click save.

DigiCore Australia – 936a Glen Huntly Rd, Caulfield South, Vic 3162 Phone: 03 9945-2240
Email: [email protected]
In the new box that appears you will need to enter information in that is relevant to the POI.
Description, Type, Category are mandatory fields. Once you have finished click save.

DigiCore Australia – 936a Glen Huntly Rd, Caulfield South, Vic 3162 Phone: 03 9945-2240
Email: [email protected]
5. Geo Zones
A Geo Zone is a handy marking point on the map that can be utilised for a number of reporting alarms. The 3
types of Geo Zones are Preferred, No Go and Waypoint. The ‘Preferred’ geo zone is a marked area on the map
that is the preferred location for vehicles/drivers to be positioned.
The ‘No Go’ geo zone is a marked area on the map that is a restricted area. A number of different alarms can
be set up when a driver enters this zone. The ‘Waypoint’ geo zone is marked areas on the map that can be
utilised for notifying when a vehicle enters a specified area.
Preferred Geo Zones
To create a preferred Geo Zone click on the Geo Zones tab Add.

DigiCore Australia – 936a Glen Huntly Rd, Caulfield South, Vic 3162 Phone: 03 9945-2240
Email: [email protected]
A new window will pop-up with a map and options. In this window you may choose the shape of the
area (Polygonal or Rectangle), the name of the Geo Zone, and the type of Geo Zone (Preferred, No Go
or Waypoint). You may select specific drivers to set the Geo Zone to or just click save to assign the Geo
Zone to the group.
6. Driver Tags
A driver tag is used for registering when a driver is using a vehicle. Although driver tags can be used by anyone,
they can be assigned to specific individual people, allowing a greater level of specificity reporting which drivers
are using which vehicles.
Driver tags have two (2) sets of numbers on them - the short tag number and the long tag number. The short
tag number consists of six (6) digits (numbers only) whereas the long tag number consists of sixteen (16) digits
(numbers and letters).
Editing Drivers
To edit a Diver Tag click on the Driver tab. Then click on the pencil icon next to the tag you want to
edit.

DigiCore Australia – 936a Glen Huntly Rd, Caulfield South, Vic 3162 Phone: 03 9945-2240
Email: [email protected]
A pop-up window will appear allowing you to edit the details for the driver associated with the specific
driver tag. Here you can edit the First and Last name of the driver you want associated with that tag.
You are also able to give the tag a Driver ID. Although this is usually the same as the Long Tag number,
this can also be changed to reflect who the driver tag is associated to. When you have finished editing
click save.

DigiCore Australia – 936a Glen Huntly Rd, Caulfield South, Vic 3162 Phone: 03 9945-2240
Email: [email protected]
7. Reports
The three (3) main reports you will utilise through the Ctrack Online system are Vehicle Trip Summary, Vehicle
Trip Report & Movement Report.
Vehicle Trip Summary - A summary of all trips for the selected vehicle
Vehicle Trip Report – A report breaking down each trip for the vehicle selected
Movement Report – A list of every packet sent from the vehicle
Vehicle Trip Summary
To run a Vehicle Trip Summary (VTS), hover your mouse cursor over Reports Trips and Utilisation
Vehicle Trip Summary

DigiCore Australia – 936a Glen Huntly Rd, Caulfield South, Vic 3162 Phone: 03 9945-2240
Email: [email protected]
On the new screen that opens up, click in the field labelled ‘Type here to search for a vehicle’. Select
the vehicle you want to run the report for and click the green ‘+’ to add the vehicle.
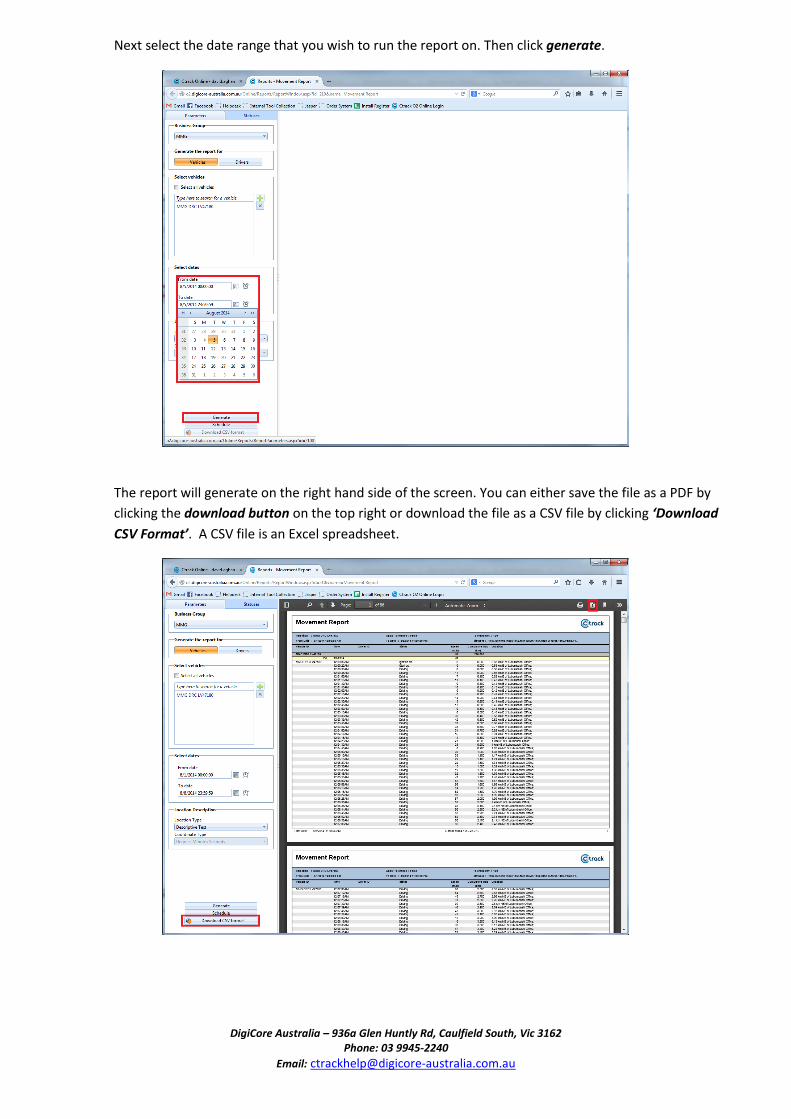
Next select the date range that you wish to run the report on. Then click generate.

DigiCore Australia – 936a Glen Huntly Rd, Caulfield South, Vic 3162 Phone: 03 9945-2240
Email: [email protected]
The report will generate on the right hand side of the screen. You can either save the file as a PDF by
clicking the download button on the top right, or download the file as a CSV file by clicking ‘Download
CSV Format’. A CSV file is an basic Excel spreadsheet.

DigiCore Australia – 936a Glen Huntly Rd, Caulfield South, Vic 3162 Phone: 03 9945-2240
Email: [email protected]
Vehicle Trip Report
To run a Vehicle Trip Report (VTR), hover your mouse cursor over Reports Trips and Utilisation
Vehicle Trip Report
On the new screen that opens up click in the field labelled ‘Type here to search for a vehicle’. Select
the vehicle you want to run the report for and click the green ‘+’ to add the vehicle.

DigiCore Australia – 936a Glen Huntly Rd, Caulfield South, Vic 3162 Phone: 03 9945-2240
Email: [email protected]
Next select the date range that you wish to run the report on. Then click generate.
The report will generate on the right hand side of the screen. You can either save the file as a PDF by
clicking the download button on the top right, or download the file as a CSV file by clicking ‘Download
CSV Format’. A CSV file is an basic Excel spreadsheet.

DigiCore Australia – 936a Glen Huntly Rd, Caulfield South, Vic 3162 Phone: 03 9945-2240
Email: [email protected]
Movement Report
To run a Movement Report (MR), hover your mouse cursor over Reports Trips and Utilisation
Movement Report
On the new screen that opens up click in the field labelled ‘Type here to search for a vehicle’. Select
the vehicle you want to run the report for and click the green ‘+’ to add the vehicle.
DigiCore Australia – 936a Glen Huntly Rd, Caulfield South, Vic 3162 Phone: 03 9945-2240
Email: [email protected]
Next select the date range that you wish to run the report on. Then click generate.
The report will generate on the right hand side of the screen. You can either save the file as a PDF by
clicking the download button on the top right or download the file as a CSV file by clicking ‘Download
CSV Format’. A CSV file is an Excel spreadsheet.

DigiCore Australia – 936a Glen Huntly Rd, Caulfield South, Vic 3162 Phone: 03 9945-2240
Email: [email protected]
8. Alarm Icons
Below is a list of alarm icons you will see show up in Ctrack online and what their meanings are.
This is activated if the user presses the SOS button. The base station is immediately notified of the SOS status
The system can notify when a mobile reaches a predefined waypoint area. The base station operator will be alerted when the specific mobile has entered the area, giving an indication of the mobile’s distance (in kilometres) from the nearest set location.
The system can notify when a mobile leaves a predefined waypoint area. The base station operator will be alerted when the specific mobile has left the area, allowing for calculation of loading intervals, rest breaks etc.
This alarm will appear when a mobile strays into a predefined prohibited region, which is called a NoGo area. Upon entering a NoGo area the Ctrack unit will report immediately to the base station and enter a high update mode (the rate at which the unit will update can be configured with all SOLO and ASSIST units) reporting in 2 minute intervals continuing for 15 minutes from the time the NoGo area is cleared. The mobile status will change however the moment the NoGo area is cleared to reflect its current status. The base station warning alarm will not clear until the base station operator has acknowledged it.
This alarm will appear when a mobile strays outside a predefined region that you want it to remain within, this region is termed a preferred area. The Ctrack unit will report immediately to the base station when the mobile strays outside its preferred area and enter a high update mode (The rate at which the unit will update can be configured with all SOLO and ASSIST units).Reporting in 2-minute intervals it will remain in this high update mode for 15 minutes from the time it re-enters its preferred area although its status will change to reflect its current status. The base station warning alarm will not clear until the base station operator has acknowledged it.
The Ctrack unit will alert the base station when the mobile is being driven in excess of the maximum speed as set in the mobiles on-board Tab within Register/Edit Mobiles. The base station will show the exact location of the event happening. This is only a warning device and will not prevent the situation re-occurring. If send speed with position is selected for the mobile (from within the Main Tab of Register/Edit Mobiles) the system will indicate the speed of the mobile at each position. If send speed profile is selected for the mobile (from within the On-board Tab within Register/Edit Mobiles), the system will also indicate the speed of the mobile in 1 minute intervals, irrespective of the positions stored.
This occurs when Ctrack determines that the unit is stationery i.e. not moving.
DigiCore Australia – 936a Glen Huntly Rd, Caulfield South, Vic 3162 Phone: 03 9945-2240
Email: [email protected]
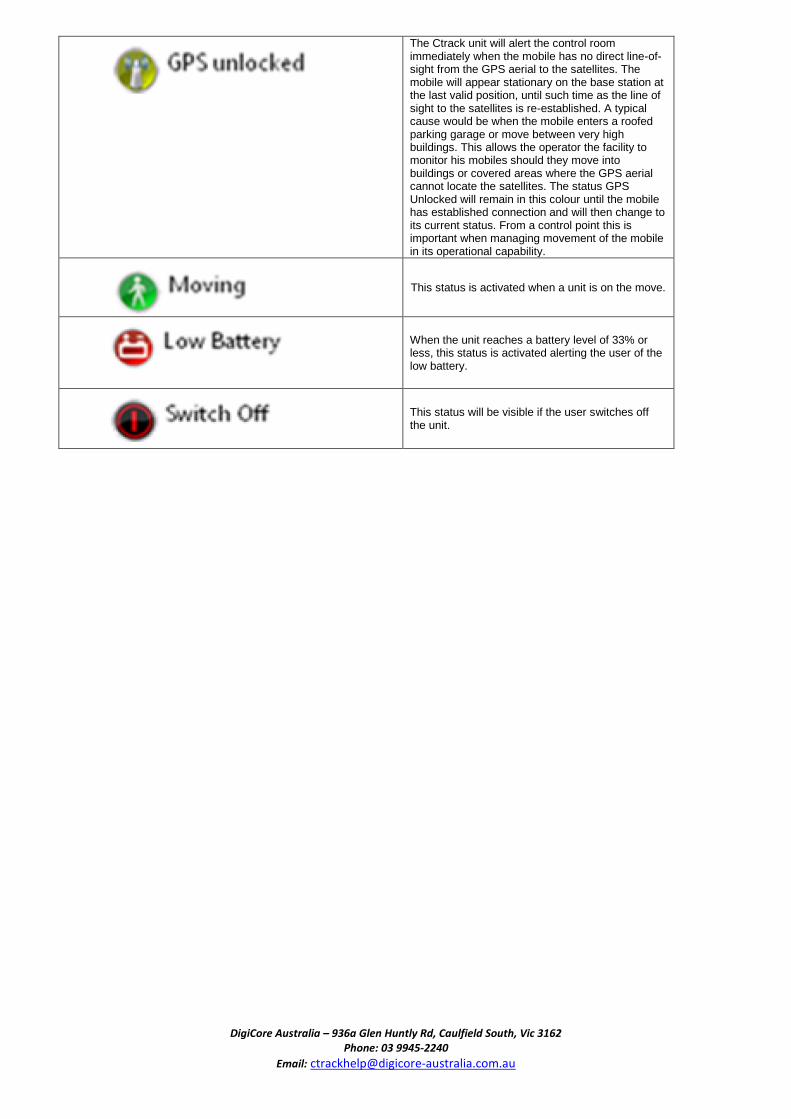
The Ctrack unit will alert the control room immediately when the mobile has no direct line-of-sight from the GPS aerial to the satellites. The mobile will appear stationary on the base station at the last valid position, until such time as the line of sight to the satellites is re-established. A typical cause would be when the mobile enters a roofed parking garage or move between very high buildings. This allows the operator the facility to monitor his mobiles should they move into buildings or covered areas where the GPS aerial cannot locate the satellites. The status GPS Unlocked will remain in this colour until the mobile has established connection and will then change to its current status. From a control point this is important when managing movement of the mobile in its operational capability.
This status is activated when a unit is on the move.
When the unit reaches a battery level of 33% or less, this status is activated alerting the user of the low battery.
This status will be visible if the user switches off the unit.