dining services education & training services . education & training . ... cold & hot...
TRANSCRIPT

Dining Services Education & Training
A collection of 43 complete lesson plans to inservice staff in long-term care communities
Digna I Cassens, MHA, RDN, CLT, FAND

PREFACE
This book is a compilation of some of my lifetime work in long-term care communities as a consultant dietitian and in community colleges as an educator. I believe that knowledge is power, and the happiest staff is well trained staff. Both a minor in education and a lifetime teaching credential with the California Community Colleges qualify me to teach basic culinary, foodservice and nutrition classes and conduct credentialing classes for dietary managers. As a full-time consultant contracting independently I often had to write a professional looking, legible lesson plan to inservice staff. Sometimes it was difficult to juggle my time and fit everything in during the contracted hours that I had to provide direct consulting services and completing required clinical documentation. There never seemed to be enough time for program development. How often I wished I had ready to use professional looking lesson plans complete with outline, syllabus and lesson plans. An inservice tool box ready to use. I’m sure that many of you have felt the same way about your time; it’s busy and limited. Like most consultants, I organized my work in 3-ring binders, and they kept getting bigger and heavier. Soon it struck me that sharing it with other practitioners was the best way to extend their usefulness. It’s taken a few years to put it all together, and now it’s finally here, an inservice training tool box. This book includes 43 lesson plans complete with outline, syllabus and competencies – more than enough for 3 years of monthly inservices. Each lesson plan is divided into the course objectives, course content and participant competencies. The syllabus is written in simple language and is detailed enough for even the most inexperienced to use, so the dietitian can provide an approved lesson pan to the CDM, DTR or even an intern. If you you find this book useful in your practice please look for my other books.
http://www.nutritionmanagementsystems.org http://www.flavorfulfortifiedfood.com
1 of 3
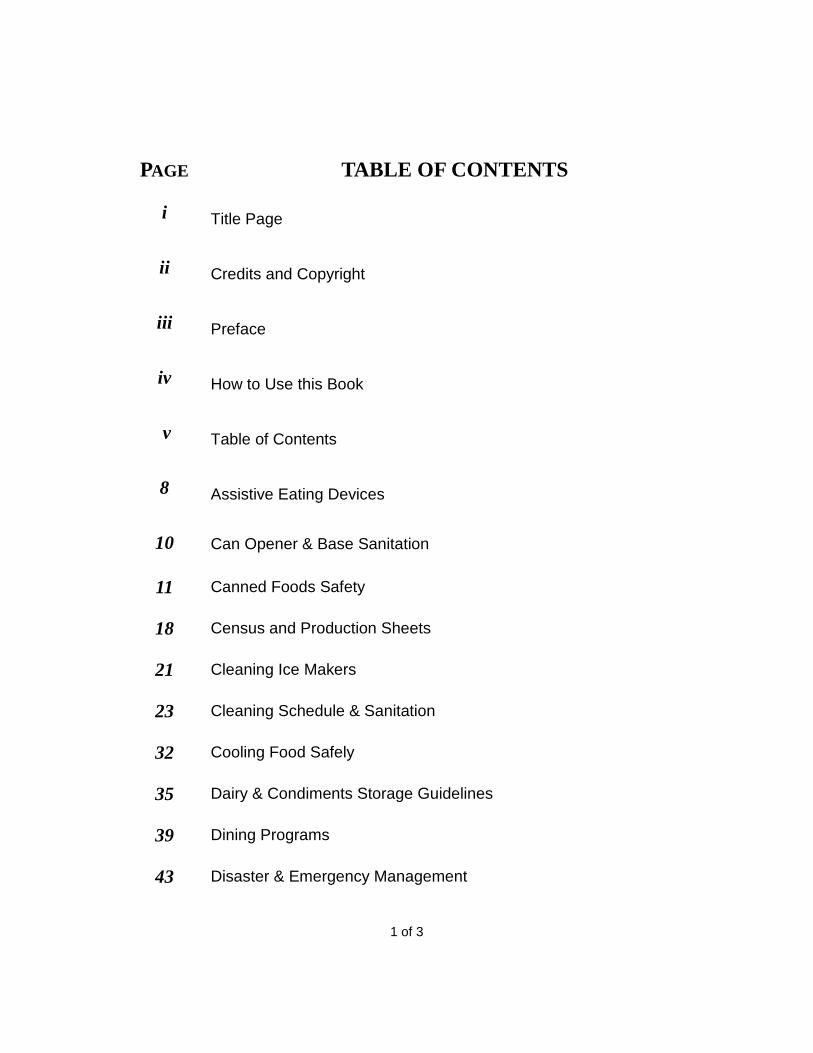
PAGE TABLE OF CONTENTS
i Title Page
ii Credits and Copyright
iii Preface
iv How to Use this Book
v Table of Contents
8 Assistive Eating Devices
10 Can Opener & Base Sanitation
11 Canned Foods Safety
18 Census and Production Sheets
21 Cleaning Ice Makers
23 Cleaning Schedule & Sanitation
32 Cooling Food Safely
35 Dairy & Condiments Storage Guidelines
39 Dining Programs
43 Disaster & Emergency Management

2 of 3
PAGE TABLE OF CONTENTS
46 Dish machines – Cold & Hot Temperatures
48 Dishroom Maintenance & Sanitation
50 Dishwashing – Manual Method
52 Eggs – Preventing Foodborne Illness
62 Floor Cleaning
64 Food First Fortified Food Program
72 Food Temperature Safety
79 Garbage & Trash Disposal
80 Garnishes
82 Gloves – Proper use in Dietary
85 Hazard Analysis Critical Control Point (HACCP)
93 Handwashing
99 Hydration Maintenance
101 Infection Control in Dining Services
110 Ingredients Bins
111 Janitorial Supplies Storage
113 Meals Quality – Preparation & Evaluation
122 Menus & How to Use Them

3 of 3
PAGE TABLE OF CONTENTS
130 Nutritional Needs
133 Personal Hygiene
142 Protein Portion
143 Puréed Food Preparation and Service
147 Refrigerated & Frozen Foods Storage Guide
149 Safety & Accident Prevention
152 Sanitizing Buckets & Cloths (Red & Green Buckets)
155 Satisfaction with Meals
159 Slushy Puréed Food Preparation (Thin Puréed Food Preparation)
161 Standardized Recipes
165 Steamers & Steam Kettles
167 Thermometer Calibration
171 Resources and References
173 About the Author

DINING SERVICES DEPARTMENT EDUCATION & TRAINING
ASSISTIVE EATING DEVICES
1 of 2 ©DNMS All Rights Reserved
OBJECTIVES At the conclusion of the presentation, the participants will be able to:
1. State 2 reasons why assistive eating devices are prescribed 2. Name 3 types of assistive eating devices available in their kitchen 3. Describe how the meal is served when there is an adaptive feeding
tool required 4. Describe how to wash and sanitize assistive eating devices
COURSE CONTENT Imagine the frustration of being hungry, having delicious food right in front of you, and watch it get cold because you can’t eat it. Some individuals have problems with their hands, whether it’s lack of dexterity, strength or coordination, a deformity, tremors, pain or diminished cognition. These individuals are at a high risk for weight loss due to a low meal intake. The use of assistive eating devices will in most cases restore their ability to eat by themselves and improve their total meal intake. Assistive eating devices are utensils people use when they have difficulty with eating or drinking independently. The term adaptive eating equipment is also used. These devices are typically used for people with disabilities or people that have low dexterity. Since assistive eating equipment is intended for therapeutic and restorative use an evaluation and order from a licensed therapist skilled in its use. This way the device is used correctly and under supervision with adequate training and therapy for improvements. Assistive eating devices are considered dietary department equipment just like any other tableware and has to be washed and sanitized after each use. The device is placed on each tray or table setting and is available for the resident to use when eating. Procedure for compliance 1. Therapist or MD order assistive eating devices 2. Dining services stores and maintains devices 3. Prescribed devices are placed on each meal tray and provided during snack
times as needed 4. Equipment returns to the kitchen along with all dishes after each meal for
washing and sanitizing
Assistive eating devices are used to 1. Increase the individual’s independence when eating 2. Maintain their dignity, independence and comfort 3. Improve the resident’s intake
8

DINING SERVICES DEPARTMENT INSERVICE TRAINING
Cleaning Schedule and Sanitation Checklist
Page 3 of 9
©DNMS 7/29/2017 All Rights Reserved
DINING SERVICES DEPARTMENT SANITATION CHECKLIST
ITEM TO CHECK Yes No COMMENTS/ACTION 1. Is the kitchen floor swept and mopped after
each meal?
2. Check 3 pans that are stored; are they correctly stored, clean and dry?
3. Are overhead light fixtures covers intact and free of dead insects and dirt?
4. Are the vent grates clean and free of dust? If free standing fans are used, are they clean and free of dust and not blowing directly into the food?
5. Is the food storage area free of vermin, insects and other pests?
6. After washing, are dishes put away dry and correctly stored?
7. Are all sections of the steamtable currently working; are they clean and free of scale or rust?
8. Are there internal thermometers in all freezers and refrigerators, and do they work?
9. Are all days recorded on the temperature logs? 10. On the dishwashing temperature log, are all
entries for low temperature maintained above 145°F for wash cycle and 160°F for rinse cycle?
11. Ask dishwasher: what do you do if the rinse temperature fell to 95°F?
12. Do you see all dishwashing staff washing and/or sanitizing their hands between dirty and clean dish loads?
This is a quick list all staff can complete during a quick walkthrough. Managers should complete this list daily during their rounds.
25

DINING SERVICES DEPARTMENT EDUCATION & TRAINING
Cooling Food Safely
1 of 3 ©DNMS All Rights Reserved
OBJECTIVES At the conclusion of the presentation, the participants will be able to:
1. Verbalize and demonstrate methods of proper food cooling techniques. 2. Verbalize and demonstrate how to properly use the Food Cooling
Temperature Record. COURSE CONTENT
Review methods used for cooling of food
The goal of this process is to cool foods safely by doing it rapidly and reducing the time is kept in the temperature danger zone. That is a temperature range in which food-borne bacteria can grow is known as the danger zone. Food safety agencies, such as the United States Food Safety and Inspection Service (FSIS), define the danger zone as roughly 39°F to 140 °F.
1. Cut in smaller pieces – either in half or quarters 2. Remove liquids and if using later cool separately 3. Place in shallow pans 4. If appropriate to the food being cooled, adding ice as an ingredient 5. Place food to be cooled in the back and higher refrigerator or
freezers shelves if possible 6. Use one of the 3 approved methods by placing in:
a. ice bath b. freezer (uncovered until temperature reaches ) c. refrigerator (uncovered until temperature reaches )
Review the use of the Food Cooling Temperature Record
1. After food is cooked place in freezer with thermometer and when it reaches 135°F record time on sheet.
2. After two hours of the time recorded earlier take temperature and document. If 70°F then monitor for another 2 hours.
3. If not 70°F or below then reheat to 165°F for 15 seconds and start the process again with documentation.
Sample Cooling Log
To complete the cooling log use this form or the one provided by your manager. Start documenting temperature when food reaches 135°F, the beginning of the danger zone.
32

DINING SERVICES DEPARTMENT EDUCATION & TRAINING
Cooling Food Safely
2 of 3 ©DNMS All Rights Reserved
Cooling Log
Date Food item Final cooking Cooling Hour 1 Hour 2 Hour 3 Hour 4 Time/Temp Time/Temp Temperature – start @ 135°F
Remember Danger Zone is between 41 0F - 1400 F Hour 2: If temperature is above 70 oF Move to freezer & contact supervisor
Hour 4: If temperature is above 41 0F call supervisor for corrective actions and/or meal substitution
*Write all interventions under comments, use cooling tips
33
DINING SERVICES DEPARTMENT EDUCATION & TRAINING
Cooling Food Safely
3 of 3 ©DNMS All Rights Reserved
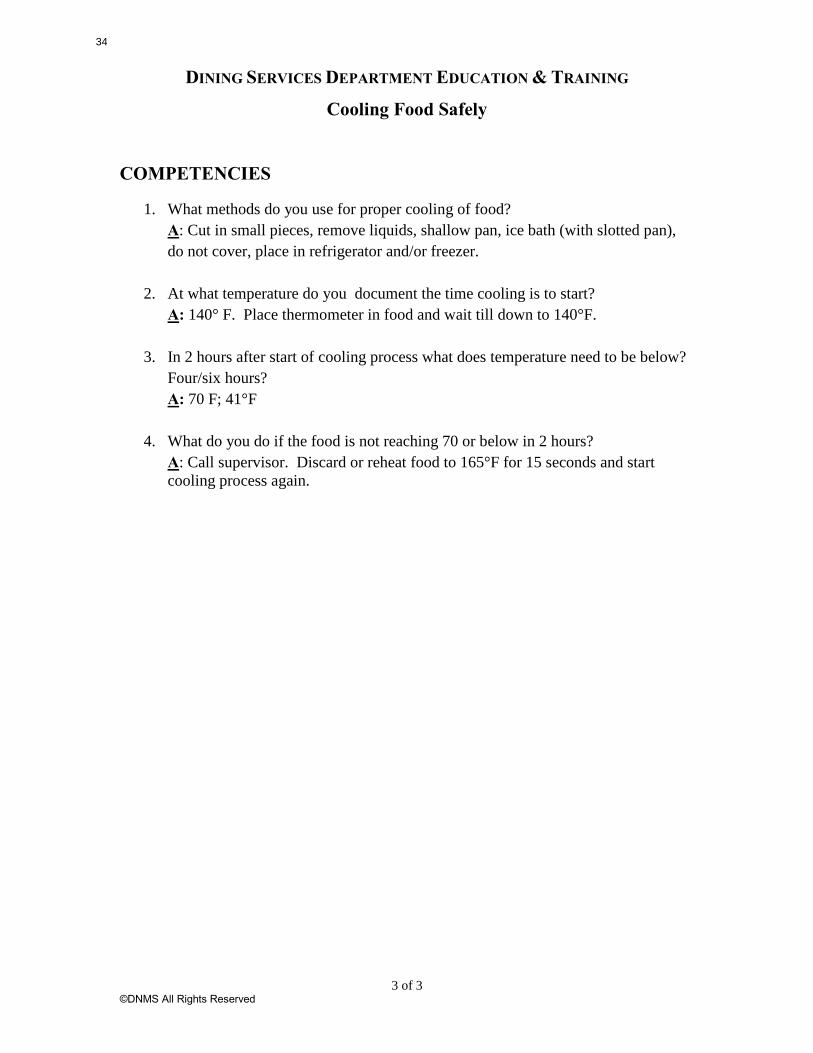
COMPETENCIES
1. What methods do you use for proper cooling of food? A: Cut in small pieces, remove liquids, shallow pan, ice bath (with slotted pan), do not cover, place in refrigerator and/or freezer.
2. At what temperature do you document the time cooling is to start?
A: 140° F. Place thermometer in food and wait till down to 140°F.
3. In 2 hours after start of cooling process what does temperature need to be below? Four/six hours? A: 70 F; 41°F
4. What do you do if the food is not reaching 70 or below in 2 hours?
A: Call supervisor. Discard or reheat food to 165°F for 15 seconds and start cooling process again.
34

DINING SERVICES DEPARTMENT EDUCATION & TRAINING
Dairy & Condiment Storage Guidelines
1 of 4 ©DNMS All Rights Reserved
OBJECTIVES At the conclusion of the presentation, the participants will be able to:
1. Explain and demonstrate how to properly cover, label, and date opened refrigerated dairy and condiments\ foods for storage.
2. Learn what packaging dates mean on dairy and condiment food items. 3. Describe safe food handling and discard date guidelines of opened
refrigerated dairy and condiment foods. CONTENT
There are often doubts about how to properly store dairy products and shelf-stable condiments once opened. Following these guidelines will ensure safe storage of these items.
Review procedure for dairy and refrigerated condiments food storage
1. Cover a. If the container has its own cover, use it, making sure the
inside of the lid and container edges are clean b. If the container is a resealable carton, it can be closed tightly
again. Otherwise the contents have to be transferred to a clean sealable container such as a plastic or glass container
c. Bagged items can be stored in the original bags either in a larger plastic storage bin with tight fitting lid, or a plastic bag with a sealable side (usually called Ziploc bags)
2. Label a. Label all items with the date opened b. If the “use by” date is included in the label make sure it is
visible and/or rewrite it on the new label c. If repackaging an opened item it’s best to try using the same
label on the new package; otherwise write the name exactly as the original on the new label
3. Date a. There are 3 types of dates important for all foods whether
received or prepared i. Date received ii. Date opened iii. Date to be used by whether reused, rotated or
discarded
35

DINING SERVICES DEPARTMENT EDUCATION & TRAINING
Dairy & Condiment Storage Guidelines
2 of 4 ©DNMS All Rights Reserved
Review dating on dairy and condiment foods
Types of Dates 1. A "Sell-By" date tells the store how long to display the product
for sale. You should buy the product before the date expires. 2. A "Best if Used By (or Before)" date is recommended for
best flavor or quality. It is not a purchase or safety date. 3. A "Use-By" date is the last date recommended for the use of the
product while at peak quality. The date has been determined by the manufacturer of the product.
4. "Closed or coded dates" are packing numbers for use by the manufacturer.
Review storage time guidelines chart for opened dairy
and condiments on the next page
36

DINING SERVICES DEPARTMENT EDUCATION & TRAINING
Dining Programs
2 of 4 ©DNMS All Rights Reserved
Lighting and background music are not distracting Clients receive assistance needed and desired from staff Meal time is relaxing, somewhat fun, and never institutional
Dining Room Assessment Check List
When developing a dining room assessment checklist it needs to include Physical plant appearance and function Tables, chairs, equipment Clients placement, seating choices, comfort, positioning Staffing of dining areas Philosophy of dining and client expectations
General standards for dining programs include Attractive settings with table cloths or place mats Area cleanliness and décor Atmosphere, music, lighting, noise level Seating arrangements Clients arrival, meal timing, service Pre-meal service, hydration, socialization Meal service and monitoring Meal completion Assistance Meal replacement
For CNAs Orientation to the dining room setting How to properly dress and groom residents for the dining experience How to bring residents to their assigned seats. Transferring residents to chairs from wheelchairs as much as possible How to properly position residents at the table How to properly place the plates, glasses, flatware on the table in front of
the resident Orientation to the dining care plan How to record the percentage of intake
Training for Activities Taking residents out of the dining rooms when there for activities for
resting and grooming prior to the meal How to properly set the tables prior to the residents arrival How to create the right ambiance (mood) in the dining room with music,
tablecloths or placemats, centerpieces
40

DINING SERVICES DEPARTMENT EDUCATION & TRAINING
Dairy & Condiment Storage Guidelines
1 of 4 ©DNMS All Rights Reserved
OBJECTIVES At the conclusion of the presentation, the participants will be able to:
1. Explain and demonstrate how to properly cover, label, and date opened refrigerated dairy and condiments\ foods for storage.
2. Learn what packaging dates mean on dairy and condiment food items. 3. Describe safe food handling and discard date guidelines of opened
refrigerated dairy and condiment foods. CONTENT
There are often doubts about how to properly store dairy products and shelf-stable condiments once opened. Following these guidelines will ensure safe storage of these items.
Review procedure for dairy and refrigerated condiments food storage
1. Cover a. If the container has its own cover, use it, making sure the
inside of the lid and container edges are clean b. If the container is a resealable carton, it can be closed tightly
again. Otherwise the contents have to be transferred to a clean sealable container such as a plastic or glass container
c. Bagged items can be stored in the original bags either in a larger plastic storage bin with tight fitting lid, or a plastic bag with a sealable side (usually called Ziploc bags)
2. Label a. Label all items with the date opened b. If the “use by” date is included in the label make sure it is
visible and/or rewrite it on the new label c. If repackaging an opened item it’s best to try using the same
label on the new package; otherwise write the name exactly as the original on the new label
3. Date a. There are 3 types of dates important for all foods whether
received or prepared i. Date received ii. Date opened iii. Date to be used by whether reused, rotated or
discarded
35

DINING SERVICES DEPARTMENT EDUCATION & TRAINING
Dairy & Condiment Storage Guidelines
2 of 4 ©DNMS All Rights Reserved
Review dating on dairy and condiment foods
Types of Dates 1. A "Sell-By" date tells the store how long to display the product
for sale. You should buy the product before the date expires. 2. A "Best if Used By (or Before)" date is recommended for
best flavor or quality. It is not a purchase or safety date. 3. A "Use-By" date is the last date recommended for the use of the
product while at peak quality. The date has been determined by the manufacturer of the product.
4. "Closed or coded dates" are packing numbers for use by the manufacturer.
Review storage time guidelines chart for opened dairy
and condiments on the next page
36

DINING SERVICES DEPARTMENT EDUCATION & TRAINING
Dairy & Condiment Storage Guidelines
3 of 4 ©DNMS All Rights Reserved
Storage Time and Temperature Guidelines
Dairy Refrigerator 35°F – 40°F Freezer 0°F Non-dairy Liquid Creamer 3 weeks See package
Cream or Half & half unopened 3 weeks Not recommended Cream or Half & half opened 1 week Not recommended
Cream, heavy, whipping 1 week Not recommended Margarine 3 months 1 year
Evaporated milk opened 1 week Not Recommended Whole milk 1 week or see expiration date 1 month
Non-fat dry reconstituted 1 week 1 month Eggs Refrigerator 35°F – 40°F Freezer 0°F
Eggs fresh in shell 2 to 5 weeks Not recommended Eggs fresh out of shell whipped 1 day 1 month
Home prepared puddings 1 week 1 week – may thaw lumpy Fruits Refrigerator 35°F – 40°F Freezer 0°F
Canned fruits in syrup or juice 1 week 2 months (thaws mushy) Juices canned or bottled 2 weeks In glass or plastic up to 1 year Meats. Poultry, Fish Refrigerator 35°F – 40°F Freezer 0°F
Beef 5 to 7 days 6 to 12 months Veal and Pork 5 to 7 days 4 to 8 months
Lamb 5 to 7 days 6 to 9 months Chicken and Turkey 2 days 9 to 12 months
Sausages 2 to 4 days 2 to 4 months Cooked meats & meat dishes 5 to 7 days 3 to 4 months
Meat gravies and broths 5 to 7 days 3 to 4 months Bacon 7 days 1 to 2 months Ham 7 days 1 to 2 months
Canned tuna in water, opened 5 days 1 month Fish fresh or frozen (thawed) 3 to 5 days 4 to 6 months
Fish cooked 5 to 7 days Not recommended Miscellaneous Refrigerator 35°F – 40°F Freezer 0°F Vegetables, fresh 5 to 7 days 8 to 9 months Potatoes, fresh 30 days Not recommended Rice, cooked 5 to 7 days 1 month (thaws mushy)
Soups and Stews 2 to 3 days 5 to 6 months Sandwiches 2 to 3 days 1 month Casseroles 2 to 3 days 1 month
37

DINING SERVICES DEPARTMENT EDUCATION & TRAINING
Dining Programs
4 of 4 ©DNMS All Rights Reserved
COMPETENCIES
Describe how to set a table correctly:
1. Live plants are the best choice for table centerpieces: True False
2. When a resident refuses a meal, what meal replacement will you offer?
a. Peanut Butter & Jelly Sandwich b. Chocolate Chip cookies c. Chicken broth d. A second cup of coffee
3. If a resident refuses a meal, will you…? (check all the correct options)
a. Report it to the charge nurse b. Offer a meal replacement similar to the refused portion of the meal c. Wheel him/her back to the room and hope they’ll be hungry for the
next meal d. Offer a glass of milk and let it go at that e. Offer a supplement beverage and get if from the licensed nurse
4. Check all the types of music you think is an appropriate types play in the
dining rooms during meals. There are no wrong answer
a. Chopin waltzes b. New Age c. Waves and bird sounds d. A Mozart symphony e. Classic Jazz f. Acid rock g. Rock ‘n Roll instrumentals h. “Elevator” music i. Drum & Base j. The Beatles k. Robert Bublé
l. Opera m. R & B n. Blues o. Country music p. Latin Jazz q. Santana r. Reguetón & Reggae s. Rap t. Mambo, salsa, bolero u. Soft instrumentals v. Loud popular music stations
This was a fun bonus question but a very serious one. The choice of music always depends on the residents and their preferences. Ask them and their families if possible, and if no one gives you the answer, choosing the most conservative and soft music is always a good choice. Never choose loud and avoid excessive DJ chatter.
42

DINING SERVICES DEPARTMENT EDUCATION & TRAINING
Disaster and Emergency Plan
2 of 3 ©DNMS All Rights Reserved
3. Have a written contract with another facility to store perishable foods in the event of a sudden loss of freezer or cooler space, if possible
4. Keep a current hard copy of your tray cards, or maintain a current list of patients and their diets
5. Maintain backups for your other computer files (flash drive, CD, DVD, external hard drive, or system network)
6. Store flashlights with working batteries in your kitchen and/or dietary offices, and know where they are located; test batteries at least annually
7. Know your backup power source, and how to implement the backup power plan
8. Understand which pieces of kitchen equipment you can operate, when running under emergency power, without exceeding available power
Supplies need to assure uninterrupted food-service operation to residents, staff and visitors 1. Maintain an emergency menu 2. Assure that a 7-day supply of nonperishable foods are available in-house 3. Keep a 7-day supply of paper/plastic/foam dishes and utensils in-house
Emergency procedures review 1. Review your facility and department Disaster and Emergency Procedures,
menus and inventory 2. All staff should know where the emergency keys are kept and how to use
emergency equipment such as fire extinguishers and their location 3. All staff should know how to access the emergency food and water supply,
the emergency residents tray cards and diet list, and the emergency phone numbers.
4. All staff should know how to respond to and what to do during an emergency
5. Instruction should review all emergency procedures in the facility’s emergency manual and if necessary tour the emergency supplies room and demonstrate the use of alarms and fire extinguishers
44

DINING SERVICES DEPARTMENT EDUCATION & TRAINING
Dishroom Maintenance & Sanitation
2 of 2 ©DNMS All Rights Reserved
COMPETENCIES
1. List 3 rules to keep the dishroom sanitary are
2. Cracked dishes can still be used because cracks don’t matter
3. Why shouldn’t you scrub plastic ware?
4. The best way to sanitize plastic ware is to bleach them.
49

DINING SERVICES DEPARTMENT EDUCATION & TRAINING
Dishwashing – Manual method
2 of 2 ©DNMS All Rights Reserved
Two-Compartment Method
Drain board
Compartment
1
2
2
Stacked
Pre-rinsed
Wash
Rinse
Refill with clean water & sanitizer
Sanitize COMPETENCIES
1. How do you set-up the 2 compartment sink? A: The side closest to the dirty dish side is wash and the side with clean storage of side is sanitize.
2. How much sanitizer do you put in the sink?
A: Manually is 6 ounces and by pump is two pumps.
3. What is the acceptable sanitizer PPM? A: 200 PPM
4. What do you do when the sink is not properly working?
A: Stop washing dishes and/or do not start and notify DSS and maintenance. If no response turn off machine and proceed to using the manual dishwashing method.
51

DINING SERVICES DEPARTMENT EDUCATION & TRAINING
Food First! Fortified Recipes
1 of 5 ©DNMS All Rights Reserved
OBJECTIVES At the conclusion of the presentation, the participants will be able to:
1. Verbalize and understand what and why a fortified diet is served. 2. Understand the facility’s Fortified Diet Protocol. 3. Read and understand the production spreadsheet to find out what the
daily fortified food item is. COURSE CONTENT 1. Purpose
a) To have staff able to prepare and serve a fortified diet as stated as ’s protocol b) To fully understand the reasons and consequences of serving a fortified diet.
2. Process
a. A fortified diet is prepared for a resident that requires more protein and calories than what is served on our regular menu. The reasons that a resident is placed on a fortified diet varies. A fortified diet will provide an average of 30-40 g more protein and 800-1,000 more calories per day.
b. Protocol requires that: Every Resident on a fortified diet will receive a fortified 8 oz
glass of milk and 1 food item that is fortified as denoted on the food production spreadsheet.
c. 8 oz Fortified milk will be made from the fortified recipe. The recipe for fortified milk is as follows:
- 1 Gallon Whole Milk - 5 Cups Non-Fat Dry Milk Powder - Stir with a wire whisk until blended
d. If a resident requests or requires only 1 fortified food item will provide either the fortified milk or the fortified food item.
Fortified Food Program
Menu Calories Gm Protein Cc Fluid Gm Fat Fortified Food Menu 2800-3000 100-112 gm 2200 cc 4-6 gm Regular Menu 1900-2100 l 72-80 gm 1800 cc 3-4 gm
59

Calories Protein Carbohydrates Fat
257 kcal 19 g 27 g 8 g
Fortified Milk
Ingredients 1 Serving 10 Servings Milk, whole 1 cup 2 ½ quart Non-fat dry milk ¼ cup 2 ½ cups Method of Preparation
1. Blend ingredients, refrigerate for 6 hours
Nutrition Facts per 1 cup serving
Helpful Hints ∗ Fortified milk can also be made with any kind of milk - buttermilk, lactaid
milk, chocolate milk ∗ Add a flavored syrup or powder for variety, such as chocolate or
strawberry
Start to Finish: 6 hr 5 min Active Time: 5 min
65

DINING SERVICES DEPARTMENT INSERVICE TRAINING
Food Temperature Safety
Page 1 of 6 ©DNMS2017 All Rights Reserved
LEARNING OBJECTIVES After working through this course, you will be able to do the following: • Explain the purpose of the Dietary Services department • State safe temperatures for hot foods • State safe temperatures for cold foods • Explain safe food tips for hot foods • Explain safe food tips for cold foods • List ways to help rapid-cool hot foods OVERVIEW The incidence of foodborne illness outbreaks has increased in the past decade. Unsafe food temperatures contribute to a significant number of foodborne illnesses. Specific examples of unsafe practices resulting in outbreaks include the following:
• Holding foods that require Time/Temperature Control for Safety (TCS) at room temperature
• Unsafe refrigeration temperatures • Unsafe holding temperatures • Improper thawing of frozen food • Unsafe reheating of leftovers
The incidence of food-temperature-related deficiencies on state and federal surveys continues to be high throughout the nation. Food handlers are the single, most-common source of food contamination leading to foodborne illnesses in nursing facilities. By knowing which foods are potentially hazardous and practicing safe food-handling techniques, you can help drastically reduce the incidence of foodborne illnesses in the facility. It is the responsibility of every dietary staff member to follow food-handling guidelines, to help prevent the spread of infection and illness within the facility and to ensure compliance with Quality Assessment and Process Improvement (QAPI) standards.
67

Temperature Guidelines
Cool foods promptly at proper temperature Once food is prepared it should be eaten right away. Since cold temperatures slow the growth of bacteria, if you’re saving it for later, cool rapidly in the refrigerator to 41° Fahrenheit (5° Celsius).
Proper thawing and reheating temperature Thaw all frozen foods in the refrigerator and not at room temperature to avoid spoilage. When reheating be sure that the inside of the food reaches 165° Fahrenheit (74° Celsius) to be safe.
Cook foods to proper temperature Foods are safely cooked when they are heated at a high enough temperature for a long enough time to kill disease causing organisms. The target temperature is different for different foods. Make sure that each food is cooked to the recommended temperature which ranges from 145° Fahrenheit (63° Celsius) to 165° Fahrenheit (74° Celsius).
73

DINING SERVICES DEPARTMENT INSERVICE TRAINING
Garnishes
Page 1 of 2 ©DNMS 7/29/2017 All Rights Reserved
LEARNING OBJECTIVES After working through this Training for Dietary Services Department Garnishes course, you will be able to do the following: Define garnishes List 3 reasons for garnishing foods List 7 criteria for selecting appropriate garnishes List 5 criteria for attractive and appropriate plate presentation DEFINITION
A garnish is an edible ornament which is added to a dish to improve food appearance and taste.
REASONS FOR GARNISHING
1. To present foods with optimal eye appeal and taste. a. “We eat with our eyes” b. Contrast in color and texture
2. First impressions are important. The appeal of the meal depends upon the presentation.
GUIDELINES FOR GARNISH SELECTION
1. Simple garnishes instead of elaborate garnishes 2. Add color contrast to enhance color combination 3. Provide contrast in shape and texture 4. Appropriate size for plate size, portion size and food being garnished 5. Complement flavor of the food being garnished 6. Should be edible and compatible with the food served with 7. Should be fresh in flavor and appearance 8. Select garnishes appropriate to the dietary restrictions and the
texture modifications
GUIDELINES FOR ATTRACTIVE PLATE PRESENTATION 1. Arrange food well on the plate and select appropriate food combinations 2. Cut sandwiches in varied shapes to add interest 3. Use appropriate glassware and plates; correct size, clean, free of chips,
marks and stains 4. Serve high water content foods in separate bowls or ramekins and place
in plate or on the side to avoid foods running together with other foods 5. Use bread & butter plates or bread bags; do not place bread on same
plate as the meal if there are runny foods or thin sauces on the plate 6. Place adaptive equipment on the side to allow residents to view an
attractive place setting first
75

DINING SERVICES DEPARTMENT INSERVICE TRAINING
Hazard Analysis Critical Control Point (HACCP)
3 of 8
©DNMS All Rights Reserved
PLAN DEVELOPMENT
A HACCP plan is a document describing the procedures used in a specific facility to prepare Time/Temperature Control for Safety Foods (TCS) based on a general plan that provides basic guidelines. The following must be considered when developing a facility specific HACCP plan:
• Menu • Equipment • Process • Flow • Staffing
There are seven basic principles that must be considered when developing a HACCP program.
• Principles one, two and three assist in developing the system • Principles four and five enable implementation of the system • Principles six and seven help maintain the system and ensure its
effectiveness Hazard analysis is the process of identifying and evaluating potential hazards associated with foods during preparation. Control points are then developed to prevent or control contamination or increased hazard. Each recipe is analyzed for times during which bacterial growth may occur due to adverse conditions. These periods of time are called critical control points (CCP). The reasons to develop and implement a HACCP system are many:
• Avoid high costs of an outbreak • Benefit from efficiencies of a system • Reduce food waste and spoilage • Improve quality of food • Increase employee involvement and awareness
IMPLEMENTATION
The seven-step process of implementing a HACCP system is as follows: 1. Identify Time/Temperature Control for Safety Foods in recipes and describe
preventive measures. • Determine where and when to prevent problems by looking at the flow of
food in your kitchen and identifying potential areas and times during which contamination may occur.
• Hazards to consider are: ◊ Chemical ◊ Biological
82

DINING SERVICES DEPARTMENT EDUCATION & TRAINING
Handwashing
6 of 6
©DNMS All Rights Reserved
COMPETENCIES 1. What is the definition of handwashing?
2. What five things can be prevented from spreading by proper
handwashing?
3. What are at least ten conditions that require handwashing?
4. What are the steps to proper handwashing?
5. What should you do to cleanse your hands when a sink and water are not
available?
6. What are the steps to drying your hands?
7. What are the three reasons why gloves are worn in medical facilities?
8. Why does the use of gloves not replace handwashing?
9. What are two components of proper nail care?
10. What are two benefits of using hand lotion?
11. What are two aspects to consider when choosing a hand lotion?
93

DINING SERVICES DEPARTMENT EDUCATION & TRAINING
Hydration Maintenance
2 of 2 ©DNMS 7/29/2017 All Rights Reserved
o Sugar-free beverage o Clear broth
• Identify beverages that can be given for residents on thickened liquids: o Thickened water, juice, sugar-free beverage o Thickened broth
• Identify foods and beverages that cannot be given to residents on thickened liquids or on fluid restrictions:
o Ice cream o Gelatin o Soups (unless thickened for thickened liquids and/or measured within
the fluid restriction) • Identify residents on fluid restriction that must not be encouraged to have
additional fluids COMPETENCIES
1. List 4 primary reasons for dehydration. A: Diarrhea, vomiting, poor intake, exposure to sun or hot temperatures, fever, excessive sweating, diabetes, burns.
2. List 4 negative outcomes associated with dehydration:
A: Fall, weight loss, confusion/change in mental status, body cramps, death.
3. What beverages does the kitchen provide for the residents? A: Water pitchers at bedside, water and other beverages on meal trays, nourishments/supplements, medicine cart pitchers, beverages given with activities and beverages available at nursing stations and/or public areas.
4. What are examples of liquids provided for a hydration program? A: Popsicles, gelatin, water, SF beverage, clear broth
5. What are examples of beverages that are acceptable to give to residents
on thickened liquids? A: Thickened water, juice, sugar-free beverage, thickened broth
6. What residents must not be offered additional fluids? A: Residents with fluid restriction ordered by the physician.
95
DINING SERVICES DEPARTMENT EDUCATION & TRAINING
Janitorial Supplies Storage
2 of 2 ©DNMS All Rights Reserved
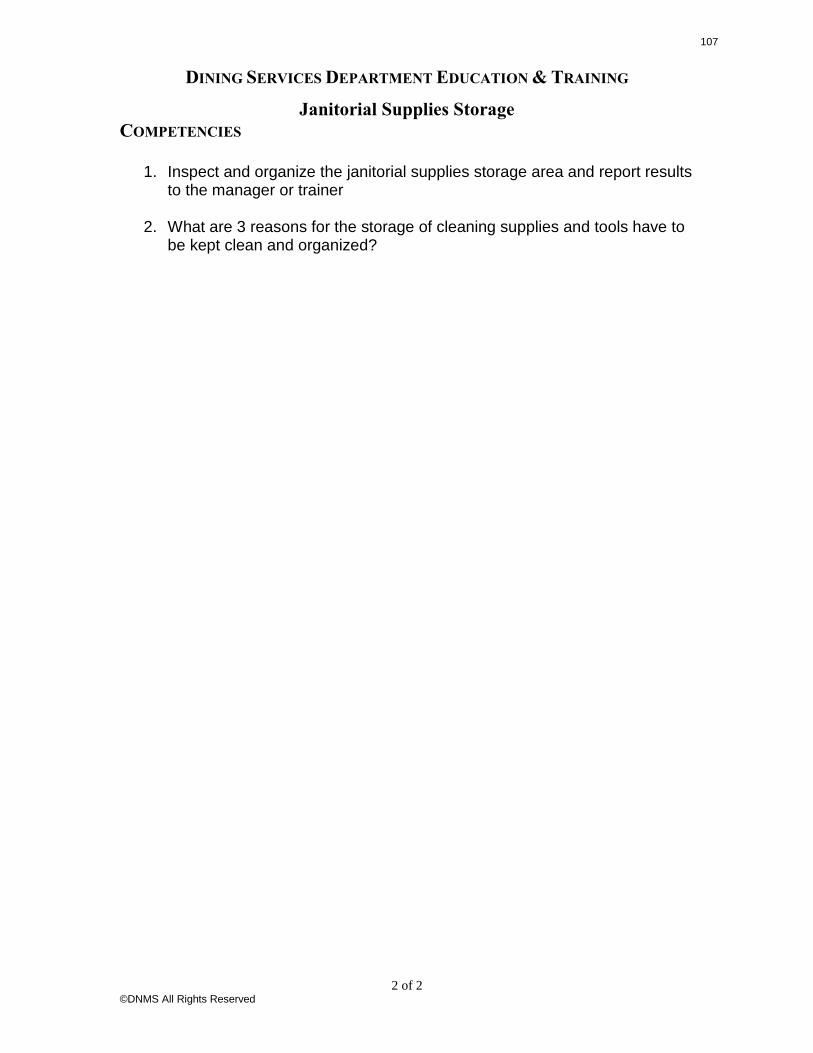
COMPETENCIES
1. Inspect and organize the janitorial supplies storage area and report results to the manager or trainer
2. What are 3 reasons for the storage of cleaning supplies and tools have to be kept clean and organized?
107
DINING SERVICES DEPARTMENT INSERVICE TRAINING
Meals Quality – Preparation & Evaluation
Page 7 of 9
©DNMS All Rights Reserved
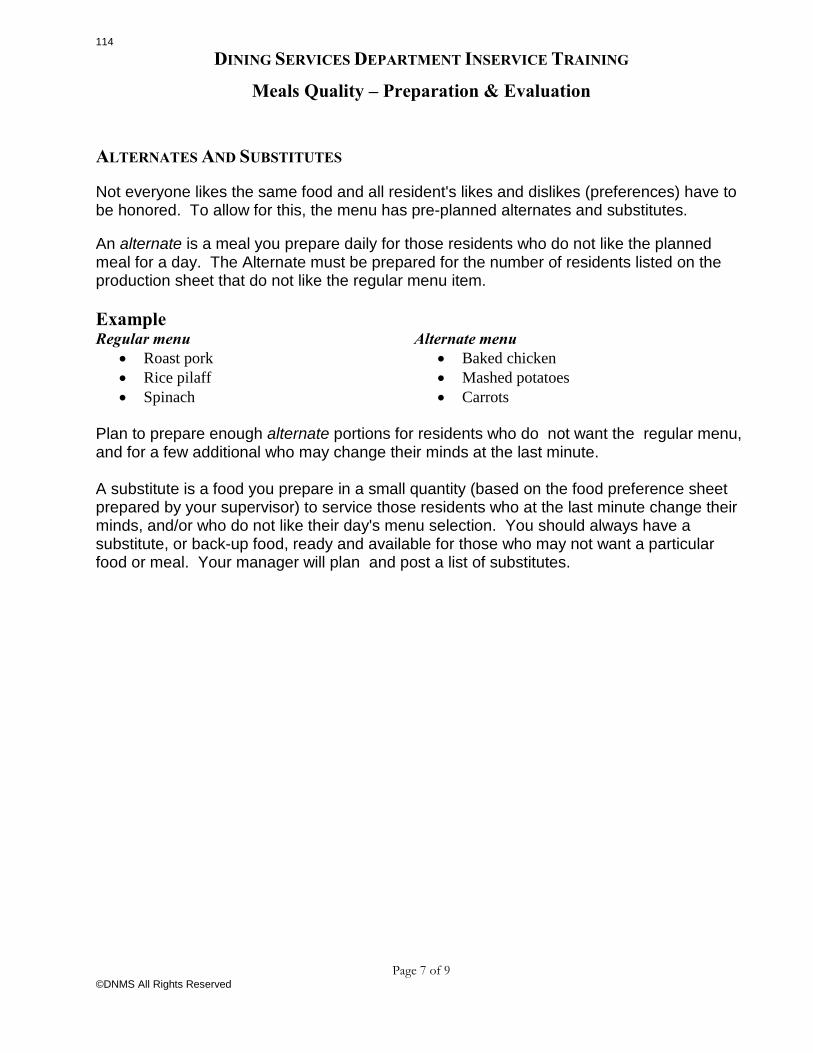
ALTERNATES AND SUBSTITUTES
Not everyone likes the same food and all resident's likes and dislikes (preferences) have to be honored. To allow for this, the menu has pre-planned alternates and substitutes. An alternate is a meal you prepare daily for those residents who do not like the planned meal for a day. The Alternate must be prepared for the number of residents listed on the production sheet that do not like the regular menu item. Example Regular menu
• Roast pork • Rice pilaff • Spinach
Alternate menu • Baked chicken • Mashed potatoes • Carrots
Plan to prepare enough alternate portions for residents who do not want the regular menu, and for a few additional who may change their minds at the last minute. A substitute is a food you prepare in a small quantity (based on the food preference sheet prepared by your supervisor) to service those residents who at the last minute change their minds, and/or who do not like their day's menu selection. You should always have a substitute, or back-up food, ready and available for those who may not want a particular food or meal. Your manager will plan and post a list of substitutes.
114

DINING SERVICES DEPARTMENT INSERVICE TRAINING
Menus & How to Use Them
Page 3 of 8
© 2017DNMS All Rights Reserved
MEAL REPLACEMENTS: A meal replacement is food and/or beverage offered by nursing staff to residents who have not eaten enough of a meal (75% or more of the total food served on their tray). The DSS is responsible for developing and posting a daily list of acceptable meal alternates. These are not included on the menu, as they are a facility choice item based on your own resident's preference. The meal replacement may be the same as the substitute, or a different choice. FOOD PREFERENCES AND PRODUCTION SHEETS A current census will be maintained for staff to use when preparing meals. The diet census sheet is an important tool to ensure all food items required for accurate food service are prepared to maintain and improve resident meal satisfaction, reduce waste and avoid distribution delays. It should always include food preferences so that staff knows how much of everything to prepare. PRODUCTION SHEET - BREAKFAST WEEKLY UPDATE DATES: _________,____________,___________,___________ JUICE Tomato Juice_____________________ Cranberry Juice___________________ Prune Juice______________________ Other Juice, Specify________________ ________________________________ Thickened Juice___________________
EGGS No Eggs____________________________ Special Eggs________________________ ___________________________________ ___________________________________ ___________________________________ ___________________________________
MILK 8 oz.____________________________ 4 oz.____________________________ Nonfat Milk_______________________ 8 oz. Thickened Milk_______________ 4 oz. Thickened Milk_______________ Cocoa___________________________
"NO" LIST (Dislikes & Allergies) No Pancakes________________________ No French Toast_____________________ No Coffee Cake______________________ Other______________________________ Bacon______________________________ No Bacon/Sausage___________________
FRUIT _______________________________ ________________________________
CEREAL Hot Cereal__________________________ Oatmeal____________________________ Dry Cereal__________________________
119
DINING SERVICES DEPARTMENT EDUCATION & TRAINING
Nutritional Needs
3 of 3 ©DNMS All Rights Reserved
Nutritional needs change throughout life as a result of several influences:
a. Aging b. Disabilities c. Illness
Interventions are often necessary to accomplish the following:
a. Improve meal acceptance by meeting food preferences b. Increase nutrient density of foods using fortified recipes c. Increase total intake by offering smaller more frequent meals d. Replace uneaten food with a preferred food similar in nutrients
Supplement when necessary using house prepared supplements such as high calorie high protein puddings, shakes and smoothies
COMPETENCIES
1. List the 3 macronutrients
2. On the menu point one food that is a major source to the of at least one macronutrient
3. On the menu find one source of the following vitamins and minerals: a. Vitamin A b. Vitamin D c. Vitamin E d. Vitamins D e. Folic Acid f. Iron g. Calcium
4. List 2 possible reasons for loss of appetite
5. List one intervention you would recommend for a resident that is either not
eating or eating less
127
DINING SERVICES DEPARTMENT EDUCATION & TRAINING
Safety & Accident Prevention
3 of 3 ©DNMS All Rights Reserved
COMPETENCIES
1. State 3 ways to ensure employee safety in kitchens
2. What are 3 rules to follow to ensure safe storage in dry storage areas
3. Briefly describe the safe knife handling and storage method
4. Name 2 important fire prevention guidelines
146

DINING SERVICES DEPARTMENT EDUCATION & TRAINING
Sanitizing Buckets & Cloths
3 of 3 ©DNMS All Rights Reserved
COMPETENCIES
1. What is the acceptable PPM for a prepared sanitizing bucket? A: 200 PPM
2. What cloth do you use for the sanitizing bucket?
A: Clean reusable or disposable wiping cloth
3. How often do you change the water for the sanitizing bucket? A: Every 4 hours, or when it appears to be dirty
4. How do you use the sanitizing cloth?
A: When surfaces need cleaning using a food-safe spray or soap and water; rinse cloth thoroughly, squeeze excess water and place back in bucket until next use
FILL IN THE BLANK
1. The test strip results should read _______ ppm for quaternary. 2. The number of cloths that can be placed inside the sanitizing bucket is
_______ to _______
3. Sanitizing solution should be changes every _______ hours or when _______
4. The color of the results from the sanitizing strip color when correctly tested
is __________
TRUE OR FALSE 5. A central sanitizing bucket for all staff to use is the best solution as it
encourages sharing and builds teamwork. 6. It is acceptable for a sanitizing bucket to be stored on the counter during
food preparation as a reminder to staff to clean as they go.
7. Sanitizing solution can be stored in any bucket, pot or pan as long as the ppm results are met.
149

DINING SERVICES DEPARTMENT EDUCATION & TRAINING
Satisfaction with Meals
4 of 4 ©DNMS All Rights Reserved
COMPETENCIES 1. Demonstrate and use the quality monitor & Meal Satisfaction survey 2. Demonstrate and use the resident Meal Satisfaction questionnaire 3. Open discussion session with instructor asking participants in turn to state
1 or 2 appropriate substitutes for each of the food types listed in the chart
above.
153

DINING SERVICES DEPARTMENT EDUCATION & TRAINING
Slushy Puréed Food Preparation
1 of 2 ©DNMS All Rights Reserved
OBJECTIVES At the conclusion of the presentation, the participants will be able to:
1. Define the meaning of a slushy purée consistency 2. State equipment needed to prepare slushy puréed food 3. State foods to use and foods to avoid in slushy puréed food preparation 4. State liquids to use slushy puréed in slushy puréed food 5. State 3 methods to enhance calories and flavor in slushy puréed food
CONTENT
Definition A Slushy Puréed diet is for persons who need a liquefied, thin or drinkable Blenderized diet. This diet is well a well-balanced and meets nutrient needs to maintain weight and skin integrity. The Liquefied diet is identified by several names all meaning the same; Liquefied, Drinkable, Thin or Slushy. The viscosity of the final product depends on preparation methods, resident’s ability and diet order.
Preparation
All foods are in a liquid form, thin enough drink in a mug or tumbler or sip with a spoon without the need for chewing. It is blended and if needed strained to remove chunks of foods, seeds or fibers that may cause choking or require chewing.
Instructions Equipment needed:
- Blender, food processor or food mill - Fine wire strainer - Wire whisk or fork
• Avoid fibrous fresh fruits and vegetables and high fat or gristly meats, as they are difficult to puree.
• Avoid nuts, seeds, whole grain or bran cereals, starches, and foods with tough skins or hulls. - To liquefy in a blender: - Put small pieces of solid food in blender - Add a small amount (¼ cup) of fluid. - Blend until puréed. - Strain through jelly strainer to remove particles.
• Liquids to use: - Broth
154

DINING SERVICES DEPARTMENT EDUCATION & TRAINING
Slushy Puréed Food Preparation
2 of 2 ©DNMS All Rights Reserved
- Clear soups - Cream - Cream soups, strained - Fruit juice - Half & Half - Milk
• Other foods to use: - Smooth yogurt, without chunks of fruit or nuts, thinned with
appropriate liquid - Sour cream thinned with half & half or milk Ice cream, without chunks of nuts, fruit or candy – will melt in the mouth
or may melt before drinking - Gelatin desserts without fruits or vegetables – will melt in the
mouth or may melt before drinking - Tomato or vegetable juice. Fruit juices. - Solid fats and cheese blend more easily if they are first melted. Oil,
salad dressings, yogurt or cream can be added directly to the puree to thin further.
• Provide balanced meals that are adequate in calories, protein, vitamins, minerals and fluid and offer 6 to 8 cups of water a day
COMPETENCIES
1. What does “slushy puréed” food mean?
2. What equipment is used to prepare slushy puréed food?
3. What are 2 types of food to avoid when preparing slushy puréed food?
4. State liquids to use slushy puréed in slushy puréed food
5. State 3 methods to enhance calories and flavor in slushy puréed food
6. An observation of actual slushy food preparation & service, taste food. & evaluate the flavor, texture, aroma & appearance of at least one item
155

DINING SERVICES DEPARTMENT INSERVICE TRAINING
Standardized Recipes
1 of 4
©DNMS All Rights Reserved
LEARNING OBJECTIVES After working through this course you will be able to do the following:
• Explain this facility’s house diet policy • Explain the purpose and procedure for standardized recipes • Explain the diet types • Describe the Dining department’s performance assessment
OVERVIEW
The Dining Services department is part of the total resident care. The primary purpose of the department is to provide wholesome, safe and appetizing food that meets the nutritional, psychosocial, and psychological needs of the resident according to the physician’s diet order, as well as complying with local, state, and federal requirements and quality standards and service. HOUSE DIET POLICY
The House Diet Policy consists of the following components: • Policy for diets served in the facility. • Purpose for the policy. • Description of House Diets.
POLICY: In addition to the regular diet, standardized therapeutic diets and texture modified diets will be offered. PURPOSE: To aid in the treatment of certain disease states. PROCEDURE: 1. Diet orders will conform to the House Diets when medically possible. See description
of House Diets. 2. Menus are written for the House Diets. 3. Diet orders that are not on the Description of House Diets require notification of the
Registered Dietitian Nutritionist for guidance. Refer your own policies and procedures manual for your facility house diets policy
156
DIN
ING
SE
RV
ICE
S D
EPA
RT
ME
NT
INSE
RV
ICE
TR
AIN
ING
Stan
dard
ized
Rec
ipes
3
of 4
©
DN
MS
All R
ight
s R
eser
ved
NA
ME
: YA
NK
EE
POT
RO
AST
T
IMIN
G:
TE
MPE
RA
TU
RE
: PO
RT
ION
SIZ
E:
3 oz
. mea
t
Pre-
Prep
: 20
Min
. C
ook
Tem
p: 3
00o F
Inte
rnal
Tem
p: 1
65°F
2 oz
. gra
vy
NU
MB
ER
: Pr
ep/A
ssem
bly:
15
Min
. C
hill
Tem
p: 4
1°F
UT
EN
SIL
: To
ngs o
r For
k 5-
A-4
6 C
ook/
Chi
ll: 4
-5 H
r. PA
N S
IZE:
12"
x20"
x4"
PO
RT
ION
S 10
25
50
75
10
0 20
0 30
0 IN
GR
ED
IEN
TS
ME
ASU
RE
ME
ASU
RE
ME
ASU
RE
ME
ASU
RE
ME
ASU
RE
ME
ASU
RE
ME
ASU
RE
BEE
F, B
ON
ELES
S 2
LBS
8 oz
6
LBS
8 oz
10
LB
S 8
oz
18 L
SB 8
oz
25 L
BS
50 L
BS
75 L
BS
SALT
3/
4 ts
p 2
tsp
1 T
+ 1
tsp
2 T
3 T
+ 1
tsp
1/3
C ½
C
PEPP
ER
DA
SH
¼ ts
p ½
tsp
¾ ts
p 1
tsp
2 tsp
3
tsp
WA
TER
6
oz
2 C
1 Q
T 1
QT
+ 2
C 2
QTS
1
GA
L 1
GA
L +
2 Q
TS
TOM
ATO
PU
REE
1¼
C
3 C
1 Q
T +
2 C
2 Q
TS +
1 C
3
QTS
1
GA
L +
2 Q
TS
2 G
ALS
+ 1
QT
BA
Y L
EAF
½
1 1
2 3
6 9
FLO
UR
6
T 1
C 2
C 3
C 1
QT
2 Q
TS
3 Q
TS
WA
TER
, CO
LD
1/3
C ¾
C
1½ C
2¼
C
3 C
1 Q
T +
2 C
2 Q
TS +
1 C
M
ET
HO
D:
1.
Seas
on m
eat w
ith sa
lt an
d pe
pper
. 2.
Pl
ace
in ro
astin
g pa
n an
d ad
d w
ater
, tom
ato
pure
e an
d ba
y le
af.
3.
Coo
k slo
wly
at 3
00o F
unt
il in
tern
al m
eat t
empe
ratu
re re
ache
s 165
°F.
4.
Th
icke
n pa
n dr
ippi
ngs w
ith fl
our t
hat h
as b
een
mix
ed w
ith c
old
wat
er.
Rem
ove
exce
ss fa
t if n
eces
sary
. M
ake
grav
y (fo
llow
gra
vy re
cipe
). A
djus
t sea
soni
ngs a
nd p
our o
ver m
eat i
n pa
n. R
ehea
t to
145o F.
T
EM
PER
AT
UR
E C
ON
TR
OL
: To
use
imm
edia
tely
: •
Rem
ove
from
juic
es.
•
Let s
tand
at l
east
½ h
our b
efor
e sli
cing
. Sl
ice.
•
Arr
ange
slic
es in
1 o
z. p
ortio
ns o
verla
ppin
g in
stea
mta
ble
pan
and
rehe
at in
ove
n to
145
o F. S
erve
hot
at 1
45o F.
To
stor
e an
d sli
ce th
e ne
xt d
ay:
•
If no
t usin
g im
med
iate
ly, c
ut in
to q
uarte
rs, c
over
, lab
el a
nd c
hill
to 7
0 o F
in 2
hou
rs, a
nd 4
00 F in
4 h
ours
, unt
il ne
eded
.
• W
hen
read
y to
use
, slic
e co
ld m
eat i
n 1
oz. p
ortio
ns a
nd a
rrang
e in
shal
low
stea
mta
ble
pan.
•
Pour
hot
juic
es o
r gra
vy o
ver m
eat,
cove
r with
foil
and
rehe
at in
350
o F ov
en u
ntil
tem
pera
ture
reac
hes a
t lea
st
165o F
for 1
5 se
cond
s. S
erve
hot
at 1
45o F.
MO
DIF
ICA
TIO
N IN
STR
UC
TIO
NS:
E
xcha
nges
: 1
porti
on =
3 m
eats
Sodi
um R
estr
icte
d:
Om
it sa
lt. U
se lo
w so
dium
tom
ato
pure
e.
Low
Fat
, Dia
betic
, Con
trol
led
Car
bohy
drat
e:
As w
ritte
n.
Pure
e:
Pure
e to
smoo
th c
onsi
stenc
y, a
ddin
g sm
all a
mou
nt o
f hot
liqu
id if
nee
ded.
5-A
-46
GR
AM
S PR
OT
EIN
: 24
GM
HA
CC
P G
uide
lines
Saf
e S
tora
ge &
CC
P
Ther
apeu
tic D
iets
&
Mod
ified
Tex
ture
s
Mod
ified
Tex
ture
s ar
e pr
epar
ed fr
om
Reg
ular
or a
ppro
pria
te d
iet o
rder
Use
a
food
pro
cess
or to
pur
ee m
eats
.
Rec
ipe
Num
ber
Che
ck p
ortio
n si
ze –
sh
ould
mat
ch th
e m
enu
or
you
mus
t adj
ust a
mou
nt
prep
ared
.
Pre
para
tion
inst
ruct
ions
M
easu
rem
ents
to b
e fo
llow
ed fo
r qua
ntiti
es
prep
ared
Impo
rtan
t to
not
e ti
min
g w
hen
pla
nn
ing
pr
odu
ctio
n t
ime
for
mea
l to
be
read
y o
n
tim
e an
d p
rope
rly
coo
ked
&/o
r ch
ille
d.
Tem
pera
ture
con
trol
is
mos
t im
port
ant.
T
his
is
part
of
th
e en
tire
pre
para
tion
pr
oces
s. K
eep
tem
pera
ture
co
olin
g l
ogs.
Ch
eck
por
tion
siz
e –
shou
ld
mat
ch t
he
men
u o
r y
ou
mu
st a
dju
st a
mou
nt
prep
ared
.
Rec
ipe
Nam
e &
N
umbe
r Im
porta
nt to
not
e tim
ing
whe
n pl
anni
ng
prod
uctio
n tim
e fo
r mea
l to
be re
ady
on ti
me
and
prop
erly
coo
ked.
Tem
pera
ture
con
trol –
the
tem
pera
ture
to
coo
k, c
ool a
nd s
tore
158
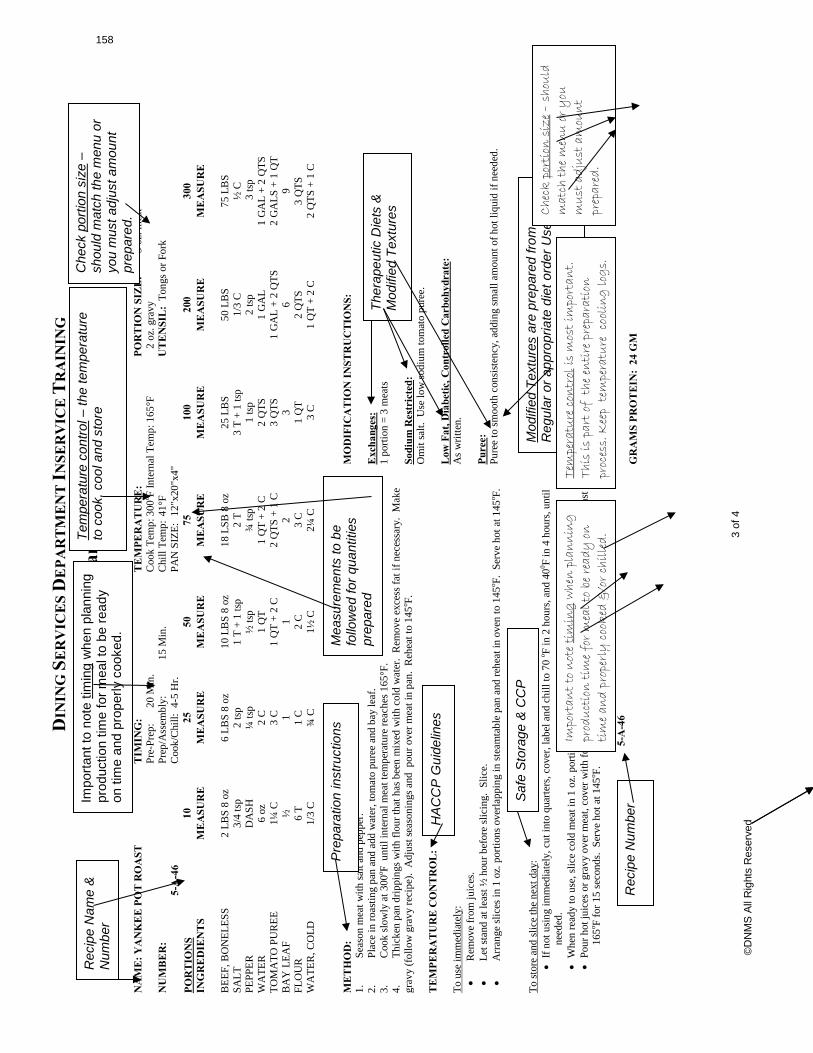
DINING SERVICES DEPARTMENT INSERVICE TRAINING
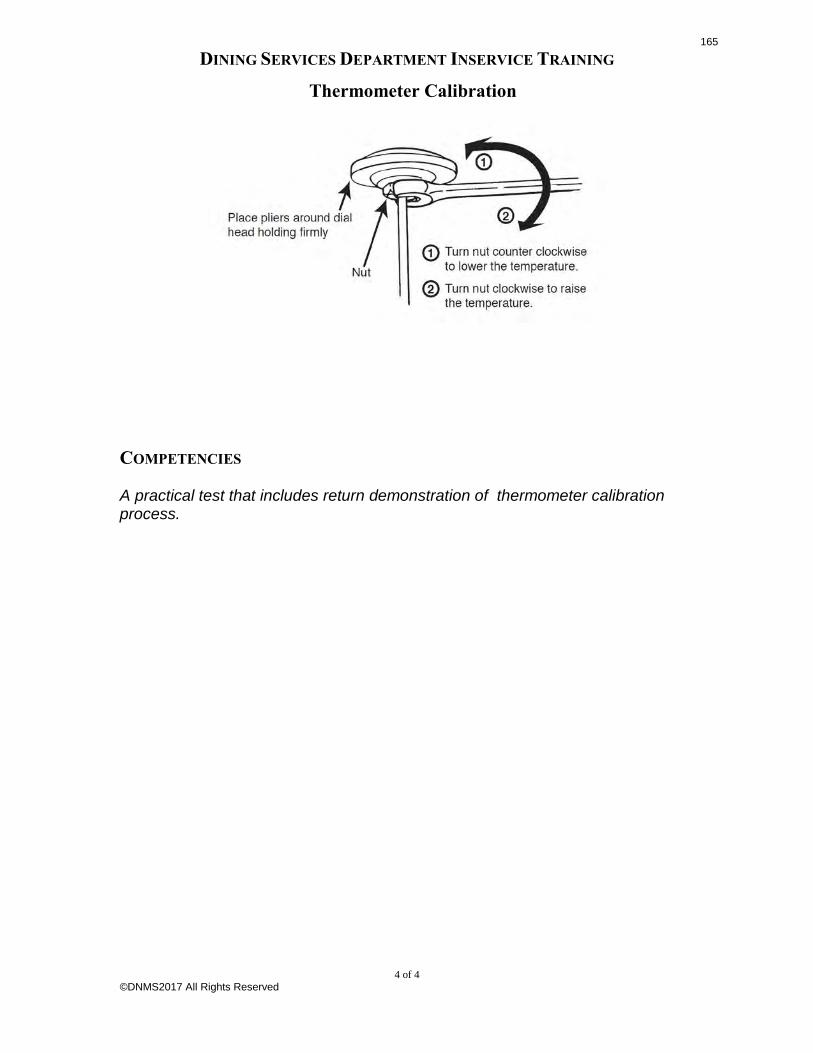
Thermometer Calibration
4 of 4 ©DNMS2017 All Rights Reserved
COMPETENCIES
A practical test that includes return demonstration of thermometer calibration process.
165