directory - elecrow.com® custom pcb assembly, … starter kit f… · · 2016-09-01directory...
TRANSCRIPT

1
Directory
Preface – Getting Started .......................................................................................................... 2
1. Crowtail - Base Shield Introduction .................................................................................. 4
2. Crowtail- LED .................................................................................................................... 4
3. Crowtail- Button ............................................................................................................... 5
4. Crowtail- Buzzer ................................................................................................................ 5
5. Crowtail- Touch Sensor ..................................................................................................... 5
6. Crowtail- Vibration Motor ................................................................................................ 6
7. Crowtail- Tilt Switch .......................................................................................................... 6
8. Crowtail- Relay .................................................................................................................. 6
9. Crowtail- Linear Potentiometer ........................................................................................ 7
10. Crowtail- Moisture Sensor ............................................................................................ 7
11. Crowtail- Light Sensor .................................................................................................. 7
12. Crowtail- Sound Sensor ................................................................................................ 7
13. Crowtail- Thermistor Temperature Sensor ................................................................... 8
14. Crowtail- OLED ............................................................................................................. 8
Lesson1: LED Control ................................................................................................................. 9
Lesson2: Button Control LED ................................................................................................... 12
Lesson3: Touch, Touch! ........................................................................................................... 13
Lesson4: Tilt Alarm! ................................................................................................................. 14
Lesson5: Intelligent Temperature Control Fan ........................................................................ 15
Lesson6: Linear Potentiometer Control Breathing LED ........................................................... 16
Lesson7: Moisture Alarm ........................................................................................................ 17
Lesson8: Sound-light Controlled LED ...................................................................................... 18
Lesson9: Display Something on the OLED ............................................................................... 19

2
Preface – Getting Started
Welcome to the world of Crowtail! Crowtail is a modulated, ready-to-use toolset, it takes a
building block approach to assembling electronics. It simplifies and condenses the learning
process significantly.
The Crowtail products are basic-functional modules that consists of a Base Shield and
various modules with standardized connectors, each Crowtail module has its specific functions,
such as light sensing and temperature sensing. With these Crowtail modules, users do not need
to deal with the mess jumper wires or debug the electronic circuits, they can just plug the
Crowtail modules to the base shield and then play!
Before we discuss those Crowtail modules one by one, you need to seat yourself and finish
some preparations.
1. What’s Arduino?
Arduino is a flexible and easy-to-learn open source development platform that enjoys
great fame among makers, geeks and interactive artists. The Elecrow Basic Kit For Arduino helps
you get the basic understanding of Arduino, It contains the most popular accessories for DIY
projects, such as Breadboard, Jumper wires, Color Led, Resistors, Buzzer, etc. With the straight
forward instructions with the kit, you can easily dig into the Arduino world and start your own
Arduino project.
2. Arduino IDE Installation
Arduino is also the name of a programming IDE based on C/C++. After you get your Arduino,
you should install the IDE. Depending on OS version, the specific installation varies. Thankfully
Arduino team provides us a detailed installation guide for most OS systems:
http://arduino.cc/en/Guide/HomePage
Then, connect you Arduino board to PC via USB. Install the Driver and the computer will
recognize the Arduino board as a COM port:

3
3. Language Reference
Arduino team also provides a good and comprehensive website for you to learn:
http://arduino.cc/en/Reference/HomePage

4
Part 1 Modules Introduction
1. Crowtail - Base Shield Introduction
The Crowtail - Base Shield is a standard IO expansion board for the Arduino. It regulate the
IOs of Arduino to the standard Crowtail interface, which can be sorted into 4 kinds: Analog (A),
Digital (D), UART (U) and IIC(I):
11 Digital I/O ports (D2~D12) that have a mark “D”. These ports can be used to read and
control digital Crowtail modules (Crowtail modules that have a mark “D”), such as the Button and
LEDs. Some of the digital I/O ports can also be used as PWM (pulse width modulation) outputs;
6 Analog ports (A0~A5) that have a mark of “A”. Besides the functional of digital, these A
ports can read the analog signal, such as a potentiometer or light sensor;
3 UART ports that have a mark of “U”. These interfaces can be used for UART
communication such as the Wifi module or Bluetooth module;
2 IIC ports that have a mark of “I”. These interfaces are for the IIC Communication, users
can utilize 2 IIC modules at the same time;
Besides, there is also a 2x5 female connector of 5V and GND, for customer usages. Users can
connect any electronic modules to the Base Shield with jumper wires easily.
2. Crowtail- LED
The Crowtail- LED is a simple LED indicator with resistor. The LED would be on when

5
activated by logic HIGH, and off by logic LOW. It is the most common used indicator for human
interfacing, and the best way for users stepping into the Arduino.
There are 3 LED modules in the Crowtail- Starter Kit, with Red/Yellow/Green color.
3. Crowtail- Button
The Crowtail- Button is a momentary push button which rebounds on its own position after
released. The button outputs a logic HIGH signal when pressed, and logic LOW when released.
4. Crowtail- Buzzer
The Crowtail- Buzzer module is for making sound in your project. It sounds when activated
by a logic HIGH signal. Connect the buzzer to any of the D(digital) ports of Crowtail- Base Shield,
you can easily make it sounds with setting the related ports to logic HIHG.
The buzzer module can be also connected to an pulse-width modulation(PWM) output to
generate various of tones.
5. Crowtail- Touch Sensor
The Crowtail- Touch sensor detects the human fingers. When human finger touches, or

6
nearby, it reports the Arduino: ”hey, it seems someone touches me” .
6. Crowtail- Vibration Motor
The vibration modules vibrates when it activated by signal logic HIGH, like the vibration of a
phone. This module is consist of a permanent magnet coreless DC motor.
With the panel mount design the vibration modules is easy to install, or stick onto other
modules, to make them vibrates together with the vibration motor module.
7. Crowtail- Tilt Switch
The Crowtail- Tilt Switch is a sensor to detect the station of forwards. It outputs logic LOW in
Horizontal direction and logic HIGH in Vertical direction.
8. Crowtail- Relay
The Crowtail- Relay module is a digital normally-open switch. Through it, you can control
circuit with high voltage/ larger current, with low voltage, say the 5V logic of Arduino board.

7
9. Crowtail- Linear Potentiometer
The Crowtail- Linear Potentiometer module incorporates a linear variable resistor with a
maximum resistance of 10KΩ. When you move the slider from one side to the other, its output
voltage range from 0 V to the VCC you applied.
10. Crowtail- Moisture Sensor
This Moisture Sensor can be used to detect the moisture of soil or your pet plant's water
level, let the plants in your garden reach out for human help.
11. Crowtail- Light Sensor
The Crowtail- Light Sensor module incorporates a light dependent resistor (LDR) to detect
the lightness. Typically, the resistance of the LDR will decrease when the ambient light intensity
increase, it means that the output signal from this module will be higher in bright light, and lower
in the dark.
12. Crowtail- Sound Sensor

8
The Crowtail- Sound Sensor is an electric microphone that detects the sound loudness.
13. Crowtail- Thermistor Temperature Sensor
The Crowtail- Thermistor Temperature Sensor uses a thermistor to detect the ambient
temperature.
14. Crowtail- OLED
The Crowtail- OLED is constructed with 128 x 64 dot matrix OLED module. Users can display
characters& pictures on this small screen.
9
Part2: Crowtail Applications
Lesson1: LED Control
LED control is basic in Arduino. In this lesson, you can learn how to make the LED blinks, and
how to control the brightness.
Material:
Arduino UNO x 1
Crowtail- Base Shield x 1
Crowtail- LED x 1
Crowtail- Cable x 1
USB cable x 1
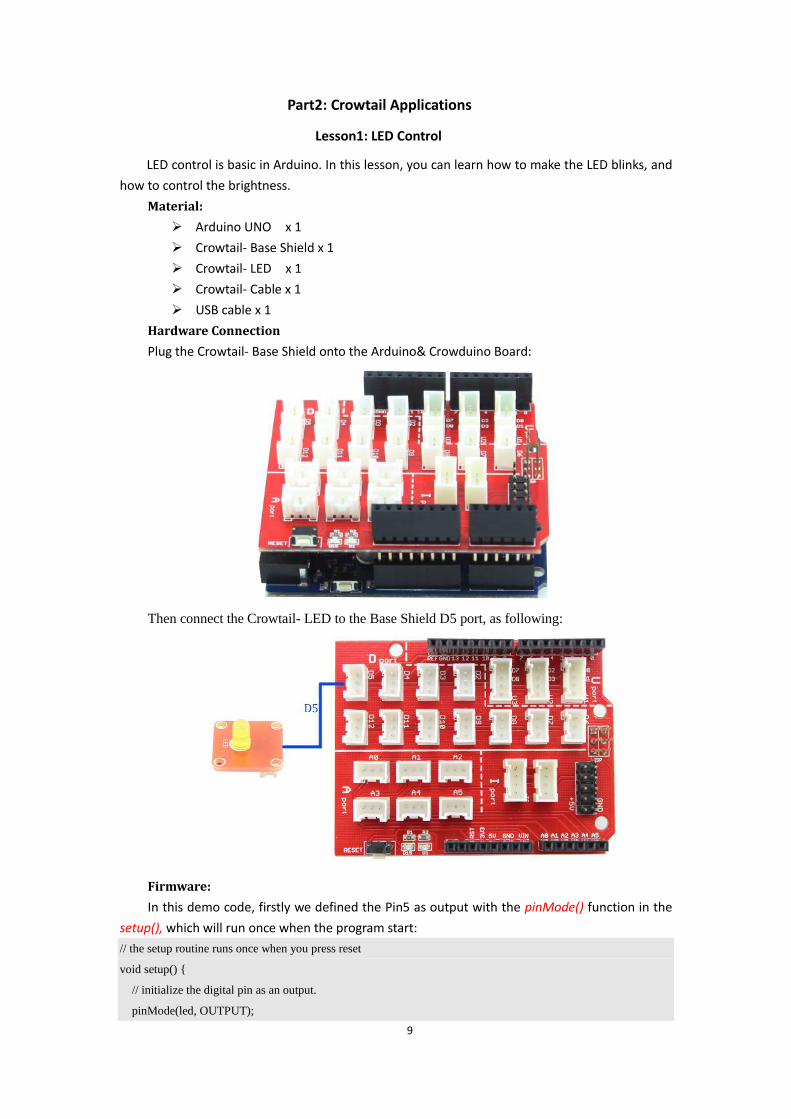
Hardware Connection
Plug the Crowtail- Base Shield onto the Arduino& Crowduino Board:
Then connect the Crowtail- LED to the Base Shield D5 port, as following:
Firmware:
In this demo code, firstly we defined the Pin5 as output with the pinMode() function in the
setup(), which will run once when the program start:
// the setup routine runs once when you press reset
void setup() {
// initialize the digital pin as an output.
pinMode(led, OUTPUT);

10
}
And then make Pin5 changes between logic HIHG and LOW, with an interval of 1000ms, with
digitalWrite() and delay() function in the loop(),which will run repeatedly, to make the LED blinks
forever:
void loop() {
digitalWrite(led, HIGH); // turn the LED on (HIGH is the voltage level)
delay(1000); // wait for a second
digitalWrite(led, LOW); // turn the LED off by making the voltage LOW
delay(1000); // wait for a second
}
Program downloading:
Download the Crowtail Starter Kit Demo Code, Open the P01_LED_Control.ino with Arduino
IDE as below:
Click Tools->SerialPort, and choose the right com port, which will list after the driver
successfully installed:

11
Click Tools->Board, choose the Arduino board you are using, such as the Arduino Uno
Click Upload, the code will be compiled and uploaded to the board. The down area of IDE
shows following information if download succeed:

12
After the programming, the Crowtail- LED will blink with a second. You can change the delay()
parameter in the program to change the interval.
(Explore more Arduino functions here: http://www.arduino.cc/en/Reference/HomePage )
Lesson2: Button Control LED
In the lesson1, we learned how to control a LED turn on/off. Do you want to control it by
yourself use the button? In this lesson, we will tell you how to realize it. When the button is
pressed, the LED will be lighten, and turn off when released.
Material:
Crowtail- LED x 1
Crowtail- Button x 1
Hardware Connection
Open the Arduino Code P02_Button_Control_LED.ino, and upload it to Arduino board.
When the button is pressed, the LED turns ON. Otherwise, the LED turns OFF.
Firmware:
In the programs, the Arduino first read the status of the button with the function
digitalRead():
// read the state of the pushbutton value:
buttonState = digitalRead(buttonPin);
// check if the pushbutton is pressed.
And thus to decide make the LED on or off, with the function digitalWrite():
// if it is, the buttonState is HIGH:
if (buttonState == HIGH) {
// turn LED on:
digitalWrite(ledPin, HIGH);
}
else {
// turn LED off:
digitalWrite(ledPin, LOW);
}

13
Lesson3: Touch, Touch!
Do you want to control a LED just by your finger touch a pad. The Crowtail- Touch Sensor can
help you do it. This sensor can detect the change in capacitance when a finger pressed or nearby,
that means no matter your finger directly touches the pad or just stays close to the pad, your
project can sense you fingers.
Material:
Crowtail- Touch Sensor x 1
Crowtail- LED x 1
Hardware Connection
Open the Arduino P03_Touchsensor_Control_LED and download to the Arduino.
When your finger touches the pad, the LED turns ON. Otherwise, the LED turns OFF. You
can also put some things on the sensor such as an aleck cover, cardboard and try again, the sensor
can also sense your fingers, within about 2mm distance.

14
Lesson4: Tilt Alarm!
In this lesson we will learn how to detect the forward status, and then to make an alarm
with vibration if the forward is in vertical.
Material:
Crowtail- Vibration Motor x 1
Crowtail- Tilt Switch x 1
Hardware Connection
Open the P04_Vibration_Motor.ino : Firstly we define the tilt switch and motor pins, and variable to store the tilt switch status:
const int tiltswitchPin = 4; // the number of the Tilt Switch pin
const int motorPin = 5; // the number of the vibration motor pin
int tiltswitchState = 0; // variable for reading the tilt switch status
And define the motor as OUTPUT and tilt switch as INPUT:
void setup() {
pinMode(motorPin, OUTPUT); // initialize the vibration motor pin as an output:
pinMode(tiltswitchPin, INPUT); // initialize the tilt switch pin as an input:
}
If the tilt switch is in vertical forwards, makes the motor begin to vibrate, ans wise versa:
void loop(){
tiltswitchState = digitalRead(tiltswitchPin); // read the state of the tiltswitch value:
// if it is, the tiltswitchState is HIGH:
if (tiltswitchState == HIGH) {
digitalWrite(motorPin, HIGH); // vibration motor vibrate
}
else {
digitalWrite(motorPin, LOW); // turn vibration motor off:
}
}
Upload the program to Arduino& Crowduino. Try to rotate the tilt switch, the vibration motor
will vibrated or not with the forward of the tilt switch.

15
Lesson5: Intelligent Temperature Control Fan
Do you want to design a fan, which can automatic working when the temperature higher. In
this lesson, we will design an intelligent temperature control fan.
Material:
Crowtail- Thermistor Temperaturen Sensor x 1
Crowtail- Relay x 1
Fan x1
Hardware Connection
Firmware
Open the P05_IntelligentTemperatureControlFan.ino
In the program, the Arduino firstly detects the current temperature:
a=analogRead(0);
resistance=(float)(1023-a)*10000/a; //get the resistance of the sensor;
temperature=1/(log(resistance/10000)/B+1/298.15)-273.15;//convert to temperature via datasheet ;
And if the temperature exceeds the temperature set in the program, the Arduino board set a
logic HIHG to the relay, making the relay ON , to open the Fan:
if(temperature>20)
{
digitalWrite(Relay, HIGH); //if temperature >20 degree,turn the Relay on,fan working
}
else
{
digitalWrite(Relay, LOW);//if temperature <=20 degree,turn the Relay off,fan not working
}
Upload successfully. You can set a threshold temperature value to control the realy ON or
OFF, then control the fan work or not.

16
Lesson6: Linear Potentiometer Control Breathing LED
Do you want to control a LED light as human breathing? It means that a LED adopts PWM
control to achieve the effect as a breathing light.
Material:
Crowtail- Linear Potentiometer x 1
Crowtail- LED x 1
Hardware Connection
Firmware:
Open the Arduino P06_Breathing_LED.ino
In the function Loop(), Arduino get the potentiometer position and then convert the data
from 0~1023 to 0~255 with function map():
sensorValue = analogRead(analogInPin); // read the Linear Potentiometer value:
int gapValue = map(sensorValue,0,1023,0,255); //remap the 0~1023 data to 0~255;
And then control the lightness of LED with PWM wave, the higher duty of the logic HIHG,
the lighter the LED would be.
The PWM wave can be only generated with the some of the pins, 3/5/6/9/10/11, for the
Arduino Uno or Crowduino, with the function analogWrite():
analogWrite(ledPin, gapValue); // PWM control the lightness of LED
Upload the program to Arduino& Crowduino, you can see the brightness of the LED changes
with the linear potentiometer position.

17
Lesson7: Moisture Alarm
Sometimes we are too busy to take care of our plants, if there is not enough water for them,
they will be not so good. Here we make a small project to monitor the soil moisture of the plants,
and then alarm you this, with some different tones, to show you how urgent now to give your
plants some water.
We will use the moisture sensor to detect the soil moisture, and then emits some tones to
alarm you how urgent it is now to water your plants.
Hardware Connection
Connect the moisture sensor to one of the A ports, and buzzer to one of the D ports , note
that as we need to use the PWM wave, so only the D3/5/6/9/10/11 would be work:
Firmware
Open the Arduino P07_Moisture_Buzzer.ino
After getting the sensor from the moisture which range from 0~1023, the Arduino make the
buzzer emits sounds with frequency inversely proportional to the sensor data, if the sensor data
shows that the current soil is too dry:
void loop() {
sensorValue = analogRead(analogInPin); // read the analog in value:
Serial.print("sensor = " );
Serial.print(sensorValue); // print the results to the serial monitor:
if(sensorValue<300)
{
tone(buzzer, 3000-sensorValue*5); // emitters voice with frequency inversely proportional to the sensor
data
}
else
{
noTone(buzzer);
digitalWrite(buzzer, LOW);// if not, stop to make any alarm;
}
delay(200);
}

18
Upload the program to Arduino& Crowduino, and plug the moisture sensor into soil, or even
a cup of water for experiment, you will hear the buzzer emits different sounds with your placing
the moisture sensor in& out.
Lesson8: Sound-light Controlled LED In our daily life, you must notice that the stair light during the day, when somebody up or
down stair, it is not work, but in the night, it would light up when somebody make some noise by
clipping. In this lesson, we will simulate an intelligent switch, control the light turns OFF in the
day and turns ON in the night when there is somebody making some noise.
We will read light information from the light sensor and read sound information from the
sound sensor. Then set a threshold value to control the LED ON or OFF.
Material:
Crowtail- Sound Sensor x 1
Crowtail- Light Sensor x 1
Crowtail- LED x 1
Hardware Connection
Connect the LED to “D” port such as D5, and the light sensor/sound sensor to the “A” port
as below:
Firmware
Open the Arduino Code P08_Sound_LightControlLED.ino
In the firmware, we define the Pins we connected, and some Variable to store the data
received from the sensor:
int lightPin = A0; // input pin for the light sensor
int soundPin = A3; // input pin for the sound sensor
int ledPin = 5; // Pin for the LED
int lightValue = 0; // variable to store the value coming from the sensor
int soundValue = 0;
And get the sensor data :
lightValue = analogRead(lightPin); // read the value from the sensor:
soundValue = analogRead(soundPin);

19
If the light sensor data below the threshold we set, that means it is night; and if the sound
sensor detects some noise, then we can light up the LED:
if((lightValue < 800)&&(soundValue>500))//if in dark, and some noise detected
{
digitalWrite(ledPin, HIGH); // turn the LED on
delay(5000); //turn on the LED for 5S
}
else{
digitalWrite(ledPin, LOW); // turn the LED off:
}
After successfully uploading the code, the LED turns OFF under the lamp and the
environment was be quiet. The LED will be ON for 5 second only when it in darkness and some
noise detected.
Lesson9: Display Something on the OLED
Crowtail- OLED is constructed from 128 x 64 dot matrix OLED module. Users can display text
or pictures on the OLED, with simple IIC communication and the given library in Elecrow.
Hardware Connection
Connect the OLED display to Base Shield Port “I” as below:
Firmware
For this application, an Arduino library “U8glib” is needed. Firstly, copy the folder of
“U8glib” to the Arduino library file: … \Arduino\libraries
And then open the P09_OLED_Display.ino
20
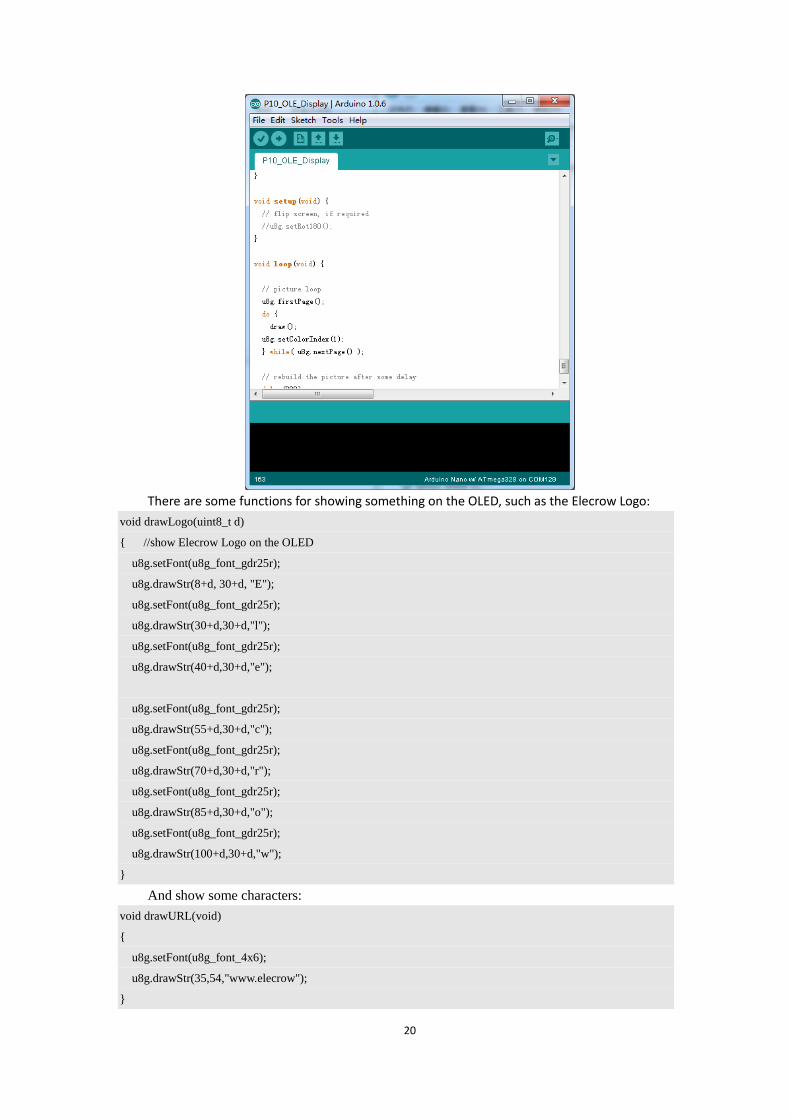
There are some functions for showing something on the OLED, such as the Elecrow Logo:
void drawLogo(uint8_t d)
{ //show Elecrow Logo on the OLED
u8g.setFont(u8g_font_gdr25r);
u8g.drawStr(8+d, 30+d, "E");
u8g.setFont(u8g_font_gdr25r);
u8g.drawStr(30+d,30+d,"l");
u8g.setFont(u8g_font_gdr25r);
u8g.drawStr(40+d,30+d,"e");
u8g.setFont(u8g_font_gdr25r);
u8g.drawStr(55+d,30+d,"c");
u8g.setFont(u8g_font_gdr25r);
u8g.drawStr(70+d,30+d,"r");
u8g.setFont(u8g_font_gdr25r);
u8g.drawStr(85+d,30+d,"o");
u8g.setFont(u8g_font_gdr25r);
u8g.drawStr(100+d,30+d,"w");
}
And show some characters:
void drawURL(void)
{
u8g.setFont(u8g_font_4x6);
u8g.drawStr(35,54,"www.elecrow");
}

21
Upload successfully. You can see the OLED displays: