discovering plate boundaries - rice universityplateboundary.rice.edu/tgpart1_notes.pdf · plate...
TRANSCRIPT

Discovering Plate BoundariesTeachers Guide: Introduction
Dale S. SawyerRice University 1
Dale S. SawyerRice University
Discovering Plate Boundaries
A data rich exercise in which students discover plate tectonic boundary
processes
Teachers Guide Part 1: Introduction
Hi, my name is Dale Sawyer. I am a Professor of Earth Science at Rice University in Houston Texas. Thanks for your interest in Discovering Plate Boundaries. In this presentation I would like to introduce you to the exercise, describe how it is done in the classroom with your students, and show you why I think it valuable.

Discovering Plate BoundariesTeachers Guide: Introduction
Dale S. SawyerRice University 2
Dale S. Sawyer Rice University
Who is this exercise for?I have used it with:
5th graders8th gradersHigh School studentsRice University students not majoring in scienceRice University students majoring in GeologyScience Teachers
It is usable over this range because it is based on observation and description. It does not require prior knowledge.The main aspect that I change is the level of expectation and the level of detail in the wrap-up presentation.
Unlike most classroom exercises, this one is useful for students of all ages, well almost! Although I do not list it on the slide, I have actually done one workshop for K-4 teachers, and the data maps and a highly simplified form of the exercise have been used in several of their classrooms. In general, I think that the exercise can work for grades 5 and up.How can I do this you ask! Now I am beginning to sound like an Infomercial! Sorry!It is broadly usable because it asks the students to observe, describe, and classify data. It is not critical that they bring previous knowledge of plate tectonics, geography, or earth science into the classroom. In fact, I often find that students who are bright and curious, but have no knowledge of the subject, get the most out of the exercise.It is useful if they know what earthquakes and volcanoes are. It is useful if they have seen a world map and know the names of the continents and oceans. In my experience, prior knowledge of plate tectonics and plate boundary processes often includes as many misconceptions as it does correct conceptions. A sense that one already knows all about something is a tremendous impediment to actually confronting data and letting the data suggest models of how a process really works. This is something faced by scientists everyday; stopping frequently to really see our data is key to scientific progress. It is also important in daily life!I vary the expectations I have of the students doing the exercise. From older students I expect more detail in their descriptions of the data at plate boundaries. I expect them to be a bit more insightful into anomalies in the datasets. I expect them to give clearer, more organized, presentations to the class. When I move through the room while the students are meeting in their groups talking about the data, I push older students a bit harder to think more deeply about the data.I am surprised to find that 8th graders often do this exercise as well as college freshmen!
Discovering Plate BoundariesTeachers Guide: Introduction
Dale S. SawyerRice University 3
Dale S. Sawyer Rice University
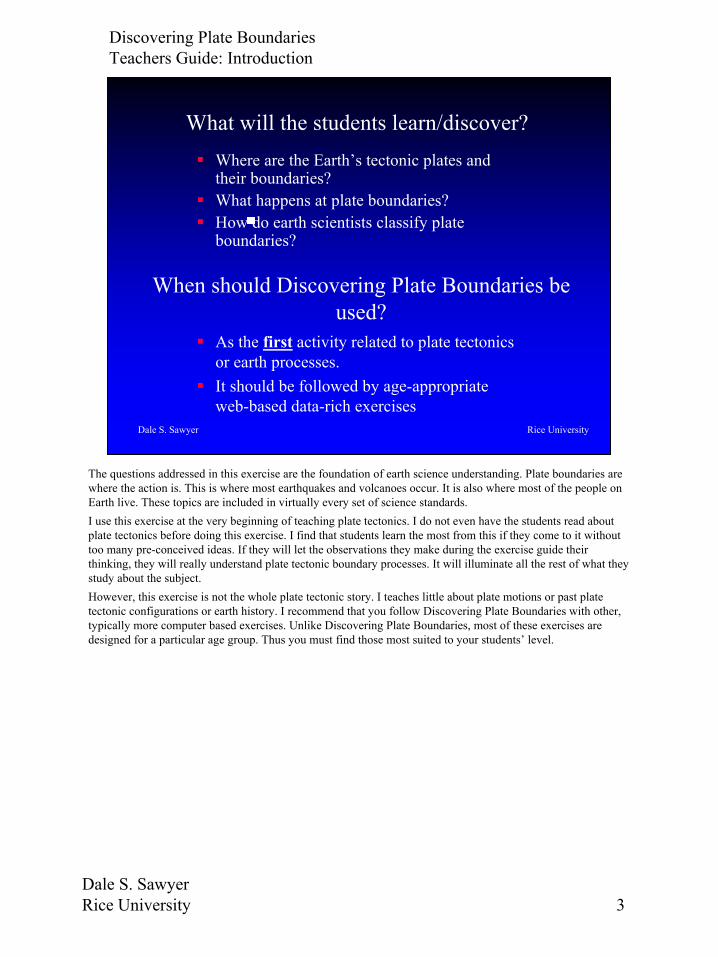
What will the students learn/discover?Where are the Earth’s tectonic plates and their boundaries?What happens at plate boundaries?How do earth scientists classify plate boundaries?
When should Discovering Plate Boundaries be used?
As the first activity related to plate tectonics or earth processes.It should be followed by age-appropriate web-based data-rich exercises
The questions addressed in this exercise are the foundation of earth science understanding. Plate boundaries are where the action is. This is where most earthquakes and volcanoes occur. It is also where most of the people on Earth live. These topics are included in virtually every set of science standards.I use this exercise at the very beginning of teaching plate tectonics. I do not even have the students read about plate tectonics before doing this exercise. I find that students learn the most from this if they come to it without too many pre-conceived ideas. If they will let the observations they make during the exercise guide their thinking, they will really understand plate tectonic boundary processes. It will illuminate all the rest of what they study about the subject.However, this exercise is not the whole plate tectonic story. I teaches little about plate motions or past plate tectonic configurations or earth history. I recommend that you follow Discovering Plate Boundaries with other, typically more computer based exercises. Unlike Discovering Plate Boundaries, most of these exercises are designed for a particular age group. Thus you must find those most suited to your students’ level.

Discovering Plate BoundariesTeachers Guide: Introduction
Dale S. SawyerRice University 4
Dale S. Sawyer Rice University
Seismology Map – Earthquake Locations and Depths
An exercise based on observing, describing, and classifying data must be built on some rich and well displayed data. I use 4 data maps that contain an amazing amount of information about large scale plate tectonic processes on the Earth. These data have been acquired over many years by many scientists. When examined together, most of the basic tenets of plate tectonics are laid bare and seem irrefutable. Scientists developing the key ideas of plate tectonics over the past 40 years had only fragments of these data to work with as they tried to describe, classify, and interpret what they saw. In Discovering Plate Boundaries, you will be asking your students to walk the same path, but with the advantage of more complete, although not perfect, data.The first map shows earthquake locations and depths. The location of each earthquake is indicated by a small dot and its depth is indicated by the color of the dot. Red dots indicate earthquakes having depths between zero and 33 km. We refer to these as shallow earthquakes. The yellow or orange dots indicate earthquakes having depths between 33 and 70 km. We call these intermediate depth earthquakes. The green dots indicate earthquakes having depths between 70 and 300 km We call these deep earthquakes. The blue dots indicate earthquakes having depths between 300 and 700 km. We call these ultra-deep earthquakes.

Discovering Plate BoundariesTeachers Guide: Introduction
Dale S. SawyerRice University 5
Dale S. Sawyer Rice University
Volcanology Map – Recent Volcanic Activity
The second map shows the locations of recent volcanic or thermal features on the Earth. In this dataset, recent refers to the past 10,000 years. The dots represent volcanoes, geysers, hot springs, and similar features.In these slides, the maps are not shown in a way that you can see all the detail. The second part of the Teachers Guide, called A Tour of the Maps, shows the maps in much more detail. It is also possible to download the maps in several high resolution formats from the DPB website so that you can see the details.

Discovering Plate BoundariesTeachers Guide: Introduction
Dale S. SawyerRice University 6
Dale S. Sawyer Rice University
Geochronology Map – Seafloor Age
The third map shows the age of the oceanic crust under most of the world’s oceans. This map really highlights divergent plate boundaries, also known as mid-ocean ridges or spreading centers. The scale bar on the right shows how the colors correspond to age of the seafloor in millions of years. Red signifies the youngest crust. Blue signifies the oldest known oceanic crust.An important feature of the maps used in this exercise is that they are all displayed at the same scale and projection, and use the same coastline data. Uniformity of the map base makes it easy for students to compare data from map to map. This is an important aspect of the exercise. It is possible to obtain excellent maps (better than mine!) of each of these data from other sources, but they are unlikely to be displayed in the same way. I have found inconsistent display to be a source of frustration for students.

Discovering Plate BoundariesTeachers Guide: Introduction
Dale S. SawyerRice University 7
Dale S. Sawyer Rice University
Geography Map – Topography and Bathymetry
The fourth, and perhaps the richest of the data maps, shows the topography and bathymetry of the Earth. This is the elevation of the land surface and the depth of the oceans. The map uses color to indicate varying elevation and depth and simulates sun shading to add a sense of 3-dimensionality to the map. The scale bar on the right shows how colors on the map correspond to elevation in meters.

Discovering Plate BoundariesTeachers Guide: Introduction
Dale S. SawyerRice University 8
Dale S. Sawyer Rice University
Preparation for Discovering Plate Boundaries
Ideally done in three 50 minute class periods over several daysCan be done in a 3 hour lab periodAttach the 4 data maps to the walls of the roomHave 1 copy of the Student Instruction sheet per studentHave 2 copies of the B&W plate boundary map per student (+ extras)Have a mixture of colored pencils available for students to useHave 1 overhead transparency of plate boundary map per plate groupHave some colored overhead markers for students to use
I usually do the exercise over three 50 minute periods. I usually try to distribute these over several days. I have done the whole exercise in one 3 hour lab period. However, it can be divided in other ways quite successfully.Before the students arrive, I put the four data maps up on the walls of the room, far enough apart that groups of 8-10 students can stand around a map and not interfere with a group standing around and discussing another map. I use 24 by 36 in laminated versions of the maps so that everyone in such a group can see the map readily and participate in the group discussion. I try to do the exercise in a room where the students have access to some space in front of each of the maps. I find that students discuss the maps more readily if they are standing, rather than sitting, around the map. It makes it less likely, and more obvious to the teacher, if one or two students are avoiding participating in the map discussions. It is also important that there be places in the classroom where groups of students can sit together, ideally at a lab table, to discuss their plate boundary classifications during the second period of the exercise.The only items consumed during this exercise are the Student Instructions sheet (one per student), plate boundary maps copied onto paper (two per student) and overhead transparencies (one for each 4 student plate group). The data maps are reusable; I have a set I have used about 20 times and they are in fine shape! I keep a plastic bin with 40 or so colored pencils and 8 sets of transparency markers that I have also used many times.

Discovering Plate BoundariesTeachers Guide: Introduction
Dale S. SawyerRice University 9
Dale S. Sawyer Rice University
Day 1A 50 Minute Period
Each Student is each given a Student Instruction SheetEach Student is each given a plate boundary mapEach student receives a random card labeled with the name of a scientific specialty and a plate name
When the students arrive for the first period of the class, I hand out the Student Instruction sheet, and a plate boundary map. I use 11 by 17 in black and white maps that I make on a copying machine. They are displayed at the same projection and base as the data maps, although to a smaller scale. I also hand each student a slip of paper with a Scientific specialty (Seismology, Geochronology, Volcanology, or Geography) and a Plate Name (Pacific Plate, North American Plate, African Plate, and etc.). My goal is to have each student have a different combination of specialty and plate, and for all four scientific specialties to be covered for each plate used in the exercise. Therefore, if you have 24 students, I would use 6 plates and have all four specialties for each. Numbers that are not multiples of four can be handled by having 1-3 plates with only 3 specialties. If I have to do this, I drop a different specialty from each, but never Seismology. I bet you can guess that I am a Seismologist!I mix the specialties and plates up randomly among students because I think this exercise works best if they are not self arranged into their usual social groupings.

Discovering Plate BoundariesTeachers Guide: Introduction
Dale S. SawyerRice University 10
Dale S. Sawyer Rice University
Overview of Day 1The students are assembled in their specialty groups in front of their data mapThey are instructed to become familiar with their map and to observe how their data behave on or near plate boundaries
They are to OBSERVE rather than INTERPRET
Their descriptions should include words like wide or narrow, straight or curved, symmetric or not symmetric, deep or shallow, ridge or valley, active or inactive.On the first day they are to look at the whole worldThey are to develop a classification scheme for up to 5 boundary types using their data.
The boundary types are to be called Type 1, Type 2, and etc.They should write a description of each boundary type on the back of their plate boundary mapThey should assign a pencil color to each boundary typeThey should color the boundary with that colorIf the boundary is not symmetric in their data, they should invent a way to show that on their map
I ask the students to assemble in their specialty groups at their respective maps: Seismologists at the Earthquake map, Volcanologists at the Volcano map, Geochronologists at the Seafloor Age map, and Geographers at the Topography map. Each group is asked to become familiar with their map. They should read the side label to see what is being displayed and how it is displayed. Some maps show locations of events. Other maps show contoured data using colors. They should work as a group to figure out what they are looking at. I find that at first those who dominate the discussion at the maps are the usual suspects. After a while, other leaders usually emerge, because they really begin looking carefully at the map and the data. I like watching this dynamic emerge!While the students are doing this, I circulate among the groups listening and often clarifying misconceptions I hear popping up. I want to be sure that each group has reached an understanding of the basics of the data display. This usually takes about 15 minutes.I then ask the students, still in their specialty groups at their maps, to begin to describe and classify their data. Each group is to work only with its data map. Each group is to come up with a classification of the plate boundaries of the world based on their data. They are to use up to 5 plate boundary type classifications. These are to be given numbers such as boundary type 1, boundary type 2, and etc. They are not to use plate tectonic terminology, although they will try! They are to write a description of how they identified their plate boundary types. I say that the description should be clear enough that someone unfamiliar with their map, and without help, could use their description to find examples of that boundary type on the map. They are then asked to use a colored pencil to mark (on their individual map) all plate boundaries in the world which fit that description. They should use different colored pencils for each of their boundary types.

Discovering Plate BoundariesTeachers Guide: Introduction
Dale S. SawyerRice University 11
Dale S. Sawyer Rice University
Seismology Data Map Student Annotated Map
Student Written Description
At first they are usually stumped by this. Some will go off in weird directions. I usually get them on track by having someone in the group select a plate boundary segment, perhaps the boundary between the North American Plate and the Eurasian Plate in the Atlantic Ocean. I ask them to tell me what their data show on or near that plate boundary segment (upper left map in the slide). The seismologists might notice that there are only shallow earthquakes along that boundary. They might add that the quakes are almost all exactly on the boundary, and that the line of quakes and the plate boundary both have a zig-zag pattern. I then suggest to them that they have just defined their Type 1 plate boundary. I ask that each student write on the back of their copy of the plate boundary map the definitions of their groups’ boundary types (shown at the bottom of the slide) and mark the boundary type identifications in colored pencil on the map (upper right map in the slide). I then ask them to look at the plate boundary and data maps to find other plate boundary segments that also fit this description. They usually find others quite easily and then mark those boundaries with the color they have assigned to Type 1 plate boundaries. I then suggest that they repeat this process by finding a plate boundary segment they have not yet marked and repeat the whole process to define a Type 2 plate boundary. They usually get it and can proceed without aid for most of the rest of the period. They will each be asked to turn in these marked maps at the end of the exercise. This keeps everyone engaged in the group discussions!I move from group to group assisting, questioning, and prodding where it seems necessary. The class time usually runs out before the students are quite finished. I often have students ask if I will leave the maps up so that they can come look at them and finish their maps before the next class. I always try to make that possible!

Discovering Plate BoundariesTeachers Guide: Introduction
Dale S. SawyerRice University 12
Dale S. Sawyer Rice University
Seismology Map Example
This is an example of a well done Seismology based classification map for Day 1 of the exercise. The companion legend for this map is in the next slide. This is better than I expect of most students. Note that this is not the only correct answer. The classification labels are completely arbitrary. What I look for in these maps is a sense that the students have really observed the data and then created logical classifications. I do not worry about them having classifications that match exactly with current plate tectonic theory! I also find that many students (particularly younger ones) are not able to complete their maps during the class period. Usually, they have identified most of the areas that are fairly simple in their dataset, and it is the more confusing areas that they have not gotten to. I do not penalize them for this. A teacher might elect to extend the time that they have for this part of the exercise.I have the students keep their maps and Plate Boundary Type classifications after Day 1 to be used later in the exercise. I have them turn them in at the end of Day 3 of the exercise.

Discovering Plate BoundariesTeachers Guide: Introduction
Dale S. SawyerRice University 13
Dale S. Sawyer Rice University
Seismology Map Legend Example
This is an example of a well done Seismology based classification map for Day 1 of the exercise. I have the students write these on the back of the plate boundary map that each is given. They select the boundary symbol they want to use. Note that for plate boundary types with no sided-ness (such as types 1, 2, 4, and 5) a simple colored line may be used. The colors may be chosen based on what colored pencil each student can find. The colors do not need to match from student to student or group to group. The Type 3 boundary symbol shown here reflects that the deep earthquakes occur on one side of the boundary. The students should invent a symbol for this. I chose to use lines perpendicular to the PB to indicate this. Note that the nature of this symbol is described in the Type 3 Boundary description. Note that I could just as well have placed the marks on the side of the plate boundary that did not have deep earthquakes.

Discovering Plate BoundariesTeachers Guide: Introduction
Dale S. SawyerRice University 14
Dale S. Sawyer Rice University
Volcanology Map Example
This is an example of a well done Volcanology based classification map for Day 1 of the exercise. Remember the caveats: This is better than I expect of most students, and it is not the only correct answer! I present it as an example of the style I am looking for; not as an answer sheet for grading!

Discovering Plate BoundariesTeachers Guide: Introduction
Dale S. SawyerRice University 15
Dale S. Sawyer Rice University
Volcanology Map Legend Example
This is an example of a well done Volcanology legend.

Discovering Plate BoundariesTeachers Guide: Introduction
Dale S. SawyerRice University 16
Dale S. Sawyer Rice University
Geochronology Map Example
This is an example of a well done Geochronology based classification map for Day 1 of the exercise. Remember the caveats: This is better than I expect of most students, and it is not the only correct answer! I present it as an example of the style I am looking for; not as an answer sheet for grading!

Discovering Plate BoundariesTeachers Guide: Introduction
Dale S. SawyerRice University 17
Dale S. Sawyer Rice University
Geochronology Map Legend Example
This is an example of a well done Geochronology legend.

Discovering Plate BoundariesTeachers Guide: Introduction
Dale S. SawyerRice University 18
Dale S. Sawyer Rice University
Geography Map Example
This is an example of a well done Geography based classification map for Day 1 of the exercise. Remember the caveats: This is better than I expect of most students, and it is not the only correct answer! I present it as an example of the style I am looking for; not as aan answer sheet for grading!

Discovering Plate BoundariesTeachers Guide: Introduction
Dale S. SawyerRice University 19
Dale S. Sawyer Rice University
Geography Map Legend Example
This is an example of a well done Geography legend.

Discovering Plate BoundariesTeachers Guide: Introduction
Dale S. SawyerRice University 20
Dale S. Sawyer Rice University
Overview of Day 2A 50 Minute Period
Assemble the students in their plate groupsEach plate group will consist of 4 students, each expert in one specialtyThe group will visit each data map for a briefing by the expert on that map. Every student presents, every student is an expert!Each student is given a new plate boundary mapEach plate group now focuses on the boundaries of their plateThey are asked to classify those boundaries using up to 5 new boundary typesThe new Boundary type descriptions will now be based on all 4 data typesEach group will be given an overhead transparency of the Plate Boundary map and overhead markersEach group will prepare for one spokesperson to present their work to the class on Day 3
When the students gather for Day 2 of the exercise, I ask them to assemble in their Plate Groups. Each plate group should consist of a seismologist, a volcanologist, a geographer, and a geochronologist. I usually have each group move to a lab table together. This will be a different group than they worked with the first day. I then explain that each group contains experts on all the data types, but that each expert has only looked at data in their own specialty area. Therefore each group needs to work their way around the maps to become familiar with all the data. As they stand at each map, the expert on that map should make an informal presentation to the others in their group about their data. They should first tell what the data are and how they are symbolized. They should then point out the most important features shown on their map. They should briefly introduce the plate boundary types they came up with and where they can be found in the world. They may want to pay particular attention to the boundary types they found at the boundaries of the plate their group is to work on. I then turn them loose on the maps.As they seem to be finishing their presentations at the maps, about 15 minutes into the class, I get their attention to tell them that their next task is to come up with a new classification scheme for the boundaries of their plate (not the whole world). This scheme should be labeled Boundary type A, B, and etc, and should now be based on all four types of data. Thus a plate boundary type A might be described as having shallow earthquakes right on the plate boundary, sparse or no volcanoes, lying on a topographic high with deeper water to either side, and following a line of young seafloor. In most cases the students will do this by bringing together the classification maps they did the first day. They should notice that they plate boundary types that correlate (at least approximately) from data type to data type.As they work on these new maps, which each student will have to make and turn in at the end of the exercise, I remind them to put their boundary type descriptions on the back of their new map and color the boundaries on the map. I also pass out the transparencies and markers and tell the students that a spokesperson from each group will need to speak to the class, using the marked up transparency, at the beginning of day 3.

Discovering Plate BoundariesTeachers Guide: Introduction
Dale S. SawyerRice University 21
Dale S. Sawyer Rice University
Day 2
Much of Day 2 is spent with plate groups working together at lab tables and occasionally consulting the data maps. I move from table to table listening in and asking leading questions of the groups.
Discovering Plate BoundariesTeachers Guide: Introduction
Dale S. SawyerRice University 22
Dale S. Sawyer Rice University
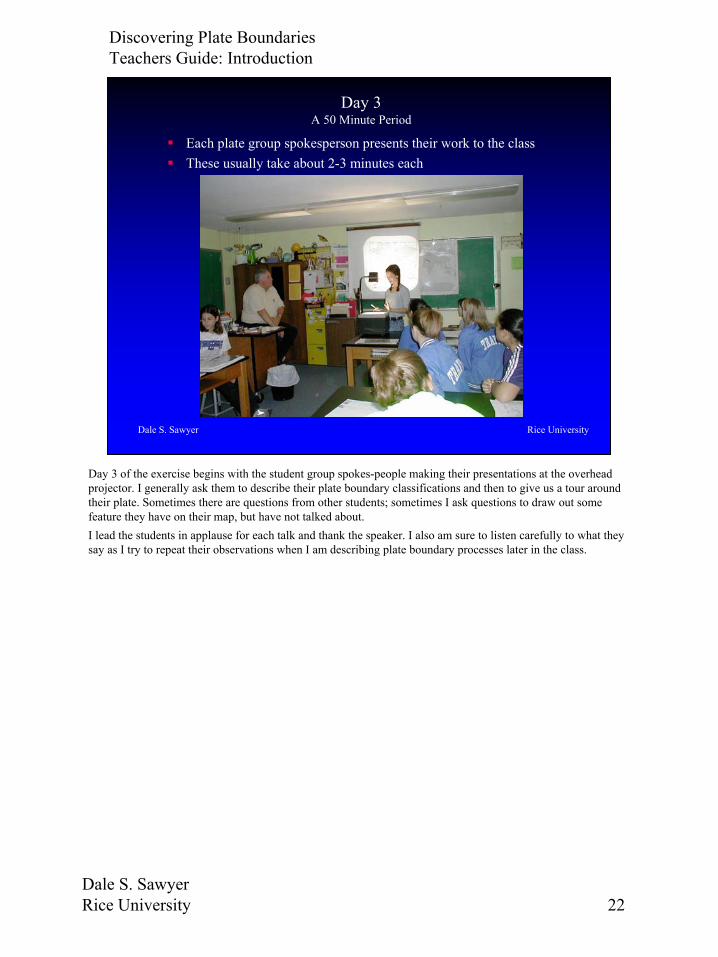
Day 3A 50 Minute Period
Each plate group spokesperson presents their work to the classThese usually take about 2-3 minutes each
Day 3 of the exercise begins with the student group spokes-people making their presentations at the overhead projector. I generally ask them to describe their plate boundary classifications and then to give us a tour around their plate. Sometimes there are questions from other students; sometimes I ask questions to draw out some feature they have on their map, but have not talked about.I lead the students in applause for each talk and thank the speaker. I also am sure to listen carefully to what they say as I try to repeat their observations when I am describing plate boundary processes later in the class.

Discovering Plate BoundariesTeachers Guide: Introduction
Dale S. SawyerRice University 23
Dale S. Sawyer Rice University
Day 3The teacher wraps up the exercise with a presentation on plate boundary processesThe teacher should introduce divergent, convergent, and transform plate boundary types
I then spend the remainder of the class leading a discussion of plate boundary processes and introducing the terminology earth scientists use to describe these plate boundaries. I first use this graphic to discuss divergent boundaries, convergent (subducting) boundaries, and transform boundaries. I discuss why each of these boundaries have the particular observable phenomena the students have seen. I try to frequently refer to words that they used in their presentations to describe these.

Discovering Plate BoundariesTeachers Guide: Introduction
Dale S. SawyerRice University 24
Dale S. Sawyer Rice University
Day 3The teacher should introduce correct terminology and description of the processes at plate boundariesThe teacher should refer to classification descriptions that were presented/discovered by the students
I have a set of transparencies that show close-ups of the Discovering Plate Boundaries data maps for particularly good examples of each type of plate boundary. These are very handy for illustrating the data relationships that characterize each fundamental type of plate boundary. The example in the slide illustrates convergent plate boundaries in Southeast Asia. Each map in the transparency covers exactly the same area, making comparison easy.I try to let the students lead me in directions of their interest. There are usually many questions about what is going on at various plate boundaries, and sometimes away from plate boundaries (ie. Hawaii!). This type of discussion inevitably finishes off the third day of the exercise and may extend into the next day of the class.I have the students turn in their 2 annotated plate boundary maps as they leave. I usually grade these in a very simplified way. I give them a zero, check minus, check, or check plus for each map. Check minus reflects very little or careless work on the map. Check plus reflects an above average product relative to the age and ability of the students.

Discovering Plate BoundariesTeachers Guide: Introduction
Dale S. SawyerRice University 25
Dale S. Sawyer Rice University
Educational Aspects of This Exercise
Discovery based
Data rich
Geography
Writing descriptions
Map reading
Classification
Emphasizes observation
Cooperative learning
Random group interaction
Presentation skills
I find that students learn a lot about plate tectonics if they participate actively in the exercise. However they also practice a number of important skills that are often missing in most classroom activities that simply present the facts of plate tectonics to students. I particularly like the fact that this exercise emphasizes observation and classification. It is rare that students are confronted with data that are really quite complicated and potentially confusing, and asked to gradually make order of it. They are most often told what the generally accepted classifications are rather than having to find patterns themselves. This is the type of thinking that scientists (and non-scientists) must learn.I like that the exercise involves random groups interacting to reach consensus on patterns in the data. The jig-saw aspect of the exercise means that students end up working with classmates they would never choose if left to form their own groups. I find that the groups work very well.I like the presentation and descriptive writing skills incorporated into the exercise. Every student gives a presentation to 3 other students on Day 2. Even if the student is usually apprehensive about speaking to others, they have the advantage here because their audience has not seen their map before. Therefore they get to be the expert!These maps are rich in data, far beyond that exploited in this exercise. Some teachers tell me that they leave the maps up long after the exercise is done. They note that they often see students looking at the maps before class!Finally, the exercise is a great way to develop geographic knowledge. I use many geographic location names when I talk about the Earth’s plate boundaries. I urge the students to learn and use correct names during our discussions. It is great to have geography come up in a context different than simply learning names of places as a memorization exercise!

Discovering Plate BoundariesTeachers Guide: Introduction
Dale S. SawyerRice University 26
Dale S. Sawyer Rice University
More Information Available
Teachers Guide Part 2: A Tour of the MapsTeachers Guide Part 2: A Tour of the Maps
Teachers Guide Part 3: Plate Tectonic ProcessesTeachers Guide Part 3: Plate Tectonic Processes
http://terra.rice.edu/plateboundary
[email protected]@rice.edu
This has been an introduction to using Discovering Plate Boundaries in your classroom. If you are thoroughly familiar with global geophysical data and plate tectonic processes, then you are probably ready to go! If you are not, and you are in good company, you may want to take a look at Parts 2 and 3 of this Teacher’s Guide. In Part 2, called A Tour of the Maps, I look at the data maps one at a time, zooming in to particularly good examples of each type of plate boundary. I try to show you what I see when I look at each of the maps, and what I point out to the students as they do the exercise.In Part 3, called Plate Boundary Processes, I look at the Plate Boundary types one at a time. I emphasize the physical and chemical processes that occur there, and show you why these manifest themselves as they do in each Data Map.I hope that you find Discovering Plate Boundaries useful in your classroom! If you have questions about using the exercise, you may contact me at [email protected]. You may download any of the materials needed to use the exercise from my website at http://terra.rice.edu/plateboundary