diy christmas advent calendar sewing tutorial · 2019-06-04 · diy christmas advent calendar...
TRANSCRIPT
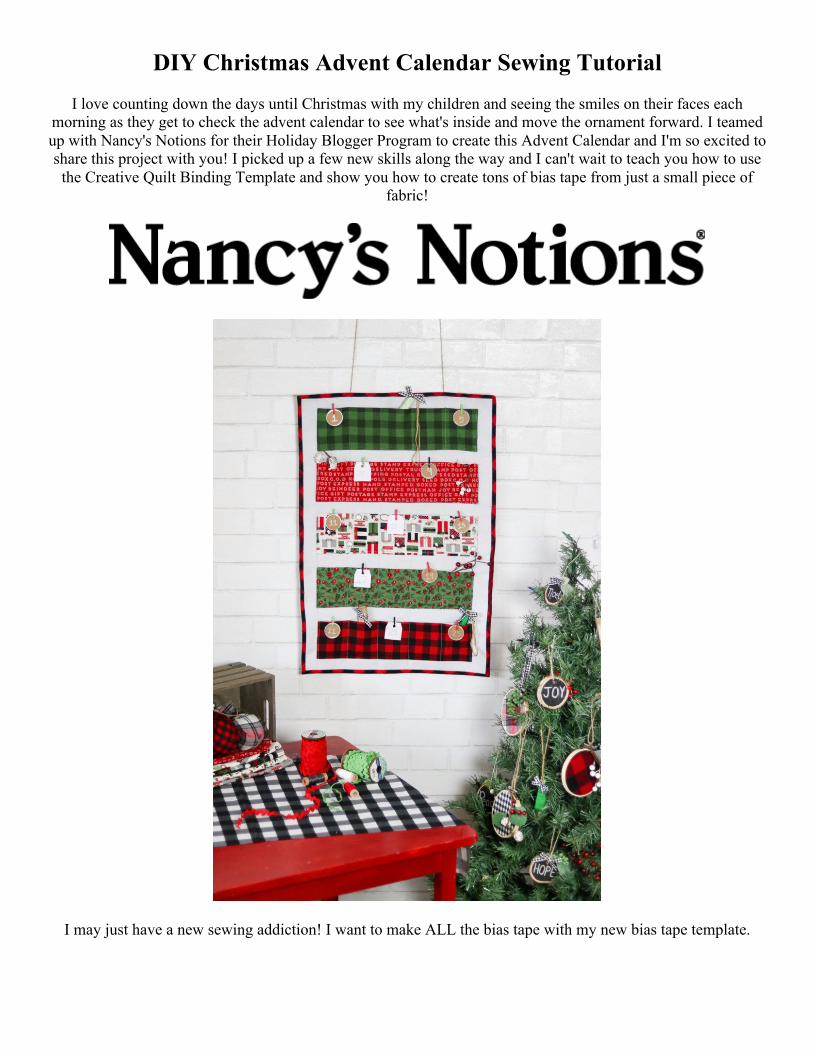
DIY Christmas Advent Calendar Sewing Tutorial I love counting down the days until Christmas with my children and seeing the smiles on their faces each
morning as they get to check the advent calendar to see what's inside and move the ornament forward. I teamed up with Nancy's Notions for their Holiday Blogger Program to create this Advent Calendar and I'm so excited to share this project with you! I picked up a few new skills along the way and I can't wait to teach you how to use
the Creative Quilt Binding Template and show you how to create tons of bias tape from just a small piece of fabric!
I may just have a new sewing addiction! I want to make ALL the bias tape with my new bias tape template.
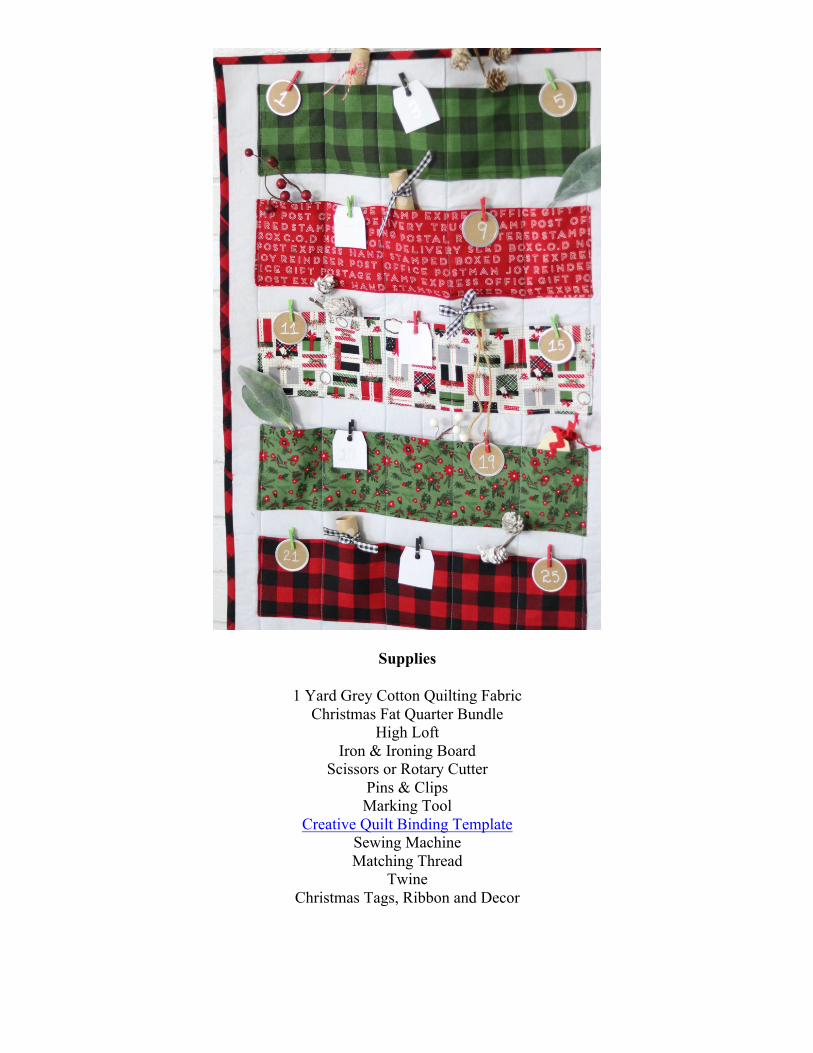
Supplies
1 Yard Grey Cotton Quilting Fabric Christmas Fat Quarter Bundle
High Loft Iron & Ironing Board
Scissors or Rotary Cutter Pins & Clips Marking Tool
Creative Quilt Binding Template Sewing Machine Matching Thread
Twine Christmas Tags, Ribbon and Decor
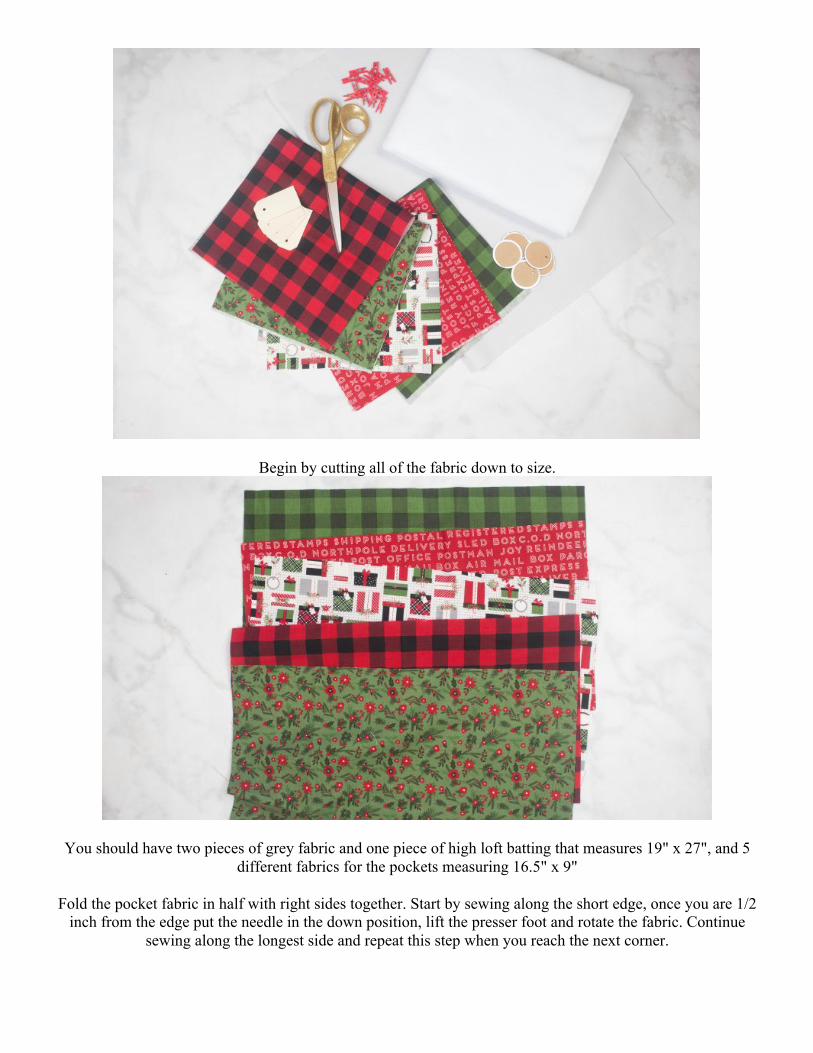
Begin by cutting all of the fabric down to size.
You should have two pieces of grey fabric and one piece of high loft batting that measures 19" x 27", and 5 different fabrics for the pockets measuring 16.5" x 9"
Fold the pocket fabric in half with right sides together. Start by sewing along the short edge, once you are 1/2 inch from the edge put the needle in the down position, lift the presser foot and rotate the fabric. Continue
sewing along the longest side and repeat this step when you reach the next corner.
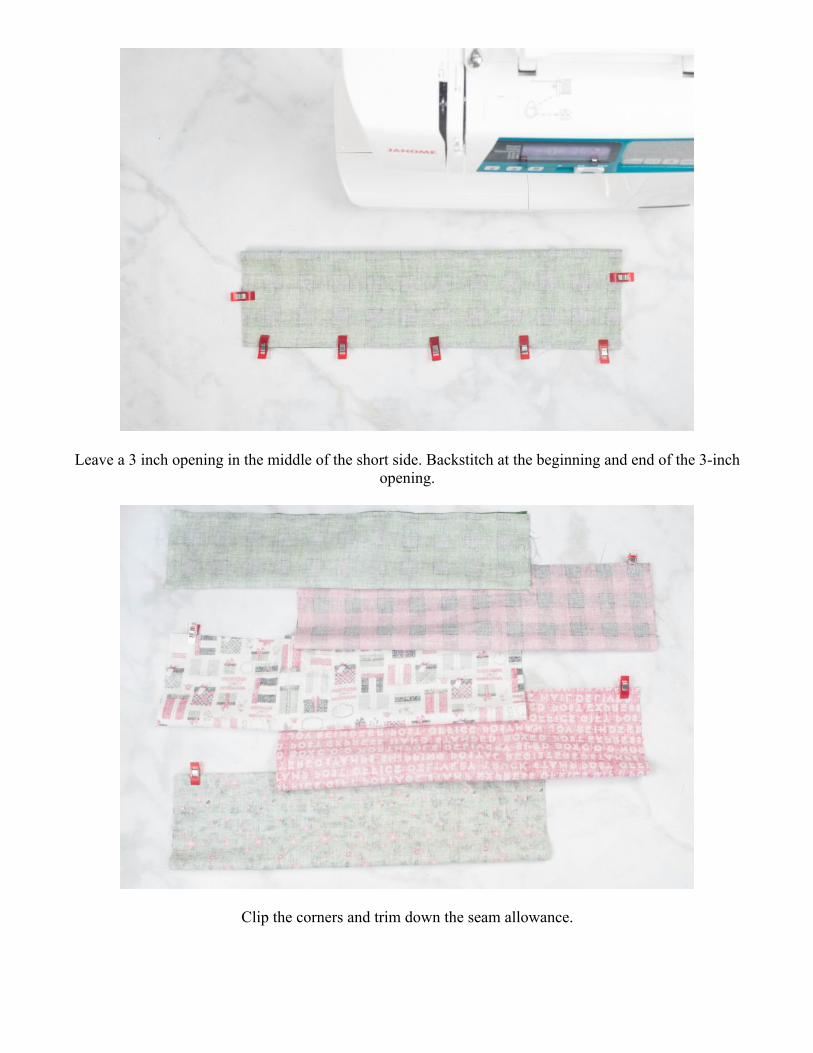
Leave a 3 inch opening in the middle of the short side. Backstitch at the beginning and end of the 3-inch opening.
Clip the corners and trim down the seam allowance.

Turn the pocket right side out and press. Use a needle to gently pull the corners out. You will want sharp corners for this project!
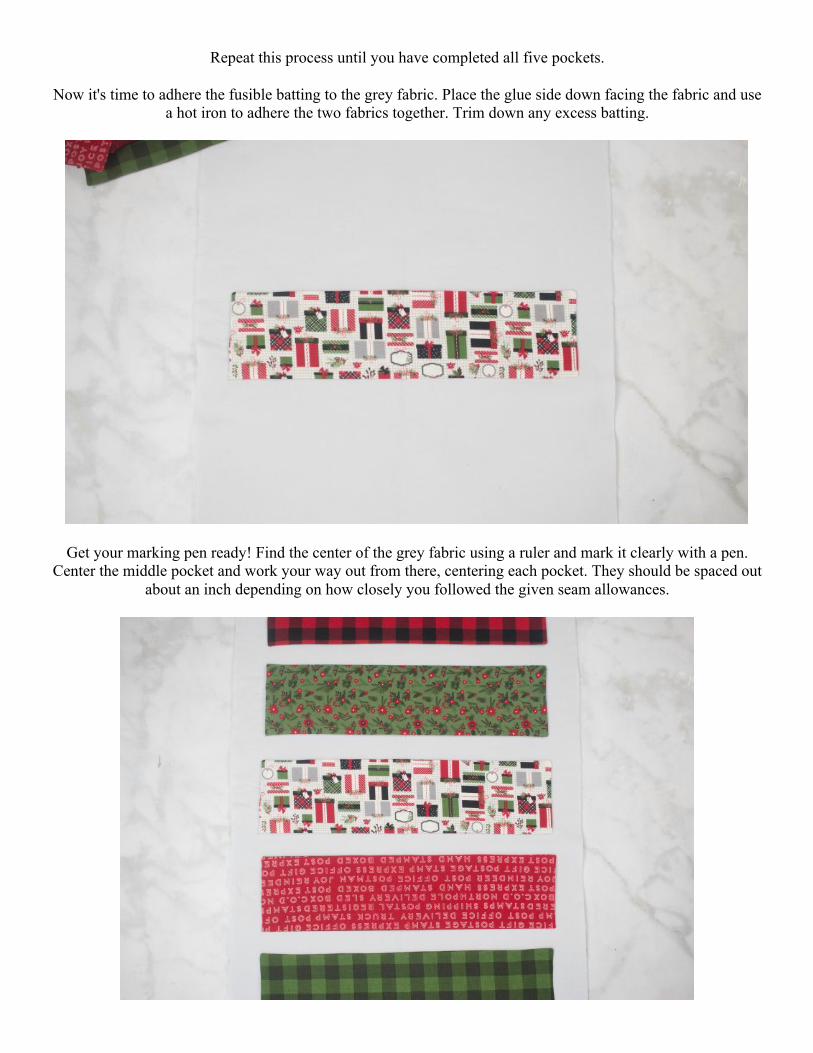
Repeat this process until you have completed all five pockets.
Now it's time to adhere the fusible batting to the grey fabric. Place the glue side down facing the fabric and use a hot iron to adhere the two fabrics together. Trim down any excess batting.
Get your marking pen ready! Find the center of the grey fabric using a ruler and mark it clearly with a pen. Center the middle pocket and work your way out from there, centering each pocket. They should be spaced out
about an inch depending on how closely you followed the given seam allowances.
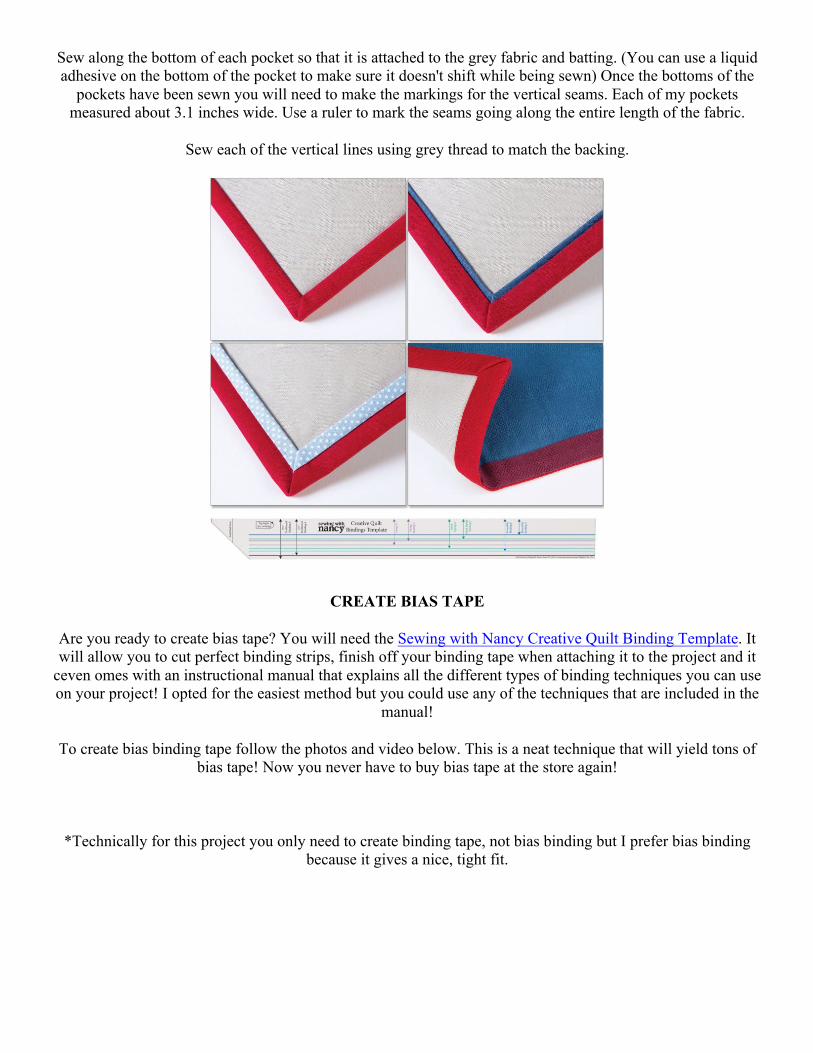
Sew along the bottom of each pocket so that it is attached to the grey fabric and batting. (You can use a liquid adhesive on the bottom of the pocket to make sure it doesn't shift while being sewn) Once the bottoms of the
pockets have been sewn you will need to make the markings for the vertical seams. Each of my pockets measured about 3.1 inches wide. Use a ruler to mark the seams going along the entire length of the fabric.
Sew each of the vertical lines using grey thread to match the backing.
CREATE BIAS TAPE
Are you ready to create bias tape? You will need the Sewing with Nancy Creative Quilt Binding Template. It will allow you to cut perfect binding strips, finish off your binding tape when attaching it to the project and it
ceven omes with an instructional manual that explains all the different types of binding techniques you can use on your project! I opted for the easiest method but you could use any of the techniques that are included in the
manual!
To create bias binding tape follow the photos and video below. This is a neat technique that will yield tons of bias tape! Now you never have to buy bias tape at the store again!
*Technically for this project you only need to create binding tape, not bias binding but I prefer bias binding because it gives a nice, tight fit.
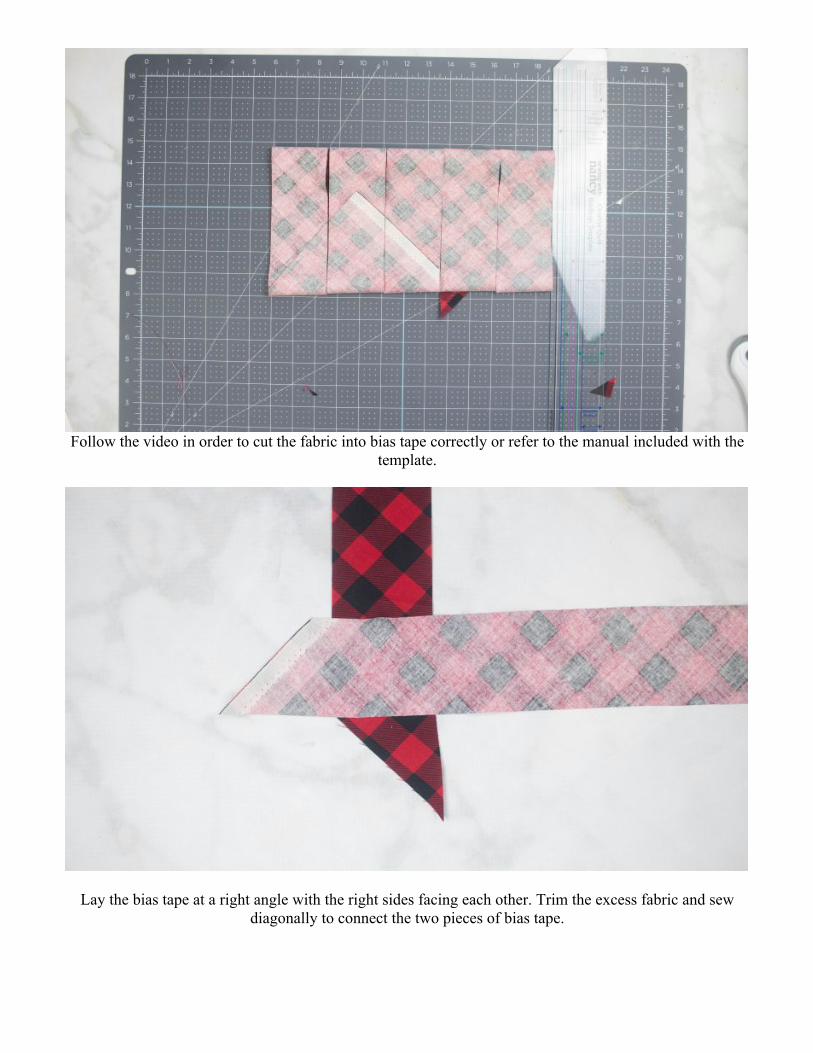
Follow the video in order to cut the fabric into bias tape correctly or refer to the manual included with the
template.
Lay the bias tape at a right angle with the right sides facing each other. Trim the excess fabric and sew diagonally to connect the two pieces of bias tape.
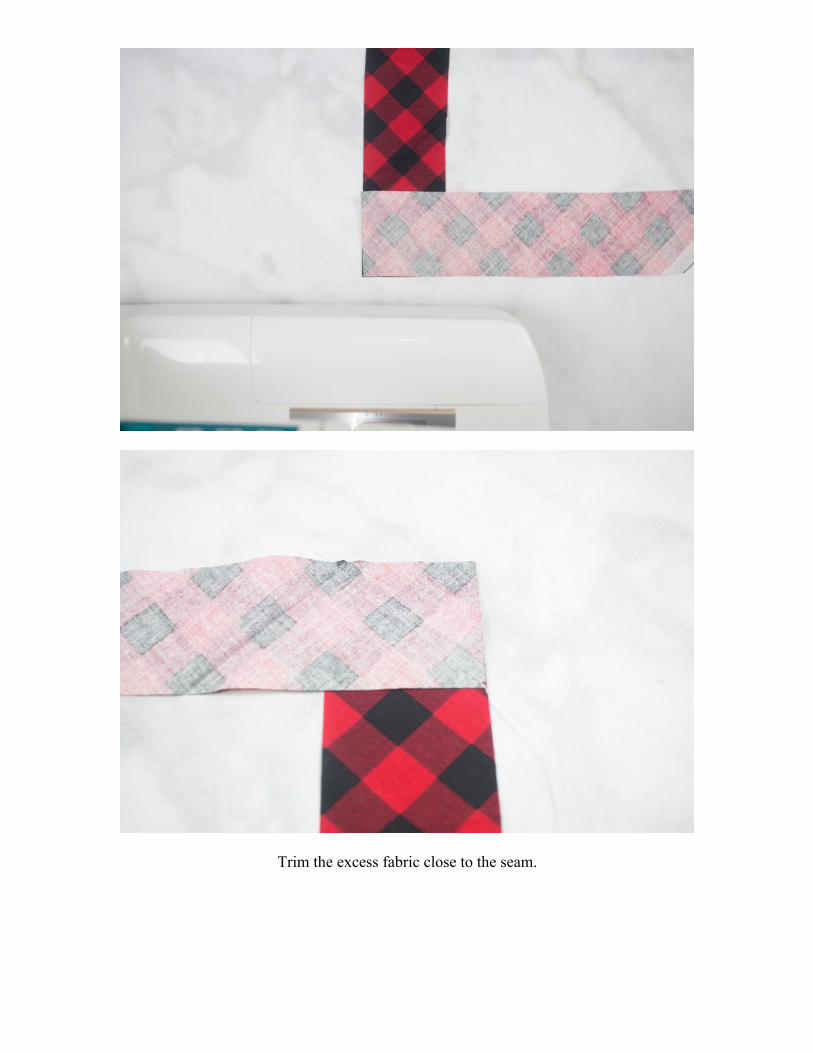
Trim the excess fabric close to the seam.
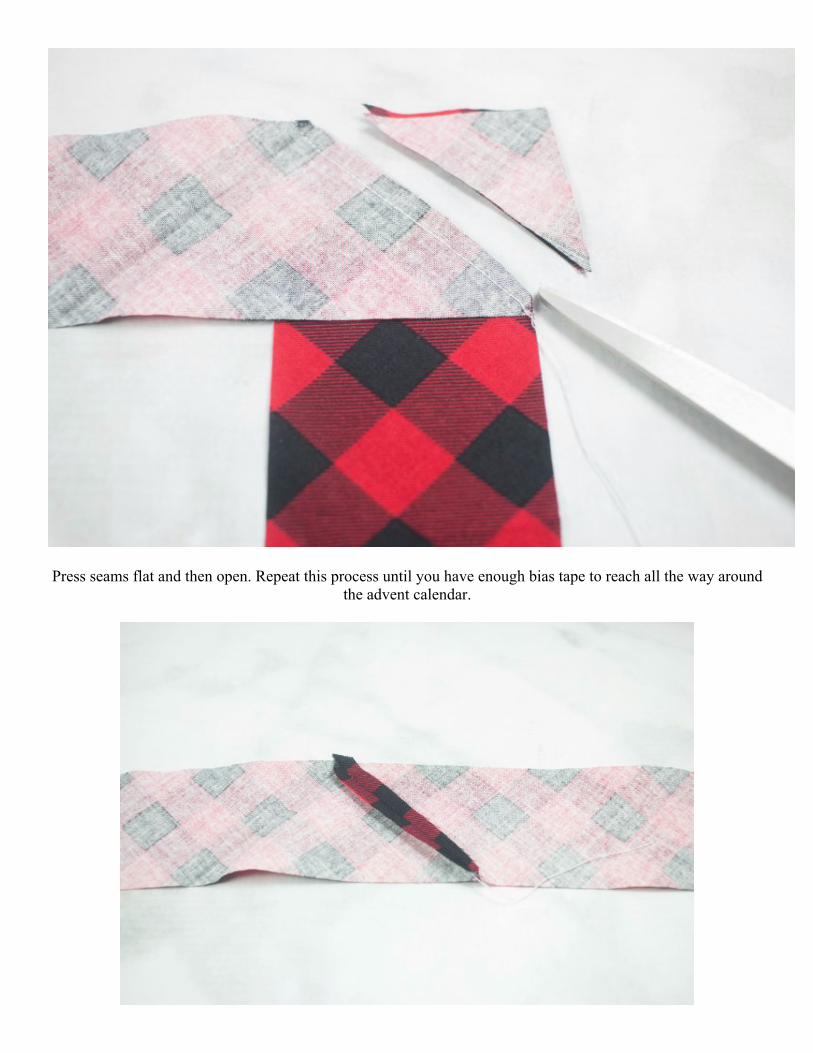
Press seams flat and then open. Repeat this process until you have enough bias tape to reach all the way around the advent calendar.
SEW BIAS BINDING
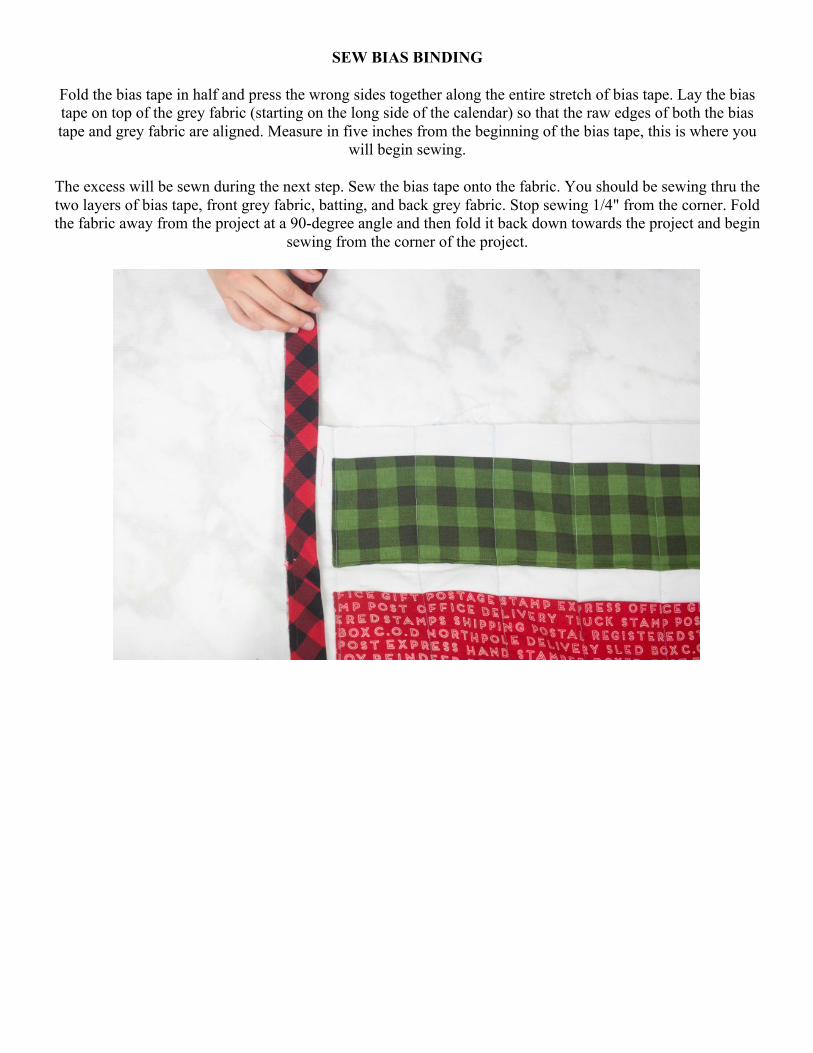
Fold the bias tape in half and press the wrong sides together along the entire stretch of bias tape. Lay the bias tape on top of the grey fabric (starting on the long side of the calendar) so that the raw edges of both the bias tape and grey fabric are aligned. Measure in five inches from the beginning of the bias tape, this is where you
will begin sewing.
The excess will be sewn during the next step. Sew the bias tape onto the fabric. You should be sewing thru the two layers of bias tape, front grey fabric, batting, and back grey fabric. Stop sewing 1/4" from the corner. Fold the fabric away from the project at a 90-degree angle and then fold it back down towards the project and begin
sewing from the corner of the project.
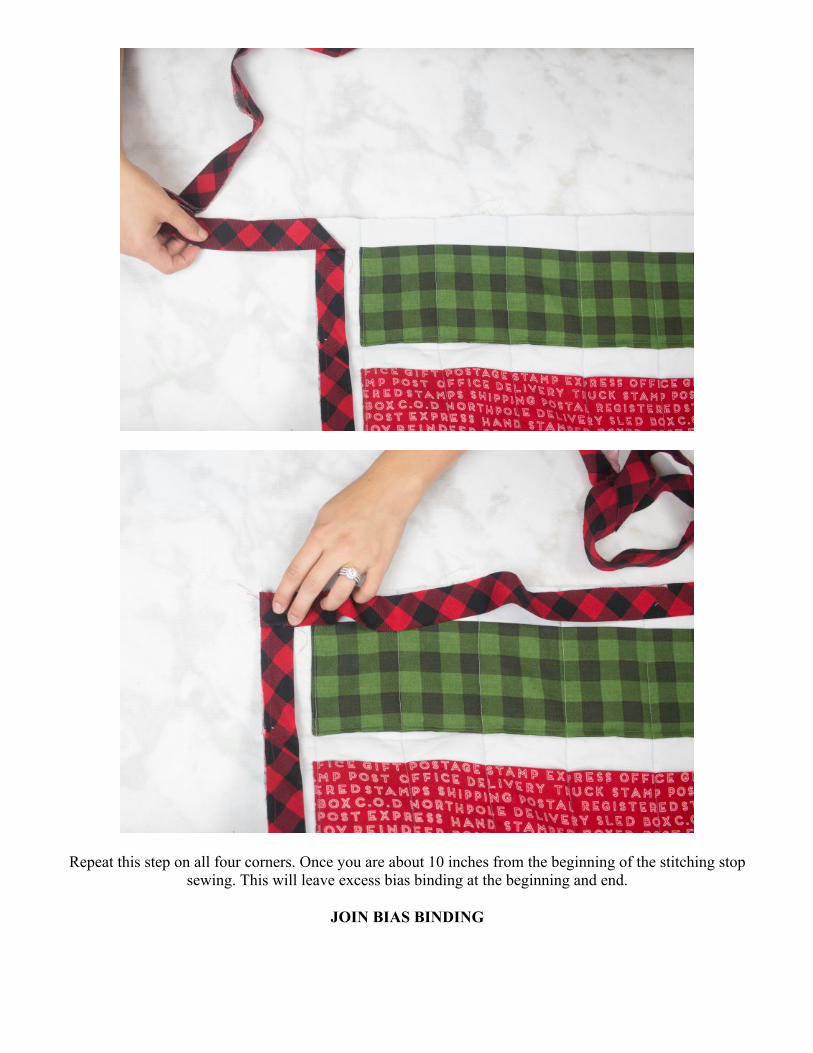
Repeat this step on all four corners. Once you are about 10 inches from the beginning of the stitching stop sewing. This will leave excess bias binding at the beginning and end.
JOIN BIAS BINDING
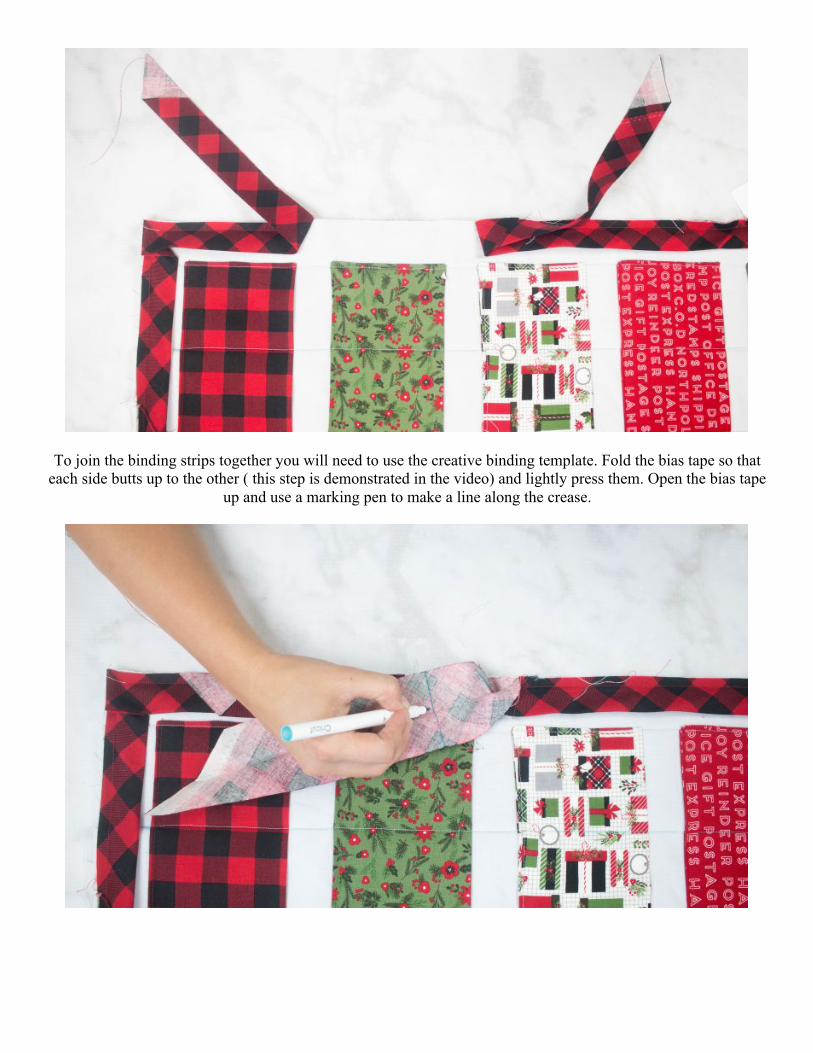
To join the binding strips together you will need to use the creative binding template. Fold the bias tape so that each side butts up to the other ( this step is demonstrated in the video) and lightly press them. Open the bias tape
up and use a marking pen to make a line along the crease.
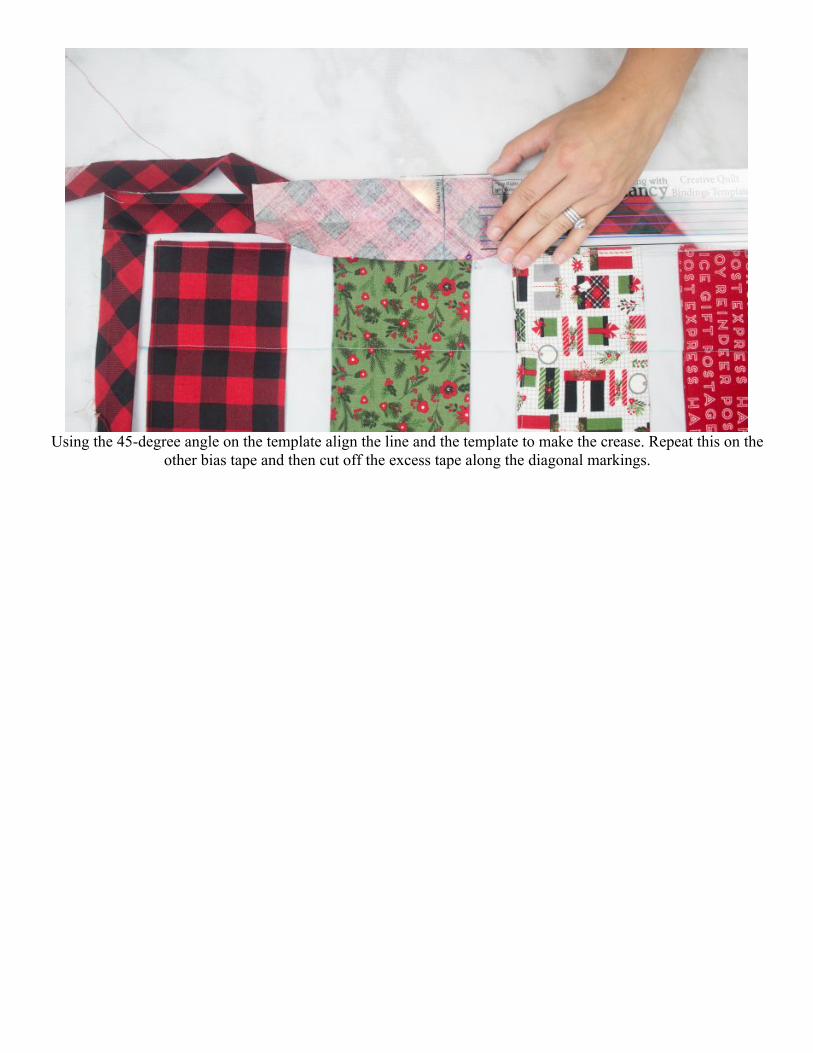
Using the 45-degree angle on the template align the line and the template to make the crease. Repeat this on the
other bias tape and then cut off the excess tape along the diagonal markings.
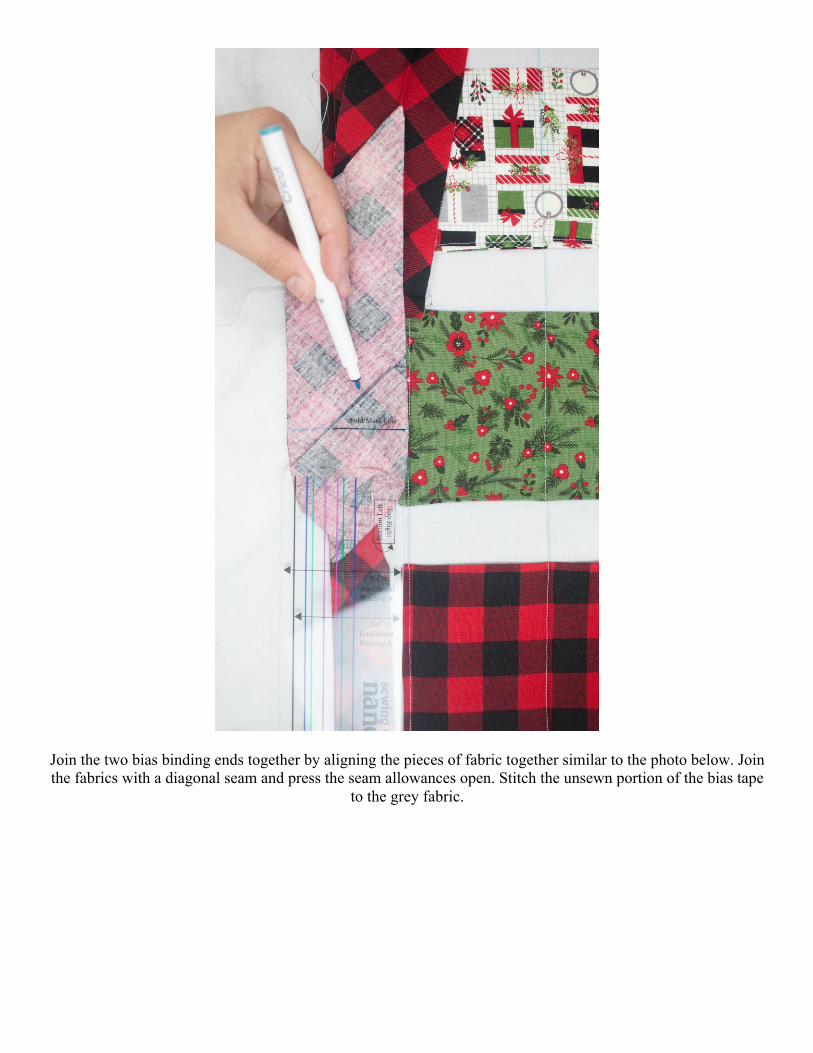
Join the two bias binding ends together by aligning the pieces of fabric together similar to the photo below. Join the fabrics with a diagonal seam and press the seam allowances open. Stitch the unsewn portion of the bias tape
to the grey fabric.

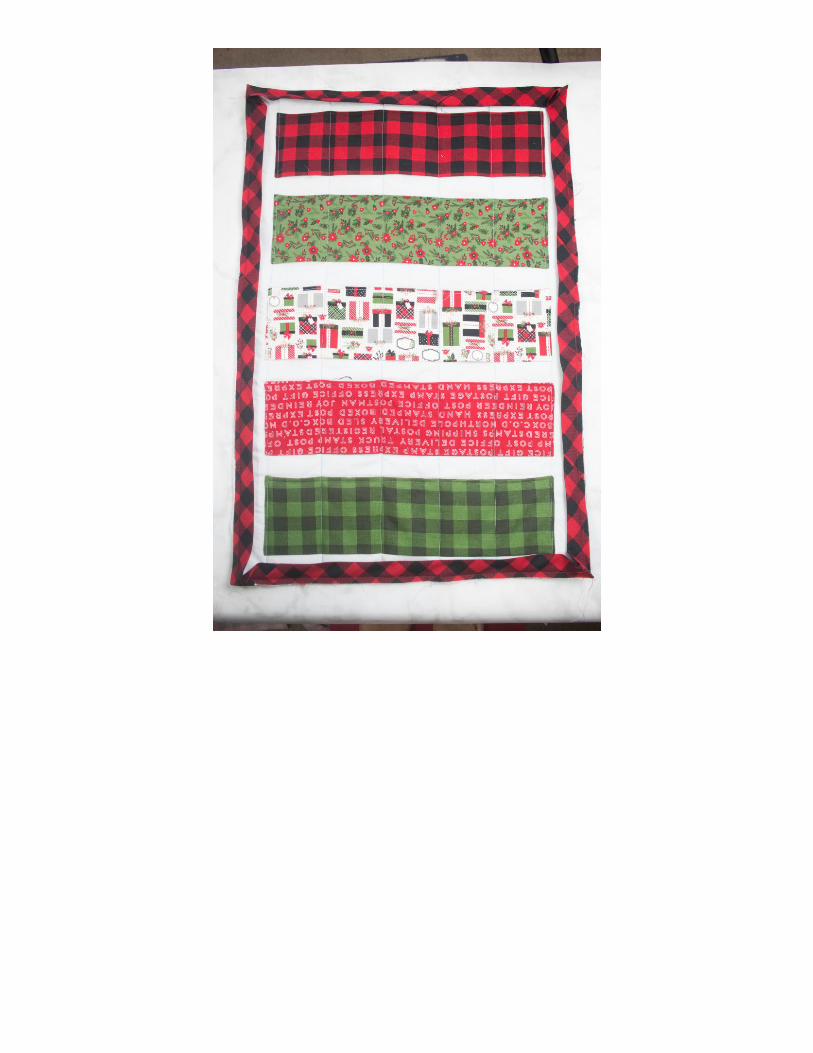

Press the bias tape away from the advent calendar. This will help to create a nice crisp edge. Once all of the bias tape has been pressed away turn the project over and use glue or fabric tape along the exposed bias tape. This
will help you to position the bias tape in exactly the right place.
Use clips to secure the bias tape to the back of the advent calendar.

Place clips along the bias tape all the way around the project and hand stitch the bias tape to the back of the advent calendar.
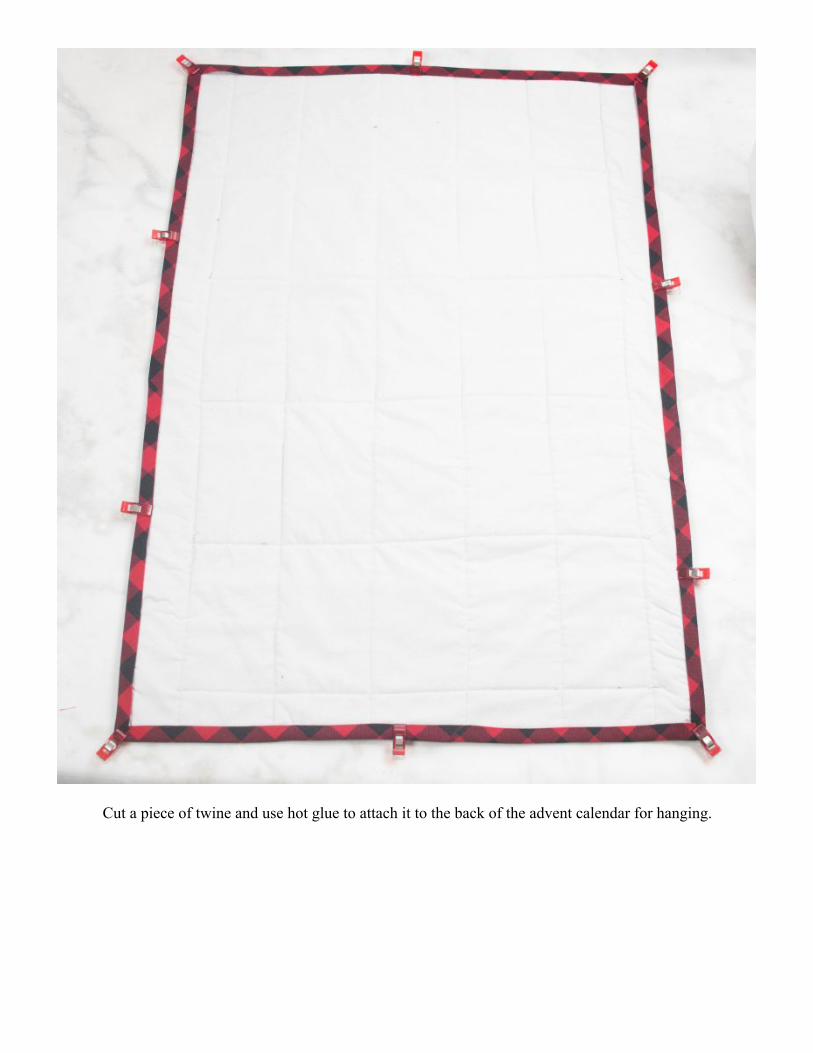
Cut a piece of twine and use hot glue to attach it to the back of the advent calendar for hanging.
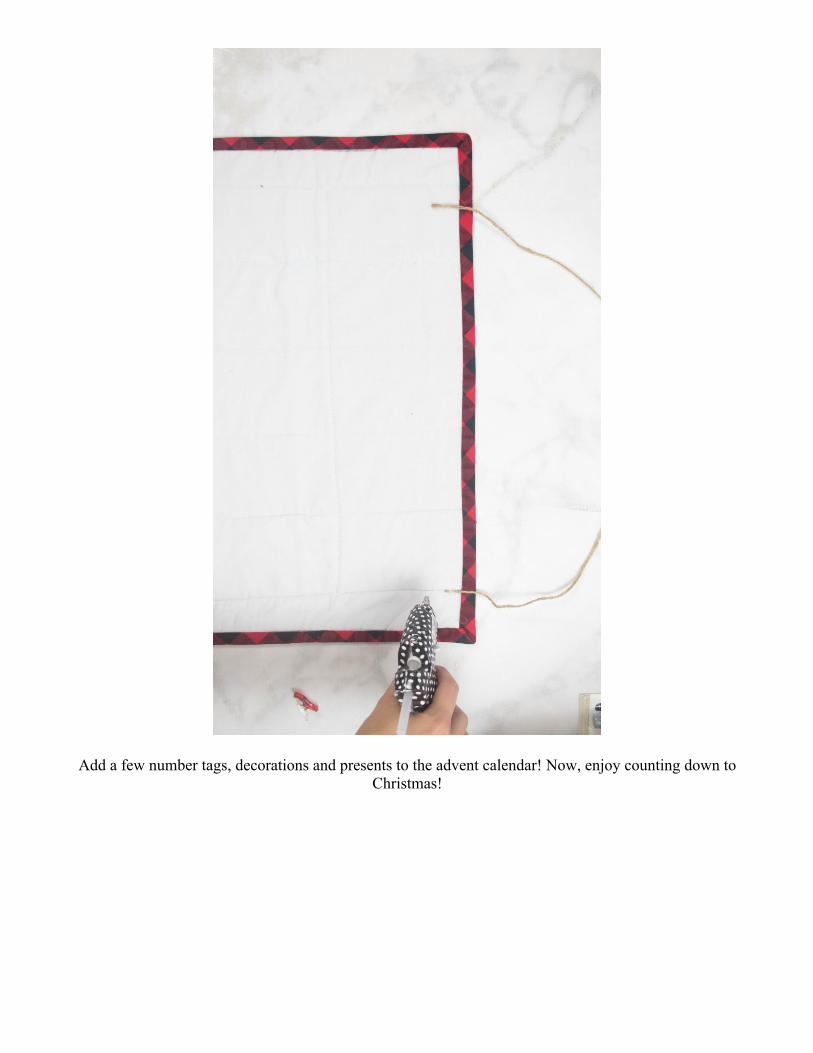
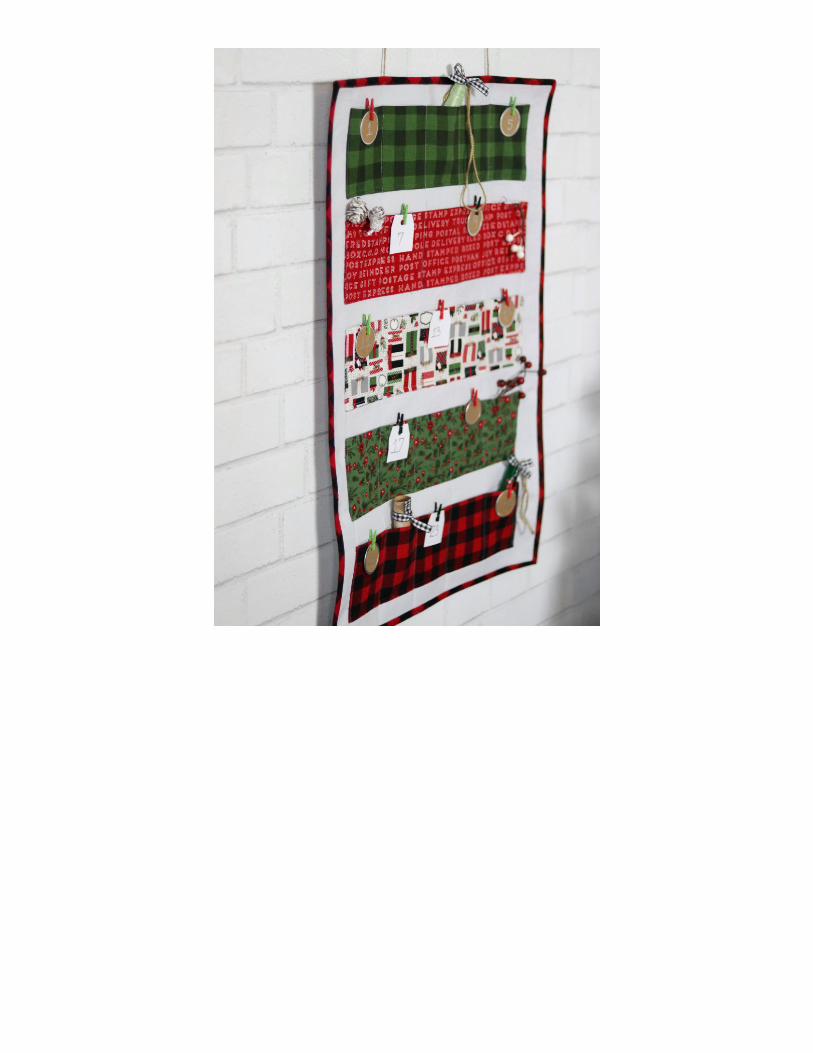
Add a few number tags, decorations and presents to the advent calendar! Now, enjoy counting down to Christmas!