d.i.y. pirate cannon - home - home - cannons€¦ · title: how to make your own pirate cannon...
TRANSCRIPT

Simple Weekend Project
Introduction Amaze your friends and make them green with envy at your next Pirate party, fancy dress or Halloween.
Just follow these simple instructions and you’ll soon be the most feared (and envied) swashbuckler in the neighbourhood.
Copyright Free �1
Materials
• Timber 3” X 2”stud X 33’ (approx 10 metres)
• Wheels (Nylon - Trolley) 2 X 8” nylon (200mm) 2 X 6” nylon (150mm)
• Fasteners 4 X 1/2” X 4” coach screw 4 X 1/2” round washer 12 X 4” hex roof screws 14 X 1” hex roof screws 8 X 3” wood screws 1 X pack of 4” jolt nails
• Trunnion Caps 2 X 2” (50mm) strap brace tensioners
Cannon Barrel
The Wyvern IV Cannon Barrel is 4 foot long (1214mm) in matt black and was purchased from www.cannonsdirect.com for $249.00 US including free delivery.
Tools Required
Electric drill Various drills and drill bits 10mm hex bit Pencil and tape measure Saw Hammer Spanners
D.I.Y. PIRATE CANNONHow to make your own life-size Pirate Cannon
Simple Weekend Project
Skill level required = Easy
Step 1 Raid your own wood pile and/or purchase the items listed in the materials section together with your Cannon Barrel.
Step 2 Cut your timber to length as listed below:
Carriage cheeks (each side)• 1 X 15” (375mm) these will be marked and trimmed later
• 1 X 20” (500mm)
• 1 X 25” (625mm)
• 3 X 30” (750mm)
Front transom or cross member• 4 X 10” (250mm) these will be marked and trimmed later
Axles or trucks• 2 X 15 + 3/8” (385mm)
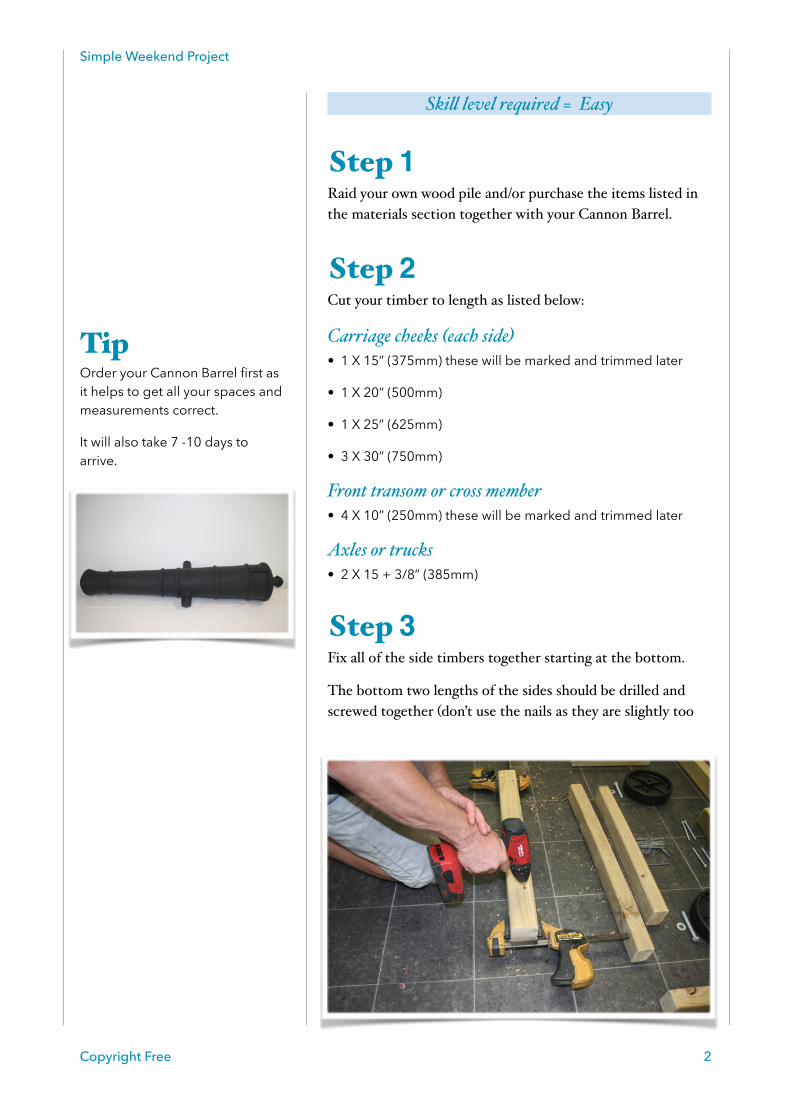
Step 3 Fix all of the side timbers together starting at the bottom.
The bottom two lengths of the sides should be drilled and screwed together (don’t use the nails as they are slightly too
Copyright Free �2
Tip Order your Cannon Barrel first as it helps to get all your spaces and measurements correct.
It will also take 7 -10 days to arrive.

Simple Weekend Project
long and will show or protrude).
Next drill, and nail together, levels three, four and five.
Be sure to keep all nails invisible by marking and checking the position of the level above first.
Also ensure each piece is flush at the front.
Level six needs to be cut and shortened into two pieces with a 2 + 1/4” (55mm) gap between for the cannon trunnions to sit in.
N.B. The total length of level six should still be 15” (375mm).
Use the self tapping hex screws to fix the two pieces of this level.
Your finished sides look like this.
Copyright Free �3

Simple Weekend Project
Step 4 Place the two finished sides upside down and parallel to each other. Fix the rear axle with one nail only at each side (level with each other).
The axle centre should be directly in line with the first step (or end of level four). A distance of 5” (125mm) as shown.
Turn the whole carriage over. Place the Cannon Barrel in the trunnion gaps and narrow the sides at the front until the barrel trunnion mounts touch the wood.
The sides should taper uniformly and the gap at the front should be around 8 + 3/8” (210mm).
Next upturn the carriage once more and maintain the 8 + 3/8” (210mm) gap at the front. The front axle should be fixed/nailed with its centre directly in line with the rear of the first small piece of wood (front of the trunnion gap) at 4 + 5/8” (117mm). This ensures that the front wheel does not sit proud of the carriage at the front.
Finally drill and nail the axles (two nails on each side) to secure fully.
Copyright Free �4

Simple Weekend Project
Step 5 Now mark the transom members (one at a time) on each side for correct length and angle, then cut with a saw.
N.B. using your cannon barrel in position, check if three or four pieces of timber are required for correct height of the transom. This one only required three pieces.
Nail the three lengths of the transom together and slide into position from the rear.
The transom should fit in neatly and sit slightly recessed from the front of the cheeks and just overlapping the axle.
Pre drill then fasten the transom in place using two self tapping hex screws on each side.
Copyright Free �5

Simple Weekend Project
Step 6 Mark the centres of each axle point and pre-drill to take the large axle screws.
Attach the wheels using the large axle screws.
The two larger wheels go at the front.
Place your Cannon Barrel into the trunnion spaces and attach the strap braces over the top to secure the barrel. These ones needed drilling to accept the 25mm hex screws.
Decorate and finish your carriage to suit. Iron fasteners, rings, chains, ropes and staining all work well.
Your Pirate Cannon is complete and ready to pillage and plunder!
Copyright Free �6