do+not+distribute.+ reclaiming*blingdenstone - …zaffudo.com/012813 dnd next playtest packet/102912...
TRANSCRIPT

Confidential information of Wizards of the Coast LLC. Do not distribute.
D&D Next Playtest ©2012 Wizards 1
Reclaiming Blingdenstone By Robert J. Schwalb and James Wyatt Blingdenstone, a city that was once the home of thousands of svirfneblin (deep gnomes) and the only safe refuge in the northern Underdark, is in ruins. Although a brave band of svirfneblin struggles to reclaim the city, the gnomes cannot do so without help. The power to aid them is in the hands of the adventurers. Reclaiming Blingdenstone is a series of six short adventures, each designed to be playable in one to two hours. These adventures have no set sequence. They comprise six tasks that must be completed to help the gnomes revive their city.
Background About a century ago, several thousand svirfneblin called Blingdenstone home. Their former settlement is a mere forty-‐five miles from Menzoberranzan, the drow city, but the gnomes used illusion, geomancy, and traps to avoid drow attention. This peaceful existence was shattered, however, when drow came in force to enslave the svirfneblin. Fewer than a thousand gnomes escaped to the surface, finding refuge in city of Silverymoon in the Silver Marches, where most have lived in exile ever since. In the last four decades, svirfneblin have begun moving back into the ruins to recover their homes, with aid from the folk of the Silver Marches. But developments in the past few years have drawn the attention of surface folk away from Blingdenstone. Efforts to reclaim the ruins have stalled. The gnomes’ supplies and numbers have begun to dwindle. They need help to reclaim what is rightfully theirs.
Preparation Read through the entire adventure so you’re ready for whatever course the characters pursue. As the adventurers interact with deep gnomes in the safer portions of the ruins, the characters learn about the tasks that need
doing. The adventurers choose which missions to undertake, as well as the order in which to accomplish them. All the adventures refer to the Blingdenstone map or the map of the House Center. You might employ location descriptions to set the stage for exploration without worrying about details such as room sizes and specific positioning. However, you can use the generic tunnel maps as you see fit. Monsters are referred to in the text. Full statistics appear in the Bestiary of the D&D Next playtest packet
Starting the Adventure The adventurers have already trekked through the Underdark to Blingdenstone. Read: Whether lured by the promise of glory or driven by a desire to help, you and your companions have traveled far to lend aid to the svirfneblin of Blingdenstone. After drow attacked the city to enslave the deep gnomes, the survivors lived in exile for over a century. But some have returned to their home, and they’re embroiled in a battle to rid their caverns of monstrous inhabitants. Your guide is a svirfneblin explorer named Briddick, who is slender with slate-‐gray skin, a bald head, and wide, gray eyes. He leads the way through secret tunnels and a winding labyrinth. Finally, you reach the ruined city. Work to repair damage the drow dealt continues. The gnomes wear tattered armor and bloody bandages. They carry notched and broken weapons, suggesting that the fighting has been fierce and frequent. Once inside the city, the adventurers are free to explore and interact with the gnomes. Quick Play If you are running this adventure in a setting where time is limited, you can gloss over

Confidential information of Wizards of the Coast LLC. Do not distribute.
D&D Next Playtest ©2012 Wizards 2
interaction with the gnomes and sketch out the six adventure options for the players: Chapter 1: Talk to the pechs in the old forges (area 7), and secure their aid to deal with the elementals in the Hall of Miners (area 6). Chapter 2: Close off a passage that kobolds use to enter the ruins (area $14), and collect singing crystals in the Wormwrithings. Chapter 3: Retrieve the crown of Blingdenstone from the House Center (area 17). Chapter 4: Wake the Speaking Stones (area 18). Chapter 5: Stop the raiding orcs (area 10). Chapter 6: Negotiate trade in Mantol-‐Derith.
Blingdenstone in Ruins The svirfneblin have secured a ring of caverns and tunnels surrounding what was once the temple of Segojan Earthcaller. Barricades assembled from rubble define the boundary between the reclaimed portion of the city and the wilderness beyond. Where the gnomes’ boulder-‐like buildings still stand, they are cracked and crumbling, testimony to the fury of the drow attack that destroyed Blingdenstone. Shallow caves in the ruins are deserted, but some still show signs of those who once lived within. Connecting tunnels are choked with bones and debris, although the gnomes tidy the remains when they are able. Refer to the Blingdenstone map. Each numbered area is described in the following sections. Any area the gnomes have already reclaimed is marked with an asterisk (*).
1–5. Entrance Areas* The main entrance to Blingdenstone is a wide stairway (1) between two walls of stone. The stairs go up to a landing (3). Beyond the landing are two immense metal-‐banded doors that open into the city. In the wall of the stairway, a tunnel sized to allow ore carts through (2) leads up to a small side chamber (4). After such carts are hitched to a chain at the bottom of the tunnel, a single svirfneblin can turn the crank at the top of the ramp, hauling carts up to the landing. Blingdenstone is a series of chambers connected by low tunnels. Past the entrance
doors is the largest cavern, home to the city guard and designed solely for defense (5). A narrow corridor, where even gnomes must march single file, leads into the rest of the city from the entrance cavern. The adventurers’ guide led them up the stairway and through the defensive labyrinth in the entry cavern. Neither the maze’s twisting tunnels nor the deadly traps found in them are accurately depicted on the map. If the characters wish to leave, they must secure a gnome guide to lead them out or risk becoming hopelessly lost in the tunnel network. Wild Ruins In caverns not otherwise inhabited, monsters roam freely. Orc bands are the most common, but other scavengers can be encountered. When characters move through these tunnels, they catch glimpses of creatures that move away from their light. For each of the major caverns marked with an uppercase letter (A through Q) the party passes through, roll 1d10. If the adventurers have already dispatched the wight in area 17, roll for random encounters there, too. On a result of 1 to 4, the characters encounter a significant danger. Consult the “Blingdenstone Encounters” table in appendix 1. Orc attacks cease for a while if fifteen or more orcs are slain. See chapter 5 for details.
6. Hall of Miners This large cavern was for smelting ore and repairing damaged equipment. It also served as an informal marketplace for those seeking uncut gems and unworked metal. Now, earth elementals that once served the miners inhabit this cavern. A strange elemental called Ogrémoch’s Bane commands them, and their behavior is unpredictable. Deep gnomes warn anyone who asks about this cavern not to attack the elementals. Each elemental feels any injury sustained by another elemental in the hall. Ogrémoch’s Bane can whip such roused elementals into a fury that could spell the end of the gnome colony here in the ruins.

Confidential information of Wizards of the Coast LLC. Do not distribute.
D&D Next Playtest ©2012 Wizards 3
In chapter 1, the characters have the opportunity to remove this threat.
7. Armorers and Weaponsmiths Guild This cluster of smithies was a market for svirfneblin armaments. The forges are now cold, and the tools are bent and broken. Pechs, creatures that have a magical affinity for earth, dwell here and have coaxed the stone to grow over the area. They prefer to hide from intruders by melding into nearby rock. In chapter 1, the adventurers can secure the aid of the pechs in clearing the Hall of Miners.
8. The Ruby in the Rough* A low building in the center of this large cavern marks the entrance to the temple of Segojan Earthcaller, the gnome god of earth, nature, and death. This temple was and is the center of life in Blingdenstone. The temple is a series of linked caverns stretching far below those on the map, holding the products of centuries of beautiful craftwork. Many treasures once housed here were looted during the drow assault and over the century that followed, but some caverns were sealed off and remain untouched. Burrow Warden Kargien Dissengulp, the leader of the gnome expedition, has set up a headquarters in a small building just outside the temple entrance. Kargien led the svirfneblin here over forty years ago, and his face is lined with care. He despairs as the fruits of his labors slip from his grasp. He brightens when he first sees the adventurers. Kargien’s main goal is to secure the crown of the old svirfneblin kings from the House Center (area 17). If he has a chance, he says: “For generations, the kings of Blingdenstone ruled from the House Center. We have tried to take it back, but evil lingers around the old structure, a vile presence that prevents us from reclaiming it. We need you to drive the evil off and secure the ruins. Most of all, we need to lay hands on the crown of our last king, who died there.”
A character who makes a DC 15 Wisdom check gets the sense that Kargien would very much like to wear the crown. The warden also wears a gold chain that has a large emerald pendant, which sticks out as a blatant display of wealth in the otherwise meager conditions in Blingdenstone. If the adventurers accept Kargien’s challenge, refer to chapter 3.
9. The Steadfast Stone In a natural cavern on the northern edge of the city stands this temple of Callarduran Smoothhands, the chief god of deep gnomes almost everywhere except Blingdenstone. The central altar, a standing stone once inlaid with hundreds of tiny rubies, is crushed. Raiders: Each time the adventurers enter this cavern, roll 1d6. If the result is 5 or 6, 1d3 + 1 orcs are found here, looting. The orcs fight until half are killed, then they run back toward caverns G and H. If you plan to run chapter 5, keep track of how many orcs are slain. Treasure: A character who has an hour and the tools can extract 1d4 + 2 ruby fragments (20 gp each) from the stones here. Orc raiders encountered here carry 1d6 fragments. Each orc also has 3d6 sp.
10. The Trillimac Stockade This place was once a house of worship dedicated to Baervan Wildwanderer, the gnome god of travel and nature. The temple is fashioned from a tightly packed grove of edible trillimac mushrooms around a clear pool full of blind cave fish. A band of orcs camps here, using the pool for water, and the mushrooms and fish for food. The orcs pick through the ruins in the northern part of the city, bounded by the elementals in area 6 and the pechs in area 7. They also avoid the House Center (area 17), which they believe to be haunted. They are less afraid of the gnomes than they are of undead and elementals, so they frequently test the barricades in areas 11, 12, 13, and 16. In chapter 5, the adventurers can undertake a mission to break these savages.

Confidential information of Wizards of the Coast LLC. Do not distribute.
D&D Next Playtest ©2012 Wizards 4
11. The Silent Shrieker* The marketplace where gnomes once traded fungal spores stands in shambles. This cavern now serves only as a passage between areas 13 and 16.
12. Phantasmal Glamours* Svirfneblin refer to the area by the name of one of its long-‐gone buildings, a spell component shop catering to illusionists. This cavern has a supply of fresh water welling up in a pool. Raiders: Each time the adventurers visit this cavern, roll 1d10. If the result is 10, 1d3 + 1 orcs attack the northern barricade at some point. The orcs fight until half are killed, then they run back toward caverns G and H. If you plan to run chapter 5, keep track of how many orcs are slain. Each orc carries 3d6 sp. Residents: Five sentries are divided among the four barricades here. Two watch the northernmost barricade, where orc attacks are most common. The proprietor of Phantasmal Glamours, an aged svirfneblin named Henkala Shadowsong, survived the fall of the city more than a hundred years ago. She stays in this cavern, feebly trying to reassemble her shop. Lively in conversation, her face and eyes are still bright despite the decrepitude of her body. Henkala believes that the pechs can help deal with Ogrémoch’s Bane. The adventurers’ arrival gives her the motivation and the opportunity to put her theory to the test. She explains: “Let me tell you something Burrow Warden Kargien won’t listen to and I can do nothing about at my age. There’s an evil elemental spirit, you see, that’s haunted Blingdenstone since before it fell. Now the creature keeps to the Miners’ Hall, but who’s to say it’s going to stay there? Once it gets the idea in its gravel head to send elementals our way, there won’t be much we can do. “But pechs have moved into the old Armorers and Weaponsmiths Guild. They know elementals, and if anyone can help us deal with Ogrémoch’s Bane, it’s them. Talk to them. Do what you can.
Kargien might not thank you for it, but I will. I assure you, the gratitude of an old woman is something to be treasured.” She winks at you. If the adventurers agree to talk to the pechs, refer to chapter 1.
13. The Trader’s Grotto* This cavern, which prominently features petrified mushrooms, once served as Blingdenstone’s central market. Now, it’s an infirmary. Raiders: Each time the adventurers visit this cavern, roll 1d10. If the result is 10, 1d3 + 1 orcs attack the southern barricade at some point. (If the House Center is clear, they might attack the northern barricade instead.) The orcs fight until half are killed, then they run back toward caverns G and H. If you plan to run chapter 5, keep track of how many orcs are slain. Each orc carries 3d6 sp. Residents: A pair of weary sentries stands guard at each of two barricades that block off ways into areas beyond the reclaimed caverns. Cots hold wounded warriors, and two healers tend to the injured. One healer is a female deep gnome named Jalless. Whenever anyone comes to the cavern, she barks, “Make yourself useful!” before demanding that the visitor brings her water from the nearby pool or holds a bandage in place while she cuts it to the proper length. If the characters help, she is talkative and friendly. The other healer, a young male gnome named Krell, is sullen and quiet, rolling his eyes at Jalless when he thinks she’s not looking. A bowl of citrine and white quartz stands out in the infirmary. Some of the gemstones are crushed. If asked about the gems, Jalless says: “Scouts bring these from the Wormwrithings, and I know a thing or two about crystals and gems. I appraise the stones for a small share. The sand is useful as an inert part of bandage paste or cast plaster.”
Confidential information of Wizards of the Coast LLC. Do not distribute.
D&D Next Playtest ©2012 Wizards 5
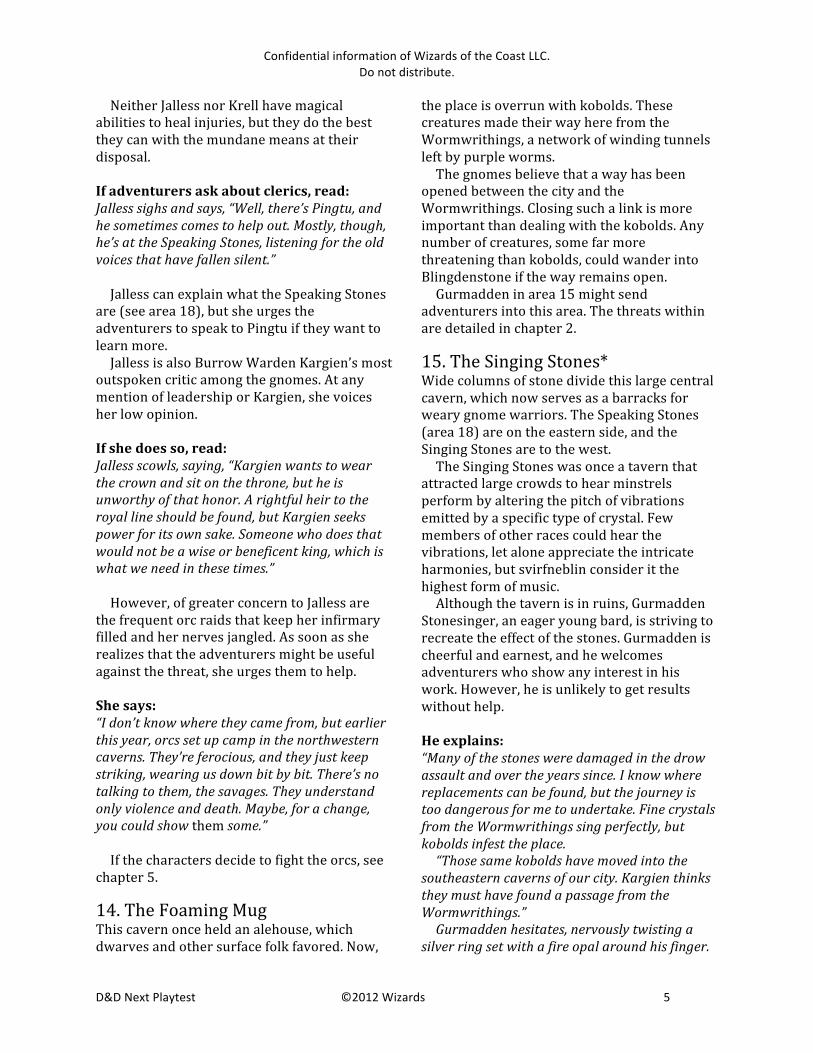
Neither Jalless nor Krell have magical abilities to heal injuries, but they do the best they can with the mundane means at their disposal. If adventurers ask about clerics, read: Jalless sighs and says, “Well, there’s Pingtu, and he sometimes comes to help out. Mostly, though, he’s at the Speaking Stones, listening for the old voices that have fallen silent.” Jalless can explain what the Speaking Stones are (see area 18), but she urges the adventurers to speak to Pingtu if they want to learn more. Jalless is also Burrow Warden Kargien’s most outspoken critic among the gnomes. At any mention of leadership or Kargien, she voices her low opinion. If she does so, read: Jalless scowls, saying, “Kargien wants to wear the crown and sit on the throne, but he is unworthy of that honor. A rightful heir to the royal line should be found, but Kargien seeks power for its own sake. Someone who does that would not be a wise or beneficent king, which is what we need in these times.” However, of greater concern to Jalless are the frequent orc raids that keep her infirmary filled and her nerves jangled. As soon as she realizes that the adventurers might be useful against the threat, she urges them to help. She says: “I don’t know where they came from, but earlier this year, orcs set up camp in the northwestern caverns. They’re ferocious, and they just keep striking, wearing us down bit by bit. There’s no talking to them, the savages. They understand only violence and death. Maybe, for a change, you could show them some.” If the characters decide to fight the orcs, see chapter 5.
14. The Foaming Mug This cavern once held an alehouse, which dwarves and other surface folk favored. Now,
the place is overrun with kobolds. These creatures made their way here from the Wormwrithings, a network of winding tunnels left by purple worms. The gnomes believe that a way has been opened between the city and the Wormwrithings. Closing such a link is more important than dealing with the kobolds. Any number of creatures, some far more threatening than kobolds, could wander into Blingdenstone if the way remains open. Gurmadden in area 15 might send adventurers into this area. The threats within are detailed in chapter 2.
15. The Singing Stones* Wide columns of stone divide this large central cavern, which now serves as a barracks for weary gnome warriors. The Speaking Stones (area 18) are on the eastern side, and the Singing Stones are to the west. The Singing Stones was once a tavern that attracted large crowds to hear minstrels perform by altering the pitch of vibrations emitted by a specific type of crystal. Few members of other races could hear the vibrations, let alone appreciate the intricate harmonies, but svirfneblin consider it the highest form of music. Although the tavern is in ruins, Gurmadden Stonesinger, an eager young bard, is striving to recreate the effect of the stones. Gurmadden is cheerful and earnest, and he welcomes adventurers who show any interest in his work. However, he is unlikely to get results without help. He explains: “Many of the stones were damaged in the drow assault and over the years since. I know where replacements can be found, but the journey is too dangerous for me to undertake. Fine crystals from the Wormwrithings sing perfectly, but kobolds infest the place. “Those same kobolds have moved into the southeastern caverns of our city. Kargien thinks they must have found a passage from the Wormwrithings.” Gurmadden hesitates, nervously twisting a silver ring set with a fire opal around his finger.

Confidential information of Wizards of the Coast LLC. Do not distribute.
D&D Next Playtest ©2012 Wizards 6
Then he says, “I know it’s asking a lot. But you’d be doing me and the city a great service if you’d cut your way through the kobolds, find the passage they’re using, gather at least six singing crystals, and close the passage on your way back.” If asked about his ring, Gurmadden reveals it’s an old family heirloom that dates from before the fall of Blingdenstone. Back then, the Stonesingers were important folk in the city. Gurmadden shows the characters a few of the crystals he’s looking for. He offers to pay 10 gp for each singing crystal brought back to him. If the adventurers agree to help, see chapter 2. If the characters agree, Gurmadden adds: “To gather crystals or other stones in the Wormwrithings, you’ll need mining tools. Be sure to bring some, or you’ll be sorry.”
16. The Golden Hills Hearth* This cavern once held a great hall dedicated to the gnome gods who dwell in the mythic Golden Hills. Young gnomes feasted and courted in splendor there. A large pool at the western end of the cavern provided fresh water to a number of establishments in the cavern, but the area is nearly lifeless now. Raiders: Each time the adventurers visit the area, roll 1d10. If the result is 10, 1d3 + 1 orcs attack the northern barricades at some point. The orcs fight until half are killed, then they run back toward caverns G and H. If you plan to run chapter 5, keep track of how many orcs are slain. Each orc carries 3d6 sp. Residents: A grim sentry stands guard at each of two barricades protecting the cavern from orc raiders. Another guards a small, locked enclosure for the gnomes’ supplies. Exhaustion and despair are written on the sentinels’ faces. A middle-‐aged gnome named Fendrick Pestle manages the supplies and shares the sentries’ grim demeanor. He is concerned about dwindling provisions and the quality of the gnomes’ weapons. Fendrick believes that, unless they can find a reliable source of trade, the gnomes won’t be able to hold out much
longer against the dangers of the ruins and the surrounding region. He shares: “We need more weapons. In the past, we dealt with our neighbors at the great trading post of Mantol-‐Derith, but where our salt and gems once found welcome, now we find only refusal. Since no one there will trade with us openly, we need outsiders to carry a load of goods to the outpost and negotiate a bulk trade for duergar weapons. If you don’t reveal you’re trading on our behalf, you should find a warmer welcome.” If the adventurers decide to venture to Mantol-‐Derith, see chapter 6.
17. The House Center This cavern holds a large stone building that was once the city’s seat of government. The House Center is also where the deep gnomes made a desperate last stand against the drow. Many of their bodies still linger here. Burrow Warden Kargien is desperate to recover the crown of the last king from this area. The adventurers have a chance to retrieve it in chapter 3.
18. The Speaking Stones* At the eastern end of the cavern that also holds the Singing Stones stands a circle of stone menhirs that predate Blingdenstone. When the characters see the stones, read: Two dozen stone monoliths stand here, arranged in a rough circle with a gap on one side. Seven of the stones, about evenly spaced, stand around eight feet tall, much taller than the rest. Each taller monolith has a vaguely humanoid shape, stooped and bent like a giant, sleeping deep gnome. Thought to be a cluster of ancient galeb duhrs, the Speaking Stones are revered as manifestations of the Lords of the Golden Hills, the gnome deities. Svirfneblin priests cast their divinations within the circle, interpreting their responses from subtle vibrations in the rock here. But the stones have fallen silent, and the

Confidential information of Wizards of the Coast LLC. Do not distribute.
D&D Next Playtest ©2012 Wizards 7
deep gnomes can’t help but feel that their gods have abandoned them. A glum svirfneblin priest named Pingtu lingers around the stones in hopes of hearing any stirring. If the adventurers speak to him, he asks for help. He says: “Back in the old days, we communed with our gods through the Speaking Stones. We have tried to call on them again, but they have been silent for all the years since our return. Many of us think we cannot possibly hope to reclaim the whole city while the stones are sleeping. Waking them will restore our spiritual heart. It might even restore our hope. Then, perhaps, we can finish the work we have started.” If the adventurers agree to help, see chapter 4. Evarell’s Journal During their adventures to reclaim Blingdenstone, the characters will come across torn pages of an old journal. Each page is a small sheet of vellum, about three inches by five inches. On the front of each page are notes that Evarell, an adventurer who journeyed into this area, took while exploring. These notes contain clues that might help the adventurers. On the back of each page, written upside down and in a different hand, are fragments of an ancient elven prophecy that a different eccentric scholar collected. These prophetic lines don’t have a direct impact on the adventure, but they reveal hints about the future of the Forgotten Realms.
Confidential information of Wizards of the Coast LLC. Do not distribute.
D&D Next Playtest ©2012 Wizards 8
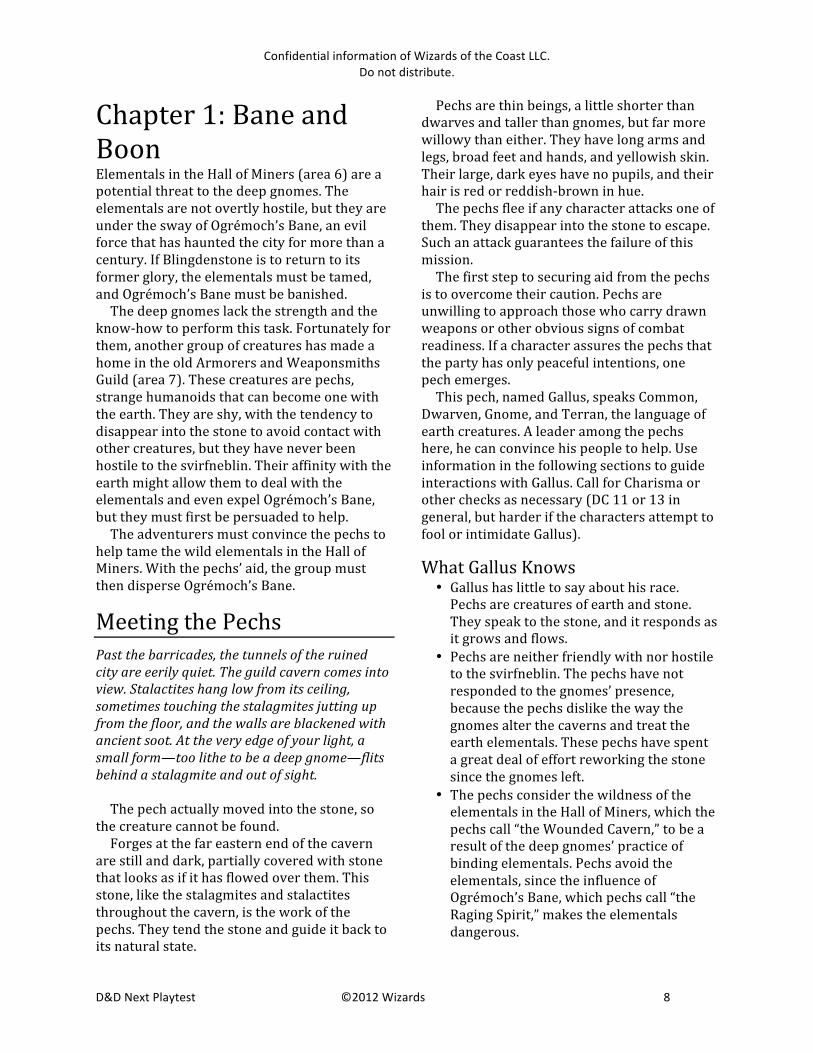
Chapter 1: Bane and Boon Elementals in the Hall of Miners (area 6) are a potential threat to the deep gnomes. The elementals are not overtly hostile, but they are under the sway of Ogrémoch’s Bane, an evil force that has haunted the city for more than a century. If Blingdenstone is to return to its former glory, the elementals must be tamed, and Ogrémoch’s Bane must be banished. The deep gnomes lack the strength and the know-‐how to perform this task. Fortunately for them, another group of creatures has made a home in the old Armorers and Weaponsmiths Guild (area 7). These creatures are pechs, strange humanoids that can become one with the earth. They are shy, with the tendency to disappear into the stone to avoid contact with other creatures, but they have never been hostile to the svirfneblin. Their affinity with the earth might allow them to deal with the elementals and even expel Ogrémoch’s Bane, but they must first be persuaded to help. The adventurers must convince the pechs to help tame the wild elementals in the Hall of Miners. With the pechs’ aid, the group must then disperse Ogrémoch’s Bane.
Meeting the Pechs Past the barricades, the tunnels of the ruined city are eerily quiet. The guild cavern comes into view. Stalactites hang low from its ceiling, sometimes touching the stalagmites jutting up from the floor, and the walls are blackened with ancient soot. At the very edge of your light, a small form—too lithe to be a deep gnome—flits behind a stalagmite and out of sight. The pech actually moved into the stone, so the creature cannot be found. Forges at the far eastern end of the cavern are still and dark, partially covered with stone that looks as if it has flowed over them. This stone, like the stalagmites and stalactites throughout the cavern, is the work of the pechs. They tend the stone and guide it back to its natural state.
Pechs are thin beings, a little shorter than dwarves and taller than gnomes, but far more willowy than either. They have long arms and legs, broad feet and hands, and yellowish skin. Their large, dark eyes have no pupils, and their hair is red or reddish-‐brown in hue. The pechs flee if any character attacks one of them. They disappear into the stone to escape. Such an attack guarantees the failure of this mission. The first step to securing aid from the pechs is to overcome their caution. Pechs are unwilling to approach those who carry drawn weapons or other obvious signs of combat readiness. If a character assures the pechs that the party has only peaceful intentions, one pech emerges. This pech, named Gallus, speaks Common, Dwarven, Gnome, and Terran, the language of earth creatures. A leader among the pechs here, he can convince his people to help. Use information in the following sections to guide interactions with Gallus. Call for Charisma or other checks as necessary (DC 11 or 13 in general, but harder if the characters attempt to fool or intimidate Gallus).
What Gallus Knows • Gallus has little to say about his race. Pechs are creatures of earth and stone. They speak to the stone, and it responds as it grows and flows.
• Pechs are neither friendly with nor hostile to the svirfneblin. The pechs have not responded to the gnomes’ presence, because the pechs dislike the way the gnomes alter the caverns and treat the earth elementals. These pechs have spent a great deal of effort reworking the stone since the gnomes left.
• The pechs consider the wildness of the elementals in the Hall of Miners, which the pechs call “the Wounded Cavern,” to be a result of the deep gnomes’ practice of binding elementals. Pechs avoid the elementals, since the influence of Ogrémoch’s Bane, which pechs call “the Raging Spirit,” makes the elementals dangerous.

Confidential information of Wizards of the Coast LLC. Do not distribute.
D&D Next Playtest ©2012 Wizards 9
• Ogrémoch’s Bane is an earth elemental that takes the form of a dust cloud. In the city’s heyday, it drifted about, freeing elementals and driving them into destructive rages. Given the Bane’s form, the pechs suppose it is unlikely to take damage from nonmagical sources.
• The deep gnomes once summoned Entemoch in a cavern about a day’s journey northwest of the city. Entemoch is Ogrémoch’s twin brother and the consort of Sunnis, Princess of Good Earth Creatures. He granted a blessing in the cavern, now called Entemoch’s Boon, so that spells that draw on elemental earth are enhanced. The pechs believe that the Boon is why the Bane remains, and the Bane exists only to see the Boon destroyed. However, the pechs surmise that the Bane can’t end the Boon with only the help of elementals. Further, the deep gnomes highly esteem the Boon, and they are likely to be unwilling to destroy it to counteract the Bane.
Suspecting the Bane can only be harmed by magic, the characters might return to Henkala to ask for aid. She gives them the +1 handaxe she would have given them at the end of the mission.
What Gallus Wants • Burrow Warden Kargien has made no efforts to meet the pechs or secure their friendship. He has erected barricades between the gnomes’ territory and the pechs’ cavern, just like those that protect the svirfneblin from the orcs. The pechs resent this sign of mistrust and would like to speak with Kargien about peaceful coexistence. If the adventurers assure Gallus that they will try to gain him an audience with Kargien, the pech greets their requests for assistance more warmly.
• The deep gnomes wound the earth, and these caverns are better off without them. However, Gallus admits that the gnomes need a home, and it is better that they salvage their old city, where damage has
already been done. But if the svirfneblin reclaim their city, the pechs will be driven out, and all the work they have done over the past decades will be undone. If the deep gnomes can be convinced to preserve the cavern as pechs have reworked it, and to allow the pechs to stay here, Gallus is more inclined to help. But the gnomes will want their forges, which must be removed from the stone and relocated if the pechs are to remain here. The pechs can and will help with such relocation if it benefits them.
• Although the orcs in the northern part of the ruins avoid the pechs, Gallus is afraid that the orcs might overcome their fear and attack. If the adventurers promise to deal with the orcs, Gallus is more willing to give aid to the gnomes.
• The kobolds in the southeastern caverns often wander into this cavern in search of treasure or food. The pechs use their ability to shape stone to divert the kobolds and steer them away, but the pechs resent the intrusion. If the characters agree to deal with the kobolds, Gallus is more likely to lend a hand against Ogrémoch’s Bane.
If the adventurers make promises to Gallus that they have no intention of keeping, the speaking character must make a DC 15 Charisma check to fool the pech. If Gallus believes the adventurers are lying to him, he becomes angry and must be calmed before negotiations can continue.
What Gallus Can Do If the adventurers address Gallus’s desires, they secure the pechs’ aid. Gallus leaves through the stone wall, promising to return shortly with companions that can help. He returns after about ten minutes with seven other pechs, ready to confront the elementals and Ogrémoch’s Bane. If the characters attempt to lead the pechs into reclaimed gnome territory, the sentries at the barricades protest. They don’t trust the pechs and don’t want them wandering through their caverns, where they might decide to alter the shape of the stone or even collapse the

Confidential information of Wizards of the Coast LLC. Do not distribute.
D&D Next Playtest ©2012 Wizards 10
caves. No amount of diplomacy or argument sways the sentries on this point. If the argument goes on too long, the pechs begin to drift away. In that case, if the adventurers don’t immediately turn their attention to reassuring the pechs, the pechs leave. The characters must secure the creatures’ aid again. The adventurers must traverse the northern caverns to reach the Hall of Miners, which means passing through orc-‐held territory. As the characters travel, read: The narrow tunnels winding through the caverns north of the city are spooky. Strange sounds, such as cackling and growls, echo through the halls. The pechs know caverns G and H are thick with orcs. Unless the House Center is cleared, the pechs are nervous about entering area 17, but they prefer that path to entering the heart of orc territory. They recommend steering around the House Center building and sticking close to the southern wall. Each time the group enters a cavern marked with a letter (A through Q), roll 1d10. On a result of 1 to 4, consult the “Blingdenstone Encounters” table in appendix 1. Keep track of the number of orcs the party kills if you plan to run chapter 5. If, despite the pechs’ warning, the group enters cavern G or H, see chapter 5. Pechs disappear into the stone when monsters attack. The pechs might help the adventurers by using rock to slow down an enemy or block a critical hit enough to turn it into a normal hit. Otherwise, they avoid conflict. After the trip, the party finally arrives at area 6.
The Hall of Miners From the Hall of Miners comes a dull rumbling, like large stones rolling across the cavern floors. The low, narrow passage opens, revealing the entrance to the vast hall. A vaguely humanoid form made entirely of rock lurches toward you, arms raised to strike.
Gallus quickly warns, “Do not attack it unless you wish to drive all the elementals in the hall into a killing frenzy!” Pechs gather in front of you and extend their hands toward the onrushing elemental. The earth ripples forward until it reaches the elemental’s feet. It charges on a few more steps, slows, then stops, its arms falling to its side. It lowers its head, bowing or admitting defeat, then turns and hurries back into the darkness. The pechs then form a ring around you. Gallus says, “We can keep the elementals at bay, and we will try to prevent the Raging Spirit from harming you. But when we reach the spirit, holding it back will take all our efforts. You must talk to it, if you can, or rely on your own powers to drive it away from here. Normal weapons will not avail you, but magic might. We promise to aid you any way we can.” The pechs wait while the adventurers discuss a strategy. Gallus can offer a few more details about Ogrémoch’s Bane. • Ogrémoch’s Bane manifests as a cloud of dust, but when angered it is a raging whirlwind of gravel. Entering the whirlwind is likely to be fatal. The pechs can keep it at bay, as long as the adventurers stay within their protective circle.
• The pechs know of no way to coax Ogrémoch’s Bane to leave the area, but that doesn’t mean no such way exists.
• As Gallus said before, the pechs believe that the Raging Spirit’s existence is linked to Entemoch’s Boon. The pechs are not willing to help destroy the Boon.
• If the adventurers suggest taking Ogrémoch’s Bane to Entemoch’s Boon, Gallus realizes that the doing so might render the Bane more vulnerable to attack. He tells the characters this fact. If the characters can lure the Bane to the Boon (see “Talking to the Bane”), the Bane’s presence makes the journey safe. The characters then have to fight the Bane in the Boon’s cavern (see “Fighting the Bane”).

Confidential information of Wizards of the Coast LLC. Do not distribute.
D&D Next Playtest ©2012 Wizards 11
Once the adventurers are ready to proceed, the pechs advance with them into the cavern. When the characters move on, read: It takes a few moments for the group to arrive at the center of the cavern. As you near the midpoint, pebbles and dust leap into the air, coalescing into a spinning cloud of debris. The cloud gathers speed and shape, forming into a bloated, humanoid mass with a snarling, bestial visage. Glittering black stones serve as its eyes, which swivel in airy sockets to fix on you. The monster’s maw tears open, and it roars, “Who dares enter my domain? Kneel! Kneel before me, you insignificant mortals, or face my wrath!” The pechs lift their hands to create a ward against the Bane. If the characters drop to their knees, the elemental’s curiosity is piqued, and you should use the “Talking to the Bane” section. If the characters fail to kneel, Ogrémoch’s Bane becomes enraged. In this case, go to the “Fighting the Bane” section.
Talking to the Bane The spirit looms over you, and a deep laugh sounds in the cloud. It then says, “What have we here? Puny mortals, seeking plunder?” The elemental entertains questions. If necessary, you can call for Charisma checks (DC 11 or 13). Some possible questions and answers follow. Why are you here? “The gnomes brought me forth when they sought succor and comfort from my master’s hated brother, Entemoch.” What do you want? “An end to the calling and binding of elementals. The gnomes call up elementals from my master’s service and enslave them. By what right do they do this?” What will it take for you to move on? “As long as the miserable gnomes profit from Entemoch’s Boon, I will remain. I will undo their works and loose elementals they bind.” What is Entemoch’s Boon? “Long ago, when the gods were silenced at the beginning of this age of upheaval, the gnomes of Blingdenstone sought wisdom from the spirits of the earth. They received a blessing from Entemoch, consort
to the princess of good earth elementals. This blessing allows the puny gnomes to call forth the elementals and enslave them. The blessing is within a cavern some distance northwest of here. I would destroy it, but I cannot do so without the aid of mortals.” How can we end the Boon? “Topple the stones of Entemoch’s Boon. Shatter them, and the blessing will end. Only then will I move on. I cannot attack the stones, but I can give you the strength to do so.” The characters are free to try another approach to persuade Ogrémoch’s Bane to leave Blingdenstone. Use the information presented here to weigh their likelihood of success. Reward creative thinking. If informed, the svirfneblin endorse no plan to harm or destroy Entemoch’s Boon. Any svirfneblin who learn about the plan try to stop the characters from enacting it. If the characters go to the Boon, read: Three twisting columns reach up from the floor of this large, boulder-‐strewn cavern. Bright runes wind round each pillar, and the earth thrums with energy here. Each pillar has 100 hit points and can also be broken with a DC 17 Strength check made with disadvantage. Destroying any pillar ends the Boon and banishes the Bane. If Ogrémoch’s Bane is in the cavern of Entemoch’s Boon, it cannot attack the stones, but it can grant a +5 bonus to damage rolls against the stones and eliminate the disadvantage on Strength checks made to break them. If the Boon is destroyed, the Bane disappears.
Fighting the Bane The pechs raise a low wall of stone from the cavern floor, and the whirlwind parts around it, unable to pass their barrier. In a moment, the cloud of dust and gravel envelops their entire protective circle. Ogrémoch’s Bane has AC 15 and100 hit points. It is immune to nonmagical weapon damage, and it takes half damage from (has

Confidential information of Wizards of the Coast LLC. Do not distribute.
D&D Next Playtest ©2012 Wizards 12
resistance to) any damage not of the force or holy type. In the cavern of Entemoch’s Boon, the Bane loses its weapon damage immunity, but retains its resistance. The Bane cannot be charmed, frightened, put to sleep, or held. Unable to reach through and harm anyone inside the pechs’ protective ring, the Bane takes no actions other than to whirl around the stone circle. Flying rocks batter any creature that leaves the pechs’ protection, dealing 1d8 bludgeoning damage each round. Pushing through the ten-‐foot area of the whirlwind requires a DC 15 Strength check made as an action. Once per round, the Bane can slam a creature no more than fifteen feet outside the protective circle. The elemental has +4 to hit and deals 1d8 + 4 bludgeoning damage. If the characters grow frustrated in fighting the Bane, one of the pechs, grunting with the effort of maintaining the ward, lifts a round stone out of the earth. An instant later, the stone begins to glow, and the pech hands it to the adventurer. This effort causes the ward to falter momentarily, allowing the Bane to deal 1d4 – 1 bludgeoning damage to each character inside the circle. The stone can be thrown as a simple weapon, dealing 1d12 + the character’s Strength or Dexterity modifier force damage to the Bane on a hit. A given pech can create such a stone once per round, at the cost of weakening the ward each time. Reward the players for creative thinking in this process. Give them 1d6 bonus damage for clever efforts. Increase the bonus damage if the plan requires weakening or leaving the pechs’ ward.
Conclusion If Ogrémoch’s Bane is destroyed or disappears, the other elementals wander off or find a path back to their home plane. Adventurers who search the cavern find a scattering of small gemstones (75 gp total) and the tattered first page of Evarell’s Journal. If the characters return to Henkala Shadowsong to report their success, she is overjoyed unless she knows they destroyed Entemoch’s Boon. Then she is ambivalent,
leaning toward unhappy. The response of Blingdenstone citizens is the same as Henkala’s. Unless the adventurers make it clear that the pechs were unwilling to help destroy the Boon, any negative aspects of the gnomes’ reaction spill over into how they later treat the pechs. If Henkala is overjoyed, read: Henkala embraces each of you warmly. “I promised you the thanks of an old woman for completing this task,” she says, “and you shall have it.” Rummaging in the ruins of her old shop, she produces a small bundle, which she gives to you. The bundle contains three potions of healing and an amethyst (100 gp). It also contains a +1 handaxe if the characters haven’t already received that item. If Henkala is ambivalent, read: Henkala frowns, saying, “I suppose the sacrifice was warranted, since our reclaiming of the Boon was a long way off, especially with Ogrémoch’s Bane on the loose. But it’s a bitter thing, and one you’d better keep to yourself around here. I promised you the thanks of an old woman for completing this task, and you have it.” The characters might be able to wheedle the reward out of Henkala with some roleplaying and a few successful DC 13 Charisma checks. Otherwise, she gives the party nothing.

Confidential information of Wizards of the Coast LLC. Do not distribute.
D&D Next Playtest ©2012 Wizards 13
Chapter 2: Wormwrithings Kobolds of the Urlbluk tribe haunt a region known as the Wormwrithings, a place full of tunnels that purple worms bored in the stone and earth. The kobold presence in the city means that some previously unknown passage has opened to link the city to the Wormwrithings. This prospect promises far greater dangers than kobolds. The kobolds have not yet entered Blingdenstone in great numbers. They instead range around the southeastern caverns, sometimes intruding upon the pechs in area 7. Kobolds usually stay away from the gnome barricades. As long as the characters are venturing into the Wormwrithings, they can help the city in another way. Before the fall, the deep gnomes gathered precious metals and gemstones from fresh worm tunnels bored through the rock. Gurmadden Stonesinger hopes the adventurers can do the same and bring back several specimens of a specific crystal that svirfneblin musicians play by manipulating the crystals’ vibrations. He hopes to recreate a crystal orchestra in the Singing Stones (area 15). To that end, he offers 10 gp for each crystal retrieved, and he needs at least six crystals. The adventurers must close any passage linking Blingdenstone to the Wormwrithings. Also, the group can seek singing crystals, returning to close the passage after retrieving six. To aid the group in accomplishing the goals, the gnomes give a mining pick to anyone who wants one.
The Guide Burrow Warden Kargien sends a guide along with the characters, since navigating the Wormwrithings can be treacherous. Miglin Crackedquartz, the guide, stands just over three feet tall and weighs a few dozen pounds. He has gray skin, one bulging black eye, and a patch over the other eye. He is gruff and acerbic, as well as oily and a little smelly. Most
of his time is spent complaining or offering boring reports about the various properties of nearby rocks. He’s also concerned more with gemstones than he is with the people around him. When not guiding folks through the Underdark, Miglin wanders Blingdenstone, making notes about the caverns and passages. Miglin Crackedquartz: AC 12; 10 hp; pick +1 (1d6 piercing); Knowledge Dungeoneeiring +6, Spot +5
Keen Senses: Miglin and any party he is with cannot be surprised.
Through the Ruins Past the barricades, the southern tunnels of the ruined city are eerily quiet, except for the constant muttering of your guide and the sound of your footsteps. Miglin leads you through caverns lined with shallow caves and through narrow tunnels with low ceilings. He peers around, searching for any new tunnels. Miglin leads the characters to area 14. Kobolds have set two traps to protect the heart of their lair. The traps are marked on the map with Xs. Falling Net Traps: Characters can attempt a DC 15 Wisdom check to spot either the net stretched above the passage or one of the tripwires near the floor. A character actively searching needs to make a DC 13 Intelligence check instead. If a character finds anything, the adventurers can search to find the three tripwires with three successful DC 13 Intelligence checks and avoid the trap entirely. If a net falls, characters in the twenty-‐foot-‐diameter area of the net must make a DC 13 Dexterity saving throw to avoid being restrained beneath the net. A restrained character can take an action to cut the net with a slashing weapon or to escape with a DC 13 Strength or Dexterity check. Kobold Responders: As soon a net falls, eight kobolds rush out from a nearby passage, attacking any characters trapped in the net first. The kobolds flee when any of them dies after they no longer outnumber their foes. Treasure: Each kobold has 1d4 cp.

Confidential information of Wizards of the Coast LLC. Do not distribute.
D&D Next Playtest ©2012 Wizards 14
Passage to the Wormwrithings The passage to the Wormwrithings is a fissure that opened up a century or so ago. This fissure starts in the southeastern corner of area 14, where it is twenty feet wide and almost as tall. It then goes southeast before narrowing a few hundred feet past the entrance. After narrowing, it veers south and gradually winds northwest to the Wormwrithings. Where it narrows is a good place to seal the passage, using picks or other methods to weaken the ceiling and collapse it. That tactic is Miglin’s suggestion. Let the players decide their approach, and use your judgment about their likelihood of success. Intelligence checks and Wisdom checks can help the characters find a safe solution.
Into the Wormwrithings The characters can go into the Wormwrithings to pursue other goals. Kobolds that infest the area consider the intrusion to be an act of war. Read: Miglin leads you down the tunnel for what seems like miles. At last, the passage opens into the side of an enormous circular tunnel, winding off into the darkness in both directions. Jutting from the rock just across the tunnel, you spot a gleaming crystal like the ones Gurmadden showed you. Falling Net Trap: Kobolds have set up a falling net trap just outside the connecting passage, so any character who steps into the circular tunnel triggers the trap by breaking one of three tripwires. Use the trap description in the “Through the Ruins” section. Kobold Responders: If the trap is triggered, a kobold attack similar to the one described in the “Through the Ruins” section occurs. Treasure: The kobolds have 1d4 cp each. With a pick and a little effort, the adventurers can remove the singing crystal from the rock.
Wandering the Wormwrithings After entering the Wormwrithings, the characters can wander the area as long as they want. Passages here are twenty feet in diameter, with smaller natural passages breaking through the smooth walls at various points. The worm paths often cross each other from unusual directions, including vertically. Passages extend for anywhere between forty and several hundred feet before changing direction. Creatures can walk normally across the center ten feet of a worm tunnel, but the sloping five-‐foot edges to either side are difficult terrain. Once the characters have the six singing crystals they need, Miglin assumes they want to return to the city. He refuses to risk his neck for the sake of greed, since the only reason to stay is to acquire more treasure. Miglin leaves the characters on their own if they don’t agree to leave.
Lost in the Wormwrithings Without Miglin, the characters face a serious risk of staying lost in the tunnels. After Miglin is gone, to return to Blingdenstone, each character must make a DC 13 Intelligence or Wisdom check. If half or more of the characters succeed, the party moves closer to the city. A group of kobolds ambushes the party (see “Kobold Ambush” under the “Encounters in the Wormwrithings” section) if more than half the characters fail. The adventurers must succeed on three such group checks to navigate out of the Wormwrithings.
Encounters in the Wormwrithings Each hour the characters stay in the area, roll 1d10 and consult the “Wormwrithings Encounters” table.
Confidential information of Wizards of the Coast LLC. Do not distribute.
D&D Next Playtest ©2012 Wizards 15
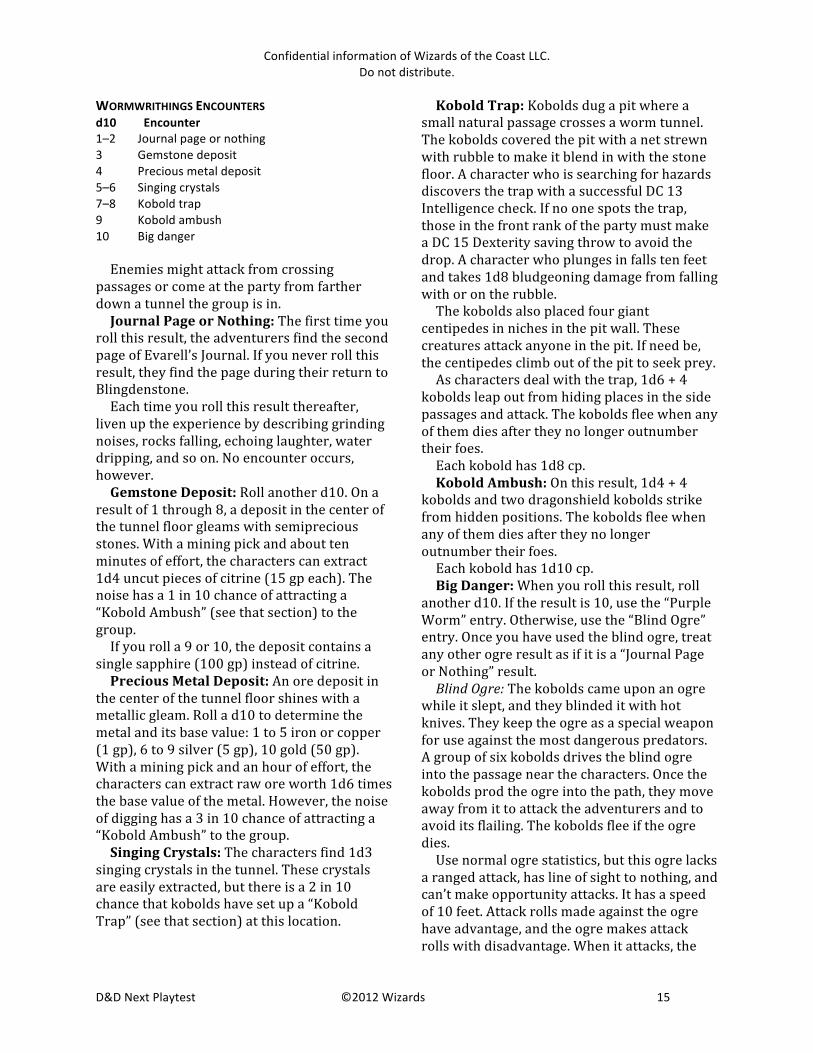
WORMWRITHINGS ENCOUNTERS d10 Encounter 1–2 Journal page or nothing 3 Gemstone deposit 4 Precious metal deposit 5–6 Singing crystals 7–8 Kobold trap 9 Kobold ambush 10 Big danger Enemies might attack from crossing passages or come at the party from farther down a tunnel the group is in. Journal Page or Nothing: The first time you roll this result, the adventurers find the second page of Evarell’s Journal. If you never roll this result, they find the page during their return to Blingdenstone. Each time you roll this result thereafter, liven up the experience by describing grinding noises, rocks falling, echoing laughter, water dripping, and so on. No encounter occurs, however. Gemstone Deposit: Roll another d10. On a result of 1 through 8, a deposit in the center of the tunnel floor gleams with semiprecious stones. With a mining pick and about ten minutes of effort, the characters can extract 1d4 uncut pieces of citrine (15 gp each). The noise has a 1 in 10 chance of attracting a “Kobold Ambush” (see that section) to the group. If you roll a 9 or 10, the deposit contains a single sapphire (100 gp) instead of citrine. Precious Metal Deposit: An ore deposit in the center of the tunnel floor shines with a metallic gleam. Roll a d10 to determine the metal and its base value: 1 to 5 iron or copper (1 gp), 6 to 9 silver (5 gp), 10 gold (50 gp). With a mining pick and an hour of effort, the characters can extract raw ore worth 1d6 times the base value of the metal. However, the noise of digging has a 3 in 10 chance of attracting a “Kobold Ambush” to the group. Singing Crystals: The characters find 1d3 singing crystals in the tunnel. These crystals are easily extracted, but there is a 2 in 10 chance that kobolds have set up a “Kobold Trap” (see that section) at this location.
Kobold Trap: Kobolds dug a pit where a small natural passage crosses a worm tunnel. The kobolds covered the pit with a net strewn with rubble to make it blend in with the stone floor. A character who is searching for hazards discovers the trap with a successful DC 13 Intelligence check. If no one spots the trap, those in the front rank of the party must make a DC 15 Dexterity saving throw to avoid the drop. A character who plunges in falls ten feet and takes 1d8 bludgeoning damage from falling with or on the rubble. The kobolds also placed four giant centipedes in niches in the pit wall. These creatures attack anyone in the pit. If need be, the centipedes climb out of the pit to seek prey. As characters deal with the trap, 1d6 + 4 kobolds leap out from hiding places in the side passages and attack. The kobolds flee when any of them dies after they no longer outnumber their foes. Each kobold has 1d8 cp. Kobold Ambush: On this result, 1d4 + 4 kobolds and two dragonshield kobolds strike from hidden positions. The kobolds flee when any of them dies after they no longer outnumber their foes. Each kobold has 1d10 cp. Big Danger: When you roll this result, roll another d10. If the result is 10, use the “Purple Worm” entry. Otherwise, use the “Blind Ogre” entry. Once you have used the blind ogre, treat any other ogre result as if it is a “Journal Page or Nothing” result. Blind Ogre: The kobolds came upon an ogre while it slept, and they blinded it with hot knives. They keep the ogre as a special weapon for use against the most dangerous predators. A group of six kobolds drives the blind ogre into the passage near the characters. Once the kobolds prod the ogre into the path, they move away from it to attack the adventurers and to avoid its flailing. The kobolds flee if the ogre dies. Use normal ogre statistics, but this ogre lacks a ranged attack, has line of sight to nothing, and can’t make opportunity attacks. It has a speed of 10 feet. Attack rolls made against the ogre have advantage, and the ogre makes attack rolls with disadvantage. When it attacks, the

Confidential information of Wizards of the Coast LLC. Do not distribute.
D&D Next Playtest ©2012 Wizards 16
ogre strikes at a random creature within its reach. Each kobold has 1d4 sp. Purple Worm: The tunnel shakes violently, and Miglin, his eyes wide with panic, yells for the group to follow him as he bolts back down the tunnel. If Miglin isn’t with the group, a DC 11 Intelligence or Wisdom check is enough for a character to discern the approach of a purple worm. Each character who fails to flee the area must make a DC 11 Dexterity saving throw. A purple worm emerges from one wall and plunges into another, swallowing and killing any character who fails the saving throw. Any character who saves manages to leap out of the way as the worm passes.
Conclusion Once the passage to the Wormwrithings is sealed, the gnomes have little trouble dealing with the kobolds that remain in the ruins. When the adventurers return to Blingdenstone, they can deliver any singing crystals to Gurmadden. If they do, read: Gurmadden whoops with joy. “You must stay and hear these played, after I pay you, of course,” he says. He pays 10 gp for each crystal. If the characters give him six crystals, he throws in a fine gold medallion engraved with a stylized diamond shedding beams of light (the symbol of Segojan Earthcaller). The medallion is worth 50 gp. If he has all the crystals he needs, Gurmadden treats willing adventurers to a concert. If he does, read: After taking a few minutes to arrange the new crystals among the old, Gurmadden sits down and begins tapping the crystals. You hear nothing. Then, other svirfneblin gather to enjoy the music, and a few join Gurmadden. The sound grows richer and more audible, comparable to
that of a glass harp. Obvious delight emerges on the faces of the gathered gnomes.

Confidential information of Wizards of the Coast LLC. Do not distribute.
D&D Next Playtest ©2012 Wizards 17
Chapter 3: Clearing the House Center Burrow Warden Kargien claims to need to clear the House Center for the symbolic victory it will give his people. But he also wants the crown of King Schnicktick, who died defending the area. Efforts to reach the king’s remains have failed thanks to an evil presence haunting the House Center. The gnomes are uncertain what the evil is. Some say it’s the angry spirit of the dead king, while others say it’s a drow, driven mad, who lingered here after the fall of the city. Svirfneblin who have drawn near the ruins have seen shapes, gnome-‐sized and larger, moving in the shadowed hall. Gnomes who have gone closer have not returned to the encampment. Kargien hopes the adventurers can identify the threat, and drive it off or destroy it. The adventurers must recover the crown. If they manage to destroy the evil in the House Center, so much the better.
The House Center The journey to the House Center requires traversing one wide tunnel lined with shallow caves and littered with rubble and debris. Vermin skitter and slither in some of the caves you pass, but nothing dares to come fully into your light. You soon reach an open cavern with a large building in its center. From what the gnomes have told you, the building must be the House Center. The upper level has collapsed, but the ground floor is mostly intact. It has two visible entrances. One is a rubble-‐strewn doorway on the south side of the building. Two iron doors, drooping in the entryway, flank the other entrance, on the eastern side of the building. An eerie red-‐orange light flashes from inside the broken doors. Two humanoid figures shamble out of the shadows and in your general direction. They look like orcs, but no life is in their eyes or their movements.
These creatures are orc zombies. They attack without tactics or fear. Map of the House Center The House Center map shows the remaining rooms. Room 1 on the map contains the crumpled iron doors described above. The other visible entrance and a western ingress are open doorways missing their doors but not the hinges.
1. Entry This entry chamber is strewn with debris, including a scattering of small bones. The heavy wooden door leading out of this room sags on its hinges but still opens properly. Monsters: Four fire beetles nest here among the rubble.
2. Trapped Hall This hall contains a covered pit trap. Anyone searching for traps can find it with a DC 13 Intelligence check, and it can be jammed closed with two DC 15 Dexterity checks. Otherwise, the trap triggers when a character reaches the center of the hallway, dropping everyone in the hall into the pit. Those who are near the outer edge can attempt a DC 15 Dexterity saving throw to leap to safety. Characters who drop into the pit fall ten feet and take 1d10 piercing damage from the spiked floor.
3. Guard Post Iron portcullises are shattered and rusted on the ground in the doorways of this former guard post. Monsters: Three gnome skeletons stand watch here, ready to attack any living creatures they sense. Levers: Two levers jut from the eastern wall, one to the north and one to the south. The northern lever controls the pit in area 4, while the southern lever controls the pit in area 2. When a lever is up, the pit covers are closed and the trap is set. When a trap is triggered, its lever drops into the middle position. Pushing the lever back up resets the trap, but pushing it down closes and locks the cover so the trap cannot be triggered.

Confidential information of Wizards of the Coast LLC. Do not distribute.
D&D Next Playtest ©2012 Wizards 18
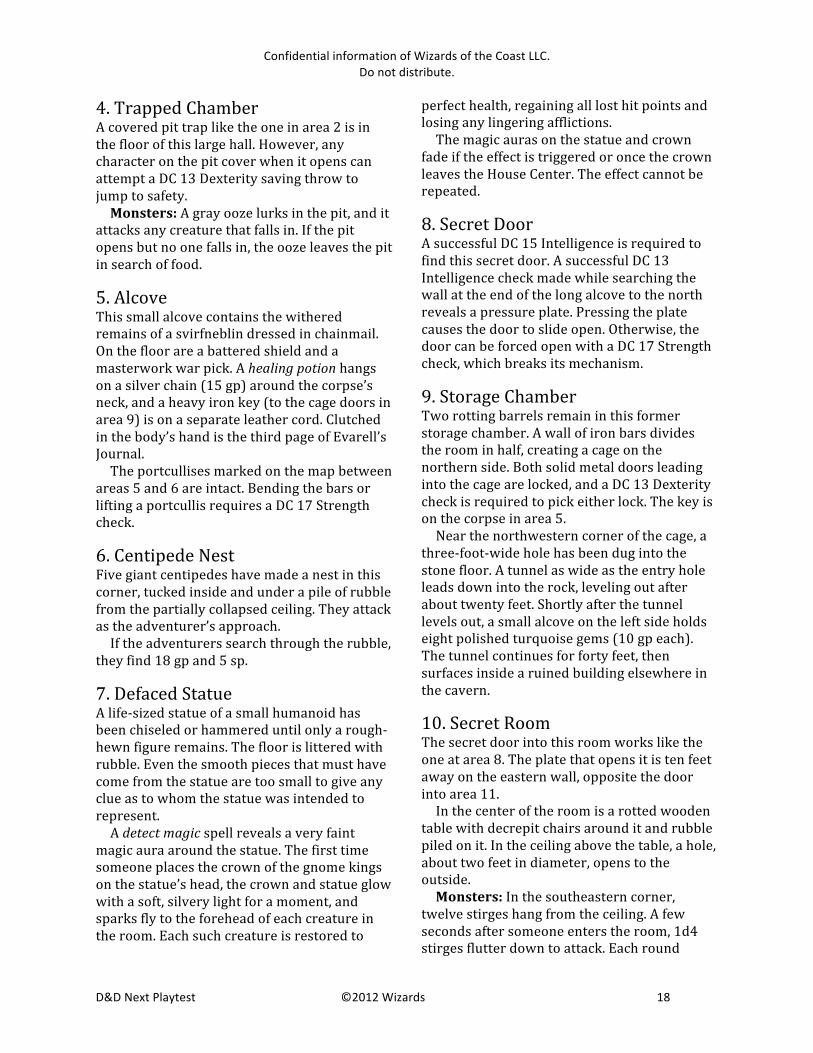
4. Trapped Chamber A covered pit trap like the one in area 2 is in the floor of this large hall. However, any character on the pit cover when it opens can attempt a DC 13 Dexterity saving throw to jump to safety. Monsters: A gray ooze lurks in the pit, and it attacks any creature that falls in. If the pit opens but no one falls in, the ooze leaves the pit in search of food.
5. Alcove This small alcove contains the withered remains of a svirfneblin dressed in chainmail. On the floor are a battered shield and a masterwork war pick. A healing potion hangs on a silver chain (15 gp) around the corpse’s neck, and a heavy iron key (to the cage doors in area 9) is on a separate leather cord. Clutched in the body’s hand is the third page of Evarell’s Journal. The portcullises marked on the map between areas 5 and 6 are intact. Bending the bars or lifting a portcullis requires a DC 17 Strength check.
6. Centipede Nest Five giant centipedes have made a nest in this corner, tucked inside and under a pile of rubble from the partially collapsed ceiling. They attack as the adventurer’s approach. If the adventurers search through the rubble, they find 18 gp and 5 sp.
7. Defaced Statue A life-‐sized statue of a small humanoid has been chiseled or hammered until only a rough-‐hewn figure remains. The floor is littered with rubble. Even the smooth pieces that must have come from the statue are too small to give any clue as to whom the statue was intended to represent. A detect magic spell reveals a very faint magic aura around the statue. The first time someone places the crown of the gnome kings on the statue’s head, the crown and statue glow with a soft, silvery light for a moment, and sparks fly to the forehead of each creature in the room. Each such creature is restored to
perfect health, regaining all lost hit points and losing any lingering afflictions. The magic auras on the statue and crown fade if the effect is triggered or once the crown leaves the House Center. The effect cannot be repeated.
8. Secret Door A successful DC 15 Intelligence is required to find this secret door. A successful DC 13 Intelligence check made while searching the wall at the end of the long alcove to the north reveals a pressure plate. Pressing the plate causes the door to slide open. Otherwise, the door can be forced open with a DC 17 Strength check, which breaks its mechanism.
9. Storage Chamber Two rotting barrels remain in this former storage chamber. A wall of iron bars divides the room in half, creating a cage on the northern side. Both solid metal doors leading into the cage are locked, and a DC 13 Dexterity check is required to pick either lock. The key is on the corpse in area 5. Near the northwestern corner of the cage, a three-‐foot-‐wide hole has been dug into the stone floor. A tunnel as wide as the entry hole leads down into the rock, leveling out after about twenty feet. Shortly after the tunnel levels out, a small alcove on the left side holds eight polished turquoise gems (10 gp each). The tunnel continues for forty feet, then surfaces inside a ruined building elsewhere in the cavern.
10. Secret Room The secret door into this room works like the one at area 8. The plate that opens it is ten feet away on the eastern wall, opposite the door into area 11. In the center of the room is a rotted wooden table with decrepit chairs around it and rubble piled on it. In the ceiling above the table, a hole, about two feet in diameter, opens to the outside. Monsters: In the southeastern corner, twelve stirges hang from the ceiling. A few seconds after someone enters the room, 1d4 stirges flutter down to attack. Each round

Confidential information of Wizards of the Coast LLC. Do not distribute.
D&D Next Playtest ©2012 Wizards 19
thereafter, 1d4 more stirges join the fray until all have come down. Treasure: Under the table is the skeleton of a svirfneblin. Beneath the skeleton is a crumbling leather pouch holding 27 sp.
11. Audience Hall A large dais takes up the southern side of this enormous room, and on it is a large throne. Upon the high seat sits a gaunt dark elf, but his hollow eye sockets and desiccated flesh betray his undead nature. The corpse of a svirfneblin, a bent silver crown still resting on its skull, serves as a footstool for the drow abomination. Two squat skeletons flank the throne, and two more drow carcasses, draped in rotting flesh, slouch beside the dais. At least a dozen other bodies litter the floor around the dais. “And who might you be?” the creature on the throne asks in a wheezing voice. “Have you come to pay homage to Pharran Nicostas, the conqueror and rightful king of Blingdenstone?” As he asks this last question, he gestures to himself. Monsters: The creature on the throne is a wight, which was once a drow soldier whose desire in life was to be known as the conqueror of Blingdenstone. His ambition sustains him after his death, and he spends his days on the throne, with the dead monarch under his feet to symbolize his successful conquest. Two gnome skeletons protect the wight, as do two zombies formed from other drow corpses. Development: Pharran demands that his new “subjects” kneel before addressing him, and he warns them that “the crown” must be given its due before acting on anyone’s behalf. If the adventurers make any request before offering some form of tribute, or if Pharran feels insulted, the wight turns to a skeleton and shouts, “Take them away!” Pharran rescinds this edict only if the adventurers are immediately and sufficiently apologetic. Little is to be gained from talking with Pharran, except the story of his boundless ambition and his “victory.” Only an extraordinary feat of swindling or diplomacy could persuade him to part with the king’s crown without a fight.
Treasure: Aside from the gnome king’s crown, which has a faint magic aura if examined with a detect magic spell, the valuables scattered around the chamber are 26 gp, 108 sp, and 94 cp. The wight has an ornate longsword with a fire opal set in the pommel (100 gp). The magic aura on the crown fades if the crown leaves the House Center or it is used to trigger the effect in area 7. A polished stone engraved with the word “Sunnis” hangs on a chain around the gnome king’s neck. If a character takes an action to present this medallion to Ogrémoch’s Bane, the Bane takes 1d12 + the character’s Wisdom modifier holy damage. The damage increases by 1d8 if the character using the medallion is outside the pechs’ protective circle, or by 2d8 if the character stands in the Bane’s whirlwind to use the medallion. This action can be taken only once per round.
Orc Attack Orcs who range the northern caves keep a wary eye on this cavern. If the adventurers leave the ruins, the orcs assume that the area is safe to enter and the adventurers are laden with treasure. Howling with triumph, four orcs charge from the north to attack the party. If you plan to run chapter 5, keep track of how many orcs the adventurers kill.
Conclusion If the adventurers take the king’s crown to Burrow Warden Kargien, he accepts it. Read: With a gleam in his eye, Kargien holds the crown gingerly in both hands. “Well,” he finally says, “we shall have to see what the elders say about this. With no rightful heir to the throne, who should wear it? We shall have to see, indeed.” A DC 13 Wisdom check reveals that Kargien is struggling to resist the temptation of placing the crown on his head. The gleam in his eye is one of ambition. If the adventurers return and place the crown in safekeeping away from Kargien until

Confidential information of Wizards of the Coast LLC. Do not distribute.
D&D Next Playtest ©2012 Wizards 20
a rightful king is identified, Gurmadden, Jalless, and Henkala support the move. Kargien threatens to banish the group, but he soon realizes that doing so would be unpopular among his followers. He backs down. Playing out the consequences of this political situation is left to your discretion. Debate about who should wear the crown could grow to consume the gnome community. Jalless, Gurmadden, and Henkala believe an effort must be made to trace the royal bloodline and find a proper king. Secretly, Gurmadden believes he is part of the bloodline. Pingtu and Fendrick support Kargien’s bid for the throne, particularly if the adventurers are successful in all their missions.

Confidential information of Wizards of the Coast LLC. Do not distribute.
D&D Next Playtest ©2012 Wizards 21
Chapter 4: Wake the Stones For centuries, Blingdenstone’s priests gathered in the Speaking Stones menhir circle to commune with the Lords of the Golden Hills. Since the gnomes’ return, however, the stones have been silent. Blingdenstone’s residents believe a curse has been leveled against this place. The area is cursed. When the drow invaded, the last gnome high priest, Bendekik, performed a ritual to conceal the area’s power and prevent the drow from using that power to find the fleeing gnomes. He intended to lift the wards once his people returned. Before he could escape, however, the drow found, captured, tortured, and mortally wounded him. While dying, he spoke a final curse, and until it is lifted, the stones cannot speak. The adventurers must help the priest Pingtu lift the curse and revive the Speaking Stones.
Pingtu and the Speaking Stones Pingtu was an acolyte studying under Bendekik, but Pingtu hasn’t been here long. Further, his expertise is limited, and the Speaking Stones’ silence has him stumped. He knows the following information. • Legend holds that the stones are ancient galeb duhrs, humanoids hailing from the Elemental Plane of Earth. They are so ancient that they are indistinguishable from stone, and they have never moved in svirfneblin memory.
• In the old days, the area emitted faint, persistent vibrations. The priests used ritual divinations during which the vibrations changed frequency. Every priest knows how to perform the rituals and interpret the vibrations.
• Bendekik died defending this chamber from the drow. When the svirfneblin arrived here forty years ago, long before Pingtu came, Bendekik’s remains were
found in the center of the menhir circle. The gnomes removed the bones and interred them beneath the Ruby in the Rough (area 8).
• When Pingtu recently tried a ritual divination, he heard the voice of his dead master begin to speak. Before hearing anything coherent, Pingtu fled. He admits he was afraid a vengeful ghost was manifesting. He’s still afraid, to his shame, and he hasn’t tried another ritual since.
Bendekik’s Curse Regretful of his past cowardice, Pingtu decides to try another ritual divination. Before he does so, he asks only for protection from any bitter apparition that might appear. He then performs the ritual. Read: As Pingtu’s invocation ends, the room’s silence gains a sort of heaviness. A voice breaks the silence, echoing as it says: Seven stones stand and silently mourn. Seven gods weep in the Golden Hills. Here, many drow did break my form, But seven my wrath left still. Seventy times seven years silent the stones stand, Unless seven bright stones from Earthcaller’s hand, Seven sweet prayers of the Golden Land, And seven shattered arms of the drow band Are offered here, by my command. These verses are instructions for lifting the curse. Waiting 490 years isn’t an option, so Pingtu asks the adventurers for help. Read: Pingtu says, “The Earthcaller, Segojan, is the patron deity of Blingdenstone and the god of nature and the dead. He provides treasures under the earth for us to find. The ‘bright stones,’ then, must refer to such treasures—gems. “We use gems to teach children the colors of light fractured by a cut diamond: red ruby, orange fire opal, yellow citrine, green emerald, blue aquamarine, indigo sapphire, and violet

Confidential information of Wizards of the Coast LLC. Do not distribute.
D&D Next Playtest ©2012 Wizards 22
amethyst. I think we shall need one of each of these stones. “I have an aquamarine right here,” he says, taking a polished blue stone from his pouch. “Also, I was told the remains of seven drow were found with Bendekik. It sounds like my old teacher wants their weapons shattered here in the circle. We’ll need the weapons and a hammer, which should be among our supplies. Fendrick Pestle, our provisioner, should know more about all that.” “The sweet prayers? Well, they’re for me to perform when we’ve gathered the materials we need.”
Seven Bright Stones The stones can be found in other adventures and among the gnomes of Blingdenstone. Pingtu knows about the gems and their locations in the city, but it’s more satisfying for the characters to realize the connections themselves. If the adventurers have been to an area where a gem can be found, and the players don’t recall that fact, the character who has the highest Intelligence or Wisdom score recollects. If possible, choose a few different characters to remember various gems. Amethyst: Henkala Shadowsong in area 12 might have already given the adventurers an amethyst. Otherwise, the characters have to ask around the encampment to find a gnome with an amethyst. Inquiries quickly lead to Henkala. She gives the adventurers the stone readily, asking them to come talk to her later about a task she has in mind for them if Ogrémoch’s Bane still exists. Citrine: Those who brave the Wormwrithings often find citrine stones. Gnomes who recover the gems bring them to Jalless in the infirmary (area 13) for appraisal. Jalless gives her largest citrine to the cause without a thought. Emerald: Burrow Warden Kargien wears a gold chain with an emerald pendant. He gladly lends the emerald if the adventurers have already given him the crown from the House Center. If the characters recovered the crown but didn’t give it to Kargien, he demands the item in exchange. Those who have not tried to recover the crown must promise to do so and
to bring the item to Kargien upon completing the endeavor. In this case, Kargien also requires Pingtu to support Kargien’s claim to Blingdenstone’s throne. Pingtu agrees. In any case, Kargien wants his emerald back after the Speaking Stones awaken. Fire Opal: The wight in the House Center has a fire opal (see chapter 3). Gurmadden, in area 15, wears a silver ring set with a fire opal. Despite the ring’s sentimental value, Gurmadden hands it over gladly if he knows what it’s for, and the characters have brought or agree to bring him singing crystals from the Wormwrithings. Otherwise, he is reluctant to part with his heirloom, requiring the characters to sway him (DC 13 Charisma checks; DC 11 if Pingtu vouches for the characters). Sincere oaths to return the ring garner the characters a +2 bonus on checks to persuade the bard. Ruby: The temple to Callarduran Smoothhands (area 9) contained an altar studded with rubies. A ruby fragment from the shattered altar satisfies the curse. If the characters go to the temple during this adventure, the orc raiders are present. Defeated raiders carry ruby pieces the characters can take without further damaging the old shrine. Sapphire: Sapphires can sometimes be found in the Wormwrithings. Pingtu knows that a necklace with a large sapphire was once on display beneath the Ruby in the Rough (area 8). If it survived the raid, it is sealed inside a stone cyst shaped by magic. Pingtu can provide an elixir to crack the cyst, but to find the cyst, the characters must venture into the old tunnels underneath area 8. A swarm of four cave rats and two dire rats attacks the party inside the warrens. Once the rats are defeated, the adventurers soon find a room and a stone cyst where Pingtu said it should be. The elixir cracks the cyst, revealing an exquisite silver necklace set with a large sapphire jewel.
Seven Shattered Arms Breaking the curse requires the weapons of the drow Bendekik defeated while defending the

Confidential information of Wizards of the Coast LLC. Do not distribute.
D&D Next Playtest ©2012 Wizards 23
Speaking Stones. These items are stored with the gnomes’ other supplies in area 16. Once he learns that the weapons might help awaken the Speaking Stones, Fendrick Pestle goes to the locked supply area to help the adventurers search. He is surprised to find the guard missing, the door unlocked, and a dragonshield kobold and six kobolds inside, packing supplies into sacks to carry them away. Fendrick runs to call the other sentries from the barricades, leaving the party to deal with the kobolds for three rounds. Trapped behind enemy lines, the kobolds fight desperately. Once four kobolds fall, the others try to flee. With the kobolds dispatched, Fendrick helps the characters look for the weapons. Working together, the group finds the right crate after a few minutes of moving boxes and barrels. Inside the crate are three rapiers, two daggers, a hand crossbow, and a short sword. Also in the crate is the fourth page of Evarell’s Journal. The page indicates the position of the weapons around the ring as Evarell found them, before the gnomes returned to Blingdenstone. Fendrick also gives the characters a hammer if they need one for the shattering of the weapons.
Conclusion Once the characters have gathered the required components, Pingtu assembles them for the ritual that should awaken the stones. He says: “Performing this ritual is an honor I bestow upon you for all your hard work. You must place the gems, in order—red ruby, orange fire opal, yellow citrine, green emerald, blue aquamarine, indigo sapphire, and violet amethyst—at the foot of each stone, walking widdershins from the southernmost stone. Then, place the weapons as the vellum you have indicates and break them in whatever way you can. While you do all this, I’ll offer the prayers my old teacher wants to hear. A crowd of svirfneblin starts to gather, including gnomes the adventurers know. Intoning the Prayers: As the adventurers perform the physical tasks, Pingtu offers prayers to each of seven gnome deities:
Segojan Earthcaller, Callarduran Smoothhands, Garl Glittergold, Baervan Wildwanderer, Flandal Steelskin, Gaerdal Ironhand, and Baravar Cloakshadow. Placing the Gems: The adventurers must place one gem in front of each large menhir, moving widdershins. Pingtu can explain that “widdershins” means moving around the circle from south, to east, to north, and to west, before finally returning to the south. If the stones are placed correctly, a shudder ripples through the cavern floor, prompting an exclamation of delight from Pingtu in the middle of his prayers. Shattering the Arms: The adventurers must break the drow weapons. Each weapon must be placed back in its original position in front of one of the seven large menhirs, then the weapon must be smashed. A single strong blow with a hammer (DC 13 Strength check) can shatter a weapon if it’s in the correct location. Once all seven weapons are broken, another shudder shakes the earth, and the air vibrates for a moment. Pingtu squeaks with delight again. When the characters finish, read: Pingtu finishes his prayers soon after you complete your tasks. The entire cavern and all its contents, including your insides, vibrate. Then the vibrations settle into a soft hum. Pingtu does a little hopping jig. Tears on his cheeks, he says, “Oh forgive my fool cowardice, my old teacher. Thank you seven lords, and thank you my brave friends. The Speaking Stones are active once more!” Pingtu attempts another ritual to peer into the future of Blingdenstone. Read: Pingtu says, “Now, let us ask the stones about our future, eh?” He chants a ritual prayer, and the stones issue a low hum that grows louder as he continues. Higher overtones become audible, shifting subtly in a melodic way. The svirfneblin priest is ecstatic. He lifts his hands and his head. A peaceful smile on his face, he basks in the vibrations around his body.
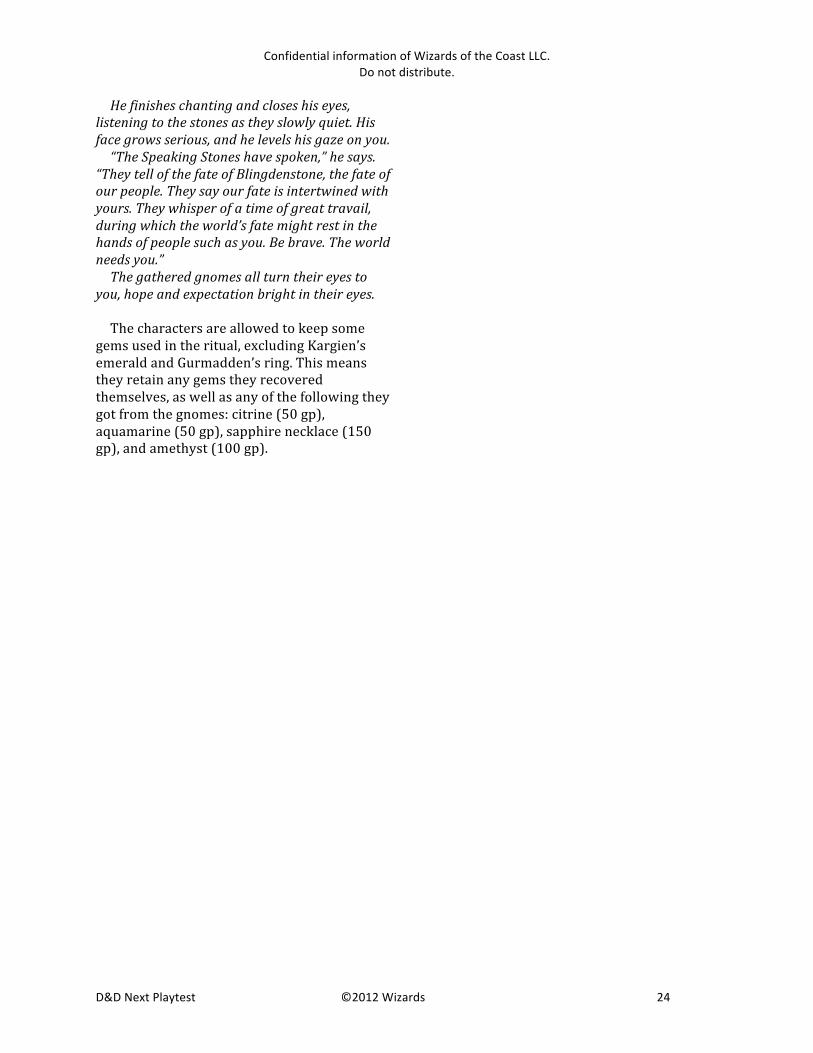
Confidential information of Wizards of the Coast LLC. Do not distribute.
D&D Next Playtest ©2012 Wizards 24
He finishes chanting and closes his eyes, listening to the stones as they slowly quiet. His face grows serious, and he levels his gaze on you. “The Speaking Stones have spoken,” he says. “They tell of the fate of Blingdenstone, the fate of our people. They say our fate is intertwined with yours. They whisper of a time of great travail, during which the world’s fate might rest in the hands of people such as you. Be brave. The world needs you.” The gathered gnomes all turn their eyes to you, hope and expectation bright in their eyes. The characters are allowed to keep some gems used in the ritual, excluding Kargien’s emerald and Gurmadden’s ring. This means they retain any gems they recovered themselves, as well as any of the following they got from the gnomes: citrine (50 gp), aquamarine (50 gp), sapphire necklace (150 gp), and amethyst (100 gp).

Confidential information of Wizards of the Coast LLC. Do not distribute.
D&D Next Playtest ©2012 Wizards 25
Chapter 5: Stop the Raiders Forty years ago, when the svirfneblin first returned to Blingdenstone, the gnomes found only a few enemies lurking in the ruins. However, the gnomes were too few to hold the city against the threats of the larger Underdark. Other creatures invaded their holdings until the gnomes found themselves constrained to the area they now hold. Aside from Ogrémoch’s Bane in area 6, which was present before the fall of the city, the greatest threat the gnomes now face is orcs that took up residence in the northern caverns within the past year. The orcs’ domain is shaded on the city map. Main caverns are marked with an uppercase letter from A to Q. The primary lair is in cavern G, which is also marked as area 10. The characters must venture into the orc lair, and slay or drive off all the orcs. These orcs respond only to violence. They leave the ruins if their leader and the orog are slain, or if their band is reduced to ten or fewer members.
Fighting the Orcs Whatever ideas the players come up with to face the orcs, use the information presented in this adventure to improvise the orcs’ reactions. This environment is dynamic, changing in response to the adventurers’ actions. Inevitably, something will happen that the text doesn’t account for. Use your best judgment, trying to think like an orc: selfish, rash, and cruel, but interested in survival. In all, forty-‐one normal orcs live in the ruins. At any given time, ten to fifteen of these orcs are out looking for supplies or loot. Ashkabbar, the orc leader, is always in cavern G, and an orog named Blugdub is always in cavern H. If the adventurers have spent much time in Blingdenstone or have played through other chapters, they might have already killed several orcs. Reduce the total number of orcs accordingly, and keep track of orcs slain throughout this chapter. All normal orcs have 3d6 sp.
Sweeping the Caverns Each time the party passes through caverns A through Q, roll 1d10. On a result of 1 to 4, consult the “Blingdenstone Encounters” table in appendix 1. If the adventurers enter cavern G or cavern H, refer to the “Raiding the Lair” section. After the adventurers have killed fifteen orcs, including any orcs killed in other chapters, the orcs go on high alert.
High Alert The orcs go on high alert when they have taken such losses that their leader feels he must organize a defense. The orcs pull back to caverns F, G, H, and I, and they no longer send raiding parties out. While the orcs are on high alert, none appear as a random encounter, and none test the gnome barricades. The orcs stick to their camps, and no orcs gather in the middle of cavern G. Ashkabbar assigns orcs to sentry duty at the four locations marked on the map with an S. Each such location has up to 1d6 + 1 orcs on watch, up to a maximum total of the number of orcs remaining. The orcs at the two southern passages—one leading to caverns D and E, the other leading into area 17—remain mostly still. Orcs at the other two points have larger areas to cover, so they wander back and forth. Within the lair, if any orcs are available after sentry duty is assigned, Ashkabbar has two extra orcs with him. Blugdub adds one orc to his retinue. If the adventurers are in the caverns north of the city when Ashkabbar declares high alert, he sends Blugdub and his lackeys to hunt the invaders. Otherwise, the lair is as described in the “Raiding the Lair” section. After the orcs have been on alert for twelve hours with no further incidents, they cautiously return to their normal activities. They go back on alert if they lose half their numbers again, but they are likely to flee instead of going on alert a third time.
Raiding the Lair The orcs in caverns G and H group themselves into family units at different camps around the caves, marked with the lowercase letters a

Confidential information of Wizards of the Coast LLC. Do not distribute.
D&D Next Playtest ©2012 Wizards 26
through e. Ashkabbar camps at f, and Blugdub camps at g. At any given time, 1d6 + 1 orcs are gathered near the center of the cave and engaged in brawling, gaming, drinking, and other uncouth behavior. The orcs are accustomed to their warriors traveling in and out of the cave, and they roll perception-‐related checks with disadvantage. However, if they spot intruders, or the adventurers attack them, the orcs at camps a, b, and d see the fighting and run to help drive the invaders off. Each camp of normal orcs (a through e) has 2d4 orcs in it at any given time. Orcs at these camps can’t see any of the other camps. However, fighting at camp a, b, or d draws the attention of any orcs in the center of the cavern, and they aid their kin. If outnumbered, orcs at camp b, c, or d flee toward Ashkabbar’s camp, while those at camp e flee toward Blugdub’s camp. Ashkabbar’s Camp: Camp f is the orc leader’s camp, and he keeps four burly female orcs with him at all times. He can see fighting at camp b or c, but he doesn’t help those orcs. When he sees fighting, he readies himself and his companions for battle, ensuring that they cannot be surprised. Conversely, orcs at camp b or c come to Ashkabbar’s aid if they see him fighting intruders. Ashkabbar has a pile of treasure, consisting of 35 gp, 62 sp, and a potion of healing. He also has the fifth page of Evarell’s Journal. Each female has a silver bracelet (20 gp each). Blugdub’s Camp: Similarly, the orog at camp g has two orc lackeys. Blugdub and his orcs can see fighting at camp e, and they intervene to help those orcs. Likewise, the orcs at camp e help if they see fighting at camp g. Blugdub also has treasure, including 10 gp, 123 sp, and three lapis lazuli stones (15 gp each).

Confidential information of Wizards of the Coast LLC. Do not distribute.
D&D Next Playtest ©2012 Wizards 27
Chapter 6: Trade Mission Created as a means to provide necessary resources to various settlements across the Underdark, Mantol-‐Derith is the principal trade center in the Northdark. Here, under three covenants that govern activity, people of Menzoberranzan, the duergar city of Gracklstugh, and the surface world can mingle, trade goods and rumors, and withdraw, all without fear of attack. Svirfneblin once traded freely in Mantol-‐Derith, but since the fall of Blingdenstone, drow have made it so that deep gnomes are not welcome in the trading post. Shortly after their return, and a few times over the last decades, the gnomes sent a cart laden with salt and gemstones to Mantol-‐Derith, only to be rebuffed every time. Now, the gnomes fear they might soon be overrun unless they can trade for new weapons at the trade center. The adventurers must take a load of salt and gemstones to Mantol-‐Derith, and then negotiate a trade for duergar weapons. Besides weapons, the gnomes desire provisions, minor magic items, and cotton. Also, if any deep gnomes are available on the slave market, the adventurers should purchase the gnomes and escort them back to Blingdenstone.
Traveling to Mantol-‐Derith Fendrick Pestle gives the adventurers a heavy cart and two deep rothé—shaggy bovines native to the Underdark—to pull it. Into the cart, the gnomes load a dozen ten-‐pound sacks of salt (50 gp each), and three small chests, each holding ten gems (25 gp each). For these items, the gnomes expect to receive goods worth 1,200 gp back in trade. Before the adventurers depart, Fendrick briefs them about the trading mission. Read: Fendrick says, “Look, don’t tell anyone you come on Blingdenstone’s behalf. The drow will cut you off if they find out.
“Also, three covenants govern Mantol-‐Derith: Don’t steal, don’t disguise goods, and don’t use magic in negotiations. No one there tolerates violations of those covenants. They execute folks for breaking them. “The trading post sits about halfway between here and Menzoberranzan, just four miles north of the Darklake. It takes about two days of travel to get there. At the gate, use the password “Malastros” to gain entrance. “Just so you know, we paid a lot to get that word. Don’t mess this up . . . please.” The trip takes twenty hours of travel. Every eight hours, whether the adventurers are traveling or resting, roll 1d10. On a result of 1 or 2, consult the “Underdark Encounters” table in appendix 1. When the characters arrive, read: About a dozen hobgoblins guard the entrance to Mantol-‐Derith, but they let you in when you speak the password. You travel through a wide passage until you come to a large, natural cavern. Its vaulted ceiling rises forty feet at the center, but the cavern winds about for hundreds of feet past that point. Water trickles down from above, carving out tiny rills in the cavern floor. Rough-‐hewn flagstones form walkways through the vault, dodging the pools of collected water and columns of stone. The reflective crystals and semiprecious stones covering the walls cause light to bounce about, filling the chamber with soft illumination. Camps are tucked into different corners, dark banners with strange sigils hanging above each one in the still air. All manner of people— gray-‐skinned dwarves, dark elves, humans, goblinoids, and more—move among the camps. An enormous floating sphere crowned with eyestalks also roams the walkways. Everyone is haggling, arguing, or just looking fearsome.
Acclimating to Mantol-‐Derith Numerous traders and travelers gather in Mantol-‐Derith. Most are minor dealers in

Confidential information of Wizards of the Coast LLC. Do not distribute.
D&D Next Playtest ©2012 Wizards 28
exotics—poisons, drugs, and dangerous spells. They deal with each other or the four cartels that have large camps set up in different corners of the cavern. Each trading camp has several tents for privacy, pack beasts to haul goods, and samples of their wares on display. Guarded caves connected to the main chamber serve as warehouses. In addition to the three covenants, the merchants here frown on violence. A scuffle is fine, but those who start a deadly fight or who get caught breaking a covenant are tied up and dragged to the Darklake. They’re thrown in the water, still tied. Characters exploring the outpost can gather the following information. Play out the characters’ interactions with residents of Mantol-‐Derith. When needed, call for Charisma checks to determine characters’ success at learning the lay of the land. DC 11: If you’re looking to buy weapons, the duergar can provide them. Grimmdar Szort leads the duergar trade group. He’s the one to talk to. Besides Grimmdar Szort’s faction, three other cartels channel most of the significant trade of Mantol-‐Derith. A cunning drow female named Erelda H’tithet represents the dark elves. A half-‐orc female named Tawar Kroul represents the surface world. And then there’s the Hooded One—a mind flayer who doesn’t seem to represent anyone but himself. He’s said to be fantastically wealthy, and his tastes are eccentric. Cross any of these leaders or their cartels, and even if you keep your skin, you’ll never trade in this outpost again. If you don’t want to trade with one of the cartels, plenty of merchants have minor goods to offer. But none of them can provide a significant quantity of merchandise. If you want one fine sword, you can buy it easily. But if you’re looking for dozens of weapons, you have to deal with the duergar. DC 13: The goods most commonly traded in Mantol-‐Derith are slaves, weapons, food, alcohol, poisons, art objects and fine jewelry, potions and scrolls, gemstones and precious metals, salt, and exotic surface goods such as perfumes, spices, and cotton. Most of the trade is done in barter, and several supposedly
objective facilitators sell their services to appraise goods and guarantee fair trades. DC 15: Erelda made it clear long ago that deep gnomes aren’t welcome here. At her decree, no one is willing to supply the svirfneblin. Erelda sometimes receives a prestigious visitor, a dark elf noble who reminds the merchants that the gnomes of Blingdenstone and their goods are not to be received here. DC 17: The noble is named Talabrina Duskryn, and she always travels with bugbears. She’s not to be trifled with.
Trading in Mantol-‐Derith Cartels deal in trade units valued at 100 gp each. A cartel has sale units (the cartel sells these items) and demand units (the cartel buys these items). A cartel’s leader won’t come out and say what he or she wants to buy. Doing so puts the cartel in a weak bargaining position. When presented with desired goods, a leader feigns disinterest to lower the asking price without driving the seller away. Newcomers must interact with merchants to learn where and what to trade for what they need. Making Deals: To acquire what they need, the characters have to deal with Erelda H’tithet. The duergar cartel has weapons, but Grimmdar wants alcohol, gold, silver, and slaves. The surface cartel has alcohol, but Tawar is interested only in art objects, poisons, and obsidian daggers, which the drow have. The Hooded One has gold, silver, and slaves, but he wants art or magic items, which the drow have. When the characters interact with a merchant, you can call for Charisma checks (influence), Intelligence checks (valuation), and Wisdom checks (intuition and sensing motives) to determine how successful the interaction is. Rely on roleplaying as much or as little as you wish. Revealing Ties: If any character mentions that the adventurers come on behalf of the gnomes of Blingdenstone, the merchant they are trading with refuses to deal with them

Confidential information of Wizards of the Coast LLC. Do not distribute.
D&D Next Playtest ©2012 Wizards 29
further. After 1d4 hours, no one in Mantol-‐Derith will trade with the party. The mission fails.
Duergar Cartel Grimmdar Szort is the principal member of the duergar cartel. A heavy-‐set, aging duergar, Szort has long gray hair and a bristly beard. His dark eyes imply intelligence, but he talks as if he has marbles in his mouth. Grimmdar is also very rude. Besides Grimmdar, the duergar camp includes over thirty duergar soldiers, carters, and traders. The duergar strap their goods to the backs of giant tarantulas they call steeders. Sale Units: Ten weapons, twenty-‐five pick heads, two thousand pieces of ammunition. Demand Units: Alcohol (two tuns of ale or beer, a hogshead of cheap wine, or two gallons of fine wine), one two-‐pound bar of smelted gold, four five-‐pound bars of smelted silver, five slaves.
Drow Cartel The cunning Erelda, scion of the merchant house H’tithet, runs the drow cartel. Despite her finery, she is waifishly thin and has off-‐putting red eyes. She conceals her scorn for others well, affecting a polite demeanor. Erelda lives in fear of Talabrina Duskryn. If it weren’t for Duskryn, Erelda would welcome trade with the deep gnomes again. Blingdenstone is the best source of salt and gems. In addition to Erelda, the drow camp includes ten drow, serving as guards, and twenty slaves (mostly goblinoids), for hauling goods and protecting the drow. Giant lizards pull drow wagons through the Underdark. Sale Units: One piece of fine art or jewelry, two potions of healing or 1st-‐level spell scrolls, five doses of poison, four obsidian daggers, five slaves (no svirfneblin). Demand Units: Gems worth 100 gp, twenty pounds of salt.
Hooded Cartel A newcomer to Mantol-‐Derith, the Hooded One is a mind flayer armed with vast wealth. He speaks only telepathically.
The Hooded One collects wonders uncovered in the Underdark, as well as slaves. He is curious and quite congenial for an inhuman monster. If the characters deal with the Hooded One, he gives them the sixth page of Evarell’s Journal. He is most interested in the fragment of prophecy on the back. The illithid says that he believes the prophecy points to a day, soon, when mind flayers will rise to the surface, find a world locked in darkness, and bring an end to the age of humanity. The mind flayer’s camp is more of a luxury retreat. Twenty thralls, mostly grimlocks, serve him in the camp. Sale Units: Five slaves (no svirfneblin), one two-‐pound bar of smelted gold, four five-‐pound bars of smelted silver. Demand Units: Two potions of healing or 1st-‐level spell scrolls, one piece of fine art.
Surface Cartel Tawar Kroul runs the cartel associated with goods from the surface world. She shows few signs of her orc ancestry, since her grandfather was a half-‐orc who sired his children with a human. Slim and attractive, with long black hair and dark eyes, she has an olive complexion and a no-‐nonsense manner. Tawar deals very aggressively. Tawar’s camp includes four human assistants, as well as thirty orc bodyguards, porters, and servants. Sale Units: Alcohol (two tuns of ale or beer, a hogshead of cheap wine, or two gallons of fine wine), one crate of fruit, one gallon of perfume, fifty pounds of pepper or ginger, six pounds of saffron or cloves, a cord of lumber, one bale of cotton, twenty-‐five yards of linen, ten yards of silk. Demand Units: Five doses of poison, four obsidian daggers, one piece of fine art.
Minor Merchants In addition to the four major cartels, about a dozen individual merchants trade in a large open market in Mantol-‐Derith. These merchants deal in single items for bartered value as shown in the equipment chapter. If you can’t find a price, make one up.

Confidential information of Wizards of the Coast LLC. Do not distribute.
D&D Next Playtest ©2012 Wizards 30
Individual merchants that share a race with a cartel tend to have ideas as to what that cartel wants. Merchants from the surface have some knowledge of what the surface cartel buys. Only the Worthful, the beholder merchant, has any good ideas about the Hooded One’s desires. Addan Orshill: A human from Silverymoon, Addan sells leather armor. He is a weaselly, unpleasant fellow who is suspected of stealing from other merchants. Adreen: This young human seems cheerfully oblivious to the deadly Underdark around her. She sells exotic pets, including birds, monkeys, wild cats, and ferrets, as well as lizards, spiders, and stranger creatures from the Underdark. She dances around her stall, talking and singing to the animals. Adreen rarely sells anything, but she doesn’t seem to mind. Aphras Tirin: Although neither a noble nor a graduate of Sorcere, the magical academy of Menzoberranzan, this drow merchant has some magical talent. He sells spell components and alchemical items such as acid, alchemist’s fire, antitoxin, and poisons. He tries to convince Zarell Tahaladar to let him see the magical writings she acquires, but she is uncooperative. Clanker: An aged duergar, Clanker drapes himself in chains fastened to manacles around his ankles and wrists. He says he likes the sound. If nothing else, his distinctive style draws attention to his trade in metal tools, chains, and the like. Effran Redspur: A young duergar from Gracklstugh, Effran sells cured meats in hopes that a trader’s life will allow her to see the wider Underdark. Despite her ambition, she has barely traveled off the path between her city and the trading post. Gak Fixen: A gnarled surface gnome and a devotee of the bloodthirsty burrowing god Urdlen, Gak is as twisted and evil as his appearance suggests. For all that, he sells a wide array of musical instruments and can play entrancing tunes on most of them. Kurken Garshorn: Kurken is a bald and beardless duergar who sells metal armor. An exile from Gracklstugh, Kurken suffers all sorts of indignities from other duergar, who vandalize his stall and otherwise cause him
difficulties. He feels Mantol-‐Derith is the only place he can hope to earn a living. Mara Orshill: Addan’s wife Mara maintains a separate stall where she sells fine clothes, costumes, silk rope, and similar fine goods of cloth. She and her husband are estranged, and they are prone to loud quarrels when they meet. Mara is making plans to leave Mantol-‐Derith. The Worthful: Few beholders are merchants, but the Worthful is a rare exception. This monstrous creature trades in skilled or exotic slaves such as master artisans, trained professionals, and even adventurers. These slaves cost 100 gp each, five times the normal rate in Mantol-‐Derith. The Worthful has one dejected svirfneblin slave, a gemcutter named Jengal Tumthub. Jengal was taken in an orc raid twenty-‐five years ago, and he is ecstatic once he learns that the adventurers intend to bring him back to Blingdenstone. He hopes to see his beloved Jalless again. Url: A dejected dwarf smith, Url hates that his life has come to selling weapons in Mantol-‐Derith. He despises duergar and drow, but he is beholden to an evil Red Wizard who keeps Url’s beloved hostage. Url gives a portion of his profits and any knowledge he gathers to this wizard in exchange for his lover’s continued survival. Zarell Tahaladar: This elegant drow sells scrolls and books, including blank spellbooks and tomes that hold a tremendous variety of lore. She gets her paper from Tawar Kroul, but treats and binds it beautifully. She also has a large network of contacts that provide her with rare books. She reads and keeps more volumes than she sells.
Back to Blingdenstone If the adventurers leave Mantol-‐Derith with a load of duergar weapons, Erelda H’tithet suspects the group is working for the svirfneblin. She sends eight hobgoblin mercenaries after the characters. The mercenaries strike an hour after the adventurers first make camp.

Confidential information of Wizards of the Coast LLC. Do not distribute.
D&D Next Playtest ©2012 Wizards 31
If the adventurers capture any hobgoblins, they reveal who hired them and why. Each hobgoblin carries 5 gp, the payment for their services. The return from Mantol-‐Derith takes as much time and has the same potential for random encounters as the trek to the trading post.
Conclusion If the adventurers successfully bring a load of weapons back to Fendrick Pestle, he is very happy. Read: Fendrick whoops with glee. “These weapons,” he says, “might make the difference between life and death for us. Reclaiming the ruins will be easier, as will holding the city against future attack.” Fendrick is almost as glad to receive any other supplies the adventurers bring back. If the characters reveal why the gnomes have been kept out of Mantol-‐Derith, Fendrick takes the news to Burrow Warden Kargien for discussion. If the adventurers bring Jengal Tumthub back to the city, he is thrilled to be home and anxious to see Jalless. She gave Jengal up for dead years ago, so she is simultaneously happy and very confused to see him. Their reunion is rough, but both gnomes are grateful to the adventurers.
Appendix 1: Encounters As the adventurers travel through the environs of Blingdenstone or the nearby Underdark, use these tables to determine what hazards they encounter.
Blingdenstone Encounters Use this table when the characters are moving through uninhabited caverns of the Blingdenstone ruins (marked with a letter, A through Q). Roll 1d10 each time the adventurers enter one of these caverns. On a result of 1 to 4, a significant danger is encountered. Roll another d10, then consult the “Blingdenstone Encounters” table. BLINGDENSTONE ENCOUNTERS Roll Encounter 1–6 1d4 + 1 orcs (If you plan to run chapter 5, keep
track of how many orcs the adventurers kill.) 7 2d4 stirges 8 2d6 giant centipedes 9 2d4 fire beetles 10 1 gelatinous cube
Underdark Encounters Use the “Underdark Encounters” table while the characters are traveling in the Underdark beyond Blingdenstone but are not in the Wormwrithings. UNDERDARK ENCOUNTERS d10 Encounter 1 1 ogre 2 1 troll 3–4 2d6 + 3 giant centipedes 5–7 1d6 + 1 orcs 8–9 1d4 gnolls 10 1 gray ooze
Confidential information of Wizards of the Coast LLC. Do not distribute.
D&D Next Playtest ©2012 Wizards 32
Appendix 2: Hidden Enemy The most dangerous foe the characters might face is the drow Talabrina Duskryn, who skulks around Blingdenstone. Adventurers can run across her during any of their missions, as you choose. In convention play, if you have been handed this appendix, the dark elf appears in your adventure.
Talabrina Duskryn A treacherous and greedy dark elf (use the drow statistics), Talabrina Duskryn wears a suit of drow chainmail woven in a spiderweb pattern. Around her neck hangs her house’s insignia, a fiery sigil wrought in adamantine. Talabrina needs no reason to hate, but her loathing for the deep gnomes consumes her, driving her to commit unspeakable atrocities. More than anything, Talabrina lusts for treasure, and she spends much of her time scouring the ruins for baubles and trinkets. In her zealous mind, she believes her efforts against the svirfneblin please the Spider Queen, helping to elevate Talabrina’s status and that of her house. Two bugbear slaves serve Talabrina. The brutes obey her every command, no matter how cruel or sordid. Both are unusual—one is an albino, and the other is black as night. The gnomes suspect they have a wicked enemy in their midst. A number of scouts have gone missing, their mutilated corpses turning up days later. Kargien explains these deaths away as the work of kobolds or orcs, but he secretly and rightly fears a drow is responsible for the murders.
Using Talabrina With little interest in testing her might, Talabrina prefers to move in the shadows, making tasks more difficult for her enemies. Because she is unwilling to fight all the gnomes of Blingdenstone at once, she avoids direct
combat. That said, if the adventurers seek her out, she gives them a lesson they’ll never forget if they manage to survive. Each of the following sections describes how the drow might involve herself in any venture the characters are pursuing. Talabrina’s tactics depend on how you want to use her in the future. If you’re running this adventure as a one-‐off experience, she fights smart and takes greater risks. That’s also a viable tactic for a home game, but it can be more rewarding to keep her alive as a recurring threat.
Chapter 1 When the adventurers interact with Gallus, he begins with a much more hostile attitude. Talabrina has already tortured and killed one pech. She told the rest that the same fate awaits them if they help the svirfneblin. The adventurers must convince Gallus that they can protect the pechs. When Ogrémoch’s Bane manifests, Talabrina lurks behind a natural column nearby. If the pechs raise their protective circle, she attacks them. She kills one pech every two rounds. Each time she slays a pech, the circle is breached for the next round, as described in chapter 1 when a pech produces a magic stone. If all the pechs perish, the protective circle disappears, leaving the characters unshielded. A character who fights through Ogrémoch’s Bane to reach Talabrina takes damage as described in chapter 1, but he or she can then confront the drow and her bugbears. Characters can also launch magical attacks through the Bane, but the Bane deflects missile weapons. Once Ogrémoch’s Bane is dispersed, Talabrina is likely to withdraw.
Chapter 2 The excursion into the Wormwrithings offers Talabrina an opportunity to attack the adventurers far away from the protection of Blingdenstone. She stalks the group. Each time you roll a duplicate result on the “Wormwrithings Encounters” table, Talabrina and her bugbears attack during the encounter. She fights for two rounds, and then withdraws.

Confidential information of Wizards of the Coast LLC. Do not distribute.
D&D Next Playtest ©2012 Wizards 33
However, she tries to kill Miglin before the party can leave the Wormwrithings.
Chapter 3 Suspecting that the adventurers are going to try to reclaim the crown, Talabrina enters the House Center ahead of them. When the adventurers reach area 11, Talabrina makes sure violence breaks out as soon as possible. She then uses her ranged attack and magical powers to aid the wight against the characters. If confronted, she blows a whistle to call her servants, who arrive during the next round. She withdraws soon after. If that doesn’t happen, Talabrina departs as soon as it looks like one side is going to win the battle in the audience hall.
Chapter 4 Talabrina cannot allow the characters to reawaken the Speaking Stones. She attacks Pingtu during the ritual to revive the stones, withdrawing only if he dies or she and her bugbears are wounded. The characters have to keep Pingtu alive while they drive off Talabrina or complete the ritual. If they fail, they have to find someone else who can complete the ritual in Pingtu’s place. Pingtu: AC 14; 16 hp; pick +2 (1d6 piercing)
Chapter 5 Talabrina follows the adventurers through the caverns, skulking in the shadows. During any fight against orcs, Talabrina has a 25 percent chance to aid the orcs with her ranged attacks or magical powers. If confronted, she blows a whistle to call her servants, who arrive during the next round. She withdraws soon after.
Chapter 6 Talabrina knows that if the svirfneblin gain the weapons they seek, her mission will fail. She temporarily replaces Erelda H’tithet and refuses to trade with the adventurers, forcing them to turn to another merchant to make the trade on their behalf. If the characters obtain the weapons, Talabrina and her slaves join the hobgoblins in following and attacking the party. She withdraws as soon as she and her
slaves are wounded, or the hobgoblins are all slain.

Fragments of Evarell’s Journal For an explanation, see the sidebar on page 7. Evarell’s Journal—First Page (found in the Hall of Miners) [FRONT] Kobolds fond of pits and nets stung in a pit careful of digging noise Noise—when the earth shakes run like the wind! [BACK] When the trials begin, in soul-‐torn solitude despairing, the hunter waits alone. The companions emerge from sun-‐drenched forest eaves, embracing the swordsman at their side. Evarell’s Journal—Second Page (found in the Wormwrithings) [FRONT] The Hooded One is a monster and a gentleman appreciates fine art and simple magic might know more than he lets on Treachery is everywhere in the Dark Bazaar. [BACK] When the shadows descend, in fiend-‐sworn covenant unswerving the blighted brothers hunt, and the godborn appears, in rose-‐blessed abbey reared, arising to loose the shadowed spark.

Evarell’s Journal—Third Page (found in the House Center) [FRONT] Diminutive elementals? fey? earth spirits? Pechs Amenable—want a friendly overture Larger—definitely elementals—furious Sentient dust cloud Forget normal weapons, spells not ideal . . . Magic missile works! [BACK] When the harvest time comes, in hate-‐fueled mission grim unbending, the shadowed reapers search. The adversary strives with fiend-‐wrought enemies, opposing the twisting devils’ schemes. Evarell’s Journal—Fourth Page (found among the gnome supplies) [FRONT] Ring of standing stones Drow here—torture? rapier crossbow dagger gap rapier dagger short sword rapier [BACK] When the tempest is born, as storm-‐tossed waters rise uncaring, the promised hope still shines. And the reaver takes hold of dawn-‐born chosen’s fate, pursuing the light across the sea.
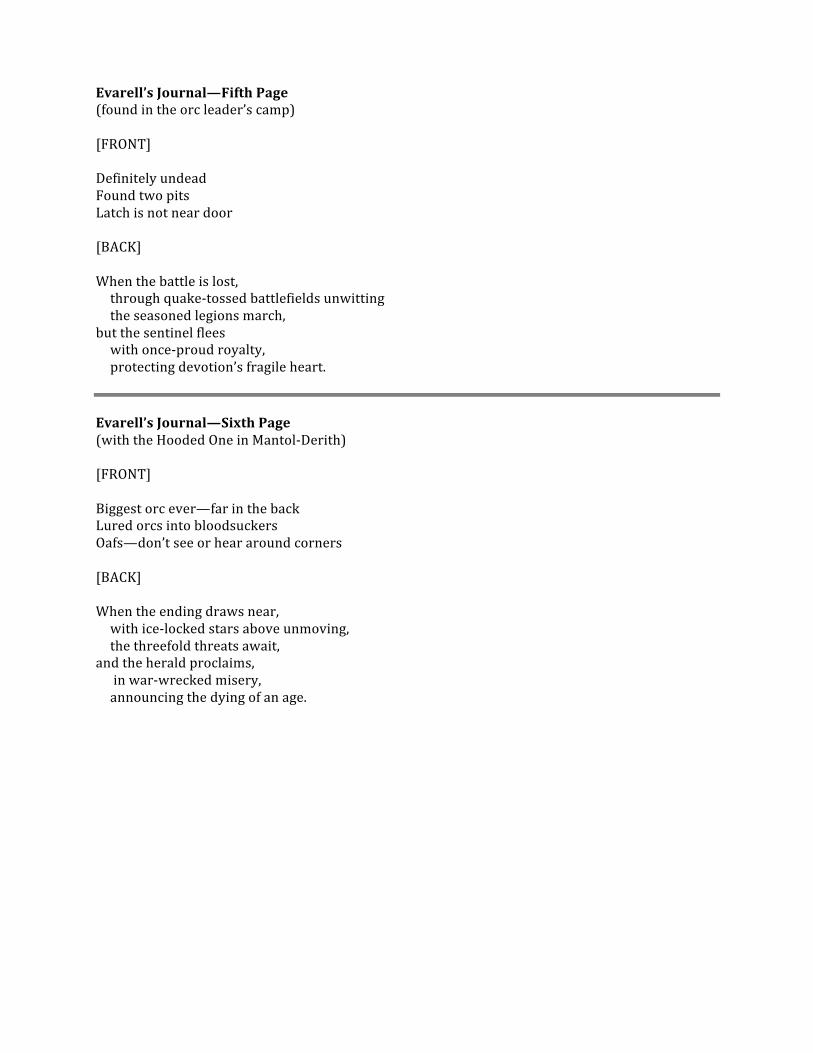
Evarell’s Journal—Fifth Page (found in the orc leader’s camp) [FRONT] Definitely undead Found two pits Latch is not near door [BACK] When the battle is lost, through quake-‐tossed battlefields unwitting the seasoned legions march, but the sentinel flees with once-‐proud royalty, protecting devotion’s fragile heart. Evarell’s Journal—Sixth Page (with the Hooded One in Mantol-‐Derith) [FRONT] Biggest orc ever—far in the back Lured orcs into bloodsuckers Oafs—don’t see or hear around corners [BACK] When the ending draws near, with ice-‐locked stars above unmoving, the threefold threats await, and the herald proclaims, in war-‐wrecked misery, announcing the dying of an age.


