CHAPTER-III
METHODOLOGY
In this chapter, Selection of subject, Selection of variables, Orientation of
subjects, Criterion measures, Reliability of data, Instrument reliability, Competency
tester, and Administration of the test and Statistical procedure for analyzing the data
have been described.
3.1. SELECTON OF SUBJECTS
For the purpose of this study Ninety Police men of “TAMIL NADU POLICE
ACADEMY” at KOLLAPAKKAM, VANDALUR, CHENNAI were selected as
subjects, their age was ranged from 30 to 45 years.
All the subjects were assigned to two Experimental groups (A and B) and one
Control group (C), each consisting 30 subjects. Group A and B were treated as
experimental group and named,
Group A – Twelve weeks - Yogic practices of Package - I.
Group B – Twelve weeks - Yogic practices of Package - II.
Group C -- Control group.
3.2. SELECTIONS OF VARIABLES
The researcher reviewed the available scientific literature pertaining to the
Suryanamaskar, Asana, Pranayama, Bandha, Mudra and Transcendental Meditation
on selected Health fitness components, Physiological, and Psychological variables.
In the present study following variables were selected.
81 3.2.1. DEPENDENT VARIABLES
a) Health fitness components (Health related fitness)
Endurance
Strength
Flexibility
Body composition
b) Physiological variables
Resting pulse rate
VO2 Max
Breath holding time
Blood pressure
c) Psychological variables
Anxiety
Job satisfaction
Job involvement
Organizational climate

82 3.2.2. INDEPENDENT VARIABLES
The two different packages (I & II) of yogic practices are selected on the basis
of the difficulty. The practices are simple can perform easily by all the Police men.
YOGIC PRACTICES OF PACKAGE - I (GROUP - A)
(Swami Sathyananda Saraswathi)
Loosening Exercises
Suryanamaskar
Asana
Pranayama
Mudra
Transcendental Meditation
YOGIC PRACTICES OF PACKAGE - II (GROUP - B)
(Swami Kuvalayananda)
Loosening Exercises
Asana
Pranayama
Bandha
Mudra
Relaxation

83 3.3. EXPERIMENTAL DESIGN
The two methods of yogic training given to Experimental groups A & B and
Control group C not given any kind of yogic practices.
After the experimental period of Twelve weeks in progression, post test scores
were obtained from all the three groups. The differences between initial and final
scores on Health fitness components, Physiological, and Psychological variables
considered as the effect of varied packages (I & II) of yogic training on subjects. The
mean differences were tested for significance using Analysis of Covariance
(ANCOVA)
3.4. PILOT STUDY:
The pilot study was conducted with 90 subjects and the difficulties were noted
and rectified. The calculated intra-class correlation of the pilot study shows that there
was significant difference in Health fitness components like Endurance, Strength,
Flexibility, Body composition, Physiologically in Resting pulse rate,VO2 max, Breath
holding time, Blood pressure, Psychologically in Anxiety, Job satisfaction, Job
involvement, Organizational climate. This enabled the investigator to adopt suitable
training schedule for the study.
3.5. CRITERION MEASURES
a). Health fitness components
Endurance measured by “Bent Knee Sit-Ups Test”.
Strength measured by “Push- Ups Test”
Flexibility measured by “Sit and Reach Test”
Body composition measured by “Body Mass Index (BMI)”.
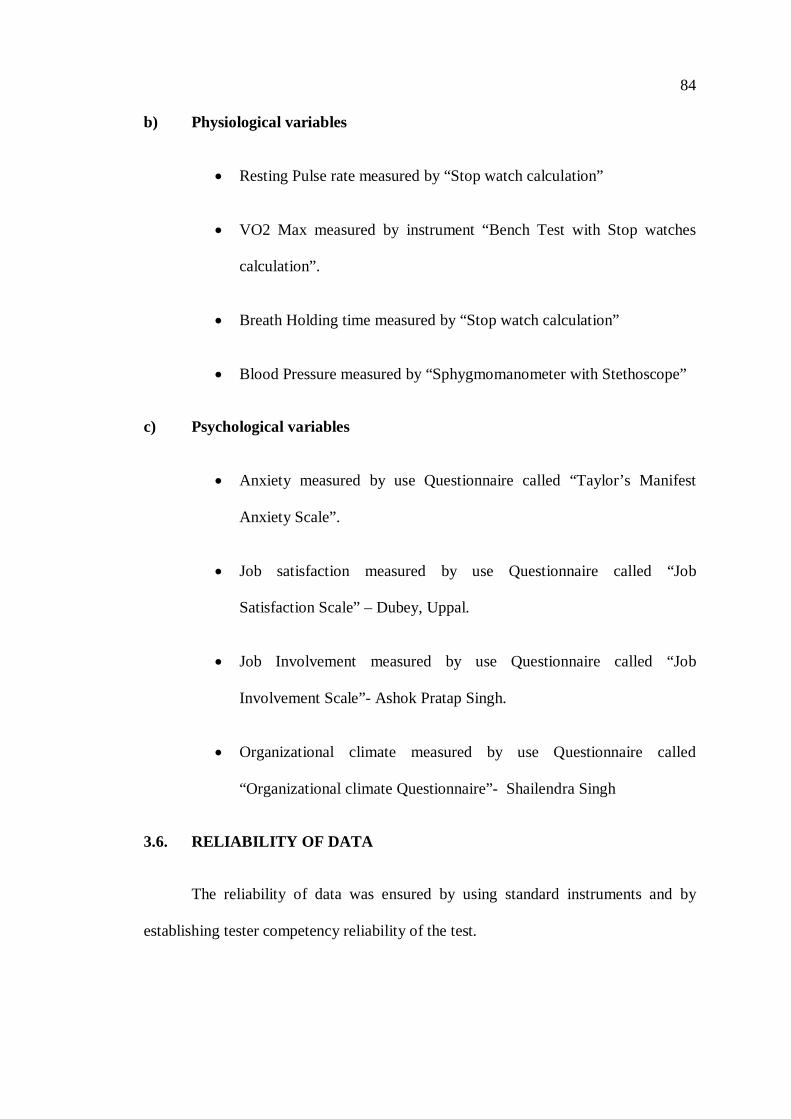
84 b) Physiological variables
Resting Pulse rate measured by “Stop watch calculation”
VO2 Max measured by instrument “Bench Test with Stop watches
calculation”.
Breath Holding time measured by “Stop watch calculation”
Blood Pressure measured by “Sphygmomanometer with Stethoscope”
c) Psychological variables
Anxiety measured by use Questionnaire called “Taylor’s Manifest
Anxiety Scale”.
Job satisfaction measured by use Questionnaire called “Job
Satisfaction Scale” – Dubey, Uppal.
Job Involvement measured by use Questionnaire called “Job
Involvement Scale”- Ashok Pratap Singh.
Organizational climate measured by use Questionnaire called
“Organizational climate Questionnaire”- Shailendra Singh
3.6. RELIABILITY OF DATA
The reliability of data was ensured by using standard instruments and by
establishing tester competency reliability of the test.
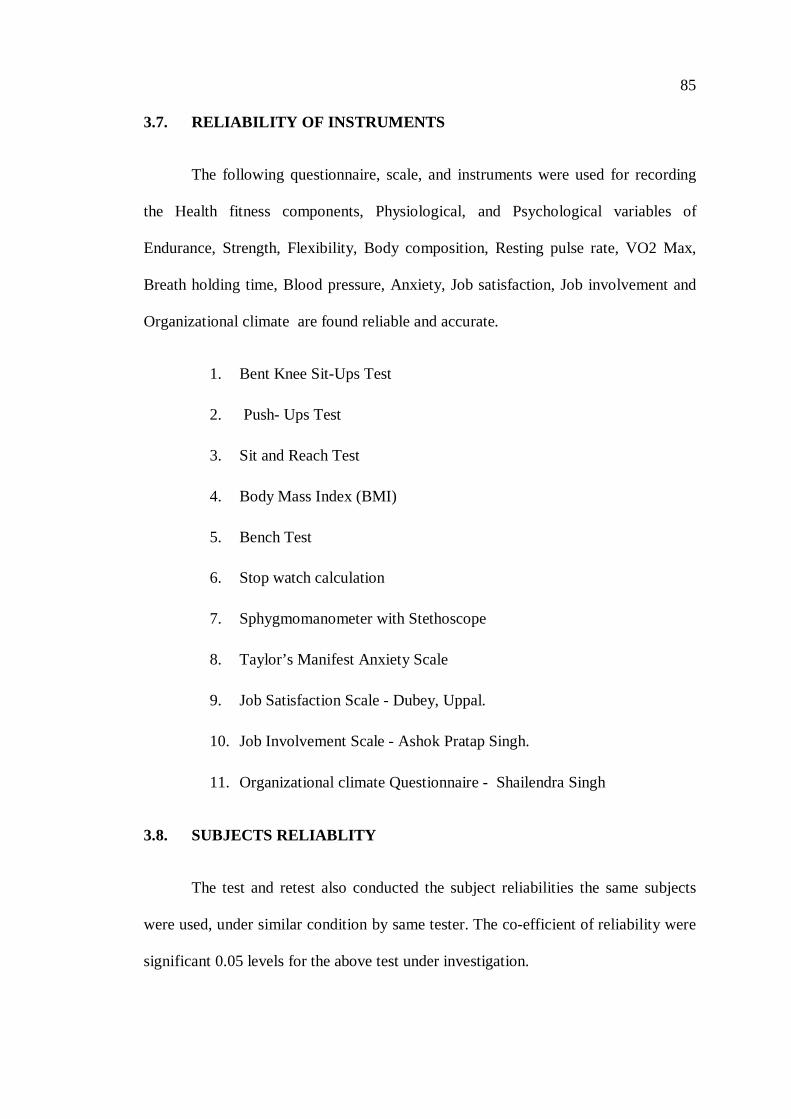
85 3.7. RELIABILITY OF INSTRUMENTS
The following questionnaire, scale, and instruments were used for recording
the Health fitness components, Physiological, and Psychological variables of
Endurance, Strength, Flexibility, Body composition, Resting pulse rate, VO2 Max,
Breath holding time, Blood pressure, Anxiety, Job satisfaction, Job involvement and
Organizational climate are found reliable and accurate.
1. Bent Knee Sit-Ups Test
2. Push- Ups Test
3. Sit and Reach Test
4. Body Mass Index (BMI)
5. Bench Test
6. Stop watch calculation
7. Sphygmomanometer with Stethoscope
8. Taylor’s Manifest Anxiety Scale
9. Job Satisfaction Scale - Dubey, Uppal.
10. Job Involvement Scale - Ashok Pratap Singh.
11. Organizational climate Questionnaire - Shailendra Singh
3.8. SUBJECTS RELIABLITY
The test and retest also conducted the subject reliabilities the same subjects
were used, under similar condition by same tester. The co-efficient of reliability were
significant 0.05 levels for the above test under investigation.
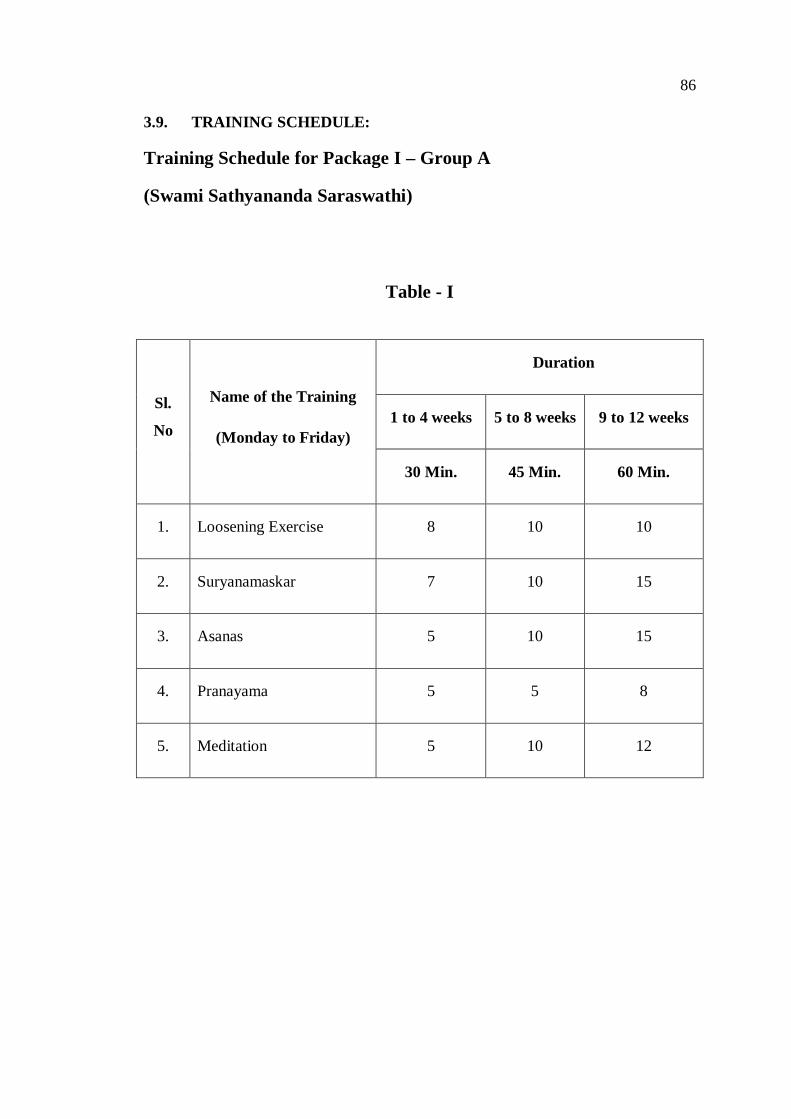
86 3.9. TRAINING SCHEDULE:
Training Schedule for Package I – Group A
(Swami Sathyananda Saraswathi)
Table - I
Duration
1 to 4 weeks 5 to 8 weeks 9 to 12 weeks Sl.
No
Name of the Training
(Monday to Friday)
30 Min. 45 Min. 60 Min.
1. Loosening Exercise 8 10 10
2. Suryanamaskar 7 10 15
3. Asanas 5 10 15
4. Pranayama 5 5 8
5. Meditation 5 10 12

87 Training Schedule for Package II – Group B
(Swami Kuvalayananda)
Table I.a
Duration
1 to 4 weeks 5 to 8 weeks 9 to 12 weeks Sl.
No
Name of the Training
(Monday to Friday)
30 Min. 45 Min. 60 Min.
1. Loosening Exercise 8 10 10
2. Asanas 5 10 20
3. Pranayama 5 10 15
4. Bandha 5 5 5
5. Relaxation 7 10 10
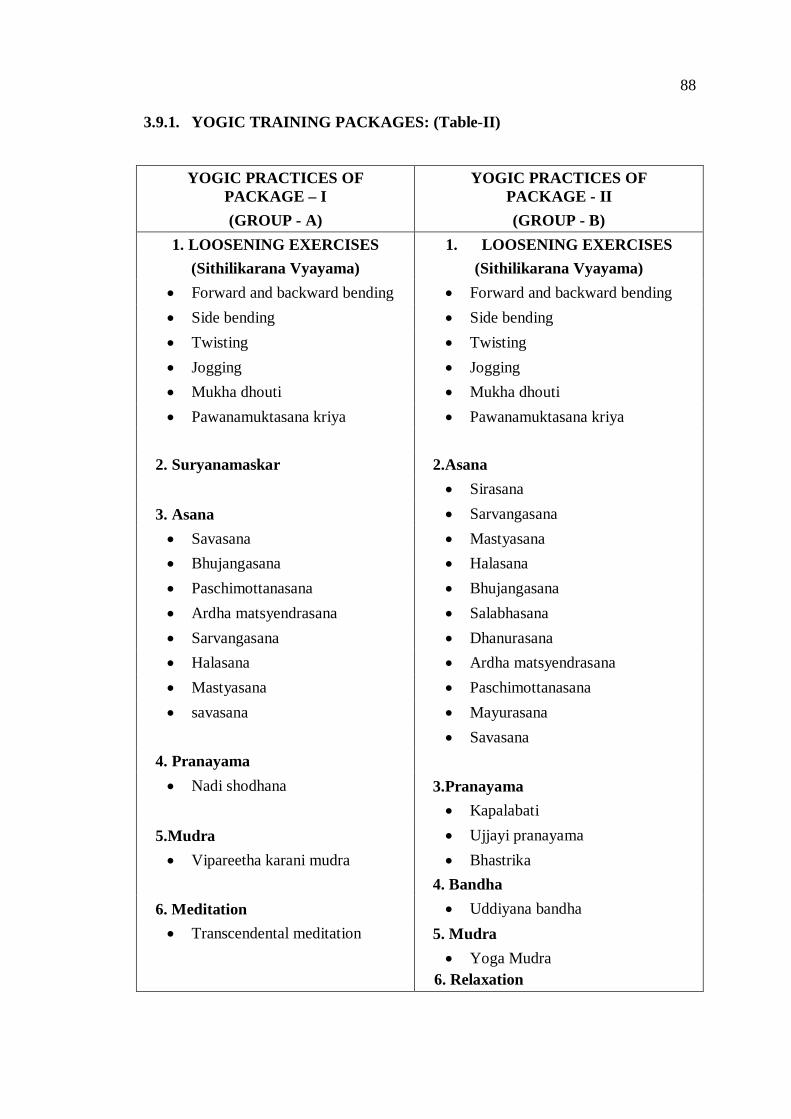
88 3.9.1. YOGIC TRAINING PACKAGES: (Table-II)
YOGIC PRACTICES OF PACKAGE – I
YOGIC PRACTICES OF PACKAGE - II
(GROUP - A) (GROUP - B) 1. LOOSENING EXERCISES 1. LOOSENING EXERCISES
(Sithilikarana Vyayama) (Sithilikarana Vyayama) Forward and backward bending Forward and backward bending Side bending Side bending Twisting Twisting Jogging Jogging Mukha dhouti Mukha dhouti Pawanamuktasana kriya Pawanamuktasana kriya
2. Suryanamaskar 2.Asana
Sirasana 3. Asana Sarvangasana Savasana Mastyasana Bhujangasana Halasana Paschimottanasana Bhujangasana Ardha matsyendrasana Salabhasana Sarvangasana Dhanurasana Halasana Ardha matsyendrasana Mastyasana Paschimottanasana savasana Mayurasana
Savasana 4. Pranayama Nadi shodhana 3.Pranayama
Kapalabati 5.Mudra Ujjayi pranayama Vipareetha karani mudra Bhastrika
4. Bandha 6. Meditation Uddiyana bandha Transcendental meditation 5. Mudra
Yoga Mudra
6. Relaxation

89 3.9.1.1. YOGIC PRACTICES OF PACKAGE – I (GROUP - A)
(Swami Sathyananda Saraswathi)
1. LOOSENING EXERCISES (Sithilikarana Vyayama)
Some loosening and stretching exercise called Sithilikarana Vyayama are
introduced with help to make the body supple and flexible so that they aid in Asanas
that are designed to conserve the energies and transform them to subtle forms of
mental energies.
The first series of Sithilikarana Vyayama are meant to achieve this goal of a
good physique by proper training of mainly the muscles and the spine. They not only
help in performing the asanas better by loosening the joints for patients of different
ailments, but they also help in building up stamina and tolerance.
Sithilikarana Vyayama as the name indicates are loosening exercises
performed normally with speed and repetitions. These dynamic practices are akin to
conventional Physical training exercises except that most of these practices involve
flexing of the spine.
a) Forward and backward bending
1. Come to sthiti tadasana.
2. Stretch the arms straight above the head with the palms facing forward.
3. Inhale and bend backwards with arms stretched above the head.
4. While exhaling bend forward as much as possible.
5. While inhaling come up and bend back wards and go on rapidly to
forward bending with exhalation.
6. Repeat 20 times with increasing speeds.

90
7. Gradually slow down and ultimately stop the practice.
b) Side Bending
1. Come to sthiti tadasana.
2. Keep the legs about one meter apart.
3. Raise the hand sideways parallel to the ground while inhaling.
4. Bend to the right till the right hand touches the right heel while
exhaling.
5. Bend in the same plane.
6. Look at the palm of the left hand directing forwards. Come up with
inhalation.
7. Repeat 4 to 5 times to the right and left side alternate.
8. Relax in sithila tadasana.
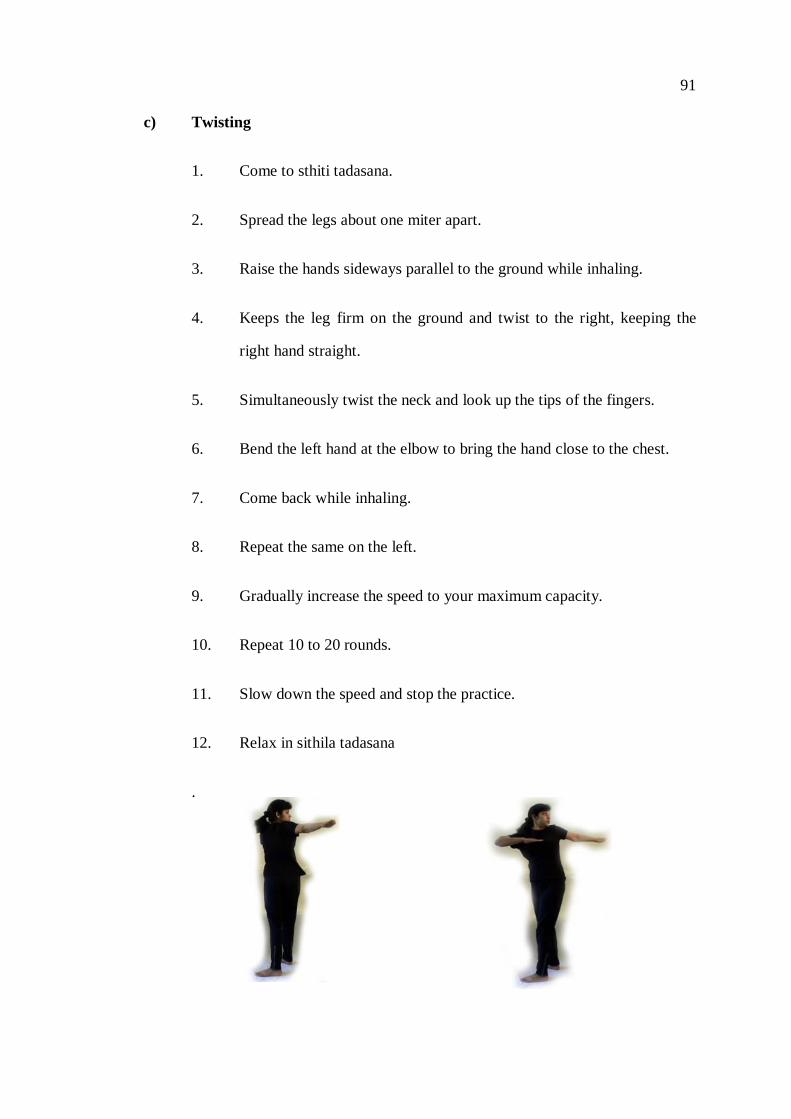
91 c) Twisting
1. Come to sthiti tadasana.
2. Spread the legs about one miter apart.
3. Raise the hands sideways parallel to the ground while inhaling.
4. Keeps the leg firm on the ground and twist to the right, keeping the
right hand straight.
5. Simultaneously twist the neck and look up the tips of the fingers.
6. Bend the left hand at the elbow to bring the hand close to the chest.
7. Come back while inhaling.
8. Repeat the same on the left.
9. Gradually increase the speed to your maximum capacity.
10. Repeat 10 to 20 rounds.
11. Slow down the speed and stop the practice.
12. Relax in sithila tadasana
.
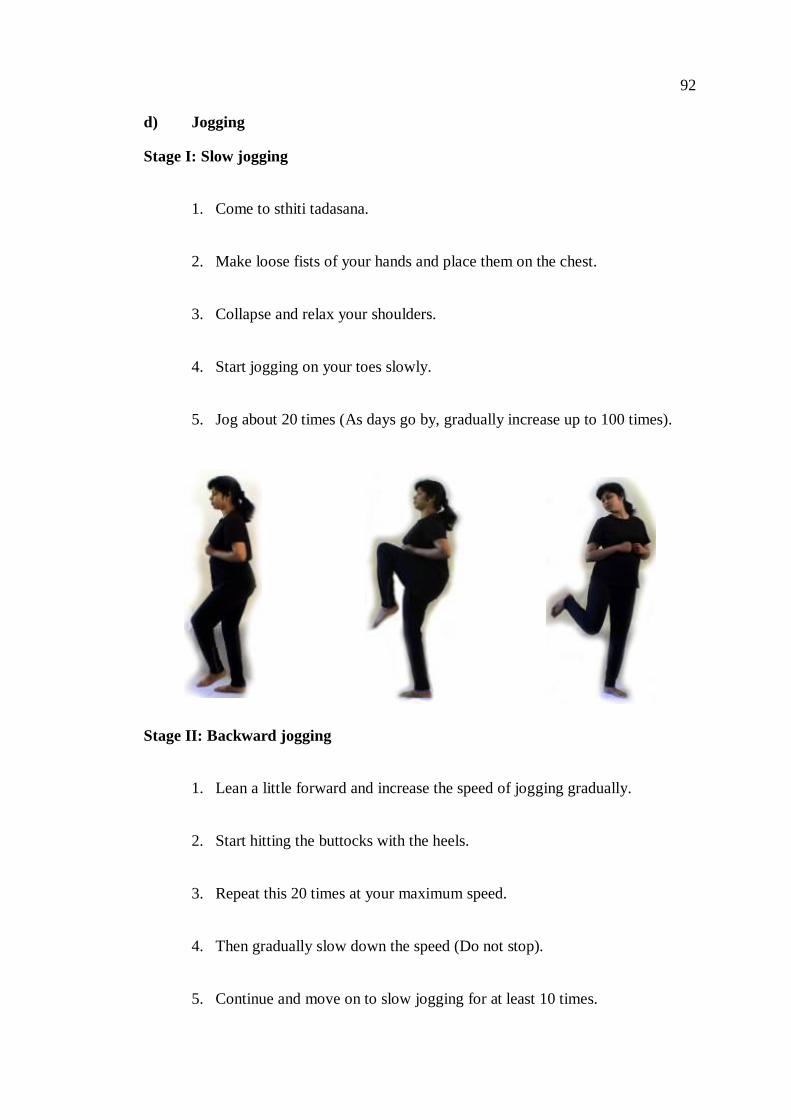
92 d) Jogging
Stage I: Slow jogging
1. Come to sthiti tadasana.
2. Make loose fists of your hands and place them on the chest.
3. Collapse and relax your shoulders.
4. Start jogging on your toes slowly.
5. Jog about 20 times (As days go by, gradually increase up to 100 times).
Stage II: Backward jogging
1. Lean a little forward and increase the speed of jogging gradually.
2. Start hitting the buttocks with the heels.
3. Repeat this 20 times at your maximum speed.
4. Then gradually slow down the speed (Do not stop).
5. Continue and move on to slow jogging for at least 10 times.

93 Stage III: Forward jogging
1. Lean backward a little and now as you increase the speed again try to raise
the knees higher and higher.
2. Raise the knees forwards to reach the chest level.
3. Repeat 20 times at your maximum speed.
4. Slow down the practice coming back to the stage of slow jogging again.
5. Continue slow jogging for a few rounds, count 10 times.
Stage IV: Side jogging
1. Gradually increase the speed taking the heels side ways.
2. As the speed increases bring the heels as close to the elbows as possible.
3. Repeat this movement 20 times at your maximum speed.
4. Gradually slow down to come back to slow jogging stage.
5. Keep jogging a few more rounds (10 times) and finally stop the practice.
e) Mukha Dhouti
1. Stand with forward bend of the trunk, palm on your thighs and legs
about a meter apart.
2. Inhale deeply and expel the air forcibly as in a jet through the mouth
continuously.
3. Repeat several times.

94 f) Pawanamuktasana Kriya
Stage 1: Leg Rotation
1. Come to supine posture.
2. While inhaling raise the right leg up to 45° positions, without bending
the knee. Keep the left leg firm in the ground.
3. At 45° exhale and again while inhaling raise the leg further up to 90°
positions.
4. Now while exhaling, bend the right leg at the knee and pull the right
knee towards the chest with the hands (fingers interlocked) and lift the
head simultaneously and place the chin on the right knee. Keep your
breathing normal.
5. Maintain with lift the left leg and rotate 5 rounds clockwise and 5
round anti-clockwise without bending the knee with normal breathing.
6. Then lower the left leg to the ground.
7. Now while inhaling release the hands
bring the head back on to the ground and
straighten the right leg.
8. While exhaling lower the right leg to
45°position.
9. Here inhale and while exhaling again lower the right leg further down
to the ground. Relax for a while.
10. Repeat the same practice on the left side.
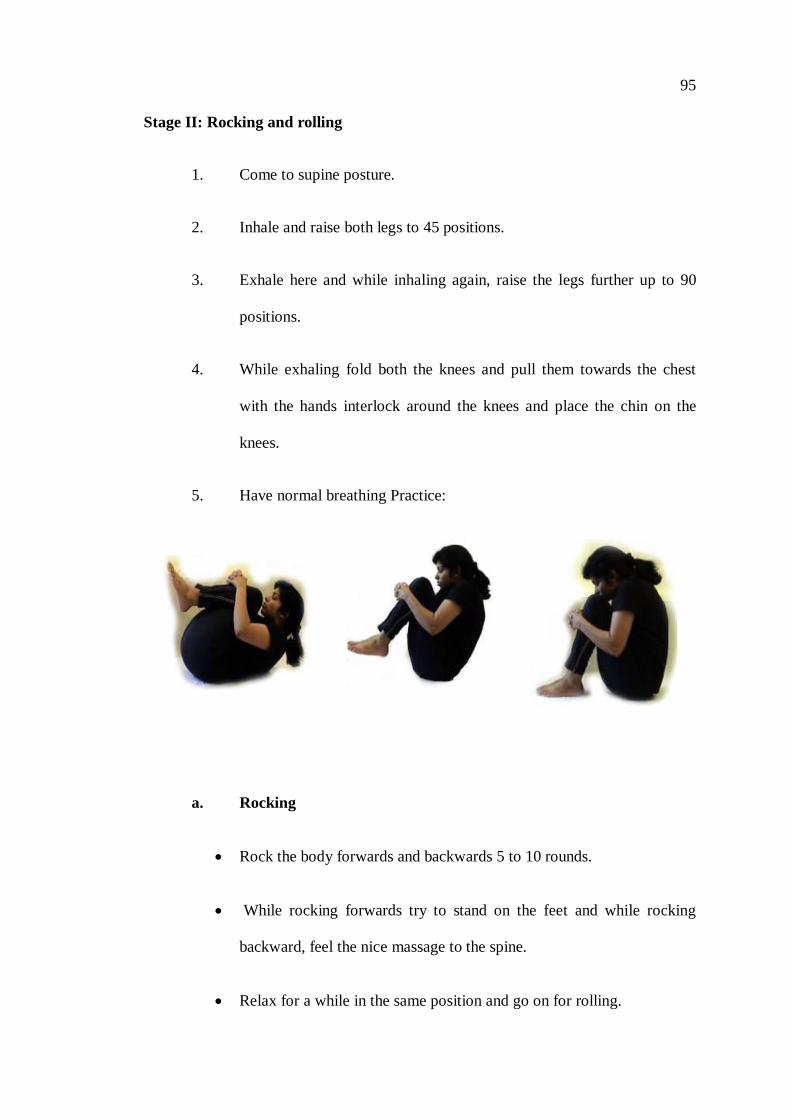
95 Stage II: Rocking and rolling
1. Come to supine posture.
2. Inhale and raise both legs to 45 positions.
3. Exhale here and while inhaling again, raise the legs further up to 90
positions.
4. While exhaling fold both the knees and pull them towards the chest
with the hands interlock around the knees and place the chin on the
knees.
5. Have normal breathing Practice:
a. Rocking
Rock the body forwards and backwards 5 to 10 rounds.
While rocking forwards try to stand on the feet and while rocking
backward, feel the nice massage to the spine.
Relax for a while in the same position and go on for rolling.

96
b. Rolling
Roll the entire body to the right until the right elbow touches the
ground.
Then roll to the left until the left elbow touches the ground.
Repeat this rolling alternately to the right and left 5 rounds.
Stop the movement.
Inhaling, release the hands, bring the head on to the ground and
straighten both the legs to 90.
While exhaling, lower the legs slowly to 45 positions.
Inhale here and while exhaling again lower the legs further down till
the legs are on the ground.
Relax in savasana.
SURYANAMASKAR
Suryanamaskar (an ancient Indian yoga) is the art of solar vitalization. It is a
complete meditative technique in itself as it includes Asanas, Pranayama, Mantras and
Mudras. It has got three aspects: form, vital energy and rhythm. It is the easiest way
for a person to get used to Yoga. It should be done along with chanting of mantras in
every posture. In simple words, Suryanamaskar is a combination of 12 different
postures, followed in a particular sequence with a specific breathing pattern. It helps
an individual to vitalize and unblock the whole system. It reduces fat from almost all
parts of the body, as it stretches each and every muscle and tones it.
97
Wash your face & hands after waking up. Then go to a place where you can
stand facing the rising Sun. Fold your hands as in "Namaste". With your eyes closed,
pray silently to Lord Sun -
"Hey Surya Dev, Mera Pranaam sweekar karen , Samasta Bhaagya Janit
Sankaton Se meri raksha karen" ( O Lord Sun , Salutation to you . Please protect me
from all ill effects that fate may have in store for me).
You can keep a small carpet or piece of cloth to stand on. But it should be
clean & kept safely after the entire activity is over.
There are 12 names of lord Sun that need to be chanted during the entire
exercise. One name/prayer before commencement of each round. Each round consists
of 12 postures/positions and there are 12 rounds.
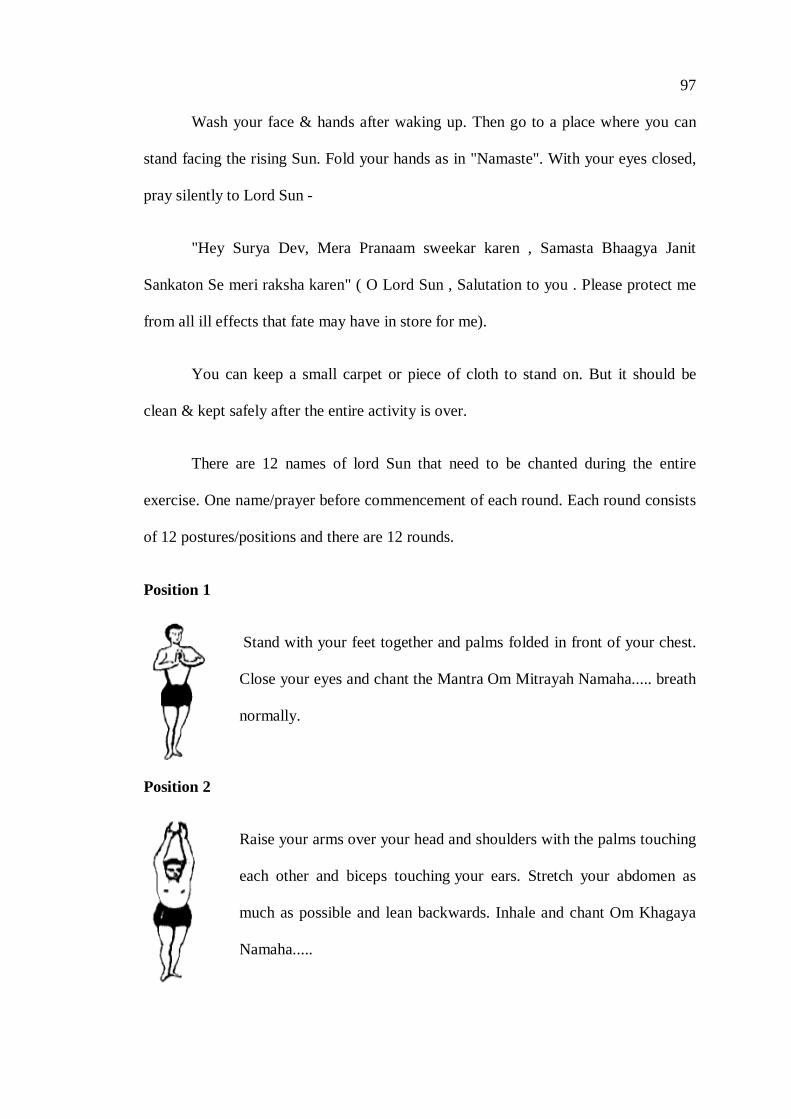
Position 1
Stand with your feet together and palms folded in front of your chest.
Close your eyes and chant the Mantra Om Mitrayah Namaha..... breath
normally.
Position 2
Raise your arms over your head and shoulders with the palms touching
each other and biceps touching your ears. Stretch your abdomen as
much as possible and lean backwards. Inhale and chant Om Khagaya
Namaha.....

98 Position 3
Bend forward and place your palms at the side of your feet.
Touch the knee with your forehead and exhale deeply, while
chanting Om Suryaya Namaha.....
Position 4
Take one leg back and place the other leg in the front with
palms firm on the ground. Raise your head and inhale, while
chanting Om Bhanuvae Namaha.....
Position 5
Bring the leg that was in front next to other one and keep the
hips off the floor, with your hands supporting the body in a
push-up position. Exhale and chant Om Ravi Namaha.....
Position 6
Lower your knees, chest and forehead, with your palms firmly
on the ground next to your chest and elbows bent upwards.
Hold the breath here and chant Om Pushnae Namaha.....
Position 7
Lower your waist and raise your upper body. Look upwards
and keep your arms straight. Inhale and chant Om Hiranya-
Garbhaya Namaha.....

99 Position 8
Raise your hips and bring your head to the floor with eyes on
the navel and heel on the floor - like an inverted 'V'. Exhale
and chant Om Marichiye Namaha.....
Position 9
In this step the posture is the same as in step 4. Inhale and
chant Mantra Om Adityaya Namaha.
Position 10
In this step the posture is the same as in step 3. Exhale while
chanting Om Savitre Namaha.....
Position 11
In this step the posture is the same as in step 2. Inhale and chant
Om Arkaya Namaha.....
Position 12
In this step the posture is the same as in step 1. Breathe
normally and chant Om Bhaskaraya Namaha.....
100 Surya Namaskar Benefits
When performed properly, Surya Namaskar gives immense benefits and
purifies the body, mind and soul. Following are the benefits of Surya Namaskar:
The strength in the back and legs is increased to a great extent. The waist
is shaped perfectly and any skin disorder is cured off completely. When
done with immense concentration, it increases confidence and boosts the
personality.
Any disease or disorder of the throat is corrected and the food pipe or
esophagus is strengthened. Eyes are made stronger and sharper and the
vision improves.
The digestive system and the stomach become stronger and improve the
overall metabolism. Your body becomes balanced with the correct
amount of energy being released whenever wanted.
Due to the stretching, the intestines are strengthened and the abdomen
walls become stronger.
The back muscles are toned up and strengthened to a great extent and the
spine and arms become stronger.
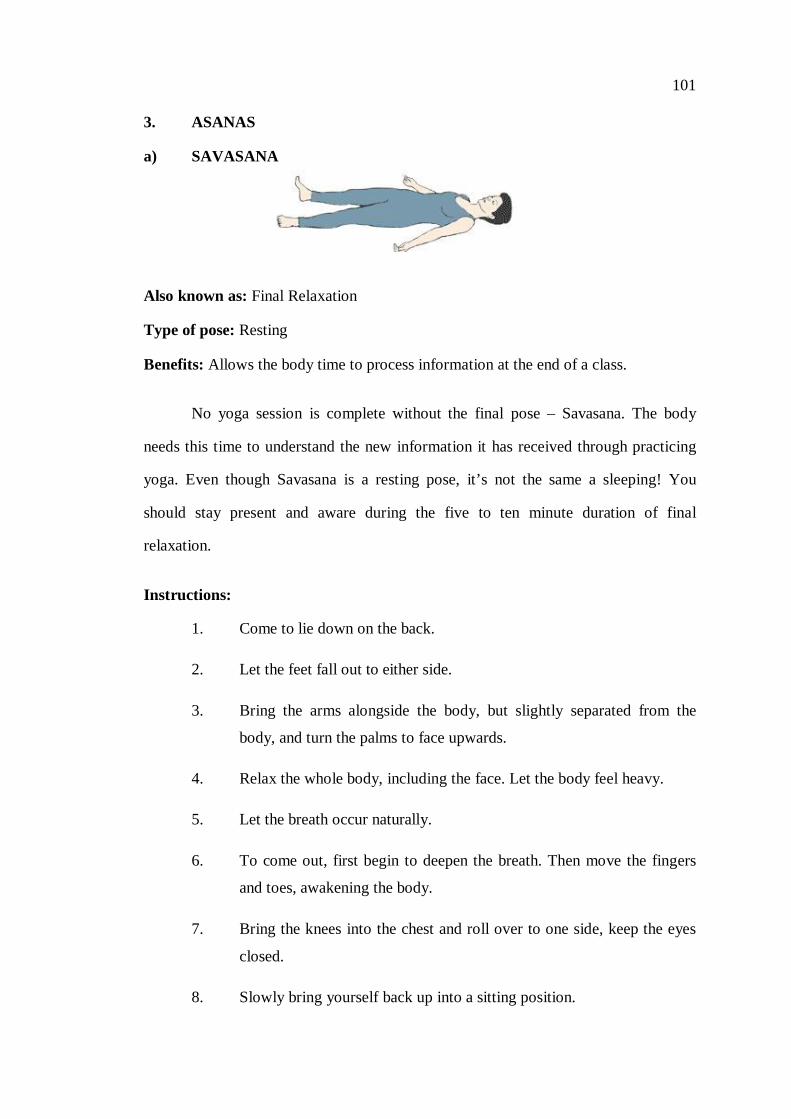
101 3. ASANAS
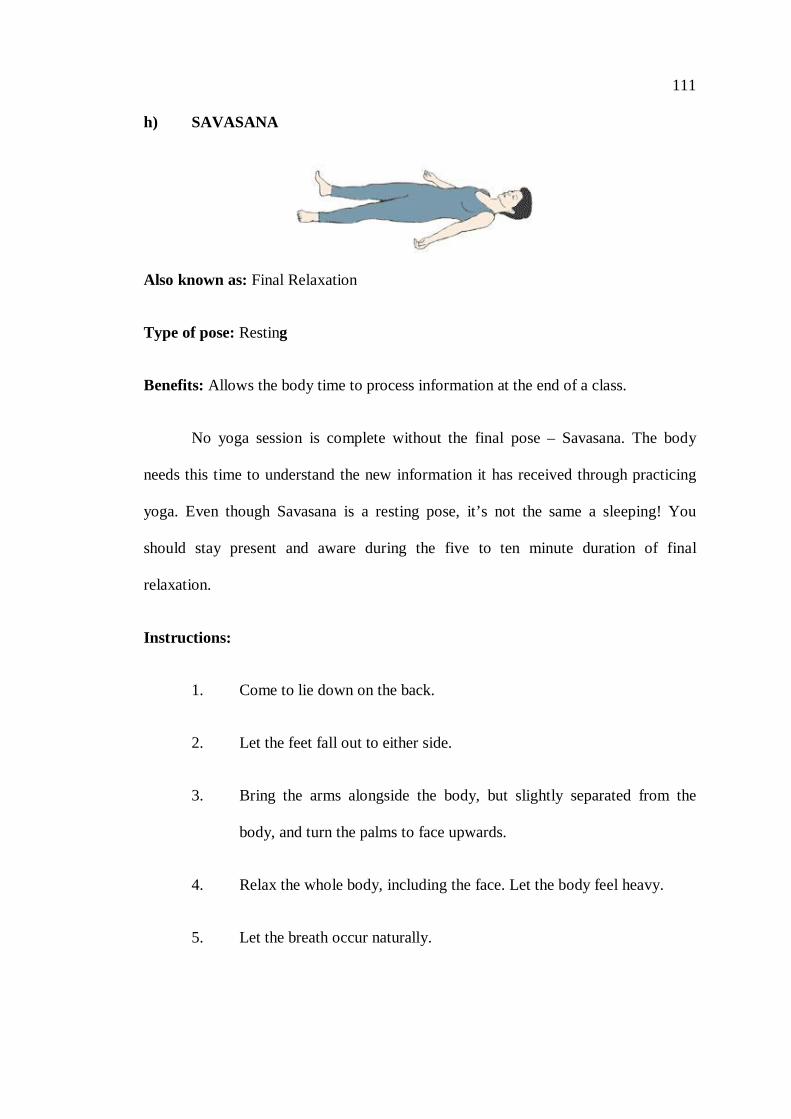
a) SAVASANA
Also known as: Final Relaxation
Type of pose: Resting
Benefits: Allows the body time to process information at the end of a class.
No yoga session is complete without the final pose – Savasana. The body
needs this time to understand the new information it has received through practicing
yoga. Even though Savasana is a resting pose, it’s not the same a sleeping! You
should stay present and aware during the five to ten minute duration of final
relaxation.
Instructions:
1. Come to lie down on the back.
2. Let the feet fall out to either side.
3. Bring the arms alongside the body, but slightly separated from the
body, and turn the palms to face upwards.
4. Relax the whole body, including the face. Let the body feel heavy.
5. Let the breath occur naturally.
6. To come out, first begin to deepen the breath. Then move the fingers
and toes, awakening the body.
7. Bring the knees into the chest and roll over to one side, keep the eyes
closed.
8. Slowly bring yourself back up into a sitting position.

102 b) BHUJANGASANA
Technique:-
1. Take prone lying position, legs together, toes together, pointing outward,
hands by the side of the body, fingers together palm facing upward and
forehead resting on the
2. Fold hands at the elbows, place palms on the ground near each side of the
shoulder, thumb should be under the armpit.
3. Bring chin forward and place it on the ground. Gaze in front.
4. Raise chin and turn head backward as much as possible. Raise the thorax
turning supine backward upto the navel. Do not raise navel.
5. Maintain the posture for sometime. Then slowly bring your body on the
ground, starting form upper part of the navel region, thorax shoulder, chin
and lastly place the forehead on the ground.
6. Now, relax your hands and place them by the either side of the thighs
103 Benefits:-
This effects the muscles of the body.
"It is beneficial in flatulence after meals.
It is more effective for Asthma, Dyspepsia and Vata diseases and helps in
keeping the spine flexible.
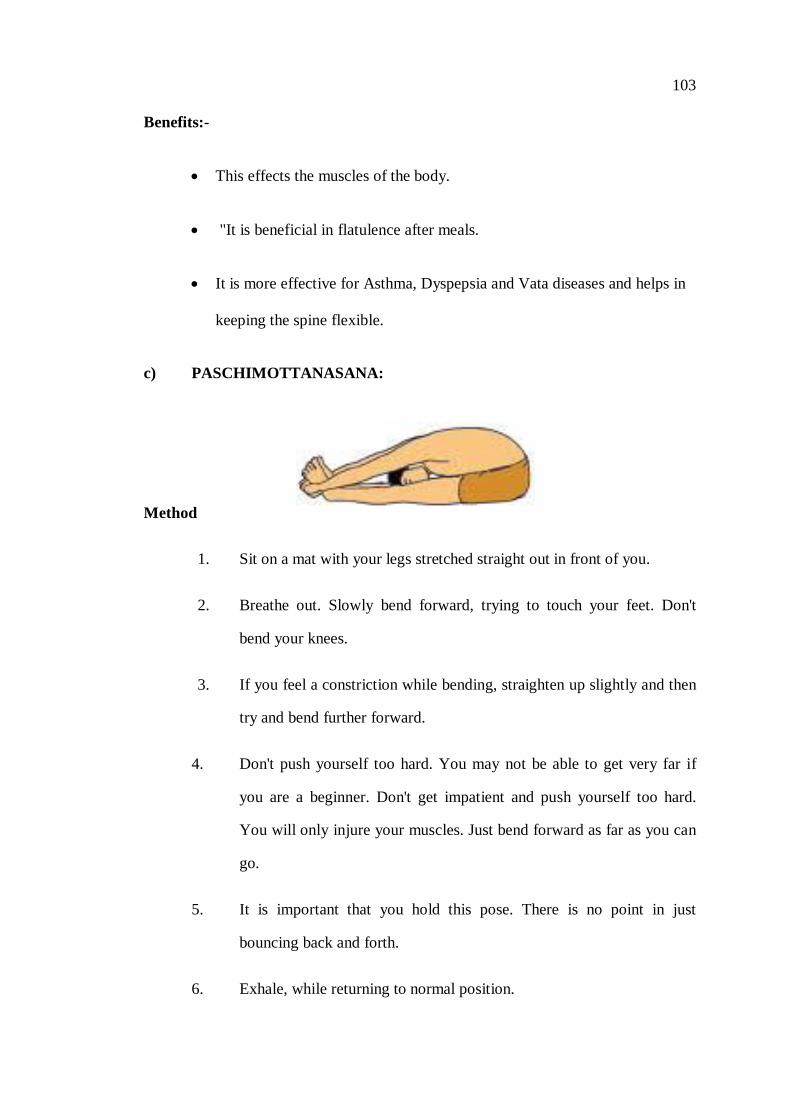
c) PASCHIMOTTANASANA:
Method
1. Sit on a mat with your legs stretched straight out in front of you.
2. Breathe out. Slowly bend forward, trying to touch your feet. Don't
bend your knees.
3. If you feel a constriction while bending, straighten up slightly and then
try and bend further forward.
4. Don't push yourself too hard. You may not be able to get very far if
you are a beginner. Don't get impatient and push yourself too hard.
You will only injure your muscles. Just bend forward as far as you can
go.
5. It is important that you hold this pose. There is no point in just
bouncing back and forth.
6. Exhale, while returning to normal position.
104 Benefits
Stretches the back and spine
Stretches the shoulders
Stretches the hamstrings
Beneficial for the kidneys, liver, ovaries and uterus. (It is thus a must
for women. It also helps ease menstrual discomfort.)
Beneficial for diabetics and improves digestion.
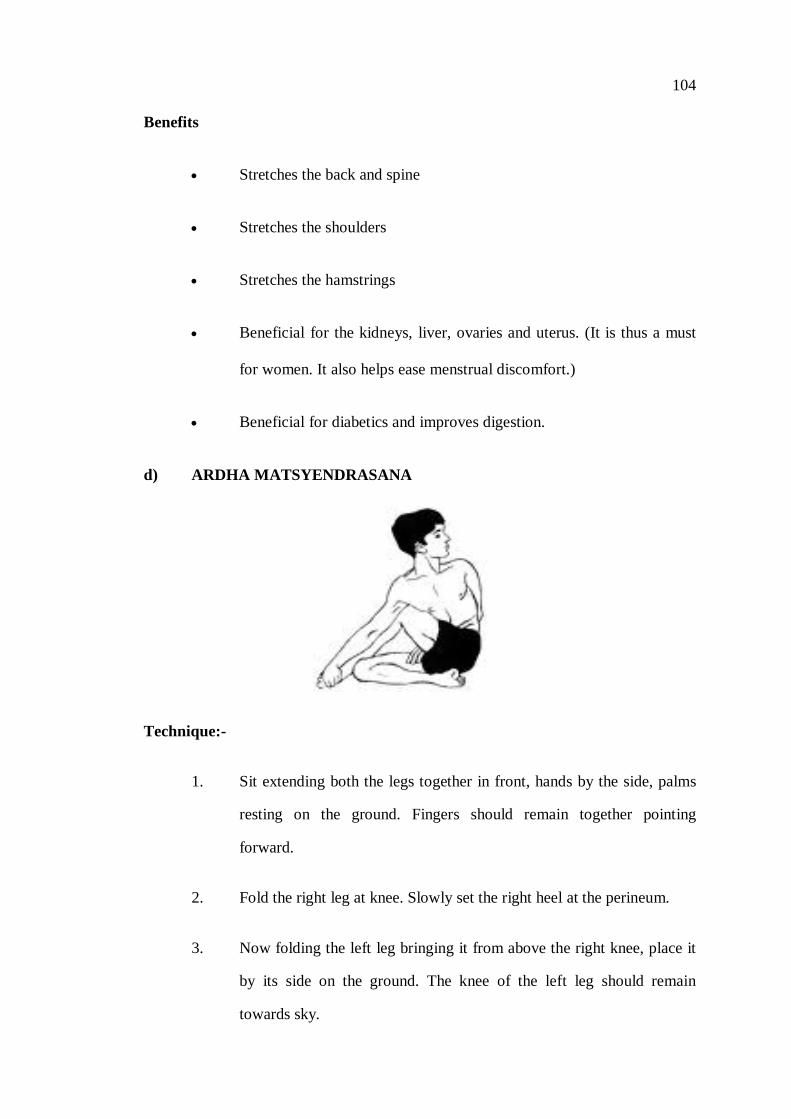
d) ARDHA MATSYENDRASANA
Technique:-
1. Sit extending both the legs together in front, hands by the side, palms
resting on the ground. Fingers should remain together pointing
forward.
2. Fold the right leg at knee. Slowly set the right heel at the perineum.
3. Now folding the left leg bringing it from above the right knee, place it
by its side on the ground. The knee of the left leg should remain
towards sky.
105
4. Now bring the right hand on the left side of the left knee. The left knee
should remain at the left side of the right armpit.
5. Now straighten the right hand and hold the toe or ankle of the left leg.
6. Twisting the body to the left side, look backwards, place the left hand
bringing it from the back on the right thigh. Gaze should be towards
back.
7. While returning to the original position first release the hand from the
thigh and turn head forward.
8. Now bring the back to normal position after loosening the right hand.
9. Bring the left leg in original position.
10. Now bring the right leg also original position.
11. Repeat it similarly from the other side by folding the left leg first.
Benefits:-
It is very much useful in constipation and dyspepsia.
This Asana improves liver efficiency and removes debility of kidney.
It is very useful in diabetes.
It is very beneficial for the muscles of shoulder and back.
Those suffering from stiffness in spine should practice it very
carefully.

106 e) SARVANGASANA
The Sanskrit name for this posture sarvangasana means 'all the body'.
Technique
1. Lie flat on your back. Inhale deeply while raising your legs and spine
until the toes point to the ceiling.
2. The body rests on the shoulders and the back of the neck. The body is
supported by the hands, which are placed on the center of the spine
between the waist and the shoulder blades. Keep your spine and legs
straight.
3. Breathe slowly and deeply with the abdomen and concentrate on the
thyroid gland. On a male, the thyroid gland is located behind the adams
apple. For women, it is located in the same area which is a few inches
above the sternal notch (hollow of the neck where the neck joins the
rest of the body.) or approximately half way up the neck from the
sternal notch. Stay in this position for about two minutes.

107
4. To come out of this posture, just bend your knees, curve your back and
slowly return to lying on the floor while exhaling. First bend your
knees, put the palms on the floor, then curving the spine, gradually
unfold it the way one unrolls a carpet. When your entire back touches
the floor, straighten the knees, take a deep breath and slowly lower
your legs to the ground while breathing out.
5. If you wish, you may go straight into the next posture (the 'reverse
posture') instead of lying down.
Benefits
The main benefit of the shoulder stand is to get the thyroid gland
working at peak efficiency. It's the thyroid gland which is mainly
responsible for your correct weight and youthful appearance.
The shoulder stand also regulates the sex glands.
It vitalizes the nerves, purifies the blood and promotes good
circulation, strengthens the lower organs and helps them to stay in
place.
It gives a healthy stretch to the neck muscles.
It is beneficial for people suffering from poor circulation, constipation,
indigestion, asthma and reduced virility.
This pose is especially recommended for women after childbirth and
for those suffering from painful menstruation, other female disorders,
and seminal weakness.
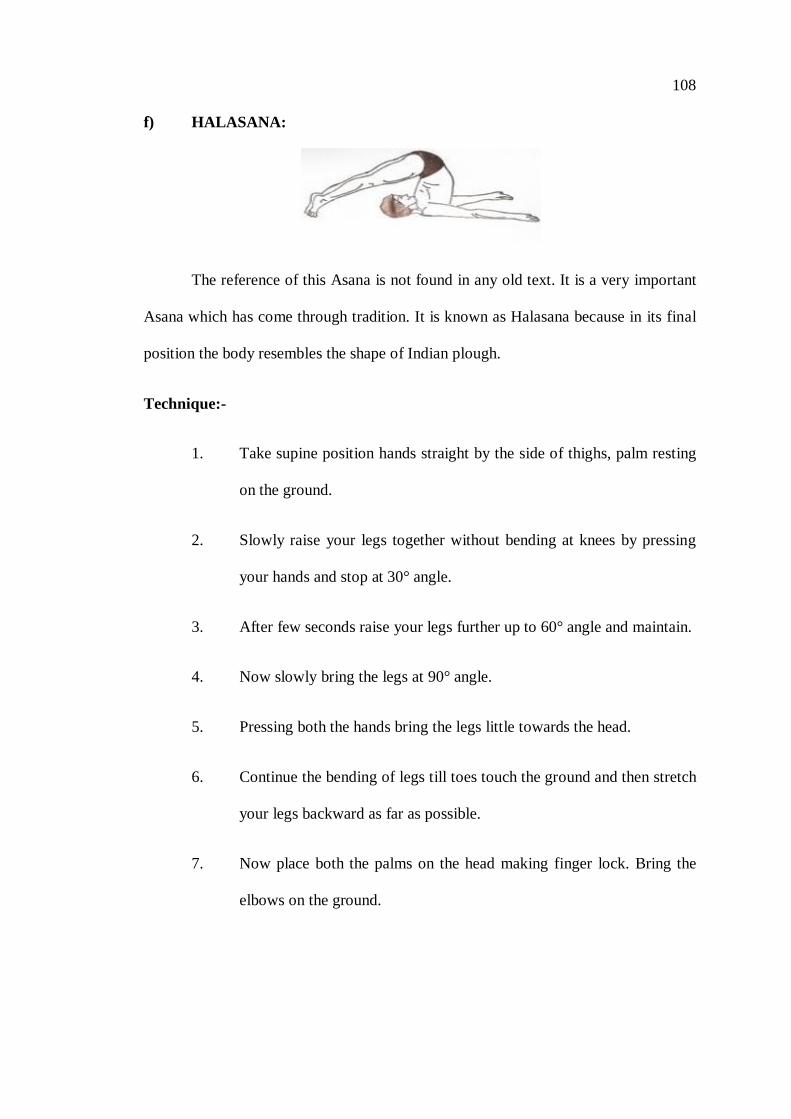
108 f) HALASANA:
The reference of this Asana is not found in any old text. It is a very important
Asana which has come through tradition. It is known as Halasana because in its final
position the body resembles the shape of Indian plough.
Technique:-
1. Take supine position hands straight by the side of thighs, palm resting
on the ground.
2. Slowly raise your legs together without bending at knees by pressing
your hands and stop at 30° angle.
3. After few seconds raise your legs further up to 60° angle and maintain.
4. Now slowly bring the legs at 90° angle.
5. Pressing both the hands bring the legs little towards the head.
6. Continue the bending of legs till toes touch the ground and then stretch
your legs backward as far as possible.
7. Now place both the palms on the head making finger lock. Bring the
elbows on the ground.

109
8. While returning back to the original position first release the finger-
lock. Stretch the hands straight and place them on the ground by the
side of the body.
9. Lower the waist and raise the legs from the ground. Slowly let the
waist rest on the ground and stop bringing the legs at 90° angle.
10. Slowly come back to the original position.
Benefits:-
Due to the disturbance of abdominal muscles if there is a complaint of
Dyspepsia or constipation, it can be corrected by the practice of this
Asana.
The practice of this Asana is also useful in certain types of diabetes.
Maximum benefits of Halasana can be derived when Bhujangasana is
practiced immediately after Halasana.
Those suffering from cervical spondilitis or stiffness in spine should
practice it very carefully.
g) MASTYASANA
Matsyasana, or Fish Pose, is a Yoga posture

110 Technique
1. Lie on your back with your knees bent and arms at your side.
2. Arch your back as much as you can while raising it off the ground by
pushing the floor with your elbows. At the same time, throw your head
backwards, resting the crown of your head on the floor. Use your
forearm and elbows to support you.
3. Expand your chest. Breathe deeply with the abdomen and concentrate
on the thyroid gland.
4. Stay in this position for about one minute. Slowly come back to the
starting position.
Benefits
The fish posture normalizes the function of the thyroid, pituitary,
pineal and adrenal glands. It limbers and stretches the neck,
strengthens and tones the nervous system, the kidneys, the stomach and
intestines, the pelvic organs, and the nerves connected with the sex
functions.
This is the only posture in this sequence which bends the spine
(including the neck) backwards. This is essential, to counteract the
preceding asanas which bend the spine forwards. The result is to give a
healthy stretch to the muscles and ligaments of the spine in the
opposite direction.
This posture benefits people with asthma.
111 h) SAVASANA
Also known as: Final Relaxation
Type of pose: Resting
Benefits: Allows the body time to process information at the end of a class.
No yoga session is complete without the final pose – Savasana. The body
needs this time to understand the new information it has received through practicing
yoga. Even though Savasana is a resting pose, it’s not the same a sleeping! You
should stay present and aware during the five to ten minute duration of final
relaxation.
Instructions:
1. Come to lie down on the back.
2. Let the feet fall out to either side.
3. Bring the arms alongside the body, but slightly separated from the
body, and turn the palms to face upwards.
4. Relax the whole body, including the face. Let the body feel heavy.
5. Let the breath occur naturally.

112
6. To come out, first begin to deepen the breath. Then move the fingers
and toes, awakening the body.
7. Bring the knees into the chest and roll over to one side, keep the eyes
closed.
8. Slowly bring yourself back up into a sitting position.
PRANAYAMA
NADI SHODHANA
Technique 1: Preparatory practice
1. Sit in any comfortable meditation posture, preferably siddha/siddha
yoni asana or padmassana. (Those who cannot sit in a meditation
posture my sit against a wall with the legs outstretched or in a chair
which has a straight back) Keep the head and spine upright.
2. Relax the whole body and close the eyes.
3. Practice yogic breathing for some time

113
4. Adopt nasagra mudra with the right hand and place the left hand on the
knees in chin or jnana mudra
5. Close the right nostril with the thumb.
6. In hale and exhale through the left nostril 5 times.
7. Be aware of each breath.
8. After 5 breaths release the pressure of thumb on the right nostril and
press the left nostril with the ring finger, blocking the flow of air.
9. Inhale and exhale through the right nostril 5 times, keeping the
respiration rate normal.
10. Lower the hand and breathe 5 times through both nostrils together.
11. This is one round.
12. Practice 5 rounds or for 3 to 5 minutes, making sure that there is no
sound as her air passes through the nostrils. After practicing for 15
days go on to technique 2.
Technique 2: Alternate nostril breathing
1. In this technique the duration of inhalation /exhalation is controlled.
2. Close and right nostril with the thumb and breathe in through the left
nostril.
3. At the same time count mentally, l “l. Om;2,Om; 3, Om”, until
inhalation ends comfortably. This is the basic count.

114
4. Breathe deeply with yogic breathing. Do not strain. Close the left
nostril with the ring finger, release the pressure of the thumb on the
right nostril and while breathing out through the right nostril,
simultaneously count, “1 Om: 2, Om; 3, Om. The time for inhalation
and exhalation should be equal.
5. Next, inhale through the right nostril, keeping the same count in the
same manner.
6. At the end of inhalation close the right nostril, counting as before.
7. This is one round.
8. Practice 10 rounds.
Benefits :
Calms the mind, soothes anxiety and stress, balances left and right
hemispheres, promotes clear thinking
TRANSCENDENTAL MEDITATION
TM is to be practiced fifteen to twenty minutes twice daily while sitting
comfortably in a chair. In essence, the TM technique comprises the silent mental
repetition of a simple sound known as a mantra, allowing the repetition to become
quieter and quieter, until it disappears and one is left conscious, but without thoughts.
This is the goal of the inward stroke of meditation and is called pure consciousness (in
Sanskrit: turiya or Samadhi with Abraham Maslow: peak experience). Together with
the mind, the body has come to rest too, and starts to clear out "stress". This means

115 bodily activity, and therefore also mental activity in the form of thoughts: the outward
stroke of meditation. After the purification has finished, the inward stroke starts again,
etc.
BENEFITS OF TRANSCENDENTAL MEDITATION
There is a large body of peer-reviewed research that shows the benefits of
meditation that include reduced stress and better health.
Some of the meditation benefits include
Better health and well-being
Increased self – confidence
Clarity of mind and purpose
Ability to manage stress and anxiety
Better sleep and increased energy
Clarity of mind and ability to maintain focus
Inner calm and a sense of balance
3.9.1.2. YOGIC PRACTICES OF PACKAGE – II (GROUP - B)
(Swami Kuvalayananda)
1. LOOSENING EXERCISES (Sithilikarana Vyayama)
Forward and backward bending
Side bending
Twisting
Jogging
Mukha dhouti
Pawanamuktasana kriya
116 2. ASANAS
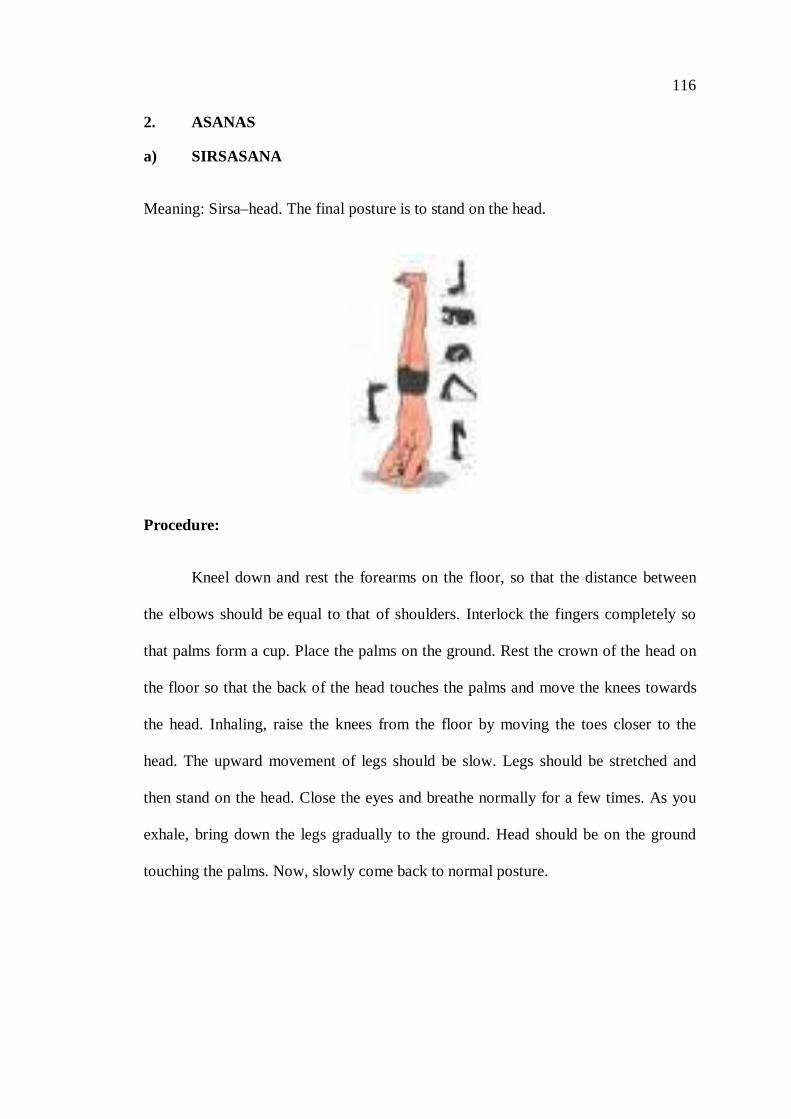
a) SIRSASANA
Meaning: Sirsa–head. The final posture is to stand on the head.
Procedure:
Kneel down and rest the forearms on the floor, so that the distance between
the elbows should be equal to that of shoulders. Interlock the fingers completely so
that palms form a cup. Place the palms on the ground. Rest the crown of the head on
the floor so that the back of the head touches the palms and move the knees towards
the head. Inhaling, raise the knees from the floor by moving the toes closer to the
head. The upward movement of legs should be slow. Legs should be stretched and
then stand on the head. Close the eyes and breathe normally for a few times. As you
exhale, bring down the legs gradually to the ground. Head should be on the ground
touching the palms. Now, slowly come back to normal posture.
117 Benefits:
It gives balance and poise, both physically and mentally.
Pure and healthy blood flows to the brain and rejuvenates brain cells.
Gives relief in problems like common cold, cough, tonsilitis, holitosis
etc
Cures constipation
Preserves the efficiency of sensory organs
Thyroid and parathyroid gland are benefitted
Hernia can be effectively checked in its incipient stage and can be kept
under control cures nervous and hepatic types of asthma
Limitations:
Should be avoided by women during pregnancy and menses
Hypertension patients should not practice it.
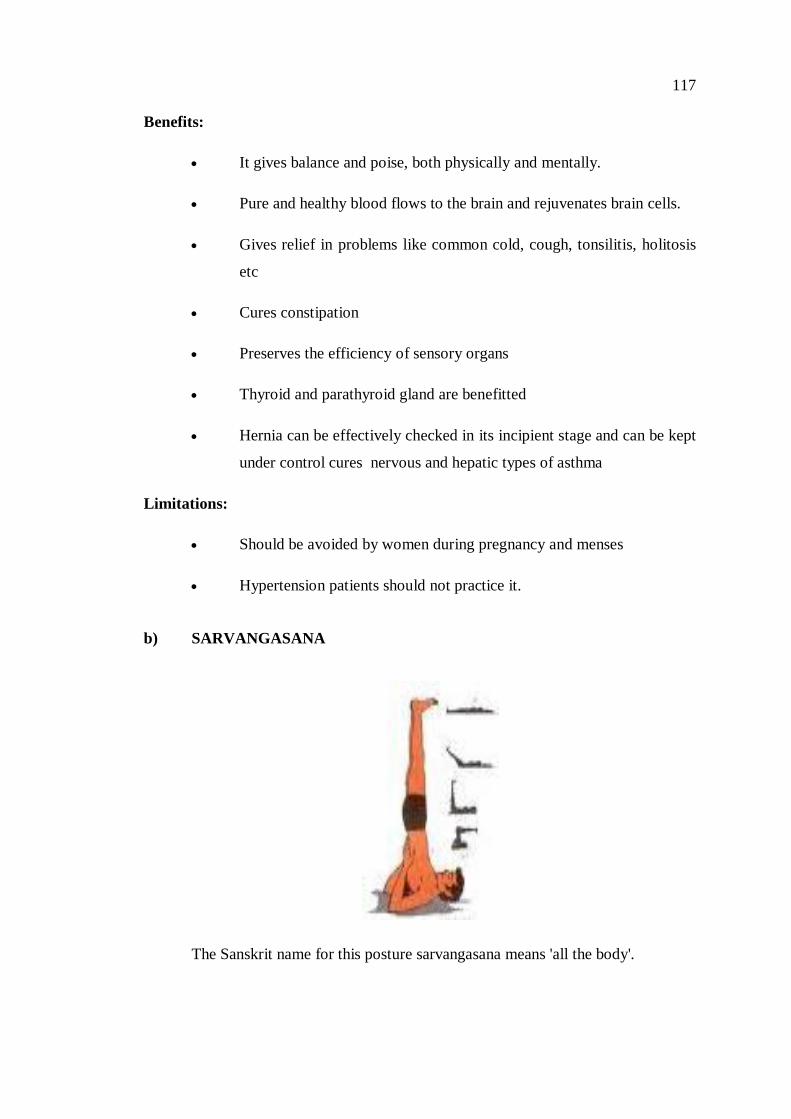
b) SARVANGASANA
The Sanskrit name for this posture sarvangasana means 'all the body'.

118 Technique
1. Lie flat on your back. Inhale deeply while raising your legs and spine
until the toes point to the ceiling.
2. The body rests on the shoulders and the back of the neck. The body is
supported by the hands, which are placed on the center of the spine
between the waist and the shoulder blades. Keep your spine and legs
straight.
3. Breathe slowly and deeply with the abdomen and concentrate on the
thyroid gland. On a male, the thyroid gland is located behind the adams
apple. For women, it is located in the same area which is a few inches
above the sternal notch (hollow of the neck where the neck joins the
rest of the body.) or approximately half way up the neck from the
sternal notch. Stay in this position for about two minutes.
4. To come out of this posture, just bend your knees, curve your back and
slowly return to lying on the floor while exhaling. First bend your
knees, put the palms on the floor, then curving the spine, gradually
unfold it the way one unrolls a carpet. When your entire back touches
the floor, straighten the knees, take a deep breath and slowly lower
your legs to the ground while breathing out.
5. If you wish, you may go straight into the next posture (the 'reverse
posture') instead of lying down.
119 Benefits
The main benefit of the shoulder stand is to get the thyroid gland working
at peak efficiency. It's the thyroid gland which is mainly responsible for
your correct weight and youthful appearance.
The shoulder stand also regulates the sex glands.
It vitalizes the nerves, purifies the blood and promotes good circulation,
strengthens the lower organs and helps them to stay in place.
It gives a healthy stretch to the neck muscles.
It is beneficial for people suffering from poor circulation, constipation,
indigestion, asthma and reduced virility.
This pose is especially recommended for women after childbirth and for
those suffering from painful menstruation, other female disorders, and
seminal weakness.
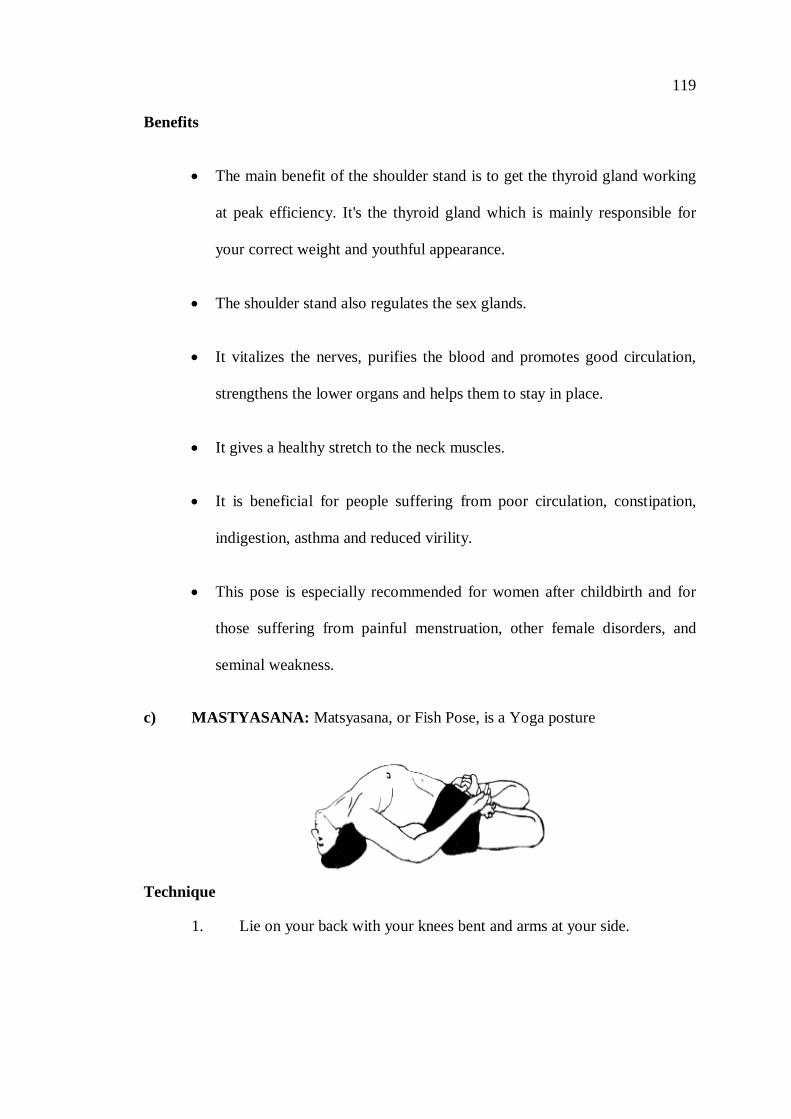
c) MASTYASANA: Matsyasana, or Fish Pose, is a Yoga posture
Technique
1. Lie on your back with your knees bent and arms at your side.
120
2. Arch your back as much as you can while raising it off the ground by
pushing the floor with your elbows. At the same time, throw your head
backwards, resting the crown of your head on the floor. Use your
forearm and elbows to support you.
3. Expand your chest. Breathe deeply with the abdomen and concentrate
on the thyroid gland.
4. Stay in this position for about one minute. Slowly come back to the
starting position.
Benefits
The fish posture normalizes the function of the thyroid, pituitary, pineal
and adrenal glands. It limbers and stretches the neck, strengthens and tones
the nervous system, the kidneys, the stomach and intestines, the pelvic
organs, and the nerves connected with the sex functions.
This is the only posture in this sequence which bends the spine (including
the neck) backwards. This is essential, to counteract the preceding asanas
which bend the spine forwards. The result is to give a healthy stretch to the
muscles and ligaments of the spine in the opposite direction.
This posture benefits people with asthma.
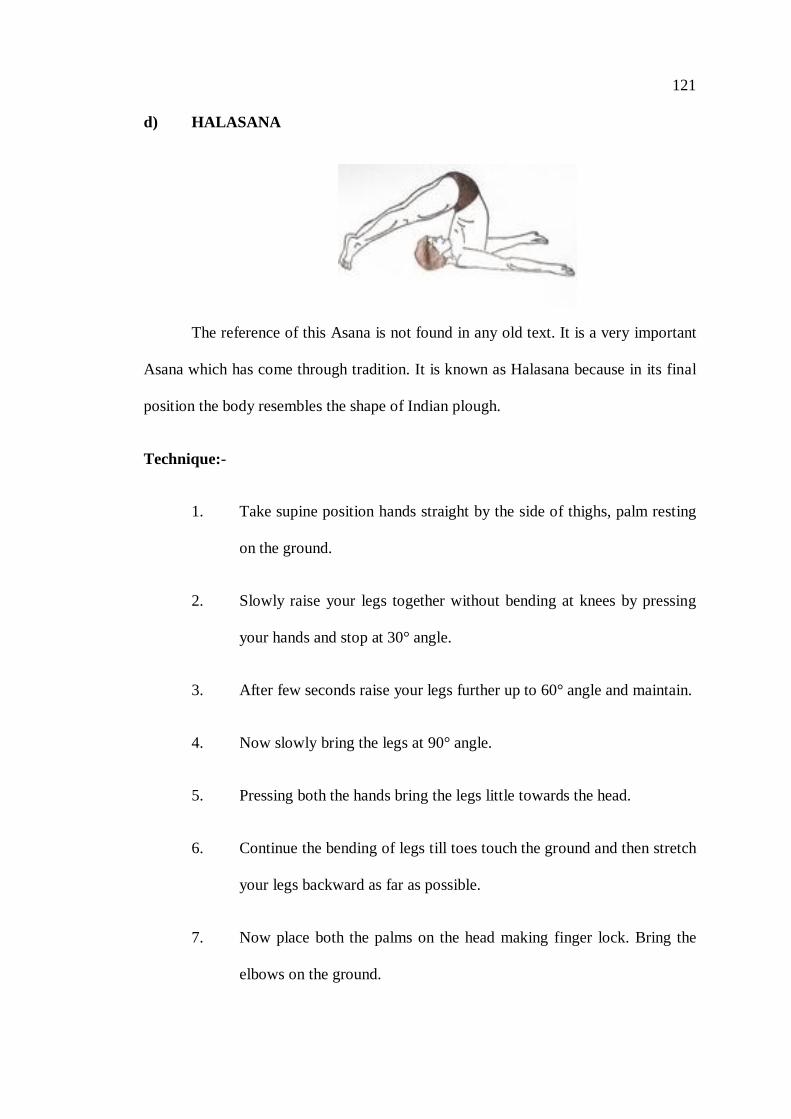
121 d) HALASANA
The reference of this Asana is not found in any old text. It is a very important
Asana which has come through tradition. It is known as Halasana because in its final
position the body resembles the shape of Indian plough.
Technique:-
1. Take supine position hands straight by the side of thighs, palm resting
on the ground.
2. Slowly raise your legs together without bending at knees by pressing
your hands and stop at 30° angle.
3. After few seconds raise your legs further up to 60° angle and maintain.
4. Now slowly bring the legs at 90° angle.
5. Pressing both the hands bring the legs little towards the head.
6. Continue the bending of legs till toes touch the ground and then stretch
your legs backward as far as possible.
7. Now place both the palms on the head making finger lock. Bring the
elbows on the ground.
122
8. While returning back to the original position first release the finger-
lock. Stretch the hands straight and place them on the ground by the
side of the body.
9. Lower the waist and raise the legs from the ground. Slowly let the
waist rest on the ground and stop bringing the legs at 90° angle.
10. Slowly come back to the original position.
Benefits:-
Due to the disturbance of abdominal muscles if there is a complaint of
Dyspepsia or constipation, it can be corrected by the practice of this
Asana.
The practice of this Asana is also useful in certain types of diabetes.
Maximum benefits of Halasana can be derived when Bhujangasana is
practiced immediately after Halasana.
Those suffering from cervical spondilitis or stiffness in spine should
practice it very carefully.
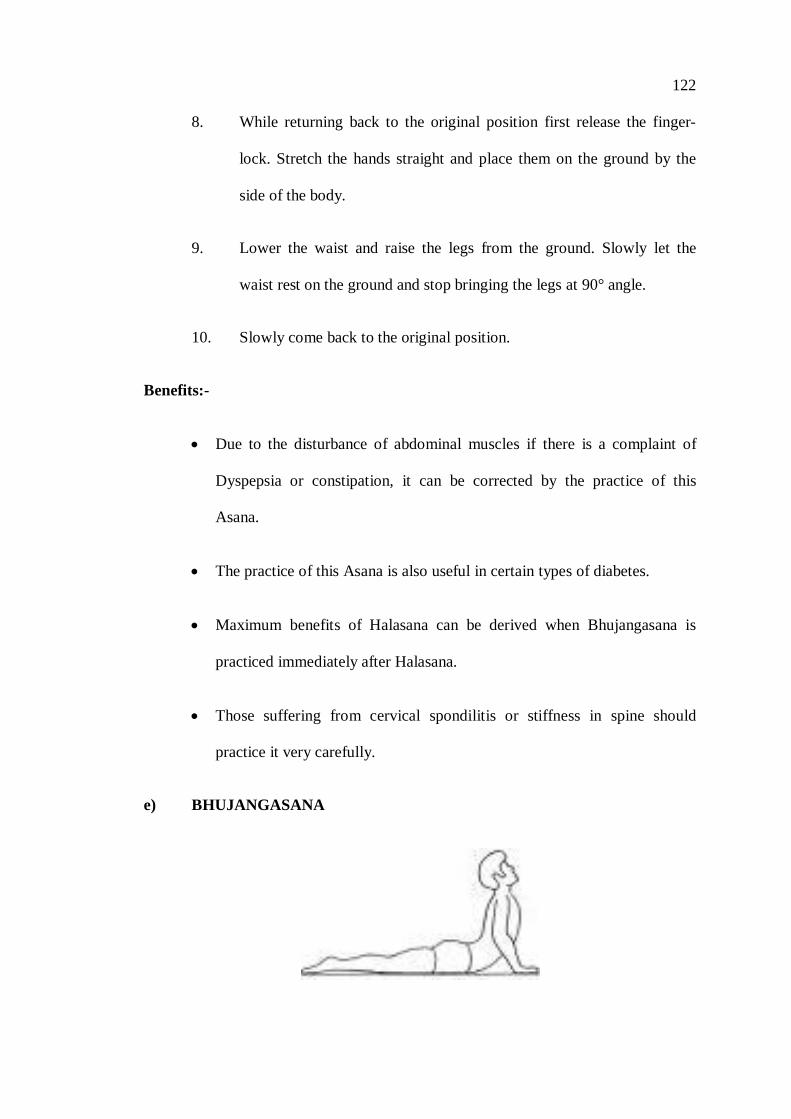
e) BHUJANGASANA
123 Technique:-
Take prone lying position, legs together, toes together, pointing outward,
hands by the side of the body, fingers together palm facing upward and forehead
resting on the
1. Fold hands at the elbows, place palms on the ground near each side of
the shoulder, thumb should be under the armpit.
2. Bring chin forward and place it on the ground. Gaze in front.
3. Raise chin and turn head backward as much as possible. Raise the
thorax turning supine backward upto the navel. Do not raise navel.
4. Maintain the posture for sometime. Then slowly bring your body on
the ground, starting form upper part of the navel region, thorax
shoulder, chin and lastly place the forehead on the ground.
5. Now, relax your hands and place them by the either side of the thighs
Benefits:-
This effects the muscles of the body.
"It is beneficial in flatulence after meals.
It is more effective for Asthma, Dyspepsia and Vata diseases and helps in
keeping the spine flexible.
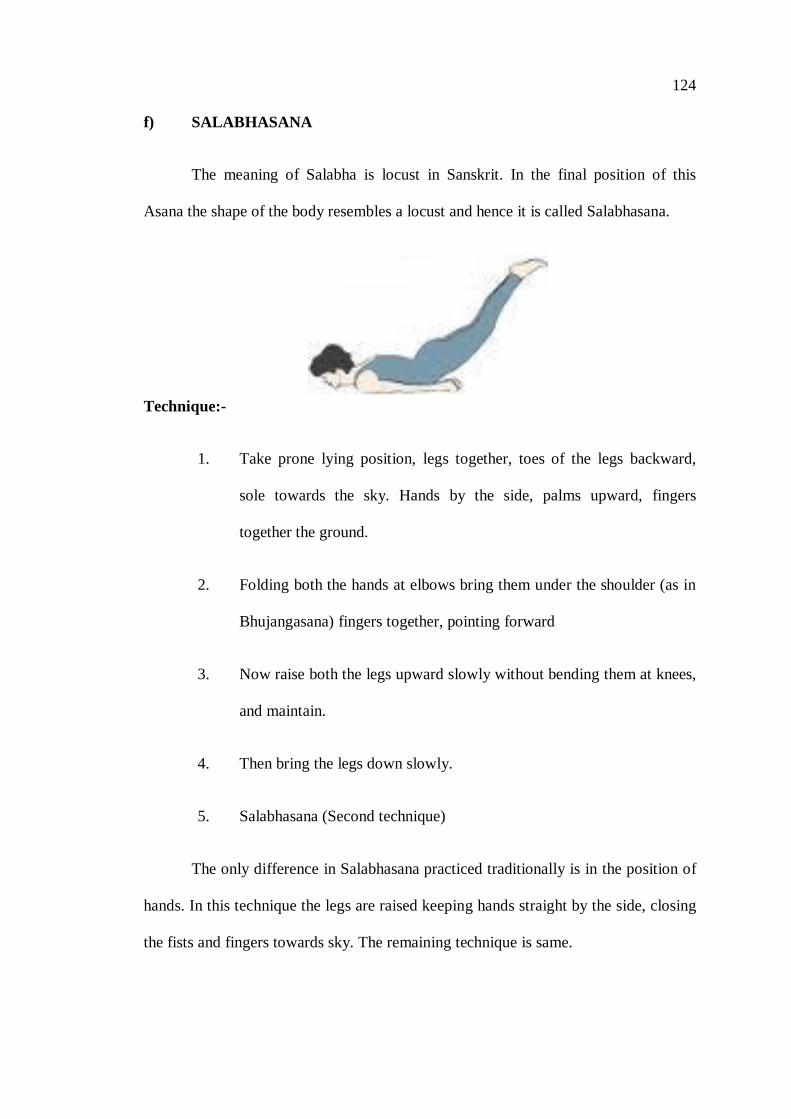
124 f) SALABHASANA
The meaning of Salabha is locust in Sanskrit. In the final position of this
Asana the shape of the body resembles a locust and hence it is called Salabhasana.
Technique:-
1. Take prone lying position, legs together, toes of the legs backward,
sole towards the sky. Hands by the side, palms upward, fingers
together the ground.
2. Folding both the hands at elbows bring them under the shoulder (as in
Bhujangasana) fingers together, pointing forward
3. Now raise both the legs upward slowly without bending them at knees,
and maintain.
4. Then bring the legs down slowly.
5. Salabhasana (Second technique)
The only difference in Salabhasana practiced traditionally is in the position of
hands. In this technique the legs are raised keeping hands straight by the side, closing
the fists and fingers towards sky. The remaining technique is same.
125 Benefits:-
This strengthens the muscles of lower abdomen.
This is beneficial in digestion and removes constipation.
This gives strength to the lungs.
Those suffering from high blood pressure, heart disease or having
complaint of asthma, should not practice it.
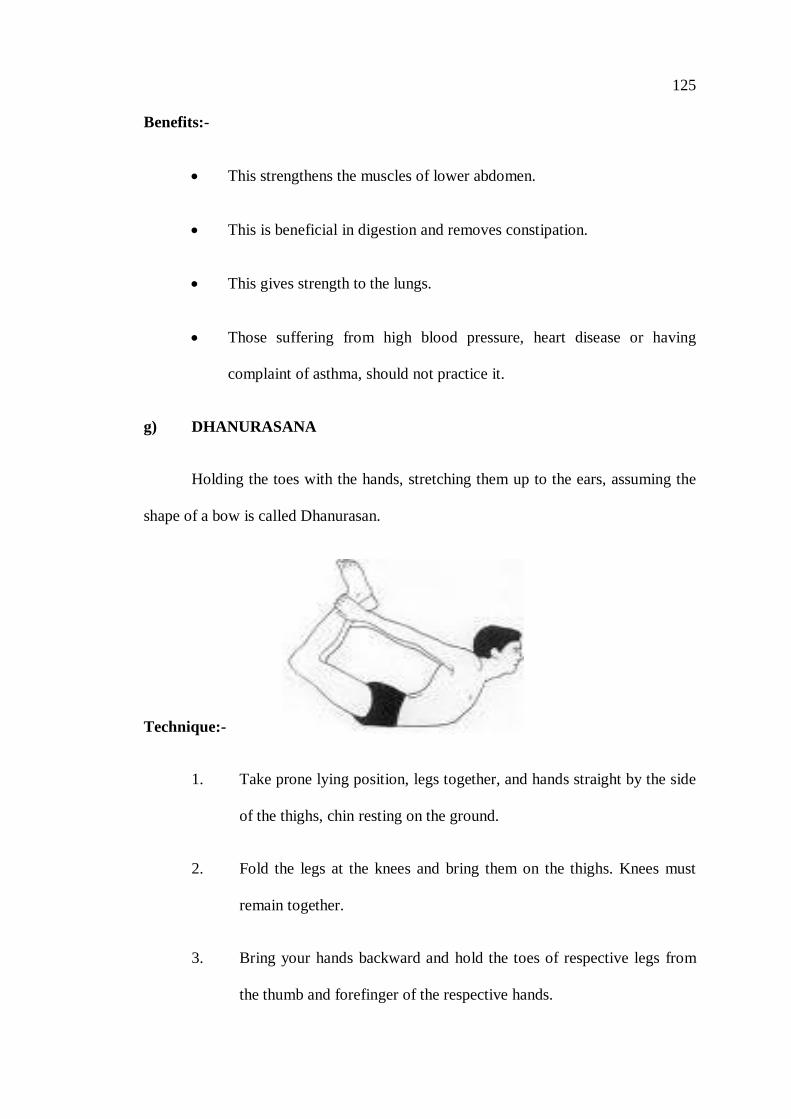
g) DHANURASANA
Holding the toes with the hands, stretching them up to the ears, assuming the
shape of a bow is called Dhanurasan.
Technique:-
1. Take prone lying position, legs together, and hands straight by the side
of the thighs, chin resting on the ground.
2. Fold the legs at the knees and bring them on the thighs. Knees must
remain together.
3. Bring your hands backward and hold the toes of respective legs from
the thumb and forefinger of the respective hands.

126
4. Raise your legs a little up and simultaneously raise your head and
chest.
5. Holding the toes, pull the legs towards ears and bring the toes near the
ear. Gaze in front.
6. While returning to this original position, loosen your hands, take legs
backward, let the thighs touch the ground, leave the toes and ultimately
bring the legs and hand to the first position.
Benefits:-
It makes spine and back muscles flexible, removes nervous weak-ness.
It helps in removing constipation and pitta disorders.
Those suffering from lumbar spondilitis should not practice it.
h) ARDHA MATSYENDRASANA
Technique:-
1. Sit extending both the legs together in front, hands by the side, palms
resting on the ground. Fingers should remain together pointing
forward.
2. Fold the right leg at knee. Slowly set the right heel at the perineum.
127
3. Now folding the left leg bringing it from above the right knee, place it
by its side on the ground. The knee of the left leg should remain
towards sky.
4. Now bring the right hand on the left side of the left knee. The left knee
should remain at the left side of the right armpit.
5. Now straighten the right hand and hold the toe or ankle of the left leg.
6. Twisting the body to the left side, look backwards, place the left hand
bringing it from the back on the right thigh. Gaze should be towards
back.
7. While returning to the original position first release the hand from the
thigh and turn head forward.
8. Now bring the back to normal position after loosening the right hand.
9. Bring the left leg in original position.
10. Now bring the right leg also original position.
11. Repeat it similarly from the other side by folding the left leg first.
Benefits:-
It is very much useful in constipation and dyspepsia.
This Asana improves liver efficiency and removes debility of kidney.
It is very useful in diabetes.
It is very beneficial for the muscles of shoulder and back.
Those suffering from stiffness in spine should practice it very
carefully.
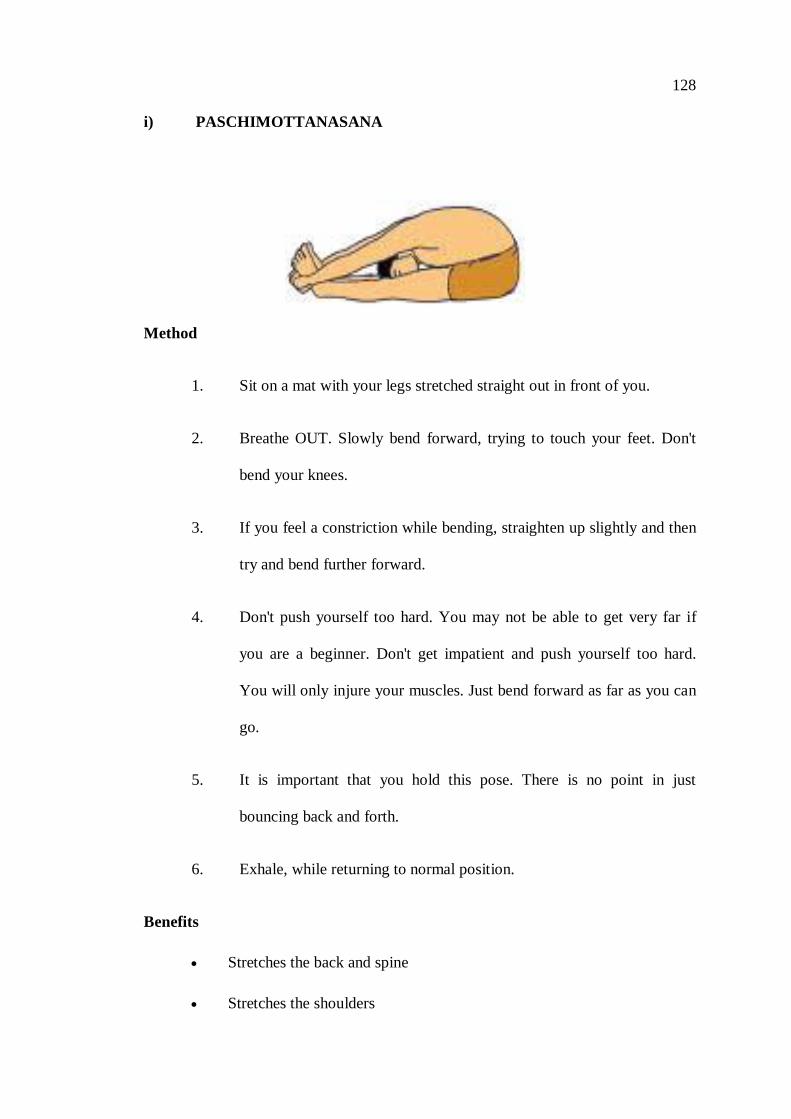
128 i) PASCHIMOTTANASANA
Method
1. Sit on a mat with your legs stretched straight out in front of you.
2. Breathe OUT. Slowly bend forward, trying to touch your feet. Don't
bend your knees.
3. If you feel a constriction while bending, straighten up slightly and then
try and bend further forward.
4. Don't push yourself too hard. You may not be able to get very far if
you are a beginner. Don't get impatient and push yourself too hard.
You will only injure your muscles. Just bend forward as far as you can
go.
5. It is important that you hold this pose. There is no point in just
bouncing back and forth.
6. Exhale, while returning to normal position.
Benefits
Stretches the back and spine
Stretches the shoulders

129
Stretches the hamstrings
Beneficial for the kidneys, liver, ovaries and uterus. (It is thus a must for
women. It also helps ease menstrual discomfort.)
Beneficial for diabetics and improves digestion.
j) MAYURASANA
Holding the ground with both the palms, supporting the (corresponding) sides
of the navel by both the elbows and raising oneself like a horizontal stick, in the air,
this is called Mayurasana.
'Mayur' means Peacock in Sanskrit. One has to hold his whole body like a
stick on both his elbows, as shown in the picture. We assume the shape of a Peacock
hence it is called Mayurasana.
Technique:-
1. Sit on both your upper scales. Knees should be placed on the ground.
2. Stretch out fingers of your hands and place the palms on the ground,
fingers will remain stretched pointing backward.
3. Place elbows gently on either side of the navel.

130
4. Slowly stretching both legs together, come little forward very
cautiously, and then raise the upper part of the body.
5. If the upper part of the body is raised up, then straighten your legs also
like a stick (horizontal) and keep straight your chest, neck and head
also.
6. Maintain it for sometime then return to the origin position, slowly fold
your legs and place the knees on the ground.
7. Now raising your hands from the ground sit on the soles.
Benefits:-
This Asana is a very good measure against visceroptosis and dyspepsia.
It is useful in diabetes also.
Those suffering from cervical spondilitis should not practice it.
k) SAVASANA
Also known as: Final Relaxation
Type of pose: Resting
Benefits: Allows the body time to process information at the end of a class.
131
No yoga session is complete without the final pose – Savasana. The
body needs this time to understand the new information it has received through
practicing yoga. Even though Savasana is a resting pose, it’s not the same a sleeping!
You should stay present and aware during the five to ten minute duration of final
relaxation.
Instructions:
Come to lie down on the back.
Let the feet fall out to either side.
Bring the arms alongside the body, but slightly separated from the body,
and turn the palms to face upwards.
Relax the whole body, including the face. Let the body feel heavy.
Let the breath occur naturally.
To come out, first begin to deepen the breath. Then move the fingers and
toes, awakening the body.
Bring the knees into the chest and roll over to one side, keep the eyes
closed.
Slowly bring yourself back up into a sitting position.
132 PRANAYAMA
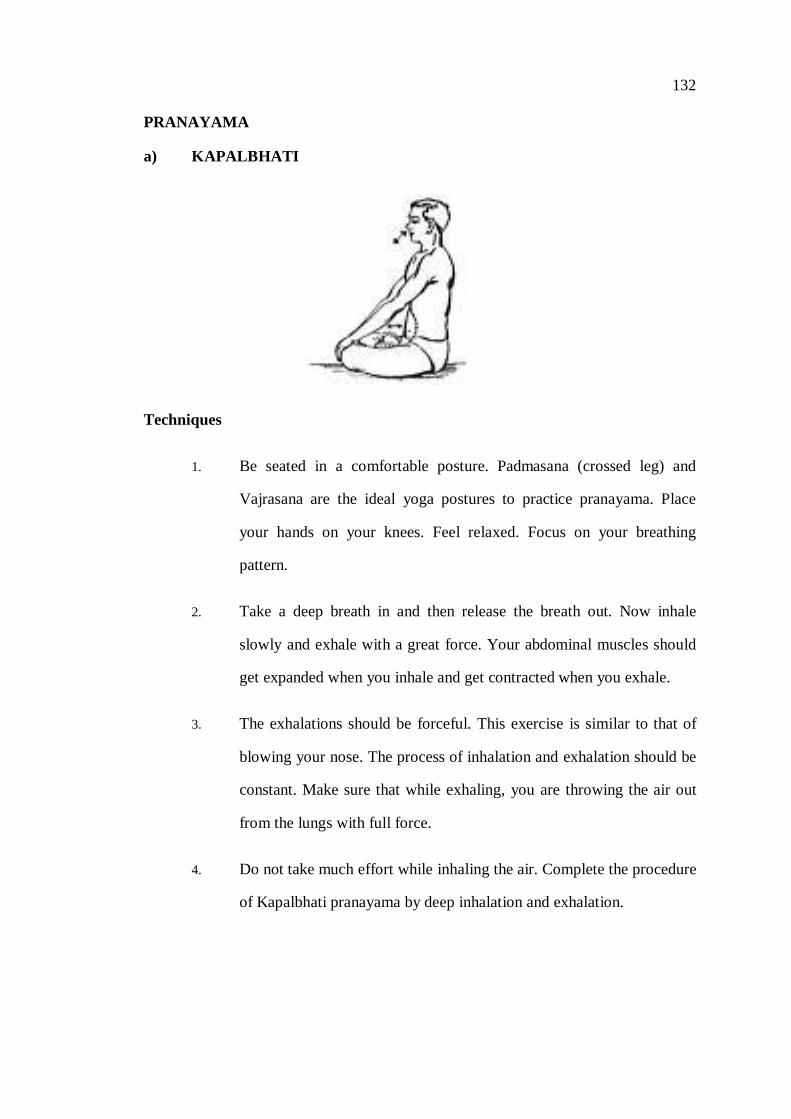
a) KAPALBHATI
Techniques
1. Be seated in a comfortable posture. Padmasana (crossed leg) and
Vajrasana are the ideal yoga postures to practice pranayama. Place
your hands on your knees. Feel relaxed. Focus on your breathing
pattern.
2. Take a deep breath in and then release the breath out. Now inhale
slowly and exhale with a great force. Your abdominal muscles should
get expanded when you inhale and get contracted when you exhale.
3. The exhalations should be forceful. This exercise is similar to that of
blowing your nose. The process of inhalation and exhalation should be
constant. Make sure that while exhaling, you are throwing the air out
from the lungs with full force.
4. Do not take much effort while inhaling the air. Complete the procedure
of Kapalbhati pranayama by deep inhalation and exhalation.

133
5. You have successfully completed one round of Kapalbhati pranayama.
A learner can do 3 rounds of Kapalbhati pranayama by doing 15
exhalations in each round. Take small breaks between each round. You
can increase the number of exhalations and rounds of pranayama as per
your convenience
BENEFITS
Kapalbhati pranayama helps to detoxify lungs and respiratory tracks.
Boosts the supply of oxygen and purifies blood.
Helps to tone up the abdominal muscles. It is also helpful in reducing
belly fat.
Kapalbhati pranayama is practiced before meditation. It improvises
concentration span and helps to stay away from unwanted thoughts while
practicing meditation.
As its name suggests, a regular practice of Kapalbhati pranayama makes
you look beautiful.
b) UJJAYI PRANAYAMA
Technique
1. Sit in a comfortable meditative pose or lie in savasana.
134
2. Become aware of the natural breathing process and feel the air passing
down through the windpipe. Slightly cntract the region at the back of
the throat as you do when you swallow.
3. Inhale and exhale through the nose with the mouth closed.
4. Make the inhalation and exhalation long, deep and controlled.
5. Practice full yogic breathing and concentrate on the sound.
6. Begin practicing for 3 minutes and progressively work your way up to
10 minutes.
7. Practice as above, but fold the tongue back so that the tip of the tongue
presses the back of the soft palate on the roof of the mouth.
8. As you inhale say “sa” to yourself and as you exhale say “ha.” Repeat
ten times.
9. Inhalation and exhalation should be of equal duration, smooth and
relaxed.
10. Notice your mind wandering as you practice breathing and keep
bringing your mind back to the breath.
11. Focus on the exhalation. Notice where your breath normally stops.
Increase the fullness of the exhalation.
Benefits:
Calms the mind and the body
The breath becomes a focal point which increase concentration
Meditation practice become easier to concentrate
135
Stimulates Circulation and metabolism
Increases prana
Increases sense
Stimulates olfactory glands
Lungs absorb oxygen more completely by opening the alveoli in the
lungs.
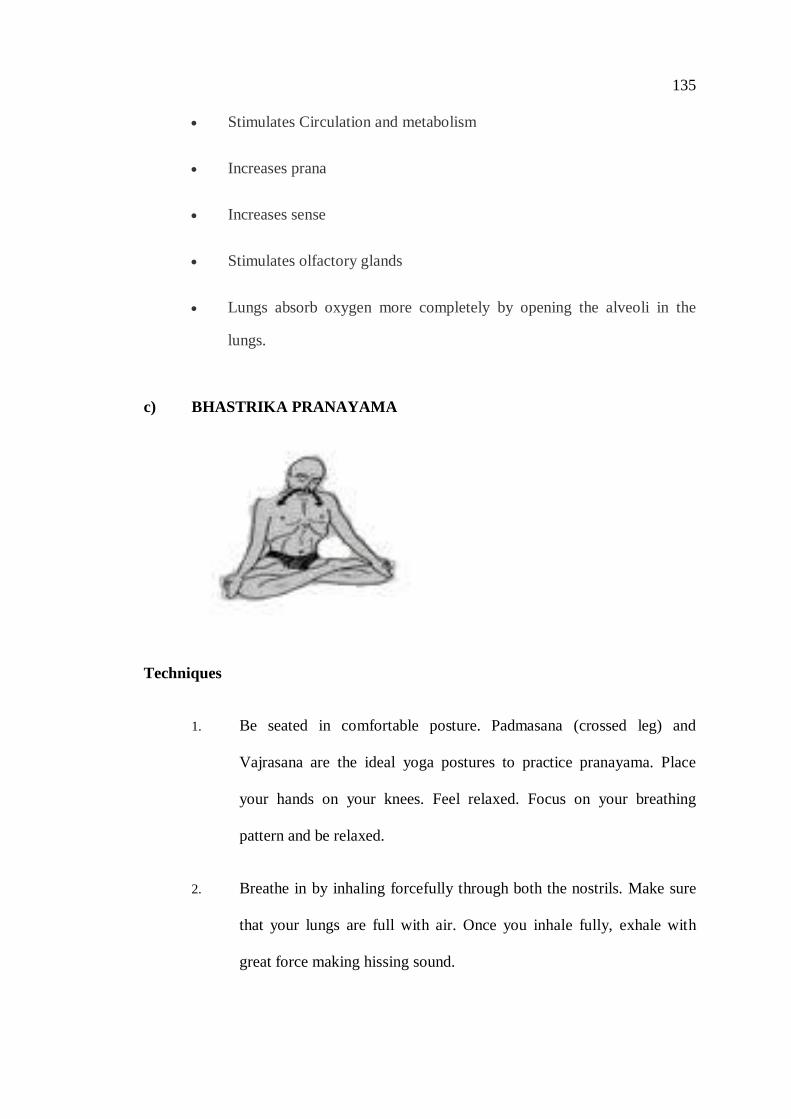
c) BHASTRIKA PRANAYAMA
Techniques
1. Be seated in comfortable posture. Padmasana (crossed leg) and
Vajrasana are the ideal yoga postures to practice pranayama. Place
your hands on your knees. Feel relaxed. Focus on your breathing
pattern and be relaxed.
2. Breathe in by inhaling forcefully through both the nostrils. Make sure
that your lungs are full with air. Once you inhale fully, exhale with
great force making hissing sound.
136
3. In Bhastrika pranayama one needs to apply force while breathing in
and breathing out. You can determine how much speed to apply while
inhaling and exhaling keeping in mind your heath and endurance
power.
4. When you breathe in while performing Bhastrika pranayama, your
abdominal should not blow up. Instead your chest area should blow up.
Repeat the procedure for 5 to 10 times.
5. You have successfully completed Bhastrika pranayama. One should
perform Bhastrika pranayama for 5 minutes everyday. Those who have
high blood pressure or heart disease should not practice Bhastrika
pranayama.
BENEFITS
Helps to throw out toxins and cures illnesses of respiratory track
Boosts the supply of oxygen and purifies blood
Helps to keep negative thoughts away
Increases warmth in the body and helps to prevent common cold
Regular practice of Bhastrika pranayama keeps you away from all
diseases
137 BANDHA
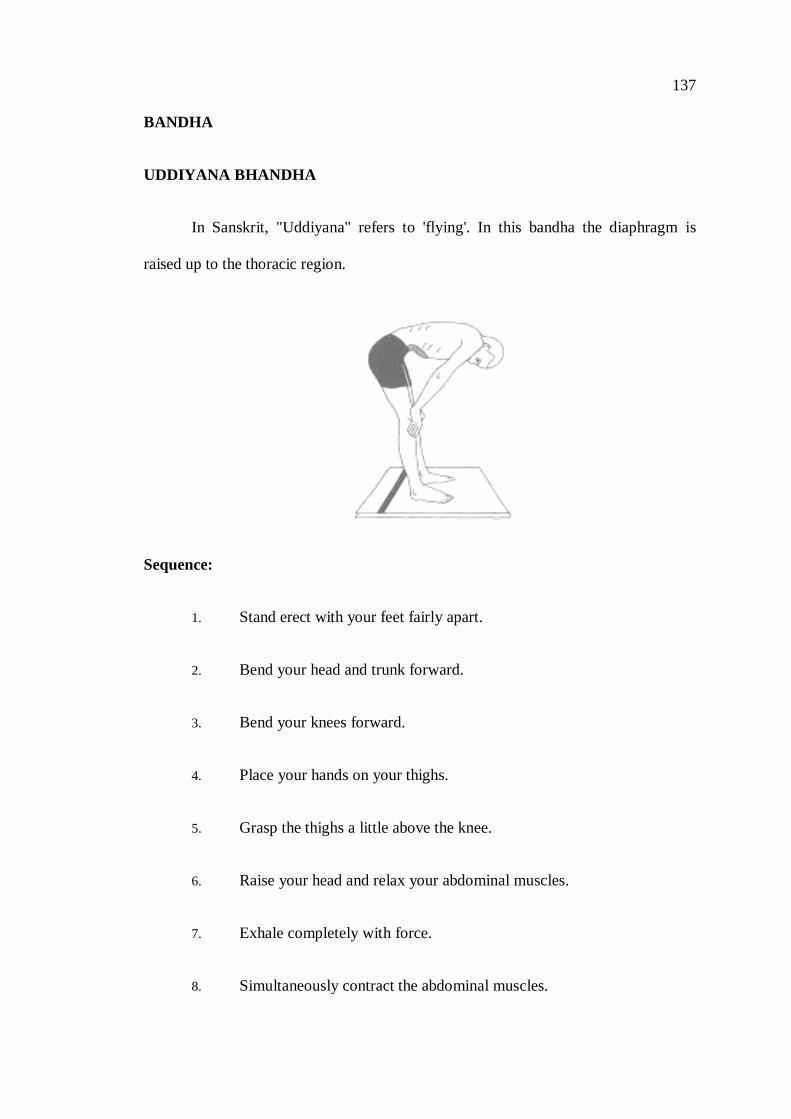
UDDIYANA BHANDHA
In Sanskrit, "Uddiyana" refers to 'flying'. In this bandha the diaphragm is
raised up to the thoracic region.
Sequence:
1. Stand erect with your feet fairly apart.
2. Bend your head and trunk forward.
3. Bend your knees forward.
4. Place your hands on your thighs.
5. Grasp the thighs a little above the knee.
6. Raise your head and relax your abdominal muscles.
7. Exhale completely with force.
8. Simultaneously contract the abdominal muscles.

138
9. Hold your breath and do not let any air into your lungs.
10. Press your hands gently on the thighs and perform 'mock inhalation'.
Keep your glottis closed to prevent air from flowing into your lungs.
11. Expand the thoracic cage and raise the ribs quickly followed by
relaxation of abdominal muscles.
12. When the ribs rise, your relaxed diaphragm will also move upwards.
13. At the same time, the abdominal front muscles get sucked inwards and
up towards the ribs. As a result the thoracic cavity vacuum is
automatically filled up.
14. A deep depression takes place in the relaxed abdominal wall. The
abdomen assumes a hollow concave shape.
15. Concentrate on the solar plexus.
16. Hold on to this position without any air in the lungs for as long as you
comfortably can.
17. Inhale slowly and deeply to bring the chest and abdomen back to its
original shape.
18. Return to the starting position by straightening your head, trunk and
legs.
19. Take rest for about 15 seconds between two rounds.
20. You can perform three rounds of the bandha.
139 Benefits:
It strengthens the abdominal muscles and diaphragm.
The lung capacity increases with practice of Uddiyana bandha.
Your abdominal muscles become more resilient.
Uddiyana bandha tones up the solar plexus - the root locations of all the
nerves.
The coordination between voluntary and the involuntary nervous
systems improves.
Blood circulation to the abdominal muscles increases.
Vital organs such as heart, stomach, liver, pancreas, spleen, kidneys, gall
bladder, the transverse colon, get massaged and thus their performance
gets enhanced with this yoga bandha.
Increased mobility of the diaphragm helps you take deeper and fuller
breaths.
MUDRA
YOGA MUDRA (The Stoop (Symbol of Yoga))
The practice of this posture is considered very important for its spiritual value
in the higher stages of Yoga training when the pose is maintained for as long as one
hour or more. The physical effect of the Yoga Mudra is mainly internal purification,

140 as it helps keep our system clean by promoting a good elimination. To do the Yoga
Mudra you must first sit down in the Lotus Posture.
\
Technique:
1. Sit up straight, keeping both legs crossed tailor fashion. Clench your
fists and place them on both sides of the abdomen, a little below the
navel.
2. Take a deep breath, and while exhaling bend forward as low as you
can, firmly pressing the fists against the abdomen.
Benefits:
The Yoga Mudra is an excellent exercise for people troubled by
constipation, as it increases the peristaltic movements of the bowels.
It strengthens the abdominal muscles, tones up the nervous system and
the colon, and massages the pelvic region.
It helps men to overcome seminal weakness.
In the higher stages of training it helps the awakening of the Kundalini.
141 3.10. TEST ADMINISTRATION
3.10.1. HEALTH FITNESS COMPONENTS
1. ENDURANCE
Purpose : To asses the muscular endurance
Equipments : A mat and a stopwatch.
Procedure : To subjects were asked to take a supine lying position on the
mat, knees bent to an angle less than 90 degrees, and hands clasped behind neck. A
partner held the ankles firmly on the ground. To perform the sit-ups, the subjects
lifted his trunk, head and elbows forward in curt-up motion elbows touching the knees
and then lowered his trunk touching the done continuously without pause for one
minute. Number of correctly executed sit-ups was recorded as his performance.
To facilitate counting and recording the subjects were paired one subjects
performed the exercise. While his partner counted. After the score was recorded, the
subject inter changed their positions, i.e., the partner become the performer and vice
versa.
Scoring : Recorded the number of correctly executed sit-ups performed with
in one.
2. STRENGTH
Purpose : To estimate the muscular strength
Equipments : Yoga mats
Procedure : The subject being tested took prone lying position on the
ground with the hands under the shoulder and fingers stretched, legs straight and

142 parallel with comfortably apart and the toes under the feet on the command ‘go’ the
subject performed push up with the arms and extended it completely the legs and the
back were kept straight throughout the test then the subject lowered her body using
the arm until it came 90 degree angle and upper arms were parallel to the ground the
action was repeated as many time as possible .
Scoring : Total number of correct push- ups was recorded as the score
of the test
3. FLEXIBILITY
Purpose : To estimate the trunk flexibility.
Equipments : Yardstick and measuring steel tape
Procedure : Place the yardstick on the floor and put an 18 inch piece of
take across the 15 inch mark on the yardstick. The tape should secure the yardstick to
the floor. The subject sits with the other end of the yardstick between the legs. The
subject’s heel should almost touch the tape at the 15-inch mark and be about 12 inch
apart with the legs held straight. The subject bends forward, touches with parallel
hand for as possible, and touches the yardstick. The subject should hold this reach
long each for the distance to be recorded.
Scoring : Perform three trials the best score recorded in inch.
4. BODY COMPOSITION
Purpose : To measure the body fat level
Equipment : Body Mass Index Scale (BMI)

143
Procedure : BMI is a mathematical calculation that compares weight to
height. To find your BMI, do the following calculations:
The BMI is equal to the body weight in kilograms divided by body height
in meters squared (kg/m x m)
Scoring: BMI values less than 18.5 -underweight
BMI of 18.5 to 24.9 - healthy and normal.
BMI of 25.0 to 29.9 - overweight.
BMI of 30.0 to 40.0 - obese
BMI of greater than 40 - extremely obese
3.10.2. PHYSIOLOGICAL VARIABLES
1. RESTING PULSE RATE
Purpose : To measure the Pulse rate.
Equipment : Stop watch calculation.
Procedure : The subject will be seated on the chair and pulse is recorded
from the radial artery for 15 second and will be multiplied with four.
Scoring : Measured through count with stop watch and Score is 72
pulse per minute.
2. Vo2 MAX
Purpose : The purpose of the test was to find out the aerobic capacity of
the subjects.
Equipments : Stopwatch and 18 inches high bench.
144
Procedure : After heave the command ‘short’ from the investigator. The
subjects stopped up and down on a bench of 18 inches high. All the time the subjects
stepped upon the bench with their body erect. The stepping process was performed in
four counts as follows.
a. Left foot was placed on the bench
b. Right foot was placed on the bench
c. Left foot was place on the floor
d. Right foot was also placed on the floor
The subject were allowed to lead off which the same foot each time or to
change the foot was he designed bat the four counts was maintained. As the
metronomes were not
Available the counting was done as “up” and “down”. The subjects their step-
ups which they heard the command ‘stop’ from the investigator
(2) The stepping exercises continued for three minutes. In which each minute
the subject conversed twenty-five step-ups and at the completion of stepping the
students remained standing and the pulse rate was measured for a 15 seconds period
from 5 to 20 seconds into recovery.
(3) The predict the maximal oxygen uptake Vo2 by step test the formula
Max.Vo2 =111.33-(0.42×step test) that is pulse rate per minute.
145 3. BREATH HOLDING TIME
Purpose : To measure the breath holding time.
Equipment : Stop watch.
Procedure : A stopwatch was used to record the breath holding time. For
the measurement of breath holding, the tester holds the nose of the subject tightly,
using his left hand especially with thumb and index finger. After holding the nose,
they can breathe only through mouth. As soon as the subject look a deep breath to the
full capacity of his lungs. The mouth was closed and the stop watch was started.
When the capacity to hold the breath was over, the subject opened his lips,
simultaneous by the watch was stopped, and the time was taken.
Scoring : Only one trial was given and the particular time was
considered for the study
4. BLOOD PRESSURE
Purpose : To measure the Blood pressure.
Equipment : Sphygmomanometer with Stethoscope.
Procedure : Blood pressure will be measured by Sphygmomanometer. It
involves a pressure cuff and mercury or Aneroid manometer. The cuff was placed
around the subjects upper arm approximately at heart level. Systolic blood pressure
was found by listening to the flow of blood just below the cuff. As the cuff pressure
was gradually reduced, the pressure at which the sounds disappear or becomes
muffled, was a recorded as diastolic blood pressure. The difference between systolic
and diastolic is referred to s the blood pressure.
Scoring : Measured in Sphygmomanometer with Stethoscope and
score is 120/80 mmHg
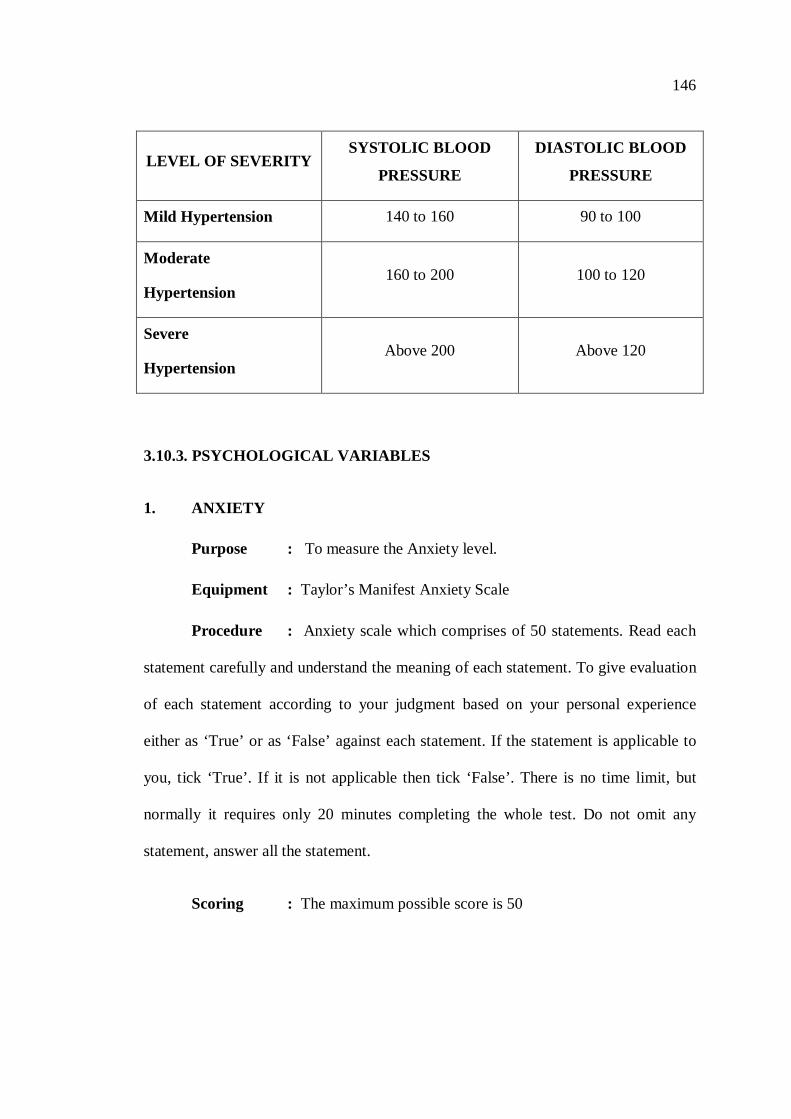
146
LEVEL OF SEVERITY SYSTOLIC BLOOD
PRESSURE
DIASTOLIC BLOOD
PRESSURE
Mild Hypertension 140 to 160 90 to 100
Moderate
Hypertension 160 to 200 100 to 120
Severe
Hypertension Above 200 Above 120
3.10.3. PSYCHOLOGICAL VARIABLES
1. ANXIETY
Purpose : To measure the Anxiety level.
Equipment : Taylor’s Manifest Anxiety Scale
Procedure : Anxiety scale which comprises of 50 statements. Read each
statement carefully and understand the meaning of each statement. To give evaluation
of each statement according to your judgment based on your personal experience
either as ‘True’ or as ‘False’ against each statement. If the statement is applicable to
you, tick ‘True’. If it is not applicable then tick ‘False’. There is no time limit, but
normally it requires only 20 minutes completing the whole test. Do not omit any
statement, answer all the statement.
Scoring : The maximum possible score is 50
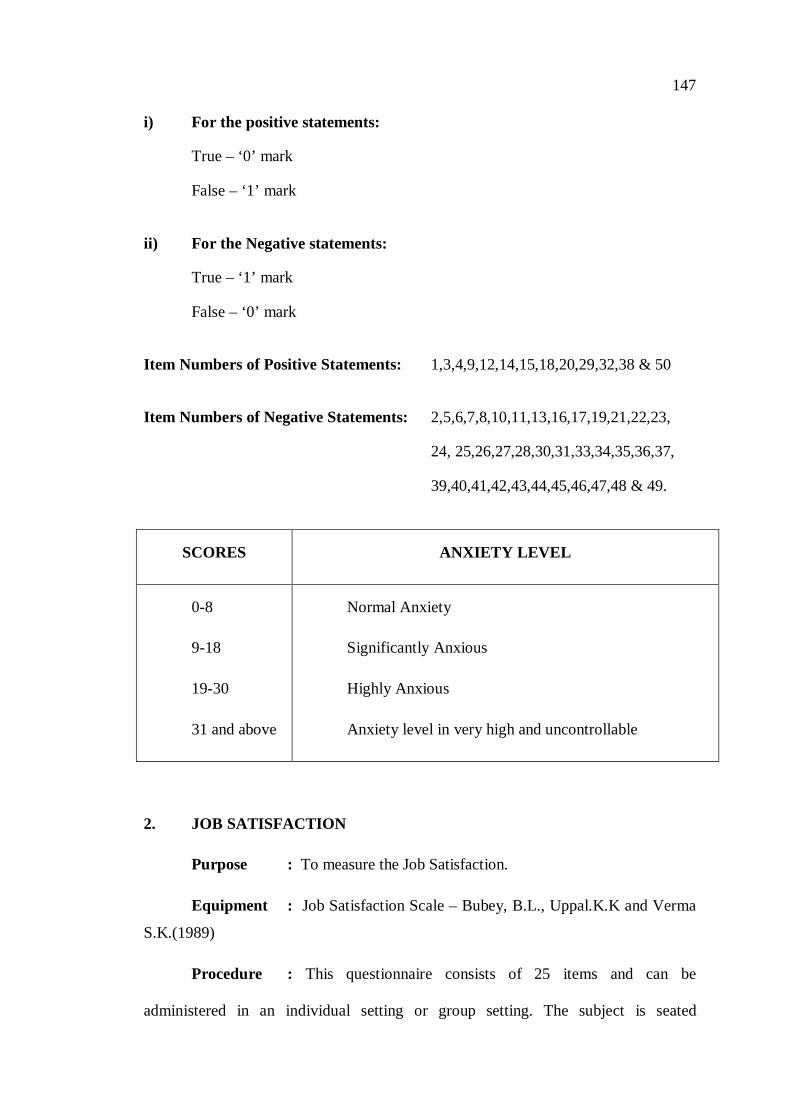
147 i) For the positive statements:
True – ‘0’ mark
False – ‘1’ mark
ii) For the Negative statements:
True – ‘1’ mark
False – ‘0’ mark
Item Numbers of Positive Statements: 1,3,4,9,12,14,15,18,20,29,32,38 & 50
Item Numbers of Negative Statements: 2,5,6,7,8,10,11,13,16,17,19,21,22,23,
24, 25,26,27,28,30,31,33,34,35,36,37,
39,40,41,42,43,44,45,46,47,48 & 49.
SCORES ANXIETY LEVEL
0-8
9-18
19-30
31 and above
Normal Anxiety
Significantly Anxious
Highly Anxious
Anxiety level in very high and uncontrollable
2. JOB SATISFACTION
Purpose : To measure the Job Satisfaction.
Equipment : Job Satisfaction Scale – Bubey, B.L., Uppal.K.K and Verma
S.K.(1989)
Procedure : This questionnaire consists of 25 items and can be
administered in an individual setting or group setting. The subject is seated

148 comfortably. Read each statement carefully and understand the meaning of each
statement. Find the statement suitable for you; put a tick mark in the corresponding
column adjacent to each statement. The experimenter should take care to see that the
subject completes the questionnaire in 20 to 25 minutes.
Scoring : The items are scored on a 5 point scale from 0 to 4 as given
below:
RESPONSE SCORE
Strongly agree Agree Undecided Disagree Strongly disagree
0 1 2 3 4
The scores can be summed up for all the 25 statements in order to arrive at a
single total score for an individual.
Low scores indicate satisfaction and high scores indicate dissatisfaction.
3. JOB INVOLVEMENT
Purpose : To measure the Job Involvement.
Equipment : Job Involvement Scale - Ashok Pratap Singh.
Procedure : Here is a list of statements given to read each one of them
carefully; at the end of each statement is a scale given four point description.
Strongly agree, Agree, Disagree, and Strongly disagree.
You may put tick mark appropriate column which is suitable.

149
Scoring : The score for the response against each statement in the Job
Involvement Scale is given below:
Strongly agree - 1
Agree - 2
Disagree - 3
Strongly disagree - 4
By adding, the total score for an individual can be obtained. The total score
ranges from 40 to 160.
4. ORGANIZATIONAL CLIMATE
Purpose : To measure the Organizational climate.
Equipment : Organizational climate Questionnaire - Shailendra Singh
Procedure : This questionnaire can be administered in both in individual
setting and group setting. This questionnaire has 31 items under 9 sub-heads, each
describe some characteristics of work in organization. Each statement is to be rated on
a 5 point scale as described below:
1. Means true to almost no extent
2. Means true to a small extent
3. Means true to some extent
4. Means true to a great extent
5. Means true to a very great extent.
There is no time limit but work as fast as and take care not to omit any
statement.

150
Scoring : Each statement is scored on a 5 point rating ranging 1 to 5, and
may be interpreted as below:
Interpretation:
30 to 70 = Poor perception.
71 to 110 = Moderate.
111 to 150 = Good perception
FIVE POINT RATING SCORE
Means true to almost no extent Means true to a small extent Means true to some extent Means true to a great extent Means true to a very great extent.
1 2 3 4 5
The subject score can be obtained by adding all the scores on 31 statements.
3.11. COLLECTION OF DATA
To achieve these purpose only three groups consisting 30 subjects were
selected. Group ‘A’ trained with Yogic practices of Package – I and Group ‘B’
trained with Yogic practices of Package – II for Twelve weeks. After the training
period all subjects were tested on selected criterion variables at different stages such
as pre post test.
3.12. STATISTICAL TECHNIQUES
The Analysis of covariance (ANCOVA) was used to find out the pre test and
post test significance difference among three groups and to find out the paired mean
differences, scheffe’s post hoc test was used.

151
FLOW CHART SHOWING METHODOLOGY ADOPTED IN THIS STUDY
SUBJECTS (N=90)
EXPERIMENTAL I N = 30
EXPERIMENTAL II N=30
CONTROL GROUP N=30
PRE - TEST HEALTH RELATED
FITNESS COMPONENTS PHYSIOLOGICAL
VARIABLES PSYCHOLOGICAL
VARIABLES 1. ENDURANCE 2. STRENGTH 3. FLEXIBILITY 4. BODY COMPOSITION
1. RESTING PULSE RATE 2. VO2 MAX 3. BREATH HOLDING TIME 4. BLOOD PRESSURE
1. ANXIETY 2. JOB SATISFACTION 3. JOB INVOLVEMENT 4. ORGANIZATIONAL
CLIMATE
EXPERIMENTAL I PACKAGE A YOGIC TRAINING
EXPERIMENTAL II PACKAGE B YOGIC TRAINING
CONTROL GROUP (NO TREATMENT)
POST TEST
HEALTH RELATED PHYSIOLOGICAL PSYCHOLOGICAL FITNESS COMPONENTS VARIABLES VARIABLES
1. ENDURANCE 1. RESTING PULSE RATE 1. ANXIETY 2. STRENGTH 2. VO2 MAX 2. JOB SATISFACTION 3. FLEXIBILITY 3. BREATH HOLDING TIME 3. JOB INVOLVEMENT 4. BODY 4. BLOOD PRESSURE 4. ORGANIZATIONAL
COMPOSITION CLIMATE
STATISTICAL ANALYSIS Analysis of Co-Variance (ANCOVA)
And Scheffe’s Post hoc Test
RESULTS, DISCUSSIONS & CONCLUSIONS


