Download - Co corahs albedoinstr_11sept2012
Measuring Snow Properties:
Albedo, Depth, Density, and
Temperature
Elizabeth Burakowski, UNH
September 2012

Equipment
Scraper or Spatula
Field Notebook
Pyranometer onleveling boom
YardstickDigital Hanging Scale
2-ft and 4-ft snowtubes with caps
IR Temperature Gun

Where to Measure
• In an level open area, with minimal shadingfrom trees, houses, fences, etc.
• Undisturbed snow pack (no footprints, pet waste, etc)
• Point leveling boom at sun (south) to reduce shadowing
• If snowpack is thin or patchy, pick an area that is most representative of overall snow conditions.
• Measurement areaisabout 1 m2
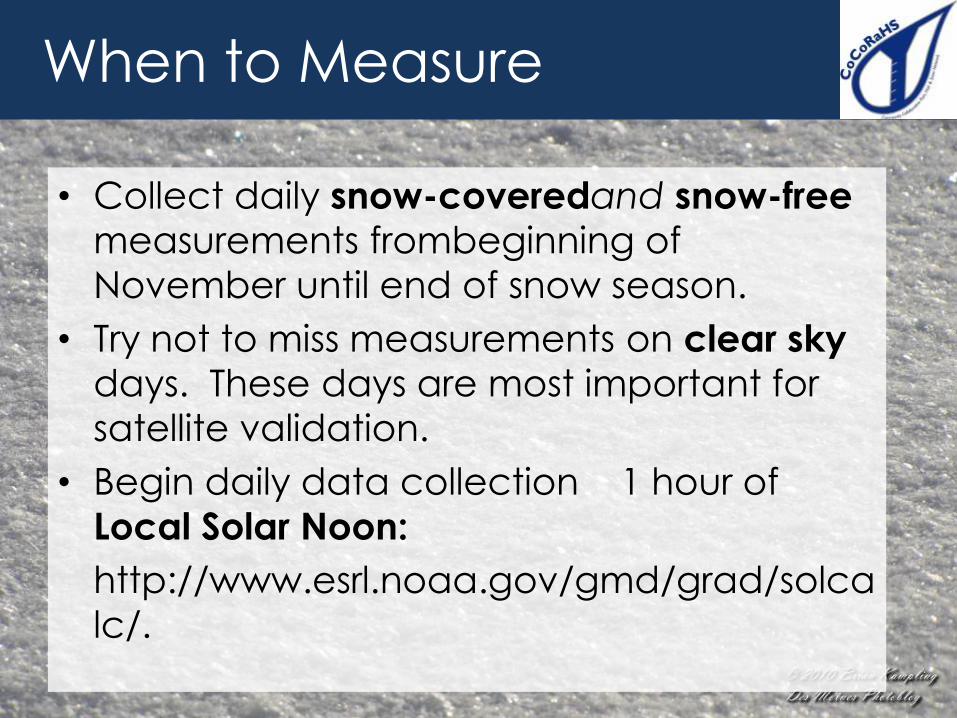
When to Measure
• Collect daily snow-coveredand snow-free
measurements frombeginning of
November until end of snow season.
• Try not to miss measurements on clear sky
days. These days are most important for
satellite validation.
• Begin daily data collection 1 hour of
Local Solar Noon:
http://www.esrl.noaa.gov/gmd/grad/solca
lc/.

What to Measure
1. Albedo
2. Snow Depth
3. Snow Density
4. Snow Temperature
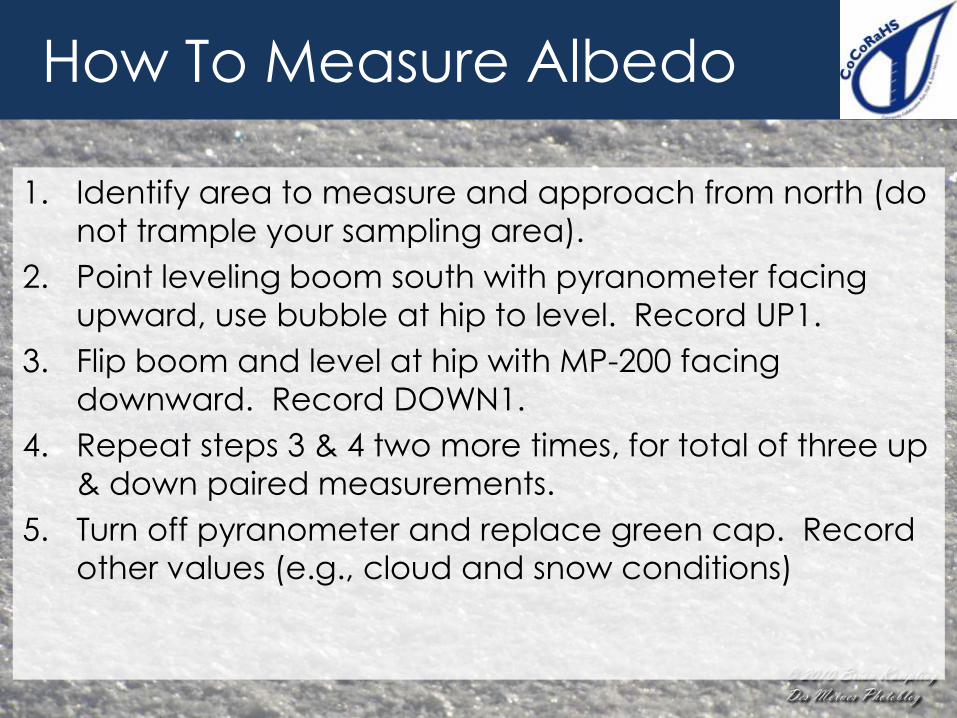
How To Measure Albedo
1. Identify area to measure and approach from north (do
not trample your sampling area).
2. Point leveling boom south with pyranometer facing
upward, use bubble at hip to level. Record UP1.
3. Flip boom and level at hip with MP-200 facing
downward. Record DOWN1.
4. Repeat steps 3 & 4 two more times, for total of three up
& down paired measurements.
5. Turn off pyranometer and replace green cap. Record
other values (e.g., cloud and snow conditions)
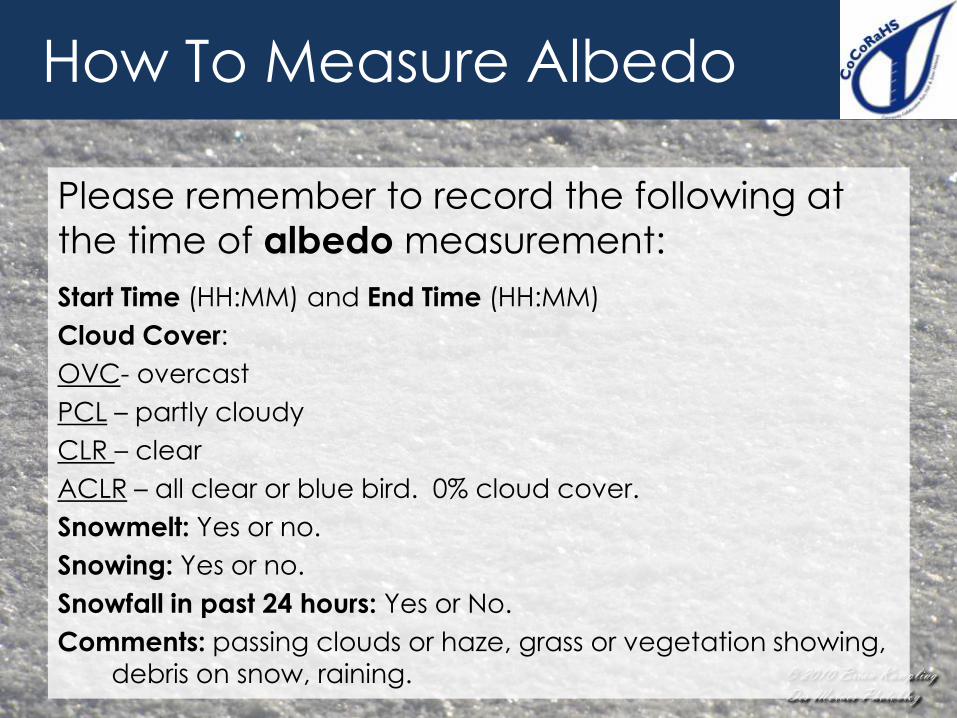
How To Measure Albedo
Please remember to record the following at
the time of albedo measurement:
Start Time (HH:MM) and End Time (HH:MM)
Cloud Cover:
OVC- overcast
PCL – partly cloudy
CLR – clear
ACLR – all clear or blue bird. 0% cloud cover.
Snowmelt: Yes or no.
Snowing: Yes or no.
Snowfall in past 24 hours: Yes or No.
Comments: passing clouds or haze, grass or vegetation showing,
debris on snow, raining.

How To Measure Albedo
1. Power button
2. Meter read-out (in
Watts/m2
3. No need to use
these buttons.
Sensor will display
values instantly.
2
3
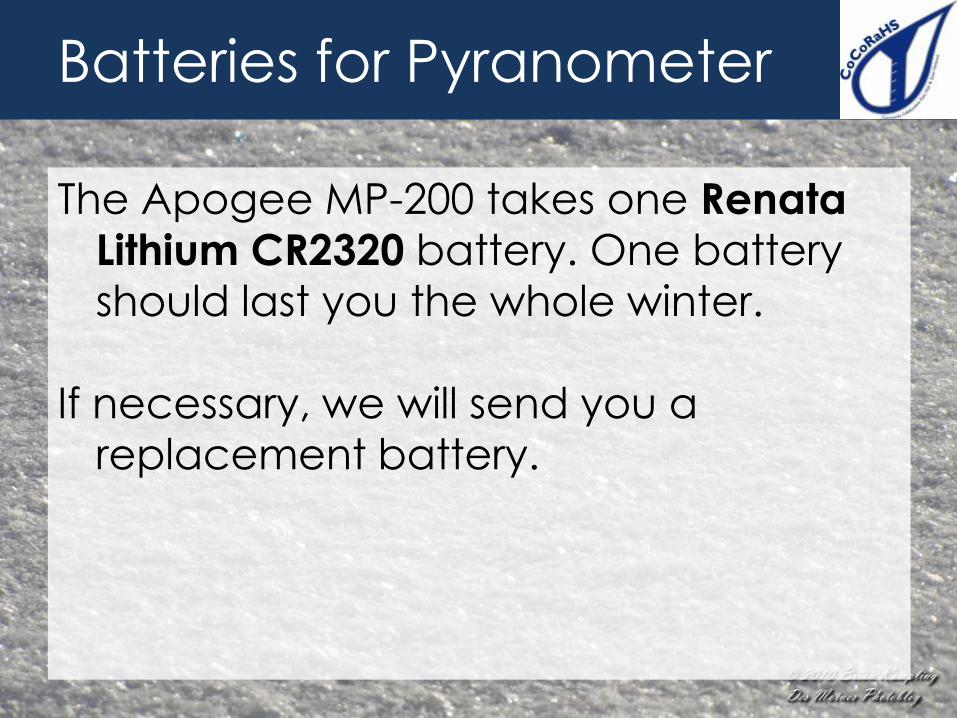
Batteries for Pyranometer
The Apogee MP-200 takes one Renata
Lithium CR2320 battery. One battery
should last you the whole winter.
If necessary, we will send you a
replacement battery.

How to Measure
Surface Temperature
1. Make sure the IR gun is set to
measure in oF by pressing
the scale selector button
2. Point the IR temperature
gun vertically about 3 inches
above the surface.
3. Press the measure button for
5 seconds and record the
temperature displayed on
the screen.
4. Hold the gun steady and
level for best results. If the
temperature changes, pick
the average number of the
displayed values.

How to Measure Snow Depth
1. Place the snow tube (2-ft or 4-ft) vertically into
the snow pack, making sure the hanging hole is
at the top end of the tube.
2. Scrape snow off the side of the tube and
measure snow depth to ground, rounding to
nearest 0.5”. If you are unable to reach the
ground surface (i.e., ice layer at bottom of tube),
record the snow depth collected in the tube
and note approximate thickness of ice not
collected in tube.

How to Measure Snow Density
1. Place spatula under bottom of tube, lift way from
the snowpack and carefully secure cap on
bottom of tube. Bring the tube indoors to weigh
(scale does not work well in cold weather).
2. Hang the scale from a sturdy hook. Turn on the
scale and watch for 0.000 lb to appear. (Hit
MODE button to switch from kg to lb).
3. Hang tube on metal scale hook, using hole at
the top of the tube. Measure to nearest
hundredth (0.00). Record the total weight (tube,
caps and snow!) in lab notebook.
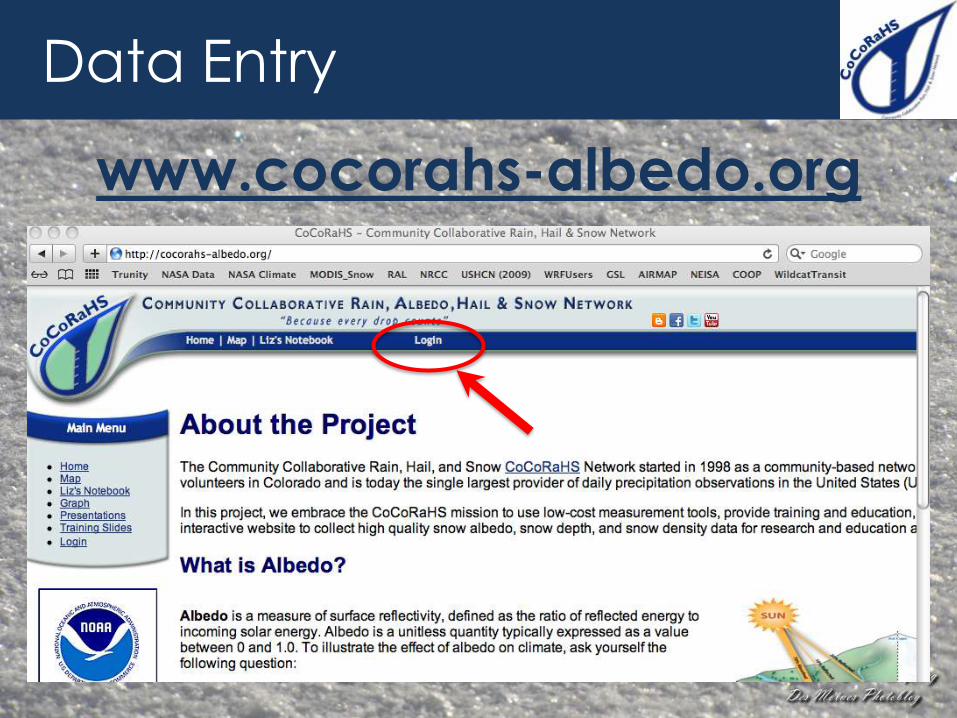
Data Entry
www.cocorahs-albedo.org
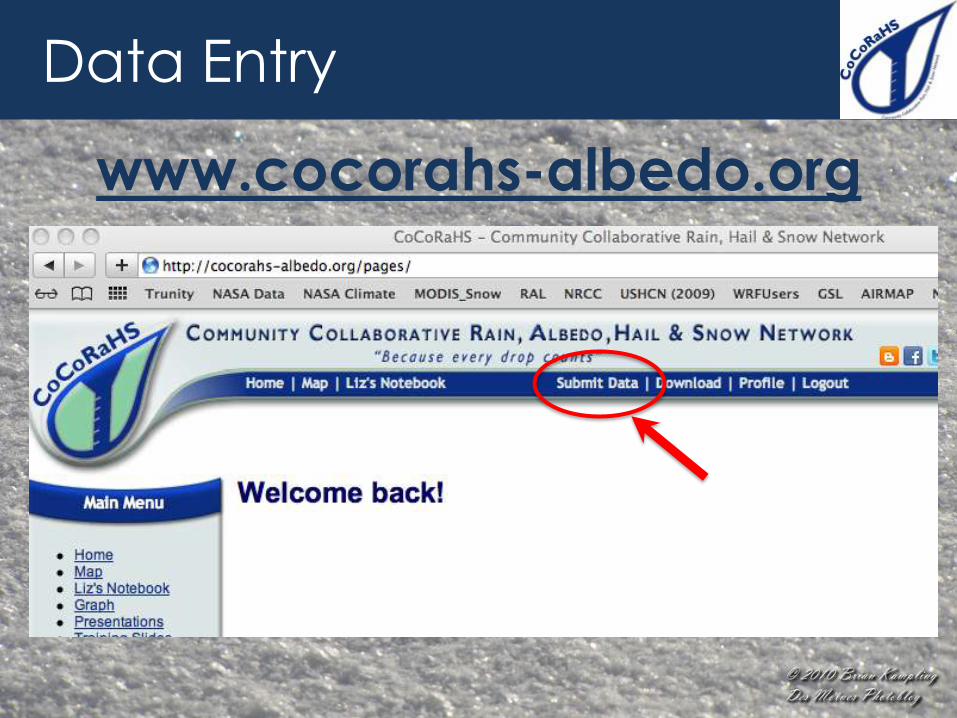
Data Entry
www.cocorahs-albedo.org
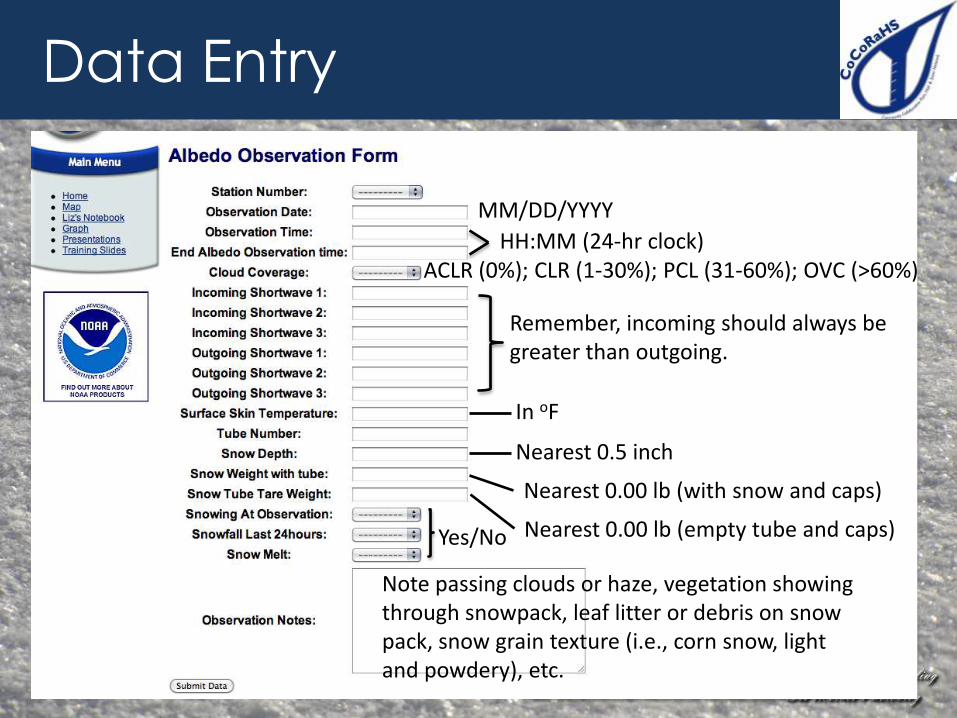
Data Entry
HH:MM (24-hr clock)
MM/DD/YYYY
Remember, incoming should always be greater than outgoing.
In oF
Nearest 0.5 inch
Nearest 0.00 lb (with snow and caps)
Nearest 0.00 lb (empty tube and caps)
Note passing clouds or haze, vegetation showing through snowpack, leaf litter or debris on snow pack, snow grain texture (i.e., corn snow, light and powdery), etc.
Yes/No
ACLR (0%); CLR (1-30%); PCL (31-60%); OVC (>60%)

How To Measure
1. Identify area to measure and approach from
north.
2. Point leveling boom south with MP-200 facing
upward, use bubble at hip to level. Record UP1.
3. Flip boom and level at hip with MP-200 facing
downward. Record DOWN1.
4. Repeat steps 3 & 4 two more times, for total of
three up & down paired measurements.
5. Turn off MP-200 and replace cap. Record other
comments (e.g., cloud and snow conditions)
6. Enter recorded values on CoCoRaHS.org
Think Snow!
Questions?
Contact: Liz Burakowski


![· co co 40 Illiö % t J O O o o o co o o o co o o IJ o o co +0 a o O O O o . 0) 00 oo co E co co o O co co O co co co co co co o 00 co co o u] co CO](https://cdn.vdocument.in/doc/165x107/5b810bdc7f8b9a7b6f8b79f2/-co-co-40-illioe-t-j-o-o-o-o-o-co-o-o-o-co-o-o-ij-o-o-co-0-a-o-o-o-o-o-0.jpg)


