
Module – Laboratory Materials and Techniques
Faculty Teaching Guide for Dental Materials
Module - Laboratory Materials and Techniques
- 1 -1

Faculty Teaching Guide for Dental Materials
Faculty Teaching Guide for Dental Materials
Module - Laboratory Materials and TechniquesModule OverviewA large variety of dental laboratory materials are utilized by the dental assistant. Each material has unique
properties in order to perform specific functions. This module discusses some of the lab materials used in the
dental environment for patient care.
The Big Picture
ResourcesThis module utilizes the following learner resources:
Textbooks:
Dental Assisting, A Comprehensive Approach, 2nd edition, by Donna J. Phinney and Judy Halstead. Delmar
Learning, 2004. ISBN 1-4018-3480-9.
Materials and Procedures for Today’s Dental Assistant, by Ellen Dietz, Delmar Learning, 2004. ISBN 0-7668-
2659-7.
Workbook: Workbook to Accompany Dental Assisting, A Comprehensive Approach, 2nd edition, by Donna J.
Phinney and Judy Halstead, prepared by Karen L. Waide, Delmar Learning, 2004. ISBN 1-4018-3483-3.
2
Faculty Teaching Guide forDental Materials
Module:Laboratory Materials and Techniques
Section 2:Diagnostic Casts
Section 1:Alginate Impression
Part A: Elastomeric Impression Materials
Part B: Gypsum Materials
Part A: Alginate Impression Material
Part B: Bite Registration
Part A: Waxes and Custom Trays
Part B: Temporary Crowns
Section 3:Provisional Materials

Module – Laboratory Materials and Techniques
Instructor’s Manual: Instructor’s Manual to Accompany Delmar’s Dental Assisting, A Comprehensive Approach,
2nd edition, by Donna J. Phinney and Judy Halstead. Delmar Learning, 2004. ISBN 1-4018-3482-5.
Delmar’s Dental Assisting Video Series: Delmar Learning. ISBN 0-7668-1031-3.
Faculty CD-ROM: The faculty CD-ROM includes this Faculty Guide the PowerPoint Presentation for Dental
Materials.
Additional ResourcesSafety Standards and Infection Control for Dental Assistants, by Ellen Dietz. Delmar Learning, 2002. ISBN 0-
7668-2659-7.
Electronic Classroom Manager to Accompany Delamr’s Dental Assisting, A Comprehensive Approach, 2nd edition,
by Donna J. Phinney and Judy Halstead. Delmar Learning, 2004. ISBN: 1-4018-3484-1.
Section 1: Impression MaterialsSection OverviewMany dental procedures require cast models to be prepared by the dental assistant. Quality models
begin with accurate impressions of the patient’s dentition, continue with pouring the gypsum material, and
end with properly shaped cast models. This sections explains how to take proper impressions of your
patient’s teeth.
Outline of Section 1Part A: Alginate Impression Material
Part B: Bite Registration
Learning Objectives and CompetenciesThese learning activities directly address the Learning Objectives and Competencies
as stated.
Knowledge
1. Define the Key Terms.
2. Identify materials used in the dental lab and perform associated procedures.
Application
3. Demonstrate the knowledge and skills necessary to prepare, take, and
remove alginate impressions and wax bites.
- 3 -3
needs to see the relevance and immediate application of learning to their jobs, personal goals, or needs. They need to be shown respect and treated as adults and have many responsibilities that they must balance against the demands of learning.
The Adult Learner….

Faculty Teaching Guide for Dental Materials
Learning ActivitiesThese learning activities directly address the Learning Objectives and Competencies as stated.
[Insert Homework Assignment icon] Key Term Glossary (Part A, Objective 1)
[Insert In-Class Activity icon] Alginate Impression Set Up (Part A, Objectives 2-3)
[Insert In-Class Activity icon] Taking the Impression (Part A, Objectives 2-3)
[Insert In-Class Activity icon] Removing and Disinfecting the Alginate Impression (Part A, Objective 3)
[Insert Homework Assignment icon] Textbook Assignment (Parts A-B, All Objectives)
[Insert Homework Assignment icon] Posttest (Parts A-B, All Objectives)
[Insert In-Class Activity icon] Taking a Bite Registration (Part B, Objective 3)
Part A: Alginate Impression Material OverviewMany dental procedures require cast models to be prepared by the dental assistant. Quality models start with
accurate impressions of the patient’s teeth. This part will present the steps necessary to obtain exact
representations of the patient’s maxillary and mandibular arches, to include the hard and soft tissues.
Initial Questions and Activities1. Who of you have had impressions taken of their teeth?
There will be a variety of responses to this question depending on
learners’ previous experience. Encourage learners to share their
experiences with the class. Discuss with them how they will learn to
take impressions efficiently and with a minimum of discomfort for the
patient.
2. What is the first thing, besides washing hands that a dental assistant should do after the patient is seated?
The patient’s health history should be reviewed every time they are seated in the dental chair.
Key Concepts References and Activities SlidesIntroduction to Module Slides 1-2
Introduction to Section 1 Slide 3
Key Terms [Insert Home Ass icon] Key Term Glossary Slide 4
Alginate Impression Material Chapter ____, pgs. ____ (Phinney & Halstead) Slides 5-9
4
Encourage learners to assume roles of both patient and healthcare worker and to treat each other accordingly. Patients should ask lots of questions and state fears. Healthcare workers should practice effective patient interactive skills.
Teaching Tip

Module – Laboratory Materials and Techniques
Key Concepts References and Activities SlidesChapter ____, pgs. ____ (Deitz)
[Insert In-Class Activity icon] Alginate
Impression Set Up
[Insert Group Activity icon] Taking the
Impression
[Insert Group Activity icon] Removing and
Disinfecting the Alginate Impression
[Insert Home Ass icon] Textbook Assignment,
[Insert Home Ass icon] Posttest
[ ] Group Activities [ ] Homework [ ] Individual Activity [ ] Internet Activity [ ] In-Class Discussion [ ] In-Class Act [ ] Evaluation
[Insert In-Class Act icon] In-Class Activities Alginate Impression Set Up (Part A, Objectives 2-3). Goal: To have learners set up for an alginate
impression. Instructor should ensure enough materials and supplies are available for learners. Learners should
be placed into teams for the procedure. Learners should be graded on the procedure steps as outlined on pg.
____, Chapter ____(Phinney & Halstead). Learner workbooks contain check off sheets that can be utilized.
Taking the Impression (Part A, Objectives 2-3). Goal: To have learners take a diagnostic maxillary and
mandibular impression of a lab partner. Learners should be placed into teams and take turns being the patient
and the dental assistant. Learners should be graded on the procedure steps as outlined on pg. ____, Chapter
____(Phinney & Halstead). Learner workbooks contain check off sheets that can be utilized.
Removing and Disinfecting the Alginate Impression (Part A, Objective 3). Goal: To have learners remove
the impression from their patient’s mouth and disinfect the impression. As each procedure step is completed,
as outlined on pg. ____, Chapter ____ (Phinney & Halstead), learners should be graded. For disinfecting the
impression the instructor should ensure proper disinfecting solution is available. Learner workbooks contain
check off sheets that can be utilized for grading purposes.
[Insert In-Class Dis Ques icon] In-Class Discussion
- 5 -5
Communication skill development takes practice. Ensure that you provide many opportunities to practice these skills and encourage learners to find their own opportunities for practice outside of class.
Teaching Tip

Faculty Teaching Guide for Dental Materials
1. How should the patient be seated in the dental chair for the impression
procedure?
The patient should be seated in an upright position, and at the height of
the dental assistant’s elbow.
[Insert Home Ass icon] Homework AssignmentsKey Term Glossary. Learners will define key terms listed in the PowerPoint presentation. They are to enter this
glossary on disk, in a dedicated notebook or in a designated part of a notebook. They are expected to augment
information from text or lecture with other resources including any available in the school or public libraries or on
the Internet and will be graded at the end of the module on completeness and presentation.
Textbook Assignments. Learners are to read Chapter ___ (Phinney & Halstead) as well as Chapter ___ (Dietz).
Posttest. Have learners complete the Skills Mastery Assessment Posttest in Chapter ___ (Dietz) and be
prepared to turn them in for class discussion.
Presentation Tools
Note: If you change Objectives or Assignments, don’t forget to change the slides accordingly.Slide 1 [Insert DM 1-1]
DM – Stands for Dental
Materials. The 1st number “1”
indicates the Module called
Laboratory Materials and
Techniques. The 2nd number
indicates the slide number
Power Point Presentation for Dental Materials
Module: Laboratory Materials and Techniques
Introduce Module.
Slide 2 [Insert DM 1-2] Module: Laboratory Materials and Techniques
Introduce the sections and each part.
6

Module – Laboratory Materials and Techniques
Slide 3 [Insert DM 1-3] Section 1: Alginate Impressions
Discuss each objective in detail. Learners need to know
what they will be learning and why. Try to relate it back to
their careers as dental assistants.
Slide 4 [Insert DM 1-4] Key Terms
Review each key term and discuss.
Homework Assignment: Stop here and go over the Key
Term Glossary assignment.
Slide 5 [Insert DM 1-5] Part A: Alginate Impression Material
Discuss the purposes for alginate impressions.
Note to Instructor: For further resource materials on this
subject refer to Chapter ____ in Delmar’s Safety
Standards and Infection Control for Dental Assistants
textbook by Ellen Dietz, 2002. ISBN 0-7668-2659-7.
Address how the powder is made from seaweed and
when water is added becomes a solid.
Explain that too much water will cause imbibition and not
enough water causes syneresis.
Discuss how there is a fast set alginate, and a slow
setting type, which they may prefer to work with the first
few times.
Explain the packaging, storage and shelf life of alginate.
Point out that various types of trays used for alginate
impressions.
Discuss the role of the dental assistant in taking alginate
impressions for diagnostic casts.
- 7 -7

Faculty Teaching Guide for Dental Materials
Slide 6 [Insert DM 1-6] Alginate
Point out that alginate is the most economical impression
material available and is used frequently.
Define imbibition and syneresis.
Slide 7 [Insert DM 1-7] Impression Set up
Explain how important it is to plan ahead and have
everything out and ready before beginning any dental
procedure.
Ensure learners understand that proper infection control
must be practiced for this procedure.
Slide 8 [Insert DM 1-8] Taking the Impression
Describe how to extend a tray with bead wax and discuss
how to explain the procedure to the patient before
beginning.
Explain how too much material can stimulate the patient’s
gag reflex, and not enough material will produce a poor
impression of the patient’s dentition.
Slide 9 [Insert DM 1-9] Taking the Impression (cont.)
Describe the procedure.
Explain that the tray should be tried in the patient’s mouth
for size, before loading it with alginate material.
Inform learners that as they smooth the material with
their finger, they can also wipe excess material off so
there isn’t too much in the tray.
Discuss how to use one side of the tray to retract the
cheek and the other side should be retracted with a
8

Module – Laboratory Materials and Techniques
finger.
Explain how to check the stiffness of the material, as it is
being held in the patient’s mouth.
Point out that the warmth of the patient’s mouth will
cause the material to set more quickly than the material
left in the mixing bowl.
Slide 10 [Insert DM 1-10] Removing the Impression
Describe how the tray can be moved back-and-forth in
order to loosen it from the teeth.
Ensure learners know how to keep their fingers between
the tray and the teeth, in case the suction causes the tray
to snap loose quickly.
Explain that the patient will need a wet paper towel to
clean their face following the procedure.
Address how the impression should be disinfected
immediately and put in a moist towel, then poured with
plaster or stone as soon as possible.
Short Activity: Stop here to show Video 5: Laboratory
Impressions, Materials, and Techniques, from the Delmar
Dental Assisting Video Series.
In-Class Activity: Stop here for the Alginate Impression
Set Up activity, Taking the Impression activity, and
Removing and Disinfecting the Alginate Impression
activity.
Homework Assignment: Stop here to assign and
discuss the homework.
- 9 -9

Faculty Teaching Guide for Dental Materials
Part B: Bite RegistrationOverviewIn order to be sure how the patient’s teeth meet, a precise replica of their bite is
essential. This requires that the dental assistant place wax or other materials
into the oral cavity and ensure that the patient carefully occlude the teeth
together correctly.
Initial Questions and Activities1. What type is the term for when alginate impression takes on too much water?
The term is imbibition.
Key Concepts References and Activities SlidesBite Registration Chapter ___, pgs. ____ (Phinney & Halstead)
Chapter ____, pgs. ____ (Dietz)
[Insert Group Activity icon] Taking a Bite
Registration
[Insert Home Ass icon] Textbook Assignment
[Insert Home Ass icon] Posttest
Slide 11
Assessment Questions Slide 12
[ ] Group Activities [ ] Homework [ ] Individual Activity [ ] Internet Activity [ ] In-Class Discussion [ ] In-Class Activity [ ] Evaluation
[Insert In-Class Act icon] In-Class Activities Taking a Bite Registration (Part B, Objective 3). Goal: To have learners take a bite registration of the lab
partner used for impressions. Learners will take a bite registration of the patient they previously acquired
impressions of in Part A for proper articulation during model trimming. Learners should be graded as they
complete the steps to taking a bite registration as outlined on pg. ___, Chapter ____, (Phinney & Halstead).
Learner workbooks contain check off sheets that can be utilized for grading purposes.
[Insert In-Class Dis Ques icon] In-Class Discussion1. What would happen if the excess alginate is not removed before placing the tray into the patient’s mouth?
Excess alginate material could go down the patient’s throat and cause gagging.
10
Change small groups periodically so that learners get the benefits of working with all their classmates. Watch groups carefully to see if they are working effectively. Provide input and guidelines as appropriate.
Teaching Tip

Module – Laboratory Materials and Techniques
[Insert Home Ass icon] Homework AssignmentsTextbook Assignment. Learners are to read Chapter ___ (Dietz).
Posttest. Have learners complete the Skills Mastery Assessment Posttest in Chapter ____ (Dietz) and be
prepared to review them in class.
Ideas for learners struggling with this material …
Attending to Class. Encourage struggling learners to avoid wasting time during lab activities. Remind
them that they owe it to themselves to take advantage of each moment and to ask questions if the material
is not understood. Suggest they avoid spending time on unrelated information or discussion.
Ideas for learners who are ahead and want to learn more …
Web Research. Have learners go to the website http://www.dentsply.com and review the product catalogue
for new products and be prepared to discuss their discoveries in class.
Presentation Tools
Note: If you change Objectives or Assignments, don’t forget to change the slides accordingly.Slide 11 [Insert DM 1-10] Part B: Bite Registration
Review Part A.
Review the homework and make sure that any remaining
questions are answered.
Introduce Part B.
Explain why an accurate bite registration is necessary in
order to articulate the models together and for accurate
trimming of models.
Ensure learners understand that the patient may not
occlude their teeth together the same way each time and
that the patient should be instructed to bite on their “back
teeth.”
Address how patients should be instructed to bite their
- 11 -11

Faculty Teaching Guide for Dental Materials
teeth together before placing the bite registration material,
and then told to bite in the same manner when the material
is placed in the mouth.
Note to Instructor: To make information clearer, call a
volunteer up to the front of the class and walk through each
step. Have the learner be the patient and the instructor the
DA. Walk through each step that should be explained to the
patient prior to the taking of the bite registration.
In-Class Activity: Stop here for the Taking a Bite
Registration activity.
Slide 14 [Insert IDA 2-14] Assessment Questions
Short Activity: Stop here and have learners answer the
questions on the slide. Review material as needed to
enhance understanding.
Homework Assignment: Stop here to assign and discuss
the homework.
Section 2: Diagnostic Casts Section OverviewCast models are created by pouring various types of gypsum materials into the impression of the patient’s arch.
There are several different types of gypsum and even more varieties of elastomeric impression materials that
dental assistants needs to become proficient with using.
Outline of Section 2Part A: Elastomeric Impression Materials
Part B: Gypsum Materials
Learning Objectives and Competencies
These learning activities directly address the Learning Objectives and Competencies
as stated.
Knowledge
12
Answering a question by asking another question of the learners is a very effective teaching technique. It forces learners to think ahead to the next concept, and shows relevancy to the previous concept. It also helps keep learners engaged in the conversation and subject matter because they never know when they might be called on to answer.
Teaching Tip

Module – Laboratory Materials and Techniques
4. Define the Key Terms.
Application
5. Demonstrate the knowledge and skills necessary to prepare alginate and
elastomeric impression materials.
6. Demonstrate the knowledge and skills necessary to use gypsum materials.
7. Demonstrate the knowledge and skills necessary to pour and trim diagnostic cast models.
Learning ActivitiesThese learning activities directly address the Learning Objectives and Competencies as stated.
[Insert Homework Assignment icon] Key Term Glossary (Part A, Objective 4)
[Insert In-Class Activity icon] Taking a Polysulfide Impression (Part A, Objective 5)
[Insert In-Class Activity icon] Manipulating Elastomeric Impression Materials (Part A, Objective 5)
[Insert Homework Assignment icon] Textbook Assignment (Part A, All Objectives)
[Insert Homework Assignment icon] Posttest (Part A, All Objectives)
[Insert In-Class Activity icon] Practice Taking and Removing Impressions (Part B, Objective 5)
[Insert In-Class Activity icon] Pour Plaster Into Alginate Impressions (Part B, Objective 6)
[Insert In-Class Activity icon] Pouring Labstone Material (Part B, Objective 6)
[Insert In-Class Activity icon] Separating Models from the Impressions (Part B, Objective 7)
[Insert In-Class Activity icon] Trimming Diagnostic Cast Models (Part B, Objective 7)
- 13 -13

Faculty Teaching Guide for Dental Materials
Part A: Elastomeric ImpressionsOverviewElastomeric impression materials are more durable and have less distortion
characteristics than alginate. They have a rubber consistency and are produced in a
base and catalyst form. The two parts can be placed on a pad for mixing with a
spatula, or extruded from a device which mixes the base and catalyst together as it
flows out of a tube. These types of impression materials are used most often for
prosthodontic dental procedures requiring more accuracy from the model. Depending
on state law, the dental assistant will prepare these materials and pass them to the
dentist or will be asked to take the impressions.
Initial Question and Activities1. Who of you have had rubber-type impressions done for crowns or bridges?
There will be various answers depending on the learners’ experience. Discuss their perception of how
the dental assistant and dentist worked together as a team.
Key Concepts References and Activities SlidesIntroduction to Section 2 Slide 13
Key Terms [Insert Homeword Ass icon] Key Term
Glossary
Slide 14
Elastomeric Impression Materials Chapter ___, pgs. ____ (Phinney & Halstead)
Chapter ____, pgs. ____ (Dietz)
[Insert Group Activity icon]Taking a Polysulfide
Impression
[Insert Group Activity icon]Manipulating
Elastomeric Impression Materials
[Insert Home Ass icon] Textbook Assignment
[Insert Home Ass icon] Posttest
Slides 15-16
14
For each learning activity, ensure you provide sufficient instructions and set specific expectations. What exactly do you want learners to get out of the activity? How exactly are learners supposed to complete the activity? What could go wrong and what should learners do about it? How are learners supposed to turn in the assignment? How will they be graded?
Teaching Tip

Module – Laboratory Materials and Techniques
[ ] Group Activities [ ] Homework [ ] Individual Activity [ ] Internet Activity [ ] In-Class Discussion [ ] In-Class Activity [ ] Evaluation
[Insert In-Class Act icon] In-Class Activities Taking a Polysulfide Impression (Part B, Objective 5). Goal: For learners to gain experience manipulating
elastomeric impression materials. Instructor should ensure there are enough materials and supplies for the
class and separate learners into teams. Learners should be graded on the procedure steps as outlined on pg.
____, Chapter ____(Phinney & Halstead). Learner workbooks contain check off sheets that can be utilized.
Manipulating Elastomeric Impression Materials (Part B, Objective 5). Goal: For learners to gain
experience manipulating elastomeric impression materials with the one and two-step method. Instructor
should ensure there are enough materials and supplies for the class and separate learners into teams.
Learners should be graded on the procedure steps as outlined on pgs. ____, Chapter ____(Phinney &
Halstead). Learner workbooks contain check off sheets that can be utilized
[Insert In-Class Dis Ques icon] In-Class Discussion1. What were some of the problems found with manipulating the alginate
material, loading it into the tray, and placing it into your patient’s mouth?
Discuss proper techniques for using alginate impression material.
Explain clearly to learners how to perform each step again now that
they have experience using the material and placing it in the mouth.
[Insert Home Ass icon] Homework AssignmentsKey Term Glossary. Learners will define key terms listed in the PowerPoint presentation. They are to enter this
glossary on disk, in a dedicated notebook or in a designated part of a notebook. They are expected to augment
information from text or lecture with other resources including any available in the school or public libraries or on
the Internet and will be graded at the end of the module on completeness and presentation.
Textbook Assignment. Have learners read Chapter ___ (Dietz).
Posttest. Have learners complete the Skills Mastery Assessment: Posttest in Chapter ___ (Dietz).
Ideas for learners struggling with this material …
Read and Be Prepared: Encourage learners to be prepared for in-class discussions with questions,
comments, insights, and observations.
- 15 -15
Go over the learning activities carefully during the first part of this module to allow learners to see the plan for the class. Adult learners often like having an agenda so they can know what to expect and how to plan
Teaching Tip

Faculty Teaching Guide for Dental Materials
Ideas for learners who are ahead and want to learn more… Lecture: Give learners who are ahead a heads up regarding what will be discussed in the next class session.
Have the learner research the topic and present part of the lecture.
Presentation Tools
Note: If you change Objectives or Assignments, don’t forget to change the
slides accordingly.
Slide
13
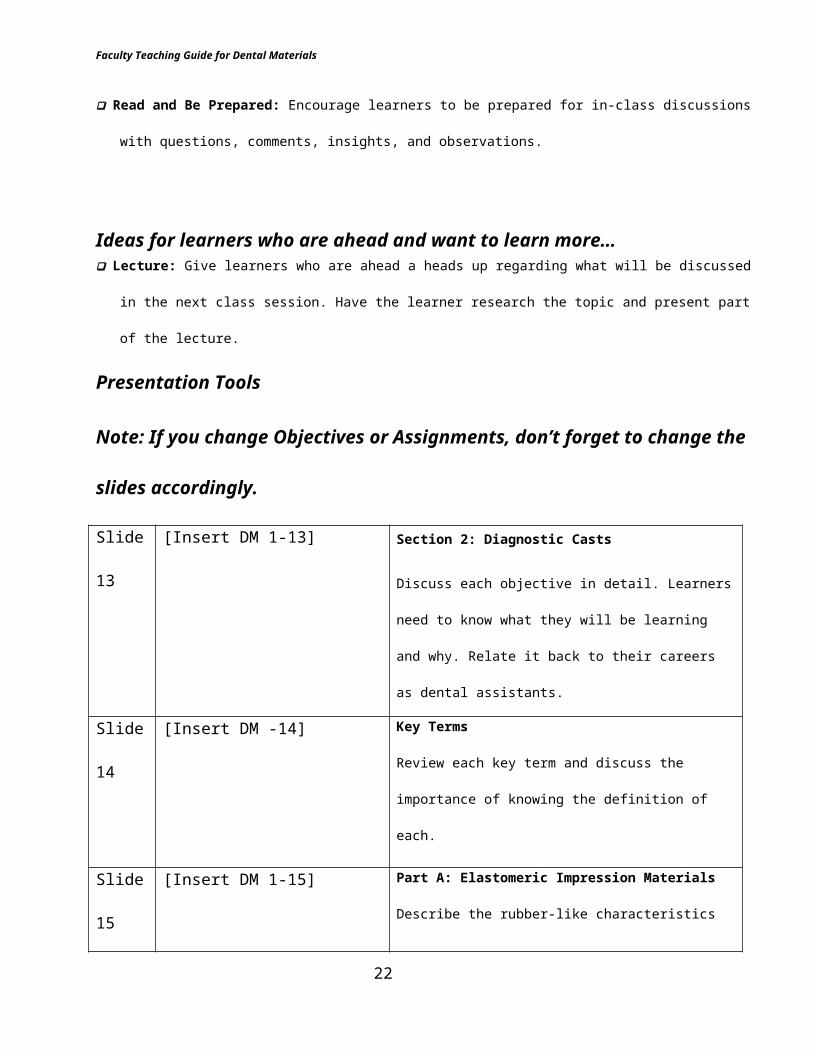
[Insert DM 1-13] Section 2: Diagnostic Casts
Discuss each objective in detail. Learners need to know
what they will be learning and why. Relate it back to their
careers as dental assistants.
Slide
14
[Insert DM -14] Key Terms
Review each key term and discuss the importance of
knowing the definition of each.
Slide
15
[Insert DM 1-15] Part A: Elastomeric Impression Materials
Describe the rubber-like characteristics of these
materials.
Explain that elastomeric impressions are either done by
mixing two parts together, manipulating putty and a
syringe, or using an extruding gun.
Address how the material must be cleaned out of the
reusable syringe after it has set, or use a disposable
syringe.
Explain that the extruder gun tips will need to be changed
for each application of the elastomeric material.
Slide
16
[Insert DM 2-16] Elastomeric Impression Materials (cont.)
Explain that there is much less distortion with these
16

Module – Laboratory Materials and Techniques
materials than with alginate impressions, but that they
are also more expensive to use and shouldn’t be wasted.
Explain that these materials are used for impressions to
be sent to the lab for prosthodontic procedures where
accuracy and precision are required.
In-Class Activity: Stop here for the Taking a Polysulfide
Impression activity, the Taking a Silicone Two-Step
Impression activity, and Manipulating Elastomeric
Impression Materials activity.
Homework Assignment: Stop here and review the Key
Terms Glossary homework assignment.
Part B: Gypsum ModelsOverviewGypsum materials come in different strengths depending on the needed use of the diagnostic cast models.
Models used for the fabrication of crowns and bridges must be poured with stronger die stone, those for use in the
office for bleach trays, for example, are usually poured with lab stone, and those not used for lab work, such as
before and after orthodontic treatment, are poured with the weaker plaster material. Regardless of which type is
utilized, it is mandatory for the dental assistant to ensure the model does not have air bubbles and correctly
depicts the patient’s hard and soft dentition. The techniques of pouring and cutting models will be presented in
this part.
Initial Questions and Activities1. What is the purpose for acquiring a wax bite of your patient?
A wax bite will ensure the models fit together properly, for model trimming,
or for articulation of the casts.
Key Concepts References and Activities SlidesGypsum Materials Chapter ___, pgs. ___ (Phinney & Halstead)
Chapter ___, pgs. ___ (Dietz)
Slides 17-19
- 17 -17
Create an environment where group activities are taken seriously and learners are expected to act in a professional manner. These behaviors will carry over into the workplace.
Teaching Tip

Faculty Teaching Guide for Dental Materials
Key Concepts References and Activities SlidesAssessment Questions [Insert Group Activity icon] Practice Taking and
Removing Impressions
[Insert Group Activity icon] Pouring Plaster
Into Alginate Impressions
[Insert Group Activity icon] Pouring Labstone
Material
[Insert Group Activity icon] Separating Models
from the Impressions
[Insert Group Activity icon] Trimming
Diagnostic Cast Models
Slide 20
[ ] Group Activities [ ] Homework [ ] Individual Activity [ ] Internet Activity [ ] In-Class Discussion [ ] In-Class Activity [ ] Evaluation
[Insert In-Class Act icon] In-Class Activities Practice Taking and Removing Impressions (Part B, Objective 5). Goal: To have learners again practice
taking a diagnostic maxillary and mandibular impression of a lab partner and removing the impression from
the mouth. Learners should be placed into teams and take turns being the patient and the dental assistant.
They should be graded as per the procedures outlined on pgs. ____ Chapter ____ (Dietz), Taking an Alginate
Impression and Removing the Alginate Impression.
Pouring Plaster Into Alginate Impressions (Part B, Objective 6). Goal: For learners to gain experience
pouring plaster into alginate impressions. Instructor should ensure there are enough materials and supplies
for the class and separate learners into teams. Learners should be graded on the procedure steps as outlined
on pg. ____, Chapter ____(Phinney & Halstead). Learner workbooks contain check off sheets that can be
utilized. Note to Instructor: This activity can be done as part of the Practice Taking and Removing
Impressions activity rather than as a separate activity with a saved alginate impression. Learners may pour
one plaster and one stone model or it would be better to get as much experience with these skills as time and
materials allow.
18

Module – Laboratory Materials and Techniques
Pouring Labstone Material (Part B, Objective 6). Goal: For learners to gain experience pouring labstone
material. Instructor should ensure there are enough materials and supplies for the class and separate
learners into teams. Learners should be graded on the procedure steps as outlined on pg. ____, Chapter
____(Phinney & Halstead). Learner workbooks contain check off sheets that can be utilized.
Separating Models from the Impressions (Part B Objective 7). Goal: For learners to gain experience
separating plaster and stone models from the impressions. Instructor should ensure there are enough
materials and supplies for the class and separate learners into teams. Learners should be graded on the
procedure steps as outlined on pg. ____, Chapter ____(Phinney & Halstead). Learner workbooks contain
check off sheets that can be utilized.
Trimming Diagnostic Cast Models (Part B, Objective 7). Goal: For learners to gain experience trimming
diagnostic cast models. Instructor should ensure learners wear eye protection, that there are enough
materials and supplies for the class and separate learners into teams. Learners should be graded on the
procedure steps as outlined on pg. ____, Chapter ____(Phinney & Halstead). Learner workbooks contain
check off sheets that can be utilized.
[Insert In-Class Dis Ques icon] In-Class Discussion1. Which material did you find easier to use for a bite registration?
Learners will have different answers. Have them explain their answer and share with the class their
opinion. Some will like the wax bite method, while others will like using the extruding gun device,
which is more difficult to manipulate in the mouth.
2. What is the difference between the polysulfide and the polysilixane impression materials?
Learners will present a variety of answers such as color, texture, odor, and this will depend on which
materials are available for you to use in your lab. Make sure they understand that the materials come
in a variety of colors. and manipulation factors differ with types of elastomeric materials.
Ideas for learners struggling with this material …
Group Participation: Suggest learners assess their group participation. They should ask themselves if they
are supportive of their classmates? Do they let others to the work? Encourage them to set up each step of
- 19 -19

Faculty Teaching Guide for Dental Materials
procedures themselves. Do they make the activity effective by focusing on the task at hand and not getting
the group off track during lab?
Ideas for learners who are ahead and want to learn more… Web Research: Go to http://www.ivoclarna.com and find the publications. Complete a one-page report on
one of the subjects in the imagazine on dental laboratory materials.
Presentation ToolsNote: If you change Objectives or Assignments, don’t forget to change the
slides accordingly.
Slide
17
[Insert DM -17] Part B: Gypsum Materials
Review Part A including the homework assignments. Make
sure that any remaining questions are answered.
Introduce Part B.
Discuss the variety of gypsum products available to
dentistry, and their various uses.
Slide
18
[Insert DM 1-18] Gypsum Materials (cont.)
Address the importance of the proper set up for pouring
models.
Review the steps in Chapter ___ (Phinney & Halstead)
outlining how to pour an alginate impression with plaster.
Slide
19
[Insert DM 1-19] Gypsum Materials (cont.)
Stress how important it is to mix the plaster or stone
material properly, that the vibrator’s purpose is to force air
bubbles to the surface, but the material will begin setting if
the assistant takes too long to pour it.
Ensure learners understand that the powder is mixed
20

Module – Laboratory Materials and Techniques
slowly into the water so that the material runs from one end
of the impression to the other in order to flow into the teeth,
and to push out any moisture. Explain how this skill takes
practice to master.
Slide
20
[Insert DM 1-20] Shaping the Models
Address the importance of wearing eye protection while
trimming the models.
Explain how the wheel must be wet and that it helps to
mark the model with a pencil before beginning the cuts.
Ensure learners understand that the bases of the model
must be even or none of their cuts will be symmetric.
Review the steps in Chapter ____ (Phinney & Halstead)
outlining how to trim diagnostic casts and study models.
Slide
21
[Insert DM 1-21] Finished Diagnostic Casts
Discuss how ideal finished models will show the area
behind the molars.
Explain that on the maxillary this is the tuberosity, and on
the mandible this is the retromolar area.
Point out that good diagnostic casts will also show the
frenums and the vestibule of both arches, and not have any
holes in the teeth.
Slide
22
[Insert DM 1-22] Assessment Questions
Short Activity: Ask the group to answer these questions to
assess their comprehension of the material recently
presented. Review any material that does not seem clear.
In-Class Activity: Stop here to complete each of the in-
- 21 -21
Faculty Teaching Guide for Dental Materials
class activities listed for this Part.
Homework Assignment: Stop here to assign and discuss
the homework.
Section 3: Provisional Materials Section OverviewMaterials used in the mouth are diverse. This section discusses dental waxes, how to fabricate custom trays for
dental patients, as well as temporary crowns for provisional coverage.
Outline of Section 3Part A: Waxes and Custom Trays
Part B: Temporary Crowns
Learning Objectives and Competencies
These learning activities directly address the Learning Objectives and Competencies
as stated.
Knowledge
8. Define Key Terms.
9. Identify the different classifications of waxes used in dentistry.
Application
10. Demonstrate the knowledge and skills necessary to fabricate custom trays.
11. Demonstrate the knowledge and skills necessary to construct and fit prefabricated temporary restorations.
Learning ActivitiesThese learning activities directly address the Learning Objectives and Competencies as stated.
[Insert Homework Assignment icon] Key Term Glossary (Part A, All Objectives)
[Insert In-Class Activity icon] Fabricate a Custom Tray (Part A, Objective 10)
[Insert Homework Assignment icon] Textbook and Workbook Assignment (Part A, All Objectives)
[Insert Homework Assignment icon] Posttest (Part A, All Objectives)
[Insert Homework Assignment icon] End of Chapter Activities (Part A, All Objectives)
[Insert In-Class Activity icon] Prepare and Cement an Aluminum Temporary Crown (Part B, Objective 11)
22
When conducting hands-on activities, continuously ask learners what they are doing, why they are doing it, and what the wrong way to do it might be. Often when learners have to explain correct and incorrect procedures, they must think about their actions more carefully.
Teaching Tip

Module – Laboratory Materials and Techniques
[Insert In-Class Activity icon] Prepare a Performed Acrylic Temporary Crown (Part B, Objective 11)
[Insert In-Class Activity icon] Manipulating Material (Part B, Objective 11)
[Insert In-Class Activity icon] Cement a Self-Cure Temporary Crown (Part B, Objective 11
[Insert In-Class Activity icon] Prepare an Acrylic Resin Temporary (Part B, Objective 11)
Part A: Waxes and Custom TraysOverviewThe dental assistant will have an opportunity to use the many varieties of waxes available for dentistry and will be
required to produce custom trays made for use in treating the dental patient.
Initial Questions and Activities1. Why would it be important for the lab technician to have an accurate bite representation of the patient?
The prosthesis must fit exactly with the way the patient occludes their teeth together.
Key Concepts References and Activities SlidesIntroduction to Section Slide 23
Key Terms [Insert Homeword Ass icon] Key Term
Glossary
Slide 24
Waxes and Custom Trays Chapter ___, pgs. ____ (Phinney & Halstead)
Chapters ___, pgs. ____ (Dietz)
[Insert Group Activity icon] Fabricate Custom
Trays
[Insert Home Ass icon] Textbook and
Workbook Assignment
[Insert Home Ass icon] Posttest
[Insert Home Ass icon] End of Chapter
Activities
Slide 25-27
[ ] Group Activities [ ] Homework [ ] Individual Activity [ ] Internet Activity [ ] In-Class Discussion [ ] In-Class Activity [ ] Evaluation
[Insert In-Class Act icon] In-Class Activities Fabricate Custom Trays (Part A, Objective 10). Goal: For learners to understand how to fabricate a custom
tray with self-cured acrylic resin and with vacuum formed acrylic resin. Instructor should ensure there are
- 23 -23

Faculty Teaching Guide for Dental Materials
enough materials and supplies for the class and separate learners into teams. Learners should be graded on
each procedure. The steps for each procedure should be followed as outlined on pgs. ____, Chapter
____(Phinney & Halstead). Learner workbooks contain check off sheets that can be utilized.
[Insert In-Class Dis Ques icon] In-Class Discussion1. What were some of the problems you encountered while pouring and trimming
models?
Discuss any problems learners had with pouring and trimming their
diagnostic casts. Explain techniques to help them and tell learners that they
will improve with more experience.
2. What is the most important thing to have to protect the operator during model trimming?
Safety glasses must be worn during model trimming to keep flying debris
from getting into the eyes.
[Insert Home Ass icon] Homework AssignmentsKey Term Glossary. Learners will define key terms listed in the PowerPoint presentation. They are to enter this
glossary on disk, in a dedicated notebook or in a designated part of a notebook. They are expected to augment
information from text or lecture with other resources including any available in the school or public libraries or on
the Internet and will be graded at the end of the module on completeness and presentation.
Textbook and Workbook Assignment. Learners are to read Chapters ____ (Dietz) and complete the
Workbook Assignments for Chapter ___ (Phinney & Halstead).
Posttests. Have learners complete the Skills Mastery Assessment: Posttest questions at the end of Chapters
____ (Dietz).
End of Chapter Activities: Have learners compete the Review Questions and Critical Thinking questions at the
end of Chapter ____ (Phinney & Halstead).
Ideas for learners struggling with this material … Assess Group Interactions. Encourage learners to assess their interaction in group activities. Tell them to
ask themselves what they do well? Where do they need to improve? Do they dominate the conversation?
Do they come to class prepared? Do they add productivity to the group during laboratory procedures?
Ideas for learners who are ahead and want to learn more …
24
Remember some learners are hesitant to do hands-on activities with their peers. Encourage them often, provide positive feedback, and create a safe environment.
Teaching Tip

Module – Laboratory Materials and Techniques
Speak Up. Encourage learners to be the spokesperson which gives them the chance to present in front of
others, but in a safe atmosphere. Tell them they know the instructor and the other learners, that they are
there to listen and learn, not to judge. Encourage them to take that feeling of confidence into the workplace.
Presentation ToolsNote: If you change Objectives or Assignments, don’t forget to change the
slides accordingly.
Slide
23
[Insert DM 1-23] Section 3: Provisional Materials
Discuss each objective for this section in detail. Learners
need to know what they will be learning and why. Try to
relate it back to their careers as dental assistants.
Slide
24
[Insert DM 1-24] Key Terms
Homework Assignment: Stop here to assign and
discuss the Key Term homework.
Review each key term and discuss the importance of
knowing the definition of each.
Slide
25
[Insert DM 1-25] Part A: Waxes and Custom Trays
Discuss how models can be placed in an articulating
device to simulate the patient’s occlusion and how
important and accurate bite registration is to this process.
Explain how the various waxes are used in dentistry.
Slide
26
[Insert DM 1-26] Waxes
Continue to discuss the many types of dental waxes and
their functions.
Slide
27
[Insert DM 1-27] Custom Trays
Describe the types of custom tray material available.
- 25 -25

Faculty Teaching Guide for Dental Materials
Explain the purpose of creating custom trays.
Inform learners that there is a self-cure acrylic material, a
light cured material, vacuum formed plastic, and
thermoplastic material, which is melted and then formed
to the shape of the patients arch.
Short Activity: Stop here and as a class complete the
Case Study at the end of Chapter ____ (Phinney &
Halstead).
In-Class Activity: Stop here for the Fabricate Custom
Trays activity.
Homework Assignment: Stop here to assign and
discuss the homework.
Part B: Provisional RestorationsOverviewA valuable dental assistant is able to construct temporary coverage for a patient’s tooth, so the patient has
coverage while the dental lab fabricates a fixed prosthesis. There are many materials and techniques available to
achieve the creation of this provisional. The dental assistant proficient with this skill will be an important asset to
any dental practice.
Initial Questions and Activities1. What type of wax would be used to extend an impression tray?
Utility wax could be used to extend the periphery of impression trays and to
ensure the impression procedure is more comfortable for the patient.
Key Concepts References and Activities SlidesProvisional Restorations Chapter ___, pgs. ____ (Phinney & Halstead)
Chapter ___, pgs. ____ (Dietz)
[Insert In-Class Activity icon] Prepare and
Slides 28-30
26
As you explain each activity, be sure to speak in relation to the dental office. Discuss real world examples and ask learners to propose their own examples. An important key to adult learning is to always bring it back to success in the workplace.
Teaching Tip
Module – Laboratory Materials and Techniques
Key Concepts References and Activities SlidesCement an Aluminum Temporary Crown
[Insert In-Class Activity icon] Prepare a
Performed Acrylic Temporary Crown
[Insert In-Class Activity icon] Manipulating
Material
[Insert In-Class Activity icon] Cement a Self-
Cure Temporary Crown
[Insert In-Class Activity icon] Prepare an
Acrylic Resin Temporary
Assessment Questions Slide 31
Summary of Module Slide 30
[ ] Group Activities [ ] Homework [ ] Individual Activity [ ] Internet Activity [ ] In-Class Discussion [ ] In-Class Activity [ ] Evaluation
[Insert In-Class Act icon] In-Class Activities Prepare and Cement an Aluminum Temporary Crown (Part B, Objective 11). Goal: For learners to
prepare an aluminum temporary crown and cement it. Instructor will need to provide typodonts or
models with posterior crown preparations and instruments and supplies necessary to practice this
skill. Learners should be graded on each procedure. The steps for each procedure should be followed
as outlined on pgs. ____, Chapter ____(Phinney & Halstead). Learner workbooks contain check off
sheets that can be utilized.
Prepare a Performed Acrylic Temporary Crown (Part B, Objective 11). Goal: For learners to
prepare a preformed acrylic temporary crown. Instructor will need to provide typodonts or models with
crown preparations and instruments and supplies necessary to practice this skill. Learners should be
graded on the procedure steps as outlined on pg. ____, Chapter ____(Phinney & Halstead). Learner
workbooks contain check off sheets that can be utilized.
Manipulating Materials (Part B, Objective 11). Goal: For learners to manipulate thermoforming matrix
buttons and self-cure composite temporary crown material. Instructor will need to provide typodonts
- 27 -27
Faculty Teaching Guide for Dental Materials
or models with posterior crown preparations and instruments and supplies necessary to practice this
skill. Learners should be graded on the procedure steps as outlined on pg. ____, Chapter
____(Phinney & Halstead). Learner workbooks contain check off sheets that can be utilized.
Cement a Self-Cure Temporary Crown (Part B, Objective 11). Goal: For learners to cement a self-
cure temporary crown. Instructor will need to provide typodonts or models with crown preparations
and instruments and supplies necessary to practice this skill. Learners should be graded on the
procedure steps as outlined on pg. ____, Chapter ____(Phinney & Halstead). Learner workbooks
contain check off sheets that can be utilized.
Prepare an Acrylic Resin Temporary (Part B, Objective 11). Goal: For learners to prepare an acrylic
resin temporary crown. Instructor will need to provide typodonts or models with crown preparations
and instruments and supplies necessary to practice this skill. Learners should be graded on the
procedure steps as outlined on pg. ____, Chapter ____(Phinney & Halstead). Learner workbooks
contain check off sheets that can be utilized.
[Insert In-Class Dis Ques icon] In-Class Discussion1. What were some of the differences between the self-curing custom tray
materials and the resin-formed custom trays?
Learners will talk about the difference in shaping the material with
an acrylic bur versus crown and bridge scissors. Tell them the
thermoplastic custom tray material cannot easily be shaped once it
is formed and cooled and that the light cured material is the easiest
to work with, but requires a light curing oven-like device.
Ideas for learners struggling with this material …
Study: Persuade learners to spread their study time out over more days and shorter periods of study.
Explain that cramming for quizzes and exams and completing homework too quickly is not as
effective as studying small chunks at a time more thoroughly.
Ideas for learners who are ahead and want to learn more
28
When learners are completing in-class activities, walk around and assist as necessary. Spend time with each group and participate in the activity. Try to help each individual. Ask learners questions and allow them to ask you questions to expand their knowledge.
Teaching Tip

Module – Laboratory Materials and Techniques
Web Research: Have learners go to techniques at the Web page http://www.bosworth.com and find the
technique for Ultra Trim. Ask learners to write a short report comparing and contrasting this technique from
the one discussed in the book under temporary restorations.
Presentation ToolsNote: If you change Objectives or Assignments, don’t forget to change the
slides accordingly.
Slide
28
[Insert DM 1-28 Part B: Provisional Restoration
Review Part A. Make sure that any remaining questions are
answered. Review the homework.
Introduce Part B.
Explain that the word provisional means to provide
temporary coverage for a tooth or teeth while the
impressions are sent to the lab, where a permanent
restoration is being made for the patient.
Ensure learners understand how vital it is that the
temporary fits well at the contacts, margins, and that the
patient occludes properly.
Slide
29
[Insert DM 1-29 Provisional Restorations (cont.)
Review the Aluminum Temporary Crown, the Preformed
Acrylic Crown, and the Self-Curing Composite Temporary
Crown Procedures as outlined in Chapter ___, on pgs.
____ (Phinney & Halstead).
Slide
30
[Insert DM 1-30 Provisional Restorations (cont.)
Discuss how if the proximal contacts on the provisional are
left open, food will collect while the patient wears the
temporary crown, and the permanent crown will probably
- 29 -29

Faculty Teaching Guide for Dental Materials
not fit the tooth correctly.
Explain that if the occlusion is not right, the patient will be
very uncomfortable, and if the margin doesn’t fit the tooth
well, it will also be a food trap, and decay may even begin
in that area.
Slide
31
[Insert DM 1-31 Assessment Questions
Short Activity: Ask the group to answer these questions to
assess their comprehension of the material recently
presented. Review any material that does not seem clear.
In-Class Activity: Stop here to complete each in-class
activity.
Slide
32
[Insert DM 1-32 Summary of Module
Review the information from this module and remind
learners that the more they practice these skills the more
valuable a dental assistant they will become.
Homework: Stop here to assign and discuss the
homework assignment.
30


