
On-Air 1300 Executive user guide ~ Edition 3 ~ 7th August ’01 ~ 3992
User GuideBT On-Air 1300 Executive
This equipment is not designed for making emergency telephone calls when the power fails. Alternative arrangements should be made for access to emergency services.
This product is intended for connection to analogue public switched telephone networks and private switchboards in the United Kingdom and Eire.
Digital cordless telephone answering machine
*YOU M
UST SUBSCRIBE TO Y
OURNETW
ORK
PROVIDERS C
ALLERDISPLAY SERVIC
E BEFORE
YOURBT O
N-AIR
1300 EXECUTIVE W
ILL
DISPLAY THIS
INFORMATIO
N.
A QUARTERLY
FEE
IS PAYABLE.

2ABC
3DEF
5JKL
8TUV
0
6MNO
9WXYZ
1
4GHI
7PQRS
C OK
1
On-Air 1300 Executive user guide ~ Edition 3 ~ 7th August ’01 ~ 3992
At a glanceHandset
Base
Play
Delete Answer
�Skip
Skip �
BT On-Air 1300
Play button
Answer button
Battery
Shows the status of the handsetbattery. When the battery is fully
charged, the icon is completelyshaded. As the battery is used,
the shaded area is reduced.
Display
Silent mode
Displayed when the handsetringer has been switched off.
Incoming calls will not cause thehandset to ring.
Secrecy
Mute the call so your callercannot hear you.
In Use
Shows that the handset is in use.
Alarm/Timer
Indicates that alarm/timer hasbeen set.
Handsfree
Indicates that you are inhandsfree mode.
In range
Indicates that you are in range ofthe base station.
Answer machine on/off
Indicates that the answer machineis switched On or Off.
New calls
Indicates that you have new calls.
Answering machine
Allows you to play back newmessages.
Intercom
Enables internal calls and calltransfer between handsets.
OK button
To confirm settings.
Greenphone
To answer a call and use thehandsfree. Switch the power on.
Delete button
To delete unwanted messages.
Answer button
To switch the answering machineon or off.
Directory
Allows quick access to yourdirectory without having to go via
the menu.
Clear
Redphone
To end a call and turn the power off.
Up/Down
Lets you move through the menuoptions and lists.
Skip buttons
Allows you to skip backwards andforwards through your messages.
Skip forward can also be used topage handsets.
Keypad
Speaker
Base 1
Handset 1
22 NOV 16:27
2
On-Air 1300 Executive user guide ~ Edition 3 ~ 7th August ’01 ~ 3992
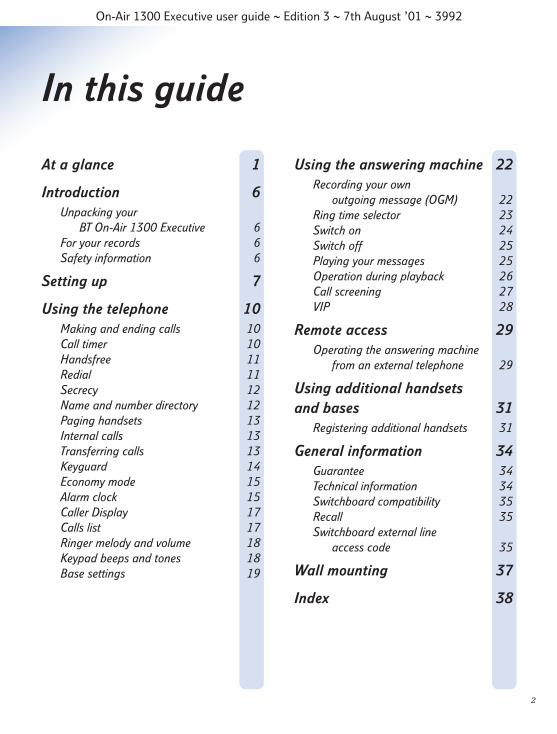
In this guide
At a glance 1
Introduction 6Unpacking your
BT On-Air 1300 Executive 6For your records 6Safety information 6
Setting up 7
Using the telephone 10Making and ending calls 10Call timer 10Handsfree 11Redial 11Secrecy 12Name and number directory 12Paging handsets 13Internal calls 13Transferring calls 13Keyguard 14Economy mode 15Alarm clock 15Caller Display 17Calls list 17Ringer melody and volume 18Keypad beeps and tones 18Base settings 19
Using the answering machine 22Recording your own
outgoing message (OGM) 22Ring time selector 23Switch on 24Switch off 25Playing your messages 25Operation during playback 26Call screening 27VIP 28
Remote access 29Operating the answering machine
from an external telephone 29
Using additional handsets and bases 31
Registering additional handsets 31
General information 34Guarantee 34Technical information 34Switchboard compatibility 35Recall 35Switchboard external line
access code 35
Wall mounting 37
Index 38
3
On-Air 1300 Executive user guide ~ Edition 3 ~ 7th August ’01 ~ 3992
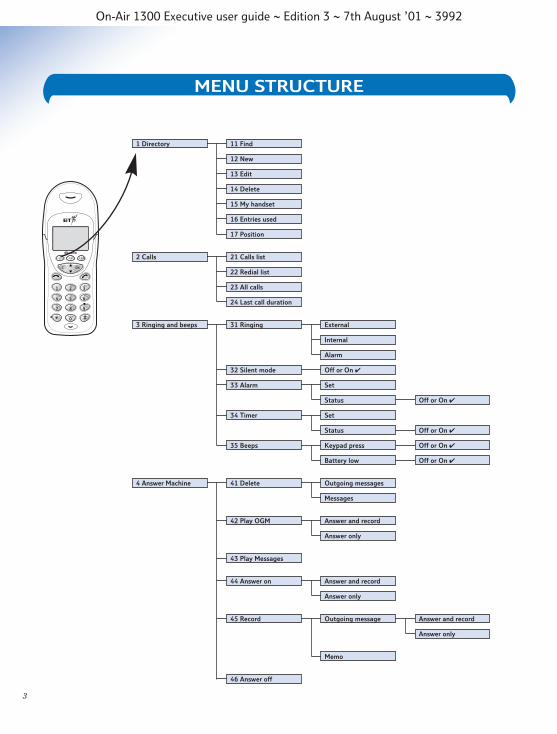
MENU STRUCTURE
31 Ringing3 Ringing and beeps
2 Calls
1 Directory 11 Find
12 New
13 Edit
14 Delete
15 My handset
16 Entries used
17 Position
21 Calls list
22 Redial list
23 All calls
24 Last call duration
External
Internal
Alarm
Off or On ✔
Off or On ✔
Off or On ✔
Off or On ✔
32 Silent mode Off or On ✔
33 Alarm
34 Timer Set
Status
Set
Status
35 Beeps Keypad press
Battery low
2ABC
3DEF
5JKL
8TUV
0
6MNO
9WXYZ
1
4GHI
7PQRS
C OK
Outgoing messages
Messages
42 Play OGM Answer and record
Answer only
43 Play Messages
46 Answer off
44 Answer on Answer and record
Answer only
41 Delete
Outgoing message Answer and record
Answer only
Memo
45 Record
4 Answer Machine

On-Air 1300 Executive user guide ~ Edition 3 ~ 7th August ’01 ~ 3992
4
5 Set 51 Program keys Directory
Redial
Silent mode
Ans machine
Intercom
511 Key •
52 Welcome screen
53 Economy mode Off or On ✔
54 Contrast
55 Keyguard Off or On ✔
56 Date/time
Intercom
Directory
Redial
Silent mode
Ans machine
512 Key • •
Ans machine
Intercom
Directory
Redial
Silent mode
513 Key • • •
MENU STRUCTURE

On-Air 1300 Executive user guide ~ Edition 3 ~ 7th August ’01 ~ 3992
5
MENU STRUCTURE
6 Base 61 Register
62 Custom base
63 Base settings
611 Automatic
612 Custom
621 Base name
622 Priority
631 Date/Time View
632 Phone line Line type
633 Handsets Chang code
Register
Deregister
634 Answer Remote acc
Dir code
Duration
Ans delay
Screen
VIP code
VIP access
Public
Private
Dial type Frequency
R duration Short
Prefix Prefix val
Min. length
Status
Pulse
Long
Set time
Set date
Important
If you make a mistake you can return to theprevious menu heading by pressing the Cbutton. If you keep pressing the C button youwill return to the idle screen.
6
On-Air 1300 Executive user guide ~ Edition 3 ~ 7th August ’01 ~ 3992
Introduction
Unpacking your BT On-Air1300 Executive
If anything is missing, please contact your placeof purchase immediately.
One BT On-Air 1300 base.
One BT On-Air 1000 Executive handset.
One power supply for base station.
One telephone line cord.
One NiMH rechargeable battery pack (installed).
Battery compartment cover.
One handset belt clip.
Three removable handset fascias.
Self adhesive label.
Four rubber feet.
Safety information
GeneralOnly use the power supply included with the product. Usingan unauthorised power supply will invalidate your guaranteeand may damage the telephone. The item number for themains power supply is 872101. If Keyguard is active, it is still possible to make emergencycalls to 999 and 112.Do not open the handset or base station. This could exposeyou to high voltages or other risks. Contact the helpline for all repairs.Radio signals transmitted between the handset and base maycause interference to hearing aids.This product should not be used near emergency/intensivecare medical equipment and should not be used by peoplewith pacemakers.Never dispose of batteries in a fire. There is a serious risk ofexplosion and/or the release of highly toxic chemicals.
CleaningSimply clean the handset and base station with a damp (not wet) cloth, or an antistatic wipe. Never use household
polish as this will damage the product. Never use a dry clothas this may cause a static shock.
EnvironmentalDo not expose to direct sunlight.
The product may heat up when the batteries are beingrecharged. This is normal. However, we recommend that youdo not place the product on antique/veneered wood to avoiddamage.
Do not stand your product on carpets or other surfaces whichgenerate fibres, or place it in locations preventing free flow ofair over it’s surfaces.
Do not submerge any part of your product in water and do notuse it in damp or humid conditions, such as in bathrooms.
Do not expose your product to fire, explosive or otherhazardous conditions.
There is a slight chance that your phone could be damaged byan electrical storm. We recommend that you unplug the powerand telephone line cord for the duration of the storm.
For your records
For guarantee purposes proof of purchase isrequired so please keep your receipt.
Enter your System Code here.
The pre-set System Code number is 0000. Seepage 19 for information on your System Code.
Enter your Remote Access Code here.
The pre-set Remote Access Code is 0000.See page 29 for more information.
Date of purchase:
Place of purchase:
Serial number:
7
On-Air 1300 Executive user guide ~ Edition 3 ~ 7th August ’01 ~ 3992
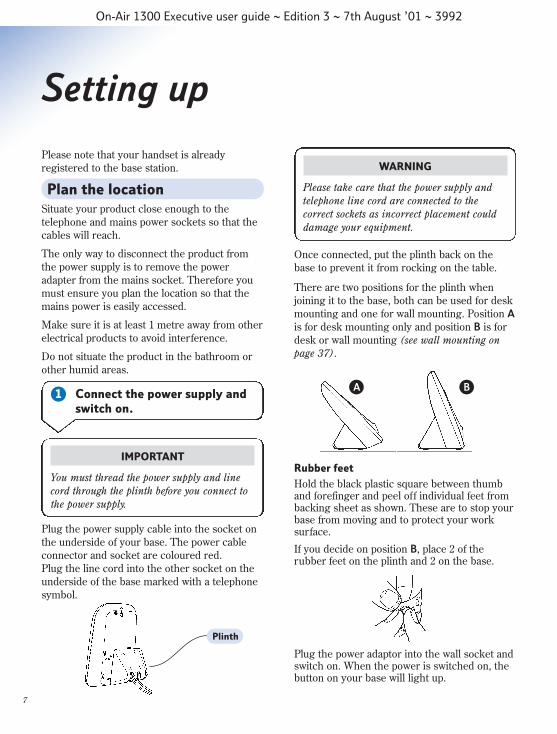
Setting up
Please note that your handset is alreadyregistered to the base station.
Situate your product close enough to thetelephone and mains power sockets so that thecables will reach.
The only way to disconnect the product fromthe power supply is to remove the poweradapter from the mains socket. Therefore youmust ensure you plan the location so that themains power is easily accessed.
Make sure it is at least 1 metre away from otherelectrical products to avoid interference.
Do not situate the product in the bathroom orother humid areas.
Once connected, put the plinth back on thebase to prevent it from rocking on the table.
There are two positions for the plinth whenjoining it to the base, both can be used for deskmounting and one for wall mounting. Position Ais for desk mounting only and position B is fordesk or wall mounting (see wall mounting onpage 37).
Plug the power adaptor into the wall socket andswitch on. When the power is switched on, thebutton on your base will light up.
Rubber feet
Hold the black plastic square between thumband forefinger and peel off individual feet frombacking sheet as shown. These are to stop yourbase from moving and to protect your worksurface.
If you decide on position B, place 2 of therubber feet on the plinth and 2 on the base.
Plan the location
1 Connect the power supply andswitch on.
Plug the power supply cable into the socket onthe underside of your base. The power cableconnector and socket are coloured red.Plug the line cord into the other socket on theunderside of the base marked with a telephonesymbol.
WARNING
Please take care that the power supply andtelephone line cord are connected to thecorrect sockets as incorrect placement coulddamage your equipment.
IMPORTANT
You must thread the power supply and linecord through the plinth before you connect tothe power supply.
BA
Plinth

On-Air 1300 Executive user guide ~ Edition 3 ~ 7th August ’01 ~ 3992
8
WARNING
Do not connect the telephone line cord to thephone socket until your handset is fullycharged. This will prevent the risk of thephone being answered before the battery ischarged. Answering the phone before thebattery is fully charged may prevent it fromreaching its optimum capacity.
2 Charge the handset batteryfor at least 16 hours
WARNING
Under no circumstances should non-rechargeablebatteries be used. Only use the approvedbatteries. Using unapproved batteries willinvalidate your guarantee and may damagethe telephone.
Fully discharging the batteries at least once aweek will help them to last as long as possible.However, the charge capacity of rechargeablebatteries will reduce with time as they wearout, so reducing the talk/standby time of thehandset. Eventually they will need to be replaced.New batteries can be obtained from any BTShop or from the helpline on 0845 601 2476.
When the battery has been charged for at least16 hours the display will show the symbol;you can then connect the telephone line cord tothe base.
Battery low warning
If the handset battery symbol is empty and youhear warning beeps, you will need to rechargeyour handset before you can use it.
Helpline
If you are experiencing difficulty, please callthe BT On-Air Helpline on 0845 601 2476.
Empty 1/3 2/3 Full
Battery performance
Your handset is supplied with NiMHbatteries. These need to be initially chargedcontinuously for 16 hours to reach fullcharge.
Note that the battery charge icon does notindicate the correct level when the batteriesare first installed. The batteries must first befully charged.
On-Air 1300 Executive user guide ~ Edition 3 ~ 7th August ’01 ~ 3992
9
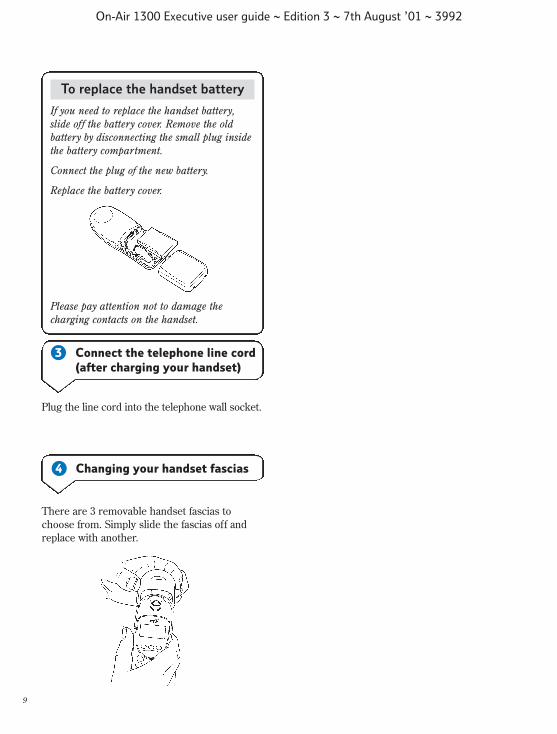
4 Changing your handset fascias
There are 3 removable handset fascias tochoose from. Simply slide the fascias off andreplace with another.
3 Connect the telephone line cord(after charging your handset)
Plug the line cord into the telephone wall socket.
To replace the handset battery
If you need to replace the handset battery,slide off the battery cover. Remove the oldbattery by disconnecting the small plug insidethe battery compartment.
Connect the plug of the new battery.
Replace the battery cover.
Please pay attention not to damage thecharging contacts on the handset.

10
On-Air 1300 Executive user guide ~ Edition 3 ~ 7th August ’01 ~ 3992
Press and hold the GREEN PHONEbutton to switch the handset on.
Press and hold the RED PHONE buttonto switch the handset off.
To switch the handset power on and off
Making and ending calls
To make an external call
Press the GREEN PHONE button.The display shows the symbol.
Dial the number.
First enter the number to be dialled.The number is shown in the display. (If you make a mistake press C toremove the incorrect digit).
If you have entered the numbercorrectly, press the GREEN PHONEbutton to dial the number.
123
Your handset will automatically time the durationof all external calls.
The handset display shows the call duration bothduring your call and for a few seconds after it iscompleted.
Call timer
Using the telephone
Press the RED PHONE button.
Press the GREEN PHONE button toanswer the call.
To end a call
To receive a call
You can adjust the volume during acall and whilst using the phone onhandsfree.
Press the button to increase thevolume.
Press the button to decrease thevolume.
The display shows the current volumelevel.
To adjust the earpiece volume
Note
The symbol on your handset displayindicates when you are in range of the basestation. If the symbol disappears you are outof range and will need to move closer to thebase station.
Please note that this product does not haveautotalk standby. To end a call you mustpress the RED PHONE button, you cannotjust replace the handset on the base station.
Preparatory dialing
On-Air 1300 Executive user guide ~ Edition 3 ~ 7th August ’01 ~ 3992
11
During a call you can switch tohandsfree mode.
Whilst on a call press the GREENPHONE button.
When handsfree is active you see thesymbol flashing
To switch handsfree off, press theGREEN PHONE button again.
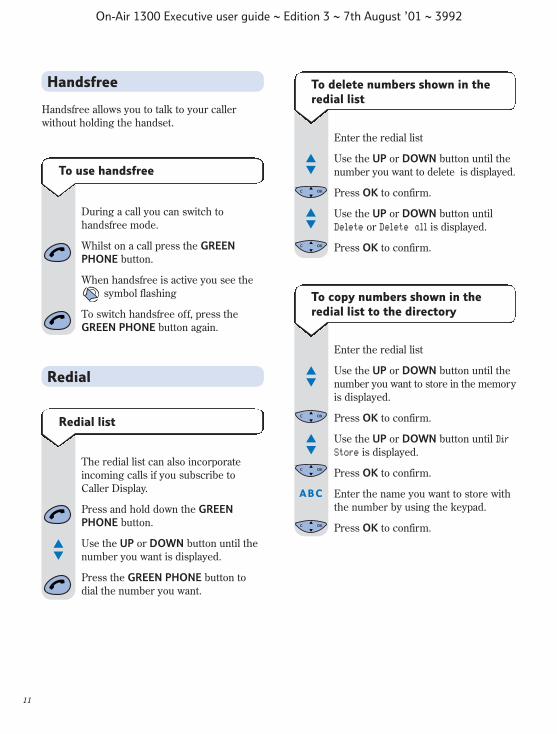
To use handsfree
Handsfree allows you to talk to your callerwithout holding the handset.
Handsfree
Redial list
The redial list can also incorporateincoming calls if you subscribe toCaller Display.
Press and hold down the GREENPHONE button.
Use the UP or DOWN button until thenumber you want is displayed.
Press the GREEN PHONE button todial the number you want.
��
Redial
Enter the redial list
Use the UP or DOWN button until thenumber you want to store in the memoryis displayed.
Press OK to confirm.
Use the UP or DOWN button until DirStore is displayed.
Press OK to confirm.
Enter the name you want to store withthe number by using the keypad.
Press OK to confirm.
��
��
C OK
C OK
C OK
ABC
To delete numbers shown in theredial list
To copy numbers shown in theredial list to the directory
Enter the redial list
Use the UP or DOWN button until thenumber you want to delete is displayed.
Press OK to confirm.
Use the UP or DOWN button untilDelete or Delete all is displayed.
Press OK to confirm.
��
��
C OK
C OK

On-Air 1300 Executive user guide ~ Edition 3 ~ 7th August ’01 ~ 3992
12
During a call, press the C button. will now flash to show it is in
operation.
Press the C button again to resume your call.
When on a call you can talk to someone in thesame room, without your caller hearing.
C OK
C OK
To switch secrecy on/off
Secrecy
You can store up to 50 of your most frequentlyused names and numbers.
Name and number directory
To store a name and number in thedirectory
Press the UP or DOWN button untilDirectory is displayed.
Press OK to confirm.
Use the UP or DOWN button to scroll to New.
Press OK to confirm.
Enter the name using the letters on thekeypad.
Entering names
Use the keypad letters to enter namesby using a long press of the button, i.e.if you press and hold the 8 button
��
the following characters appear, T, U, V,t, u, v. For example, if you wish tostore the name TOM:
To enter the letter T, press 8 and hold,the cursor will automatically move tothe right and display the next chosenletter.
To enter O, press 6 and hold.
To enter the M, press 6 and hold.
If you enter a digit incorrectly you candelete it by pressing the C button.
Press OK to confirm.
Enter the telephone number you want to store.
Press OK to confirm.
6MNO
C OK
C OK
C OK
8TUV
6MNO
123
Press the button to enter thedirectory.
Use the UP or DOWN button to findthe entry you want to dial.OrTo search alphabetically, press therelevant keypad number, for exampleto find TOM, press the 8 button andscroll through the entries under T.
Press the GREEN PHONE button todial the number.
To dial a number from the directory
Important
If you use Caller Display it is important tostore the full telephone number in the directoryincluding the area code. If you do not, thename will not match the number stored in thedirectory.
��
To insert a pause when storinga number in the directory
Press and hold the 0 button until a /appears on the point where you want toenter a pause. The / indicates a pause,therefore, when you dial the numberstored your On-Air 1300 Executive willautomatically insert the pause where itwas stored.
8TUV
0
C OK
C OK
��
ABC
On-Air 1300 Executive user guide ~ Edition 3 ~ 7th August ’01 ~ 3992
13
Press the UP or DOWN button toselect Directory.
Press OK to confirm.
Use the UP or DOWN button to scrollto Edit.
Press OK to confirm.
Use the UP or DOWN button to findthe entry you want to amend.
Press OK to confirm.
Use the C button to delete numbers orletters.
Edit the entry using the numbers/letterson the keypad.
Press the OK button to store the newentry.
The display will then show Done.
��
��
��
C OK
C OK
C OK
C OK
C OK
123
You can alert handset users that they arewanted, or locate a missing handset. (Pagingcalls cannot be answered by a handset.)
Press and hold the Skip� button onthe base until the handset starts toring. All handsets registered with thebase will ring.
To end paging, press and hold thebutton again.OrPress the RED PHONE button on anyhandset.
Skip �
To page a handset from the base
To edit and delete directory numbers
Paging handsets
If you have multiple handsets registered to abase you can make internal calls betweenhandsets.
Press the number of the handset youwish to dial i.e 1, 2, 3, 4, 5, 6.
Or
To call all handsets press the ✱ button
Press the GREEN PHONE button.
Press the RED PHONE button to endthe call.
To make an internal call to anotherhandset
123
Internal calls
You can transfer an external call to anotherhandset registered to the base.
While on an external call:
Press the OK button and Call hold 1will be displayed.
Enter the number of the handset towhich you want to transfer the call.
Press the GREEN PHONE button (if youwish you can now talk to the handsetuser first), then press the RED PHONEbutton. The call will be transferred.
To transfer an external call between handsets
C OK
123
Transferring calls

On-Air 1300 Executive user guide ~ Edition 3 ~ 7th August ’01 ~ 3992
Press the STAR button
Press OK to confirm.
Press the UP or DOWN button todisplay Set.
Press OK to confirm.
Press the UP or DOWN button todisplay Keyguard.
Press OK to confirm.
The display shows
Press the button until the ✔ isremoved from the On box.
Press OK to confirm.
14
Press the UP or DOWN button todisplay Set.
Press OK to confirm.
Press the UP or DOWN button todisplay Keyguard.
Press OK to confirm.
The display shows
Press the button until the ✔appears in the box next to On.
Press OK to confirm.
On
��
C OK
��
C OK
C OK
To switch keyguard on
Keyguard
Note
If the keyguard is active, the emergency numbers999, 112 can still be dialled.
��
C OK
��
C OK
C OK
To switch keyguard off
✔ On
�
C OK
To use your handset when thekeyguard is on
This temporarily switches off thekeyguard allowing you to make a call.The keyguard will then re-activate afterone minute in the idle state.
Press the STAR button
Press OK to confirm.
If you receive an incoming call whilstthe keyguard is on just press the GREEN PHONE button.
C OK
On-Air 1300 Executive user guide ~ Edition 3 ~ 7th August ’01 ~ 3992
15
To set economy mode
Press the UP or DOWN button to enterthe Set menu.
Press OK to confirm.
Press the UP or DOWN button toscroll to Economy mode menu.
Press OK to confirm.
Press the button.
Press OK to confirm.
To re-activate the screen press theGREEN PHONE button.
C OK
C OK
C OK
��
��
Press the UP or DOWN button to enterthe Ringing and beeps menu.
Press OK to confirm.
Use the UP or DOWN button to scrollto Alarm.
Press OK to confirm.
Set will be highlighted.
Press OK to confirm.
Enter the time you want the alarm togo off at, e.g. 17.35. (24 hour clock)
Press OK to confirm.
Use the UP or DOWN button to scrollto Status.
Press OK to confirm.
The display shows
Press the button until the ✔appears in the box next to On.
Press OK to confirm.
When the alarm is set is displayed.
You can use your handset as an alarm clock.You must set the time before the alarm willwork. The alarm will ring daily until the settingis turned off.
This feature enables you to extend the life ofthe battery by automatically switching thescreen off if the phone has not been used for 30 seconds.
123
C OK
C OK
C OK
C OK
C OK
��
��
��
C OK
On
�
To set the alarm
Alarm clockEconomy mode

On-Air 1300 Executive user guide ~ Edition 3 ~ 7th August ’01 ~ 3992
16
Press the UP or DOWN button to enterthe Ringing and beeps menu.
Press OK to confirm.
Use the UP or DOWN button to scrollto Alarm.
Press OK to confirm.
Use the UP or DOWN button to selectStatus.
Press OK to confirm.
The display shows
Press the button until the ✔ isremoved from the On box.
Press OK to confirm.
C OK
C OK
C OK
C OK
✔ On
�
��
��
��
To turn the alarm off
You can use your handset to set areminder alarm which will activateafter a period of time of your choice.
Press the UP and DOWN button toselect Ringing and beeps.
Press OK.
Press the UP or DOWN button toselect Timer.
Press OK.
Press OK again to select Set.
Using 4 digits, enter the time in 24hour clock format to elapse before yourreminder call activates.
Press OK to save.
Press the UP or DOWN button toselect Status.
Press OK.
Press the button until a ✔appears in the box next to On.
Press OK to confirm.
To switch off the timer press the button until the ✔ disappears from thebox next to On.
Press OK to confirm.
When the timer is set is displayed.
Timer
C OK
C OK
C OK
��
��

On-Air 1300 Executive user guide ~ Edition 3 ~ 7th August ’01 ~ 3992
17
To view the Calls list
Press the UP or DOWN button toselect Calls.
Press OK.
Press OK again to select Calls list. The most recently received numberwill be displayed.
Press the UP or DOWN button toscroll backwards and forwards throughthe Calls list.
When you have made your selectionpress the OK button and go throughthe options.
You have the options to:
Call (Call) a number from the Calls list.When the number you wish to call isdisplayed press the GREEN PHONEbutton. The number will beautomatically dialled.
Or
Store a number from the Calls list intothe directory (Dir store).
Or
Delete an entry (Delete) or delete allentries (Delete all).
Simply highlight the relevant optionand press the OK button.
C OK
C OK
C OK
C OK
��
��
The Calls list contains the telephone numbers of your last 20 callers. If you receive more thanone call from the same telephone number thenit will only appear once in the list.
If a call is received when the calls list is full thenthe oldest entry will be deleted automatically.
If no number is received for a call then no entrywill appear in the calls list.
Calls list
If you subscribe to a Caller Display service youcan see who is calling you on your handsetdisplay, as well as the date and time of their call(unless the number has been withheld).
If you have stored a name to go with the numberin your handset directory, the name will bedisplayed instead.
Please ensure that you have stored the fulltelephone number, including the area code,otherwise the name will not match the numberstored in the directory.
Important
To use Caller Display you must first subscribeto your network provider’s Caller DisplayService.
For more information on BT Select Servicescall BT free on 0800 800 150.
Important
The Caller Display service will not operatewhen your base station is connected to aswitchboard.
Whether you take a call or not, the caller’sdetails are stored in the Calls list. The Callslist holds the telephone numbers of the last 20people who called you. You can display, scrollthrough and dial numbers on the list andcopy them into the directory.
Caller Display
When you receive a call the caller’s number willappear on the display. If the number is also storedin your handset directory then the correspondingname will be shown instead of the number. If thecaller has withheld their number then -------------will appear on the display. If for some reason thecalling number is not available then✱✱✱✱✱✱✱✱✱✱✱✱ will appear on the display.

On-Air 1300 Executive user guide ~ Edition 3 ~ 7th August ’01 ~ 3992
Keypad beeps and tones
18
Choose from 10 different handset ringermelodies. Useful to determine which handset isringing when you are using multiple handsets.
Press the UP or DOWN button to enterthe Ringing and beeps menu.
Press OK to confirm.
Use the UP or DOWN button to scrollto Ringing.
Press OK to confirm.
Select External/Internal or Alarm asrequired.
Press OK to confirm.
Use the DOWN button to scrollthrough the Melody options. To heareach melody press the button.
Press OK to confirm.
You will then be asked to select thevolume level.
Use the UP or DOWN button to scrollthrough select the level you require.To hear each volume level press the
button
Press OK to confirm.
The display will then show Done.
If you require, the ringer can beswitched off all together. The displaywill show symbol to remind youthat the ringer is off.
To adjust ringer melody and volume
C OK
C OK
C OK
C OK
C OK
��
��
��
You can set your handset to beep or play a tonewhen you press a button on the keypad or toindicate when your battery is low.
The BT On-Air Executive will come already set to ON.
Press the UP or DOWN button to enterthe Ringing and beeps menu.
Press OK to confirm.
Use the UP or DOWN button to scrollto Beeps.
Press OK to confirm.
The display will show either Keypadpress or Battery low.
Use the UP or DOWN button tohighlight the one you wish to selectthen press the OK button to confirm.
The display will show
Press the button to turn ON orOFF.
Press OK to confirm.
The display will then show Done.
C OK
C OK
C OK
��
��
��
✔ On
�
C OK
�
Note
Please note that the melody and volume isemitted from the handset only. They are notavailable from the base.
To adjust keypad beeps and tones
Ringer melody and volume

On-Air 1300 Executive user guide ~ Edition 3 ~ 7th August ’01 ~ 3992
19
To set the time
Press the UP or DOWN button toscroll to Base.
Press OK to confirm.
Use the UP or DOWN button to scrollto Base settings.
Press OK to confirm.
Use the UP or DOWN button to scrollto Date/time.
Press OK to confirm.
Use the UP or DOWN button to scrollto Set time.
Press OK to confirm.
Use the keypad to input the time, e.g. 17.35 (24 hour clock).
Press OK to confirm.
The display will then show Done.
��
��
��
��
C OK
C OK
C OK
C OK
C OK
123456789
To set the date
Use the UP or DOWN button to scrollto Base.
Press OK to confirm.
Use the UP or DOWN button to scrollto Base settings.
Press OK to confirm.
Use the UP or DOWN button to scrollto Date/time.
Press OK to confirm.
Use the UP or DOWN button to scrollto Set date.
Press OK to confirm.
Enter the date DD/MM/YY.
Press OK to confirm.
The display will then show Done.
��
��
��
��
C OK
C OK
C OK
C OK
C OK
Your base has optional settings for functionslike changing base name and base station priority.
The functions are explained below and theprocedure for changing the settings is shownon the next few pages.
System Code
Your base station has a default setting of 0000but you may want to change this to preventunauthorised use.
If you change your System Code keep record ofthe new number by writing it in the spaceprovided on page 6.
Base settings

On-Air 1300 Executive user guide ~ Edition 3 ~ 7th August ’01 ~ 3992
You can personalise your base stations.This can make life easier when usingmultiple base stations. For example,you could name them, ‘Kitchen’,‘Lounge’, ‘Bedroom’, depending ontheir location.
Press the UP or DOWN button toscroll to Base.
Press OK to confirm.
Use the UP or DOWN button to scrollto Custom base.
Press OK to confirm.
Display will show Base name.
Press OK to confirm.
Use the UP or DOWN button to scrollto the base you wish to name.
Press OK to confirm.
Delete the old name using the Cbutton.
Enter the new name using the keypad.
Press OK to confirm.
The display will then show Done.
20
To change your System Code
By changing the system code you willbe able to take advantage of digitalsecurity which prevents calls beingoverheard or picked up on othercordless telephones.
Press the UP or DOWN button toscroll to Base.
Press OK to confirm.
Use the UP or DOWN button to scrollto Base settings.
Press OK to confirm.
Use the UP or DOWN button to scrollto Handsets.
Press OK to confirm.
Display will show Chang code.
Press OK to confirm.
Display will show Old code.
Enter System Code which is 0000 ifnot changed.
Press OK to confirm.
Now enter your new New code-----.
Press OK to confirm.
The display will show Confirm code-----.
Enter your new System Code again.
Press OK to confirm.
The display will then show Done.
C OK
C OK
C OK
C OK
C OK
C OK
C OK
CODE
CODE
CODE
��
��
��
To change base station name
C OK
��
��
C OK
C OK
C OK
C OK
C OK
ABC
��
If you change your system code keep a recordof the new number by writing it in the spaceprovided on page 6.
On-Air 1300 Executive user guide ~ Edition 3 ~ 7th August ’01 ~ 3992
21
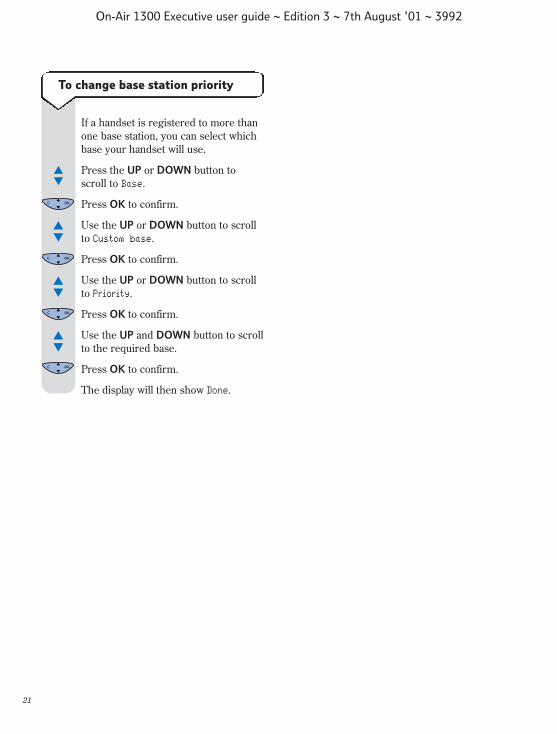
To change base station priority
If a handset is registered to more thanone base station, you can select whichbase your handset will use.
Press the UP or DOWN button toscroll to Base.
Press OK to confirm.
Use the UP or DOWN button to scrollto Custom base.
Press OK to confirm.
Use the UP or DOWN button to scrollto Priority.
Press OK to confirm.
Use the UP and DOWN button to scrollto the required base.
Press OK to confirm.
The display will then show Done.
C OK
��
��
C OK
��
C OK
C OK
��

22
On-Air 1300 Executive user guide ~ Edition 3 ~ 7th August ’01 ~ 3992
Using the answering machine
Before using your answering machine for thefirst time you need to: set the time and date,and switch the answering machine on.
Your BT On-Air 1300 Executive comes with aPre-recorded outgoing message (OGM), “Helloyour call cannot be taken at the moment soplease leave your message after the tone.” Youcan use the outgoing message or record yourown.
The base stations answering machine is sharedby all handsets. There are two types ofanswering machine mode:
1 Answer and record – Callers can leave you messages.
2 Answer only – Callers will hear youroutgoing message but cannot leave anymessage.
Each answering machine mode has its ownoutgoing message.
The answering machine has an incomingmessage capacity of approximately 15 minutes.
To set the time and date
Please see page 19 ‘To set the time and date’.
To record your own outgoingmessage (OGM)
Before proceeding it is necessary tochoose which answering machine modeyou will be using. (Answer only orAnswer and record). It is possible torecord a message for both modesalthough only one mode can be on at a time.
Use the UP or DOWN button to scrollto Answer machine.
Press OK to confirm.
Use the UP or DOWN button to scrollto Record.
Press OK to confirm.
Display will show Outgoing message.
Press OK to confirm.
Use the UP or DOWN button to scrollto Answer and record or Answer only.
Press OK, you will hear a beep in theearpiece. Speak your outgoing message.
Press OK to stop recording.
Your outgoing message will beautomatically played back through thehandset earpiece.
You can stop the outgoing messageplayback by pressing OK.
Important
The pre-recorded outgoing message (OGM)will be deleted when you record your ownoutgoing message.
��
��
C OK
C OK
��
C OK
C OK
C OK
C OK
On-Air 1300 Executive user guide ~ Edition 3 ~ 7th August ’01 ~ 3992
23
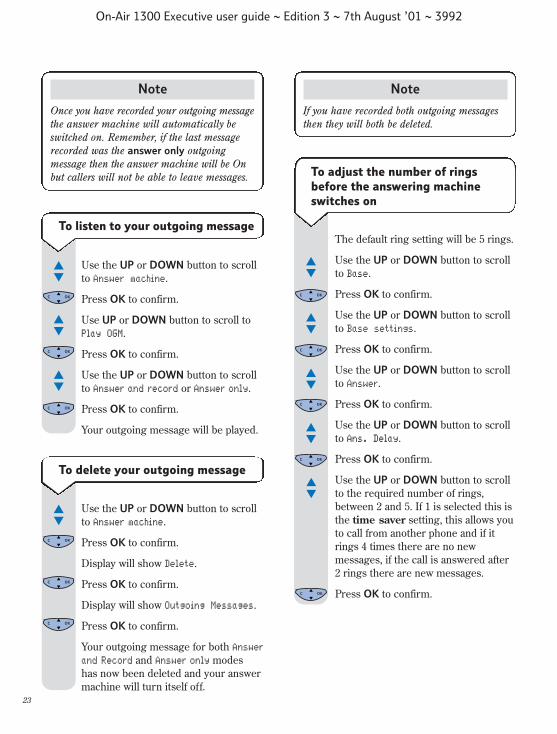
Note
Once you have recorded your outgoing messagethe answer machine will automatically beswitched on. Remember, if the last messagerecorded was the answer only outgoingmessage then the answer machine will be Onbut callers will not be able to leave messages.
Use the UP or DOWN button to scrollto Answer machine.
Press OK to confirm.
Use UP or DOWN button to scroll toPlay OGM.
Press OK to confirm.
Use the UP or DOWN button to scrollto Answer and record or Answer only.
Press OK to confirm.
Your outgoing message will be played.
��
��
��
C OK
C OK
C OK
To listen to your outgoing message
Use the UP or DOWN button to scrollto Answer machine.
Press OK to confirm.
Display will show Delete.
Press OK to confirm.
Display will show Outgoing Messages.
Press OK to confirm.
Your outgoing message for both Answerand Record and Answer only modes has now been deleted and your answermachine will turn itself off.
��
C OK
C OK
C OK
To delete your outgoing message
Note
If you have recorded both outgoing messagesthen they will both be deleted.
The default ring setting will be 5 rings.
Use the UP or DOWN button to scrollto Base.
Press OK to confirm.
Use the UP or DOWN button to scrollto Base settings.
Press OK to confirm.
Use the UP or DOWN button to scrollto Answer.
Press OK to confirm.
Use the UP or DOWN button to scrollto Ans. Delay.
Press OK to confirm.
Use the UP or DOWN button to scrollto the required number of rings,between 2 and 5. If 1 is selected this isthe time saver setting, this allows youto call from another phone and if itrings 4 times there are no newmessages, if the call is answered after2 rings there are new messages.
Press OK to confirm.
��
C OK
��
C OK
��
C OK
��
C OK
To adjust the number of ringsbefore the answering machineswitches on
��
C OK

On-Air 1300 Executive user guide ~ Edition 3 ~ 7th August ’01 ~ 3992
24
It is possible to adjust the time availablefor a caller to leave a message. Theoptions are 30 seconds, 2 minutes, 4 minutes and unlimited message length.The answer machine can store up to 32 messages approximately 15 minutesin total.
Use the UP or DOWN button to scrollto Base.
Press OK to confirm.
Use the UP or DOWN button to scrollto Base settings.
Press OK to confirm.
Use the UP or DOWN button to scrollto Answer.
Press OK to confirm.
Use the UP or DOWN button to scrollto Duration.
Press OK to confirm.
Use the UP or DOWN button to scrollto the required message length.
Press OK to confirm.
��
��
��
C OK
C OK
C OK
To adjust the time allowed forrecording incoming messages
��
��
C OK
C OK
After recording a new outgoingmessage the machine will automaticallyswitch itself on.
At the base:
To switch on answer and record modepress the ANSWER button until it isilluminated green. Note that you musthave recorded an answer and recordoutgoing message.
To switch on answer only mode pressthe ANSWER button until it flashesgreen. Note that you must have recordedan answer only outgoing message.
At the handset:
Use the UP or DOWN button to scrollto Answer machine.
Press OK to confirm.
Use the UP or DOWN button to scrollto Answer on.
Press OK to confirm.
Use the UP or DOWN button to scrollto Answer and record or Answer only.
Press OK to confirm.
After switching on the answeringmachine the appropriate outgoingmessage will be played in the earpiece.
When answer and record mode isselected the ANSWER button isilluminated green. When answer onlymode is selected the ANSWER buttonflashes green.
��
��
C OK
C OK
C OK
To switch answering machine on
��
Answer
Answer
Answer
Answer
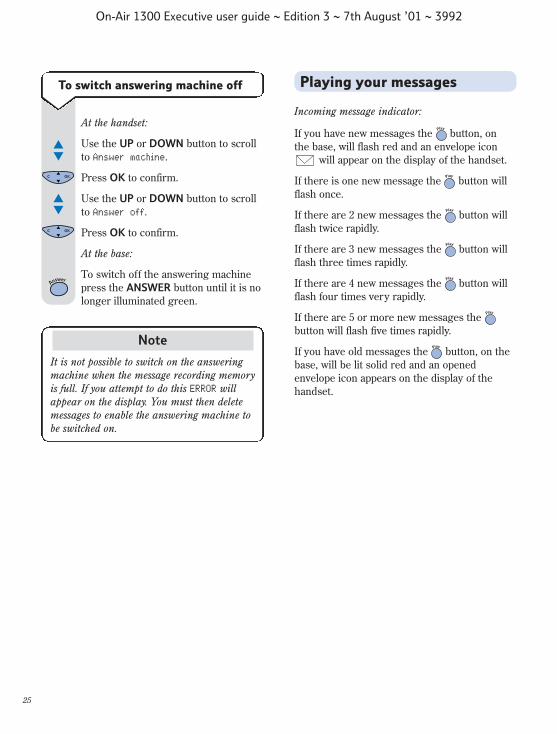
On-Air 1300 Executive user guide ~ Edition 3 ~ 7th August ’01 ~ 3992
25
At the handset:
Use the UP or DOWN button to scrollto Answer machine.
Press OK to confirm.
Use the UP or DOWN button to scrollto Answer off.
Press OK to confirm.
At the base:
To switch off the answering machinepress the ANSWER button until it is nolonger illuminated green.
To switch answering machine off
��
��
C OK
C OK
Answer
Note
It is not possible to switch on the answeringmachine when the message recording memoryis full. If you attempt to do this ERROR willappear on the display. You must then deletemessages to enable the answering machine tobe switched on.
Playing your messages
If you have new messages the button, onthe base, will flash red and an envelope icon
will appear on the display of the handset.
If there is one new message the button willflash once.
If there are 2 new messages the button willflash twice rapidly.
If there are 3 new messages the button willflash three times rapidly.
If there are 4 new messages the button willflash four times very rapidly.
If there are 5 or more new messages the button will flash five times rapidly.
If you have old messages the button, on thebase, will be lit solid red and an openedenvelope icon appears on the display of thehandset.
Play
Play
Play
Play
Play
Play
Play
Incoming message indicator:
On-Air 1300 Executive user guide ~ Edition 3 ~ 7th August ’01 ~ 3992
26
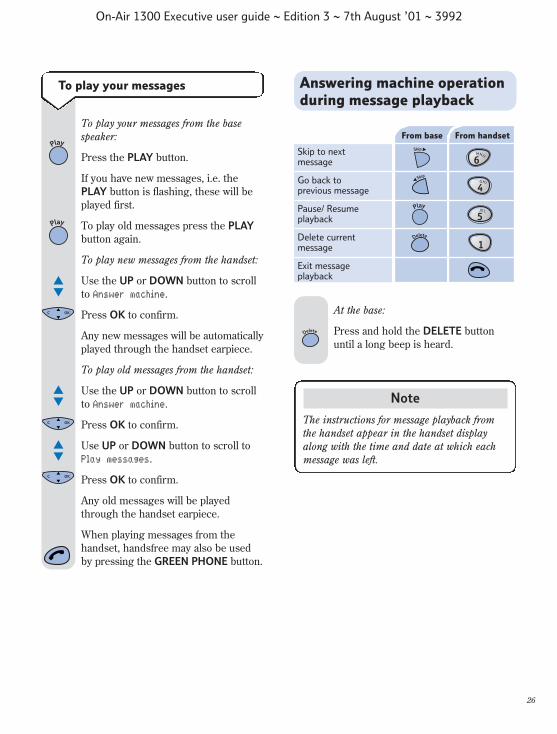
To play your messages from the basespeaker:
Press the PLAY button.
If you have new messages, i.e. the PLAY button is flashing, these will beplayed first.
To play old messages press the PLAYbutton again.
To play new messages from the handset:
Use the UP or DOWN button to scrollto Answer machine.
Press OK to confirm.
Any new messages will be automaticallyplayed through the handset earpiece.
To play old messages from the handset:
Use the UP or DOWN button to scrollto Answer machine.
Press OK to confirm.
Use UP or DOWN button to scroll toPlay messages.
Press OK to confirm.
Any old messages will be playedthrough the handset earpiece.
When playing messages from thehandset, handsfree may also be usedby pressing the GREEN PHONE button.
To play your messages
��
��
��
C OK
C OK
C OK
Play
Play
Answering machine operationduring message playback
Skip to next message
Go back to previous message
Pause/ Resume playback
Delete current message
Exit message playback
6MNO
4GHI
5JKL
1
From base From handset
Skip �
Delete
Play
�Skip
Note
The instructions for message playback fromthe handset appear in the handset displayalong with the time and date at which eachmessage was left.
At the base:
Press and hold the DELETE buttonuntil a long beep is heard.
Delete

On-Air 1300 Executive user guide ~ Edition 3 ~ 7th August ’01 ~ 3992
27
New messages must be played beforeyou can delete all messages.
At the handset:
Use the UP or DOWN button to scrollto Answer machine.
Press OK to confirm.
Delete will be shown on the display.
Press OK to confirm.
Use UP or DOWN button to scroll toMessages.
Press OK to confirm.
To delete all messages
��
��
C OK
C OK
C OK
It is possible to record a messagedirectly on to the answer machine as amemo, which can be played back in thesame way as other messages.
Use the UP or DOWN button to scrollto Answer machine.
Press OK to confirm.
Use the UP or DOWN button to scrollto Record.
Press OK to confirm.
Use the UP or DOWN button to scrollto Memo.
Press OK, you will hear a beep in theearpiece and recording starts.
Press OK to stop recording.
To record a memo message
��
C OK
��
��
C OK
C OK
C OK
You can decide whether to listen toincoming messages over the loudspeakerand answer them or let your answermachine take the message.
Alternatively you can choose not to hearthe callers messages.
Call screening is off by default.
You can intercept the call at any timeand speak to the caller by pressing theGREEN PHONE button.
Use the UP or DOWN button to scrollto Base.
Press OK to confirm.
Use the UP or DOWN button to scrollto Base settings.
Press OK to confirm.
Use the UP or DOWN button to scrollto Answer.
Press OK to confirm.
Use the UP or DOWN button to scrollto Screen.
Press OK to confirm.
To switch on call screening it isnecessary to place a tick in the boxdisplayed in the LCD. You do this bypressing the button.
To switch off press the buttonagain and the tick will be removed.
Press OK to confirm.
To use call screening
��
��
��
C OK
C OK
C OK
��
C OK
C OK
screen
�

On-Air 1300 Executive user guide ~ Edition 3 ~ 7th August ’01 ~ 3992
28
When the answering machine isswitched on, this feature allows you tostill receive calls on your handset(s) byprivileged callers who you have giventhe VIP code to.
When the VIP feature is switched onyour handset will not ring when a callis received. When the caller hears theoutgoing message they can enter ✱followed by your VIP code to makeyour handset ring.
VIP feature
(You must change the code from thedefault setting of 0000 for this to work.)
Use the UP or DOWN button to scrollto Base.
Press OK to confirm.
Use the UP or DOWN button to scrollto Base settings.
Press OK to confirm.
Use the UP or DOWN button to scrollto Answer.
Press OK to confirm.
Use the UP or DOWN button to scrollto VIP code.
Press OK to confirm.
Enter old code. (0000 if not changed).
Press OK to confirm.
Enter new code.
To set the VIP access code
��
��
��
C OK
C OK
C OK
��
C OK
C OK
CODE
CODE
Press OK to confirm.
The display will ask you to Confirm code.
Re-enter new code.
Press OK to confirm.
C OK
C OK
CODE
Use the UP or DOWN button to scrollto Base.
Press OK to confirm.
Use the UP or DOWN button to scrollto Base settings.
Press OK to confirm.
Use the UP or DOWN button to scrollto Answer.
Press OK to confirm.
Use the UP or DOWN button to scrollto VIP access.
Press OK to confirm.
To switch on, place a tick in the boxdisplayed in the LCD by pressing the
button. To switch off, press the button again and the tick will be
removed.
Press OK to confirm.
To switch VIP on and off
��
��
��
C OK
C OK
C OK
��
C OK
C OK
Note
In order to call you, when VIP is switched on,your caller must follow these steps.
1) Dial your phone number.2) Listen to the outgoing message.3) Press the ✱ button.4) Enter the VIP access code.
Your telephone will now ring.
VIP
29
On-Air 1300 Executive user guide ~ Edition 3 ~ 7th August ’01 ~ 3992
Remote access
You can operate your answering machine fromany external TouchtoneTM phone by phoning yourBT On-Air and entering your remote access code.
Having a remote access code prevents otherpeople from accessing your answering machinefunctions without your permission.
Important
You must change the Remote Access Codefrom the default setting of 0000 for yourremote access to function.
Press OK to confirm.
Enter your new four digit code.
Press OK to confirm.
The display will ask you to Confirm code.
Re-Enter your new code.
Press OK to confirm.
Use the UP or DOWN button to scrollto Base.
Press OK to confirm.
Use the UP or DOWN button to scrollto Base settings.
Press OK to confirm.
Use the UP or DOWN button to scrollto Answer.
Press OK to confirm.
Use the UP or DOWN button to scrollto Remote acc.
Press OK to confirm.
Enter your old four digit code. (Factorysetting is 0000)
To change your Remote Access Code
C OK
C OK
CODE
C OK
CODE
If you forget to switch your answeringmachine on you can do it from anothertelephone:
Dial your telephone number and let thephone ring. After approximately 10 ringsyour On-Air will automatically answer,although you will hear no message.
At this point press the # button,followed by your Remote Access Code.
Wait for the confirmation tone thenpress 7.
Your answering machine will now beswitched on.
To switch on your answering machinefrom another external telephone
CODE
7PQR
S
��
��
C OK
C OK
��
C OK
��
C OK
CODE

On-Air 1300 Executive user guide ~ Edition 3 ~ 7th August ’01 ~ 3992
30
Dial your telephone number.
Start listening to your outgoing message.
Press the # button.
Enter your remote access code.
A confirmation tone is heard.
You now have control of youranswering machine. Any new messageswill be automatically played.
To access your answering machinefrom a remote phone
CODE
To erase message being played
then To erase your outgoing message
then To erase your messages
To listen to your outgoing message
To listen to your previous message
To replay your messages, also pause/resume playback
To listen to your next message
To switch Answering machine ON
then Record new outgoing message then press to save (this will replace thecurrently selected outgoing message)
then Record a message then press to save
To switch Answering Machine OFF
5JKL
3DEF
1
1 3DEF
5JKL
1
3DEF
4GHI
5JKL
6MNO
7PQR
S
8TUV
3DEF
8TUV
5JKL
9WXYZ
Press:
How to control answeringmachines functions

31
On-Air 1300 Executive user guide ~ Edition 3 ~ 7th August ’01 ~ 3992
Using additional handsetsand basesUsing additional handsets and bases
Up to six handsets can be registered andoperated from any one base. This allows you tomake internal calls between two handsets whilea third is making an external call.
Each handset can be registered on up to fourbases.
Each additional handset you purchase must beregistered to a base.
Your handset supplied is pre-registered (as Handset 1) to its base (as Base 1).
Play
Delete Answer
�Skip
Skip �
BT On-Air 1300
2ABC
3DEF
5JKL
8TUV
0
6MNO
9WXYZ
1
4GHI
7PQRS
C OK
2ABC
3DEF
5JKL
8TUV
0
6MNO
9WXYZ
1
4GHI
7PQRS
C OK
2ABC
3DEF
5JKL
8TUV
0
6MNO
9WXYZ
1
4GHI
7PQRS
C OK
2ABC
3DEF
5JKL
8TUV
0
6MNO
9WXYZ
1
4GHI
7PQRS
C OK
2ABC
3DEF
5JKL
8TUV
0
6MNO
9WXYZ
1
4GHI
7PQRS
C OK
2ABC
3DEF
5JKL
8TUV
0
6MNO
9WXYZ
1
4GHI
7PQRS
C OK
If you purchase new handsets to use with yourcurrent BT On-Air 1300, they will not be pre-registered to a base station. You will need todo this before you can use them.
To check that the handset is registered presstalk to hear a dial tone.
Registering additional handsets
At the base:–
Press and hold down the � SKIP buttonuntil the PLAY button starts to flash.
At the handset:–
Use the UP or DOWN button to scrollto Base.
Press OK to confirm.
The display will show Register.
Press OK to confirm.
Use the UP or DOWN button to scrollto Automatic.
Press OK to confirm.
The display will show Searching forbase.
After a few seconds the handset will beregistered and display:
To register a handset to a basestation (if you have not changed the System Code from 0000)
��
��
C OK
C OK
C OK
Base 1Handset 2
�Skip

On-Air 1300 Executive user guide ~ Edition 3 ~ 7th August ’01 ~ 3992
32
To register a handset to a basestation (if you have changed theSystem Code from 0000)
At the base:–
Press and hold down the � SKIP buttonuntil the PLAY button starts to flash.
On the handset:–
Use the UP or DOWN button to scrollto Base.
Press OK to confirm.
The display will show Register.
Press OK to confirm.
Use the UP or DOWN button to scrollto Custom.
Press OK to confirm.
Use the UP or DOWN button to scrollto the required base number.
Press OK to confirm.
At this stage if you require you can editthe base name.
Press OK to confirm.
Enter the System Code using thekeypad.
Press OK to confirm.
After a few seconds the handset will beregistered and display:
C can also be pressed to return to idle.
Base 1
Handset 2
��
��
��
C OK
C OK
C OK
C OK
�Skip
��
C OK
C OK
C OK
C OK
CODE
Note
The number you save becomes the handset’sname (ie. ‘Handset 1’).
Note
When planning to use a handset with morethan one base, we recommend that you:• Give a number to each base (from 1-4).• Number each handset (from 1-6).• Register your handset(s) at base 2 (and
3 & 4 if used) using the same internalnumber as at base 1.
The display will now flash Searchingfor base.
You will then see a list of the availablehandset numbers.
Use the UP or DOWN button to scrollto the number you require.
Press OK to confirm.

On-Air 1300 Executive user guide ~ Edition 3 ~ 7th August ’01 ~ 3992
33
Press the UP or DOWN button toscroll to the Base menu.
Press OK to confirm.
Use the UP or DOWN button to scrollto Base settings.
Press OK to confirm.
Use the UP or DOWN button to scrollto Handsets.
Press OK to confirm.
Use the UP or DOWN button to scrollto De-register.
Press OK to confirm.
Enter the System Code.(0000 if notchanged).
Press OK to confirm.
Use the UP or DOWN button to scrollto the handset that you want to de-register.
Press OK to confirm.
This will time out and go back to idle.
Or
Press the C button until you get back to idle.
The handset is now de-registered.
To de-register a handset from the base
��
��
��
��
��
C OK
C OK
C OK
C OK
C OK
C OK
C OK
CODE

34
On-Air 1300 Executive user guide ~ Edition 3 ~ 7th August ’01 ~ 3992
General information
Guarantee
Your BT On-Air 1300 is guaranteed for a periodof 12 months from the date of purchase.
Subject to the terms listed below the guaranteewill provide for the repair of, or at BT’s or itsagent’s discretion the option to replace the BTOn-Air 1300, or any component thereof, (otherthan batteries), which is identified as faulty orbelow standard, or as a result of inferiorworkmanship or materials. Products over 28 daysold from the date of purchase may be replacedwith a refurbished product.
The conditions of this guarantee are:
• The guarantee shall only apply to defects thatoccur within the 12 month guarantee period.
• Proof of purchase is provided.
• The equipment is returned to BT or its agentas instructed.
• This guarantee does not cover any faults or defects caused by accidents, misuse, fair wearand tear, neglect, tampering with theequipment, or any attempt at adjustment orrepair other than through approved agents.
• This guarantee does not affect your statutoryrights.
Within the 12-month guarantee period:
If you experience a problem with your productyou should contact the Helpline on 08456012476. Calls are charged at local call rates. If the problem is not remedied, you will beadvised to return your product to the Helpline.
Outside the 12-month guarantee period:
If your product needs repair after the guaranteeperiod has ended, the repair must meet theapproval requirements for connection to thetelephone network. We recommend that youcall the Helpline on 0845 6012476 and ask fordetails of our recommended repair agents.
If you have to return your product
If the Helpline are unable to remedy yourproblem they will ask you to return the product.Pack the base station and handset securely,preferably in the original packaging. All partsmust be returned, including line cords, powersupplies and original batteries. (Please note thatwe can not take responsibility for goods damagedin transit). Use the self adhesive Freepost labelto post your product.
If you have lost the label please call the Helplinefor instructions.
Technical information
How many telephones can you have on the line?
All items of telephone equipment have a RingerEquivalence Number (REN) which is used tocalculate the number of items that may beconnected to any one telephone line.
The BT On-Air 1300 Executive (with up to 6handsets) has a total REN of 1. Any otherinstrument provided by BT may be assumed tohave a REN of 1 unless stated otherwise.
Important
Make sure the Post Office give you proof of posting.

On-Air 1300 Executive user guide ~ Edition 3 ~ 7th August ’01 ~ 3992
35
A total REN of 4 is allowed per telephone line.(For example: if the BT On-Air Executive is usedin conjunction with three extension telephones,each with a REN of 1, then the total REN = 4)
Only use approved power supply item code872101.
Only use approved batteries item code 872102.
RTTE
This apparatus was designed in compliance withEuropean Council decision Number 98/482/ECrelative to pan-European connection in view toits connection on the Public Switched TelephoneNetwork (PSTN). It is in conformity withStandards TBR21, TBR38(*)ETSI 201 121.(*) Terminals integrating an analogue handset function.
If problems arise, your supplier should becontacted first.
The EC marking attests product conformity withthe essential requirements in compliance withDirectives 73/23/EC for User Safety, 89/336/ECfor Electromagnetic perturbations and 98/13/ECfor Telecommunication network access.
The manufacturer declares that the productshave been manufactured in conformity withAnnex III of RTTE Directive 99/05/EC.
Helpline
If you are experiencing difficulty, please callthe BT On-Air Helpline on 0845 601 2476.
Generally this telephone may be connected toswitchboards which support tone signalling andtimed break recall. In the event of anydifficulties please consult your switchboardservice provider. Please note this product doesnot support earth recall.
Switchboard compatibility
To activate Recall
This is of use when connected toswitchboards or using BT SelectServices. It is only available when a callis in progress.
When you need to use recall during a call:-
Press the button.
Press the button when R appearsabove on the display.
Recall
When you connect your telephone to aswitchboard, you can set the switchboard’sexternal line access code so that when you makean external call using the handset directory,redial list or preparatory dialling, the code isautomatically dialled before the number.
Switchboard external line access code
To set the external line access code
Press the UP or DOWN button toselect Base.
Press OK.
Press the UP or DOWN button toselect Base settings.
Press OK.
Press the UP or DOWN button toselect Phone line.
Press OK.
C OK
C OK
C OK
��
��
��
On-Air 1300 Executive user guide ~ Edition 3 ~ 7th August ’01 ~ 3992
36
Press the UP or DOWN button toselect Prefix.
Press OK.
Press OK to select Prefix val.
Enter the switchboard external lineaccess code, e.g. 9. You can entercodes up to 8 digits in length.
Press OK to store.
Now you must set the number of digitsrequired to make internal calls to otherextensions on your switchboard.
Press the UP or DOWN button toselect Min.length.
Press OK.
Enter the number of digits to make aninternal call to other extensions onyour switchboard.
Press OK to store.
C OK
C OK
C OK
C OK
C OK
��
Note
For the external line access code to be dialledfor external calls only, it is important that allexternal numbers stored in your handsetdirectory must contain more digits than thenumber of digits required to make an internalcall to other extensions on your switchboard.This is most likely to occur when you havelocal external numbers stored in the handsetdirectory without the area code. To overcomepotential problems ensure that all numbersare stored complete with area code.
Press the UP or DOWN button toselect Base.
Press OK.
Press the UP or DOWN button toselect Base settings.
Press OK.
Press the UP or DOWN button toselect Phone Line.
Press OK.
Press the UP or DOWN button toselect Prefix.
Press OK.
Press the UP or DOWN button toselect Status.
Press OK.
Press the to activate or de-activate.When active the ✔ will be shown onthe display.
To activate and de-activate theexternal line access code
C OK
C OK
C OK
C OK
C OK
��
��
��
��
��
��
37
On-Air 1300 Executive user guide ~ Edition 3 ~ 7th August ’01 ~ 3992
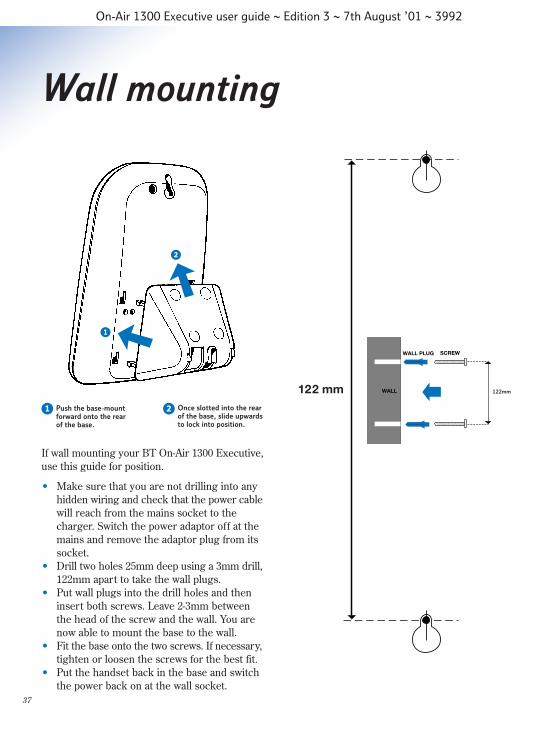
Wall mounting
2 Once slotted into the rear of the base, slide upwards to lock into position.
1 Push the base-mountforward onto the rearof the base.
If wall mounting your BT On-Air 1300 Executive,use this guide for position.
• Make sure that you are not drilling into anyhidden wiring and check that the power cablewill reach from the mains socket to thecharger. Switch the power adaptor off at themains and remove the adaptor plug from itssocket.
• Drill two holes 25mm deep using a 3mm drill,122mm apart to take the wall plugs.
• Put wall plugs into the drill holes and theninsert both screws. Leave 2-3mm betweenthe head of the screw and the wall. You arenow able to mount the base to the wall.
• Fit the base onto the two screws. If necessary,tighten or loosen the screws for the best fit.
• Put the handset back in the base and switchthe power back on at the wall socket.
122 mm WALL
WALL PLUG SCREW
122mm
2
1
38
On-Air 1300 Executive user guide ~ Edition 3 ~ 7th August ’01 ~ 3992
Index
Additional handsets & bases 31
Alarm clock 15
Answering machinecall screening 27delete messages 27delete outgoing message 23number of rings 23on/off 24, 25play messages 25pre-recorded outgoing messages 22set time and date 19record memo 27record outgoing message 22
Base settings 19
Base station name 20
Base System Code 20
Base station priority 21
Batterycharge 8install 8low warning 8performance 8replacement 9
Caller Display 17
Call screening 27
Call timer 10
Callsend 10external call 10handsfree 11internal 10make 10receive 10
redial 11secrecy 12timer 10transfer 13
Calls list 17
Date set 19
Desk mounting 7
De-register 33
Directorydelete/edit 13dial number 12insert pause 12store name and number 12
Economy mode 15
External line access code 35
Guarantee 34
Handset fascias 9
Handsfree 11
Helpline 8
Internal call 13
Keyguard 14
Keypad beeps and tones 18
Melody 18
Memo 27
Menu structure 3-5
Messages delete
Number of rings 23
On/Offalarm clock 15-16answering machine 24-25keyguard 14
On-Air 1300 Executive user guide ~ Edition 3 ~ 7th August ’01 ~ 3992
39
power 10secrecy 12VIP 28
Outgoing message delete 22
Paging 13
Pause
Power supply 7
Pre-recorded message 22
Play outgoing message 23
Recall 35
Redial list 11copy to directory 11delete 11
Registering 31
Remote access 29
Returning your product 34
Safety information 6
Setting up 7
Secrecy 12
Switchboard compatibility 35
System Code 20
Technical information 34
Telephone line cord 9
Time set 19
Timer 16
Transferring calls 13
VIP 28
Volumeearpiece 10ringer 18
Wall mounting 37

On-Air 1300 Executive user guide ~ Edition 3 ~ 7th August ’01 ~ 3992
Offices worldwideThe telecommunications services described in this publicationare subject to availability and may be modified from time to time. Services and equipment are provided subject to British Telecommunicationsplc’s respective standard conditions of contract. Nothing in this publicationforms any part of any contract.
Touchtone™ is a registered trade mark ofBritish Telecommunications plc in the UK.
© British Telecommunications plc 2001.Registered Office: 81 Newgate Street, London EC1A 7AJ.Registered in England No. 1800000.Designed by: The Art & Design Partnership Limited.Printed in Europe. On-Air 1300 Executive. Issue 3 (8/01). 3
Printed on paper which meets international environmental standards.


