
Installing Oracle Database 11gR2 Software on Red Hat
Enterprise Linux 5 (RAC)
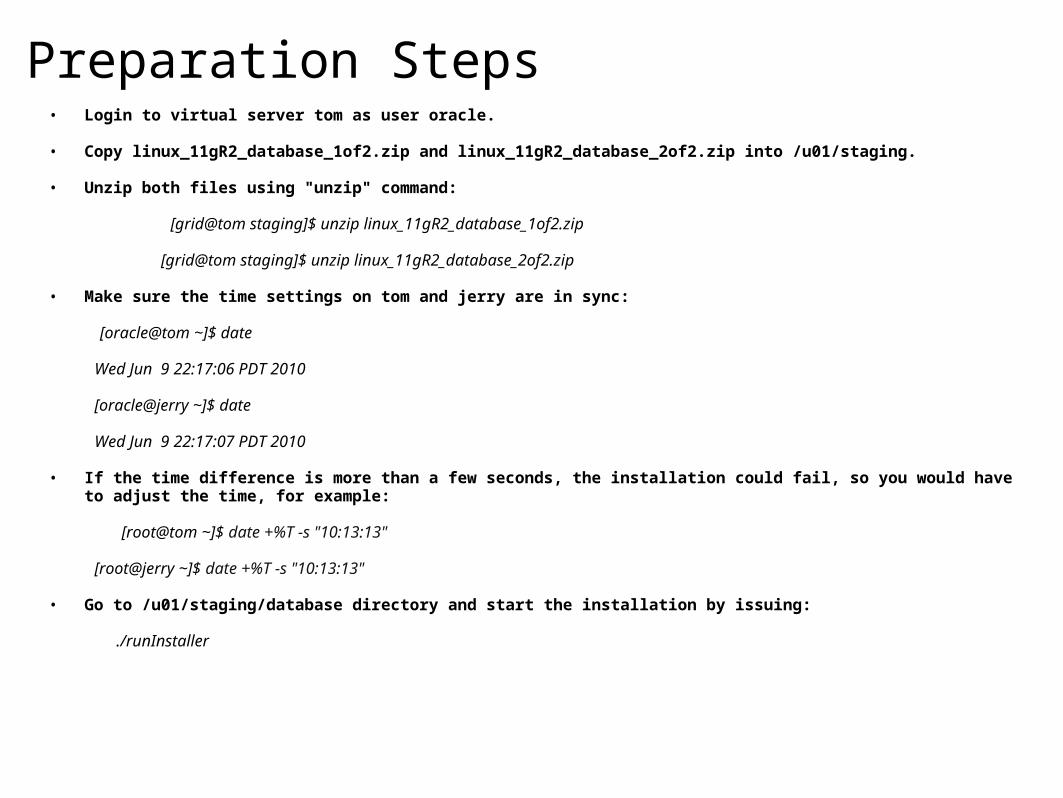
Preparation Steps• Login to virtual server tom as user oracle.
• Copy linux_11gR2_database_1of2.zip and linux_11gR2_database_2of2.zip into /u01/staging.
• Unzip both files using "unzip" command:
[grid@tom staging]$ unzip linux_11gR2_database_1of2.zip
[grid@tom staging]$ unzip linux_11gR2_database_2of2.zip
• Make sure the time settings on tom and jerry are in sync:
[oracle@tom ~]$ date
Wed Jun 9 22:17:06 PDT 2010
[oracle@jerry ~]$ date
Wed Jun 9 22:17:07 PDT 2010
• If the time difference is more than a few seconds, the installation could fail, so you would have to adjust the time, for example:
[root@tom ~]$ date +%T -s "10:13:13"
[root@jerry ~]$ date +%T -s "10:13:13"
• Go to /u01/staging/database directory and start the installation by issuing:
./runInstaller

Ignore Security Updates.

Choose "Create and configure a database".

Choose "Server Class".

Select "Real Application Clusters database installation".
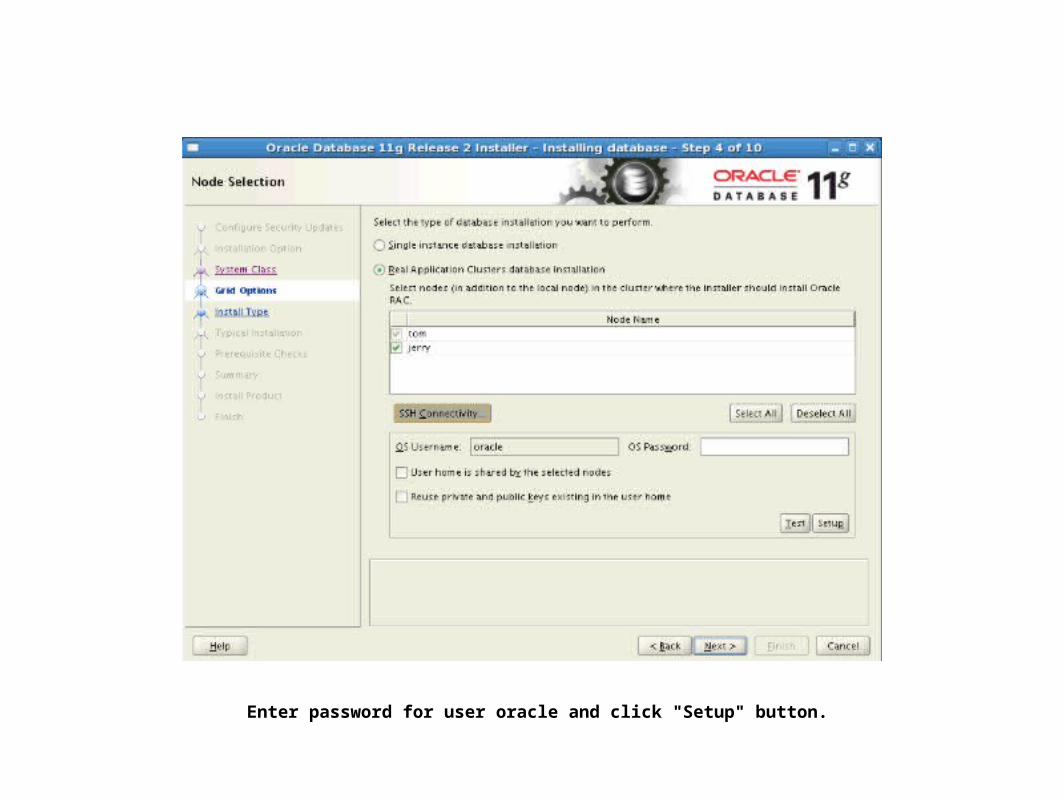
Enter password for user oracle and click "Setup" button.

Select "Advanced install".

Accept "English".

Select "Enterprise Edition".

Confirm the locations for "Oracle Base" and "Software Location".

Choose “General Purpose / Transaction Processing”.
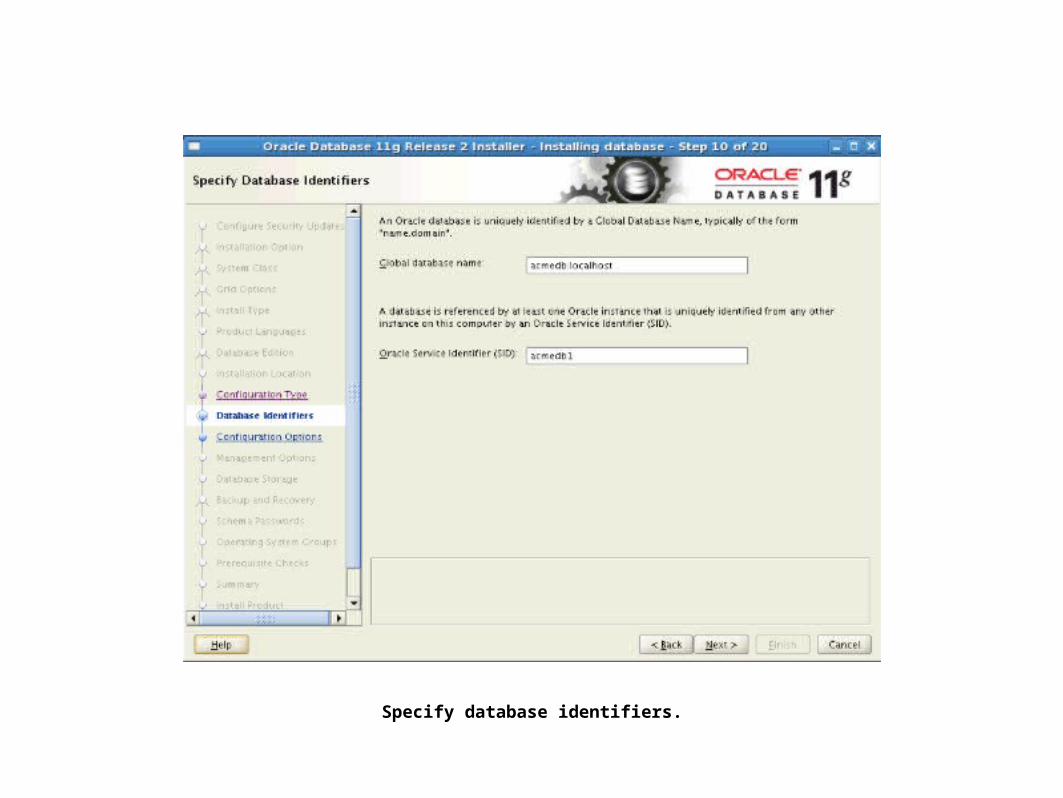
Specify database identifiers.

Accept the default configuration.
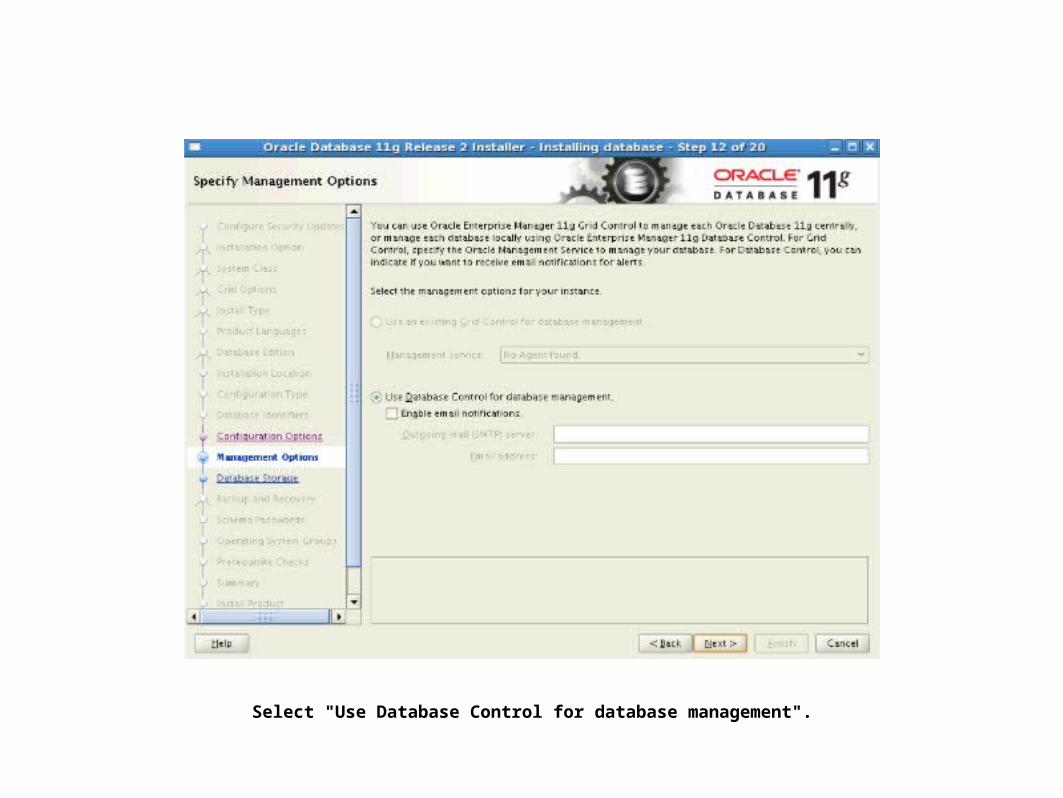
Select "Use Database Control for database management".

Select "Automatic Storage Management" and specify password for user ASMSNMP.

Choose "Do not enable automated backups".

Select disk group "Data" for DB storage.

Configure schema passwords. Ignore possible warning.

Select "dba" for OSDBA group and "oper" for OSOPER.

Wait for prerequisite checks to complete.
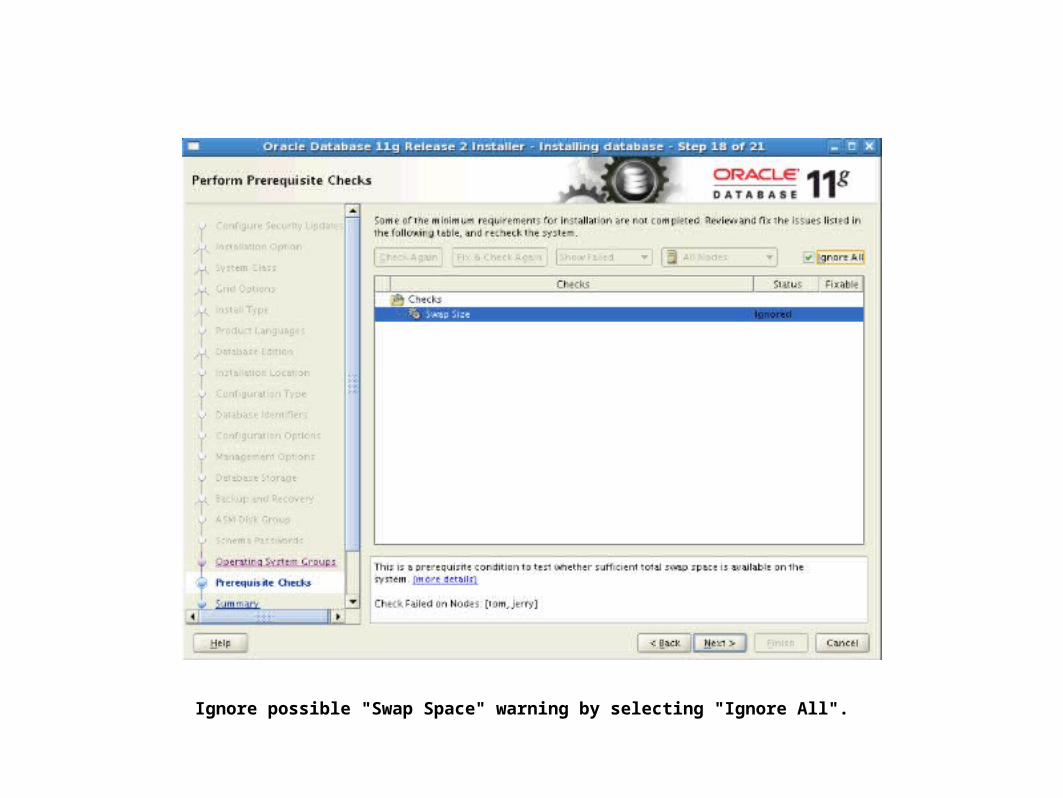
Ignore possible "Swap Space" warning by selecting "Ignore All".

Verify information on the "Summary" screen and click "Finish".
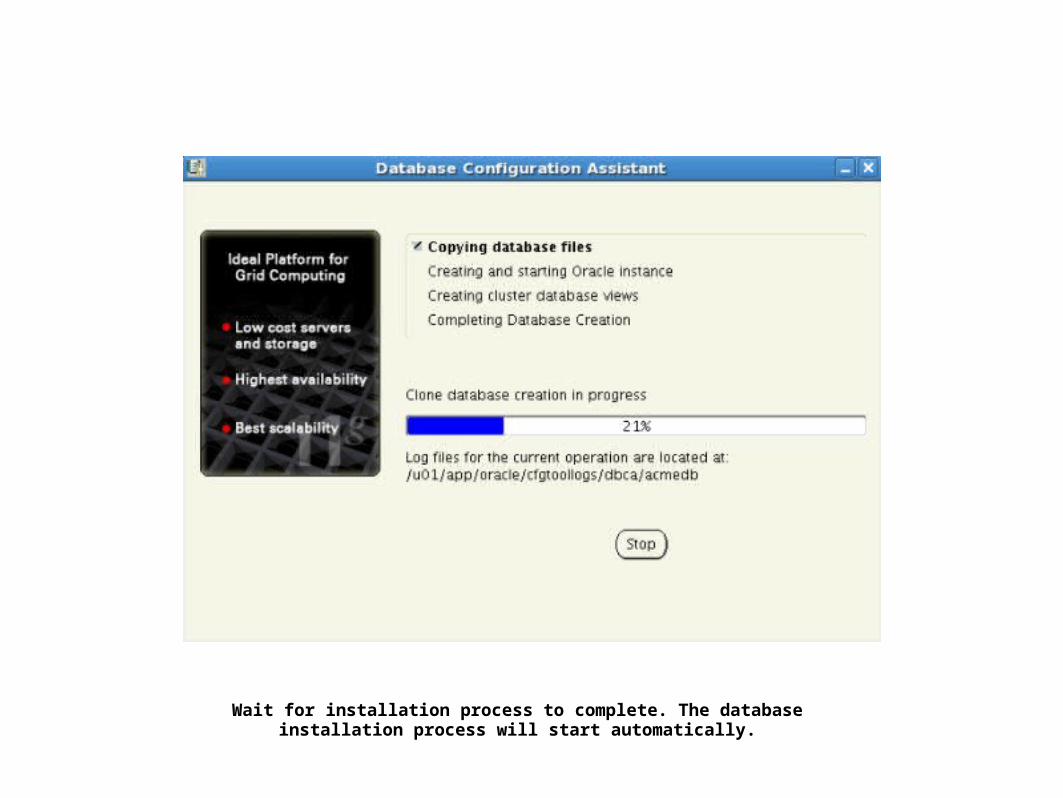
Wait for installation process to complete. The database installation process will start automatically.

Skip the password management on the Database Configuration Assistant window.
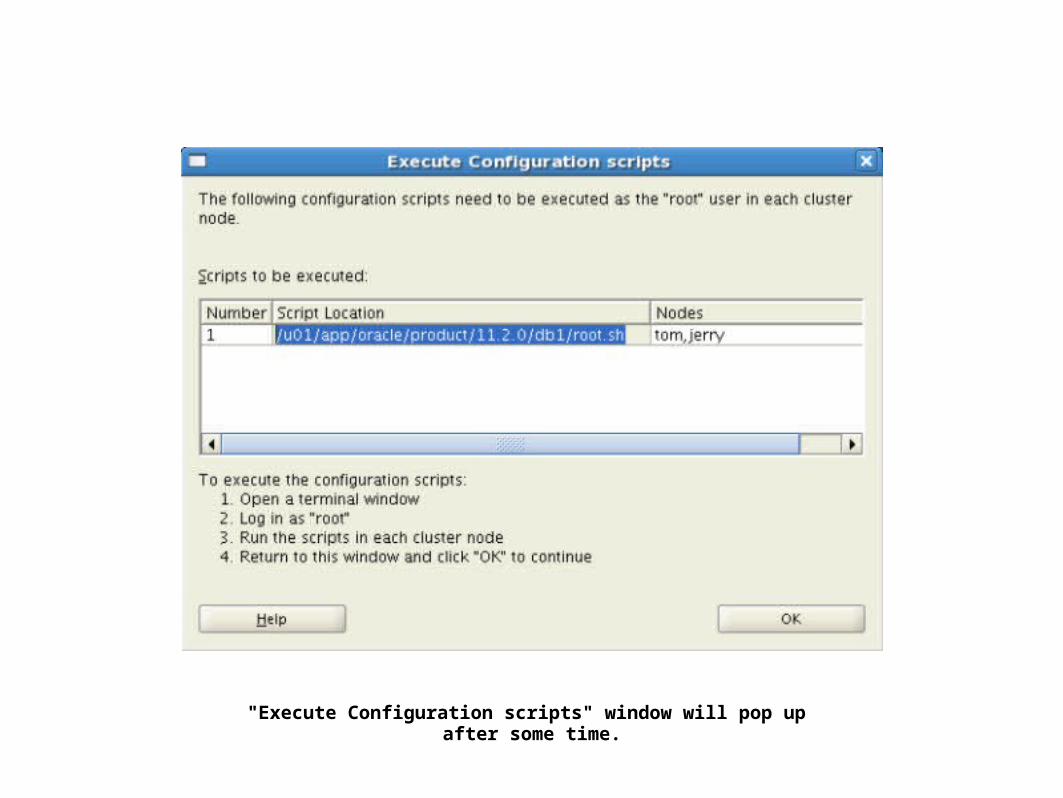
"Execute Configuration scripts" window will pop up after some time.
Executing "root" scripts in the right order
a. Execute root.sh script on tom first and wait for successful comlpetion:
[root@tom ~]$ /u01/app/oracle/product/11.2.0/db1/root.sh
b. Execute root.sh script on jerry only after it successfully completes on tom:
[root@jerry ~]$ /u01/app/oracle/product/11.2.0/db1/root.sh
c. Click "OK" on "Execute Configuration Scripts" window.
If you hit bug 8670579 during the Grid installation, you most likely are going to have problems with the Database installation as well. The solution is to install the same patch 8670579 in Oracle Home as well.

Click "Close" button to exit the Installer.

The database software installation and database creation are complete!

Commands to verify the state of the database, instances, and cluster
crsctl stat res -t
crsctl check cluster
cluvfy comp clocksync -verbose
srvctl status database -d acmedb
srvctl status asm
srvctl status nodeapps


