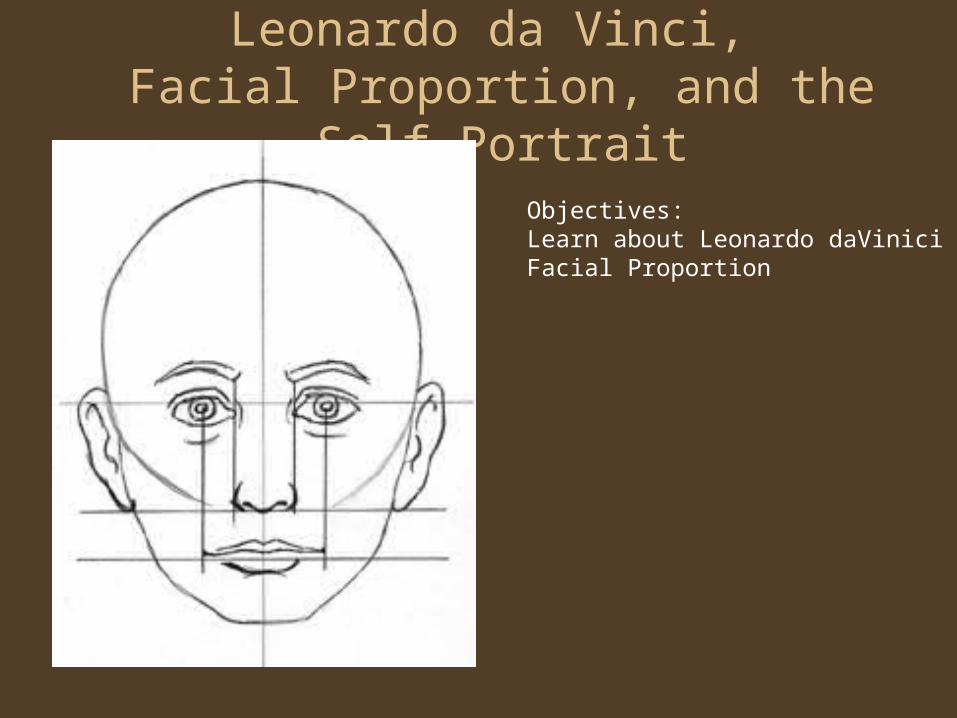
Leonardo da Vinci, Facial Proportion, and the Self-Portrait
Objectives:Learn about Leonardo daViniciFacial Proportion
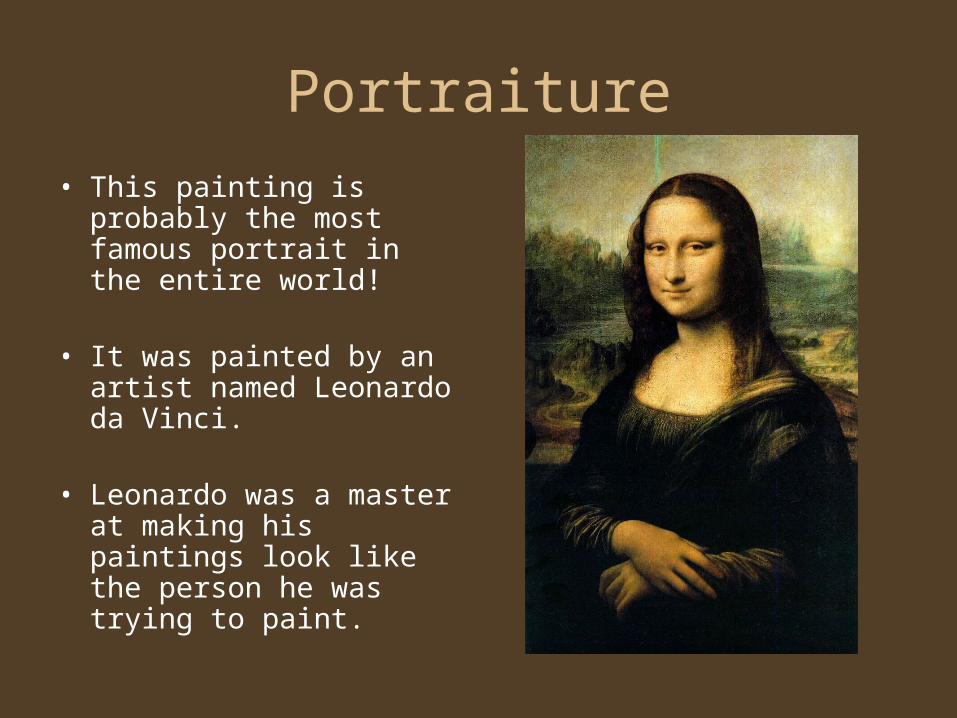
Portraiture
• This painting is probably the most famous portrait in the entire world!
• It was painted by an artist named Leonardo da Vinci.
• Leonardo was a master at making his paintings look like the person he was trying to paint.
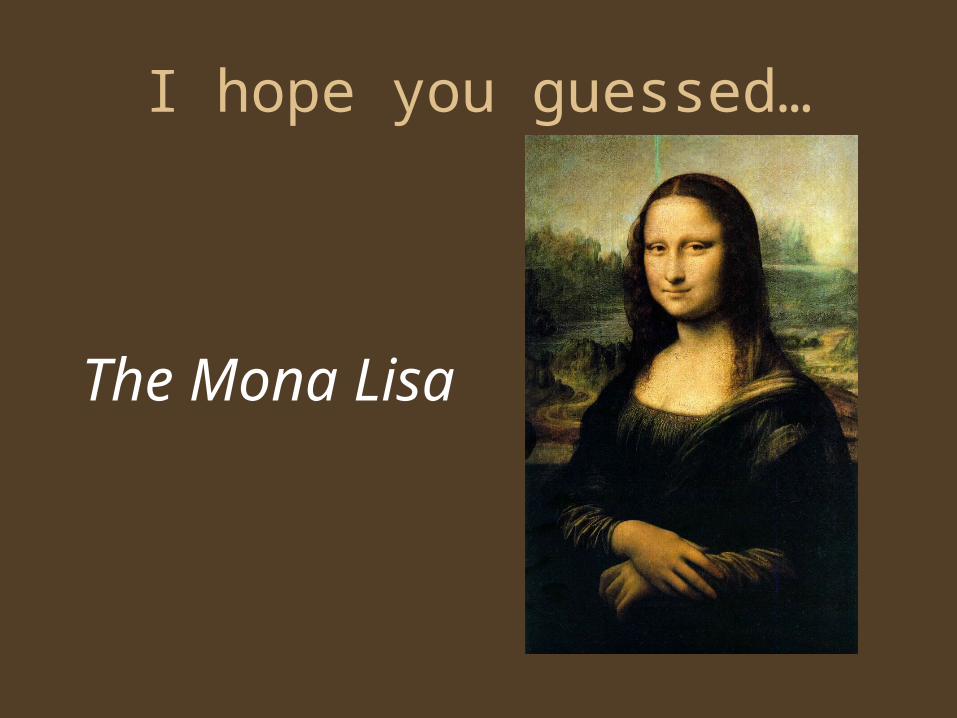
I hope you guessed…
The Mona Lisa

Leonardo Da Vinci
• Leonardo once wrote, “Know the proportions in human beings and other animals and learn the forms of all things on the earth. The more you know, the better you will paint.”
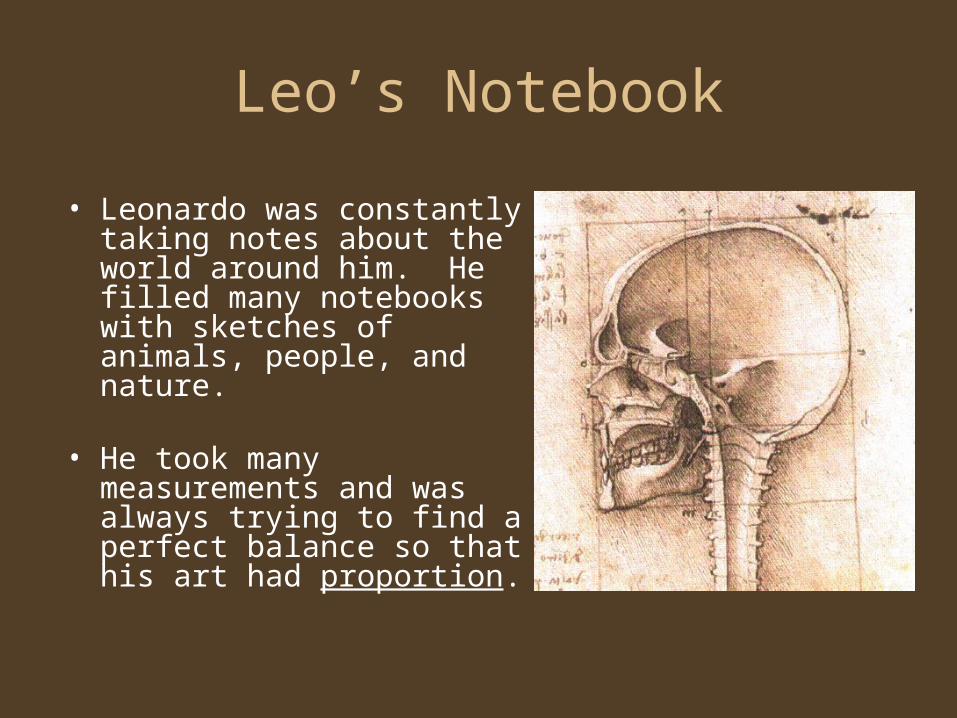
Leo’s Notebook
• Leonardo was constantly taking notes about the world around him. He filled many notebooks with sketches of animals, people, and nature.
• He took many measurements and was always trying to find a perfect balance so that his art had proportion.
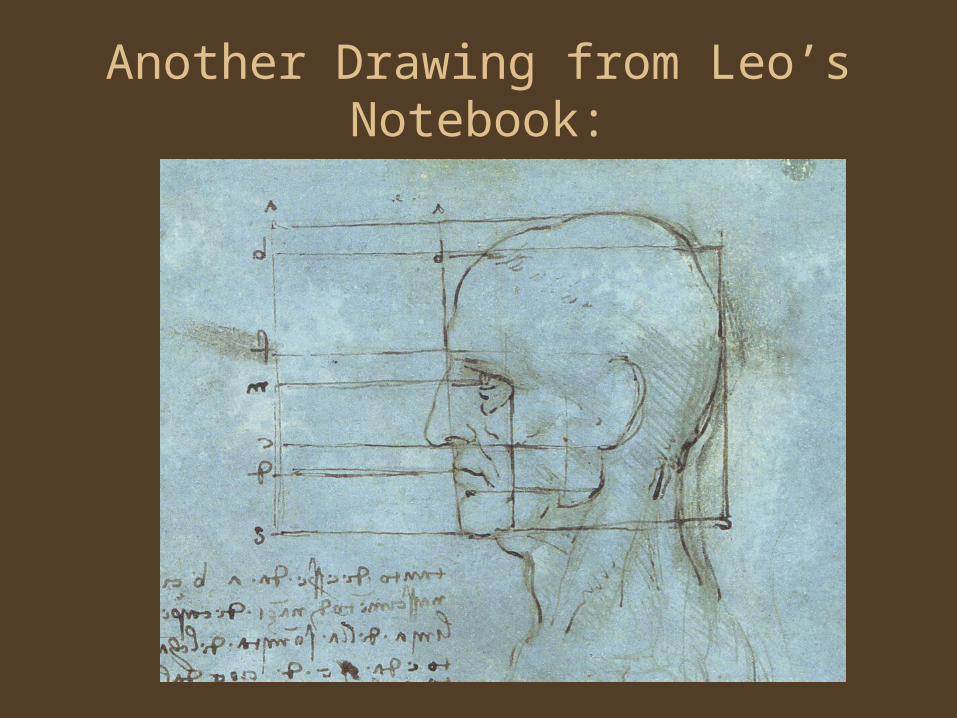
Another Drawing from Leo’s Notebook:
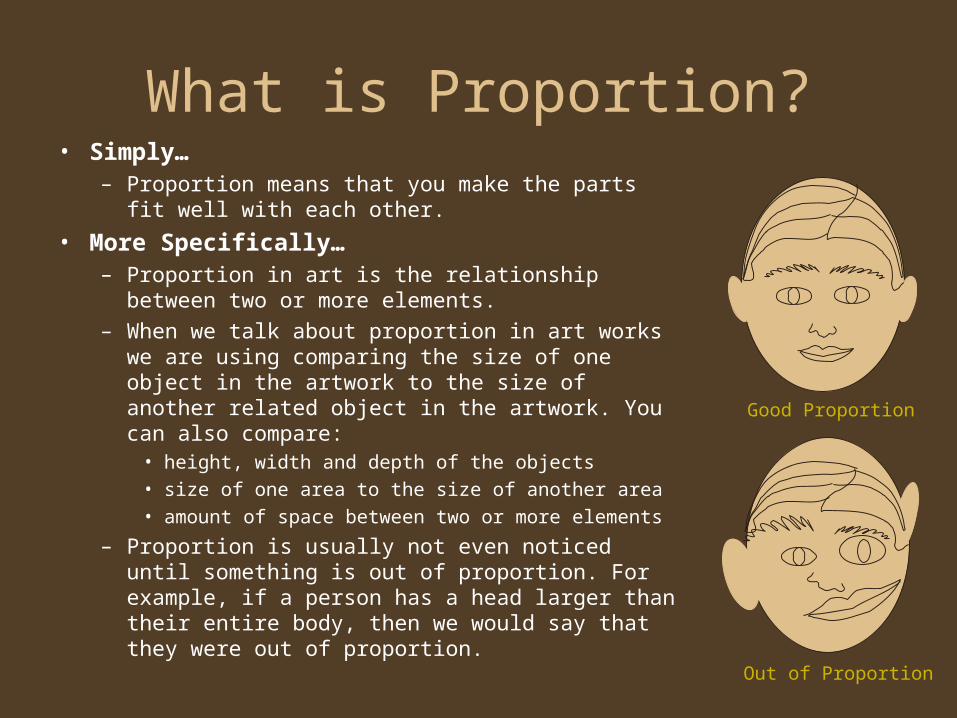
What is Proportion?• Simply…
– Proportion means that you make the parts fit well with each other.
• More Specifically…– Proportion in art is the relationship between two or
more elements.
– When we talk about proportion in art works we are using comparing the size of one object in the artwork to the size of another related object in the artwork. You can also compare:
• height, width and depth of the objects• size of one area to the size of another area • amount of space between two or more elements
– Proportion is usually not even noticed until something is out of proportion. For example, if a person has a head larger than their entire body, then we would say that they were out of proportion.
Good Proportion
Out of Proportion
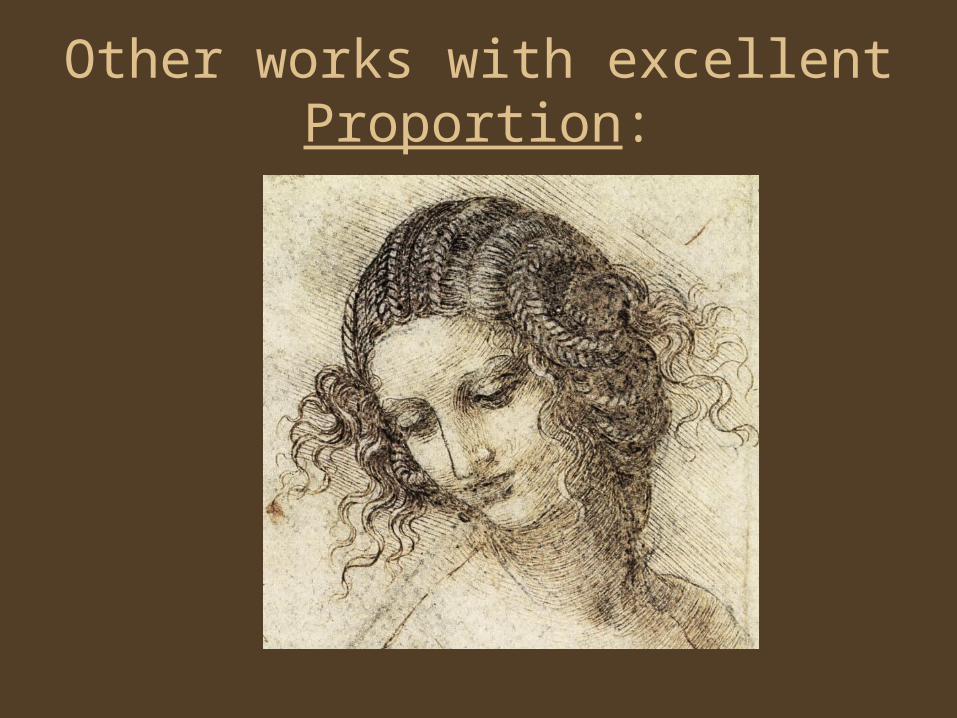
Other works with excellent Proportion:

The Self-Portrait:
• Here’s a drawing Leonardo drew of himself as an old man.
• A picture that an artist
makes of him/herself is called a self-portrait.

Face Mapping
• Face Mapping is a technique used to set up the proportion of the features on a face.

• By drawing lines that act as guides, you can figure out where parts go and how large they should be.
• This will help make your face look more realistic.
• With some practice, maybe you’ll be the next Leonardo da Vinci!
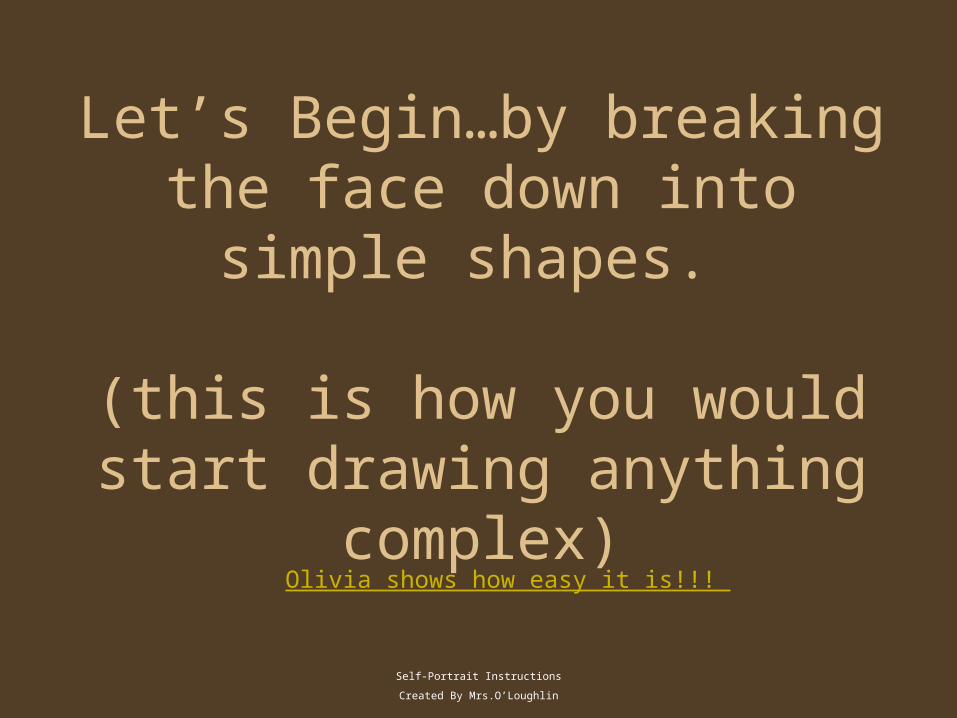
Let’s Begin…by breaking the face down into simple shapes.
(this is how you would start drawing anything complex)
Self-Portrait Instructions
Created By Mrs.O’Loughlin
Olivia shows how easy it is!!!
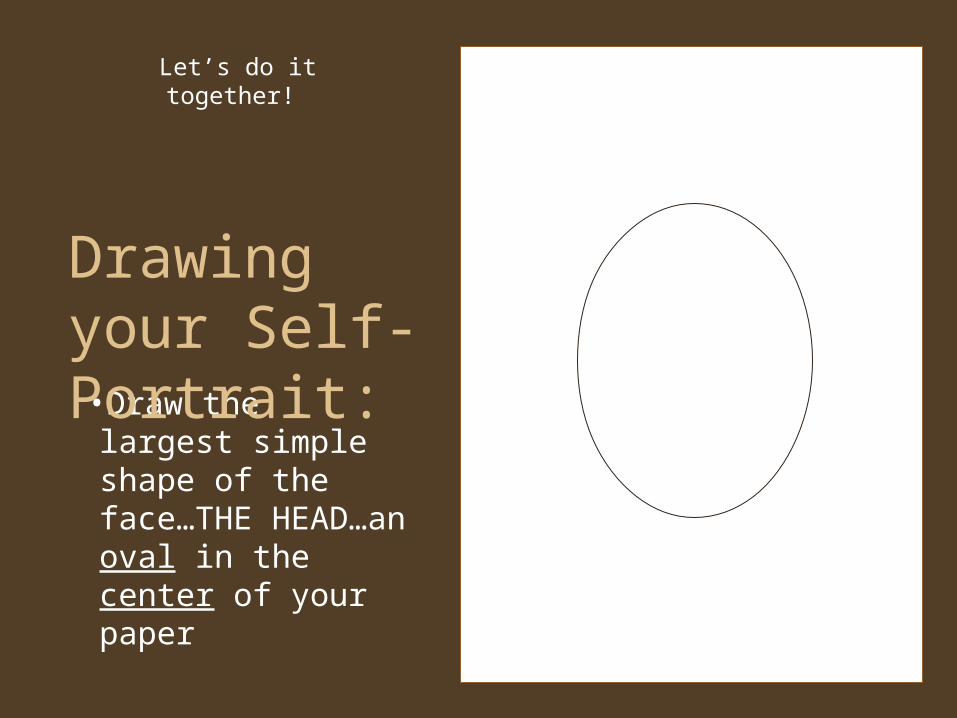
•Draw the largest simple shape of the face…THE HEAD…an oval in the center of your paper
Drawing your Self-Portrait:
Let’s do it together!
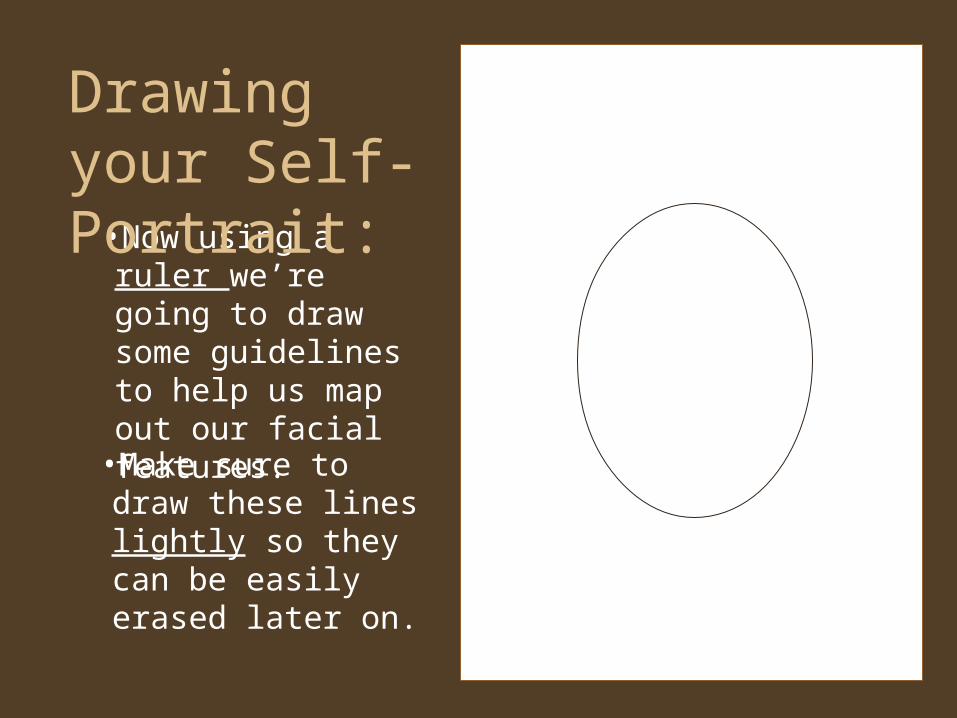
•Now using a ruler we’re going to draw some guidelines to help us map out our facial features.
Drawing your Self-Portrait:
•Make sure to draw these lines lightly so they can be easily erased later on.

•Line of Symmetry
Drawing your Self-Portrait:
•Your face is symmetrical.
•This means if you think of an invisible line drawn down the middle of your face the features on the right side are the same as on the left side.
•Remember to draw lightly.
Drawing your Self-Portrait:
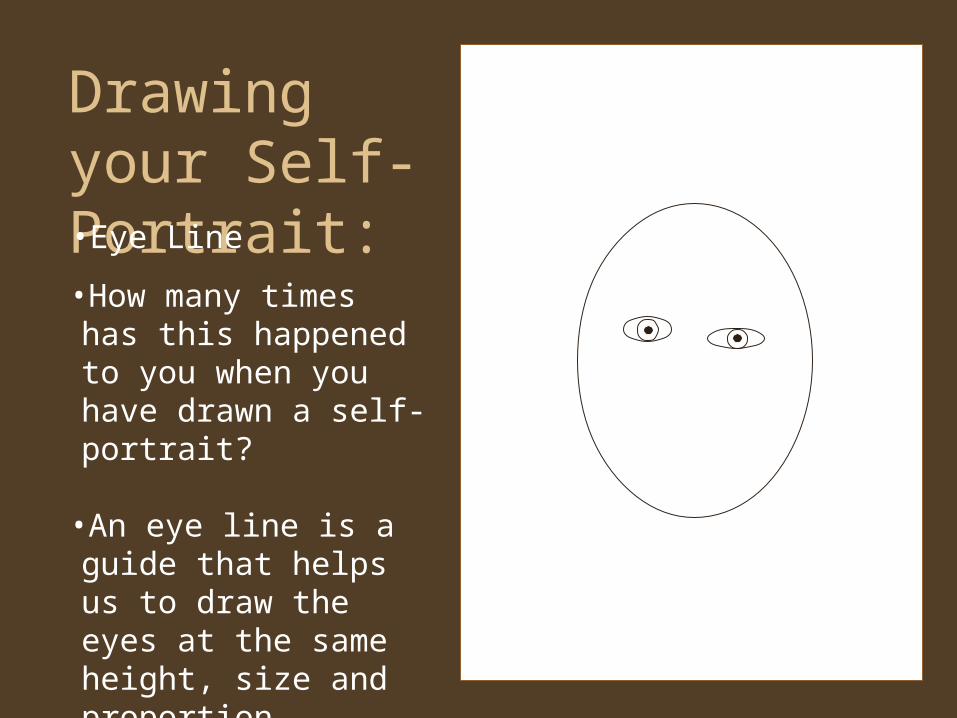
•How many times has this happened to you when you have drawn a self-portrait?
•An eye line is a guide that helps us to draw the eyes at the same height, size and proportion.
•Eye Line

•Eye Line
Drawing your Self-Portrait:
•Contrary to popular believe your eyes are not on the top portion of your face.
•Your eyes are located half way up or in the middle of your face .
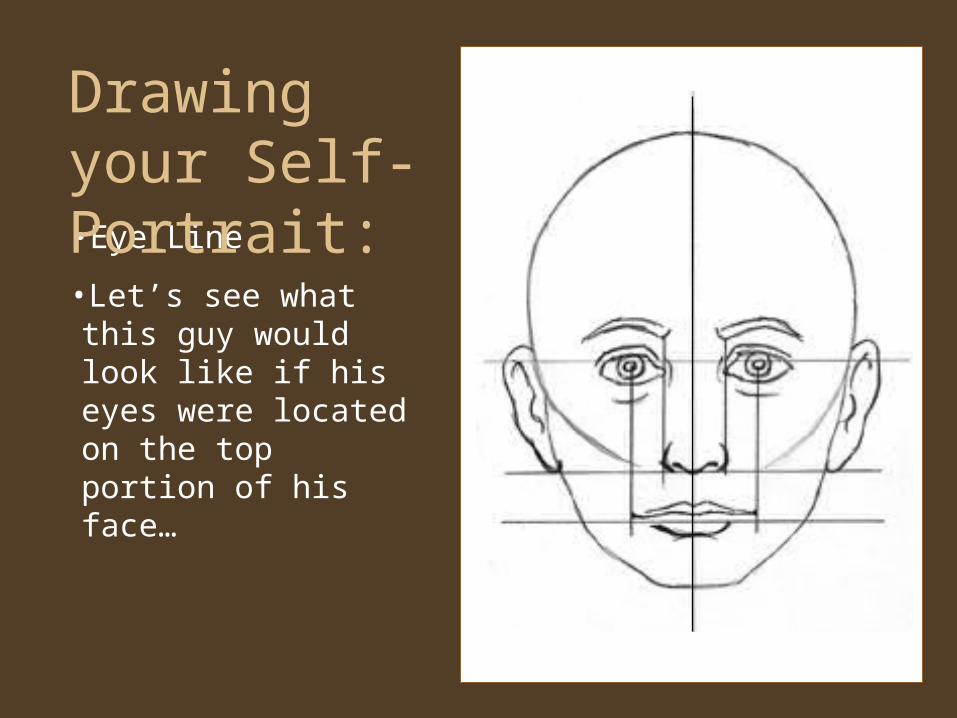
•Eye Line
Drawing your Self-Portrait:
•Let’s see what this guy would look like if his eyes were located on the top portion of his face…

•Eye Line
Drawing your Self-Portrait:
Yikes!!!

•Eye Line
Drawing your Self-Portrait:
•Using your ruler draw your eye line half way up or in the middle of your face.
•Remember to draw lightly.
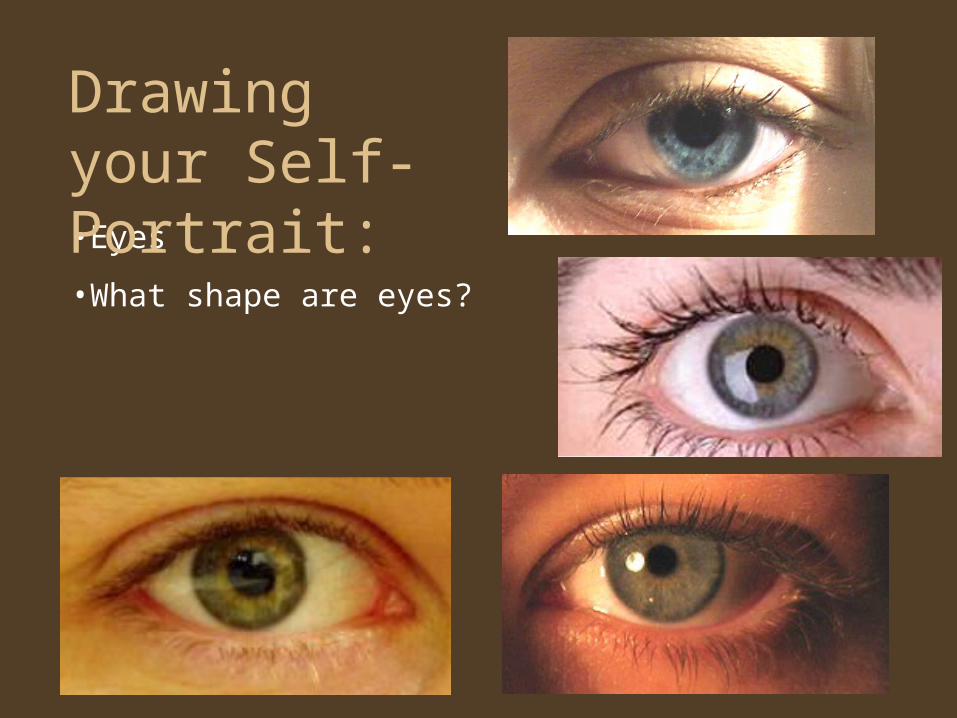
•Eyes
•What shape are eyes?
Drawing your Self-Portrait:
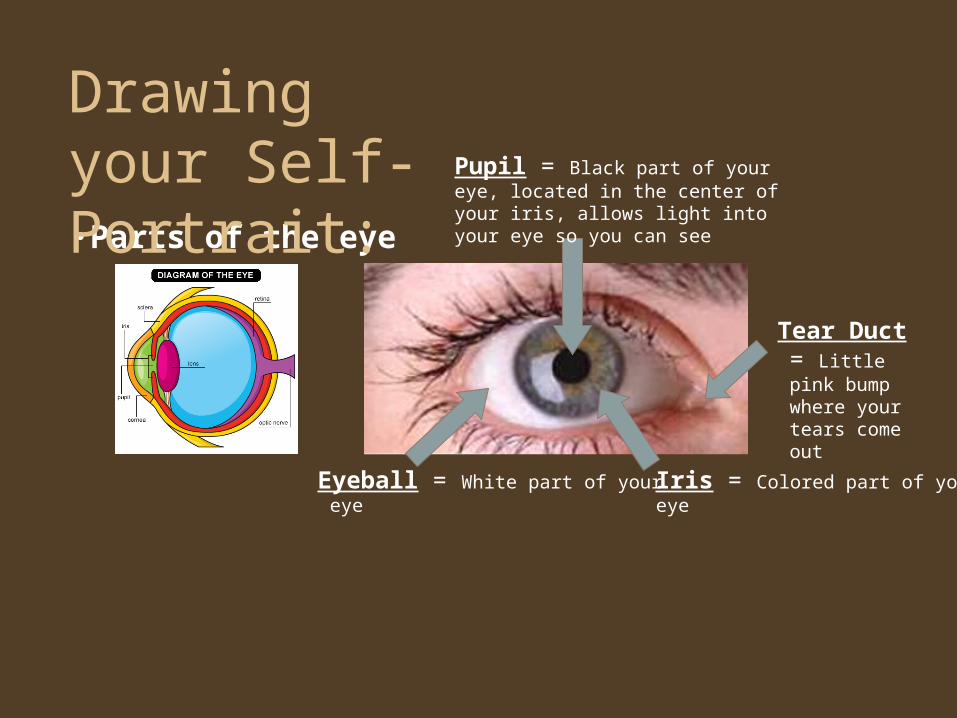
•Parts of the eye
Drawing your Self-Portrait:
Iris = Colored part of your eyeEyeball = White part of your eye
Pupil = Black part of your eye, located in the center of your iris, allows light into your eye so you can see
Tear Duct = Little pink bump where your tears come out
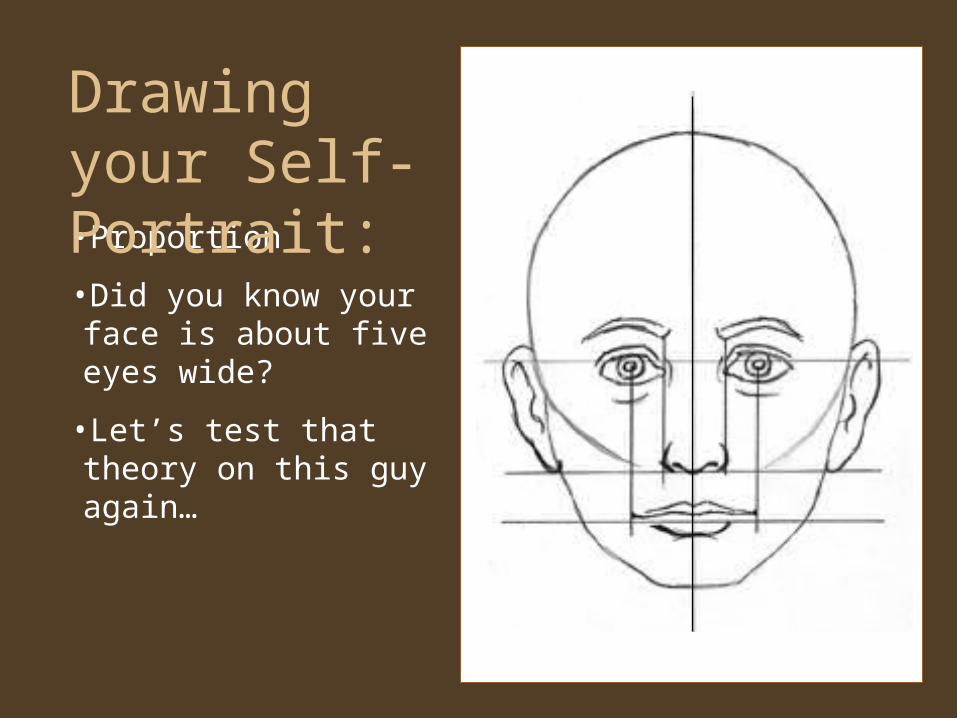
•Proportion
•Did you know your face is about five eyes wide?
•Let’s test that theory on this guy again…
Drawing your Self-Portrait:
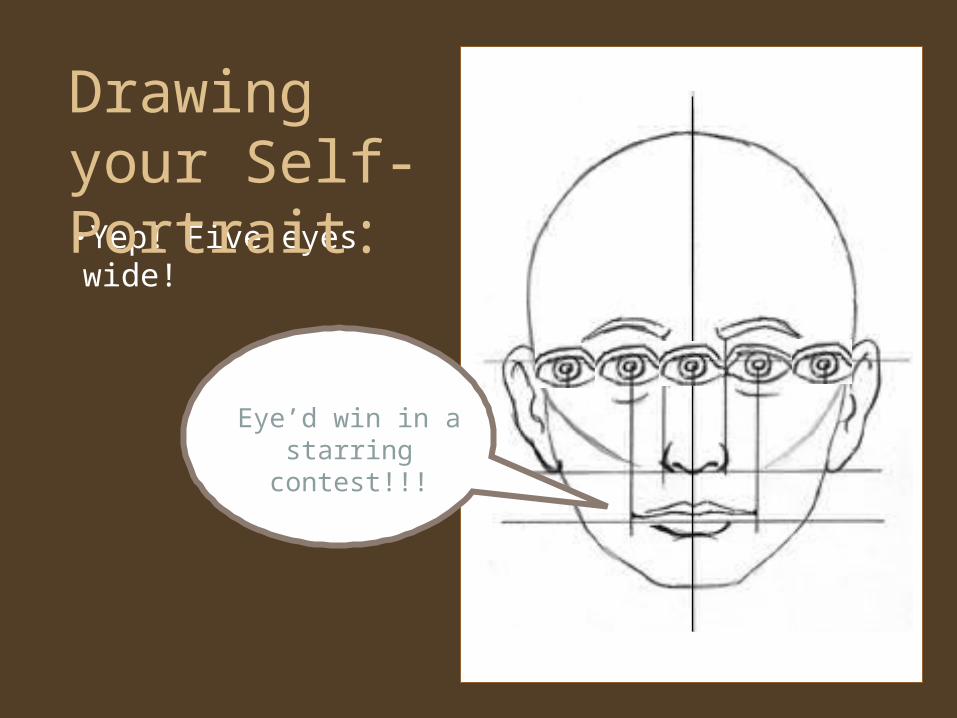
•Yep! Five eyes wide!
Drawing your Self-Portrait:
Eye’d win in a starring contest!!!

•Eyes
Drawing your Self-Portrait:
•Look at your eyes in a mirror.
•Using the eye line as a guide draw the outside shape of your eye.

•Eyes
Drawing your Self-Portrait:
•Now carefully erase your eye line.
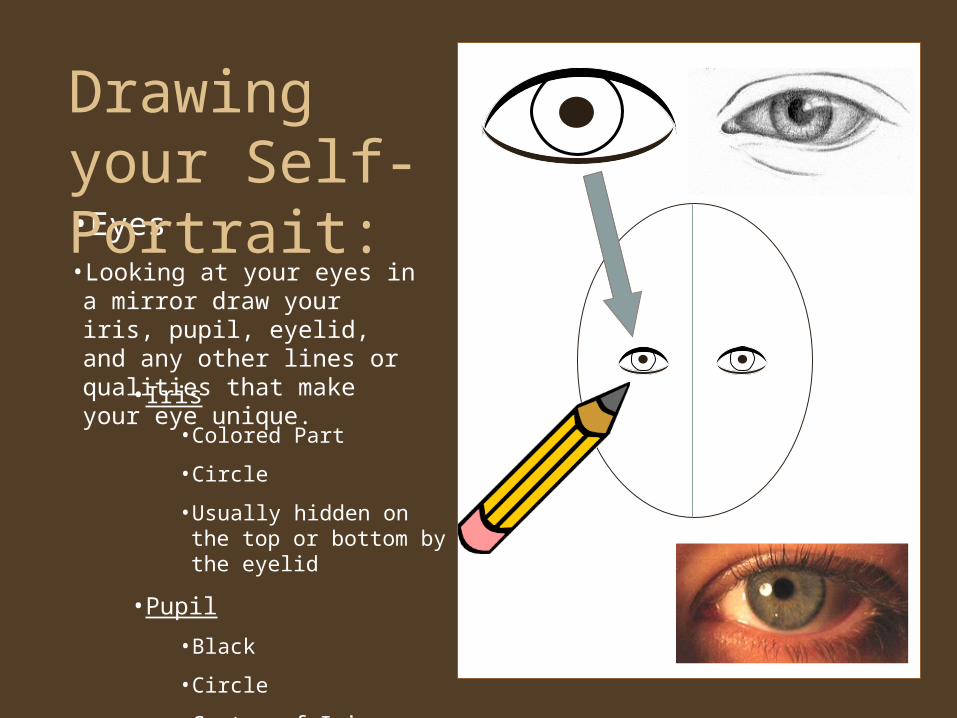
•Eyes• Looking at your eyes in a mirror draw your iris, pupil, eyelid, and any other lines or qualities that make your eye unique.
Drawing your Self-Portrait:
• Iris
• Colored Part
• Circle
• Usually hidden on the top or bottom by the eyelid
• Pupil
• Black
• Circle
• Center of Iris
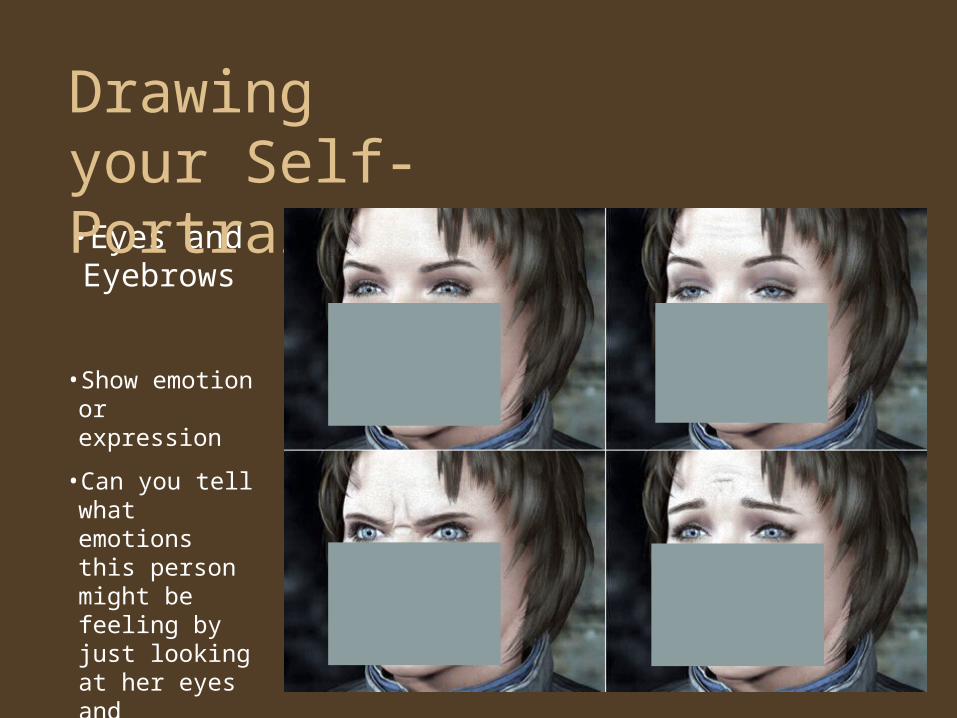
•Eyes and Eyebrows
Drawing your Self-Portrait:
• Show emotion or expression
• Can you tell what emotions this person might be feeling by just looking at her eyes and eyebrows?
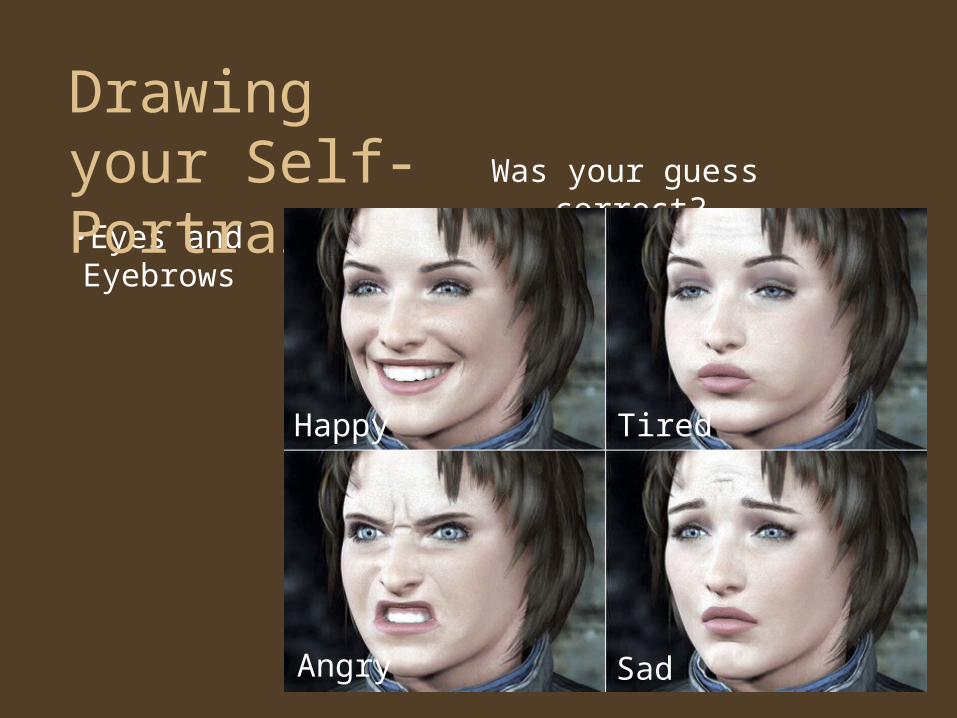
•Eyes and Eyebrows
Drawing your Self-Portrait: Was your guess correct?
Happy
SadAngry
Tired
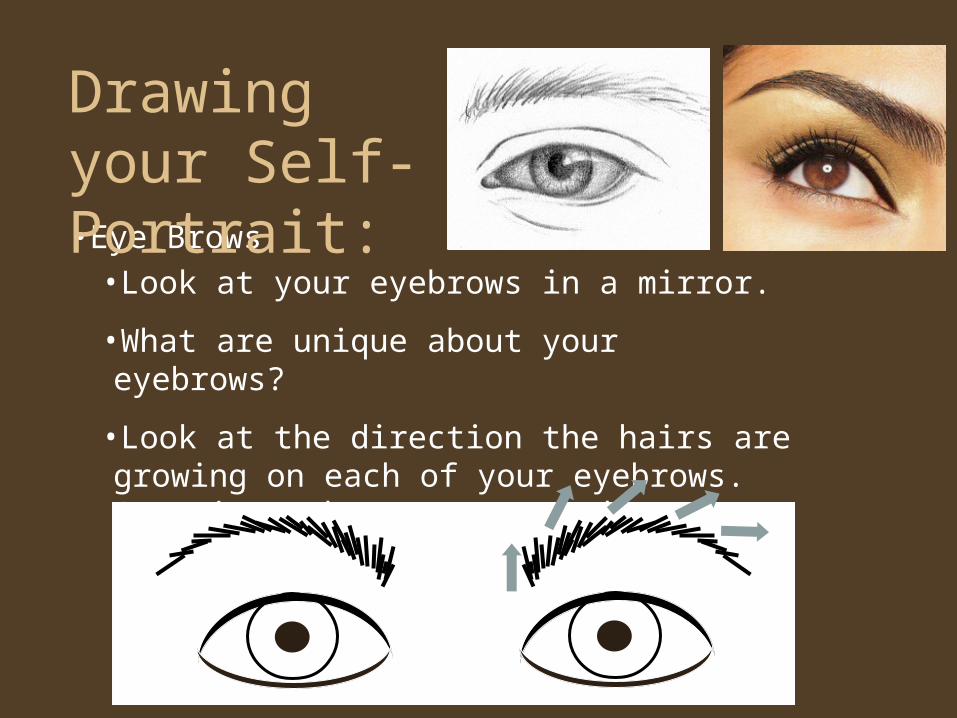
•Eye Brows
Drawing your Self-Portrait:
•Look at your eyebrows in a mirror.
•What are unique about your eyebrows?
•Look at the direction the hairs are growing on each of your eyebrows. Sometimes they grow up and sometimes to the side.
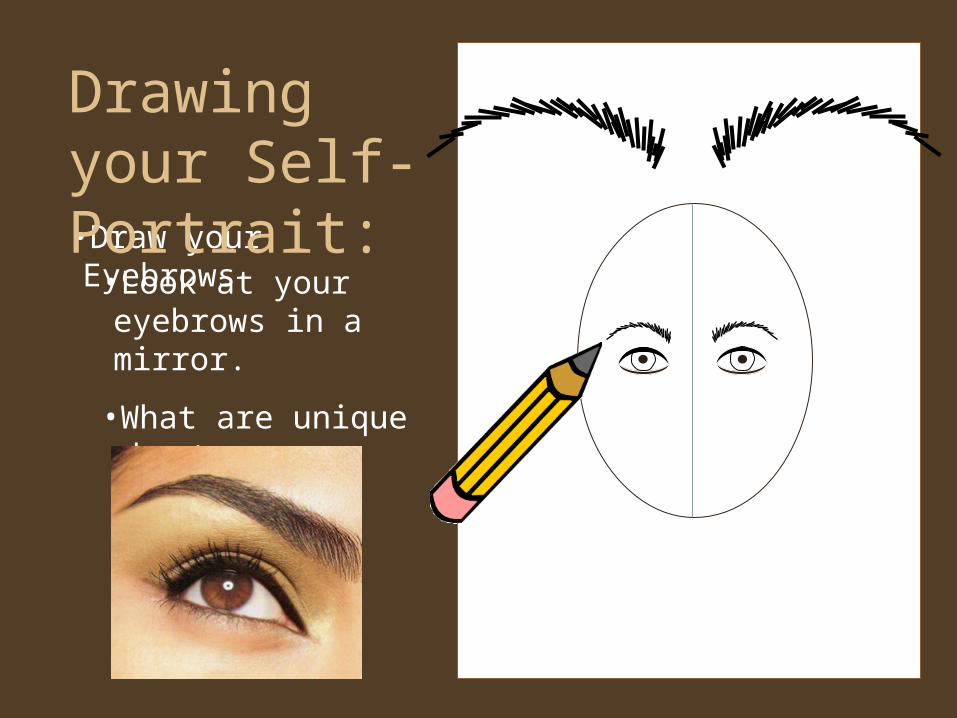
•Draw your Eyebrows
Drawing your Self-Portrait:
•Look at your eyebrows in a mirror.
•What are unique about your eyebrows?

•Nose
Drawing your Self-Portrait:
•A Couple of Nose No-No’s
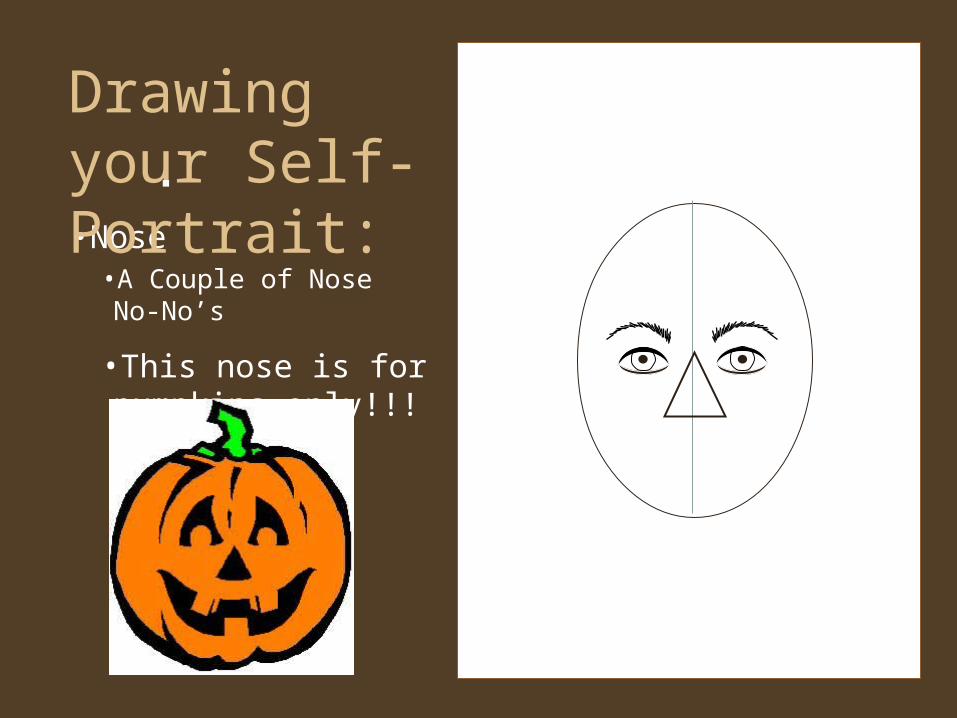
•Nose
Drawing your Self-Portrait:
•A Couple of Nose No-No’s
•This nose is for pumpkins only!!!

•Nose
Drawing your Self-Portrait:
•A Couple of Nose No-No’s
•This type of nose is reserved for pigs!!!
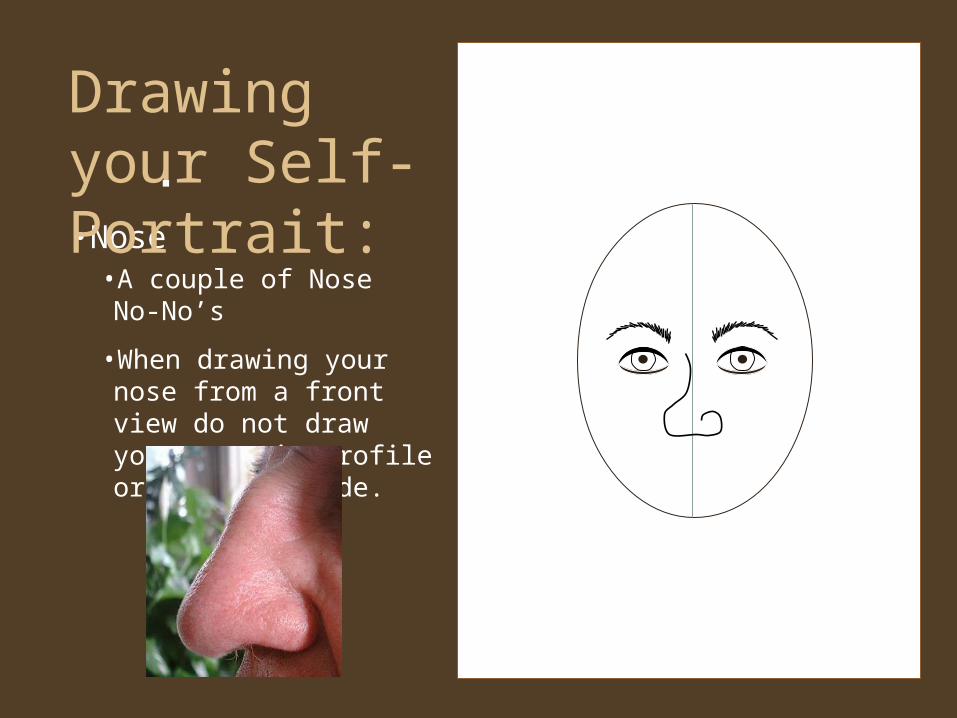
•Nose
Drawing your Self-Portrait:
•A couple of Nose No-No’s
•When drawing your nose from a front view do not draw your nose in profile or from the side.
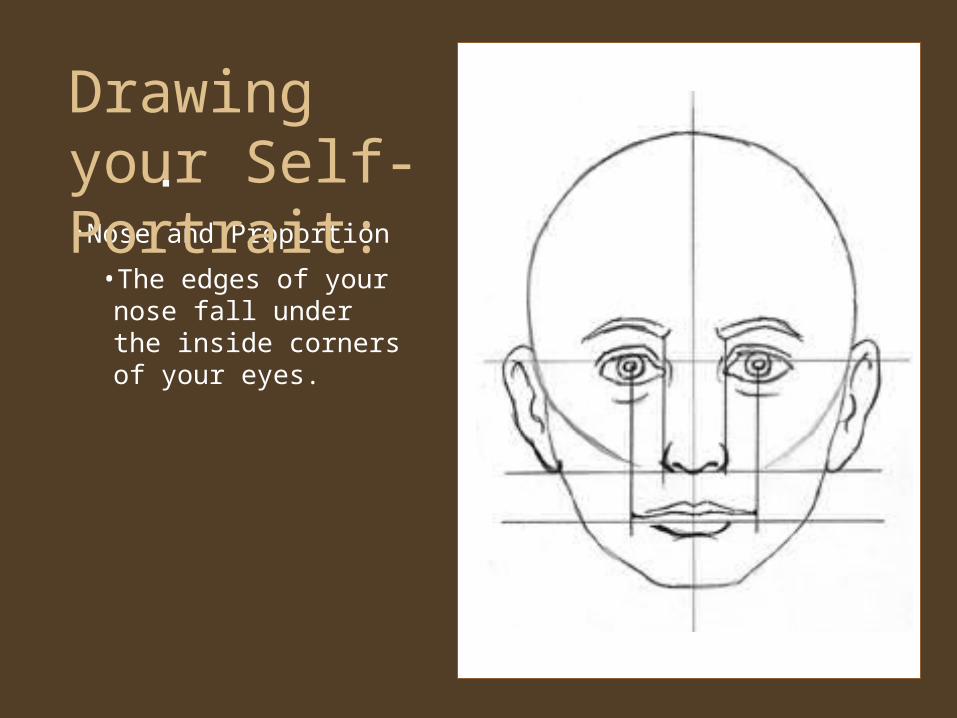
•Nose and Proportion
Drawing your Self-Portrait:
•The edges of your nose fall under the inside corners of your eyes.
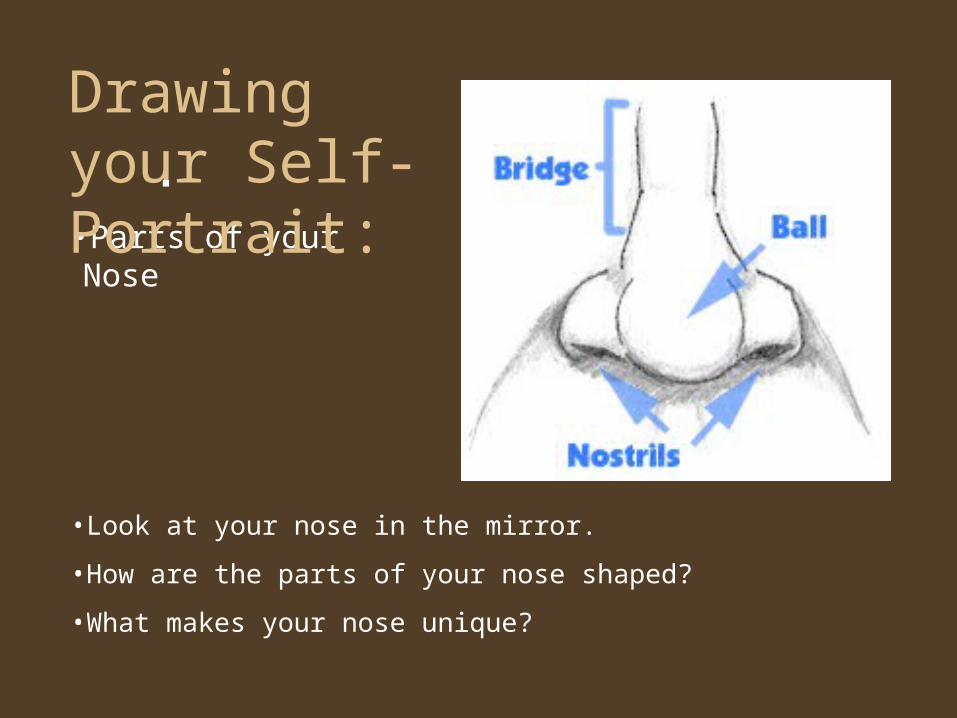
•Parts of your Nose
Drawing your Self-Portrait:
•Look at your nose in the mirror.
•How are the parts of your nose shaped?
•What makes your nose unique?
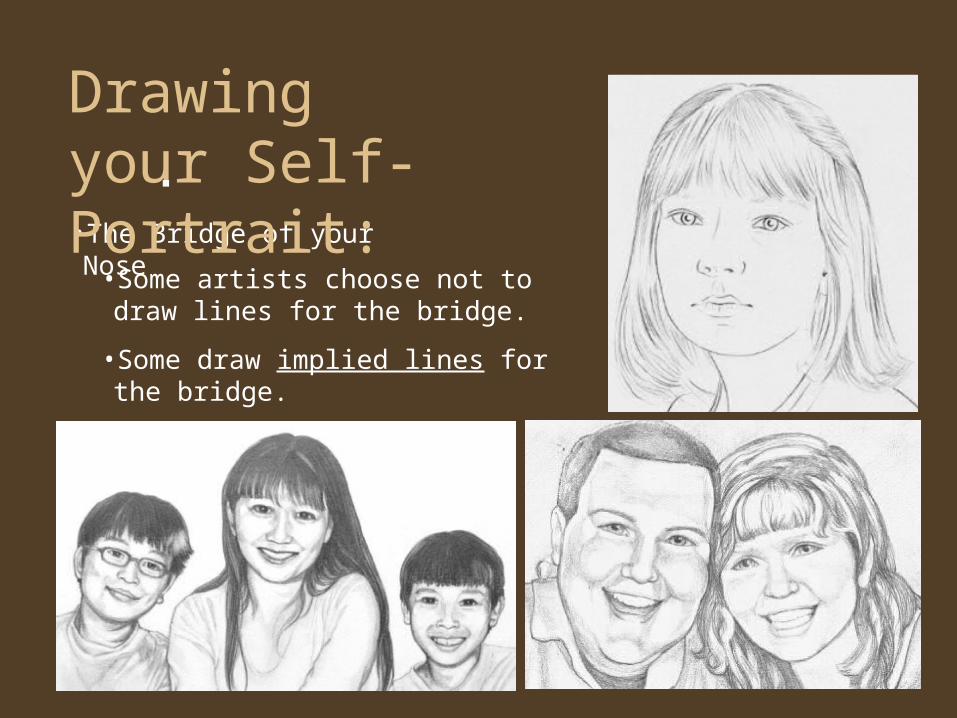
•The Bridge of your Nose
Drawing your Self-Portrait:
•Some artists choose not to draw lines for the bridge.
•Some draw implied lines for the bridge.
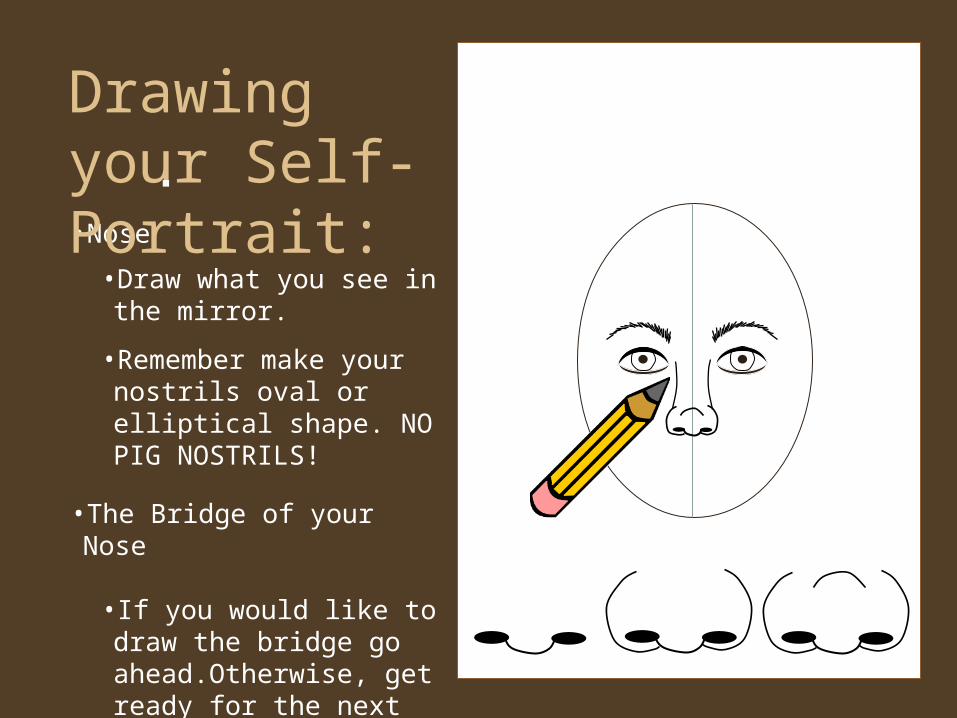
•Nose
Drawing your Self-Portrait:
•Draw what you see in the mirror.
•Remember make your nostrils oval or elliptical shape. NO PIG NOSTRILS!
• If you would like to draw the bridge go ahead.Otherwise, get ready for the next step.
•The Bridge of your Nose
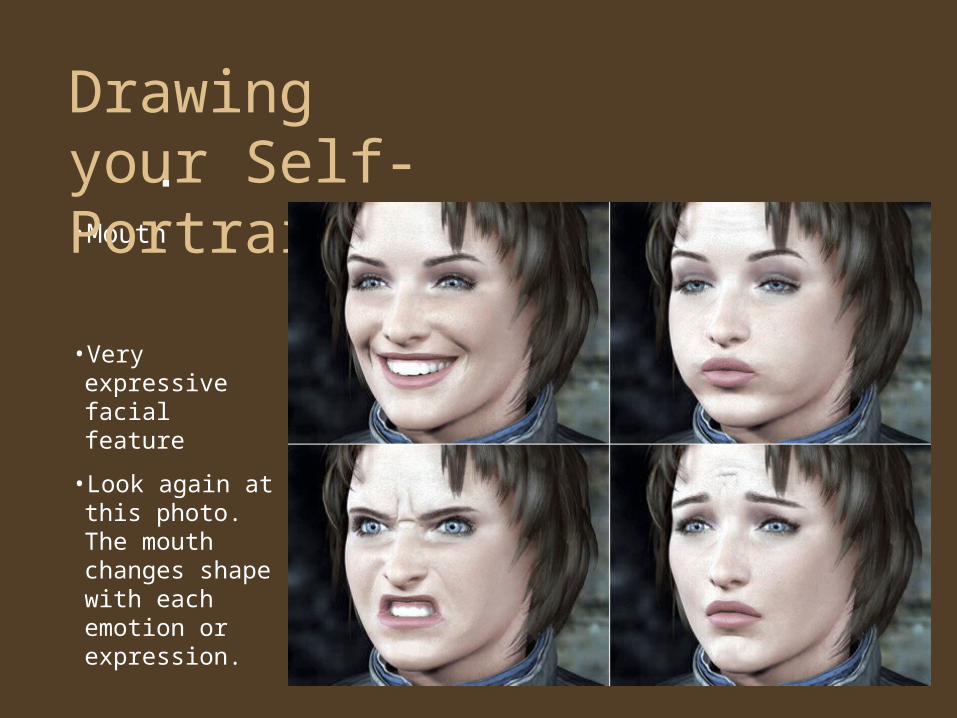
•Mouth
Drawing your Self-Portrait:
• Very expressive facial feature
• Look again at this photo. The mouth changes shape with each emotion or expression.

•Mouth
Drawing your Self-Portrait:
•Mouth No-No’s
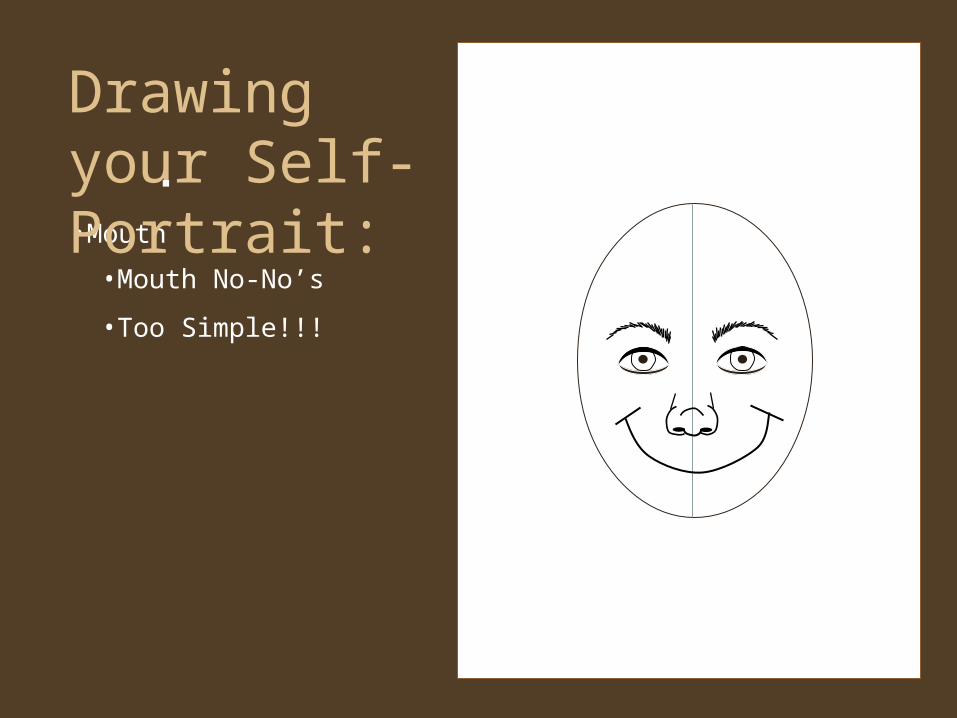
•Mouth
Drawing your Self-Portrait:
•Mouth No-No’s
•Too Simple!!!
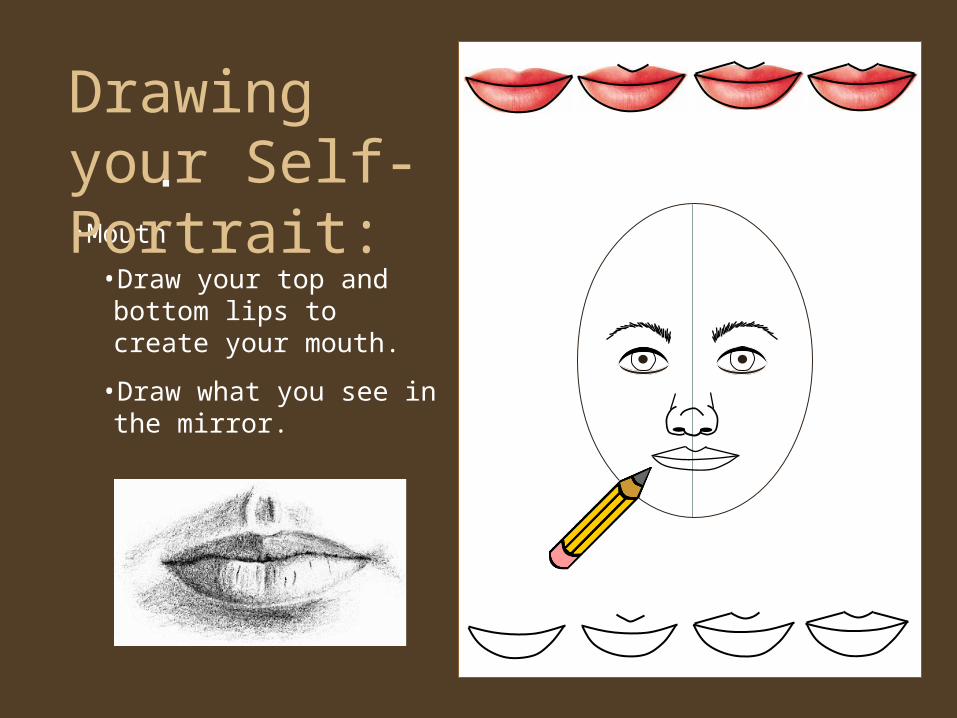
•Mouth
Drawing your Self-Portrait:
•Draw your top and bottom lips to create your mouth.
•Draw what you see in the mirror.

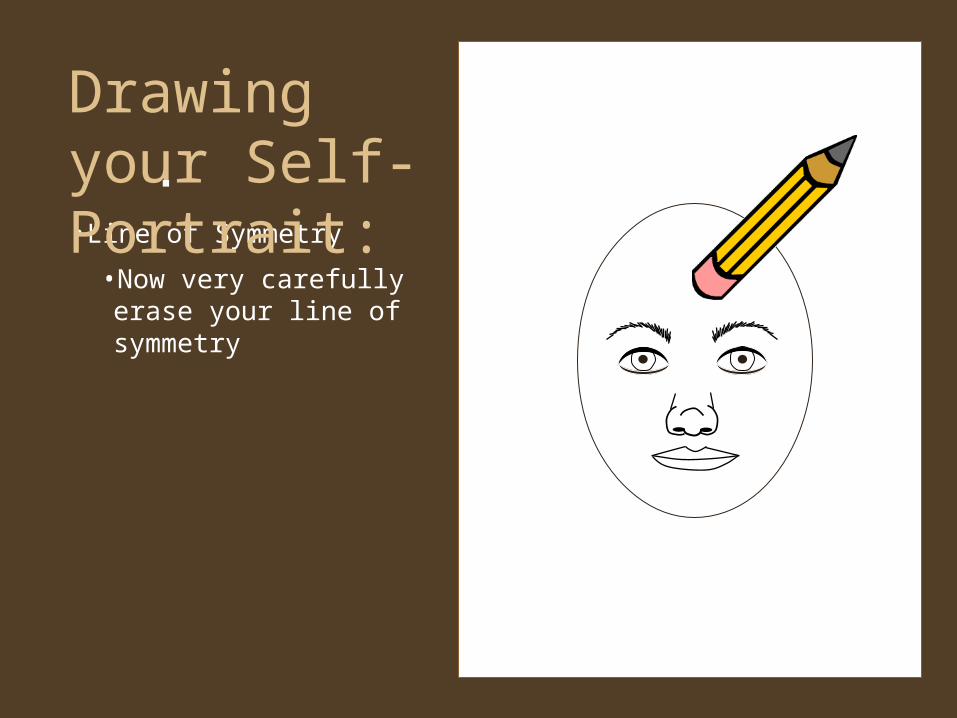
•Line of Symmetry
Drawing your Self-Portrait:
•Now very carefully erase your line of symmetry
•Line of Symmetry
Drawing your Self-Portrait:
•Now very carefully erase your line of symmetry
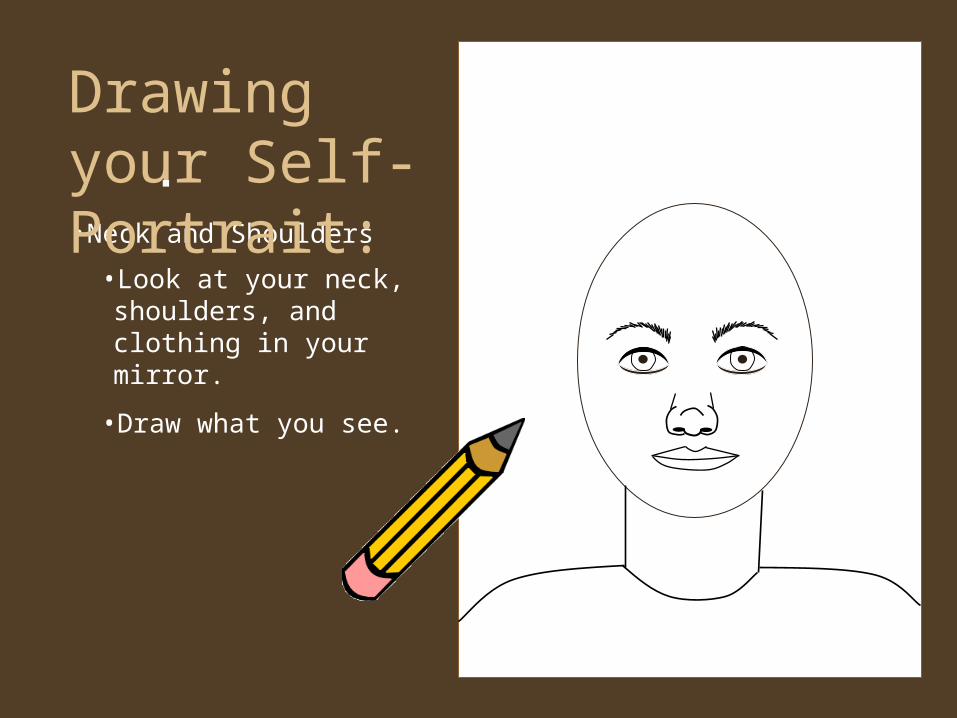
•Neck and Shoulders
Drawing your Self-Portrait:
•Look at your neck, shoulders, and clothing in your mirror.
•Draw what you see.
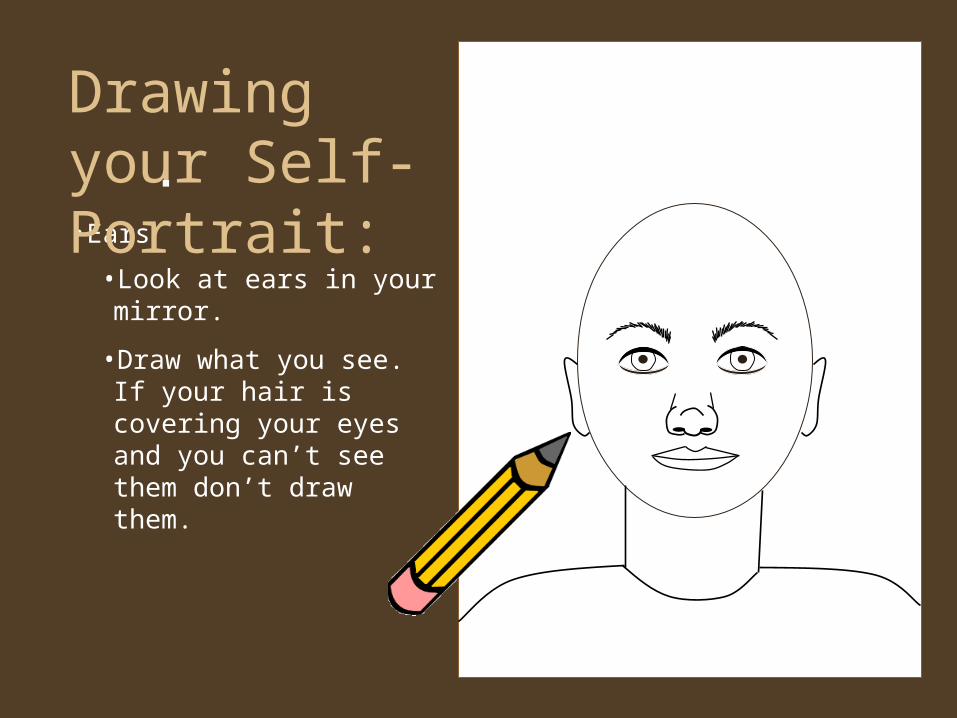
•Ears
Drawing your Self-Portrait:
•Look at ears in your mirror.
•Draw what you see. If your hair is covering your eyes and you can’t see them don’t draw them.

•Hair
Drawing your Self-Portrait:
• Look at hair in your mirror.
• Is your hair short or long?
• Straight or Curly?
• Does it cover your ears?
• Does it touch the top of your ears?
• Does it peek out underneath your ears?
• What direction is the hair growing?
• Do you have bangs?
• Do your bangs touch your eyebrows?

• A closer view at Hair
Drawing your Self-Portrait:
• Look at hair in your mirror and draw what you see.
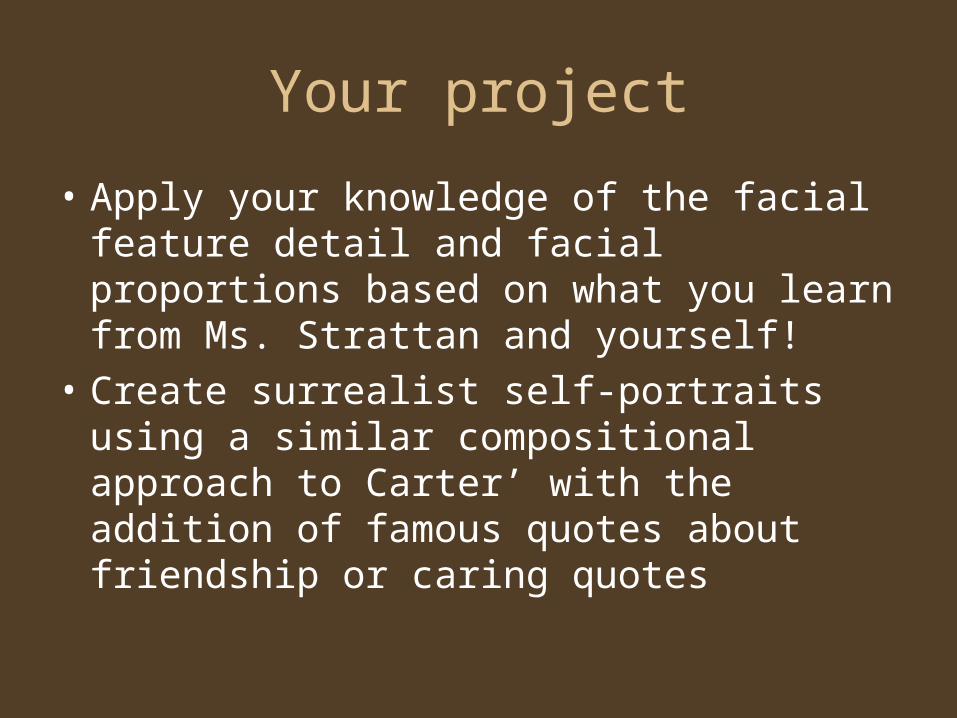
Your project
• Apply your knowledge of the facial feature detail and facial proportions based on what you learn from Ms. Strattan and yourself!
• Create surrealist self-portraits using a similar compositional approach to Carter’ with the addition of famous quotes about friendship or caring quotes

Clarence Holbrook Carter
Biography:Carter studied at the Cleveland School of Art from 1923 to 1927.. Throughout the 1930s and 40s he was known for his paintings of rural America and the burden brought on by the Great Depression. By the end of World War II he had adopted a more surrealist approach to painting.
We are going to look at his Surrealist Paintings….but what is Surrealism???
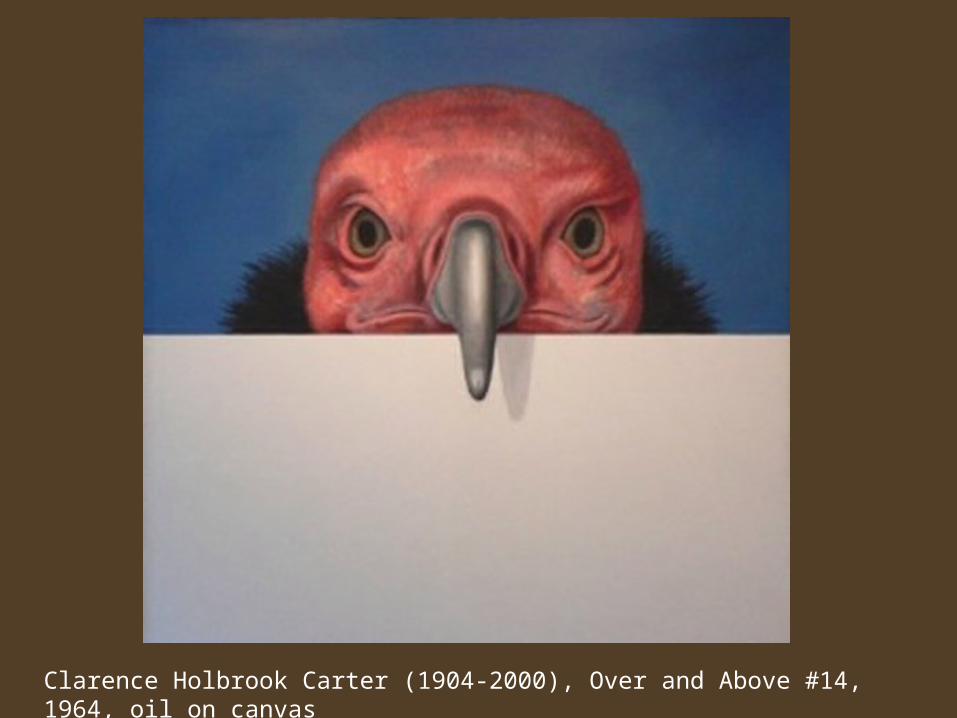
Clarence Holbrook Carter (1904-2000), Over and Above #14, 1964, oil on canvas

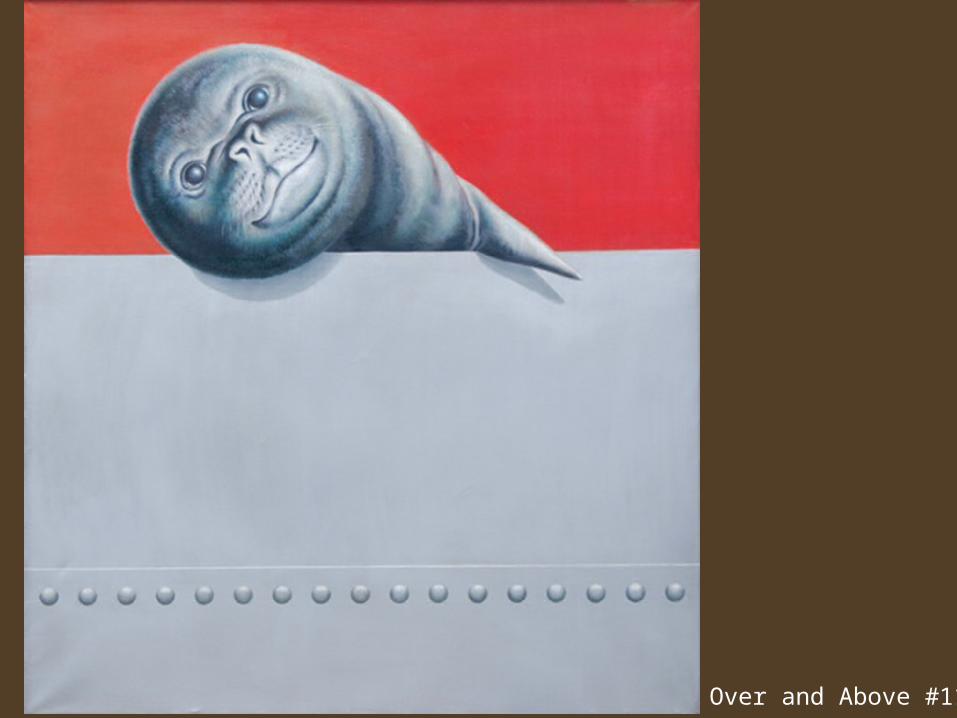
Over and Above #11
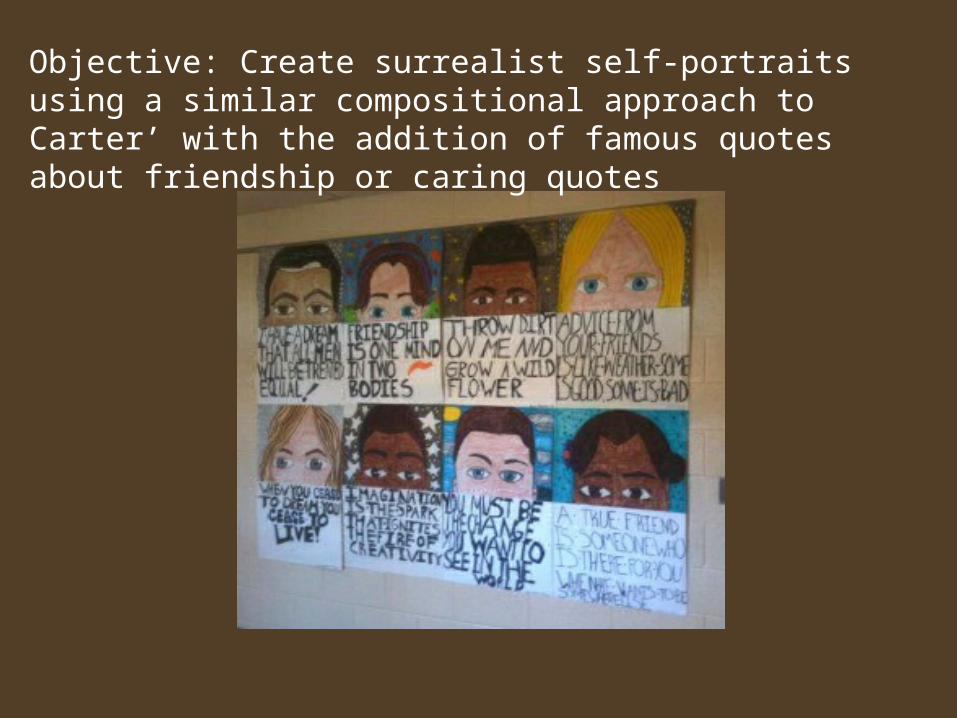
Objective: Create surrealist self-portraits using a similar compositional approach to Carter’ with the addition of famous quotes about friendship or caring quotes


