Download - Mesh Track ® Installation guideline - biu.pt

Mesh Track ®
Installation guideline

content
“Crack & Seat” unstable
concrete
Slabs if significant “Slab
Rocking” (parts of 1 m²)
✔ Step 1
Installation Guide Mesh Track® 1

content
Installation Guide Mesh Track® 1
Fill & Compact major
cracks & potholes
or
Apply a levelling course
in case of severe
damages or Mill part of
old upper layers
✔ Step 2

content
✔ Step 3
Thoroughly clean the
surface
By brushing (dry): ! tack coat
required on old concrete
pavement
High pressure cleaning ( H2O)
with immediate drying operation
! tack coat recommended on
concrete underground
also clean after milling
Installation Guide Mesh Track® 1

content
Unroll Mesh Track®
Always unroll from the top of
the roll !
✔ Step 4
Installation Guide Mesh Track® 1

content
Cut the edge wire to
facilitate the flattening
Approximately every 10m
✔ Step 5
Installation Guide Mesh Track® 1
10 m
before flattening operation

content
Longitudinal
= max.1 mesh overlap
= min. end to end
✔ Step 6
Installation Guide Mesh Track® 1
Transversal
= 30 cm overlap
Put beginning of
2nd roll under end
of 1st roll
Avoid overlapping
of transverse flat
bars
Make an overlap

content
Installation Guide Mesh Track® 1
✔ Step 7
Cut Mesh Track® around
drains and other holes

content
Flattening with a rubber-
tired roller
• Do not tension the mesh
as this may cause it to
bow
• Start in the middle of the
roll
• Continue until mesh is
completely flat
✔ Step 8
Installation Guide Mesh Track® 1
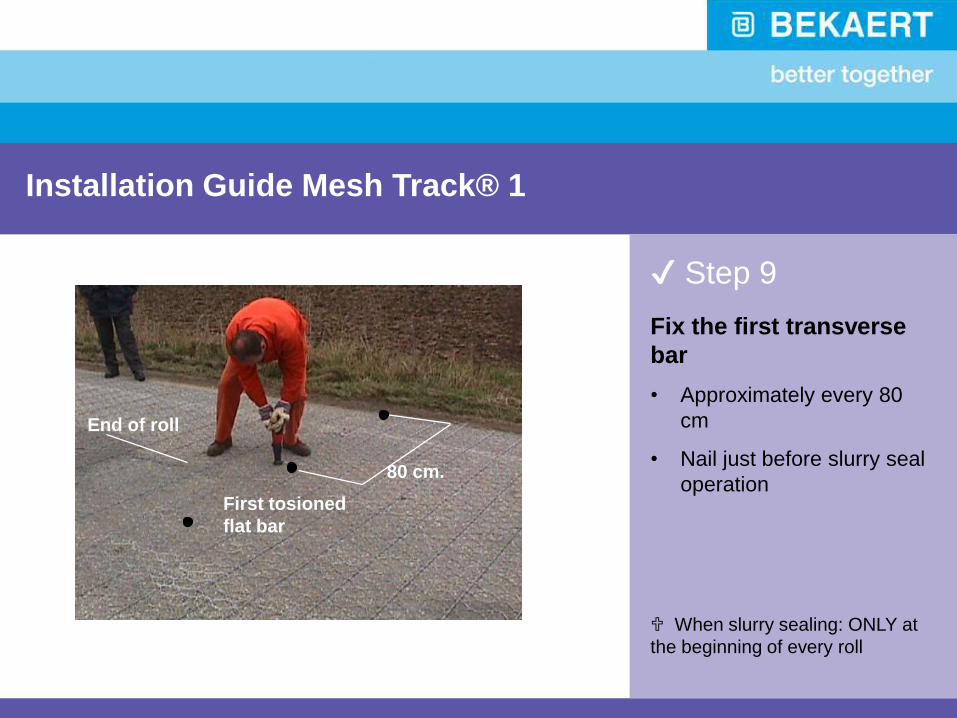
content
First tosioned
flat bar
End of roll
80 cm.
Installation Guide Mesh Track® 1
Fix the first transverse
bar
• Approximately every 80
cm
• Nail just before slurry seal
operation
✔ Step 9
When slurry sealing: ONLY at
the beginning of every roll

content
Installation Guide Mesh Track® 1
Use Spit clip A
Length 40 - 50 mm in asphalt
40 mm : at lower temp.
50 mm : at higher temp.
Length 30 mm in concrete
Use Spit P200 or P70 gun
On concrete drill holes into
the concrete first to ensure good
anchorage
content
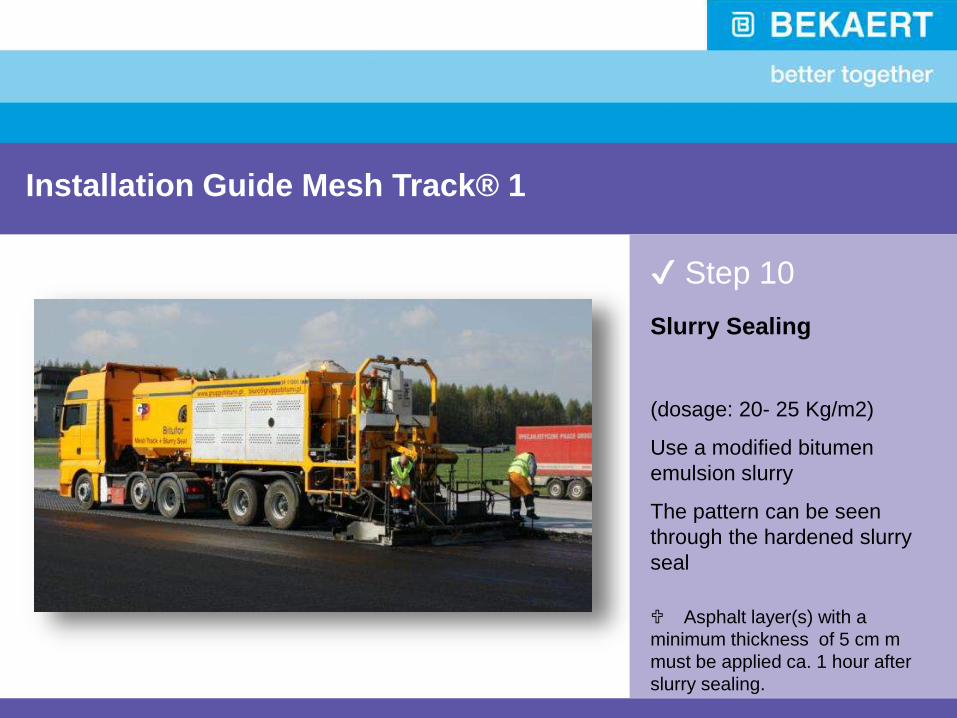
✔ Step 10
Slurry Sealing
(dosage: 20- 25 Kg/m2)
Use a modified bitumen
emulsion slurry
The pattern can be seen
through the hardened slurry
seal
Installation Guide Mesh Track® 1
Asphalt layer(s) with a
minimum thickness of 5 cm m
must be applied ca. 1 hour after
slurry sealing.


