
METHODS & PRINCIPLES USED
IN CPR
2
Introduction Methods and procedures for managing:
obstructed airways artificial respiration (AR) cardiopulmonary resuscitation (CPR)
Always consider the height and size of the patient

3
Activating EMS Activate EMS as soon as you realize the patient
requires medical attention beyond your training or the facilities available are inadequate to provide proper attention: Tell someone to call an ambulance. Have them describe the patient and keep it simple Tell them to come back If an AED is available, ask them to bring it to you

4
Activating EMS Alone with Unresponsive Adult
Immediately activate the EMS yourself and get an AED
Alone with Child or Infant Initiate resuscitation techniques for two minutes (five
cycles) then activate EMS, and continue until help arrives

5
Clearing the Airway Repositioning the head
Head tilt chin lift Tongue Jaw Lift Jaw Thrust for suspected neck injury
6
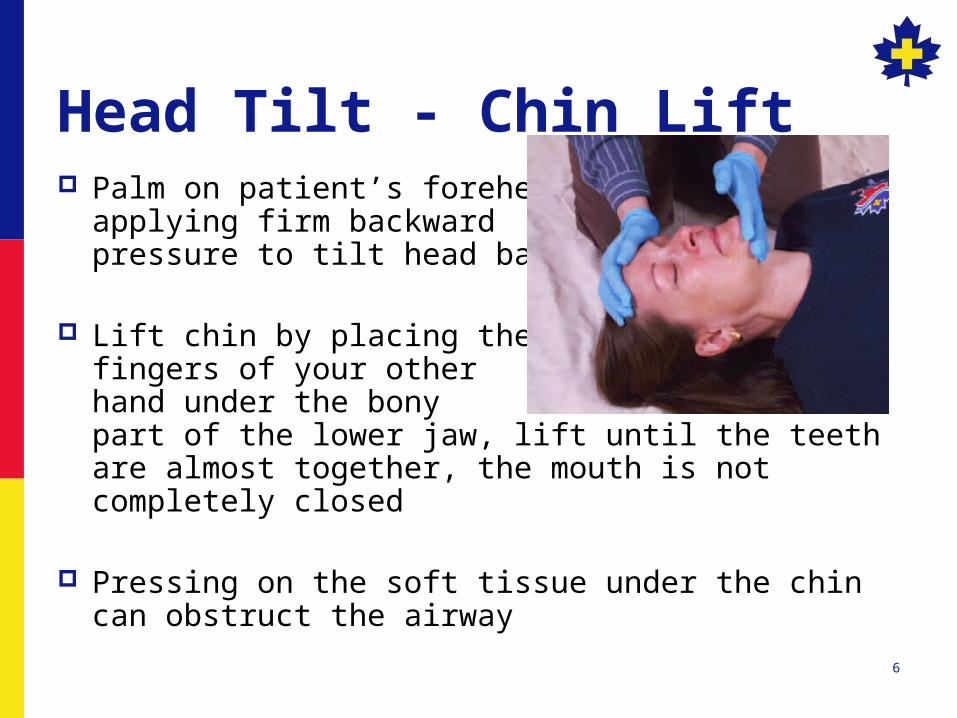
Head Tilt - Chin Lift Palm on patient’s forehead
applying firm backward pressure to tilt head back
Lift chin by placing the fingers of your other hand under the bony part of the lower jaw, lift until the teeth are almost together, the mouth is not completely closed
Pressing on the soft tissue under the chin can obstruct the airway
7
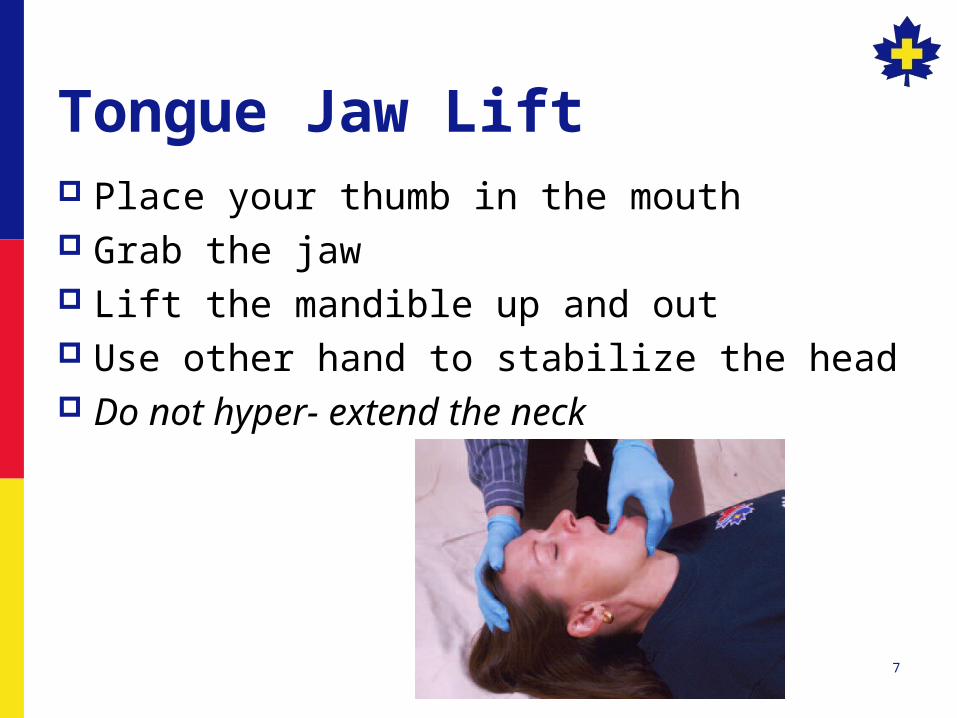
Tongue Jaw Lift Place your thumb in the mouth Grab the jaw Lift the mandible up and out Use other hand to stabilize the head Do not hyper- extend the neck

8
Jaw Thrust Place fingers of both hands behind the angle of
the patient’s lower jaw Lift, forcing the mandible forward and tilting the
head back In case of neck injury - this must be used without
lifting or moving the head

9
Mild Airway Obstructions Caused by foreign object (usually eating or
chewing) Patient may use the universal distress signal May begin to turn blue Obviously very frightened Ask “Are you choking?”
10
Mild Airway Obstruction Signs and Symptoms:
the ability to forcibly cough wheezing between coughs
11
Treatment with Good Air Exchange Prevent further injury Identify yourself as trained
in first aid Ask permission and offer
assistance Do not attempt abdominal
thrusts Never interfere with the
patient’s efforts to clear the airway
Stay with the patient until breathing is normal
Monitor vital signs Encourage the patient to
dislodge the object by coughing
If condition persists, activate EMS
If patient becomes unresponsive, treat for severe airway obstruction

12
Mild Airway Obstruction - Worsening Poor Air Exchange
ineffective or weak coughs high pitched noises while inhaling increased respiratory distress possible cyanosis
Treat this situation as a severe airway obstruction

13
Severe Airway Obstruction The inability to produce any sound indicates a
severe airway obstruction inability to speak, breathe or cough absence of chest movement or air exchange Increased cyanosis
14
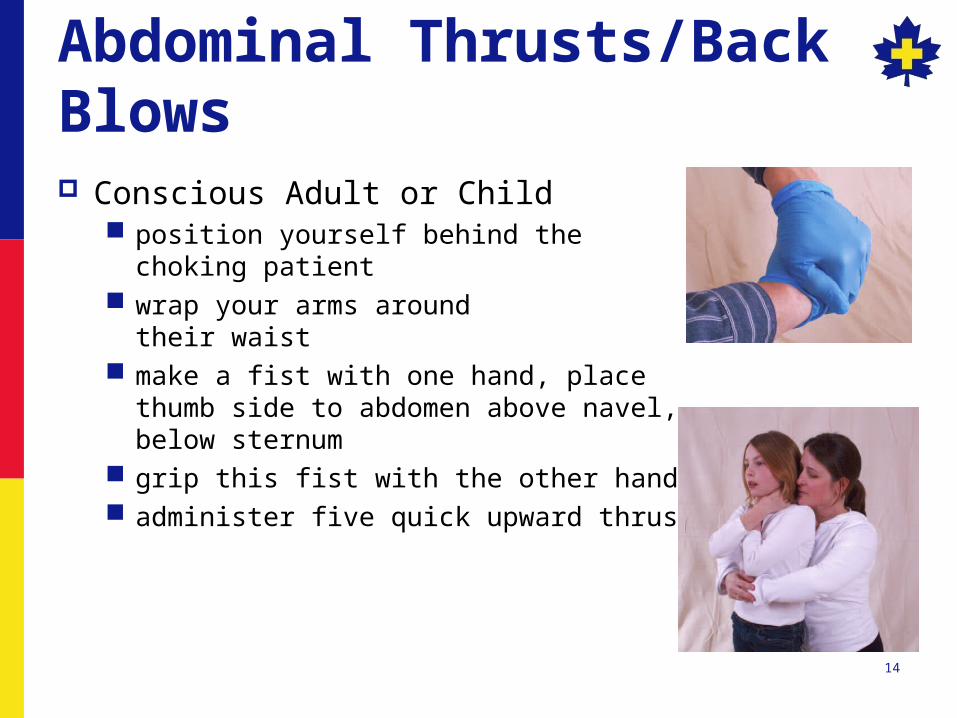
Abdominal Thrusts/Back Blows Conscious Adult or Child
position yourself behind thechoking patient
wrap your arms around their waist
make a fist with one hand, place thumb side to abdomen above navel, below sternum
grip this fist with the other hand administer five quick upward thrusts

Abdominal Thrust/Back Blows Administer five back blows between the should blades with the heel
of your hand continue until successful or patient becomes unresponsive
15

16
Special Considerations Pregnant and Grossly Obese
Use chest thrust by placing the fist mid-sternum (CPR position)
Elderly Ribs may be fragile
17
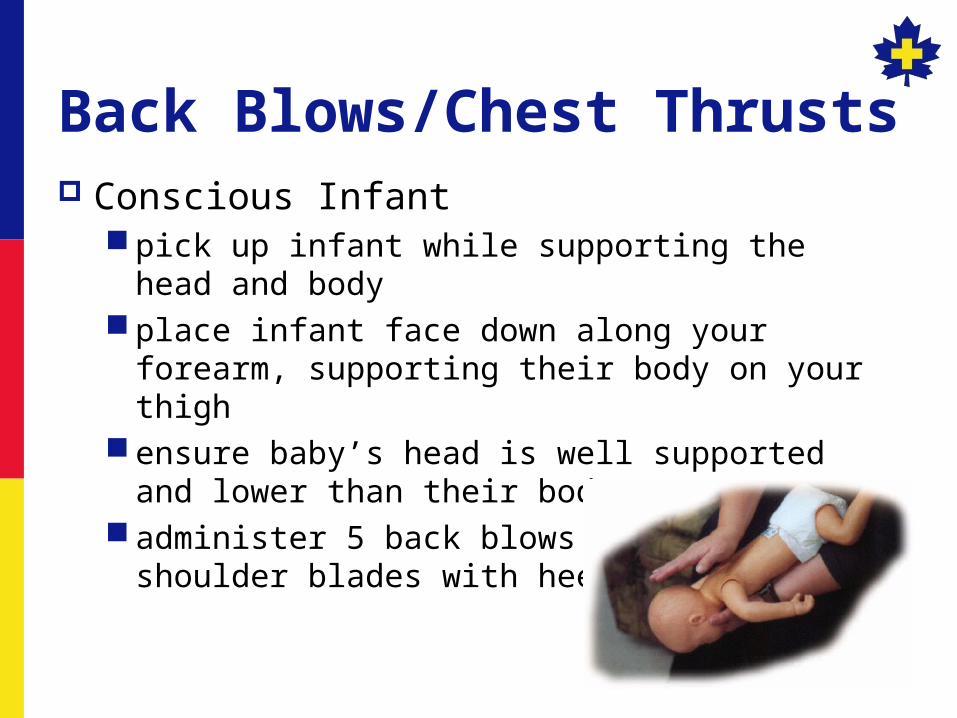
Back Blows/Chest Thrusts Conscious Infant
pick up infant while supporting the head and body place infant face down along your forearm, supporting
their body on your thigh ensure baby’s head is well supported and lower than
their body administer 5 back blows between the shoulder blades
with heel of your hand

18
turn infant face up, supporting their body on the opposite thigh
ensure baby’s head is well supported and lower than their body
landmark and administer 5 chest compressions
Back Blows/Chest Thrusts

19
Landmarking for Infant Place two fingers in the middle of the infant's
chest between the nipples Slide your fingers to just below the nipple line Administer five chest thrusts with the two fingers.
Press down quickly with the two fingers on the centre of the chest.
20
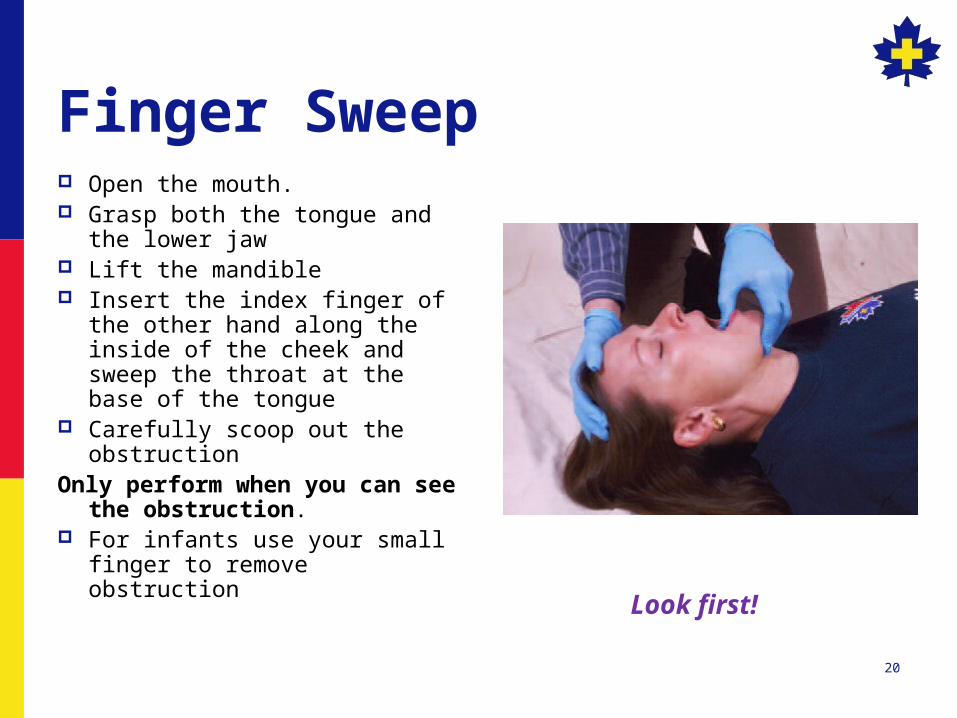
Finger Sweep Open the mouth. Grasp both the tongue and the
lower jaw Lift the mandible Insert the index finger of the
other hand along the inside of the cheek and sweep the throat at the base of the tongue
Carefully scoop out the obstruction
Only perform when you can see the obstruction.
For infants use your small finger to remove obstruction
Look first!

21
Suction Suction devices are used to remove fluids and
vomit from the airway. There are many devices on the market which all
share common instructions and precautions for use.
Suction is applied only to the mouth/oral cavity and upper airway
Apply suction for 5 to 10 seconds at a time, while the tip is being withdrawn.

22
Suction Signs and symptoms that patient would require
the use of a suction: decreased level of consciousness facial injuries involving the mouth or nose any person whose ventilation are being assisted any time an oropharyngeal airway is being used
If the choking patient becomes unresponsive, the rescuer will begin with the CPR sequence


