Download - Nate’s Notes INSIDE THIS ISSUE

IPMS / MOSS Veterans: Paul Drinkall (USMC) ~ Don Holderman (US Army)
Nate Jones (US Army) ~ Steve McKinnon (USN) Michael Praetorius (USN) ~Gary Sanders (US Army)
Dusty Taylor (US Army)
Nate’s Notes By Nate Jones, President IPMS/MOSS
I know that I am once again very late getting this
newsletter issue published, and it is nearing Christmas, but I would like to take a moment to honor and thank the
Nation’s veterans for their service!
The members of IPMS/ MOSS thank all Veterans for their
sacrifice, service, and dedication to our Country.
As the end of the year is nearing, I hope that 2016 was a good year for
you and yours. I wish you all a Merry Christmas, a Happy and prosperous
New Year and all the best in 2017!
“We’re making it a small world, because small things matter!”
An I.P.M.S./ M.O.S.S. Publication November-December 2016
Volume 8 Issue 9
IPMS/Missour i Ozarks Scale Specia l i st s Branson, Missouri 65616 Newsletter Ed itor: Nate Jones www.ipmsmoss.com [email protected] 417.230.6220
I N S I D E T H I S I S S U E
2 Last Meeting – 20 November
6 Rusty’s Ramblin’
7 Tips & Techniques: Figure
Painting Part 1
9 Next Meeting: 22 January

Page 2 Sprue Bits
20 November: The IPMS/MOSS “Knights of the Square Table” met at the
Branson Hobby Center with 15 members in attendance.
Bill Loden brought in a 1:32 F-16 that he built back in 1995, and on
which, he admittedly did not do a very good job with the original build. Rather than scrap the kit, Bill decided to breathe life back into the kit by re-vamping it to look like a mahogany model. He stripped the
original paint using Castrol Super Clean, removed the landing gear, and made a few necessary repairs. To cover faults with the original build, the canopy
was painted gold. The model was repainted and aftermarket decals were applied. A hole was drilled
in the rear section to accept a piece of acrylic rod for a display mount.
Page 3 Sprue Bits
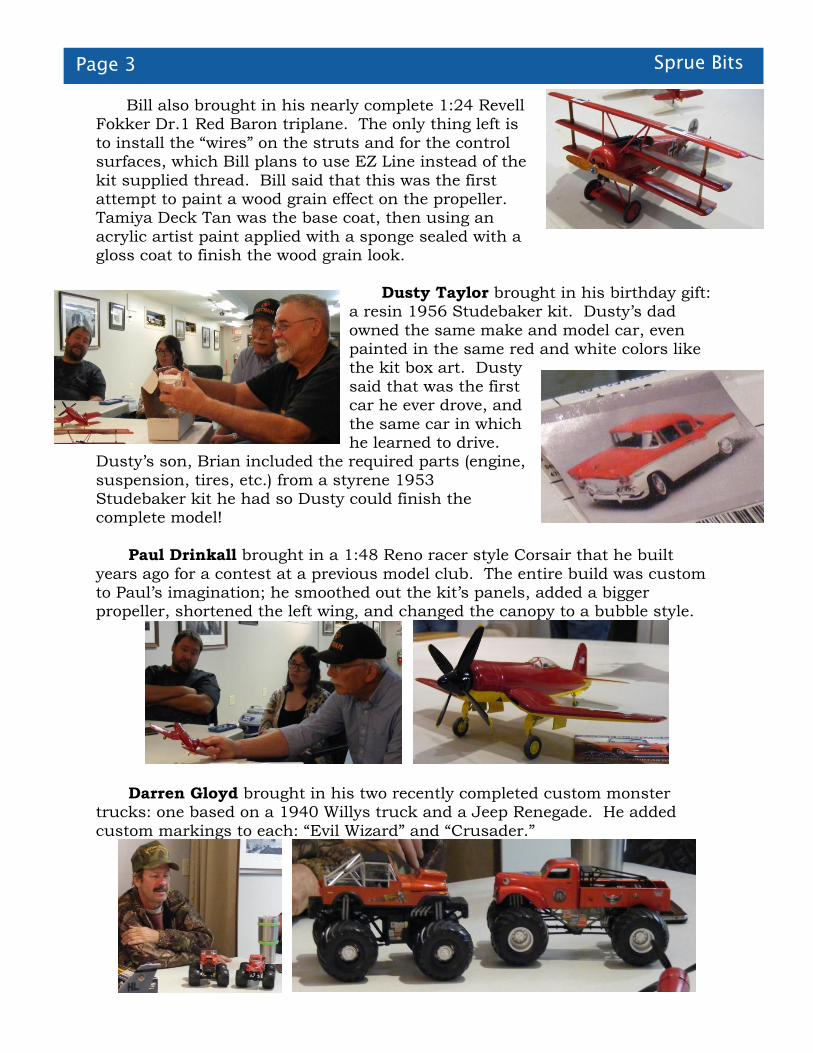
Bill also brought in his nearly complete 1:24 Revell Fokker Dr.1 Red Baron triplane. The only thing left is
to install the “wires” on the struts and for the control surfaces, which Bill plans to use EZ Line instead of the
kit supplied thread. Bill said that this was the first attempt to paint a wood grain effect on the propeller. Tamiya Deck Tan was the base coat, then using an
acrylic artist paint applied with a sponge sealed with a gloss coat to finish the wood grain look.
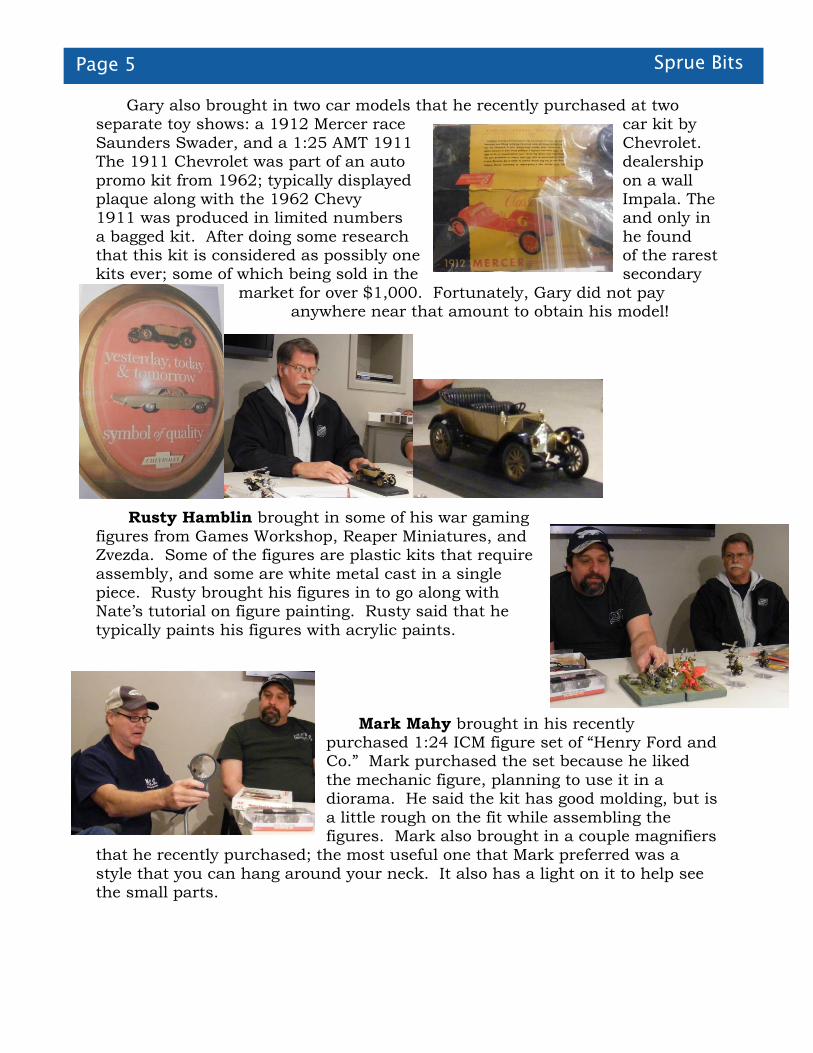
Dusty Taylor brought in his birthday gift: a resin 1956 Studebaker kit. Dusty’s dad
owned the same make and model car, even painted in the same red and white colors like the kit box art. Dusty
said that was the first car he ever drove, and
the same car in which he learned to drive.
Dusty’s son, Brian included the required parts (engine,
suspension, tires, etc.) from a styrene 1953 Studebaker kit he had so Dusty could finish the complete model!
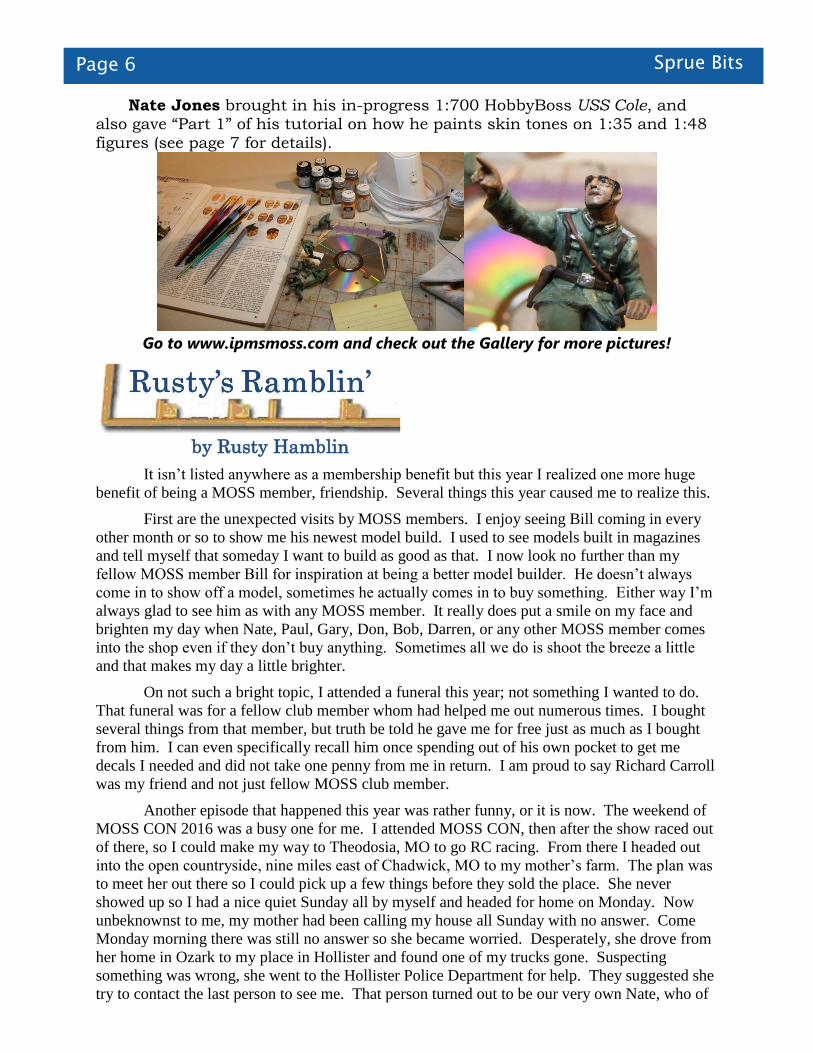
Paul Drinkall brought in a 1:48 Reno racer style Corsair that he built
years ago for a contest at a previous model club. The entire build was custom to Paul’s imagination; he smoothed out the kit’s panels, added a bigger propeller, shortened the left wing, and changed the canopy to a bubble style.
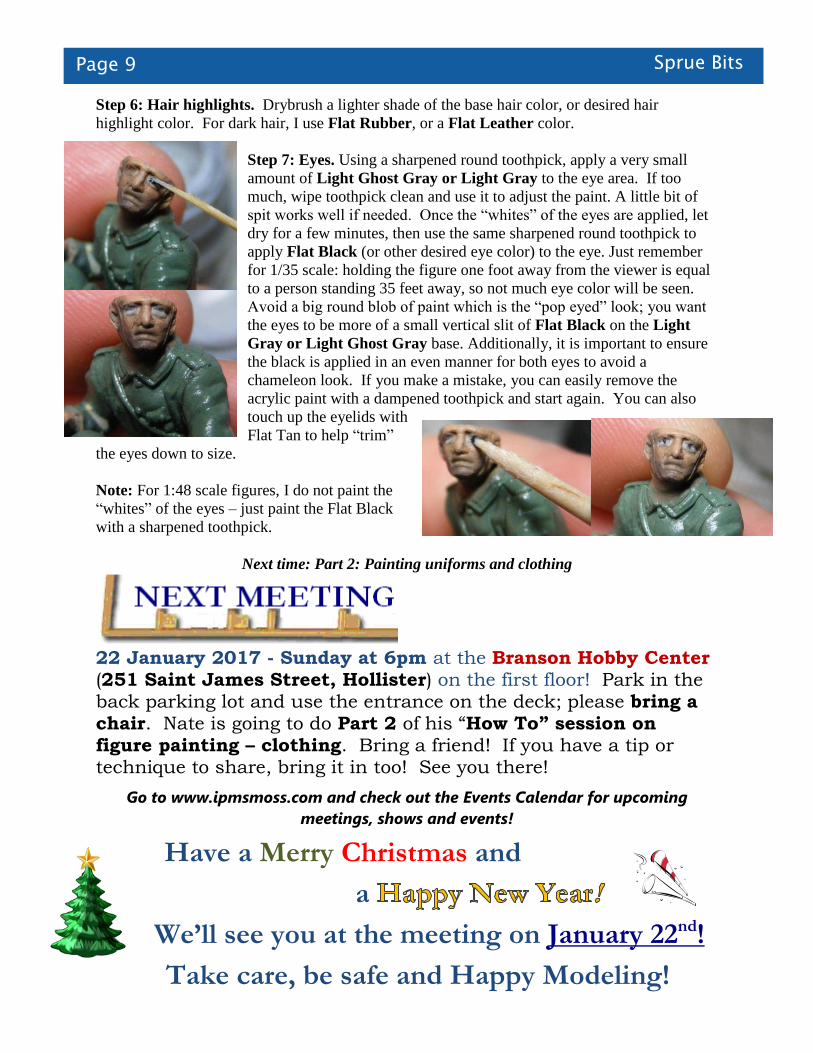
Darren Gloyd brought in his two recently completed custom monster trucks: one based on a 1940 Willys truck and a Jeep Renegade. He added
custom markings to each: “Evil Wizard” and “Crusader.”

Page 4 Sprue Bits
Bob Grenier, who promised last month not to bring any more trains, brought in a set of
Blueprint Series HO scale 85 foot Pullman Sleeper train cars. (We always have to tease Bob about
bringing in trains, but he quickly points out that it is our “fault” he brings in trains!) As trains and history
are Bob’s interest and passion, he gave us an excellent and interesting history lesson
about George Pullman and his inspiration for and development of the
now famous Pullman Sleeper cars. Michael Steenstra brought in his recently completed 1:35 Cyber Hobby
King Tiger Initial Production, and AFV Club 1:35 M5 3 inch Anti-Tank Gun diorama. Michael said the King Tiger tank was a very easy build and incredibly
detailed; with approximately 400 parts per side for the tracks alone! Michael added aftermarket resin Zimmerit panels from ATAK Models for added detail. Michael used Celluclay to create the groundwork for his M5 Anti-Tank gun,
then added a crew of Dragon figures slightly modified, and a scratch built basswood fence for added interest. He used Woodland Scenics’ Snow and Ammo products grass tufts to complete the scene, and used Testor’s Glass
Cement to simulate the mud.
Gary Sanders brought in his Meng eggplane B-17G; after looking at his references again, he saw that most B-17s
had yellow tips painted on the propellers, so Gary decided to paint yellow tips on his eggplane version which added a little
something extra that he felt was missing. Gary
also brought in a roll of SpeedTape; he recently was made aware of the product and thought to use it to install clear window parts in models. He tried the technique out on his
Revell box scale Weasel amphibious vehicle and was satisfied with the results!
Page 5 Sprue Bits
Gary also brought in two car models that he recently purchased at two separate toy shows: a 1912 Mercer race car kit by
Saunders Swader, and a 1:25 AMT 1911 Chevrolet. The 1911 Chevrolet was part of an auto dealership
promo kit from 1962; typically displayed on a wall plaque along with the 1962 Chevy Impala. The 1911 was produced in limited numbers and only in
a bagged kit. After doing some research he found that this kit is considered as possibly one of the rarest kits ever; some of which being sold in the secondary
market for over $1,000. Fortunately, Gary did not pay anywhere near that amount to obtain his model!
Rusty Hamblin brought in some of his war gaming
figures from Games Workshop, Reaper Miniatures, and Zvezda. Some of the figures are plastic kits that require
assembly, and some are white metal cast in a single piece. Rusty brought his figures in to go along with Nate’s tutorial on figure painting. Rusty said that he
typically paints his figures with acrylic paints.
Mark Mahy brought in his recently purchased 1:24 ICM figure set of “Henry Ford and Co.” Mark purchased the set because he liked
the mechanic figure, planning to use it in a diorama. He said the kit has good molding, but is
a little rough on the fit while assembling the figures. Mark also brought in a couple magnifiers
that he recently purchased; the most useful one that Mark preferred was a
style that you can hang around your neck. It also has a light on it to help see the small parts.
Page 6 Sprue Bits
Nate Jones brought in his in-progress 1:700 HobbyBoss USS Cole, and also gave “Part 1” of his tutorial on how he paints skin tones on 1:35 and 1:48
figures (see page 7 for details).
Go to www.ipmsmoss.com and check out the Gallery for more pictures!
by Rusty Hamblin
It isn’t listed anywhere as a membership benefit but this year I realized one more huge
benefit of being a MOSS member, friendship. Several things this year caused me to realize this.
First are the unexpected visits by MOSS members. I enjoy seeing Bill coming in every
other month or so to show me his newest model build. I used to see models built in magazines
and tell myself that someday I want to build as good as that. I now look no further than my
fellow MOSS member Bill for inspiration at being a better model builder. He doesn’t always
come in to show off a model, sometimes he actually comes in to buy something. Either way I’m
always glad to see him as with any MOSS member. It really does put a smile on my face and
brighten my day when Nate, Paul, Gary, Don, Bob, Darren, or any other MOSS member comes
into the shop even if they don’t buy anything. Sometimes all we do is shoot the breeze a little
and that makes my day a little brighter.
On not such a bright topic, I attended a funeral this year; not something I wanted to do.
That funeral was for a fellow club member whom had helped me out numerous times. I bought
several things from that member, but truth be told he gave me for free just as much as I bought
from him. I can even specifically recall him once spending out of his own pocket to get me
decals I needed and did not take one penny from me in return. I am proud to say Richard Carroll
was my friend and not just fellow MOSS club member.
Another episode that happened this year was rather funny, or it is now. The weekend of
MOSS CON 2016 was a busy one for me. I attended MOSS CON, then after the show raced out
of there, so I could make my way to Theodosia, MO to go RC racing. From there I headed out
into the open countryside, nine miles east of Chadwick, MO to my mother’s farm. The plan was
to meet her out there so I could pick up a few things before they sold the place. She never
showed up so I had a nice quiet Sunday all by myself and headed for home on Monday. Now
unbeknownst to me, my mother had been calling my house all Sunday with no answer. Come
Monday morning there was still no answer so she became worried. Desperately, she drove from
her home in Ozark to my place in Hollister and found one of my trucks gone. Suspecting
something was wrong, she went to the Hollister Police Department for help. They suggested she
try to contact the last person to see me. That person turned out to be our very own Nate, who of

Page 7 Sprue Bits
course saw me Saturday at MOSS CON. Because I had been last seen in Branson, the Branson
Police had to be notified. She had now started much more in motion than she realized. Past
MOSS member, Mike Staworski works for the Branson Police Department, as does Nate’s wife,
Tammy. The call went out that Rusty was missing, and my MOSS friends were now involved. I
arrived home briefly before I got a telephone call from Mike at the Branson Police Department.
Nate was already with Mike at the Department, and my mother had just arrived. They let her
know I was home, so she returned to my house just minutes before Hollister Police Officers. I
had one thankful, yet angry mother to deal with, and the Hollister Police Officer was glad to get
going I’m sure.
We laugh at it still, but it really got me to thinking about all of those important people
who could have really helped had something been wrong. These people were all friends from
MOSS and that for me makes membership worth more than the trivial amount I pay in dues.
Figure Painting, Part 1: Skin by Nate Jones
While I was in high school, inspired by Ron Volstad’s box art on DML/Dragon’s figure
sets, I decided to branch out from 1:48 aircraft to 1:35 figures. Unfortunately, my impatience
and inexperience left me with terribly painted
figures. Disheartened, I put figures on the
proverbial back burner for about five years. In the
meantime, I had purchased and read (and re-read)
Sheperd Paine’s How to Build Dioramas book
published by Kalmbach Books.
I use Model Master Enamel paints for the skin
tones and use Model Master Acrylic Paints for the
eyes. For the typical Caucasian skin tone paint scheme, I use the following colors: Flat Dark
Tan, Flat Tan, Flat Light Tan, Flat Cream, Flat Black, Flat Rubber. For the eyes, I use the
following colors: Light Ghost Gray or Light Gray, Flat Black
I use the artist acrylic sable (yellow bristle) paint brushes
because I’ve found them to be the best as far as blending
and paint application. I use the following sizes: 0, 5/0, 10/0,
000, 1, and a small, soft brush for blending.
As far as other supplies go, I have paint thinner and a rag
readily on hand, plus a mixing palette (usually an old CD),
and a piece of paper to soak up the paint for dry brushing.
Also, a variety of round toothpicks cut down to a needle
point for painting the eyes and eye brows. And most importantly – a good light!
Note: For 1:35 and 1:48 scale figures, I don’t 100% follow Sheperd Paine’s process, but instead
use it as a guide. For example, he recommends painting the eyes first after underpainting the
skin tone, but I prefer to leave them for last, or closer to the end. Also, I blend as I go; the key is
to work in small increments.

Page 8 Sprue Bits
Step 1: Base Coat Underpainting. Start with your base skin color.
I like to help save a step, by adding a drop or two of Flat Black to
the Flat Dark Tan to start. Let dry. Hours to days works well.
Step 2: Shadows. Unless you are going for a forced perspective
display, think of a 60 degree cone of light shining down from above
the figure. You can use a real light to help you determine the correct
shadow areas (under chin, nose, behind ears, between
fingers, etc). Paint the shadow areas with a mixture of
the base skin color (Flat Dark Tan), plus a drop or
two of Flat Black. Blend as you go.
Step 3: Highlights. Paint the highlight areas (bridge of nose, cheeks, forehead, chin, ear lobes,
tops of hands and fingers, etc), blend as you go. I use Flat Tan for this step.
Step 4: Light Highlights. Paint the highest points of the highlight areas again, this time with a
lighter color. I use Flat Light Tan for this step. Work in small areas and blend as you go.
Step 5: Hair and facial hair. Add the base hair color to the
appropriate/desired areas of the head and face. To represent stubble or 5
o’clock shadow, use a mixture of Flat Black, Flat Dark Tan and Flat
Light Tan, then apply to the appropriate areas of the face.
Page 9 Sprue Bits
Step 6: Hair highlights. Drybrush a lighter shade of the base hair color, or desired hair
highlight color. For dark hair, I use Flat Rubber, or a Flat Leather color.
Step 7: Eyes. Using a sharpened round toothpick, apply a very small
amount of Light Ghost Gray or Light Gray to the eye area. If too
much, wipe toothpick clean and use it to adjust the paint. A little bit of
spit works well if needed. Once the “whites” of the eyes are applied, let
dry for a few minutes, then use the same sharpened round toothpick to
apply Flat Black (or other desired eye color) to the eye. Just remember
for 1/35 scale: holding the figure one foot away from the viewer is equal
to a person standing 35 feet away, so not much eye color will be seen.
Avoid a big round blob of paint which is the “pop eyed” look; you want
the eyes to be more of a small vertical slit of Flat Black on the Light
Gray or Light Ghost Gray base. Additionally, it is important to ensure
the black is applied in an even manner for both eyes to avoid a
chameleon look. If you make a mistake, you can easily remove the
acrylic paint with a dampened toothpick and start again. You can also
touch up the eyelids with
Flat Tan to help “trim”
the eyes down to size.
Note: For 1:48 scale figures, I do not paint the
“whites” of the eyes – just paint the Flat Black
with a sharpened toothpick.
Next time: Part 2: Painting uniforms and clothing
22 January 2017 - Sunday at 6pm at the Branson Hobby Center (251 Saint James Street, Hollister) on the first floor! Park in the back parking lot and use the entrance on the deck; please bring a chair. Nate is going to do Part 2 of his “How To” session on figure painting – clothing. Bring a friend! If you have a tip or technique to share, bring it in too! See you there!
Go to www.ipmsmoss.com and check out the Events Calendar for upcoming
meetings, shows and events!
Have a Merry Christmas and
a
We’ll see you at the meeting on January 22nd!
Take care, be safe and Happy Modeling!


