
How To Set Up and Use the SAP ME
Shop Workbench Feature
Applicable Release: ME 6.0
Version 1.0
June 4, 2012
SAP Manufacturing Execution
How-To Guide

SAP ME How-To-Guide for Shop Workbench
i
© Copyright 2012 SAP AG. All rights reserved.
No part of this publication may be reproduced or transmitted in
any form or for any purpose without the express permission of
SAP AG. The information contained herein may be changed
without prior notice.
Some software products marketed by SAP AG and its
distributors contain proprietary software components of other
software vendors.
Microsoft, Windows, Outlook, and PowerPoint are registered
trademarks of Microsoft Corporation.
IBM, DB2, DB2 Universal Database, OS/2, Parallel Sysplex,
MVS/ESA, AIX, S/390, AS/400, OS/390, OS/400, iSeries,
pSeries, xSeries, zSeries, z/OS, AFP, Intelligent Miner,
WebSphere, Netfinity, Tivoli, Informix, i5/OS, POWER,
POWER5, OpenPower and PowerPC are trademarks or
registered trademarks of IBM Corporation.
Adobe, the Adobe logo, Acrobat, PostScript, and Reader are
either trademarks or registered trademarks of Adobe Systems
Incorporated in the United States and/or other countries.
Oracle is a registered trademark of Oracle Corporation.
UNIX, X/Open, OSF/1, and Motif are registered trademarks of
the Open Group.
Citrix, ICA, Program Neighborhood, MetaFrame, WinFrame,
VideoFrame, and MultiWin are trademarks or registered
trademarks of Citrix Systems, Inc.
HTML, XML, XHTML and W3C are trademarks or registered
trademarks of W3C®, World Wide Web Consortium,
Massachusetts Institute of Technology.
Java is a registered trademark of Sun Microsystems, Inc.
JavaScript is a registered trademark of Sun Microsystems, Inc.,
used under license for technology invented and implemented by
Netscape.
MaxDB is a trademark of MySQL AB, Sweden.
SAP, R/3, mySAP, mySAP.com, xApps, xApp, SAP
NetWeaver, and other SAP products and services mentioned
herein as well as their respective logos are trademarks or
registered trademarks of SAP AG in Germany and in several
other countries all over the world. All other product and service
names mentioned are the trademarks of their respective
companies. Data contained in this document serves
informational purposes only. National product specifications
may vary.
These materials are subject to change without notice. These
materials are provided by SAP AG and its affiliated companies
("SAP Group") for informational purposes only, without
representation or warranty of any kind, and SAP Group shall not
be liable for errors or omissions with respect to the materials.
The only warranties for SAP Group products and services are
those that are set forth in the express warranty statements
accompanying such products and services, if any. Nothing herein
should be construed as constituting an additional warranty.
These materials are provided “as is” without a warranty of any
kind, either express or implied, including but not limited to, the
implied warranties of merchantability, fitness for a particular
purpose, or non-infringement.
SAP shall not be liable for damages of any kind including
without limitation direct, special, indirect, or consequential
damages that may result from the use of these materials.
SAP does not warrant the accuracy or completeness of the
information, text, graphics, links or other items contained within
these materials. SAP has no control over the information that
you may access through the use of hot links contained in these
materials and does not endorse your use of third party web pages
nor provide any warranty whatsoever relating to third party web
pages.
SAP ME “How-to” Guides are intended to simplify the product
implementation. While specific product features and procedures
typically are explained in a practical business context, it is not
implied that those features and procedures are the only approach
in solving a specific business problem using SAP ME. Should
you wish to receive additional information, clarification or
support, please refer to SAP Consulting.
SAP ME How-To-Guide for Shop Workbench
ii
Document History
Document Version Description Author
1.0 Initial version Peggy Enriquez

SAP ME How-To-Guide for Shop Workbench
iii
Table of Contents
1 Introduction ........................................................................................................................................... 1
1.1 Purpose .......................................................................................................................................... 1
1.2 Scope ............................................................................................................................................. 1
1.3 Glossary ........................................................................................................................................ 1
2 Shop Workbench Overview .................................................................................................................. 1
2.1 Description and Applicability ....................................................................................................... 1
2.2 Business Purposes / Functions ...................................................................................................... 2
2.3 High-Level Process Flows ............................................................................................................ 2
2.4 High Level Data Model................................................................................................................. 2
3 Functions ............................................................................................................................................... 3
3.1 Display an SFC in the Shop Workbench ...................................................................................... 3
3.1.1 Description and Applicability ............................................................................................... 3
3.1.2 Purpose / Effects ................................................................................................................... 3
3.1.3 Process Flow ......................................................................................................................... 5
3.1.4 Data Model ............................................................................................................................ 5
3.1.5 Function Specific Setup ........................................................................................................ 5
3.1.6 Best Practices ........................................................................................................................ 6
3.2 Perform Activities from the Shop Workbench.............................................................................. 6
3.2.1 Description and Applicability ............................................................................................... 6
3.2.2 Purpose / Effects ................................................................................................................... 6
3.2.3 Process Flow ......................................................................................................................... 7
3.2.4 Data Model ............................................................................................................................ 8
4 Integration ............................................................................................................................................. 8
5 Shop Workbench Setup ......................................................................................................................... 8
5.1 Maintenance Activities ................................................................................................................. 8
5.1.1 System Rules ......................................................................................................................... 8
5.1.2 Activity Rules ....................................................................................................................... 9
5.1.3 System Configuration ......................................................................................................... 10
6 Usage Scenario Examples ................................................................................................................... 10
6.1 Display SFC and perform activities from Shop Workbench....................................................... 10
6.1.1 Purpose / Goal ..................................................................................................................... 10
SAP ME How-To-Guide for Shop Workbench
iv
6.1.2 Scenario Specific Settings ................................................................................................... 10
6.1.3 Scenario Steps ..................................................................................................................... 11
6.1.4 Scenario Flow ..................................................................................................................... 12
7 Links to Additional Information ......................................................................................................... 12
8 Other Reference Material .................................................................................................................... 12
9 Overview of Changes .......................................................................................................................... 12
SAP ME How-To-Guide for Shop Workbench
1
1 Introduction
1.1 Purpose The SAP ME How-To-Guide for Shop Workbench is intended to provide sufficient information
to enable the Shop Workbench feature to be easily configured and readily utilized to meet
business needs, making use of available best practices.
1.2 Scope This document covers all aspects of the Shop Workbench feature and its use in a Production
Operator Dashboard (POD). It does not cover the POD feature itself.
1.3 Glossary
Tree A hierarchical arrangement of items. The item at the top level of the
structure is called the root. The subordinate items are called nodes.
Node A subordinate item to the top level of a tree
2 Shop Workbench Overview
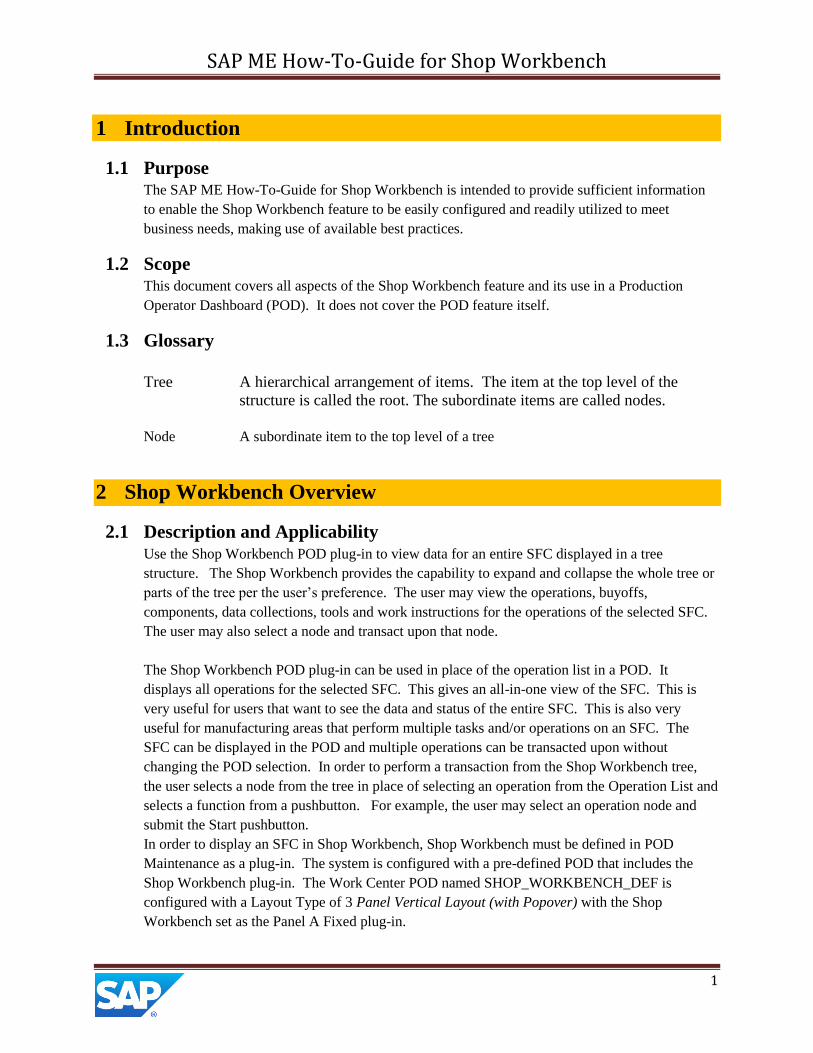
2.1 Description and Applicability Use the Shop Workbench POD plug-in to view data for an entire SFC displayed in a tree
structure. The Shop Workbench provides the capability to expand and collapse the whole tree or
parts of the tree per the user’s preference. The user may view the operations, buyoffs,
components, data collections, tools and work instructions for the operations of the selected SFC.
The user may also select a node and transact upon that node.
The Shop Workbench POD plug-in can be used in place of the operation list in a POD. It
displays all operations for the selected SFC. This gives an all-in-one view of the SFC. This is
very useful for users that want to see the data and status of the entire SFC. This is also very
useful for manufacturing areas that perform multiple tasks and/or operations on an SFC. The
SFC can be displayed in the POD and multiple operations can be transacted upon without
changing the POD selection. In order to perform a transaction from the Shop Workbench tree,
the user selects a node from the tree in place of selecting an operation from the Operation List and
selects a function from a pushbutton. For example, the user may select an operation node and
submit the Start pushbutton.
In order to display an SFC in Shop Workbench, Shop Workbench must be defined in POD
Maintenance as a plug-in. The system is configured with a pre-defined POD that includes the
Shop Workbench plug-in. The Work Center POD named SHOP_WORKBENCH_DEF is
configured with a Layout Type of 3 Panel Vertical Layout (with Popover) with the Shop
Workbench set as the Panel A Fixed plug-in.
SAP ME How-To-Guide for Shop Workbench
2
When the Shop Workbench is used in a POD to choose an operation, a user may select the
operation node and perform the usual POD button activities such as Start and Complete. The user
may also select a node underneath the operation and submit an activity for it. For example, the
user may select a Tool Group and select the Log Tool activity to display the Log Tool Entry plug-
in to record information about the selected tool group.
2.2 Business Purposes / Functions The Shop Workbench plug-in displays an SFC number’s master data in a multilevel tree like
structure. Each level of the tree displays nodes that represent a part of the SFC. The production
operator can select an SFC from the POD Work list and the SFC number’s data will display in the
Shop Workbench (see Display an SFC in the Shop Workbench ).
The Shop Workbench tree can also be used to select operations and other detailed information
about the SFC represented by the tree nodes listed underneath its corresponding operation. For
example, the production operator may select an operation and submit the Complete activity. Or
the production operator may select a Data Collection Group underneath the Data Collections node
and submit the DC Collect activity (see Perform Activities from the Shop Workbench ).
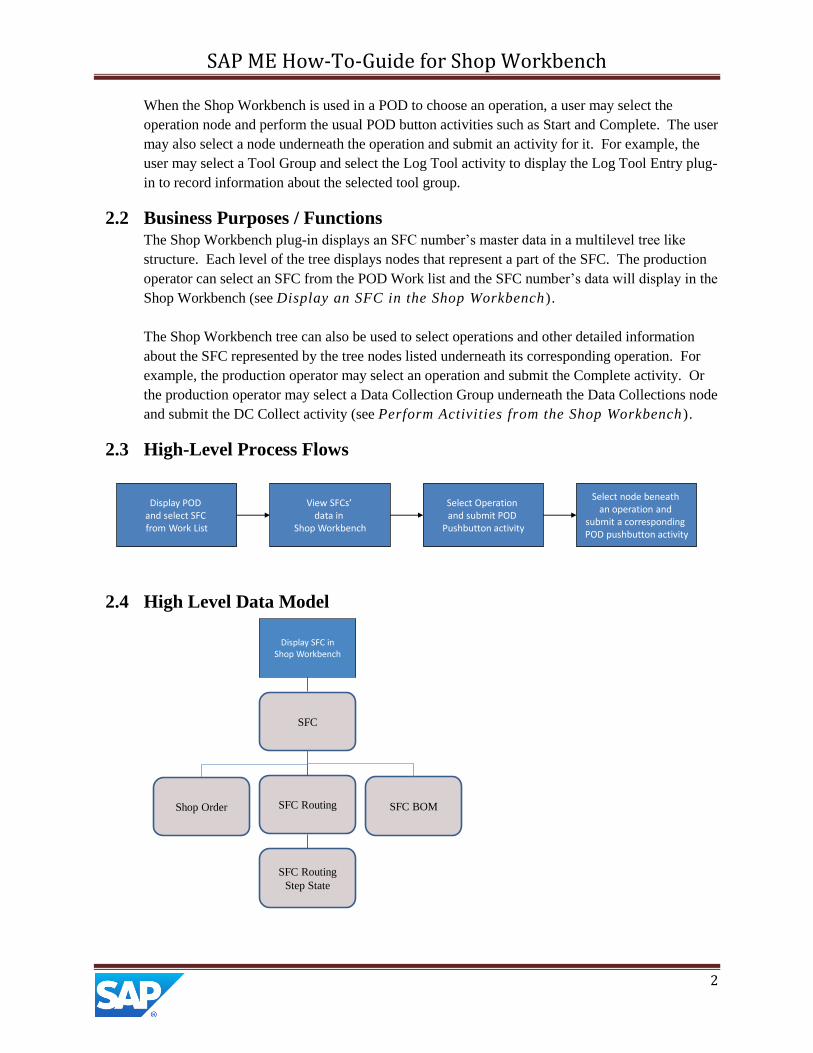
2.3 High-Level Process Flows
Display POD and select SFC from Work List
View SFCs’ data in
Shop Workbench
Select Operation and submit POD
Pushbutton activity
Select node beneath an operation and
submit a corresponding POD pushbutton activity
2.4 High Level Data Model
Display SFC inShop Workbench
SFC
Shop Order SFC Routing SFC BOM
SFC Routing
Step State

SAP ME How-To-Guide for Shop Workbench
3
Perform Activities From
Shop Workbench
Buyoff Log ParametricSFC Assy Tool Group
Tool LogSFC Assy Data
Tool Number
3 Functions The following is a list of constraints that apply to the Shop Workbench plug-in:
The icons shown next to the operation node of the tree like structure are view only
There will be no transaction capabilities on the Nodes through double click
Configuration of both Shop Workbench and Operation List in the same POD is not
supported.
Multiple select operations are not permitted from the tree
3.1 Display an SFC in the Shop Workbench
3.1.1 Description and Applicability
Use the Shop Workbench as a POD plug-in that displays the data for an SFC in a tree like
structure. It can be used by production operators to view information for the entire SFC. It
can be used by production supervision to monitor the status and progress of the SFC.
It can be used by various production support organizations, such as manufacturing engineer,
to analyze production data by displaying the information and viewing the collected data for
the SFC.
3.1.2 Purpose / Effects
When an operator selects an SFC from the Default Shop Workbench POD, the data for the
SFC is displayed in the Shop Workbench. The data gets displayed in a tree like structure.
The tree has multiple levels that represent the various parts of an SFC. Here is a summary of
the levels represented in the tree:

SAP ME How-To-Guide for Shop Workbench
4
Level one: The SFC Current Information including the SFC’s Material, Routing, BOM and
Shop Order. If the SFC has any work instructions with a change alert set, a change alert icon
will display next to the SFC Current Information title.
Level two: The SFC’s Operation(s) along with its’ status, description and Work
Center. Icons that represent Buyoffs, Components, Data Collections, Tool and Work
Instructions are displayed next to the operation name if the element is attached to the
operation. The Buyoff, Component and Data Collection icons are grayed out if all of
the applicable data has been collected.
Level three: Operation detail nodes namely Buyoffs, Components, Data
Collections, Tools and Work Instructions. If an operation does not have data
attached to a detail node, then that node will not be displayed under that
operation. For example, if an operation does not have any tool groups
attached, then the Tools node will not appear under that operation and the
tool icon will not be displayed next to the operation name. If a work
instruction has a change alert set, then a change alert icon will appear next to
the operation name.
There are activity rules for each of the detail icons which controls whether or
not that node displays (default is YES). Additionally, there are activity rules
for how many rows of data can display for each icon (default=100). For
example, if the DC_ROW_LIMIT is set to 25 and there are 30 DC groups to
collect, only 25 would display and a yellow triangle icon would display
signifying that the row limit had been reached with the icon’s tool tip
displaying the message about the number of records exceeding the limit.
With this multilevel tree, the user can see an overall view of an SFC, its operations
and operation details. When an SFC initially displays in the Shop Workbench, the
SFC Current Information (level 1) and the Operation (level 2) nodes are expanded
and the operation detail nodes are collapsed. The user has the option to collapse or
expand any node on the tree by selected the arrowhead next to the folder node
symbol. There are also buttons at the bottom of the plug-in that will Expand All and
Collapse All which will act upon all nodes in the tree.
If a user wants to view a different SFC, the user can select a new SFC from the Work
list. Once selected, the Shop Workbench will refresh with the new SFC’s data.
SAP ME How-To-Guide for Shop Workbench
5
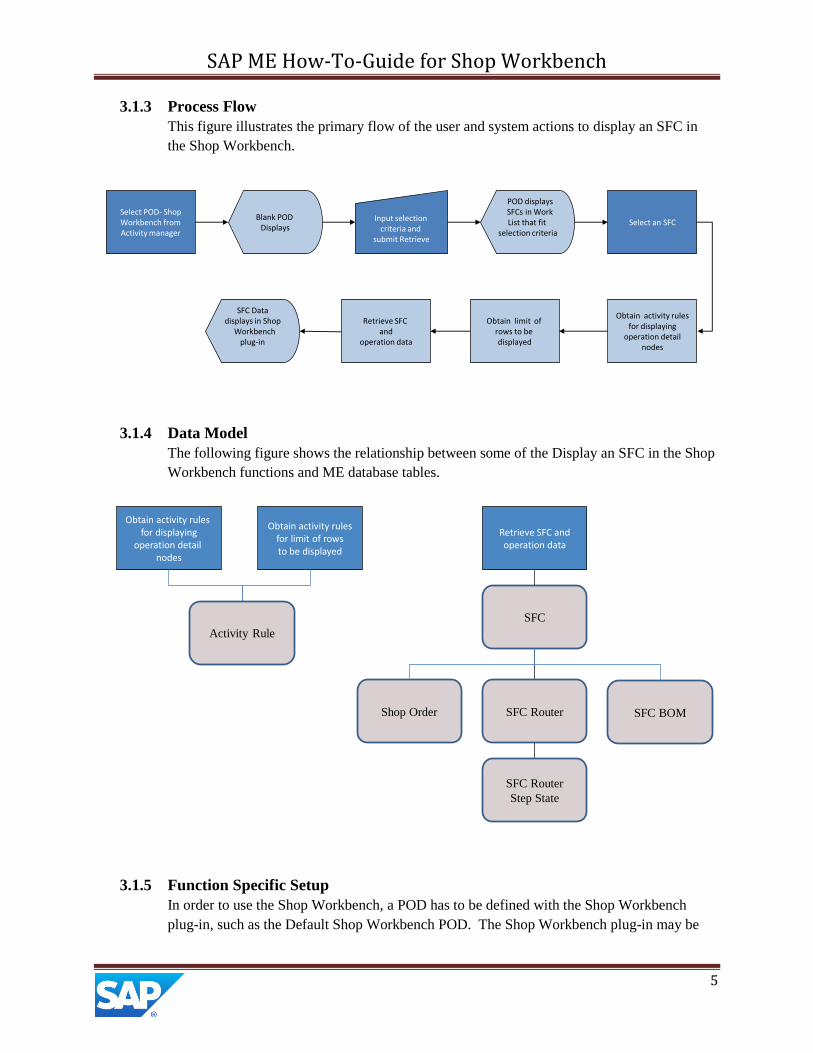
3.1.3 Process Flow
This figure illustrates the primary flow of the user and system actions to display an SFC in
the Shop Workbench.
Select POD- ShopWorkbench fromActivity manager
Input selection criteria and
submit Retrieve
Blank POD Displays
POD displays SFCs in Work List that fit
selection criteriaSelect an SFC
SFC Data displays in Shop
Workbench plug-in
Retrieve SFC and
operation data
Obtain limit of rows to be displayed
Obtain activity rulesfor displaying
operation detailnodes
3.1.4 Data Model
The following figure shows the relationship between some of the Display an SFC in the Shop
Workbench functions and ME database tables.
Obtain activity rules for displaying
operation detail nodes
Activity Rule
SFC
SFC Router
SFC Router
Step State
Obtain activity rulesfor limit of rowsto be displayed
Retrieve SFC andoperation data
Shop Order SFC BOM
3.1.5 Function Specific Setup
In order to use the Shop Workbench, a POD has to be defined with the Shop Workbench
plug-in, such as the Default Shop Workbench POD. The Shop Workbench plug-in may be

SAP ME How-To-Guide for Shop Workbench
6
defined as a fixed panel or pop-over in the POD. Operation List and the Shop Workbench
plug-in cannot be configured in the same POD.
3.1.6 Best Practices
We recommend that you define the Shop Workbench plug-in in the Work Center POD
Layout Type of 3 Panel Vertical Layout (with Popover) defined as the Panel A Default Plug-
in.
3.2 Perform Activities from the Shop Workbench
3.2.1 Description and Applicability
From the Default Shop Workbench POD, a production operator can select an SFC from the
Work list and the data for that SFC is then displayed in the Shop Workbench in a tree like
structure. The production operator can use the operation nodes of the tree or a node
underneath the operation and submit an activity.
3.2.2 Purpose / Effects
The Shop Workbench can be used as an alternative to the Operation list. Once an SFC is
displayed in the Shop Workbench, a production operator can select an operation node and
perform a transaction upon it. When the operator selects an operation (level two of the tree)
it highlights to represent that selection. The operator may then select any appropriate POD
pushbutton activity. For example, the operator may select an operation node with the status
of In Queue and then submit the Start pushbutton. The system processes the Start activity,
the Shop Workbench plug-in refreshes and changes the operation status to Active.
The Shop Workbench can also be used as an alternative to certain POD plug-in lists. When
the production operator selects a node beneath the operation detail node (level three of the
tree) the system highlights it to represent its selection. The operator can then select the
appropriate data entry POD plug-in pushbutton activity. For example, from the Default Shop
Workbench POD the operator may select one of the sequences beneath the Components
nodes which represent a component that is defined to be installed at that operation.
The operator than submits the Assembly pushbutton. The system displays the Assemble
Component data entry plug-in in a pop over panel with the selected component’s information.
The user inputs the relevant data and submits the Add pushbutton. The system displays a
message indicating that the component has been added, displays the next component (if one
exists) and refreshes the component row in the Shop Workbench to reflect the quantity
assembled.

SAP ME How-To-Guide for Shop Workbench
7
The following chart shows the Shop Workbench detail node with its corresponding plug-in
activity:
Shop Workbench Node Corresponding activity Action
Buyoffs Buyoff Accept Process the selected buyoff
Components Assembly Point Displays the assembly point
plug-in to collect component
information
Data Collections Data Collection Displays the Data Collection
Entry plug-in to enter the DC
parameter data
Tools Log Tool Data Entry Displays the Log Tool Entry
plug-in to enter tool data
Work Instructions Work Instruction Viewer Displays the Work Instructions
Viewer and displays the selected
work instruction
The operator may also select the SFC or an operation node on the Shop Workbench tree,
submit the Reports pushbutton and select the desired report from the Reports list. For
example, with an SFC displayed in the Shop Workbench, the user could submit the Reports
pushbutton, select the Activity Log Report from the list and submit the OK pushbutton. The
system will display the Activity Log Report with the data for the selected SFC.
The same is true for most activities including those assigned to the Activities pushbutton. For
example, if the user selects an operation node and selects the Earned Standards pushbutton,
the Earned Standards plug-in will display with the SFC or operation’s standards displayed.
3.2.3 Process Flow
This figure illustrates the primary flow of the user and system actions to perform
activities from the Shop Workbench .
Select operation node and select aPOD pushbutton
activitySFC Data is displayed in
Shop Workbench plug-in
Select SFC from POD
Shop WorkbenchSelect node beneath
an operation and submit a
corresponding POD pushbutton activity
Operation actiivtyprocessed
Activityprocessed

SAP ME How-To-Guide for Shop Workbench
8
3.2.4 Data Model
The following figure shows the relationship between performing activities from the
Shop Workbench functions and ME database tables.
Perform Activities From
Shop Workbench
Buyoff Log ParametricSFC Assy Tool Group
Tool LogSFC Assy Data
Tool Number
4 Integration Not applicable.
5 Shop Workbench Setup
5.1 Maintenance Activities
5.1.1 System Rules
5.1.1.1 Display End Unit Number
5.1.1.1.1 Purpose/Effect
Controls whether or not the End Unit Number field is displayed on various activities
for which it applies

SAP ME How-To-Guide for Shop Workbench
9
5.1.1.1.2 Settings/Examples
If this system rule is set to TRUE, then the End Unit Number field will display in the
SFC Current Information section of the Shop Workbench plug-in. If this system rule
is set to FALSE (default), then the End Unit Number field will not display in the SFC
Current Information section of the Shop Workbench plug-in.
5.1.2 Activity Rules
5.1.2.1 Purpose/Effect
Controls whether or not any nodes/folders display underneath the operation node
and how many rows can be displayed
5.1.2.2 Settings/Examples
Shop Workbench Plug-in Activity Rules:
Display rules:
BUYOFF_DISPLAY (YES/NO) default=YES
COMPONENT_DISPLAY (YES/NO) default=YES
DC_DISPLAY (YES/NO) default=YES
TOOL_DISPLAY (YES/NO) default=YES
WI_DISPLAY (YES/NO) default=YES
The display rules control whether or not the node is displayed on the Shop
Workbench tree. If the display rule is set to YES, then the node displays in
the Shop Workbench tree. If the display is set to NO, then the node does not
display in the Shop Workbench tree.
If the Tool_Display rule is set to Yes, then the Tool node will display on the
Shop Workbench tree underneath any operation for which a tool has been
attached.
Row limit Rules
BUYOFF_ROW_LIMIT (default 100)
COMPONENT_ ROW_LIMIT (default 100)
DC_ ROW_LIMIT (default 100)
TOOL_ ROW_LIMIT (default 100)
WI_ ROW_LIMIT (default 100)
The row limit rules sets the row limit for each node when displayed under the
operation node
If the DC_ROW_LIMIT is set to 10, then 10 Data Collection Group rows will
appear under the Data Collection folder under the operation node. If there are
12 data collection groups, the system will display the first 10 sequences of
SAP ME How-To-Guide for Shop Workbench
10
data collection groups and a yellow triangle icon will display next to the Data
Collections folder indicating that the row limit has been reached. The tool tip
on the icon reads “Not all records are displayed; the number of records found
exceeds the limit”.
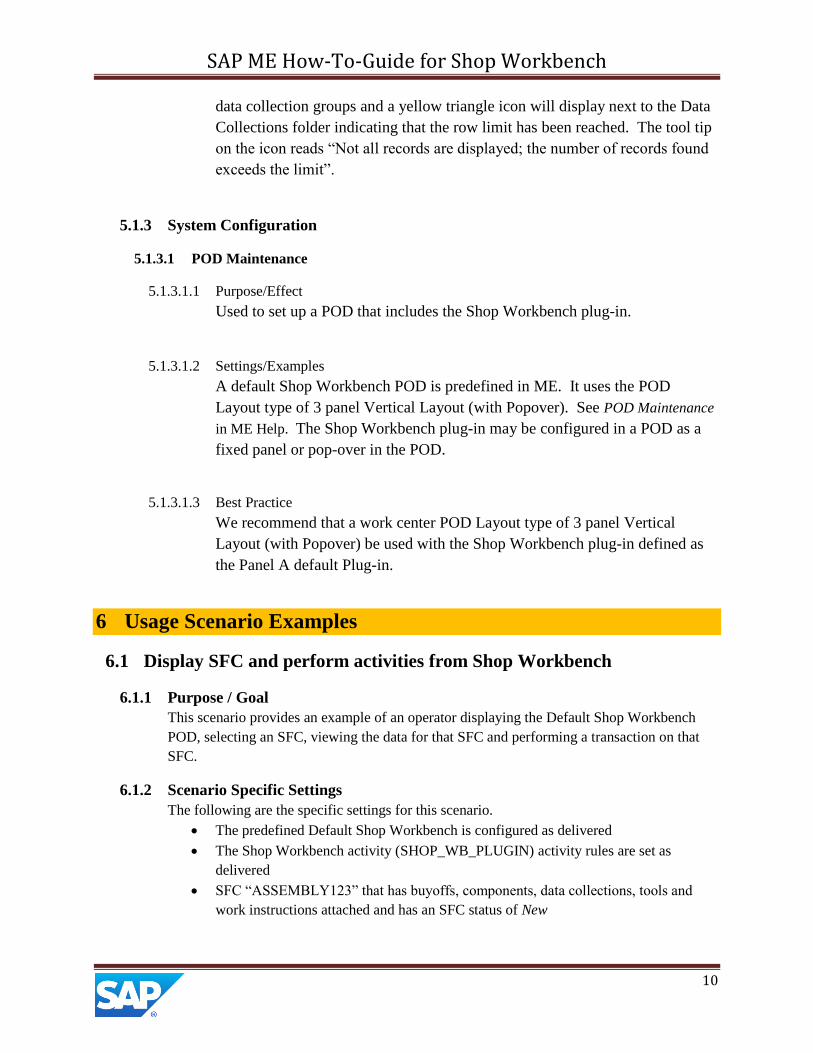
5.1.3 System Configuration
5.1.3.1 POD Maintenance
5.1.3.1.1 Purpose/Effect
Used to set up a POD that includes the Shop Workbench plug-in.
5.1.3.1.2 Settings/Examples
A default Shop Workbench POD is predefined in ME. It uses the POD
Layout type of 3 panel Vertical Layout (with Popover). See POD Maintenance
in ME Help. The Shop Workbench plug-in may be configured in a POD as a
fixed panel or pop-over in the POD.
5.1.3.1.3 Best Practice
We recommend that a work center POD Layout type of 3 panel Vertical
Layout (with Popover) be used with the Shop Workbench plug-in defined as
the Panel A default Plug-in.
6 Usage Scenario Examples
6.1 Display SFC and perform activities from Shop Workbench
6.1.1 Purpose / Goal
This scenario provides an example of an operator displaying the Default Shop Workbench
POD, selecting an SFC, viewing the data for that SFC and performing a transaction on that
SFC.
6.1.2 Scenario Specific Settings
The following are the specific settings for this scenario.
The predefined Default Shop Workbench is configured as delivered
The Shop Workbench activity (SHOP_WB_PLUGIN) activity rules are set as
delivered
SFC “ASSEMBLY123” that has buyoffs, components, data collections, tools and
work instructions attached and has an SFC status of New
SAP ME How-To-Guide for Shop Workbench
11
User has permission to perform the start, buyoff, complete, assembly, data collection
and log tool activities
User belongs to the User Group assigned to the buyoffs attached to “Assembly123”
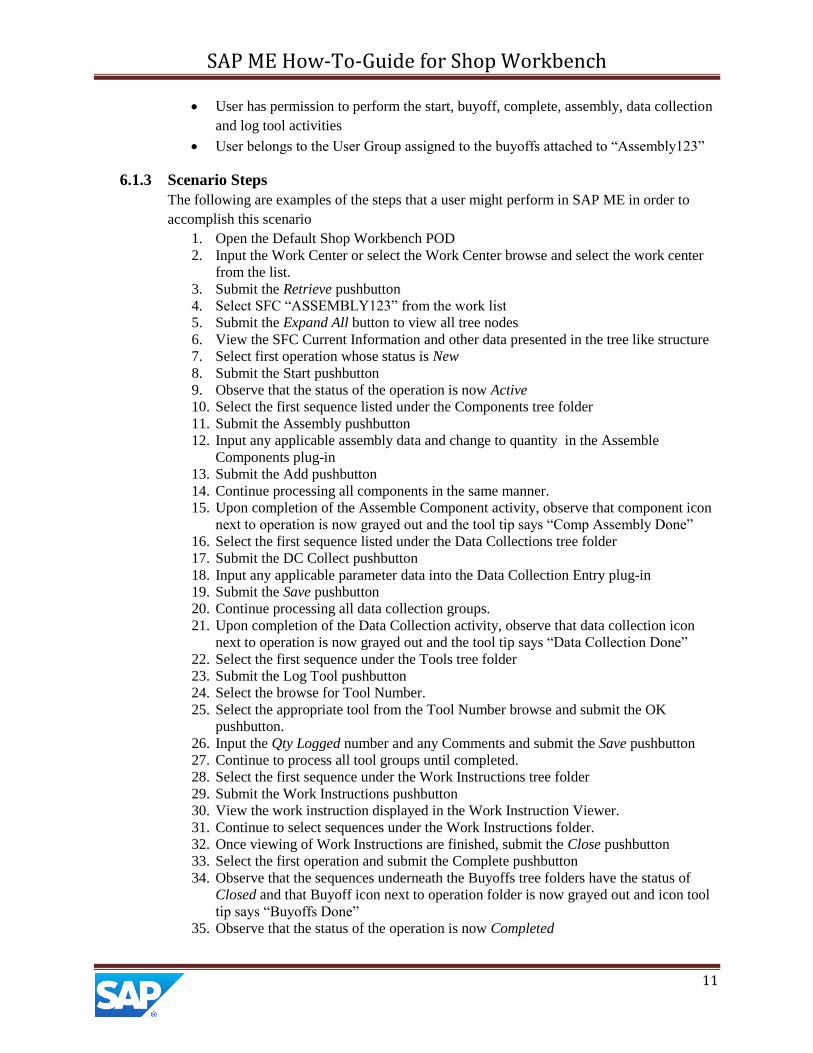
6.1.3 Scenario Steps
The following are examples of the steps that a user might perform in SAP ME in order to
accomplish this scenario
1. Open the Default Shop Workbench POD
2. Input the Work Center or select the Work Center browse and select the work center
from the list.
3. Submit the Retrieve pushbutton
4. Select SFC “ASSEMBLY123” from the work list
5. Submit the Expand All button to view all tree nodes
6. View the SFC Current Information and other data presented in the tree like structure
7. Select first operation whose status is New
8. Submit the Start pushbutton
9. Observe that the status of the operation is now Active
10. Select the first sequence listed under the Components tree folder
11. Submit the Assembly pushbutton
12. Input any applicable assembly data and change to quantity in the Assemble
Components plug-in
13. Submit the Add pushbutton
14. Continue processing all components in the same manner.
15. Upon completion of the Assemble Component activity, observe that component icon
next to operation is now grayed out and the tool tip says “Comp Assembly Done”
16. Select the first sequence listed under the Data Collections tree folder
17. Submit the DC Collect pushbutton
18. Input any applicable parameter data into the Data Collection Entry plug-in
19. Submit the Save pushbutton
20. Continue processing all data collection groups.
21. Upon completion of the Data Collection activity, observe that data collection icon
next to operation is now grayed out and the tool tip says “Data Collection Done”
22. Select the first sequence under the Tools tree folder
23. Submit the Log Tool pushbutton
24. Select the browse for Tool Number.
25. Select the appropriate tool from the Tool Number browse and submit the OK
pushbutton.
26. Input the Qty Logged number and any Comments and submit the Save pushbutton
27. Continue to process all tool groups until completed.
28. Select the first sequence under the Work Instructions tree folder
29. Submit the Work Instructions pushbutton
30. View the work instruction displayed in the Work Instruction Viewer.
31. Continue to select sequences under the Work Instructions folder.
32. Once viewing of Work Instructions are finished, submit the Close pushbutton
33. Select the first operation and submit the Complete pushbutton
34. Observe that the sequences underneath the Buyoffs tree folders have the status of
Closed and that Buyoff icon next to operation folder is now grayed out and icon tool
tip says “Buyoffs Done”
35. Observe that the status of the operation is now Completed

SAP ME How-To-Guide for Shop Workbench
12
6.1.4 Scenario Flow
The following figure provides a high level flow of the display an SFC and performs activities
from the Shop Workbench scenario.
Open and retrieve a work center in the Default ShopWorkbench POD
Select first tool group and submit
the Log Tool pushbutton
Select an SFC from the Work list
View SFC in Shop Workbench
plug-in
Select first operation and
submit Startpushbutton
Input parameter data and submit Save pushbutton
Select first DC group and
submit the DC Collect pushbutton
Process remaining
components
Select first component and
submit Assemble pushbutton
Input assembly data and change
quantity and submit Add pushbutton
Select the first work instructions and Submit the Work
Instruction pushbutton.
View remaining Work Instructions
Process remaining
Tool Groups
Process remaining DC groups
Input the Tool Number and Qty
Logged and submitthe OK pushbutton
Select first operation and submit
the Complete pushbutton
7 Links to Additional Information
8 Other Reference Material
9 Overview of Changes Shop Workbench is a new feature in SAP ME 6.0.


