
Use IP cameraslike webcam

2. Obtaining IP and credentials
3. Add RTSP path to software
4. Select webcam on Skype,Teamsand Zoom
5. Optional settings
Webcam
Steps
1. IP camera initialization
1. IP camera initialization

▪ This part shows how to start / add an IP camera. Ezviz model:▪ EZ-C2C-180▪ EZ-C6B▪ EZ-C6TC▪ EZ-C1C-PIR
Webcam
1. IP camera initialization
▪ If the camera is already added and working on Wi-Fi local, you can go directly to step 2
▪ These steps are valid for most IP cameras of Ezviz

▪ Free app required EZVIZ on Android or iOS, available at Google playand in Manzana AppStore
Webcam
1. IP camera initialization
▪ In the app, a user is created from the email and a password is chosen.

▪ The camera is added to the app by scanning the QR printed on the camera's label and the camera is powered
Webcam

▪ Wait for the camera to start and follow the steps of the app to add the data of the Wi-Fi 2.4GHz to device
Webcam

2. Obtaining IP and credentials

▪ To function as a webcam you need to know the user and password as well as the camera IP address
Webcam
2. Obtaining IP and credentials
▪ They will compose an RTSP address that will be added to the software in step 3
▪ The RTSP address of the main video stream for these IP camera models has the form:
rtsp: //user:password@IPcamera: 554 / h264 / ch1 / main / av_stream

▪ The user is admin and the password is the verification code. That is, if the Verification Code, that is printed on the camera label, is RTYFGH, the password is RTYFGH
Webcam
▪ To find out the camera IP address, a Windows PC is required and the free SADP software is installed. It is available for downloadfrom this link
▪ If the Verification Code from the app, you will have to use the one that has been established

Webcam
▪ The IP adress obtained from SADP once installed on Windows
▪ In the example, the complete RTSP path is: rtsp: //admin:[email protected]: 554 / h264 / ch1 / main /av_stream
It is important to respect the capital letters of the Verification Code
▪ Step 5, for optional configurations, explains how to set a static IP address

3. Add RTSP path to software

Webcam
3. Add RTSP path to software
▪ Free software is required to be installed on Windows SplitCam, which allows converting an RTSP route into Webcam. It is available for download athttps://splitcam.com/download

▪ Click on + and select IP camera
Webcam

Webcam
▪ Add the RTSP route with the data obtained in step 2 and click on Addrtsp: //admin:VERIFCODE@IPcamera: 554 / h264 / ch1 / main / av_stream

Webcam
▪ By keeping it running SplitCam, I know will show the video stream from the IP camera as Webcam, for whatever software is selected

4. Select webcam on Skype, Teams and Zoom
Webcam
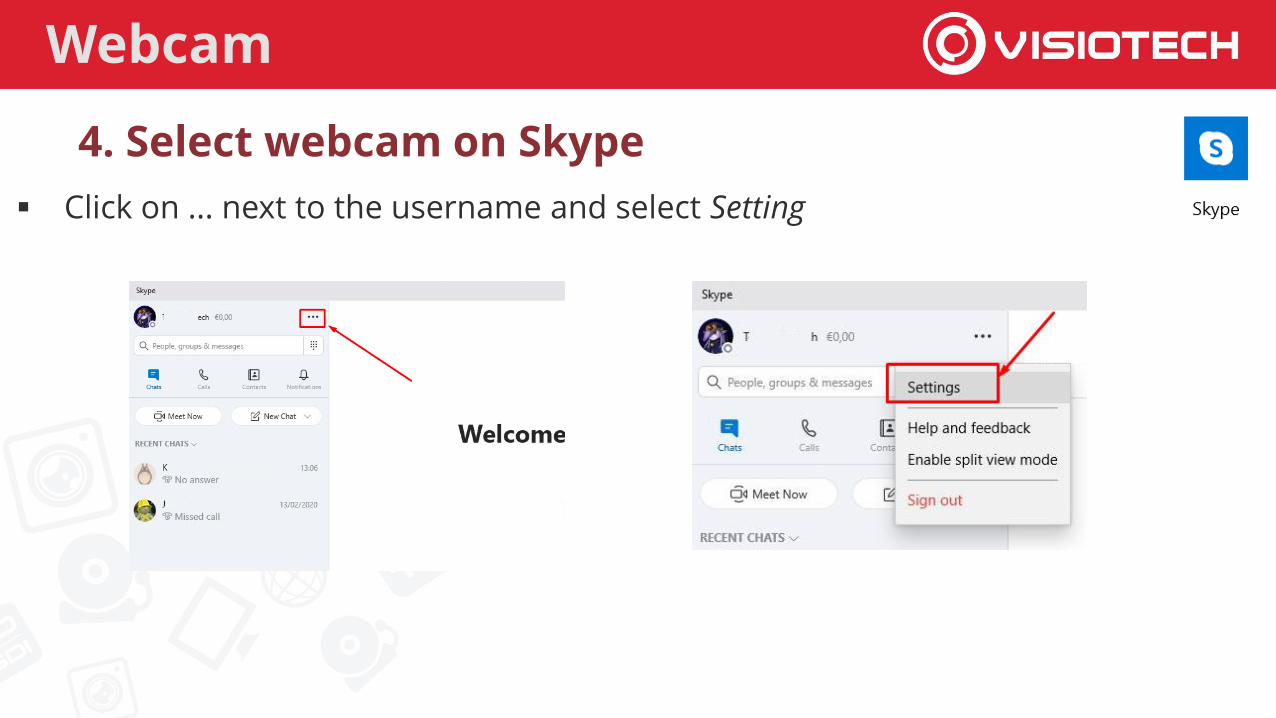
4. Select webcam on Skype
▪ Click on ... next to the username and select Setting
Webcam
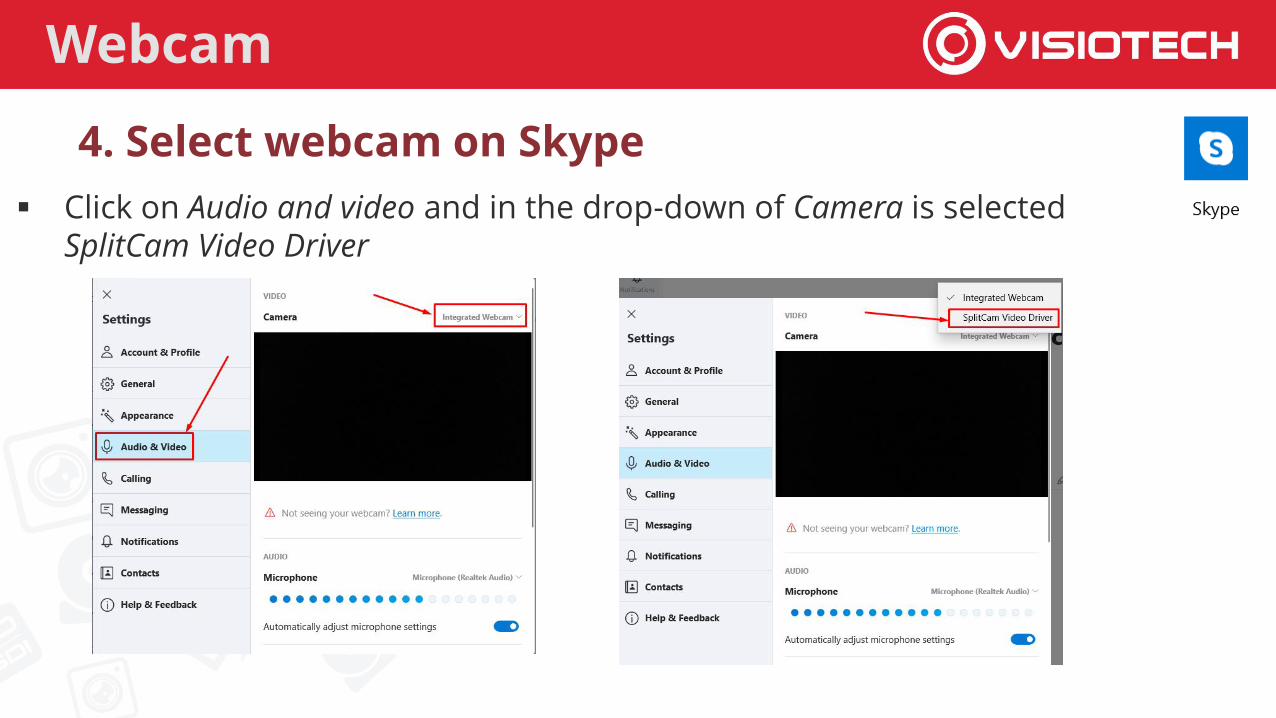
4. Select webcam on Skype
▪ Click on Audio and video and in the drop-down of Camera is selected SplitCam Video Driver
Webcam
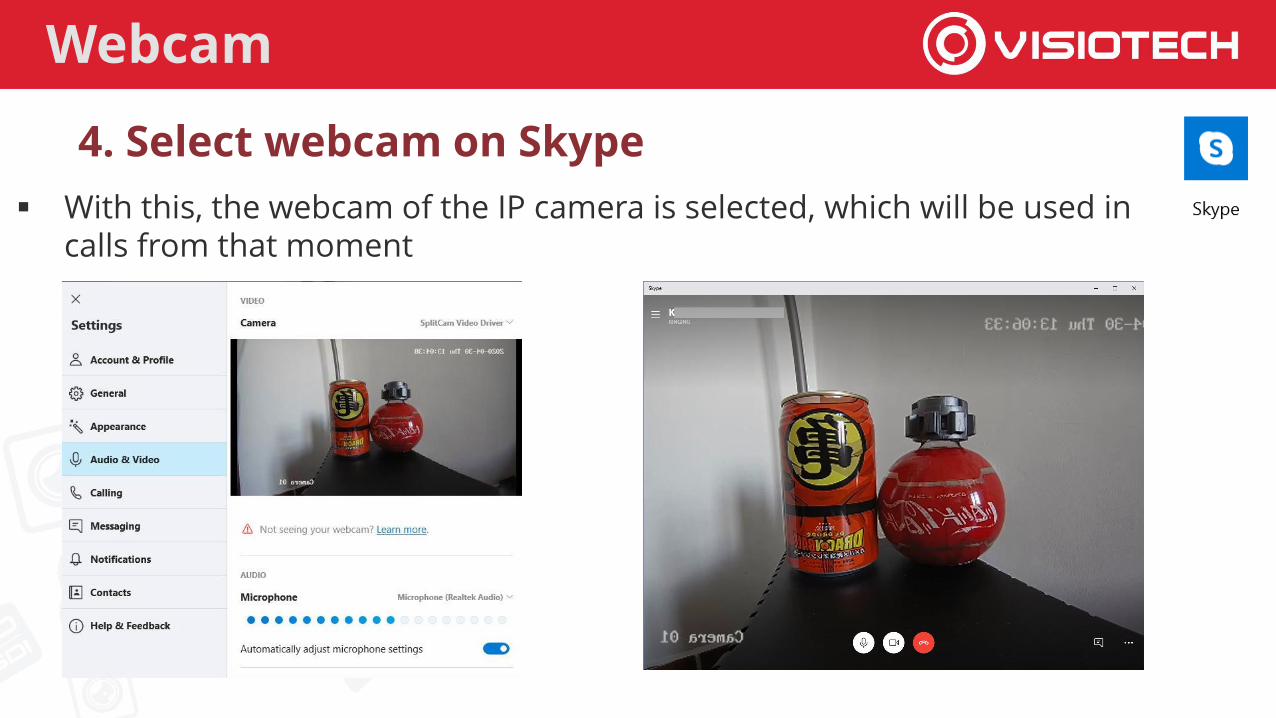
4. Select webcam on Skype
▪ With this, the webcam of the IP camera is selected, which will be used in calls from that moment

Webcam
4. Select webcam in Teams
▪ In a call, click on ... in the bar and select To show cdevice configuration

Webcam
4. Select webcam in Teams
▪ Click on the dropdown of Camera and select SplitCam Video Driver

Webcam
4. Select webcam in Teams
▪ With this, the webcam of the IP camera is selected, which will be used in calls from that moment
Webcam
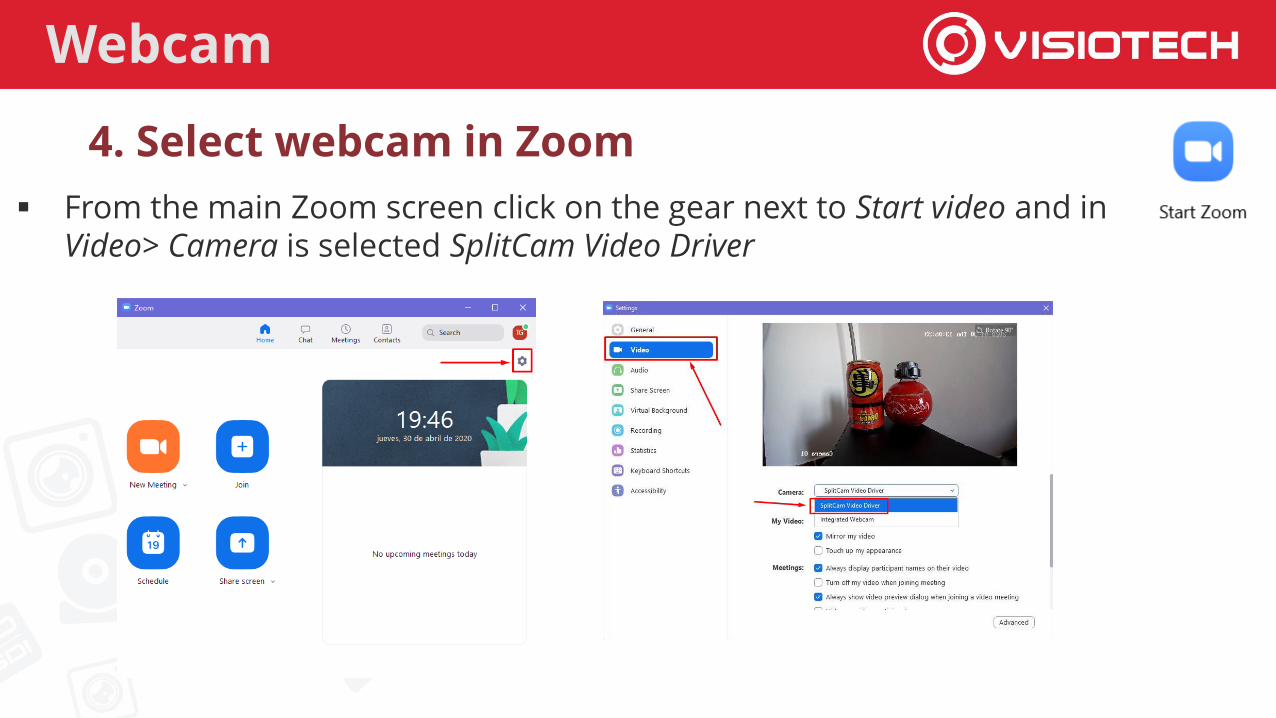
4. Select webcam in Zoom
▪ From the main Zoom screen click on the gear next to Start video and in Video> Camera is selected SplitCam Video Driver

Webcam
4. Select webcam in Zoom
▪ From a meeting in Zoom click on ^ next to Start video and select SplitCam Video Driver

5. Optional settings
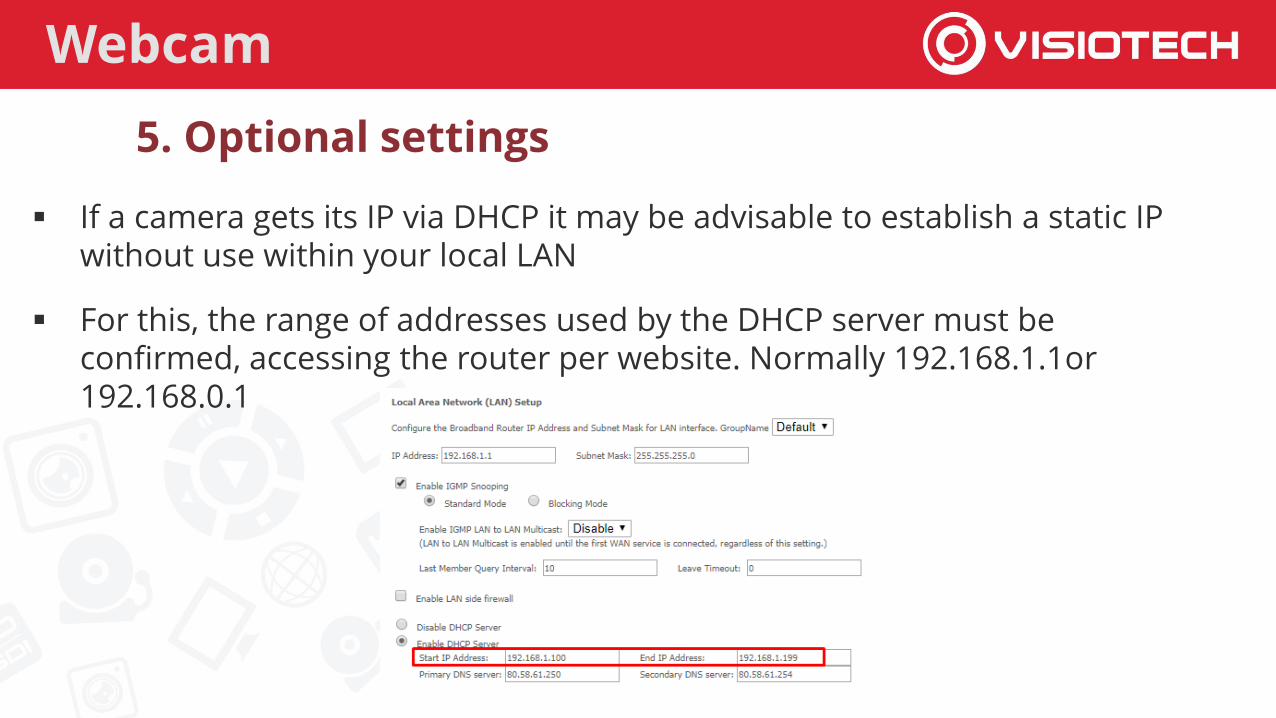
▪ If a camera gets its IP via DHCP it may be advisable to establish a static IP without use within your local LAN
Webcam
▪ For this, the range of addresses used by the DHCP server must be confirmed, accessing the router per website. Normally 192.168.1.1or192.168.0.1
5. Optional settings

▪ An IP outside that range is chosen and through the command PING in Symbol of the system is checked that there is no device when there is no response.
Webcam
5. Optional settings
▪ The example checks that the DHCP range is from 192.168.0.100 to 192.168.0.200 and that the IP 192.168.0.214 is free.

Webcam
▪ In SADP the box on the left is checked, it is unchecked Enable DHCP, the selected static IP is entered, the user's password is typed admin (that is to say the Verification Code) and click on Modify

Webcam
▪ This sets the chosen IP (192.168.0.214 in the example) to the camera
▪ Having to be modified in SplitCam to be used as a webcam


