drill winch operator’s guide warn drill winch.pdfdrill winch operator’s guide every winching...
TRANSCRIPT
ORIGINAL INSTRUCTIONS
Drill Winch Operator’s Guide
Every winching situation has the potential for personal injury. In order to minimize that risk, it is important to read this guide carefully. Please
familiarize yourself with the operation of your winch before using it and be constantly safety oriented. In this guide we provide important safety
information and instructions on how to install your winch.
SAVE THIS MANUAL and other product literature found in this kit for future reference and review frequently for continuing safe operation. Instruct
all users of this product to review this manual before operating this product.
In this kit you will find the following pieces of literature: Winch Guide, Specification and Performance Data, Product Warranty, Replacement Parts
List and other product literature specific to some products.
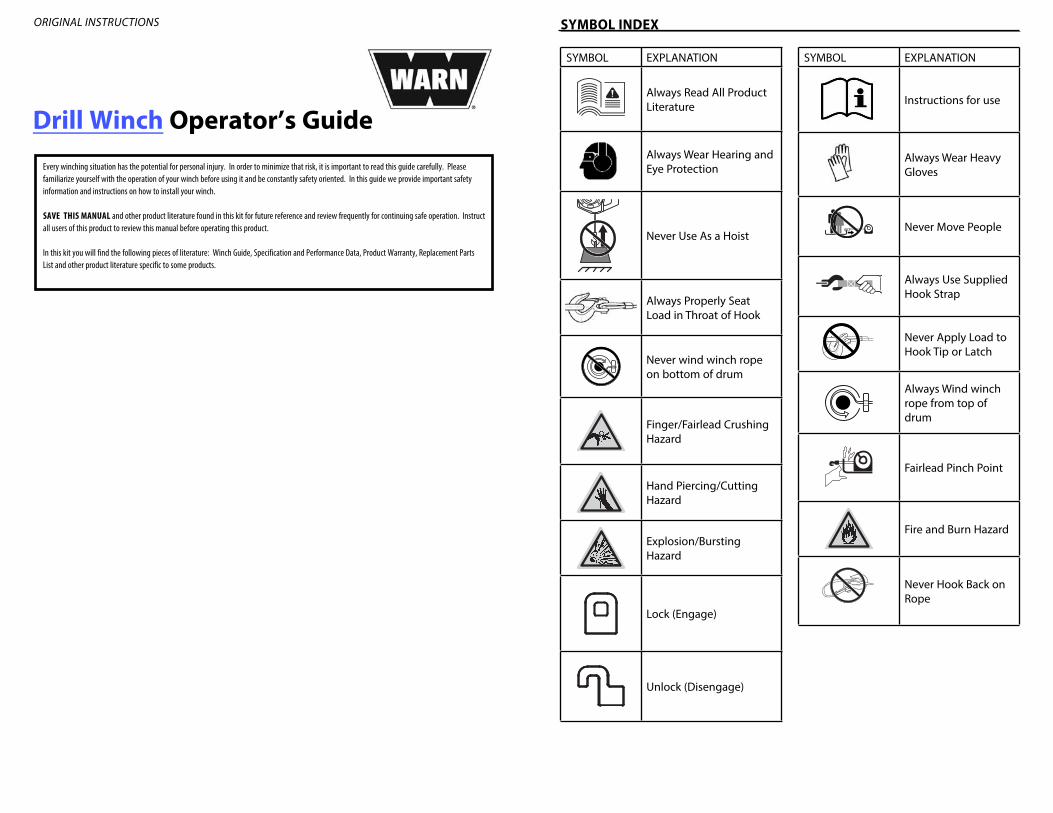
SYMBOL INDEX
SYMBOL EXPLANATION
Always Read All Product Literature
Always Wear Hearing and Eye Protection
Never Use As a Hoist
Always Properly Seat Load in Throat of Hook
Never wind winch rope on bottom of drum
Finger/Fairlead Crushing Hazard
Hand Piercing/Cutting Hazard
Explosion/Bursting Hazard
Lock (Engage)
Unlock (Disengage)
SYMBOL EXPLANATION
Instructions for use
Always Wear Heavy Gloves
Never Move People
Always Use Supplied Hook Strap
Never Apply Load to Hook Tip or Latch
Always Wind winch rope from top of drum
Fairlead Pinch Point
Fire and Burn Hazard
Never Hook Back on Rope
GENERAL SAFETY PRECAUTIONS
As you read these instructions, you will see WARNINGS, CAUTIONS, NOTICES and NOTES. Each message has a specifi c purpose. WARNINGS are safety messages that indicate a potentially hazardous situation, which, if not avoided could result in serious injury or death. CAUTIONS are safety messages that indicate a potentially hazardous situation which, if not avoided, could result in minor or moderate injury. A CAUTION may also be used to alert against unsafe practice. CAUTIONS and WARNINGS identify the hazard, indicate how to avoid the hazard, and advise of the probable consequence of not avoiding the hazard. NOTICES are messages to avoid property damage. NOTES are additional information to help you complete a procedure. PLEASE WORK SAFELY!
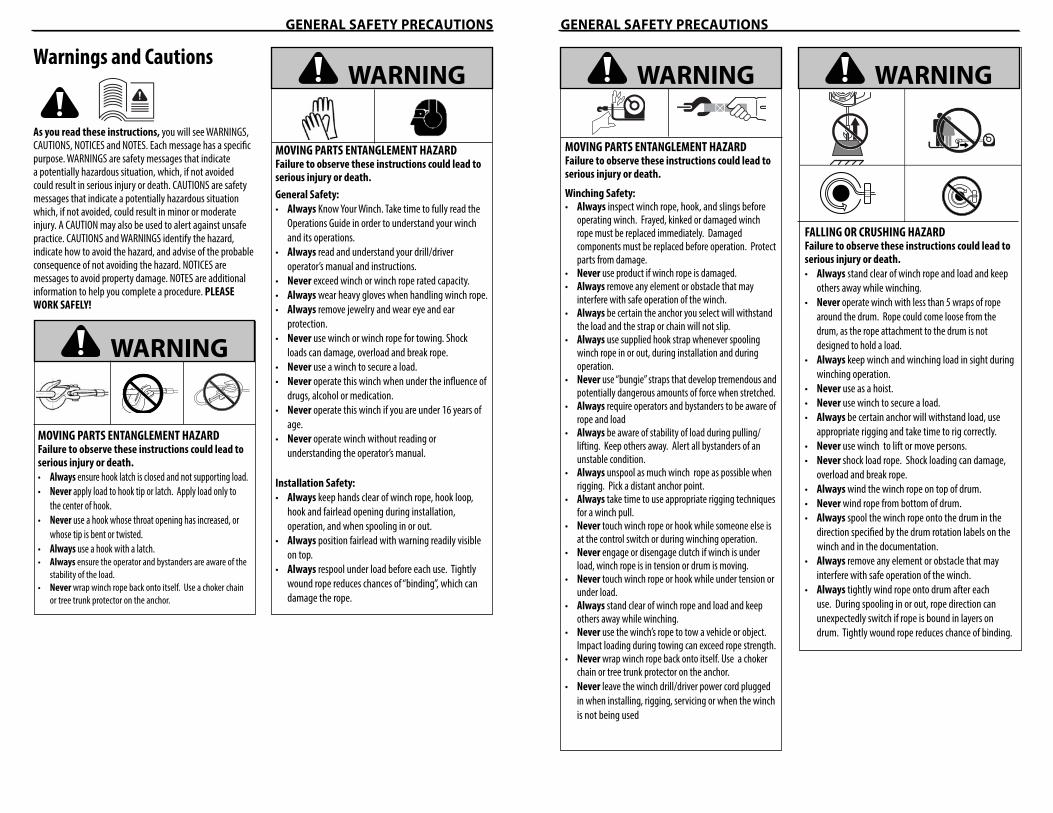
Warnings and Cautions
MOVING PARTS ENTANGLEMENT HAZARDFailure to observe these instructions could lead to serious injury or death.
• Always ensure hook latch is closed and not supporting load.
• Never apply load to hook tip or latch. Apply load only to
the center of hook.
• Never use a hook whose throat opening has increased, or
whose tip is bent or twisted.
• Always use a hook with a latch.• Always ensure the operator and bystanders are aware of the
stability of the load.
• Never wrap winch rope back onto itself. Use a choker chain
or tree trunk protector on the anchor.
MOVING PARTS ENTANGLEMENT HAZARDFailure to observe these instructions could lead to serious injury or death.
General Safety:
• Always Know Your Winch. Take time to fully read the
Operations Guide in order to understand your winch
and its operations.
• Always read and understand your drill/driver
operator’s manual and instructions.
• Never exceed winch or winch rope rated capacity.
• Always wear heavy gloves when handling winch rope.
• Always remove jewelry and wear eye and ear
protection.
• Never use winch or winch rope for towing. Shock
loads can damage, overload and break rope.
• Never use a winch to secure a load.
• Never operate this winch when under the infl uence of
drugs, alcohol or medication.
• Never operate this winch if you are under 16 years of
age.
• Never operate winch without reading or
understanding the operator’s manual.
Installation Safety:
• Always keep hands clear of winch rope, hook loop,
hook and fairlead opening during installation,
operation, and when spooling in or out.
• Always position fairlead with warning readily visible
on top.
• Always respool under load before each use. Tightly
wound rope reduces chances of “binding”, which can
damage the rope.
WARNING
WARNING
GENERAL SAFETY PRECAUTIONS
MOVING PARTS ENTANGLEMENT HAZARDFailure to observe these instructions could lead to serious injury or death.
Winching Safety:• Always inspect winch rope, hook, and slings before
operating winch. Frayed, kinked or damaged winch rope must be replaced immediately. Damaged components must be replaced before operation. Protect parts from damage.
• Never use product if winch rope is damaged.• Always remove any element or obstacle that may
interfere with safe operation of the winch.• Always be certain the anchor you select will withstand
the load and the strap or chain will not slip.• Always use supplied hook strap whenever spooling
winch rope in or out, during installation and during operation.
• Never use “bungie” straps that develop tremendous and potentially dangerous amounts of force when stretched.
• Always require operators and bystanders to be aware of rope and load
• Always be aware of stability of load during pulling/lifting. Keep others away. Alert all bystanders of an unstable condition.
• Always unspool as much winch rope as possible when rigging. Pick a distant anchor point.
• Always take time to use appropriate rigging techniques for a winch pull.
• Never touch winch rope or hook while someone else is at the control switch or during winching operation.
• Never engage or disengage clutch if winch is under load, winch rope is in tension or drum is moving.
• Never touch winch rope or hook while under tension or under load.
• Always stand clear of winch rope and load and keep others away while winching.
• Never use the winch’s rope to tow a vehicle or object.Impact loading during towing can exceed rope strength.
• Never wrap winch rope back onto itself. Use a choker chain or tree trunk protector on the anchor.
• Never leave the winch drill/driver power cord plugged
in when installing, rigging, servicing or when the winch
is not being used
FALLING OR CRUSHING HAZARDFailure to observe these instructions could lead to serious injury or death.
• Always stand clear of winch rope and load and keep
others away while winching.
• Never operate winch with less than 5 wraps of rope
around the drum. Rope could come loose from the
drum, as the rope attachment to the drum is not
designed to hold a load.
• Always keep winch and winching load in sight during
winching operation.
• Never use as a hoist.
• Never use winch to secure a load.
• Always be certain anchor will withstand load, use
appropriate rigging and take time to rig correctly.
• Never use winch to lift or move persons.
• Never shock load rope. Shock loading can damage,
overload and break rope.
• Always wind the winch rope on top of drum.
• Never wind rope from bottom of drum.
• Always spool the winch rope onto the drum in the
direction specifi ed by the drum rotation labels on the
winch and in the documentation.
• Always remove any element or obstacle that may
interfere with safe operation of the winch.
• Always tightly wind rope onto drum after each
use. During spooling in or out, rope direction can
unexpectedly switch if rope is bound in layers on
drum. Tightly wound rope reduces chance of binding.
WARNING WARNING
GENERAL SAFETY PRECAUTIONS
AVOID WINCH AND EQUIPMENT DAMAGE
• Always avoid continuous side pulls which can pile up
winch rope at one end of the drum. This can damage
winch rope or winch.
• Always ensure the clutch is fully engaged or
disengaged.
• Always avoid on/off cycles (jogging or plugging).
• Always store the drill winch in a protected, clean, dry
area.
• Always select an anchor point as far away as possible.
This will provide the drill winch with its greatest
winching power.
• Always avoid over heating the drill/driver motor.
For extended winching, stop at reasonable intervals
to allow the drill motor to cool down. See your
drill manufacturer’s operating instructions for
recommended running times.
N OT I C E
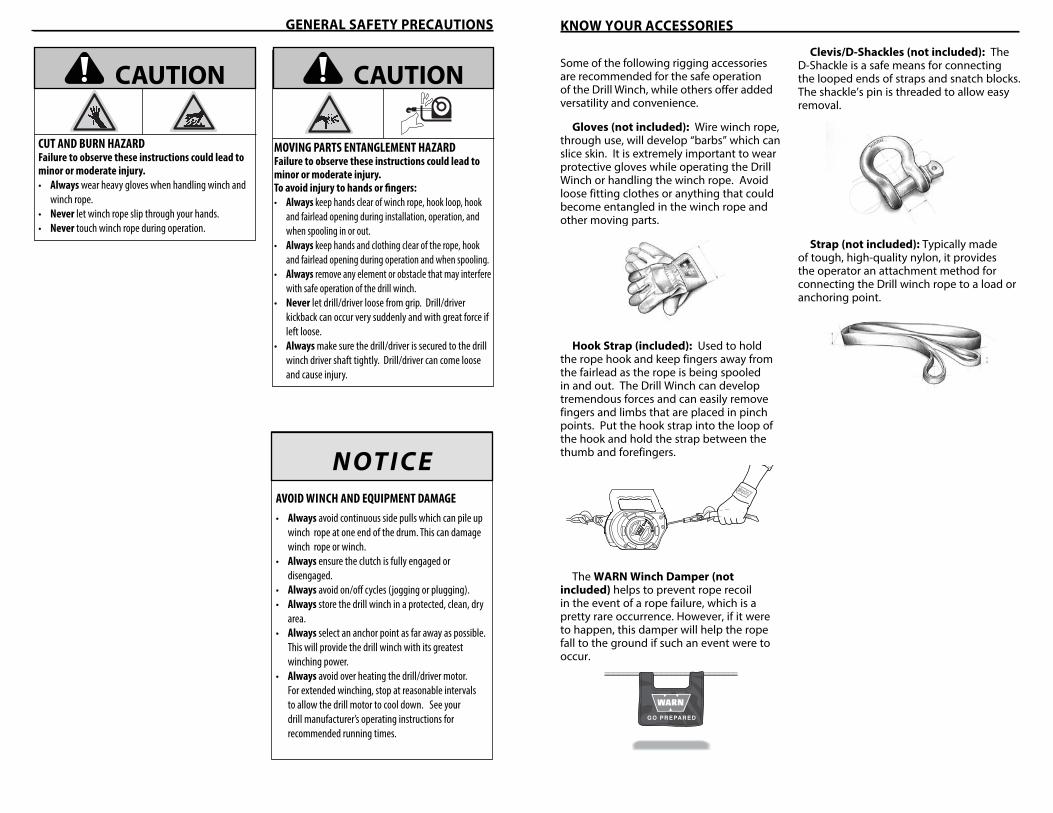
MOVING PARTS ENTANGLEMENT HAZARDFailure to observe these instructions could lead to minor or moderate injury.To avoid injury to hands or fi ngers:
• Always keep hands clear of winch rope, hook loop, hook
and fairlead opening during installation, operation, and
when spooling in or out.
• Always keep hands and clothing clear of the rope, hook
and fairlead opening during operation and when spooling.
• Always remove any element or obstacle that may interfere
with safe operation of the drill winch.
• Never let drill/driver loose from grip. Drill/driver
kickback can occur very suddenly and with great force if
left loose.
• Always make sure the drill/driver is secured to the drill
winch driver shaft tightly. Drill/driver can come loose
and cause injury.
CUT AND BURN HAZARDFailure to observe these instructions could lead to minor or moderate injury.
• Always wear heavy gloves when handling winch and
winch rope.
• Never let winch rope slip through your hands.
• Never touch winch rope during operation.
CAUTION CAUTION
KNOW YOUR ACCESSORIES
Clevis/D-Shackles (not included): The D-Shackle is a safe means for connecting the looped ends of straps and snatch blocks. The shackle’s pin is threaded to allow easy removal.
Strap (not included): Typically made of tough, high-quality nylon, it provides the operator an attachment method for connecting the Drill winch rope to a load or anchoring point.
Some of the following rigging accessories are recommended for the safe operation of the Drill Winch, while others off er added versatility and convenience.
Gloves (not included): Wire winch rope, through use, will develop “barbs” which can slice skin. It is extremely important to wear protective gloves while operating the Drill Winch or handling the winch rope. Avoid loose fitting clothes or anything that could become entangled in the winch rope and other moving parts.
Hook Strap (included): Used to hold the rope hook and keep fingers away from the fairlead as the rope is being spooled in and out. The Drill Winch can develop tremendous forces and can easily remove fingers and limbs that are placed in pinch points. Put the hook strap into the loop of the hook and hold the strap between the thumb and forefingers.
The WARN Winch Damper (not included) helps to prevent rope recoil in the event of a rope failure, which is a pretty rare occurrence. However, if it were to happen, this damper will help the rope fall to the ground if such an event were to occur.

KNOW YOUR WINCH
Before you begin, you should familiarize yourself with your WARN Drill Winch and each of its components:
5/16” Drill/Driver Shaft: The winch is powered by a standard drill/driver (non-impact). The 5/16” drill/driver shaft provides torque to the gear mechanism, which turns the winch drum and winds and unwinds the winch rope.
Winch Drum Viewing Window: The winch drum viewing window is a cut out on top of the
winch to view the winch rope winding on the winch drum.
Rope: The winch rope is wrapped around the winch drum and fed through the fairlead. The winch rope is looped at the end to accept the hook’s clevis pin. The winch rope’s diameter and length is sized according to the winch’s load capacity and design.
Gear Train: The gear train converts the drill’s torque into a large winching force. The gear train design makes it possible for the winch to be lighter and more compact.
Clutch Dial: The clutch dial allows the operator to manually disengage (unlock) the drum from the gear train, enabling the drum to rotate freely (known as “freespooling”). Engaging the clutch “locks” the winch drum back onto the gear train.
Rope Hook: The rope hook is attached to the end of the winch rope. The rope hook is rated according to the winch’s capacity. Hooks are usually used in combination with straps or chains.
Anchor Hook: The anchor hook is fastened to the anchor point. A strap will be connected to the hook and then secured to a solid connection (anchor).
Fairlead: The fairlead acts to guide the winch rope onto the drum.
5/16” Driver Shaft
Winch Drum Viewing Window
Clutch Dial
Rope
Anchor HookFairlead
Rope Hook
KNOW YOUR WINCH
The maximum pulling capacity occurs from the first layer of winch rope on the drum. By increasing the distance between the Drill Winch and the anchor point, it decreases the layers of winch rope on the drum, therefore increasing the pulling power.
Run Time/Duty Cycle
Follow the your drill/driver manufacturer’s recommended run times and cooling times.
KEY COMPONENT FUNCTIONS
Rotation control switch:
The Drill Winch is controlled by a standard drill/driver.
The rotation control switch is commonly located near the speed trigger. NOTE: See your specific drill/driver instructions for your specific rotation control switch placement and operation.
The rotation control switch on the drill provides control of the power-in (forward/clockwise) and power-out (reverse/counterclockwise) operation.Speed Trigger:
DRILL WINCH MECHANICS
Before using your WARN Drill Winch it is essential to understand how it works and the functions of the key components.
WARNING Always Know Your Winch. Take time to fully read the Operations Guide in order to understand your winch and its operations.
WARNING Always read and understand your drill/driver operator’s manual and instructions.
How the Drill Winch Reacts to Load
The Drill Winch is rated by winching capacity. The maximum winching torque occurs when there is only one layer of winch rope on the drum. As the layers of winch rope on the drum increase, the pulling power decreases. This is the basics of mechanical advantage.
Load Limiter
WARNING Never engage or disengage clutch if winch is under load, winch rope is in tension or drum is moving.
WARNING Never touch winch rope or hook while under tension or under load.
Exceeding the Drill Winch capacity will cause the mechanical load limiter to ratchet, which interrupts the power from the drill/driver. With increasing load the ratcheting frequency increases resulting in a reduction in the line speed. When this occurs, stop winching, reverse direction of drill/driver and power-out to reduce the load. Never use freespool clutch when the winch rope is under load.
Do not attempt to apply the same load if the load limiter continues to ratchet, as this can damage the unit.
If the load limiter continues to ratchet, perform the following actions:
1) Reduce the weight of the load.
2) Increase the distance of the anchor point.
Rotation Control Switch
POWER IN
POWER OUT
400 lb
500 lb
0-15
15-30

KNOW YOUR WINCH
The drill/driver’s speed trigger controls the power and speed of the power-in and power-out operation.
To turn the Drill Winch ON, depress the drill
trigger. To turn the Drill Winch OFF, release the trigger. The speed is controlled by the amount of trigger depression.
NOTICE Some drill/driver models off er a trigger that can be locked in the OFF position. We suggest using this feature to help reduce the possibility of accidental powering on when not in use. See your specifi c drill/driver’s instructions for details.
Clutch Operation:
WARNING Never engage or disengage clutch if winch is under load, winch rope is in tension or drum is moving.
The clutch allows the operator to disengage the drum from the gear train, enabling the drum to rotate freely, known as “freespooling”. Engaging the clutch “locks” the winch drum back onto the gear train.
The clutch lever, located on the winch housing opposite the dril/driver shaft, controls the clutch position.
The clutch is engaged when the clutch dial is rotated to the “lock” position.
The clutch is disengaged when the clutch dial is rotated to the “unlock” position.
The clutch will not disengage the geartrain if there is tension on the winch rope greater than 15 lbs. When switching from engaged “lock” to disengaged “unlock” the drive shaft may need to be rotated one half turn to allow freespooling.
To prevent damage, always fully lock (engage) or fully unlock (disengage) the clutch lever.
WARNING Always ensure the clutch is fully engaged or disengaged.
Speed Trigger
ENGAGED/LOCK
DISENGAGED/UNLOCK
OPERATING INSTRUCTIONS
OPERATING INSTRUCTIONS
Knowing the proper winching techniques can help keep you and others around you safe.
In this guide, you are shown the basic fundamentals for effective winching. However, it is up to you to analyze the situation and make the decisions necessary for the proper use of your Drill Winch.
Apply your knowledge of your Drill Winch and the basic fundamentals you have practiced to adjust your techniques to each unique situation.
Getting Started
1) Things you will need to operate your Drill Winch:
• All operating instructions• Drill Winch
• Winch Rope
• Rope Hook
• Anchor Hook
Items sold separately:
• Standard Drill/Driver (minimum drive torque 3 ft. lbs. - 4 N-m)
• Gloves• Rigging Accessories (straps, shackles,
WARN Damper, etc.).
2) Upon removing winch from packaging, it is very important to thoroughly inspect all parts of the system prior to winching.If any part is missing or damaged it must be immediately replaced. Contact WARN Customer Service 1.800.543.9276.
Rigging Procedures
The following steps describe rigging for single line winching. Double and multiple line rigging is not recommended with this product.
WARNING Always use supplied hook strap whenever spooling winch rope in or out, during installation or operation to avoid injury to hands and fi ngers.
WARNING Always wear heavy gloves when handling winch rope.
Step 1: PUT ON GLOVES AND ATTACH HOOK STRAP.
1) Put on gloves.
2) Attach the supplied hook strap to the rope hook. NOTE: Ensure the hook strap is attached to the hook on the winch rope, not the swiveling anchor hook.
Step 2: CONNECT TO POWER SOURCE.
NOTE: If you are using a cordless drill, be sure your battery pack is fully charged before use. Follow your drill/driver manufacturer’s recommendation.
1) Using the chuck of your drill/driver, connect to the driver shaft on your Drill Winch.
2) Secure the chuck of your drill around the driver shaft tightly to avoid the drill slipping off the shaft.
Lock/Tighten
Unlock/Release
Single Line
OPERATING INSTRUCTIONS
WARNING Always tighten drill to drill winch driver shaft. Drill can come loose and cause injury.
3) If using a corded drill/driver, verify that power cords and extension cords are positioned so that the winch rope or moving load will not damage the cords or that cords can not be stepped on, tripped over, or otherwise subjected to damage or stress.
WARNING If using the driver bit accessory, make sure to insert bit straight into your drill’s chuck jaws. Do not insert bit into chuck jaws off center. This could cause bit to be thrown from drill, resulting in possible personal injury or damage to the chuck.
Step 3: SPOOL OUT WINCH ROPE.
Freespooling is generally the quickest and easiest way to spool out winch rope.
WARNING Always keep hands clear of winch rope, hook loop, hook and fairlead opening during installation, operation, and when spooling in or out.
WARNING Always ensure the clutch is fully engaged or disengaged.
WARNING Never operate winch with less than 5 wraps of rope around the drum. Rope could come loose from the drum, as the rope attachment to the drum is not designed to hold a load.
1) Disengage the clutch by rotating clutch dial to ‘unlock’ position.
2) While always keeping tension on the winch rope spool enough winch rope for the winching operation.
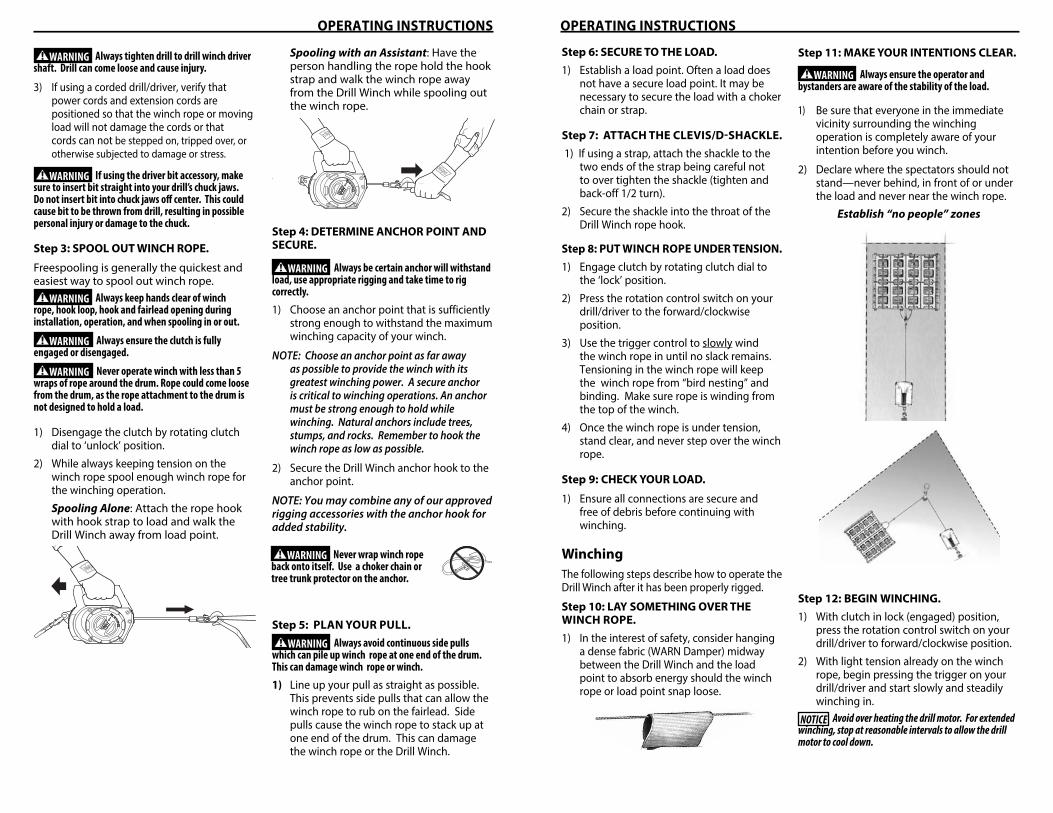
Spooling Alone: Attach the rope hookwith hook strap to load and walk theDrill Winch away from load point.
Spooling with an Assistant: Have the person handling the rope hold the hook strap and walk the winch rope away from the Drill Winch while spooling out the winch rope.
Step 4: DETERMINE ANCHOR POINT AND SECURE.
WARNING Always be certain anchor will withstand load, use appropriate rigging and take time to rig correctly.
1) Choose an anchor point that is sufficiently strong enough to withstand the maximum winching capacity of your winch.
NOTE: Choose an anchor point as far away as possible to provide the winch with its greatest winching power. A secure anchor is critical to winching operations. An anchor must be strong enough to hold while winching. Natural anchors include trees, stumps, and rocks. Remember to hook the winch rope as low as possible.
2) Secure the Drill Winch anchor hook to the anchor point.
NOTE: You may combine any of our approved rigging accessories with the anchor hook for added stability.
Step 5: PLAN YOUR PULL.
WARNING Always avoid continuous side pulls which can pile up winch rope at one end of the drum. This can damage winch rope or winch.
1) Line up your pull as straight as possible.This prevents side pulls that can allow the winch rope to rub on the fairlead. Side pulls cause the winch rope to stack up at one end of the drum. This can damage the winch rope or the Drill Winch.
WARNING Never wrap winch rope back onto itself. Use a choker chain or tree trunk protector on the anchor.
OPERATING INSTRUCTIONS
Step 6: SECURE TO THE LOAD.
1) Establish a load point. Often a load does not have a secure load point. It may be necessary to secure the load with a choker chain or strap.
Step 7: ATTACH THE CLEVIS/D-SHACKLE.
1) If using a strap, attach the shackle to thetwo ends of the strap being careful not to over tighten the shackle (tighten and back-off 1/2 turn).
2) Secure the shackle into the throat of the Drill Winch rope hook.
Step 8: PUT WINCH ROPE UNDER TENSION.
1) Engage clutch by rotating clutch dial to the ‘lock’ position.
2) Press the rotation control switch on your drill/driver to the forward/clockwise position.
3) Use the trigger control to slowly wind the winch rope in until no slack remains. Tensioning in the winch rope will keep the winch rope from “bird nesting” and binding. Make sure rope is winding from the top of the winch.
4) Once the winch rope is under tension, stand clear, and never step over the winch rope.
Step 9: CHECK YOUR LOAD.
1) Ensure all connections are secure and free of debris before continuing with winching.
Winching
The following steps describe how to operate the Drill Winch after it has been properly rigged.
Step 10: LAY SOMETHING OVER THE WINCH ROPE.
1) In the interest of safety, consider hanging a dense fabric (WARN Damper) midway between the Drill Winch and the load point to absorb energy should the winch rope or load point snap loose.
Step 11: MAKE YOUR INTENTIONS CLEAR.
WARNING Always ensure the operator and bystanders are aware of the stability of the load.
1) Be sure that everyone in the immediate vicinity surrounding the winching operation is completely aware of your intention before you winch.
2) Declare where the spectators should not stand—never behind, in front of or under the load and never near the winch rope.
Step 12: BEGIN WINCHING.
1) With clutch in lock (engaged) position, press the rotation control switch on your drill/driver to forward/clockwise position.
2) With light tension already on the winch rope, begin pressing the trigger on your drill/driver and start slowly and steadily winching in.
NOTICE Avoid over heating the drill motor. For extended winching, stop at reasonable intervals to allow the drill motor to cool down.
Establish “no people” zones

OPERATING INSTRUCTIONS
Step 13: SECURE LOAD.
1) Once movement of the load is complete, be sure to secure the load completely.
Step 14: DISCONNECT FROM ANCHOR.
1) Once load is secure, release tension in the winch rope by reversing the rotation control switch (counterclockwise position) on your drill/driver and begin pressing the speed trigger on your drill/driver.
2) Slowly power out a short length of winch rope.
3. Disconnect anchor hook from the anchor.
Step 15: POWER-IN WINCH ROPE.
1) With clutch still in the lock (engaged) position.
2) Press the rotation control switch on your drill/driver to forward/clockwise position.
3) Arrange the winch rope so it will not kink or tangle when powering-in by keeping tension on the winch rope.
NOTE: Be sure any winch rope already on the spooling drum is wound tightly.
What to look for under load As you winch in, make sure the rope
winds evenly and tightly on the drum. This prevents the outer winch rope wraps from diving into the inner wraps, “bird nesting” and binding can damage the winch rope and Drill Winch.
During side pulls the winch rope tends to stack up at one end of the drum. To prevent stacking the winch rope on one side of the drum, line up the pull as straight ahead as possible.
4) Slowly power-in the winch rope by pushing the speed trigger switch on the drill/driver and walk slowly towards the load until the rope hook is approximately 1 ft. from the fairlead.
WARNING Never spool in rope hook against the fairlead; the rope hook should be loose at the fairlead.
5) Once the rope hook is within 1 ft. from the fairlead, stop winching in and remove the rope hook from the load.
6) Slowly pulse trigger to winch in the rest of the winch rope, leaving at least 6 inches from fairlead to rope hook.
7) Winching operations are now complete.
8) Remove drill/driver from Drill Winch byreleasing/unlocking drill chuck fromdriver shaft.
9) Store the Drill Winch in a clean and dryplace.
FINAL ANALYSIS AND MAINTENANCE
WARNING To prevent serious injury or death:
Always spool the winch rope onto the drum as indicated by the drum rotation label.
Always Wind Rope Over Top of Drum.
Never Wind Rope on Bottom of Drum.
CheckBefore fi rst operation
After each use
Every 90 days
Take time to fully read the Instructions and/or Operations Guide, and/or Basic Guide to Winching Techniques, in order to understand your winch and its operations
X X
Read and understand your drill/driver operator’s manual and instructions. X X
Inspect rope for damage.
Replace rope immediately if damaged.X X X
Keep winch, rope and switch control free from contaminants.
Use a clean rag or towel to remove any dirt and debris.
X